La page est en cours de chargement...

MANUALE DI INSTALLAZIONE - INSTALLATION GUIDE - GUIDE D’INSTALLATION
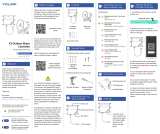
Sirena da esterno - Outdoor siren - Sirène extérieure
KSI6300000.3XX - KSI6301000.3XX
universal BUS-

2imago
manuale di installazione
ITALIANO
INTRODUZIONE
INDICE
DATI TECNICI E FUNZIONALITÀ
La sirena da esterno autoalimentata imago è più propriamente un avvisatore acustico e luminoso di livello
professionale che presenta un design unico ed esclusivo, estremamente compatto e sottile (solo 6 cm.
nel punto di maggiore spessore) unitamente ad una tecnologia d’avanguardia per ottenere prestazioni
d’eccellenza con il massimo risparmio energetico: elevata pressione sonora, lampeggiatore LED da 1W e
led di segnalazione ausiliaria ad alta efcienza e bassi consumi. La sirena è completamente gestita da un
microcontrollore che ne verica tutte le condizioni e le segnala opportunamente.
imago (versione universale) dispone di nr. 3 ingressi per attivare le segnalazioni acustiche e luminose, facilmente
abbinabili a qualunque centrale di allarme grazie alla programmazione della polarità degli ingressi. Alla prima
accensione la sirena legge tutti gli ingressi ed abbina il corretto stato di riposo senza bisogno di programmarli
manualmente, salvando la programmazione stessa su una memoria non volatile: siano essi ingressi con
comando positivo o negativo, a sicurezza intrinseca e non (comando a mancare o dare), imago abbina a
ciascuno dei tre ingressi l’opportuno funzionamento. La batteria è tenuta costantemente sotto controllo ed il
suo malfunzionamento o scarica viene immediatamente segnalato alla centrale. Oltre che la protezione da
taglio li, imago è garantita e protetta contro l’apertura e la rimozione dal muro
(anti-sabotaggio) e nonostante le sue dimensioni estremamente ridotte, nasconde all’interno un robusto
sotto-coperchio metallico anti-sfondamento. Il materiale utilizzato (policarbonato di altissima qualità con
protezione anti-UV) ed il progetto sosticato ne garantiscono la resistenza nel tempo a tutti gli agenti
atmosferici.
• Design ultramoderno con comoda e originale apertura a compasso
• Robusto contenitore (spessore min. 3 mm.) in policarbonato con pigmento anti-UV.
• Coperchio disponibile in diverse soluzioni cromatiche (anche componibile)
• Fondo trasparente disponibile di colore arancione, rosso e blu
• Robusto sotto-coperchio in metallico zincato (anti-sfondamento)
• Attivazione della segnalazione acustica e luminosa in caso di taglio li
• Buzzer piezoelettrico ad alta potenza sonora (>100dBA – 1m)
• Trattamento di protezione e isolamento della scheda (conformal coating)
• Tensione di alimentazione: 9V(min.) – 13,8V (max)
• Consumo in corrente: 10mA a riposo / 150mA massimo
• Batteria tampone: 6Vcc-1,2Ah (non inclusa)
• Range di temperatura: -10° +55 °C 95% Umidità
• Grado di protezione: IP 43
• Dimensioni (l x h x p): 195 x 330 x 60 mm
• Peso (senza batteria): Kg.1,200 - Kg.1,5 (con batteria)
Introduzione ....................................................................................................................................................................... 2
Dati Tecnici e Funzionalità ............................................................................................................................................... 2
Identicazione delle Parti ................................................................................................................................................. 3
Funzionamento .................................................................................................................................................................. 4
Installazione ....................................................................................................................................................................... 6
Collegamenti ..................................................................................................................................................................... 7
Certicazioni ...................................................................................................................................................................... 8
SOLO VERSIONE UNIVERSALE
• 1 ingresso di allarme ausiliario
• 1 ingresso per attivazione della sola segnalazione luminosa (LED 1W)
• 1 ingresso per attivazione dei LED ad alta efcienza
• Auto-apprendimento della polarità degli ingressi
• Programmazione del tempo massimo di allarme (3 o 10 minuti)
• Esclusione sabotaggio programmabile
• Controllo efcienza batteria e segnalazione mediante uscita OC - 500mA

3
imago
manuale di installazione
ITALIANO
IDENTIFICAZIONE DELLE PARTI
1. Coperchio
2. Perni (2) in acciaio INOX
3. Sottocoperchio zincato
4. Viti (2) di ssaggio sottocoperchio
5. Asola per attivazione antisabotaggio
6. Fondo trasparente
7. Fori (5) di ssaggio fondo
8. Fori (2) di ssaggio sottocoperchio
9. Foro per antistrappo
10. Asola per passaggio cavi
11. Mensola per batteria (1,2Ah)
12. Guidacavi (2)
13. Buzzer di potenza (120 dB)
14. Batteria
15. Scheda elettronica
16. Cavi (2) r/n con faston
17. Morsettiera collegamenti
18. Microswitch (2) antisabotaggio/antistrappo
19. Connettore buzzer
20. Connettore di debug (non usato)
21. LED centrale di potenza 1W
22. LED (2) alta efcienza
1
2 2
67
7
7
7
10
11
11
13
14
15
16 16
17
18
19
20
21
22
22
18
12
7
8
9
8
3
5
4 4

4imago
manuale di installazione
ITALIANO
FUNZIONAMENTO
La scheda elettronica è il cuore della sirena imago e ne permette il suo corretto
funzionamento, l’interfacciamento con la centrale, il controllo dei dispositivi annessi come la batteria rispetta le
normative applicabili. In gura viene riportata l’immagine
della scheda con le relative parti rilevanti in cui l’installatore è chiamato ad impostare e
programmare le funzioni disponibili per le proprie esigenze.
-+ALBLLITAMPF
VERSIONE UNIVERSALE VERSIONE BUS
JP1
JP2
JP3
Jumper imago versione Universale
JP1 = Disabilita sabotaggio
Jumper inserito: sabotaggio ON
Jumper tolto: sabotaggio OFF
JP2 = Tempo max allarme
Jumper inserito: tempo allarme 3 min.
Jumper tolto: tempo allarme 10 min.
JP3 = Apprendimento ingressi
Jumper inserito: cancellazione polarità.
Jumper tolto: memorizzazione
VERSIONE KS-BUS
MORSETTO TIPO DESCRIZIONE
A B KS-BUS Morsetti BUS Ksenia
+ - Alimentazione
Morsetti di
alimentazione
13,8V
VERSIONE UNIVERSALE
MORSETTO TIPO DESCRIZIONE
FUscita Segnalazione guasto
(batteria guasta o verica elettronica interna)
TAMP Uscita Contatto Normalmente chiuso (NC) per segnalare
l’apertura della sirena
LI Ingresso Attivazione dei 2 LEDs ausiliari
(attivabile da un’uscita OC o con un positivo)
BL Ingresso Attivazoine del solo LED di potenza
(attivabile da un’uscita OC o con un positivo)
AL Ingresso Attivazione della segnalazione acustica e luminosa
(attivabile da un’uscita OC o con un positivo)
+ - Alimentazione Morsetti di alimentazione 13,8V
Gli ingressi possono essere pilotati mediante uscite OC normalmente aperte o normalmente chiuse
(negativo a dare/mancare), ma anche mediante dei relè che danno o tolgono una tensione a 12 V (positivo
a dare/mancare). All’accensione deve essere prevista una fase di apprendimento in cui la sirena stabilisce i
valori di riposo.

5
imago
manuale di installazione
ITALIANO
PROCEDURA DI ACCENSIONE
PROGRAMMAZIONI - SOLO VERSIONE UNIVERSALE
APPRENDIMENTO INGRESSI - SOLO VERSIONE UNIVERSALE
PROTEZIONE E SEGNALAZIONE SABOTAGGIO
La corretta procedura di accensione della sirena imago prevede inizialmente l’alimentazione tramite batteria
(6V 1,2Ah Dimensioni: 98x50x22 non in dotazione) e poi il collegamento dei 13,8V proveniente dalla centrale
antifurto. È fondamentale rispettare questo ordine. Qualora si fornisse prima l’alimentazione dei 13,8V, la sirena
rimarrà in attesa del collegamento dei 6V tramite la batteria.
Una volta alimentata, la sirena emetterà un lampeggio singolo del led di potenza ed un breve suono sul buzzer
questo per vericarne il funzionamento e farà lampeggiare i led rossi (1Hz lento) nché la sirena stessa sarà
aperta (interruttori antisabotaggio aperti). Una volta chiuso il coperchio, i led lampeggeranno velocemente
(2Hz) per 20s al termine del quale se la sirena sarà alimentata anche dalla 13,8V inizierà a far lampeggiare
(300/700ms) il led di potenza per 20s, al termine del quale, se previsto acquisirà lo stato di riposo degli ingressi
ed inizierà il funzionamento completo, altrimenti si metterà in modalità di basso consumo in attesa della
presenza della alimentazione esterna. Se dovesse essere riaperta, riaccenderà di nuovo i led rossi, tornando
allo stato precedente. Una volta rilevata la presenza della alimentazione esterna la sirena farà lampeggiare il
led di potenza per 20s, dopo ciò, se previsto acquisirà lo stato di riposo degli ingressi e inizierà il funzionamento
completo.
La sirena imago suona e accende il led di potenza 300ms ON / 700ms OFF quando:
1. Viene a mancare l’alimentazione esterna (taglio li) (tensione minore di 7,6V)
2. Va in allarme l’ingresso [AL] (solo imago versione universale).
3. La sirena viene aperta e JP1 è inserito (solo imago versione universale).
4. La sirena viena aperta (solo imago versione KS-BUS)
Nel caso 1 e 2 la condizione di allarme perdura nché sono attive le condizioni (mancanza di
alimentazione o ingresso in allarme), in ogni caso per il tempo massimo di allarme programmato da JP2, alla
scadenza del quale se le condizioni di allarme sono ancora attive rimarrà acceso il solo led di allarme con
temporizzazione 300ms ON / 1700ms OFF. Per riattivare la segnalazione acustica è necessario che sia ripristinata
la condizione di allarme. Nel caso 3 la sirena attiva la segnalazione acustica/luminosa di allarme per il tempo
programmato, indipendentemente dall’eventuale ripristino della condizione di sabotaggio.
imago dispone delle seguenti programmazioni, attivabili con i jumper posti sulla scheda:
1 Disabilitazione segnalazione per rilevamento sabotaggio (JP1)
2 Tempo massimo attivazione buzzer (3 o 10 minuti) (JP2)
3 Apprendimento ingressi (JP3).
All’accensione, se JP3 è inserito, la sirena cancellerà la programmazione della polarità degli ingressi, e si mette
in attesa che sia rimosso. Al termine della fase di accensione saranno di nuovo memorizzati gli stati degli ingressi
ed acquisite le polarità.
La sirena imago dispone di due protezioni una contro l’apertura del coperchio, l’altra contro la rimozione dal
muro (due interruttori posti in serie). La sirena controllerà lo stato di questi interruttori ed attiverà la segnalazione
acustica e visiva alla loro apertura. Per la versione universale imago al rilevamento del sabotaggio, la
sirena attiverà un contatto per la segnalazione alla centrale. Il relè sui morsetti [TAMP] riporta lo stato dei
microinterruttori antisabotaggio, indipendentemente dallo stato di JP1 (Relè 100mA 24V max).

6imago
manuale di installazione
ITALIANO
APERTURA SIRENA
PROTEZIONE E TEST DELLA BATTERIA
FUNZIONE SOFT-STOP
INSTALLAZIONE
La sirena imago va in modalità di basso consumo spegnendo tutte le segnalazioni quando la tensione della
batteria scende al di sotto di 5V ed attiva l’uscita guasto. La sirena controlla l’efcienza della batteria ogni
10 ore per segnalare un eventuale guasto aprendo l’uscita OpenCollector [F] (solo imago versione universale)
(normalmente chiusa 500mA max).
Se la tensione di alimentazione decresce lentamente (slow rate < 100mV/minuto) la sirena imago non suonerà
per mancanza di alimentazione. Questo decremento è valido se rilevato dalla tensione di partenza (superiore
a 12V) no a 10,5V, poi può anche mancare bruscamente ma l’attivazione dell’allarme sarà impedito. Questa
peculiare funzionalità permette, nel caso di prolungata assenza di alimentazione, di evitare che la sirena suoni
e di comprometterne la sua efcienza quindi la normale vita della batteria.
La sirena va installata in un posto difcilmente accessibile per scoraggiare eventuali tentativi di effrazione. La
parete di ssaggio non deve presentare avvallamenti e/o sporgenze per non compromettere il funzionamento
del meccanismo antisabotaggio. Per una corretta installazione fare riferimento al paragrafo ‘Identicazione
delle parti’ e seguire le seguenti fasi:
1. Inserire i perni in acciaio (in dotazione) ed avvitare i dadi dall’interno evitando di serrare eccessivamente
2. Aprire il coperchio in policarbonato facendo leva sugli angoli con un cacciavite
3. Rimuovere le viti di chiusura del sotto coperchio metallico
4. Rimuovere il sotto coperchio slandolo dall’alto, facendo attenzione a non danneggiare il circuito elettronico
5. Con un trapano forare i fori di ssaggio fondo (il foro centrale in alto è già preforato per aumentare la facilità
di installazione)
6. Far passare il cavo proveniente dalla centrale attraverso l’asola
7. Fissare con i tasselli tipo scher compresi nella confezione il fondo in policarbonato alla parete
8. Impostare i jumper di programmazione (solo imago vers. universale)
9. Inserire la batteria da 6V (non inclusa) e collegare i morsetti rispettando la polarità
10. Collegare i cavi alla morsettiera
11. Vericare la procedura di accensione
12. Reinserire il sotto coperchio facendo attenzione a non toccare il circuito ed avvitare
13. Chiudere il coperchio a scatto
1 2

7
imago
manuale di installazione
ITALIANO
COLLEGAMENTI - SOLO VERSIONE UNIVERSALE
Usare sempre cavo schermato con un capo dello schermo collegato alla massa della centrale e l’altro
lasciato libero. Nella gura seguente, vengono mostrati due esempi di collegamento, il primo (a) basilare
con l’alimentazione esterna della sirena e la gestione del tamper con resistenza di ne linea da 10K, l’altro
(b) in aggiunta al collegamento base, prevede l’attivazione degli ingressi programmabili [AL] e [LI] della
sirena tramite uscite Open collector [O1] e [O2] della centrale. Inoltre l’uscita di guasto [F] viene portata ad
un ingresso di zona della centrale [i1] ad esempio per la programmazione di una successiva azione come
l’attivazione di una chiamata vocale o un SMS o una e-mail con il messaggio di guasto batteria.
DESCRIZIONE DEI MORSETTI
+R Positivo di alimentazione 13,8V - Negativo di alimentazione
M4 Antisabotaggio 24h bilanc. 10K O1 Uscita Open Collector 1
O2 Uscita Open Collector 2 i1 Ingresso di zona
N.B.
I nomi dei morsetti si riferiscono alle centrali Ksenia serie lares. La sirena imago può essere interfacciata a qualsiasi centrale antifurto con
morsetti aventi le stesse funzionalità.
L’alimentazione dei 13,8V sui morsetti [+] e
[-] della sirena, serve a mantenere carica
la batteria tampone e ad ottenere una
protezione contro il taglio dei li. Se la
vostra centrale non dispone di uscite open
collector, si possono usare scambi liberi di
relè della centrale per simulare la tensione
necessaria (positivo a dare) al morsetto
d’ingresso della sirena imago™.
Esempio: Si ha l’esigenza di far
lampeggiare i LED della sirena al vericarsi
di un certo evento programmato in
centrale e associato ad un relè. I nomi
indicativi dei morsetti di connessione sono:
[C] Comune
[NA] Normalmente aperto
[NC] Normalmente chiuso
Il collegamento che si dovrà realizzare è
mostrato nella gura qui accanto.
imago
CENTRALE
imago
CENTRALE
imago
CENTRALE
PART NUMBER DESCRIZIONE
KSI6300000.317 Sirena Universale - colore bianco con fondo trasparente arancio
KSI6300000.318 Sirena Universale - colore bianco con fondo trasparente rosso
KSI6300000.319 Sirena Universale - colore bianco con fondo trasparente blu
KSI6300000.337 Sirena Universale - colore grigio argento metallizzato con fondo trasparente arancio
KSI6300000.338 Sirena Universale - colore grigio argento metallizzato con fondo trasparente rosso
KSI6300000.339 Sirena Universale - colore grigio argento metallizzato con fondo trasparente blu
KSI6301000.317 Sirena per KS-BUS - colore bianco con fondo trasparente arancio
KSI6301000.318 Sirena per KS-BUS - colore bianco con fondo trasparente rosso
KSI6301000.319 Sirena per KS-BUS - colore bianco con fondo trasparente blu
KSI6301000.337 Sirena per KS-BUS - colore grigio argento metallizzato con fondo trasparente arancio
KSI6301000.338 Sirena per KS-BUS - colore grigio argento metallizzato con fondo trasparente rosso
KSI6301000.339 Sirena per KS-BUS - colore grigio argento metallizzato con fondo trasparente blu
KSI6901000.340 Coperchio sirena di colore beige
KSI6901000.350 Coperchio sirena di colore verde oliva
KSI6901000.360 Coperchio sirena di colore marrone rame
KSI6901000.370 Coperchio sirena di colore blu avio

8imago
manuale di installazione
L’installazione di queste apparecchiature deve essere effettuata a regola d’arte, in accordo con le norme
vigenti. Queste apparecchiature sono state sviluppate secondo criteri di qualità, afdabilità e prestazioni
adottati dalla Ksenia Security.
Si raccomanda di vericare il corretto funzionamento del sistema almeno una volta al mese. Le procedure per
il collaudo dipendono dalla congurazione del sistema.
Rivolgersi all’installatore del sistema per conoscere le procedure da seguire.
Ksenia Security Srl declina ogni responsabilità nel caso in cui le apparecchiature vengano manomesse da
personale non autorizzato. Il contenuto di questo manuale può essere soggetto a modiche, senza preavviso,
e non rappresenta un impegno da parte della KSENIA SECURITY.
Informazioni sullo smaltimento per gli utenti (Direttive RAEE)
Attenzione: Per smaltire il presente dispositivo, non utilizzare il normale bidone della spazzatura!
Le apparecchiature elettriche ed elettroniche usate devono essere gestite a parte e in conformità alla
legislazione che richiede il trattamento, il recupero e il riciclaggio adeguato dei suddetti prodotti.
In seguito alle disposizioni attuate dagli Stati membri, i privati residenti nella UE possono conferire gratuitamente
le apparecchiature elettriche ed elettroniche usate a centri di raccolta designati* o al rivenditore locale che
può ritirare gratuitamente se l’utente acquista un altro prodotto nuovo di tipologia simile.
Se le apparecchiature elettriche o elettroniche usate hanno batterie o accumulatori, l’utente dovrà smaltirli a
parte preventivamente in conformità alle disposizioni locali.
Lo smaltimento corretto del presente prodotto contribuirà a garantire che i riuti siano sottoposti al
trattamento, al recupero e al riciclaggio necessari prevenendone il potenziale impatto negativo sull’ambiente
e sulla salute umana, che potrebbe derivare da un’inadeguata gestione dei riuti.
Sono previste sanzioni molto elevate nel caso di irregolarità nel rispetto del Decreto Leg.vo 151/05.
* Per maggiori informazioni si prega di contattare l’autorità locale competente.
CERTIFICAZIONI
EN50131-1 • EN50131-4
ENTE CERTIFICATORE: IMQ - Sistemi di Sicurezza
GRADO 3 • CLASSE III
TEMPERATURA DI FUNZIONAMENTO: -10 ÷ +55 °C • 95% UMIDITÀ
ITALIANO
IMQ
Sistemi di Sicurezza

9
ENGLISH
imago
quick installation guide
INTRODUCTION
INDEX
TECHNICAL DATA AND FUNCTIONS
The self-powered outdoor siren imago is an acoustic/optical professional alarm with an unique and exclusive,
extremely compact and slim design (its maximum thickness is 6 cm.) together with an advanced technology
to combine the best possible performance with the highest energy saving: high sound pressure, 1W LED blinker
and auxiliary high-efciency low-consumption warning LED. The siren is fully controlled by a micro-controller
which verify all conditions and reports them opportunely. imago (universal version only) has 3 inputs to activate
acoustic and optical alarms, easy to match with any alarm station thanks to the input programmable polarity.
During the rst start-up the siren acquires all the inputs and associates them to the default status with no need
to program them manually, saving the programming on a ash memory: imago relates each one of the three
inputs (positive/negative missing or start with positive/negative) to the correct function. The battery is kept
under constant supervision and any malfunction or out of energy is immediately signalized to the Control Panel.
imago is protected against wire-cut, opening or removal from wall (tamper protection), and, despite of its small
dimension, hides a strong under-cover against smashes. The used material (high quality PC with UV protection)
and the sophisticated project grant long time endurance against all atmospheric agents.
• Modern Design with original and convenient rotating opening
• Solid PC housing (minimum thickness 3 mm.) with anti-UV pigment
• Front available in different colors
• Transparent base available in different colors: orange, red and blue
• Strong metallic zinc-plated under-cover (anti-smashing)
• Acoustic and optical emission for cable cut
• High acoustic power piezoelectric Buzzer (>100dBA @ 1m)
• Protective and insulating treatment of the PCB (conformal coating)
• Power Supply: 9V(min.) - 13.8V (max)
• Consumption: 10mA stand-by / 120mAmax
• Backup battery: 6Vcc - 1,2Ah
• Operative temperature: -10° +55 °C 95% Humidity
• Protection grade : IP 43
• Dimensions (l x h x p): 195 x 330 x 60 mm
• Weight (without battery): Kg.1,2 - Kg.1.5 (with battery)
Introduction ....................................................................................................................................................................... 9
Technical Data and Functions ........................................................................................................................................ 9
Parts Identications ........................................................................................................................................................... 10
Operation........................................................................................................................................................................... 11
Installation .......................................................................................................................................................................... 12
Terminals ............................................................................................................................................................................. 14
Certications ...................................................................................................................................................................... 15
UNIVERSAL VERSION ONLY
• 1 auxiliary alarm input
• 1 input for the activation of the only luminous alarm (LED 1W)
• 1 input for the activation of the high-efciency LEDs
• Self-learning of the input polarity
• Alarm maximum duration programming (3 or 10 minutes)
• Programmable exclusion of tamper
• Battery efciency control and warning through OC output -500mA

10
ENGLISH
imago
quick installation guide
PARTS IDENTIFICATION
1. Cover
2. Stainless steel hinges (2)
3. Undercover
4. Undercover locking screws (2)
5. Tamper protection activation eyelet
6. Transparent base
7. Base locking holes (5)
8. Undercover locking holes (2)
9. Anti-tear hole
10. Eyelet for cable pass-through
11. Battery base (1,2Ah)
12. Chock (2)
13. Exponential Buzzer (120 dB)
14. Battery
15. PCB - Board
16. Cables (2) r/n with faston
17. Connection clamps
18. Tamper protection/anti-tear micro-switch (2)
19. Buzzer connector
20. Debug Connector (not used)
21. Power central LED 1W
22. High efciency LED (2)
1
2 2
67
7
7
7
10
11
11
13
14
15
16 16
17
18
19
20
21
22
22
18
12
7
8
9
8
3
5
4 4

11
ENGLISH
imago
quick installation guide
OPERATION
The PCB board is the main component of the imago siren and allows its correct operation, the interface with
the alarm station, the control of the related device (i.e. the battery) are in conformity with the applicable
normative. Figure shows the PCB board and its relevant parts for which the installer has to set and program the
available function in accordance with the user needs.
-+ALBLLITAMPF
UNIVERSAL VERSION BUS VERSION
JP1
JP2
JP3
Universal version imago jumpers
JP1 = Tamper
Jumper inserted: Tamper ON
Jumper removed: Tamper OFF
JP2 = Alarm Time setting
Jumper inserted: Alarm time 3 min.
Jumper removed: Alarm time 10 min.
JP3 = Inputs conguration
Jumper inserted: polarity erasure.
Jumper removed: polarity recording.
KS-BUS VERSION
CLAMP TYPE DESCRIPTION
A B KS-BUS Ksenia BUS
terminals
+ - Power Supply Power supply
clamps 13,8V
UNIVERSAL VERSION
CLAMP TYPE DESCRIPTION
FOutput Failure warning (faulty battery or internal electronic check)
TAMP Output Normally closed Link (NC)
to warn about the opening of the siren
LI Input Activation of the two auxiliary warning LEDs
(operable from an output OC or with a positive)
BL Input Activation of the only power LED (blinking)
(operable from an output OC or with a positive)
AL Input Activation of the acoustic and optical warning
(operable from an output OC or with a positive)
+ - Power Supply Power supply clamps 13.8V
The inputs are controller with OC outputs normally open or closed (Start with negative/ negative missing), or
with a power relay that give or cut a 12V voltage (Start with negative/ positive missing). During the start up, an
auto-learning stage has to be set to establish the default values.

12
ENGLISH
imago
quick installation guide
START UP PROCEDURE
PROGRAMMING - UNIVERSAL VERSION IMAGO ONLY
PROGRAMMABLE INPUTS - UNIVERSAL VERSION IMAGO ONLY
PROTECTION AND TAMPER WARNING
The correct powering procedure of imago siren must initially to be done through the battery (6V. 1,2Ah
Dimensions: 98x50x22 mm - not included) and then giving power (13,8 Vdc typical) coming from the Control
Panel. It is fundamental to respect this order.
Once powered, the siren will give just a single ash from its main power LED and the buzzer will sound for a
second to verify the correct functioning of all parts ; moreover the red signaling LEDs will keep ashing (slow at
1 Hz) until the siren will remain open (tamper switches open). After closing the cover, the LEDs will ash faster (2
Hz) for 20 sec. If the siren has been powered also from the Control Panel, then the power LED will start to ash
(period 300/700ms) for 20 sec.; the siren will acquire the inputs stand-by condition and start its full functioning.
In case you still need to connect the power to the Control Panel, the siren will go in “low consumption mode”
waiting for the external power. If the siren will be opened again, the red LEDs will turn on, getting back to the
previous mode. Once the external power will be detected, the siren will let the power LED ash for 20 sec. and
after that, the siren will acquire the input stand-by condition and will start its full functioning. The imago siren will
sound and the power LED will be ashing (300ms ON / 700ms OFF) when:
1 External power is missing (wire cutting or voltage below 7,6Vdc).
2 The input [AL] goes in alarm (Universal version imago only).
3 The siren is being opened and JP1 is inserted (Tamper ON)(Universal version imago only).
4 The siren is being opened (KS-BUS version imago only).
In the case 1 e 2 the alarm condition will last until all power missing or alarm input active will last; in any case
for the maximum alarm time programmed by JP2, at the end of which even if the alarm conditions still exist,
only the power LED will keep ashing with setting 300ms ON / 1700ms OFF. To re-activate the acoustic signal it is
necessary to reestablish the alarm condition. In the case 3 the siren activates the alarm acoustic/ashing for the
programmed time, regardless from the restoring of the tamper condition.
imago is available with the following functions, programmable through Jumpers:
1 Tamper signal on/off (JP1)
2 Buzzer timing set-up (3 or 10 minutes) (JP2)
3 Inputs conguration (JP3)
During the start-up, if JP3 is inserted, the siren will delete the settings of the inputs polarity, and will wait for its
removal. When the start-up procedure ends, the input status will be stored in the ash memory.
imago siren has two types of protection, one against the cover opening and another one against the removal
from the wall (two switches in series). The siren will check the status of these switches and will activate the
acoustic/optical warning when they are open. For imago universal version, when a tampering is detected the
siren will open two terminal to warn the Control Panel. The clamps relay [TAMP] reports the status of the tamper
protection switches regardless from the JP1 status. (Relay 100mA 24V max)

13
ENGLISH
imago
quick installation guide
PROTECTION AND BATTERY TEST
SOFT-STOP FUNCTION
INSTALLATION
When the battery voltage is lower than 5V the imago siren sets the low energy consumption mode and it
activates the “failure” [F] output. The siren check the battery efciency each 10 hours to report a possible failure
opening the “Open collector” output [F] (universal version imago only)(normally closed 500 mA max).
When the power supply voltage slowly decreases (slew rate < 100 mV/minute) the imago siren will not emit
any acoustic alarm due to loss of power supply. This slew rate is effective if detected starting from the initial
voltage (higher than 12V) to 10,5V, then the alarm activation will be prevented even in case of a sudden loss of
voltage. This peculiar function allows to avoid the acoustic warning and to compromise the efciency and
life-time of the battery in case of protracted loss of power supply.
The siren has to be installed in a hardly accessible location to deter tamper attempts. The wall chosen must not
have any depression or protrusion in order to avoid compromising the tamper protection function. To ensure a
correct installation refer to the paragraph “Parts identication” and comply the following steps:
1. Insert stainless steel hinges and screw the nuts inside avoiding to tighten
2. Open the PC cover forcing the corners with a screwdriver
3. Remove the docking screw of the metallic undercover
4. Remove the undercover pulling it from above, taking care not to damage the electronic circuit
5. Drill the xing bottom holes
6. Pass-through the cable coming from the Control Panel in the eyelet
7. Lock with Fischer plug the PC Base on the wall
8. Set programming jumpers (universal version imago only)
9. Insert a 6V lead battery (not supplied) and link terminals accordingly with the polarity
10. Connect cables to connection terminals
11. Verify the start up procedure
12. Close the undercover and screw on
13. Close the cover
OPEN SIREN
1 2

14 imago
quick installation guide
ENGLISH
TERMINALS - UNIVERSAL VERSION IMAGO ONLY
Always use a shielded cable with an end of the shield connected to the ground of the alarm station and the
other one kept free. In the following gure 4 two connection examples are shown, the rst one (a), the simplest,
with the external power supply of the siren and the tamper management with end line resistance (10k), the
second one (b), which uses the siren programmable inputs [AL] and [LI] by means of open collector outputs
[O1] and [O2] of the Control Panel. Moreover the failure output [F] is connected to a zone input [i1] of the
alarm station (i.e. to program an action as the activation of a vocal call or SMS or e-mail with a “Battery failure”
message).
TERMINALS DESCRIPTION
+R Power positive 13,8Vdc - Power negative
M4 Tamper 24hr balanced 10KΩ O1 Open Collector 1 output
O2 Open Collector 2 output i1 Zone input
N.B.
The terminals names refer to Ksenia Control Panel series lares. The imago Universal siren can interface any Intrusion Control Panel having
terminals with same functions.
The 13,8V voltage of the terminals [+] and
[-] of the siren, keeps the backup battery
charged and provides a protection
against cables cut.
If the alarm station doesn’t have open
collector outputs, relay free exchange of
the alarm station can be used to simulate
the required voltage (start with positive)
on the input terminal of the imago siren.
Example: There’s the need to have
the siren LED blinking when an event
scheduled by the alarm station and
associated to a relay occurs. The name
shown by the terminals are:
[C] Common
[NA] Normally open
[NC] Normally closed
The connection that must be set is shown
in the following gure.
ALARM STATION
imago imago imago
ALARM STATION ALARM STATION
PART NUMBER DESCRIPTION
KSI6300000.317 Universal Siren - color white with transparent orange bottom
KSI6300000.318 Universal Siren - color white with transparent red bottom
KSI6300000.319 Universal Siren - color white with transparent blue bottom
KSI6300000.337 Universal Siren - color silver grey metallized with transparent orange bottom
KSI6300000.338 Universal Siren - color silver grey metallized with transparent red bottom
KSI6300000.339 Universal Siren - color silver grey metallized with transparent blue bottom
KSI6301000.317 Siren for KS-BUS - color white with transparent orange bottom
KSI6301000.318 Siren for KS-BUS - color white with transparent red bottom
KSI6301000.319 Siren for KS-BUS - color white with transparent blue bottom
KSI6301000.337 Siren for KS-BUS - color silver grey metallized with transparent orange bottom
KSI6301000.338 Siren for KS-BUS - color silver grey metallized with transparent red bottom
KSI6301000.339 Siren for KS-BUS - color silver grey metallized with transparent blue bottom
KSI6901000.340 Siren Cover in Beige color
KSI6901000.350 Siren Cover in Olive Green color
KSI6901000.360 Siren Cover in light Copper Brown
KSI6901000.370 Siren Cover in Blu/Grey color

15
ENGLISH
imago
quick installation guide
The complete Declaration of Conformity for each Device can be found at: www.kseniasecurity.com
Installation of these systems must be carried out strictly in accordance with the instructions
described in this manual, and in compliance with the local laws and bylaws in force. imago has been
designed and made with the highest standards of quality and performance adopted by Ksenia Security. Is
recommended that the installed system should be completely tested at least once a month. Test procedures
depends on the system conguration. Ask to the installer for the procedures to be followed. Ksenia Security
srl shall not be responsible for damage arising from improper installation or maintenance by unauthorized
personnel. The content of this guide can change without prior notice from KSENIA SECURITY.
Information for users: Disposal (RAEE Directive)
Warning! Do not use an ordinary dustbin to dispose of this equipment.
Used electrical and electronic equipment must be treated separately, in accordance with the relative
legislation which requires the proper treatment, recovery and recycling of used electrical and electronic
equipment.
Following the implementation of directives in member states, private households within the EU may return their
used electrical and electronic equipment to designated collection facilities free of charge*. Local retailers may
also accept used products free of charge if a similar product is purchased from them.
If used electrical or electronic equipment has batteries or accumulators, these must be disposed of separately
according to local provisions.
Correct disposal of this product guarantees it undergoes the necessary treatment, recovery and recycling. This
prevents any potential negative effects on both the environment and public health which may arise through
the inappropriate handling of waste.
* Please contact your local authority for further details.
CERTIFICATIONS
EN50131-1 • EN50131-4
CERTIFYNG BODY: IMQ - Security System
GRADE 3 • CLASS III
OPERATING TEMPERATURE RANGE: -10 ÷ +55 °C • 95% HUMIDITY
IMQ
Sistemi di Sicurezza

16 imago
guide d’installation rapide
FRANÇAIS
INTRODUCTION
TABLE DES MATIÈRES
CARACTERISTIQUES TECHNIQUES ET FONCTIONS
La sirène extérieure autoalimentée imago est une alarme acoustique et lumineuse professionnelle dotée
d’un design exclusif, extrêmement compact, étroit (épaisseur maximale 6 cm) mais aussi d’une technologie
avancée an d’obtenir des performances d’excellence tout en conservant au maximum l’énergie: haut
niveau sonore; ash LED de 1W et LED d’alarme d’efcience maximale et très peu gourmand en terme de
consommation. La sirène est gérée par un microcontrôleur qui vérie et transmet de manière opportune. imago
(version universelle seulement) dispose de 3 inputs pour activer les alarmes acoustique et lumineuse, faciles
à intégrer avec n’importe quelle centrale grâce à la polarité d’input programmable. Pendant la première
mise en service, la sirène lit toutes les données et les compare avec le statut correct par défaut sans pour
autant devoir les programmer manuellement et sauvant la programmation sur une mémoire ash : imago fait
correspondre chacun des 3 inputs (positif/négatif manquant ou démarrage avec positif/négatif) avec la
fonction correcte. La batterie est sous constante supervision et tout mauvais fonctionnement ou panne de
courant sont signalés directement au centre de surveillance pour autant que la centrale y soit reliée.
imago est protégée contre une coupure de câble, l’ouverture ou l’arrachage du mur (protection anti-
sabotage), et, malgré son encombrement réduit, elle cache un boîtier de protection métallique ultra solide. Le
matériau utilisé (Polycarb. de haute qualité avec protection UV) et sa forme sophistiquée lui garantissent une
très longue endurance aux intempéries.
• Joli design avec ouverture “capot de voiture!” pratique en haut de l’échelle!
• Boîtier très rigide en polycarb. (épaisseur min 3 mm.) avec pigment anti-UV
• Capot de différentes couleurs
• Base transparente, différentes couleurs également (ambrée, rouge et bleue)
• Boîtier galva intérieur de protection empêchant la perforation
• Signalisation lumineuse et acoustique en cas de sabotage
• Buzzer Piezzoelectrique (>100dBA -1m)
• Traitement particulier de protection et d’isolation du circuit imprimé
• Tension: 9V(min.) - 13.8V (max)
• Consommation: 10mA stand-by / 120mAmax
• Backup battery: 6Vcc - 1,2Ah
• Temp. de fonctionnement: -25° +55 °C
• Grade de protection: IP 43
• Dimensions (l x h x p): 195 x 330 x 60 mm
• Poids sans batterie 1200 gr - 1500 gr (avec batterie)
Introduction ....................................................................................................................................................................... 2
Caracteristiques Techniques et Fonctions ..................................................................................................................... 2
Identication des Composants ....................................................................................................................................... 3
Fonctionnement ................................................................................................................................................................ 4
Installation .......................................................................................................................................................................... 6
Borniers ............................................................................................................................................................................... 7
Certications ...................................................................................................................................................................... 8
VERSION UNIVERSELLE SEULEMENT
• 1 input auxiliaire d’alarme
• 1 input pour l’activation de la signalisation lumineuse (LED 1W)
• 1 input pour l’activation des LED’s de haute performance
• Reconnaissance automatique de la polarité d’input
• Durée d’alarme programmable (3 à 10 minutes)
• Exclusion de tamper programmable
• Contrôle du niveau de charge batterie et transmission via output CO - 500mA

17
imago
guide d’installation rapide
FRANÇAIS
IDENTIFICATION DES COMPOSANTS
1. Capot
2. Charnières Inox (2)
3. Boîtier de protection
4. Vis de blocage du boîtier(2)
5. Regard de vérication tamper
6. Base transparente
7. Trous de xation de la base (5)
8. Trous de xation du boîtier métal. (2)
9. Trou anti-arrachement
10. Regard de passage de câble
11. Support pour batterie (1,2Ah)
12. Guides (2)
13. Piezzo (120 dB)
14. Batterie
15. Circuit imprimé
16. Fils (2) n/r avec cavalier
17. Connexion clamps
18. Tamper protection/micro-switch (2)
19. Connexion du Piezzo
20. Connecteur non-utilisé
21. LED central de 1W
22. LED’s haute performance (2)
1
2 2
67
7
7
7
10
11
11
13
14
15
16 16
17
18
19
20
21
22
22
18
12
7
8
9
8
3
5
4 4

18 imago
guide d’installation rapide
FRANÇAIS
FONCTIONNEMENT
Le circuit imprimé est le composant principal de la sirène imago et assure le relais avecl la central d’alarme, le
contrôle de la batterie et la conformité avec l’application des règles en vigueur. La Figure 2 montre le circuit
imprimé ainsi que les différentes parties sur lesquelles l’installateur doit agir pour programmer les fonctions en
accord avec les besoins spéciques du client.
-+ALBLLITAMPF
VERSION UNIVERSELLE VERSION BUS
JP1
JP2
JP3
Version universelle imago jumper
JP1 = Tamper (sabotage)
Jumper inséré: Tamper ON
Jumper retiré: Tamper OFF
JP2 = Réglage temps d’alarme
Jumper inséré: Temps d’alarme 3 min.
Jumper retiré:Temps d’alarme 10 min.
JP3 = Conguration inputs
Jumper inséré: suppression polarité
Jumper retiré:enregistrement polarité
VERSION KS-BUS
BORNIER TYPE DESCRIPTION
A B KS-BUS Borniers Ksenia BUS
+ - Alimentation
Borniers
alimentation
13.8V
VERSION UNIVERSELLE
BORNIER TYPE DESCRIPTION
FSortie Avertissement de défaut
(mauvaise batterie ou vérication électronique interne)
TAMP Sortie Boucle (NF) Normalement Fermée an d’avertir en cas
d’ouverture intempestive de la sirène
LI Entrée Activation des deux LED auxiliaires (fonctionnant depuis
une sortie Collecteur Ouvert avec un positif)
BL Entrée
Activation de la seule LED de puissance (ashante)
(fonctionnant depuis une sortie Collecteur Ouvert ou avec
un positif)
AL Entrée Activation signalation Optique et Acoustique (fonctionnant
depuis une sortie Collecteur Ouvert avec un positif)
+ - Alimentation Borniers alimentation 13,8V
Les entrées (inputs) sont contrôlées avec des sorties Collecteur Ouvert NO ou NF (Démarr. avec neg./ neg.
manquant), ou avec relais de puiss. qui donne ou coupe le 12 V (Démarr. avec neg./ positif maquant). Pen-
dant la mise en service, un temps d’apprentissage automatique doit être déni an d’établir les valeurs par
défaut.

19
imago
guide d’installation rapide
FRANÇAIS
PROCÉDURE DE DÉMARRAGE
PROGRAMMATION - VERSION UNIVERSELLE SEULEMENT
INPUTS PROGRAMMABLES - VERSION UNIVERSELLE SEULEMENT
PROTECTION ET SIGNALISATION DU SABOTAGE/TAMPER
Alimentez d’abord votre sirène imago via la batterie (6V. 1,2Ah Dimensions: 98x50x22 mm - non-inclue) et ensuite
seulement alimentez-là par le 13,8Vdc venant de la centrale. IL EST CAPITAL DE RESPECTER L’ORDRE PRECONISE.
Lorsqu’elle est alimentée, la sirène va asher une fois (LED principale) et le buzzer fonctionnera 1 sec. Pour
vérier le bon fonctionnement des composants; les LED’s rouges continueront à asher lentement -à 1 Hz-
pendant le temps de son ouverture. En fermant le capot, les LED’s asheront plus rapidement (2Hz) pendant
20 sec. Si la sirène est également alimentée depuis la centrale, la LED de puissance va asher (300ms ON/700
ms OFF) pendant 20 sec; ensuite, la sirène se mettra en stand-by et fonctionnera normalement. Si vous devez
encore effectuer la connexion avec la centrale, la sirène se mettra en mode “consommation basse” en
attendant l’alimentation de la centrale. Si la sirène est réouverte, la LED rouge s’allume en revenant au mode
précédent. Lorsque la source externe de courant est détectée, la LED ashera pendant 20 sec. Et ensuite, si
c’est prévu, la sirène se mettra en stand-by et fonctionnera normalement. La sirène imago se met en service et
les LED’s de puissance asheront quand ( 300ms ON / 700ms OFF):
1. La source de courant externe est absente (sous 7,6Vdc).
2. L’input [AL] se met en alarme (uniquement version universelle imago).
3. La sirène est ouverte et JP1 est inséré (Tamper ON) (uniquement version universelle imago).
4. La sirène est ouverte (version imago KS-BUS seulement).
Dans les cas 1 et 2 la situation d’alarme perdurera tant que les conditions d’alarme seront actives (tension
absente ou entrée d’alarme). Le LED continuera à asher (300ms ON / 1700ms OFF ) pendant le temps
programmé par le JP2, et ceci jusqu’à la n de la condition d’alarme. Pour réactiver l’alarme acoustique, une
nouvelle alarme doit subvenir. Dans le troisième cas, la signalisation acoustique et visuelle est active pour le
temps programmé, indépendamment de la restauration de la condition de sabotage/tamper.
imago est disponible avec les fonctions suivantes et qui sont programmables grâce aux jumpers/cavaliers
1. Signal Tamper on/off (JP1)
2. Réglage du timing du buzzer (3 or 10 minutes) (JP2)
3. Conguration des Inputs/entrées (JP3)
Pendant le démarrage, et si le JP3 est inséré, la sirène va effacer les réglages des polarités d’entrées/inputs
et attendre que le JP3 soit retiré. Lorsque le démarrage se termine, le statut des inputs va être mémorisé et les
polarités retenues par le système.
La sirène imago possède deux types de protections. L’une contre l’ouverture de la face avant et l’autre contre
l’arrachage du mur (deux switch en série). La sirène va vérier le statut de ces switch et activer la signalisation
lumineuse et acoustique lorsqu’ils sont ouverts. La version universelle de l’imago transmettra également l’alarme
à la centrale. Les borniers relais [TAMP] donne le statut des tamper switch indépendamment du statut du JP1.
(Relais 100mA 24V max)

20 imago
guide d’installation rapide
FRANÇAIS
OUVERTURE DE LA SIRÈNE
PROTECTION ET TESTS BATTERIE
FONCTION DIMINUTION LENTE DE COURANT
INSTALLATION
Lorsque la tension de la batterie est inférieure à 5V, la sirène imago va se mettre en mode basse consommation.
Elle va ouvrir le relais de protection sabotage et activer une sortie « défaillance ». La sirène va vérier
l’efcience de la batterie toutes les 13 heures an de transmettre une éventuelle défaillance en ouvrant la
sortie collecteur ouvert [F] (version imago universelle seulement)(NC 500 mA max).
Si l’alimentation diminue lentement (< 100 mV/minute) la sirène imago ne va se mettre à hurler. Cette fonction
de « diminution lente de courant » sera effective à partir du voltage initial (au-dessus de 12V) jusqu’à 10,5V.
Ensuite, l’activation de l’alarme va être évitée en cas de perte de courant subite. Cette fonction particulière
permet d’éviter la signalisation acoustique et de détériorer l’efcacité et la durée de vie de la batterie en cas
de perte prolongée d’alimentation électrique
La sirène doit être installée sur une surface rigide dans un endroit difcilement accessible an d’éviter les
tentatives d’arrachage. Le mur choisi ne doit pas comporter de dépression ou d’excroissance qui puisse
empêcher le dispositif de tamper/sabotage de fonctionner correctement. An d’assurer une installation
correcte, référez-vous au paragraphe « identication des pièces » et effectuez les stades suivants:
1. Insérez les charnières Inox (fournies) et vissez en évitant de serrer
2. Ouvrez le capot à l’aide d’un tournevis en forçant les côtés voir
3. Retirez la vis de xation de la protection métallique intérieure
4. Retirez la protection métall. intérieure en la tirant par le haut. Attention à ne pas endommager le circuit
imprimé
5. Forez les trous de xation
6. Passez les câbles venant de la centrale par le regard prévu à cet effet
7. Fixer la base de la sirène sur le mur
8. Posez le jumper de programmation (version universelle imago uniquement)
9. Insérez la batt. pb de 6V (non fournie) et branchez les câbles en fonction des polarités
10. Connectez les câbles au bornier
11. Vériez la procédure de démarrage
12. Fermez le couvercle métal. intérieur et xez la vis
13. Fermez le capot
1 2
1/24