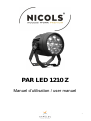
Nicols PAR LED 1210 Z Le manuel du propriétaire
- Catégorie
- Stroboscopes
- Taper
- Le manuel du propriétaire

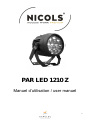
PAR LED 1210 Z
Manuel d’utilisation / user manuel
1

2
Manuel d’utilisation
1. AVANT DE COMMENCER
1.1 Que contient l’emballage
1 –Un PAR LED 1210 Z
2 – Un manuel d’utilisation
1.2 Consignes de déballage
Immédiatement après réception d'un appareil, déballez soigneusement le carton, vérifiez le contenu
pour vous assurer que toutes les pièces sont présentes et qu'elles ont été reçues en bon état. En cas de
manquement ou de bien vous semblant endommagées, avisez immédiatement l'expéditeur et conservez
le matériel d'emballage à des fins de vérification. Faites de même si l’emballage vous semble
endommagé ou n’avoir pas été manipulé convenablement.
Conservez le carton et tous les matériaux d'emballage. Dans le cas où un appareil doit être retourné sous
garantie, il est important qu’il soit retourné dans la boîte d'origine et l'emballage d'origine.
1.3 Consignes de sécurité (lisez attentivement ce manuel d’utilisation)
* S'il vous plaît garder ce manuel d’utilisation pour une future consultation. Si vous vendez l'appareil à un
autre utilisateur, assurez-vous de lui transmettre.
* Assurez-vous toujours que vous vous connectez à la tension appropriée et que la tension de ligne à
laquelle vous vous connectez n'est pas plus élevée que celle indiquée sur l'autocollant ou le panneau
arrière de l'appareil.
* Ce produit est destiné à une utilisation en intérieur uniquement!
•Pour éviter tout risque d'incendie ou de choc, n'exposez pas le controleur à la pluie ou à l'humidité.
Assurez-vous qu'il n'y a pas de matériaux inflammables à proximité de l'appareil pendant le
fonctionnement.
•Ne pas utiliser l’appareil sans lampe ou si le boitier est endommagé
•Il est impératif de ne jamais regarder directement la source lumineuse sous risque de graves séquelles
oculaires. ATTENTION aux émissions des Leds qui pourraient blesser ou irriter l’œil.
•Ne pas utiliser en présence de personnes souffrant d’épilepsie
* L'unité doit être installée dans un endroit avec une ventilation adéquate, à au moins 50 cm des
surfaces adjacentes. Assurez-vous que les fentes d'aération ne sont pas obstruées.
* Débranchez toujours la source d'alimentation avant de procéder à l'entretien ou au remplacement du
fusible et veillez à remplacer le même.
* En cas de problème de fonctionnement sérieux, arrêtez immédiatement d'utiliser l'appareil. N'essayez
jamais de réparer l'unité par vous-même. Les réparations effectuées par des personnes non qualifiées
peuvent entraîner des dommages ou des dysfonctionnements. Veuillez contacter le centre d'assistance
technique agréé le plus proche. Utilisez toujours les mêmes pièces de rechange.
* Assurez-vous que le cordon d'alimentation n'est jamais endommagé.
* Ne débranchez jamais le cordon d'alimentation en tirant sur le cordon.
•Ne pas utiliser cet appareil dans des conditions de température ambiante supérieur à 45°C ou 113 °F.
•Toute modification/adaptation/tentative de réparation et autres ajustements de votre appareil en
dehors de notre service technique, annulera sa garantie.
•La modification des câbles fournis avec ce produit peut ralentir une intervention technique. Nous vous
invitons à ne JAMAIS les couper.
PAR LED 1210 Z

3
Manuel d’utilisation
1.4 Consignes d’installation
* Ce produit peut être monté en suspension grâce à la lyre de fixation. Cette lyre peut être fixée sur une
structure ou un pont de manière sécurisée, une élingue supplémentaire reste obligatoire.
* Le produit doit être correctement fixé afin d’éviter toute vibration ou glissement lorsque celui-ci est en
marche. Assurez-vous que la structure puisse supporter 10 fois le poids de l’appareil. Utilisez des
élingues de sécurité pouvant supporter 12 fois le poids de l’appareil. Le produit doit être fixé par du
personnel qualifié.
2. CARACTERISTIQUES TECHNIQUES
PAR LED 1210 Z
* Source lumineuse : 12 x 10W RGBW 4 en 1 Zoom + effet Aura RGB 3 en 1
* Lumens : 84000Lux@1m (2°) : Rouge : 10000Lux@1m/Vert : 20000Lux@1m/Bleu :
23800Lux@1m/Blanc : 30000Lux@1m
8500Lux@1m (45°) : Rouge : 1000Lux@1m/Vert : 2140Lux@1m/Bleu :
2720Lux@1m/Blanc : 3000Lux@1m
* Angle d’ouverture : 2°-45°
* Dimmer : 0-100%
* Stroboscope : 0-20Hz
* Niveau sonore : <26dBA@1m mini
* Canaux DMX : 6/10/14
* Mode de pilotage : Auto, DMX, Master-slave, Musical
* Consommation : 145W Max
* Alimentation : AC110-240V, 50/60Hz
* Dimensions : 316x204x237 mm
* Poids net : 4,6 Kg
PAR LED 1210 Z

3. FONCTIONS PRINCIPALES :
Cet appareil a 8 modes de fonctionnement différents
4
Manuel d’utilisation PAR LED 1210 Z
3.1- Mode RUN
Appuyez sur MODE/UP/DOWN pour choisir le programme. Le programme précédemment sélectionné sera
automatiquement lancé
3.2- Mode programmes pré-enregistrés
Il y a 10 programmes pré-enregistrés. Appuyez sur UP ou DOWN pour sélectionner les programmes de votre
choix
Quand l’affichage indique
appuyez 1 première fois sur SETUP. Vous entrez dans les menus pré-enregistrés et vous pouvez régler la
vitesse.
A l’aide des boutons UP et DOWN vous pouvez changer les valeurs de 1 à 100. Appuyez une 2ème fois sur SETUP
et à l’aide des boutons UP et DOWN vous pouvez régler la vitesse de strob. Appuyez encore sur UP et DOWN
pour changer les valeurs de 0-99
Quand vous choisissez vous pouvez entrer dans le mode des couleurs fixes –Appuyez sur UP et
DOWN pour choisir les couleurs (35 couleurs différentes). Appuyez sur SETUP à nouveau et vous pourrez
ajuster l’intensité de la couleur choisi de 0-99
3.3 –Mode couleurs fixes
-Appuyez sur MODE/UP/DOWN et choisissez MANUEL pour rentrer dans les menus de réglages. A l’aide des
boutons UP et DOWN sélectionnez DIMMER MODE et appuyez sur SETUP pour rentrer dans le programme
-
-A l’aide des boutons UP et DONW choisissez le MODE DIMMER BACK et appuyez sur SETUP pour rentrer
dans le programme dimmer effet Aura
submenu value function
Red
Gray: 0-255 R dimming effect 0-100%
Green
Gray: 0-255 G dimming effect 0-100%
Blue
Gray: 0-255 B dimming effect 0-100%
White
Gray: 0-255 W dimming effect 0-100%
Flash 0-99 Strobe effect speed setting
submenu value function
B Red
Gray: 0-255 R dimming backlight 0-100%
B Green
Gray: 0-255 G dimming backlight 0-100%
B Blue
Gray: 0-255 B dimming backlight 0-100%
Flash 0-99 Backlight strobe speed setting

5
Manuel d’utilisation PAR LED 1210 Z
-A l ‘aide des boutons UP et DOWN choisissez le mode ZOOM et appuyez sur SETUP pour rentrer dans le
programme
3.4 –Mode musical
Appuyez sur SETUP et vous pourrez régler l’intensité du son de 0 à 31 à l’aide des boutons UP et DOWN.
3.5 –Mode DMX
- 6 canaux
- 10 canaux
submenu value function
Space
Gray: 0-255 Lens zoom 0-100%
Channels
Value Function
10-255 Master dimming effect 0-100%
20-255
R
dimming effect 0-100% R dimming backlight 0-100%
30-255 G dimming effect 0-100% G dimming backlight 0-100%
40-255
B
dimming effect 0-100% B dimming backlight 0-100%
50-255 W dimming effect 0-100%
60-255 Lens zoom 0-100%
Channels Value Function
10-255 Master Dimming0-100%
20-255 R 0-100%
30-255 G 0-100%
40-255 B 0-100%
50-255 W 0-100%
60-15 Strobe closed
16-255 The larger value, the faster strobe
70-255 Zoom 0-100%
80-255 Backlight R 0-100%
90-255 Backlight G 0-100%
10 0-255 Backlight B 0-100%

6
Manuel d’utilisation PAR LED 1210 Z
- 14 canaux
Channels Value Function
1 0-255 Master dimming effect 0-100%
0-10 Dimming effect function
11-17 Red
18-24 Flame Red
25-31 Deep Golden Amber
32-38 Millennium Gold
39-45 Gold Amber
246-52 Orange
53-59 Chrome Orange
60-66 Deep Amber
67-73 Spring Yellow
74-80 Lime Green
81-87 JAS Green
88-94 Fern Green
95-101 Moss Green
102-108 Primary Green
109-115 Green
116-122 Medium Blue Green
123-129 Light Blue
130-136 Lighter Blue
137-143 Steel Blue Select the color of
effect light
144-150 Half CT Blue
151-157 Full CT Blue
158-164 State Blue
165-171 Double CT Blue
172-178 Medium Blue
179-185 Just Blue
186-192 Blue
193-199 Congo Blue
200-206 Surprise Pink
207-213 Fuchsia Pink
214-220 Follies Pink
221-227 Special Rose Pink
228-234 Pink
235-241 Moroccan Pink
242-248 Cold White
249-255 Open White
3 0-255 R dimming effect 0-100%
4 0-255 G dimming effect 0-100% 2CH:0-10
5 0-255 B dimming effect 0-100%
6 0-255 W dimming effect 0-100%

7
Manuel d’utilisation PAR LED 1210 Z
70-15 Effect light Strobe closed
16-255 The larger value, the faster effect light strobe
8 0-255 Lens zoom 0-100%
9 0-255 Master backlight dimming 0-100%
0-10 Backlight dimming function
11-17 Red
18-24 Flame Red
25-31 Deep Golden Amber
32-38 Millennium Gold
39-45 Gold Amber
46-52 Orange
10 53-59 Chrome Orange
60-66 Deep Amber
67-73 Spring Yellow
74-80 Lime Green
81-87 JAS Green
88-94 Fern Green
95-101 Moss Green
102-108 Primary Green
109-115 Green
116-122 Medium Blue Green
123-129 Light Blue
130-136 Lighter Blue
137-143 Steel Blue
144-150 Half CT Blue Select the color of
backlight
151-157 Full CT Blue
158-164 State Blue
165-171 Double CT Blue
172-178 Medium Blue
179-185 Just Blue
186-192 Blue
193-199 Congo Blue
200-206 Surprise Pink
207-213 Fuchsia Pink
214-220 Follies Pink
221-227 Special Rose Pink
228-234 Pink
235-241 Moroccan Pink
242-248 Cold White
249-255 Open White
11 0-255 R dimming backlight 0-100%
12 0-255 G dimming backlight 0-100% 10CH:0-10
13 0-255 B dimming backlight 0-100%
14 0-15 Backlight Strobe closed
16-255 The larger value, the faster backlight strobe

8
Manuel d’utilisation PAR LED 1210 Z
3.6 –MODE MAITRE/ESCLAVE
Si l’affichage montre vous entrez dans le menu Maitre/Esclave
3.7 –REINITIALISATION
Si l’afficheur indique vous êtes dans le menu REGLAGE
Ce menu a 2 options : soit retour en arrière, soit réinitialisation
Utilisez les boutons UP et DOWN pour faire votre sélection
-si est affiché, appuyez sur SETUP pour régler l’heure désiré
- Si est affiché, appuyez sur SETUP pour réinitialiser. Appuyez une 2ème fois sur SETUP
pour confirmer réinitialisation OUI ou NON « Reset Y/N » à l’aide des boutons UP et DOWN
Si « dimmer curves » est indiqué sur l’afficheur, vous pouvez sélectionner « Linear », Gamma 5 » ou Gamma 2.0
à l’aide des boutons UP et DOWN
3.8 –Mode INFORMATION
Appuyez sur le bouton MODE pour avoir les informations suivantes :
-Si l’afficheur montre appuyez sur SETUP pour connaitre le menu de l’appareil
-Si l’afficheur montre appuyez sur SETUP pour connaitre la version du logiciel
-Si l’afficheur montre appuyez sur SETUP pour vérifier la température de l’appareil. Si
l’indication « NORMAL » apparait tout est OK. Si l’indication « WARNING ERROR! » apparait, cela signifie que la
température est anormalement élevée.

9
Manuel d’utilisation
4. DEPANNAGE
Vous trouverez ci-dessous une liste de problèmes qui pourraient survenir lors de l’utilisation
de votre appareil. Nous vous apportons quelques suggestions pour remédier facilement à la
situation.
1. L’appareil de fonctionne pas, il n’y a pas de lumière :
A. Vérifier les branchements de l’alimentation et du fusible
B. Vérifier la tension du secteur
2. L’appareil ne répond pas au contrôleur DMX :
A. La LED DMX doit être allumée. Si ce n’est pas le cas, vérifiez les connecteurs et les
câbles pour voir si le raccordement est correct.
B. Si la LED DMX est allumée et que le canal ne répond pas, vérifiez les réglages de
l’adresse et la polarité du signal DMX
C. Si vous rencontrez des problèmes avec le signal DMX mais de façon intermittente,
vérifier les connecteurs ou la carte électronique de l’appareil défaillant ainsi que de
l’appareil précédent.
D. Essayer d’utiliser un autre contrôleur DMX
E. Vérifiez l’absence d’interférence entre les câbles électriques
POUR TOUT PROBLEME DE PANNE, VEUILLEZ CONTACTER VOTRE REVENDEUR
5. ENTRETIEN DE L’APPAREIL
Le nettoyage du système d’optique externe de l’appareil doit être fait régulièrement;
1. Nettoyez l’appareil avec un chiffon doux et utilisez un liquide de nettoyage pour vitres
2. Il est toujours recommandé d’essuyer correctement toutes les pièces de l’appareil
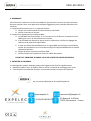
www.expelec.fr
55 Route de la Fillière
74370 Charvonnex - France
commercial@expelec.fr
33 (0)4.50.60.80.20
est une marque déposée de la Société Expelec SA
PAR LED 1210 Z

PAR LED 1210 Z
Manuel d’utilisation / user manuel
10

11
User manual
1.Before you begin
1.1 What are included
1) 1 x PAR LED 1210 Z
2) Manual
1.2 Unpacking Instructions
Immediately upon receiving a fixture, carefully unpack the carton, check the
contents to ensure that all parts are present, and have been received in good
condition. Notify the shipper immediately and retain packing material for inspection if any parts
appear damaged from shipping or the carton itself shows signs
of mishandling. Save the carton and all packing materials. In the event that a
fixture must be returned to the factory, it is important that the fixture be returned
in the original factory box and packing.
1.3 Safety Instructions
Please read these instructions carefully, which includes important
information about the installation, usage and maintenance .
* Please keep this User Guide for future consultation. If you sell the unit to another user,
be sure that they also receive this instruction booklet.
*Always make sure that you are connecting to the proper voltage and that the line
voltage you are connecting to is not higher than that stated on decal or rear panel of
the fixture.
* This product is intended for indoor use only!
* To prevent risk of fire or shock, do not expose fixture to rain or moisture. Make sure
there are no flammable materials close to the unit while operating.
* DO NO look directly at the light while the fixture is on
* The unit must be installed in a location with adequate ventilation, at least 50cm
from adjacent surfaces. Be sure that no ventilation slots are blocked.
*Always disconnect from power source before servicing or replacing lamp or fuse
and be sure to replace with same lamp source.
* In the event of serious operating problem, stop using the unit immediately. Never try to
repair the unit by yourself. Repairs carried out by unskilled people can lead to damage or
malfunction. Please contact the nearest authorized technical assistance center.
Always use the same type spare parts.
* Don’t connect the device to a dimmer pack.
* Make sure power cord is never crimped or damaged.
* Never disconnect power cord by pulling or tugging on the cord.
•Don’t operate this device under 113°F ambient temperature conditions.
•Any modification, adjustment, attempt of repair or any other settings made outside our
technical department will void your warranty. Moreover, NEVER CUT any supplied cable
because it may delay the time of repair by our service and increase the cost.
PAR LED 1210 Z

12
User manual
1.4 INSTALLATION
The unit should be mounted by its screws holes on the bracket. Always ensure that th eunit is frimly fixed
to avoid vibration and slipping while operating. The strcture to which you are attaching the unit should
be able to support 10 times the weight of the unit. Also always use a safety cable than can hold 12 times
the weight of the unti when installing the fixture. The quipment must be fixed by professionals.
2. TECHNICAL SPECIFICATIONS
12 x 10W LED PAR RGBW FC Zoom + backlight effect
* Light source : 12 x 10W RGBW 4 in 1 Zoom + backlight RGB 3 in 1
* Lumens :84000Lux@1m (2°) : Red : 10000Lux@1m/Green : 20000Lux@1m/Blue :
23800Lux@1m/White : 30000Lux@1m
8500Lux@1m (45°) : Red : 1000Lux@1m/Green : 2140Lux@1m/Blue :
2720Lux@1m/White : 3000Lux@1m
* Beam angle : 2°-45°
* Dimmer : 0-100%
* Strobe : 0-20Hz
* Sound level : <26 dBA@1m mini
* DMX Channels : 6/10/14
*Operation Mode : Auto, DMX, Master/Slave, Musical
* Power consumption : 145W Max
* Voltage : AC110-240V, 50/60 Hz
* Dimensions : 316x204x237mm
* Net weight : 4,6Kg
PAR LED 1210 Z

3. OPERATION :
This product has rich effect programs ; There are 8 working modes
13
Manuel d’utilisation PAR LED 1210 Z
3.1- Auto running mode
This mode is Auto Running Mode. When press MODE/UP/DOWN, the fixture will automatically run the
programs according to the preset program.
3.2- Built-in program mode
- This mode is Built-in program mode. There are 10 built-in program modes. You could press UP
or DOWN
- When choose press SETUP at first time can enter Built-in program mode to set speed.
Press UP and DOWN to change the value 1-100. Press SETUP at second time and you can enter strobe speed
setting. Press UP and DOWN to change the value 0-99.
- When choose can enter static color mode, press UP and DOWN can choose 35 type of colors.
Press SETUP again can set strob value of color 0-99.
3.3 –Static color mode
- When press MODE/UP/DOWN to choose MANUAL can enter built in program setting mode. Press UP and
DOWN to choose DIMMER MODE. Press SETUP to enter effect dimmung pro
-Press UP and DOWN to choose BACK DIMMER MODE. Press SETUP to enter backlight dimming program
submenu value function
Red
Gray: 0-255 R dimming effect 0-100%
Green
Gray: 0-255 G dimming effect 0-100%
Blue
Gray: 0-255 B dimming effect 0-100%
White
Gray: 0-255 W dimming effect 0-100%
Flash 0-99 Strobe effect speed setting
submenu value function
B Red
Gray: 0-255 R dimming backlight 0-100%
B Green
Gray: 0-255 G dimming backlight 0-100%
B Blue
Gray: 0-255 B dimming backlight 0-100%
Flash 0-99 Backlight strobe speed setting

14
Manuel d’utilisation PAR LED 1210 Z
- Press UP and DOWN to choose DIMMER MODE. Press SETUP to enter effect dimming pro
3.4 –Mode musical
This mode is sound-active mode press the SETUP button can enter into sensitivity settings, you can
set the sensitivity value 0-31 via UP ou DONW. When the value is 0, the sound active is no effect. .
3.5 –Mode DMX
- Press the MODE , enter to set DMX mode date setting, the LCD display will show as below :
- Press the SETUP button, LCD will show as below, enter DMX address value settings
- You can set the DMX address value 001-512 throught UP or DOWN button
3 mode DMX : 6CH/10CH/14CH
6 CHANNELS DMX MODE
20 CHANNELS DMX MODE
submenu value function
Space
Gray: 0-255 Lens zoom 0-100%
Channels
Value Function
10-255 Master dimming effect 0-100%
20-255
R
dimming effect 0-100% R dimming backlight 0-100%
30-255 G dimming effect 0-100% G dimming backlight 0-100%
40-255
B
dimming effect 0-100% B dimming backlight 0-100%
50-255 W dimming effect 0-100%
60-255 Lens zoom 0-100%
Channels Value Function
10-255 Master Dimming0-100%
20-255 R 0-100%
30-255 G 0-100%
40-255 B 0-100%
50-255 W 0-100%
60-15 Strobe closed
16-255 The larger value, the faster strobe
70-255 Zoom 0-100%
80-255 Backlight R 0-100%
90-255 Backlight G 0-100%
10 0-255 Backlight B 0-100%

15
Manuel d’utilisation PAR LED 1210 Z
-14 Channels DMX mode
Channels Value Function
1 0-255 Master dimming effect 0-100%
0-10 Dimming effect function
11-17 Red
18-24 Flame Red
25-31 Deep Golden Amber
32-38 Millennium Gold
39-45 Gold Amber
246-52 Orange
53-59 Chrome Orange
60-66 Deep Amber
67-73 Spring Yellow
74-80 Lime Green
81-87 JAS Green
88-94 Fern Green
95-101 Moss Green
102-108 Primary Green
109-115 Green
116-122 Medium Blue Green
123-129 Light Blue
130-136 Lighter Blue
137-143 Steel Blue
Select the color of effect
light
144-150 Half CT Blue
151-157 Full CT Blue
158-164 State Blue
165-171 Double CT Blue
172-178 Medium Blue
179-185 Just Blue
186-192 Blue
193-199 Congo Blue
200-206 Surprise Pink
207-213 Fuchsia Pink
214-220 Follies Pink
221-227 Special Rose Pink
228-234 Pink
235-241 Moroccan Pink
242-248 Cold White
249-255 Open White
3 0-255 R dimming effect 0-100%
4 0-255 G dimming effect 0-100% 2CH:0-10
5 0-255 B dimming effect 0-100%
6 0-255 W dimming effect 0-100%

16
Manuel d’utilisation PAR LED 1210 Z
70-15 Effect light Strobe closed
16-255 The larger value, the faster effect light strobe
8 0-255 Lens zoom 0-100%
9 0-255 Master backlight dimming 0-100%
0-10 Backlight dimming function
11-17 Red
18-24 Flame Red
25-31 Deep Golden Amber
32-38 Millennium Gold
39-45 Gold Amber
46-52 Orange
10 53-59 Chrome Orange
60-66 Deep Amber
67-73 Spring Yellow
74-80 Lime Green
81-87 JAS Green
88-94 Fern Green
95-101 Moss Green
102-108 Primary Green
109-115 Green
116-122 Medium Blue Green
123-129 Light Blue
130-136 Lighter Blue
137-143 Steel Blue
144-150 Half CT Blue
Select the color of backlight
151-157 Full CT Blue
158-164 State Blue
165-171 Double CT Blue
172-178 Medium Blue
179-185 Just Blue
186-192 Blue
193-199 Congo Blue
200-206 Surprise Pink
207-213 Fuchsia Pink
214-220 Follies Pink
221-227 Special Rose Pink
228-234 Pink
235-241 Moroccan Pink
242-248 Cold White
249-255 Open White
11 0-255 R dimming backlight 0-100%
12 0-255 G dimming backlight 0-100% 10CH:0-10
13 0-255 B dimming backlight 0-100%
14 0-15 Backlight Strobe closed
16-255 The larger value, the faster backlight strobe

17
Manuel d’utilisation PAR LED 1210 Z
3.6 –Master/Slave mode
If LCD show enter master slave mode.
3.7 –Restore Factory setting
If LCD shows enter into settings menu.
This settings menu has 2 options : LCD Back Time settings and Factory Reset settings.
Press the SETUP button when in main menu, enter the state of select options, select the options through UP or
DOWN button.
- LCD Back Time settings
If LCD show press the SETUP button to set the time, can be set : 5s, 10s, 20s, 30s On (KEEP)
-Factory Reset settings
If LCD shows press the SETUP button to set the factory reset. Press the SETUP button to confirm
« Rest Y/N. Press UP and DOWN button to switch these 2 options
-Dimmer curvres setting
If LCD shows « dimmer curves », it can be changed to « Linear », « Gammal 5 », Gamma 2.0 », via UP and
DOWN button.
3.8 –Info mode
Press the MODE button, the LCD will show , enter to get product information.
- If LCD shows press the SETUP button to check the product mode.
- If LCD shows press the SETUP button to check the software version.
- If LCD shows press the SETUP button to check the temperature control state. If LCD shows
« normal », it means the temperature control is normal. If LCD shows « Warning error! », it means abnormal
temperature control work.

18
User manual
4. TROUBLESHOOTING
Following are a few common problems that may occur during operation. Here are some suggestions
for easy troubleshooting:
1. The fixture doesn’t not work, no light :
1. Check the connection of power and main fuse
2. Measure the main voltage on the main connector
2. The fixture does not respond to DMX controller :
1. DMX LED should be on. If not, check DMX connectors, cables to see if link prperly
2. If the DMX LED is on and no response to the channel, check the address settings and DMX
polarity
3. If you have intermittent DMX signal problems, check the pins on connectors or on PCB of
the fixture or the previous one
4. Try to use another DMX controler
5. Check if the DMX cables run near or run alongside to high voltage cables that may cause
damage or interference to DMX interface circuit
FOR ANY PROBLEM OR MALFUNCTION, PLEASE CONTACT YOUR RESELLER
5. MAINTENANCE AND CLEANING
Clean with soft cloth
Always dry to parts carefully
www.expelec.fr commercial@expelec.fr
33(0)4.50.60.80.20 55 Route de la Fillière
74370 Charvonnex - France
est une marque déposée de la société Expelec SA
PAR LED 1210 Z
-
 1
1
-
 2
2
-
 3
3
-
 4
4
-
 5
5
-
 6
6
-
 7
7
-
 8
8
-
 9
9
-
 10
10
-
 11
11
-
 12
12
-
 13
13
-
 14
14
-
 15
15
-
 16
16
-
 17
17
-
 18
18


Nicols PAR LED 1210 Z Le manuel du propriétaire
- Catégorie
- Stroboscopes
- Taper
- Le manuel du propriétaire
dans d''autres langues
- English: Nicols PAR LED 1210 Z Owner's manual
Documents connexes
Autres documents
-
Briteq BT-W37L10 ZOOM Le manuel du propriétaire
-
-
-
-
-
-
Cameo PIXBAR® 600 IP G2 Manuel utilisateur
-
Chauvet OVATION Guide de référence
-
-
 afx light LEDWASH712 Manuel utilisateur
