Daewoo Korando Le manuel du propriétaire
- Catégorie
- Voitures
- Taper
- Le manuel du propriétaire
Ce manuel convient également à

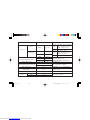
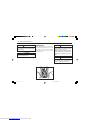
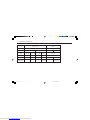
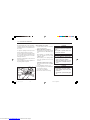
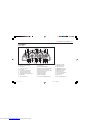
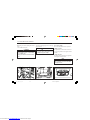
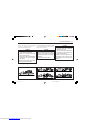
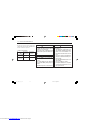
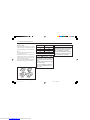
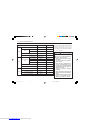
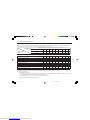
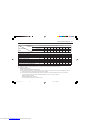
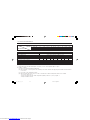
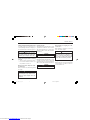
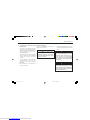
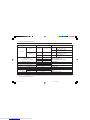
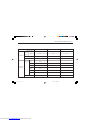
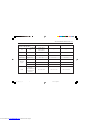
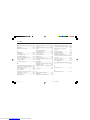
Front & Rear
axle fluid
Lubricant Capacity Classification
Diesel
MB sheet : 229.1/3 (preferable)
(API : CG grade or above
ACEA : B2, B3 or B4)
MB sheet No. 224.1
MB sheet : 229.1/3
(API : SJ grade or above
ACEA : A2 or A3)
MB sheet No. 224.1
Quality
class**
Viscosity
Quality
class**
Viscosity
Engine oil
Gasoline
D29ST 7.5 ~ 9.5 L
G23D 6.0 ~ 7.5 L
G32D 6.7 ~ 8.2 L
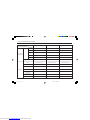
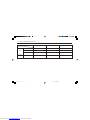
MB sheet 325.0,
BASF GLYSANTIN G05-11,
HOECHST GENANTIN SUPER 8023/14
D29ST
G23D
G32D
Engine coolant
(Coolant/Distilled water Mixture)
10.5 L
10.5 L
11.3 L
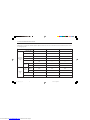
ATF DEXRON
®
IIManual transmission oil 4WD :3.6 L, 2WD : 3.4 L
Brake/Clutch fluid (Level must be
maintained between MAX & MIN level)
Brake fluid : approx. 0.7 L
Clutch fluid : approx. 0.3 L
1.0 L
9.5 L
Part time: 1.2 L / TOD: 1.4 L
Tong-IL: 1.0 L / Dymos: 1.2 L
1.9 L
SAE J 1703, DOT 3 or DOT 4
Power steering fluid
Automatic transmission fluid
(BTRA M74LE)*
Transfer case fluid
Front
Rear
ATF DEXRON
®
II, III / Total fluid ATX
CASTROL TQ 95
ATF DEXRON
®
III
SAE 80W/90, API GL-5
K140_RHD_EN.p65 2005-06-08, ¿ÀÈÄ 3:57Page 2 Adobe PageMaker 6.5K/Win
Downloaded from www.Manualslib.com manuals search engine

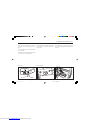
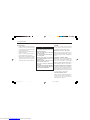
This manual has been prepared to acquaint you with the operation and maintenance of
your new KORANDO and to provide important safety information. We urge you to read
it carefully and follow the recommendations to help assure the most enjoyable, safe,
and trouble-free operation of your vehicle.
When it comes to service, remember that your SSANGYONG dealer knows your ve-
hicle best and is interested in your complete satisfaction.
We would like to take this opportunity to thank you for choosing KORANDO and as-
sure you of our continuing interest in your motoring pleasure and satisfaction.
This manual should be considered as a permanent part of your vehicle, and must re-
main with the vehicle at the time of resale.
PYUNGTAEK, KOREA
FOREWORD
K140_RHD_EN_00.p65 2004-11-11, ¿ÀÈÄ 4:071
Downloaded from www.Manualslib.com manuals search engine

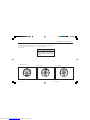
WARNING
WARNING indicates a potentially
hazardous situation which, if not
avoided, could result in serious
injury or death.
IMPORTANT NOTICE
Please read this manual and follow the
instructions carefully.
CAUTION
CAUTION indicates a potentially
hazardous situation which, if not
avoided, may result in minor or
moderate injuries, or damage to
your vehicle or other property.
: The asterisk in this manual signi-
fies an item of equipment that is not
included on all vehicles. Such items
include engine options, model
variations specific to one country,
and optional equipment.
NOTE
NOTE indicates information which
will assist you with maintenance or
other instructions concerning your
vehicle.
All information, illustrations, and specifica-
tions in this manual are based on the latest
product information available at the time of
publication.
Ssangyong reserves the right to change
specifications or designs at any time without
notice and without incurring obligation.
This vehicle may not comply with the
standards or regulations of other countries.
Before attempting to register this vehicle in
any other country, check all applicable
regulations and make any necessary
modifications.
This manual describes options and trim
available at the time of publication. Some of
the items covered may not apply to your
vehicle. Contact your Ssangyong dealer for
information on option and trim availability.
Non-Ssangyong Genuine parts and
accessories have not been examined or
approved by Ssangyong. We can not certify
the suitability or safety of non-Ssangyong
Genuine parts and accessories and are not
liable for damage caused by their use.
*
: This is the safety alert symbol used
to alert you to potential hazards
including injuries or damage to your
vehicle or other property. Obey all
safety messages that follow this
symbol.
Throughout this manual, you will find special
notations:
• Warning
• Caution
• Note
K140_RHD_EN_00.p65 2004-11-11, ¿ÀÈÄ 4:072
Downloaded from www.Manualslib.com manuals search engine

1. BEFORE DRIVING YOUR CAR ................................................................................................................ 1-1
2. STARTING AND OPERATING ................................................................................................................... 2-1
3. INSTRUMENTS AND CONTROLS .......................................................................................................... 3-1
4. VENTILATION, HEATING AND AIR CONDITIONING ............................................................................. 4-1
5. TURBO CHARGER SYSTEM ................................................................................................................... 5-1
6. IN CASE OF EMERGENCY ...................................................................................................................... 6-1
7. SERVICE AND MAINTENANCE ............................................................................................................... 7-1
8. VEHICLE CARE ......................................................................................................................................... 8-1
9. SPECIFICATION AND SERVICE DATA .................................................................................................... 9-1
10. INDEX ........................................................................................................................................................ 10-1
TABLE OF CONTENTS
K140_RHD_EN_00.p65 2004-11-11, ¿ÀÈÄ 4:073
Downloaded from www.Manualslib.com manuals search engine


1–2 BEFORE DRIVING YOUR CAR
RUNNING-IN PERIOD
There are no particular run-in rules for your
new Korando. However, following a few
simple precautions for the first few hundred
kilometers can add to the good future perfor-
mance, economy and long life of your
Korando.
• Do not race the engine.
• While driving, keep your engine speed
(RPM) below the red zone.
• Avoid full-throttle starts.
• Avoid high-speed stops, except in emer-
gencies. This will allow the brakes to bed
in properly.
• Drive at varying speeds, trying not to
“strain” the engine.
• Refrain from towing a trailer or an other
vehicle.
• Avoid harsh operations such as abrupt
start, sudden acceleration and prolonged
high speed driving.
These operations not only have a detri-
mental effect on the engine but also
cause excessive fuel and oil consump-
tion, which could result in the malfunc-
tion of the engine components.
Especially, avoid full-throttle acceleration
in low gear.
BEFORE ENTERING THE CAR
• Ensure that windows, outside rear view
mirrors and lights are clean, undamaged
and unobstructed.
• Visually note inflation condition of tyres.
• Check that all lights, switches and con-
trols work properly.
• Check the area behind the vehicle if you
are about to reverse.
• Check under the vehicle for leaks.
• Check the engine oil level and other fluid/
oil levels in engine compartment.
BEFORE DRIVING OFF
• Be sure you understand your car and
its equipment and how to operate it
safely.
• Adjust your seating position.
• Adjust inside and outside mirrors.
• Ensure that all occupants of the car
have fastened their seat belts.
• Check the operation of the warning
lights when the ignition key is turned to
“ON” position.
• Check all gauges.
• Release the parking brake and ensure
that the brake warning light goes out.
WARNING
Check to ensure that all light, signal-
ing systems and warning indicators
are in working order.
K140_RHD_EN_01.p65 2004-11-11, ¿ÀÈÄ 4:072
Downloaded from www.Manualslib.com manuals search engine

BEFORE DRIVING YOUR CAR 1–3
NOTE
In case of loss, replacement keys are
available from Ssangyong Dealers
by quoting the key number.
To protect your car from theft, an
electronic immobilization system has
been installed in your Korando. Only
keys with correct electronic code can
be used to start the car. Even if a key
has the same profile, it will not start
the engine if the electronic code is in-
correct.
Always obtain replacement of addi-
tional keys from your Ssangyong
Dealer.
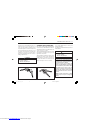
KEY
Two keys are provided which fit all key cyl-
inders. Keep one of the two keys as a
spare. The key number is stamped on the
key number plate. For vehicle security keep
the key number plate in a safe place, not in
the vehicle. You should also record the key
number in a safe place, not in the vehicle.
This deters unauthorized persons from ob-
taining a duplicate key.
KEY WITH INTEGRATED TRAN-
SPONDER AND ILLUMINATION*
On vehicles equipped with an Immobilizer
System, two keys with illumination and inte-
grated transponder are provided. Keep one
of the two keys as a spare.
The keys with illumination help you to insert
the ignition key at night. To use it, press the
light switch of key knob.
The key number is stamped on the key num-
ber plate. For vehicle security, keep the key
number plate in a safe place, not in the ve-
hicle. You should also record the key num-
ber in a safe place, not in the vehicle.
WARNING
Do not leave the key with the vehicle.
• Lock the vehicle.
• Take the key with you.
WARNING
Do not leave the key with the vehicle
• Lock the vehicle.
• Take the key with you.
If you need additional keys, contact your
Ssangyong Dealer.
See page 2-5 under Immobilizer System for
further details.
K140_RHD_EN_01.p65 2004-11-11, ¿ÀÈÄ 4:073
Downloaded from www.Manualslib.com manuals search engine

1–4 BEFORE DRIVING YOUR CAR
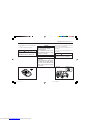
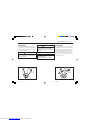
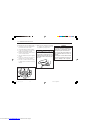
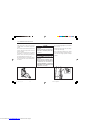
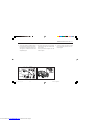
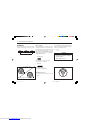
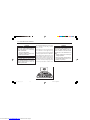
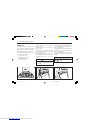
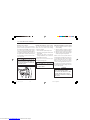
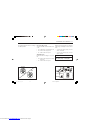
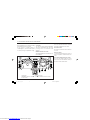
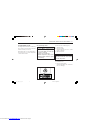
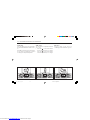
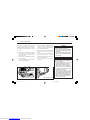
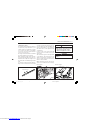
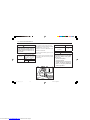
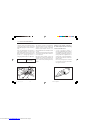
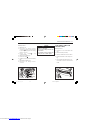
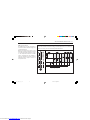
KEYLESS ENTRY SYSTEM WITH
ANTI-THEFT FUNCTION*
The keyless entry system lets you lock and
unlock the doors from up to 15m away us-
ing the transmitter.
The LED on the transmitter flashes to show
that it is operational.
A sophisticated electroic anti-theft alarm
system is equipped to ensure maximum ve-
hicle security. You are advised to gain a full
understanding of the system by throughly
reading this section of the manual.
NOTE
The operating range of the trans-
mitter will vary due to environmen-
tal conditions.
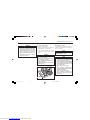
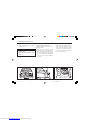
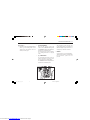
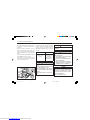
• LOCK button : Locks all doors.
Hazard lamps will flash twice, single
beep will sound and the anti-theft sys-
tem will be activated.
• UNLOCK button : Unlocks all doors.
Hazard lamps will flash once and the
anti-theft system will be deactivated.
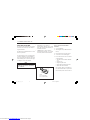
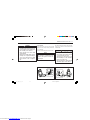
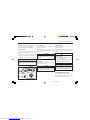
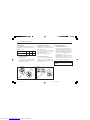
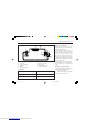
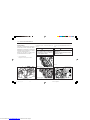
1
3
2
1. LED
2. Door lock button
3. Door unlock button
Door Lock and Anti-Theft Mode
Activation
1. Close all windows.
2. Turn the ignition key to LOCK and remove
the key.
3. Have all passengers exit the vehicle.
4. Close all doors, hood and tailgate.
5. Press and release the door lock button
on the transmitter.
• The LED on the transmitter will flash
once.
• All doors lock.
• Single beep will sound.
• Hazard warning lamps flash twice.
• Anti-theft mode is activated.
If the ignition switch is in the ON posi-
tion, the transmitter will not operate and
the anti-theft system cannot be armed.
K140_RHD_EN_01.p65 2004-11-11, ¿ÀÈÄ 4:074
Downloaded from www.Manualslib.com manuals search engine

BEFORE DRIVING YOUR CAR 1–5
NOTE
The system can be activated even if
the windows are open.
Close all the windows and doors be-
fore leaving the vehicle.
NOTE
You must use the transmitter to acti-
vate the anti-theft mode.
When Arming the System
The system provides a visual and an audio
alarm, if any of the doors, the tailgate or the
hood are unlocked without using the key or
pressing the unlock button on the transmit-
ter after closing the door for more than 2
seconds.
After 27 seconds, the alarm will automati-
cally stop.
Stopping the Alarm
the alarm stops only by unlocking a door or
the tailgate with the key or by pressing the
lock/unlock button on the transmitter.
If the system does not operate as described
above, have it checked by your Ssangyong
dealer.
Door Unlock and Anti-theft Mode
Deactivation
1. Unlock the driver's door with a key, and
anti-theft mode is deactivated.
2. Press and release the door unlock but-
ton on the transmitter.
• The LED on the transmitter will flash
once.
• All doors unlock.
• Hazard warning lamps flash once.
• Anti-theft mode is deactivated.
3. Turn on the ignition switch with a key,
and anti-theft mode is deactivated.
Auto Door Lock
If the door is not opened or the engine is
not started within 30 seconds after disarm-
ing the system with the transmitter, all the
doors are automatically locked and the theft
deterrent mode is switched on.
K140_RHD_EN_01.p65 2004-11-11, ¿ÀÈÄ 4:075
Downloaded from www.Manualslib.com manuals search engine

1–6 BEFORE DRIVING YOUR CAR
NOTE
Theft deterrent system readiness will
be released by positioning the tail-
gate to UNLOCK with the key when
the alarm is activated.
However, under this conditions, theft
deterrent system will be the second-
ary readiness and it will alarm again
when the alarming conditions are es-
tablished.
When you closed the tailgate com-
pletely again and after 2 seconds,
theft deterrent system will be ready
until you release it.
KEYLESS ENTRY TRANSMITTER
Matching Transmitter(s) to Your
Vehicle
Every transmitter is electronically coded to
prevent another transmitter from unlocking
your vehicle.
If a transmitter is lost or stolen, a replace-
ment can be purchased through your
Ssangyong dealer.
If you need a new transmitter, bring the re-
maining transmitter with you when you go
to your Ssangyong dealer. When the dealer
matches the replacement transmitter to your
vehicle, the remaining transmitter must also
be matched to the new code.
Once the new transmitter is electronically
coded, the lost transmitter will not unlock
your vehicle.
Up to 2 transmitters can be matched to your
vehicle.
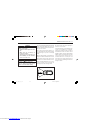
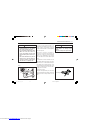
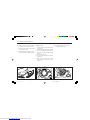
Battery Replacement
If the LED fails to illuminate, the transmitter
can still be used for a while. However, it is
an indication that a new battery is needed.
Use CR2032 (or equivalent)
replacement battery
1. Open the screw from the rear cover.
2. Remove the battery, taking care to avoid
touching the circuit board or other com-
ponents.
3. Install the new battery.
Be sure the positive side (+) faces
down toward the base.
K140_RHD_EN_01.p65 2004-11-11, ¿ÀÈÄ 4:076
Downloaded from www.Manualslib.com manuals search engine

BEFORE DRIVING YOUR CAR 1–7
CAUTION
Avoid touching the flat surfaces of
the battery with your bare fingers.
Handling will shorten battery life.
4. Reassemble the cover of the transmit-
ter.
5. Check the transmitter operation.
CAUTION
Transmitter can be damaged.
• Do not reverse the polarity.
• Avoid dropping.
• Do not place heavy objects on it.
• Keep transmitter away from water
and direct sun light.
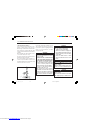
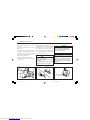
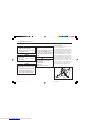
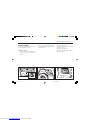
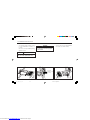
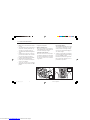
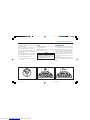
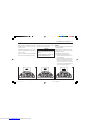
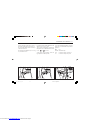
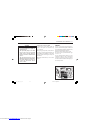
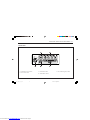
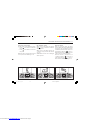
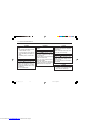
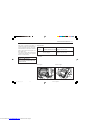
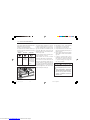
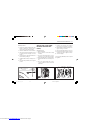
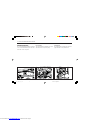
DOOR LOCKS
Front doors can be locked or unlocked
from outside by using the key.
To lock, turn the key towards the front of
the vehicle.
To unlock, turn the key towards the rear of
the vehicle.
CAUTION
Lock all doors and tailgate when
leaving the vehicle unattended.
(Outside)
UNLOCK
LOCK
NOTE
•
If transmitter gets wet, wipe it with
soft cloth.
•
When pressing the “Unlock” but-
ton while the room lamp switch is
at “Door” position, the front room
lamp comes on and goes out after
30 seconds.
K140_RHD_EN_01.p65 2004-11-11, ¿ÀÈÄ 4:077
Downloaded from www.Manualslib.com manuals search engine

1–8 BEFORE DRIVING YOUR CAR
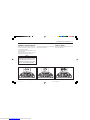
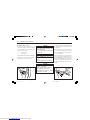
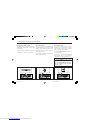
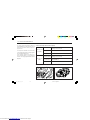
Each doors can be locked or unlocked from
the inside by pushing or puling the door lock
button located in the inside door catch.
Each doors can be locked from the outside
by pushing the door lock button then clos-
ing the door.
(Inside)
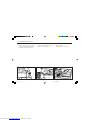
To open the door from the outside, turn the
key and pull the door handle upward.
(Outside) (Inside)
To open the door from the inside, pull the
door lock button and pull the inside door
handle.
WARNING
Never leave children or animals un-
attended in the vehicle.
• They can move the vehicle
unexpectedly.
• They can be suffocated in espe-
cially hot weather.
K140_RHD_EN_01.p65 2004-11-11, ¿ÀÈÄ 4:088
Downloaded from www.Manualslib.com manuals search engine

BEFORE DRIVING YOUR CAR 1–9
CENTRAL DOOR LOCKING
SYSTEM
You can activate the central door locking
system from driver’s or passenger’s door.
This system allows you to lock and unlock
all the doors from the driver’s or passenger’s
door, using either the key or keyless remote
(from outside) or the door lock button (from
inside).
CAUTION
Lock driver’s or passenger’s door
when leaving the vehicle unattended.
CAUTION
Automatic door locking system may
not functional when the door or/and
body is deformed by collision.
AUTOMATIC DOOR LOCKING
RELEASE
If the vehicle velocity is above 15km/h at the
event of collision, all doors and tailgate are
unlocked automatically.
AUTOMATIC DOOR LOCKING
SYSTEM
Automatic door locking
All the doors will be automatically locked
when you drive over 50km/h.
Automatic door unlocking
If you turn the ignition switch to ‘OFF’ all the
doors will be unlocked automatically.
K140_RHD_EN_01.p65 2004-11-11, ¿ÀÈÄ 4:089
Downloaded from www.Manualslib.com manuals search engine

1–10 BEFORE DRIVING YOUR CAR
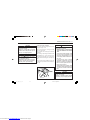
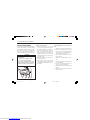
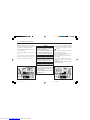
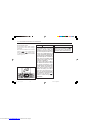
TAILGATE LOCKS
Tailgate can be locked or unlocked from
outside by using the key.
To open the tailgate, turn the key counter-
clockwise and then pull the door lever
upward.
To close the tailgate, close it and then turn
the key clockwise.
Unlock
Lock
WARNING
An open tailgate while vehicle is in
motion could obscure rearward vi-
sion, resulting in an accident.
Do not travel with the tailgate open.
WARNING
Exhaust gases are poisonous.
Do not drive with the tailgate open
to avoid exhaust gas in passenger
compartment.
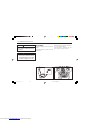
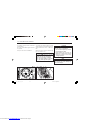
POWER WINDOWS
You may operate the power windows when
the ignition switch is ON by using the power
window switches on each door panel.
NOTE
Operating time lag
• The operation of power window
can be continued for 30 seconds
even after turning the ignition
switch off.
• If you open the door within this pe-
riod of time, the power window is
not operated at once.
K140_RHD_EN_01.p65 2004-11-11, ¿ÀÈÄ 4:0810
Downloaded from www.Manualslib.com manuals search engine

BEFORE DRIVING YOUR CAR 1–11
WARNING
Parts of the body can be trapped in
power window and struck by passing
objects.
• Keep a close watch on the windows
when closing them.
• Do not stick hands, head or any-
thing else out of the opening.
WARNING
Always remove the ignition key when
leaving the car to avert the risk of
injury arising from unattended chil-
dren operating the windows.
Driver’s window
The driver’s window has AUTO down.
• To lower the window, press down firmly,
then release the switch.
The window will open automatically un-
til it is fully open. To stop the window
while it is opening, press the switch
again.
• To raise the window, pull up and hold
the switch. To stop the window release
the switch.
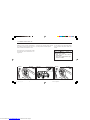
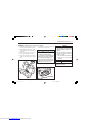
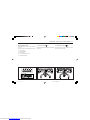
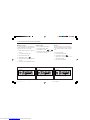
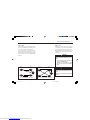
Operation Of Windows From The
Driver’s Seat
NOTE
The operation of power window can
be continued for 30 seconds even
after turning the ignition switch off.
Passenger’s
window switch
Driver’s window
switch
Passenger’s window
To lower the window press down on the
switch.
To raise the window lift up the switch.
Release the switch when the window
reaches the desired position.
Passenger’s switch is located on door to op-
erate the corresponding door window.
To lower the window press down on the
switch.
To raise the window lift up on the switch.
Release the switch when the window
reaches the desired position.
Passenger’s
window switch
Operation Of Windows From The
Passenger’s Seat
K140_RHD_EN_01.p65 2004-11-11, ¿ÀÈÄ 4:0811
Downloaded from www.Manualslib.com manuals search engine

1–12 BEFORE DRIVING YOUR CAR
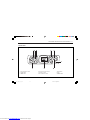
TILTABLE STEERING WHEEL
The steering wheel can be adjusted up or
down to the desired position. To adjust the
steering wheel, pull up the control lever,
adjust the wheel up or down to the proper
position, release the control lever to lock the
wheel in place.
WARNING
Control of vehicle can be lost.
Do not adjust steering wheel position
while vehicle is moving.
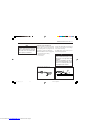
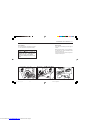
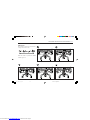
POWER OUTSIDE REARVIEW
MIRRORS
Adjust the outside rearview mirrors with the
adjusting switches so that you can see not
only each side of the road behind you but
also each side of your vehicle. This helps
you determine the location of objects seen
in the mirror.
You may adjust the outside rearview mirrors
up or down and left or right using the mirror
switch located on the driver's door panel.
The ignition switch must be ON to adjust the
mirrors.
1. Select the mirror you want to adjust by
using the left/right switch, located just
below the mirror adjustment pad, to the
left for left mirror or to the right for right
mirror.
2. Adjust the selected mirror up, down, left,
or right using the corresponding edges
of the mirror adjustment pad.
K140_RHD_EN_01.p65 2004-11-11, ¿ÀÈÄ 4:0812
Downloaded from www.Manualslib.com manuals search engine

BEFORE DRIVING YOUR CAR 1–13
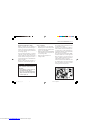
OUTSIDE REARVIEW MIRRORS
The outside rearview mirror on the
passenger’s side is convex if it says “OB-
JECTS IN MIRROR ARE CLOSER THAN
THEY APPEAR”. Use this mirror to get a
wider view of the road behind.
WARNING
Side convex mirrors make objects ap-
pear smaller and farther away than
when viewed in a flat mirror.
• Use the inside mirror to determine
the size and distance of objects
seen in the side mirror.
• Maintain rearward vision from
driver’s seating position.
CAUTION
Glass surface may be damaged.
Do not scrape ice from mirror face.
CAUTION
Do not force mirror to adjust if ice
should restrict movement of mirror.
Use deicer, spray, or blower to re-
move ice.
CAUTION
Adjust mirror angles before driving.
Foldable Outside Rearview Mirrors
If necessary, the outside rearview mirror can
be folded flat to the rear by pushing them
rearward when driving on narrow roads or
washing the vehicle, etc..
CAUTION
All round vision can be impaired,
increasing potential for accidents.
• Adjust mirror angles before driv-
ing.
• Check glass surface for damage.
• Use deicer, spray or blower to re-
move ice.
K140_RHD_EN_01.p65 2004-11-11, ¿ÀÈÄ 4:0813
Downloaded from www.Manualslib.com manuals search engine

1–14 BEFORE DRIVING YOUR CAR
NOTE
Automatic dimming function will be
operated when the ignition switch is
turned “ON” or the engine is run-
ning.
AUTOMATIC DIMMING INSIDE
REARVIEW MIRROR*
At night, when the glare is too high, the mir-
ror automatically responds to variations in
light, changing from no antiglare to antiglare
as required. The sensor under the mirror
automatically detect the glare from head-
lights behind you and reduce the glare.
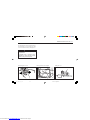
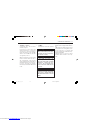
1. OFF : OFF (Ordinary usage)
2. AUTO : Automatic dimming operation at
night
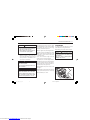
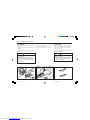
INSIDE REARVIEW MIRROR
The inside rearview mirror can be adjusted
up, down or side ways to obtain the best
view. The inside mirror has day and night
positions.
Make adjustment while the adjusting lever
is in the daytime position.
Move the adjusting lever to the night posi-
tion to reduce glare from the headlights of
vehicles behind you.
CAUTION
Maintain rearward vision from
driver’s seating position.
• Select day position and adjust to
obtain best view.
• Select night position to reduce
night glare.
• Selecting night position may re-
duce rearward clarity.
NOTE
Remember that you lose some rear-
view clarity in the night position.
Night
Day
Adjusting
lever
K140_RHD_EN_01.p65 2004-11-11, ¿ÀÈÄ 4:0814
Downloaded from www.Manualslib.com manuals search engine

BEFORE DRIVING YOUR CAR 1–15
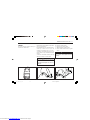
FRONT SEAT SLIDE
ADJUSTMENT
To move the seat forward or backward, pull
and hold the seat slide lever up and move
the seat as required. Then, release the le-
ver in desired position.
WARNING
Control of vehicle can be lost.
Do not adjust driver’s seat while ve-
hicle is moving.
WARNING
Excessive seat belt slack could re-
duce effectiveness of seat belts.
Adjust front seat before fastening
seat belt.
WARNING
Lose objects can interfere with seat-
slide mechanism.
Do not place objects under seat.
FRONT SEAT RECLINING
ADJUSTMENT
To change the seat back angle, lean for-
ward slightly and raise the lever. Then lean
back to the desired angle and release the
lever. After adjusting, make sure the lever
is returned to its original position; otherwise,
the seat back could unlatch while the ve-
hicle is in motion, causing the drive to lose
control of the vehicle.
K140_RHD_EN_01.p65 2004-11-11, ¿ÀÈÄ 4:0815
Downloaded from www.Manualslib.com manuals search engine

1–16 BEFORE DRIVING YOUR CAR
DRIVER’S SEAT WARMER*
Warm the driver’s seat in the cold weather
for your comfortable driving.
Press the button to warm the seat, and
press it again to stop the operation.
WARNING
Control of vehicle can be lost.
Do not adjust seat back when vehicle
is moving.
WARNING
Occupants can slide under seat belts.
• Do not recline seat back too much.
• To get maximum protection, adjust
seat back as upright as you can.
DRIVER’S SEAT HEIGHT
ADJUSTMENT*
To adjust the height of front seat, rotate the
handle.
Release the handle to lock the seat in de-
sired position.
K140_RHD_EN_01.p65 2004-11-11, ¿ÀÈÄ 4:0816
Downloaded from www.Manualslib.com manuals search engine
La page charge ...
La page charge ...
La page charge ...
La page charge ...
La page charge ...
La page charge ...
La page charge ...
La page charge ...
La page charge ...
La page charge ...
La page charge ...
La page charge ...
La page charge ...
La page charge ...
La page charge ...
La page charge ...
La page charge ...
La page charge ...
La page charge ...
La page charge ...
La page charge ...
La page charge ...
La page charge ...
La page charge ...
La page charge ...
La page charge ...
La page charge ...
La page charge ...
La page charge ...
La page charge ...
La page charge ...
La page charge ...
La page charge ...
La page charge ...
La page charge ...
La page charge ...
La page charge ...
La page charge ...
La page charge ...
La page charge ...
La page charge ...
La page charge ...
La page charge ...
La page charge ...
La page charge ...
La page charge ...
La page charge ...
La page charge ...
La page charge ...
La page charge ...
La page charge ...
La page charge ...
La page charge ...
La page charge ...
La page charge ...
La page charge ...
La page charge ...
La page charge ...
La page charge ...
La page charge ...
La page charge ...
La page charge ...
La page charge ...
La page charge ...
La page charge ...
La page charge ...
La page charge ...
La page charge ...
La page charge ...
La page charge ...
La page charge ...
La page charge ...
La page charge ...
La page charge ...
La page charge ...
La page charge ...
La page charge ...
La page charge ...
La page charge ...
La page charge ...
La page charge ...
La page charge ...
La page charge ...
La page charge ...
La page charge ...
La page charge ...
La page charge ...
La page charge ...
La page charge ...
La page charge ...
La page charge ...
La page charge ...
La page charge ...
La page charge ...
La page charge ...
La page charge ...
La page charge ...
La page charge ...
La page charge ...
La page charge ...
La page charge ...
La page charge ...
La page charge ...
La page charge ...
La page charge ...
La page charge ...
La page charge ...
La page charge ...
La page charge ...
La page charge ...
La page charge ...
La page charge ...
La page charge ...
La page charge ...
La page charge ...
La page charge ...
La page charge ...
La page charge ...
La page charge ...
La page charge ...
La page charge ...
La page charge ...
La page charge ...
La page charge ...
La page charge ...
La page charge ...
La page charge ...
La page charge ...
La page charge ...
La page charge ...
La page charge ...
La page charge ...
La page charge ...
La page charge ...
La page charge ...
La page charge ...
La page charge ...
La page charge ...
La page charge ...
La page charge ...
La page charge ...
La page charge ...
La page charge ...
La page charge ...
La page charge ...
La page charge ...
La page charge ...
La page charge ...
La page charge ...
La page charge ...
La page charge ...
La page charge ...
La page charge ...
La page charge ...
La page charge ...
La page charge ...
La page charge ...
La page charge ...
La page charge ...
La page charge ...
La page charge ...
La page charge ...
La page charge ...
La page charge ...
La page charge ...
La page charge ...
La page charge ...
La page charge ...
La page charge ...
La page charge ...
La page charge ...
La page charge ...
La page charge ...
La page charge ...
La page charge ...
La page charge ...
La page charge ...
La page charge ...
La page charge ...
La page charge ...
La page charge ...
La page charge ...
La page charge ...
La page charge ...
La page charge ...
La page charge ...
La page charge ...
La page charge ...
La page charge ...
La page charge ...
La page charge ...
La page charge ...
La page charge ...
La page charge ...
-
 1
1
-
 2
2
-
 3
3
-
 4
4
-
 5
5
-
 6
6
-
 7
7
-
 8
8
-
 9
9
-
 10
10
-
 11
11
-
 12
12
-
 13
13
-
 14
14
-
 15
15
-
 16
16
-
 17
17
-
 18
18
-
 19
19
-
 20
20
-
 21
21
-
 22
22
-
 23
23
-
 24
24
-
 25
25
-
 26
26
-
 27
27
-
 28
28
-
 29
29
-
 30
30
-
 31
31
-
 32
32
-
 33
33
-
 34
34
-
 35
35
-
 36
36
-
 37
37
-
 38
38
-
 39
39
-
 40
40
-
 41
41
-
 42
42
-
 43
43
-
 44
44
-
 45
45
-
 46
46
-
 47
47
-
 48
48
-
 49
49
-
 50
50
-
 51
51
-
 52
52
-
 53
53
-
 54
54
-
 55
55
-
 56
56
-
 57
57
-
 58
58
-
 59
59
-
 60
60
-
 61
61
-
 62
62
-
 63
63
-
 64
64
-
 65
65
-
 66
66
-
 67
67
-
 68
68
-
 69
69
-
 70
70
-
 71
71
-
 72
72
-
 73
73
-
 74
74
-
 75
75
-
 76
76
-
 77
77
-
 78
78
-
 79
79
-
 80
80
-
 81
81
-
 82
82
-
 83
83
-
 84
84
-
 85
85
-
 86
86
-
 87
87
-
 88
88
-
 89
89
-
 90
90
-
 91
91
-
 92
92
-
 93
93
-
 94
94
-
 95
95
-
 96
96
-
 97
97
-
 98
98
-
 99
99
-
 100
100
-
 101
101
-
 102
102
-
 103
103
-
 104
104
-
 105
105
-
 106
106
-
 107
107
-
 108
108
-
 109
109
-
 110
110
-
 111
111
-
 112
112
-
 113
113
-
 114
114
-
 115
115
-
 116
116
-
 117
117
-
 118
118
-
 119
119
-
 120
120
-
 121
121
-
 122
122
-
 123
123
-
 124
124
-
 125
125
-
 126
126
-
 127
127
-
 128
128
-
 129
129
-
 130
130
-
 131
131
-
 132
132
-
 133
133
-
 134
134
-
 135
135
-
 136
136
-
 137
137
-
 138
138
-
 139
139
-
 140
140
-
 141
141
-
 142
142
-
 143
143
-
 144
144
-
 145
145
-
 146
146
-
 147
147
-
 148
148
-
 149
149
-
 150
150
-
 151
151
-
 152
152
-
 153
153
-
 154
154
-
 155
155
-
 156
156
-
 157
157
-
 158
158
-
 159
159
-
 160
160
-
 161
161
-
 162
162
-
 163
163
-
 164
164
-
 165
165
-
 166
166
-
 167
167
-
 168
168
-
 169
169
-
 170
170
-
 171
171
-
 172
172
-
 173
173
-
 174
174
-
 175
175
-
 176
176
-
 177
177
-
 178
178
-
 179
179
-
 180
180
-
 181
181
-
 182
182
-
 183
183
-
 184
184
-
 185
185
-
 186
186
-
 187
187
-
 188
188
-
 189
189
-
 190
190
-
 191
191
-
 192
192
-
 193
193
-
 194
194
-
 195
195
-
 196
196
-
 197
197
-
 198
198
-
 199
199
-
 200
200
-
 201
201
-
 202
202
-
 203
203
-
 204
204
-
 205
205
-
 206
206
-
 207
207
-
 208
208
-
 209
209
-
 210
210
-
 211
211
-
 212
212
-
 213
213
-
 214
214


Daewoo Korando Le manuel du propriétaire
- Catégorie
- Voitures
- Taper
- Le manuel du propriétaire
- Ce manuel convient également à
dans d''autres langues
- English: Daewoo Korando Owner's manual
Documents connexes
Autres documents
-
Kyosho CA0501 Manuel utilisateur
-
SsangYong NEW CHAIRMAN Le manuel du propriétaire
-
Mazda MX-5 Miata 2000 Le manuel du propriétaire
-
-
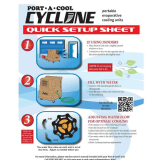 Port-A-Cool PAC2KCYC01 Guide d'installation
-
Samsung AVXWPH022EA Manuel utilisateur
-
Sharp CV-P10PR Le manuel du propriétaire
-
 Mitsubishi Electric Himeji Works SKE45A03 Manuel utilisateur
-
Haier HBF1055TVE Le manuel du propriétaire
-
Cub Cadet 37AV3AHK010 Manuel utilisateur

