La page est en cours de chargement...

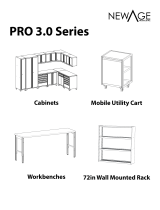
OVERHEAD 4 FT X 8 FT
GEARLOFT™ STORAGE
RACK
Assembly Instructions
ÉTAGÈRE DE RANGEMENT
SURÉLEVÉE DE 1,22 M X
2,44 M GEARLOFT™
Instructions d’assemblage
ESTANTERÍA DE
ALMACENAMIENTO
GEARLOFT™ EN
ALTURA DE
1,22 M X 2,44 M
Instrucciones de ensamblaje
In U.S.A. call: 1-866-342-4089
Aux États-Unis, composez le: 1866342-4089
En los EE.UU., llame al: 1-866-342-4089
W11369221C
In Canada call: 1-800-807-6777
Au Canada, composez le: 1800807-6777
En Canadá, llame al: 1-800-807-6777
www.gladiatorgarageworks.com
www.gladiatorgarageworks.ca
TABLE OF CONTENTS/TABLE DES MATIÈRES/ÍNDICE
OVERHEAD GEARLOFT™ STORAGE
RACK SAFETY ....................................2
DIMENSIONS (TYPICAL INSTALL) ....3
PARTS .................................................. 4
ASSEMBLY INSTRUCTIONS ..............5
Unpack the Overhead Gearloft™
Storage Rack ....................................5
Tools and Parts .................................5
Overhead Gearloft™ Storage Rack
UseRequirements ............................5
Assembling the Rack ........................ 6
Installing Overhead Gearloft™
StorageRack ....................................9
Optional Conguration ....................10
Storage Rack Care..........................10
Registering Your Product ................10
WARRANTY ...................................11
Model/Modèle/Modelo:
GALS48M4JG - Hammered Granite/Ardoise martelée/Granito forjado
GALS48M4JW - Hammered White/blanc martelé/Blanco forjado
SÉCURITÉ DE L’ÉTAGÈRE DE
RANGEMENT SURÉLEVÉE
GEARLOFT™ .....................................12
DIMENSIONS (INSTALLATION
NORMALE) ........................................13
PIÈCES ..............................................14
INSTRUCTIONS D’ASSEMBLAGE ...15
Déballer l’étagère de rangement
surélevée Gearloft™ .......................15
Outils et pièces ...............................15
Exigences d’utilisation de l’étagère
de rangement surélevéeGearloft™ ..15
Assemblage de l’étagère ................16
Installer l’étagère de rangement
surélevée Gearloft™ .......................19
Conguration optionnelle ................20
Entretien de l’étagère ......................20
Enregistrement de votre produit .....20
GARANTIE .....................................21
SEGURIDAD DE LA ESTANTERÍA DE
ALMACENAMIENTO GEARLOFT™
EN ALTURA .......................................22
DIMENSIONES
(INSTALACIÓN TÍPICA) ....................23
PIEZAS ...............................................24
INSTRUCCIONES DE
ENSAMBLAJE ...................................25
Desempaque la estantería de
almacenamiento Gearloft™ enaltura
.. 25
Herramientas y piezas ....................25
Requisitos de uso de la estantería de
almacenamiento Gearloft™ en altura ..
25
Ensamblaje de la estantería ............26
Instalación de la estantería de
almacenamiento Gearloft™ en altura
.. 29
Conguración opcional ...................30
Cuidado de la estantería de
almacenamiento .............................30
Cómo registrar el producto .............30
GARANTÍA .....................................31

2
OVERHEAD GEARLOFT™ STORAGE RACK SAFETY
You can be killed or seriously injured if you don't immediately
You
can be killed or seriously injured if you don't
follow
All safety messages will tell you what the potential hazard is, tell you how to reduce the chance of injury, and tell you what can
happen if the instructions are not followed.
Your safety and the safety of others are very important.
We have provided many important safety messages in this manual and on your appliance. Always read and obey all safety
messages.
This is the safety alert symbol.
This symbol alerts you to potential hazards that can kill or hurt you and others.
All safety messages will follow the safety alert symbol and either the word “DANGER” or “WARNING.”
These words mean:
follow instructions.
instructions.
DANGER
WARNING

3
DIMENSIONS (TYPICAL INSTALL)
MODEL
GALS48M4JG - Hammered Granite
GALS48M4JW - Hammered White
A 48" (122 cm)
B 96" (244 cm)
C 23" (54.4 cm) min. and 37.8" (96 cm) max.
A
B
C

4
PARTS
P1
P1
P1
P1
P2
P2
P2
P2
P2
P2
P3
P4
P5
P6
P3
P4
P3
P4
P6
P4
P7
P5
P3
P7
P7
P7
F1 F2
F4
F5
F3
F6
Label Description Quantity
P1 2' x 4' Rack section 4
P2 Ceiling bracket 6
P3 Vertical corner support - upper 4
P4 Vertical corner support - lower 4
P5 Vertical center support - upper 2
P6 Vertical center support - lower 2
P7 Rack connection bracket 4
F1 M8 - 1.25 x 15 Socket-head cap screw 42
F2 5/16" x 3" Lag bolt 12
F3 M8 - 1.25 x 75 Socket-head cap screw 2
F4 M8 - 1.25 Rectangular nut 14
F5 EZ Connect lock pin 6
F6 Spacer 4

5
ASSEMBLY INSTRUCTIONS
Unpack the Overhead Gearloft™
Storage Rack
1. Unpack the rack sections, support sections, ceiling brackets
and all hardware. Verify contents. See "Parts".
2. Dispose of all packaging materials properly.
Tools and Parts
■ Install overhead Gear loft storage rack according to
manufacturer's instructions and any local codes.
■ Only use provided fasteners. Do not use an alternate form of
mounting. Do not alter or modify any components included
with this product.
■ Gather the required tools and parts before starting assembly.
■ Read entire manual before starting assembly.
Tools Needed
■ Electric drill
■ Drill bit (3/16") - Included
■ 1/2" Socket wrench and/or 1/2" open end wrench
■ 6 mm Allen wrench - Included
■ Stud Finder (If ceiling has drywall covering joists/rafters)
■ Tape measure
■ Step stool or step ladder
■ Pencil / Marker
■ Masking Tape
Overhead Gearloft™ Storage
Rack Use Requirements
1. Intended for garage use, installed into a wood framed/
traditional wood structure type dwelling.
2. To be used for storing light-weight items overhead and out of
the way.
3. Recommended to be positioned 6'- 8" minimum above oor
(standard door opening height)
4. Check for clearance of all doors, vehicles, or any items to be
positioned under the storage rack.
5. The maximum weight of all items combined on the rack not to
exceed 750 lbs.
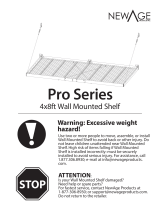
WARNING
Excessive Weight Hazard
Use two or more people to move storage rack.
Failure to do so can result in back or other injury.

6
1. Determine the ceiling locations
The garage overhead storage rack can be positioned parallel or
perpendicular to the wood ceiling joists/rafters. Determine the
application required for your desired installation. If drywall is on
the ceiling, use a stud nder to determine the joist/rafter locations
and mark with masking tape. For application requiring installation
of the brackets perpendicular to the joists/rafters, the maximum
distance between them is 24". The brackets included allow for a
24" maximum span. See gure for typical ceiling layouts. Mark
the location of the ceiling brackets on the joists/rafters or drywall,
making sure the vertical supports can be positioned between the
lag bolts used to attach the brackets. Position the center of the
brackets on a 48" grid as shown in gure.
P2
P2
P2
P2
P2
P2
Parallel layout
P2
P2
P2
P2
P2
P2
Perpendicular layout
48"
48"
48"
48"
48"
48"
2. Attach the ceiling brackets
F2
P2
F2
P3
P4
F2
5/16" x 3" Lag bolt
Using the provided drill bit (3/16"), drill all pilot holes in the center
of the joists/rafter. Two lag bolts must be used on each bracket
- one on each side of the vertical support. Mount the 6 ceiling
brackets (P2) using 5/16" x 3" Lag bolts (F2) (12).
F2
P2
F2
P5
P6
Assembling the Rack

7
3. Connect the racks
P1
P1
F1
F1
F4
F1
M8 - 1.25 x 15 Socket-head
cap screw
Lay two rack sections upside down on the oor. Assemble the
rack sections (P1) together using M8 - 1.25 x 15 Socket-head cap
screws (F1) (2) and M8 - 1.25 Rectangular nuts (F4) (2). Repeat
this with the other remaining two rack sections.
4. Attach the racks brackets
P1
P7
F1
P1
F1
M8 - 1.25 x 15 Socket-head
cap screw
Attach the rack connection brackets (P7) to both sides of the two
bolted together rack sections using M8 - 1.25 x 15 Socket-head
cap screws (F1) (8). Repeat this on the other two bolted together
rack sections.
5. Attach double rack sections
F1
M8 - 1.25 x 15 Socket-head
cap screw
P1
P1
P1
F1
F4
F4
F1
P1
Attach the two double rack sections together using
M8 - 1.25 x 15 Socket-head cap screws (F1) (2) and M8 - 1.25
Rectangular nuts (F4) (2).
6. Attach lower corner supports
P1
F1
P4
F1
M8 - 1.25 x 15 Socket-head
cap screw
Attach the four lower corner supports (P4) to the rack corners
using M8 - 1.25 x 15 Socket-head cap screws (F1) (8).
7. Attach lower center supports
P6
P1
F1
P1
F1
M8 - 1.25 x 15 Socket-head
cap screw
Attach the two lower center supports (P6) to the rack assembly
using M8 - 1.25 x 15 Socket-head cap screws (F1) (4).
F4
M8 - 1.25 Rectangular nut
F4
M8 - 1.25 Rectangular nut

8
9. Attach upper center supports
F1
M8 - 1.25 x 15 Socket-head
cap screw
F4
M8 - 1.25 Rectangular nut
F6
F6
F4
P2
F3
P5
P2
F1
F4
P5
Parallel Mounting
Perpendicular Mounting
F3
M8 - 1.25 x 75 Socket-head
cap screw
F4
M8 - 1.25 Rectangular nut
F6
Spacer
P4
P6
P6
P4
P4
P4
48"
48"
48"
Attach the upper center supports (P5) to the ceiling brackets
using one of the details in the gure depending on ceiling bracket
mounting.
Parallel Mounting
Attach supports using M8 - 1.25 x 15 Socket-head cap screws
(F1) (2) and M8 - 1.25 Rectangular nuts (F4) (2) on each upper
center support.
Perpendicular Mounting
Attach supports using M8 - 1.25 x 75 Socket-head cap screws
(F3), M8 - 1.25 Rectangular nuts (F4) and spacer (F6) (2) on each
upper center support. Verify that all of the upper supports are
properly spaced. They should be on a 48" pattern as shown in the
gure.
8. Attach upper corner supports
F1
M8 - 1.25 x 15 Socket-head
cap screw
P2
F4
F1
P3
F4
M8 - 1.25 Rectangular nut
48"
48"
Attach the upper corner support (P3) to the ceiling brackets using
M8 - 1.25 x 15 (F1) (4) and M8 - 1.25 Rectangular nuts (F4) (4).
Make sure they are positioned 48" end to end on one side and
96" end to end on the other side. See gure.

9
Installing Overhead Gearloft™ Storage Rack
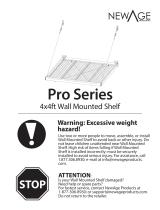
WARNING
Excessive Weight Hazard
Use two or more people to move storage rack.
Failure to do so can result in back or other injury.
1. Attach the EZ connect supports
Using two or more people, the rack system can be easily lifted
and positioned overhead. The EZ connect feature allows for
positioning 23" to 37" from the ceiling. Lift the rack into place and
connect all 6 lower supports to the upper supports. Make sure
the rack supports are all in the same position and the rack is level.
2. Complete the assembly
P2
P5
P6
F5
Make sure all bolts and screws are tight. Once the rack is in the
desired location below the ceiling, place an EZ connect lock pin
(F5) (6) in a hole on each of the corner and center supports to
lock/retain them together. The pins go through both upper and
lower supports.
NOTE : The rack system can be repositioned up or down by
removing all lock pins and relocating the EZ connect position on
the supports. Use two or more people to relocate the rack and
replace the EZ connect lock pins (F5) (6).
F5
EZ Connect lock pin

10
Optional Configuration
1. The Gladiator Overhead Gearloft™ Storage Rack can be installed in one of several congurations.
2. When using an optional conguration, never span the vertical supports more than 48" (two rack section widths).
Possible conguration with this kit :
Storage Rack Care
■ Wash storage rack with a mild liquid detergent and warm water using a soft, clean cloth.
■ Check fastener tightness annually.
Registering Your Product
There are many benets of registering your product. Find out more and register your product online at
www.gladiatorgarageworks.com. In the USA, call 1-866-342-4089. Consumers in Canada can call 1-800-807-6777.
4' x 8' (Typical)
Center support
Corner support
Connecting Bracket
4' x 6'
4' x 4'
2' x 4'

11
WARRANTY
For warranty information:
In U.S.A. call 1-866-342-4089 or visit our website at
www.GladiatorGW.com
In Canada call 1-800-807-6777 or visit our website at
www.gladiatorgarageworks.ca
There are many benets for registering the product. Find out more and register the product online at www.gladiatorgarageworks.com.

12
SÉCURITÉ DE L’ÉTAGÈRE DE RANGEMENT SURÉLEVÉE GEARLOFT™
Risque possible de décès ou de blessure grave si vous ne
suivez pas immédiatement les instructions.
Risque possible de décès ou de blessure grave si vous
ne suivez pas les instructions.
Tous les messages de sécurité vous diront quel est le danger potentiel et vous disent comment réduire le risque de blessure et
ce qui peut se produire en cas de non-respect des instructions.
Votre sécurité et celle des autres est très importante.
Nous donnons de nombreux messages de sécurité importants dans ce manuel et sur votre appareil ménager. Assurez-vous de
toujours lire tous les messages de sécurité et de vous y conformer.
AVERTISSEMENT
DANGER
Voici le symbole d’alerte de sécurité.
Ce symbole d’alerte de sécurité vous signale les dangers potentiels de décès et de blessures graves à vous
et à d’autres.
Tous les messages de sécurité suivront le symbole d’alerte de sécurité et le mot “DANGER” ou
“AVERTISSEMENT”. Ces mots signifient :

13
DIMENSIONS (INSTALLATION NORMALE)
MODÈLE
GALS48M4JG – Ardoise martelée
GALS48M4JW – Blanc martelé
A 48po (122cm)
B 96po (244cm)
C 23 po (54,4 cm) min. et 37,8 po (96 cm) max.
A
B
C

14
PIÈCES
P1
P1
P1
P1
P2
P2
P2
P2
P2
P2
P3
P4
P5
P6
P3
P4
P3
P4
P6
P4
P7
P5
P3
P7
P7
P7
F1 F2
F4
F5
F3
F6
Étiquette Description Quantité
P1 Section d’étagère de 2pi x 4pi 4
P2 Support de plafond 6
P3 Support de coin vertical – supérieur 4
P4 Support de coin vertical – inférieur 4
P5 Support central vertical – supérieur 2
P6 Support central vertical – inférieur 2
P7 Support de raccordement de l’étagère 4
F1 Vis à chapeau à tête creuseM8 – 1,25 x 15 42
F2 Tire-fond de 5/16 po x 3po 12
F3 Vis à chapeau à tête creuseM8 – 1,25 x 75 2
F4 Écrou rectangulaireM8 – 1,25 14
F5 Tige de positionnement EZ Connect 6
F6 Cale 4

15
INSTRUCTIONS D’ASSEMBLAGE
Déballer l’étagère de rangement
surélevée Gearloft™
1. Déballez les sections de l’étagère, les sections de support,
les attaches pour plafond et toute la quincaillerie. Vériez le
contenu. Consultez la section «Pièces».
2. Jetez correctement tout le matériel d’emballage.
Outils et pièces
■ Installer la tablette de rangement GearLoft conformément aux
instructions du fabricant et aux codes locaux.
■ Utiliser seulement la visserie fournie. Ne pas utiliser autre forme
de montage. Ne pas modier aucun des composants inclus
avec ce produit.
■ Installer la tablette de rangement GearLoft conformément aux
instructions du fabricant et aux codes locaux.
■ Utiliser seulement la visserie fournie. Ne pas utiliser autre forme
de montage. Ne pas modier aucun des composants inclus
avec ce produit.
Outils nécessaires
■ Perceuse électrique
■ Embout de perceuse (3/16 po) – inclus
■ Clé à douille de 1/2 po ou clé plate de 1/2 po
■ Clé hexagonale de 6mm – incluse
■ Détecteur de montant (si les poteaux/solives du plafond sont
couverts de panneaux de gypse)
■ Ruban à mesurer
■ Escabeau
■ Crayon/marqueur
■ Ruban adhésif de marquage
Exigences d’utilisation de
l’étagère de rangement
surélevée Gearloft™
1. Conçue pour une utilisation dans un garage, installée à une
maison avec cadre ou structure traditionnelle en bois.
2. Utilisée pour ranger des articles légers en hauteur et dégager
le plancher.
3. Position recommandée: 6pi 8po au-dessus du sol (hauteur
d’ouverture de porte standard)
4. Vérier le dégagement de toutes les portes, des véhicules ou
de tout élément à placer sous la tablette de rangement.
5. Le poids maximum de tous les articles sur l’étagère ne doit
pas dépasser 750lb.
AVERTISSEMENT
Risque de poids excessif
Au moins deux personnes sont nécessaires pour
déplacer l’étagère de rangement.
Le non-respect de cette instruction peut entraîner une
blessure au dos ou d’autres blessures.

16
Assemblage de l’étagère
1. Choisir les emplacements
auplafond
L’étagère de rangement surélevé pour garage peut être
positionnée de façon parallèle ou perpendiculaire avec les
poteaux/solives en bois du plafond. Choisissez l’installation
désirée en fonction de l’utilisation. Si le plafond est couvert
de gypse, utilisez un détecteur de montant pour trouver
l’emplacement des poteaux/solives et identiez-les avec du
rubanadhésif de marquage. Si votre application nécessite
l’installation de supports perpendiculaire aux poteaux/solives,
la distance maximum entre les supports doit être de 24po.
Lessupports inclus permettent un espacement maximum de
24po. Consultez l’illustration pour une installation habituelle au
plafond. Marquez l’emplacement des supports de plafond sur
les poteaux/solives ou sur le gypse en vous assurant que les
supports verticaux peuvent être positionnés entre les tire-fond
utilisés pour xer les supports. Placez le centre des supports
surune grille de 48po comme illustré.
P2
P2
P2
P2
P2
P2
Positionnement
parallèle
P2
P2
P2
P2
P2
P2
Positionnement
perpendiculaire
48po
48po
48po
48po
48po
48po
2. Fixer les supports de plafond
F2
P2
F2
P3
P4
F2
Tire-fond de 5/16 po x 3po
Utilisez l’embout de perceuse inclus (3/16 po) et percez tous les
avant-trous au centre des poteaux/solives. Deux tire-fond doivent
être utilisés sur chaque support, un de chaque côté du support
vertical. Fixez les 6 supports de plafond (P2) en utilisant des tire-
fond de 5/16 po x 3po (F2) (12).
F2
P2
F2
P5
P6

17
3. Raccorder l’étagère
P1
P1
F1
F1
F4
F1
Vis à chapeau à tête
creuseM8 – 1,25 x 15
Placer deux sections d’étagère sur le sol, de façon inversée.
Assemblez les sections d’étagère (P1) ensemble en utilisant
des vis à chapeau à tête creuseM8 – 1,25 x 15 (F1) (2) et Écrou
rectangulaireM8 – 1,25 (F4) (2). Répétez cette opération avec les
deux sections d’étagère restantes.
4. Fixer les supports d’étagère
P1
P7
F1
P1
F1
Vis à chapeau à tête
creuseM8 – 1,25 x 15
Assemblez les supports de raccordement de l’étagère (P7) sur
les deux côtés des deux sections de l’étagère xées ensemble en
utilisant des vis à chapeau à tête creuseM8 – 1,25 x 15 (F1) (8).
Répétez cette opération avec les deux autres sections d’étagère
xées ensemble.
5. Fixer les sections d’étagère doubles
F1
Vis à chapeau à tête
creuseM8 – 1,25 x 15
P1
P1
P1
F1
F4
F4
F1
P1
Assemblez les deux sections d’étagère double ensemble en
utilisant des vis à chapeau à tête creuseM8 – 1,25 x 15 (F1) (2) et
Écrou rectangulaireM8 – 1,25 (F4) (2).
6. Fixer les supports de coin inférieurs
P1
F1
P4
F1
Vis à chapeau à tête
creuseM8 – 1,25 x 15
Assemblez les quatre supports de coin inférieurs (P4) à chacun
des coins de l’étagère en utilisant des vis à chapeau à tête
creuseM8 – 1,25 x 15 (F1) (8).
7. Fixer les supports centraux inférieurs
P6
P1
F1
P1
F1
Vis à chapeau à tête
creuseM8 – 1,25 x 15
Assemblez les deux supports centraux inférieurs (P6) à l’étagère en
utilisant des vis à chapeau à tête creuseM8 – 1,25 x 15 (F1) (4).
F4
Écrou rectangulaireM8 – 1,25
F4
Écrou rectangulaireM8 – 1,25

18
9. Fixer les supports centraux
supérieurs
F1
Vis à chapeau à tête
creuseM8 – 1,25 x 15
F4
Écrou rectangulaireM8 – 1,25
F6
F6
F4
P2
F3
P5
P2
F1
F4
P5
Positionnement parallèle
Positionnement
perpendiculaire
F3
Vis à chapeau à tête
creuseM8 – 1,25 x 75
F4
Écrou rectangulaireM8 – 1,25
F6
Cale
P4
P6
P6
P4
P4
P4
48po
48po
48po
Fixez les supports centraux supérieurs (P5) aux supports de
plafond en utilisant l’un des détails de l’illustration, selon la
façondont les supports de plafond sont installés.
Positionnement parallèle
Fixez les supports en utilisant des vis à chapeau à tête
creuseM8 – 1,25 x 15 (F1) (2) et des écrous rectangulairesM8 –
1,25 (F4) (2) sur chaque support central supérieur.
Positionnement perpendiculaire
Fixez les supports en utilisant des vis à chapeau à tête
creuseM8– 1,25 x 75 (F3), des écrous rectangulairesM8–
1,25(F4) et des cales (F6) (2) sur chaque support central
supérieur. Vériez que tous les supports supérieurs sont bien
espacés. Ils devraient être espacés de 48po, comme illustré.
8. Fixer les supports de coin supérieurs
F1
Vis à chapeau à tête
creuseM8 – 1,25 x 15
P2
F4
F1
P3
F4
Écrou rectangulaireM8 – 1,25
48po
48po
Assemblez les supports de coin supérieurs (P3) aux supports de
plafond en utilisant des vis à chapeau à tête creuseM8 – 1,25 x
15 (F1) (4) et les écrous rectangulairesM8 – 1,25 (F4) (4). Assurez-
vous qu’ils sont positionnés à 48po bout à bout sur un côté et
96po bout à bout de l’autre côté. Consultez l’illustration.

19
Installer l’étagère de rangement surélevée Gearloft™
AVERTISSEMENT
Risque de poids excessif
Au moins deux personnes sont nécessaires pour
déplacer l’étagère de rangement.
Le non-respect de cette instruction peut entraîner une
blessure au dos ou d’autres blessures.
1. Fixer les tiges EZ connect
Au moins deux personnes sont nécessaires pour facilement
soulever et positionner l’étagère surélevée. La caractéristique EZ
connect permet de positionner l’étagère à une distance de 23po
à 37po du plafond. Soulez l’étagère à sa position et raccordez
chacun des 6 supports inférieurs aux supports supérieurs.
Assurez-vous que les supports de l’étagère sont tous à la
mêmeposition et que l’étagère est de niveau.
2. Terminer l’assemblage
P2
P5
P6
F5
Assurez-vous que tous les écrous et toutes les vis sont bien
serrés. Une fois l’étagère à la position souhaitée au plafond,
placez les tiges de positionnement EZ Connect (F5) (6) dans
les trous des supports de chaque coin et du centre pour bien
maintenir l’ensemble. Les tiges traversent les supports inférieurs
et supérieurs.
REMARQUE: Le système d’étagère peut être repositionné vers
le haut ou le bas en enlevant toutes les tiges de positionnement
EZ connect et en les repositionnant sur les supports. Au moins
deux personnes sont nécessaires pour repositionner l’étagère
etreplacer les tiges de positionnement EZ Connect (F5) (6).
F5
Tige de positionnement EZ Connect

20
Configuration optionnelle
1. L’étagère de rangement surélevé Gearloft™ de Gladiator peut être installée selon une ou plusieurs congurations.
2. Si vous utilisez une conguration optionnelle, n’allongez jamais le support vertical de plus de 48po (deux sections d’étagère de large).
Conguration possible avec cet ensemble:
Entretien de l’étagère
■ Lavez l’étagère à l’aide d’un détergent doux et d’eau chaude en utilisant un chiffon doux et propre.
■ Vérier annuellement le serrage de la visserie.
Enregistrement de votre produit
Il y a plusieurs avantages à enregistrer votre produit. Pour obtenir plus de renseignements et enregistrer votre produit en ligne, consulter
le www.gladiatorgarageworks.com. Aux É.-U., composez le 1866342-4089. Les consommateurs au Canada peuvent composer le
1800807-6777.
4pi x 8pi (typique)
Support central
Support de coin
Support de xation
4pi x 6pi
4pi x 4pi
2pi x 4pi
/