13
US
Settings
Calibration Matching
When Auto Calibration is executed, this function works
automatically to match the distance and level of the right
and left speakers. You can set this function only after the
Auto Calibration measurement process has been completed
and the results of Auto Calibration measurement are saved.
The setting is valid until you change it.
Note
• If an error code or warning message appears on the screen in
step6, see “List of messages after Auto Calibration measurements”
(page 13).
Tips
• The Auto Calibration measurement will be canceled if you perform
the following during the measurement process:
– Press
.
– Press the input buttons on the remote control or turn INPUT
SELECTOR on the receiver.
– Press HDMI OUT, AMP MENU, HOME or on the remote control.
– Press SPEAKERS on the receiver.
– Change the volume level.
– Connect headphones.
– Press MUSIC on the remote control or the receiver.
List of messages after Auto Calibration
measurements
• Code 30:
Headphones are connected. Please disconnect the
headphones and retry calibration.
• Code 31:
The front speakers are not selected correctly.
Select the front speakers correctly using SPEAKERS on the
receiver and perform Auto Calibration again while sound is
being output. For details on selecting the front speakers,
see “Selecting the front speakers” in the Help Guide.
• Code 32, Code 33:
– Sound is not detected from one or both of the speakers.
– Sound is not detected from one or both of the front
speakers. Please ensure that the calibration microphone is
not damaged, and is connected to the CALIBRATION MIC
jack on the front panel of the receiver, and that all
speakers are properly connected.
– Sound is not detected from either the left or right
surround speakers. Please ensure that the surround
speakers are connected to the SURROUND terminals.
– The surround back speaker is connected to the SURROUND
BACK/HEIGHT R terminal. When using only one surround
back speaker, please connect it to the SURROUND BACK/
HEIGHT L terminals.
– Only one height speaker is detected. Please ensure that
both the height speakers are connected to the SURROUND
BACK/HEIGHT terminals.
– Sound is not detected from any speakers, please ensure the
calibration microphone is not damaged and is connected to
the CALIBRATION MIC jack on the front panel of the receiver.
• Code 34:
Speakers are not placed in the proper position or the
calibration microphone may be reversed.
• Code 35:
The speaker pattern configuration does not match
calibration result. Please check the speaker pattern and
connection.
• Warning 40:
The measurement has been completed, but the noise level
is high. For best results, calibrate in as quiet a place as
possible.
• Warning 41, Warning 42:
The input signal from the calibration microphone is too
large. The microphone may be too close to the speakers.
Please place the calibration microphone at your desired
listening position. Please note, when using the receiver as
a pre-amplifier, this message may appear by mistake.
Please disregard.
• Warning 43:
The distance and phase of the subwoofer cannot be
detected. Please check the subwoofer and re-calibrate in a
quiet environment.
• Warning 44:
The measurement has been completed, but the speaker
may need to be re-positioned. Please see “Installing
Speakers” in the Help Guide.
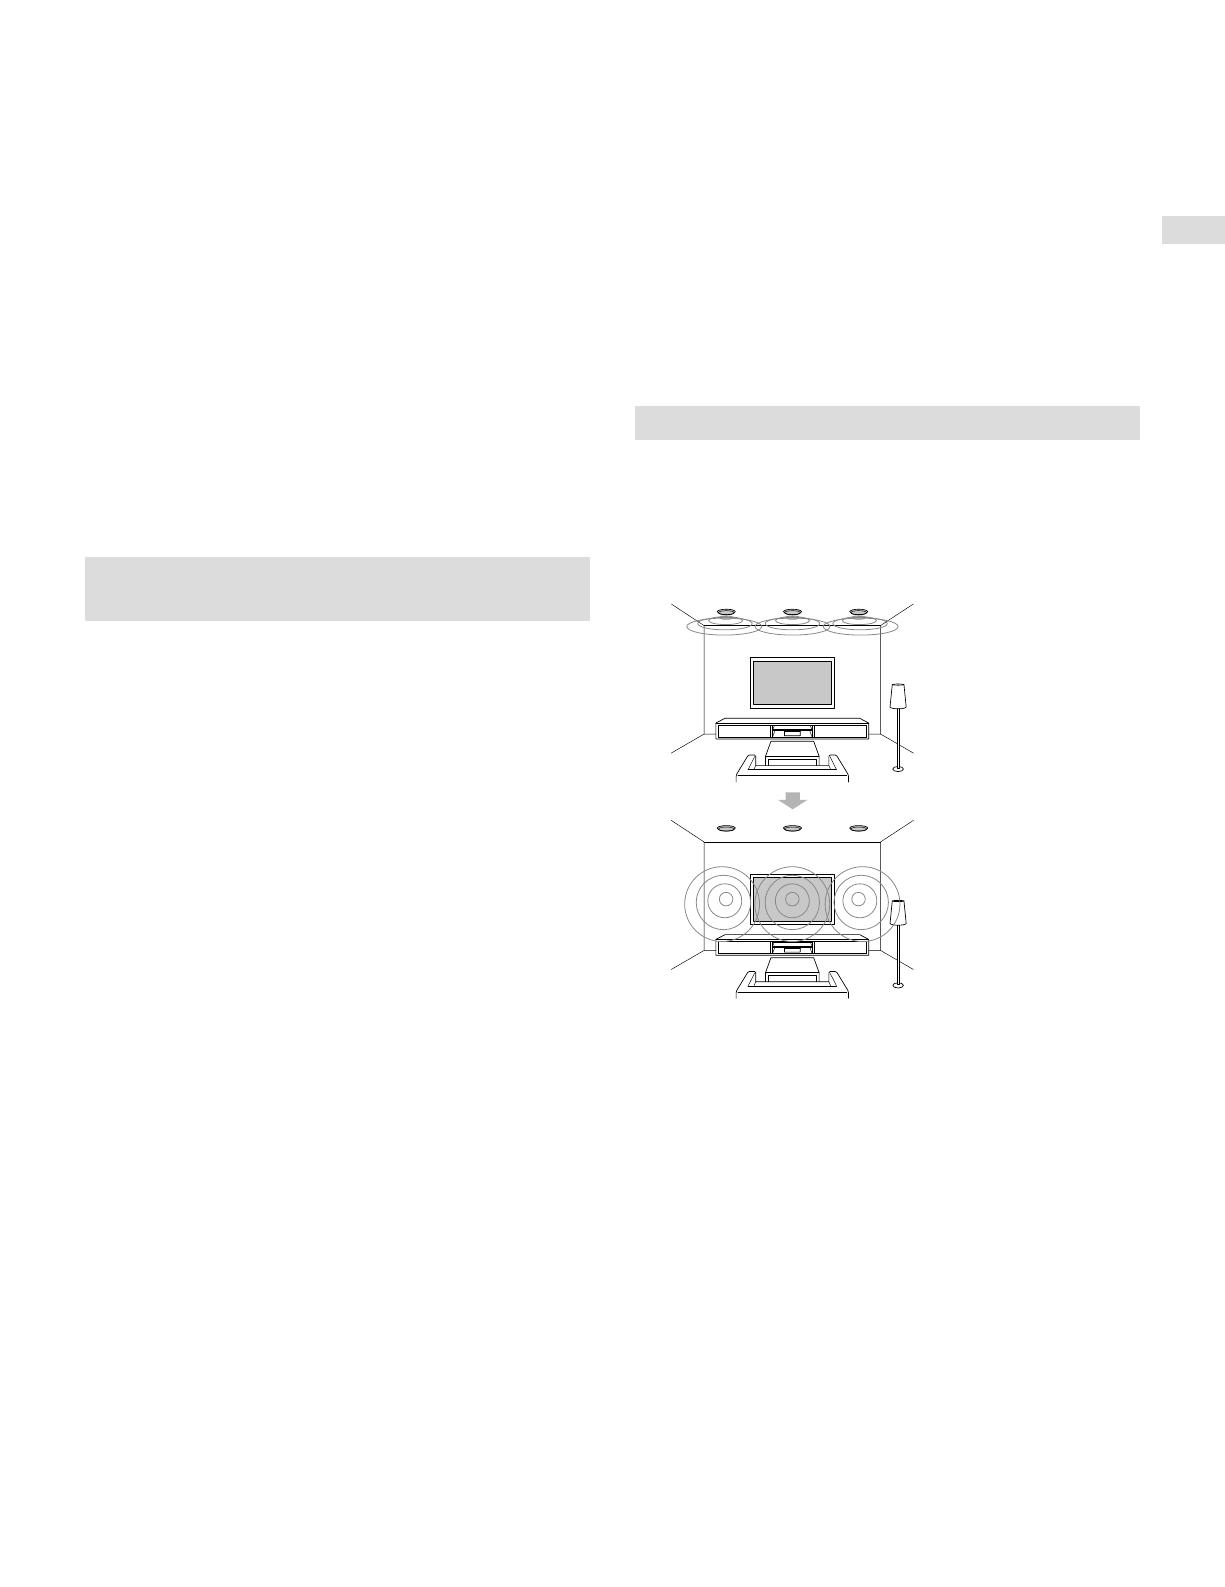
Setting the in-ceiling speaker mode
Sony has developed a new special sound mode for CI
installation. This feature will virtually relocate the front and
center in-ceiling speakers down to around the screen. That
way, the customer will hear the actors’ voices coming from
the screen instead of the ceiling. This mode also makes
music sound more natural in a room with in-ceiling speakers.
1 Perform Auto Calibration.
2 Select [Setup] - [Audio Settings] - [In-Ceiling
Speaker Mode] - [Front & Center] or [Front] from
the home menu.
Notes
• This mode does not work when [Pure Direct] is set to [On].
• This mode will be disabled in a speaker pattern with Dolby Atmos
enabled speakers.
Tips
• You can also select [In-Ceiling Speaker Mode] in [Sound Effects]
from the home menu.
• To obtain optimal effects in the listening environment, configure
the [Ceiling Height] setting in the [Speaker Settings] menu and
perform Auto Calibration.