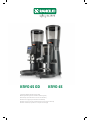
Rancilio KRYO 65 OD Manuel utilisateur
- Catégorie
- Moulins à café
- Taper
- Manuel utilisateur
Ce manuel convient également à

KRYO 65 OD KRYO 65
User Manual (Read Installation Manual first)
Mode d’emploi (Lire d’abord les instructions d’installation)
Bedienungsanleitung (Zuerst Installationsanleitung lesen)
Manuale d’uso (Leggere prima manuale d’installazione)
Manual do utilizador (Ler primeiro as instruções de instalação)
Manual de instrucciones (Leer previamente las instrucciones de instalación)

2

3
Dear customer
First of all, we thank you for choosing our products.
We are confident that the product you have
purchased will meet all your expectations. The
product you are about to use is the outcome of
extensive research and development. It is the most
efficient, user-friendly and well designed machine of
its kind.
This manual outlines the correct use and
maintenance and will help you to get the best results
from your machine. We hope you will find our
explanations clear and we may continue to earn your
business in the future.
Verehrte Kundin, verehrter Kunde
Wir danken Ihnen, dass Sie sich für unser Produkt
entschieden haben.
Wir sind überzeugt, dass das Produkt, das Sie erworben
haben, alle Ihre Erwartungen erfüllen wird. Dieses
Produkt ist das Ergebnis sorgfältiger Forschung und
Entwicklung. Wir legen besonderen Wert auf
Leistungsfähigkeit, Benutzerfreundlichkeit und Design.
Die Bedienungsanleitung wird Ihnen helfen Ihre
Kaffeemaschine ordnungsgemäss zu bedienen, zu
verstehen und das beste Ergebnis zu erzielen. Wir
hoffen, unsere Erklärungen sind klar und verständlich
und wir dürfen Sie auch in Zukunft zu unseren
geschätzten Kunden zahlen.
Chère cliente, cher client
Tout d’abord merci d’avoir choisi notre produit.
Nous avons l’assurance que le produit que vous venez
d’acheter vous donnera entière satisfaction, tout
comme tous nos autres produits sont conçus pour le
faire. Le produit que vous allez utiliser est
l’aboutissement de minutieux travaux de recherche et
d’essais. Nous garantit que l’équipement fourni offre
une fonctionnalité, une sécurité et une satisfaction
maximales par rapport aux produits actuellement sur le
marché, à la fois en termes de design et de
performances.
Ce livret d’instructions qui explique comment utiliser et
entretenir correctement votre produit vous aidera à
obtenir les meilleurs résultats d’utilisation possibles.
Nous espérons que nos explications sont faciles à
comprendre et que vous resterez l’un de nos fidèles
clients à l’avenir.
Gentile cliente
Grazie per averci accordato la Sua fiducia.
Siamo sicuri che il prodotto che Lei ha acquistato
risponderà in pieno alle Sue aspettative. Il prodotto
che Lei si accinge ad usare è il risultato di
approfonditi studi e meticolose sperimentazioni ed è
quanto di più funzionale, sicuro ed apprezzabile,
anche sotto il profilo del design, si possa trovare sul
mercato.
Questo manuale per il corretto uso e manutenzione
La aiuterà a sfruttare al meglio la sua macchina.
Sperando che trovi chiare le nostre spiegazioni, ci
auguriamo di poterLa sempre annoverare tra i nostri
clienti.
Estimado cliente
Ante todo, queremos agradecerle por haber elegido
nuestro producto.
Estamos seguros de que el producto que ha adquirido
cumplirá con todas sus expectativas. El producto que
está a punto de utilizar es el resultado de extensas
actividades de investigación y desarrollo. Es la que
ofrece el mejor rendimiento, es la más fácil de usar y la
mejor diseñada de su clase.
Este manual de instrucciones, en el que se explica la
manera correcta de utilizar y mantener su producto, le
ayudara a obtener los mejores resultados. Esperamos
que nuestras explicaciones le parezcan claras y fáciles
de comprender y que siga siendo en el futuro uno de
nuestros fieles clientes.
Caro cliente
Em primeiro lugar, obrigado por seleccionar nosso
produto.
Estamos confiantes de que o produto que adquiriu ira
dar resposta a todas as suas expectativas. O produto
que esta prestes a utilizar e o resultado de uma
investigacao e desenvolvimento extensivos. Trata-se da
máquina mais eficiente, facil de utilizar e bem
concebida do seu genero.
Este manual descreve a utilizacao e manutencao
correctas e ira ajuda-lo a obter os melhores resultados
da sua máquina. Esperamos que considere as nossas
explicacoes claras e que possamos continuar a contar
com a sua empresa no futuro.

4
ENGLISH
KRYO 65/ST KRYO 65/AT
1. DESCRIPTION ............................................................. 8
2. OPERATION ............................................................... 8
3. MAINTENANCE .......................................................... 8
4. TROUBLESHOOTING .................................................. 8
5. TECHNICAL DATA ...................................................... 8
6. INSTALLATION ........................................................... 8
7. FIRST START-UP ......................................................... 9
8. DECOMMISSIONING ................................................. 9
9. INFORMATION FOR SERVICE TECHNICIANS .............. 9
KRYO 65 OD
1. DESCRIPTION ........................................................... 10
2. OPERATION ............................................................. 10
3. MAINTENANCE ........................................................ 10
4. TROUBLESHOOTING ................................................ 11
5. TECHNICAL DATA .................................................... 11
6. INSTALLATION ......................................................... 11
7. FIRST START-UP ....................................................... 11
8. DECOMMISSIONING ............................................... 12
9. INFORMATION FOR SERVICE TECHNICIANS ............ 12
10. SOFTWARE ............................................................ 12
DEUTSCH
KRYO 65/ST KRYO 65/AT
1. BESCHREIBUNG ....................................................... 14
2. FUNKTIONSWEISE ................................................... 14
3. REINIGUNG UND PFLEGE ........................................ 14
4. PROBLEME UND LÖSUNGEN ................................... 14
5. TECHNISCHE DATEN ................................................ 14
6. INSTALLATION ......................................................... 15
7. INBETRIEBNAHME ................................................... 15
8. STILLLEGUNG .......................................................... 15
9. INFORMATION FÜR DEN KUNDENDIENST .............. 15
KRYO 65 OD
1. BESCHREIBUNG ....................................................... 16
2. FUNKTIONSWEISE ................................................... 16
3. REINIGUNG UND PFLEGE ........................................ 17
4. PROBLEME UND LÖSUNGEN ................................... 17
5. TECHNISCHE DATEN ................................................ 17
6. INSTALLATION ......................................................... 17
7. INBETRIEBNAHME ................................................... 17
8. STILLLEGUNG .......................................................... 18
9. INFORMATION FÜR DEN KUNDENDIENST .............. 18
10. SOFTWARE ............................................................ 18
FRANCAIS
KRYO 65/ST KRYO 65/AT
1. DESCRIPTION ........................................................... 20
2. FONCTIONNEMENT ................................................. 20
3. ENTRETIEN............................................................... 20
4. INCONVÉNIENTS ET REMÈDES ................................ 20
5. CARACTÉRISTIQUES TECHNIQUES ........................... 20
6. INSTALLATION ......................................................... 21
7. MISE EN SERVICE ..................................................... 21
8. MISE HORS SERVICE ................................................ 21
9. INFORMATION POUR LE SERVICE D’ASSISTANCE .... 21
KRYO 65 OD
1. DESCRIPTION ........................................................... 22
2. FONCTIONNEMENT ................................................. 22
3. ENTRETIEN............................................................... 22
4. INCONVÉNIENTS ET REMÈDES ................................ 23
5. CARACTÉRISTIQUES TECHNIQUES ........................... 23
6. INSTALLATION ......................................................... 23
7. MISE EN SERVICE ..................................................... 23
8. MISE HORS SERVICE ................................................ 24
9. INFORMATION POUR LE SERVICE D’ASSISTANCE .... 24
10. LOGICIEL ................................................................ 24
ITALIANO
KRYO 65/ST KRYO 65/AT
1. DESCRIZIONE ........................................................... 26
2. FUNZIONAMENTO ................................................... 26
3. MANUTENZIONE ..................................................... 26
4. INCONVENIENTI E RIMEDI ....................................... 26
5. DATI TECNICI ........................................................... 26
6. INSTALLAZIONE ....................................................... 27
7. MESSA IN SERVIZIO ................................................. 27
8. MESSA FUORI SERVIZIO ........................................... 27
9. INFORMAZIONE PER IL SERVIZIO ASSISTENZA ........ 27
KRYO 65 OD
1. DESCRIZIONE ........................................................... 28
2. FUNZIONAMENTO ................................................... 28
3. MANUTENZIONE ..................................................... 28
4. INCONVENIENTI E RIMEDI ....................................... 29
5. DATI TECNICI ........................................................... 29
6. INSTALLAZIONE ....................................................... 29
7. MESSA IN SERVIZIO ................................................. 29
8. MESSA FUORI SERVIZIO ........................................... 30
9. INFORMAZIONE PER IL SERVIZIO ASSISTENZA ........ 30
10. SOFTWARE ............................................................ 30

5
ESPANOL
KRYO 65/ST KRYO 65/AT
1. DESCRIPCIÓN .......................................................... 32
2. FUNCIONAMIENTO ................................................. 32
3. MANTENIMIENTO ................................................... 32
4. PROBLEMAS Y SOLUCIONES .................................... 32
5. DATOS TÉCNICOS .................................................... 32
6. INSTALACIÓN .......................................................... 33
7. PUESTA EN MARCHA ............................................... 33
8. PUESTA FUERA DE SERVICIO ................................... 33
9. INFORMACIÓN PARA EL SERVICIO DE ASISTENCIA . 33
KRYO 65 OD
1. DESCRIPCIÓN .......................................................... 34
2. FUNCIONAMIENTO ................................................. 34
3. MANTENIMIENTO ................................................... 34
4. PROBLEMAS Y SOLUCIONES .................................... 35
5. DATOS TÉCNICOS .................................................... 35
6. INSTALACIÓN .......................................................... 35
7. PUESTA EN MARCHA ............................................... 35
8. PUESTA FUERA DE SERVICIO ................................... 36
9. INFORMACIÓN PARA EL SERVICIO DE ASISTENCIA . 36
10. SOFTWARE ............................................................ 36
PORTUGUES
KRYO 65/ST KRYO 65/AT
1. DESCRIÇÃO .............................................................. 38
2. FUNCIONAMENTO .................................................. 38
3. MANUTENÇÃO ........................................................ 38
4. PROBLEMAS E SOLUÇÕES ....................................... 38
5. DADOS TÉCNICOS .................................................... 38
6. INSTALAÇÃO ............................................................ 39
7. COLOCAR EM FUNCIONAMENTO............................ 39
8. RETIRAR DE FUNCIONAMENTO .............................. 39
9. INFORMAÇÕES PARA O SERVIÇO DE ASSISTÊNCIA . 39
KRYO 65 OD
1. DESCRIÇÃO .............................................................. 40
2. FUNCIONAMENTO .................................................. 40
3. MANUTENÇÃO ........................................................ 40
4. PROBLEMAS E SOLUÇÕES ....................................... 41
5. DADOS TÉCNICOS .................................................... 41
6. INSTALAÇÃO ............................................................ 41
7. COLOCAR EM FUNCIONAMENTO............................ 41
8. RETIRAR DE FUNCIONAMENTO .............................. 42
9. INFORMAÇÕES PARA O SERVIÇO DE ASSISTÊNCIA . 42
10. SOFTWARE ............................................................ 42

Fig. 3
Fig. 2
Fig. 1a Fig. 1b
1
Mod.
12
~
Hz
2
3
11
4
13
5
6
F.n.
Pin
10
P
8 9
1
1
3
2
1
2
4
8
6
7
3
4
2
3
5
6
7
8
10 10
5
11
12
13
14
11
9 9
12

Fig. 4
Fig. 5
1
2
3

8
ENGLISH
KRYO 65/ST
KRYO 65/AT
Coffee doser grinder
1. DESCRIPTION
KRYO 65/ST
Manual-switch operated coffee grinder
KRYO 65/AT
Automatic coffee grinder with optional manual-switch operation
Legend (Fig. 1a)
1. Hopper lid
2. Bean hopper
3. Adjustment knob
4. Hopper locking slide
5. Doser lid
6. Doser
7. Tamper
8. Filter holder fork
9. Main switch
10. Grounds tray
11. Dosing lever
12. Doser adjustment knob
2. OPERATION
KRYO 65 is equipped with a locking device to secure the bean
hopper (Fig. 5). Lock the device when the grinder is in use.
The locking device is marked on the outside of the bean hopper. If
the slot of the device points to the marking, the bean hopper can
be mounted or removed. To secure the bean hopper turn the slot
to the left.
KRYO 65/ST
Main switch (Fig. 1-9) with two positions; when switched on, the
machine is on and starts coffee grinding.
KRYO 65/AT
Press the main switch (Fig. 1-9). The grinding will then take place
automatically. It shuts off when the doser is full enough.
Only grind the amount of coffee required for your immediate
needs, since leaving ground coffee unused for too long can result
in loss of freshness and flavor.
Do not regrind coffee that has already been ground.
- Place the filter holder in the filter holder fork (Fig. 1-8), pull
the dosing lever (Fig. 1a-11) firmly towards you and release,
repeating the action for each dose of coffee required.
- Level out the coffee contained in the filter, position the filter
holder under the tamper (Fig. 1a-7) and raise gently to tamp
the coffee;
- Check that there are no coffee grounds on the rim of the
filter holder.
3. MAINTENANCE
Maintenance operations should be carried out with the machine
turned off and with the plug removed from the power source.
We recommend the cleaning products you can buy from us.
Do not use metallic or abrasive tools, such as steel wool, metal
brushes, needles, etc., or detergents (alcohol etc.), but simply a
damp cloth or sponge.
3.1. Daily
- Clean the housing and the grounds tray.
- Clean fork area for the filter holder.
- Clean the coffee outlet with a brush.
3.2. Periodically or after intense use
Empty the bean hopper, and clean it of oily residues left by the
coffee with a mild soap solution. Rinse thoroughly!
Waste materials used for processing or maintenance, if not
biodegradable or pollutant, should be placed in separate
containers and taken to suitable collection centers.
4. TROUBLESHOOTING
Inspection that can be carried out by the user
For any type of problem or difficulty not specified here, unplug the
machine, refrain from attempting to repair or inspect the machine
yourself and contact an authorized service technician.
A) The machine does not turn on:
- Check that it is plugged in;
- Check that there is power being supply and that the
automatic circuit breaker or main switch is turned on;
- Check the condition of the plug and supply cable, and if
damaged, have them replaced by a qualified technician.
B) Coffee is not ground:
- Check that there are coffee beans in the bean hopper;
- Check that the hopper locking slide is open (lever inwards)
C) Long grinding time
- Check the grind adjustment setting;
- Have the burrs replaced by qualified staff.
D) Dose size varies:
- Carefully clean the doser and the coffee dispenser outlet
- Check that the dosing lever can move freely and is not
obstructed in any way.
5. TECHNICAL DATA
Versions
KRYO 65/ST
KRYO 65/AT
Machine size
mm
L.220 - D.385 - H.575
Net weight of machine
kg
13
Production
kg/h
7-9
Bean hopper capacity
g
1300
Dose adjustment
g
5-10
Identification details, specifications plate (Fig. 3)
1. Manufacturer
2. Model and version
3. Voltage
4. EC Conformity mark
5. Serial number
6. Pin
7. Total absorption
8. - -
9. - -
10. - -
11. Frequency
12. Conformity marks
13. Date of manufacture

9
6. INSTALLATION
Installation must be performed by a qualified technician.
The machine is delivered ready for installation according to the
data on the plate Fig. 3.
Check that the main power supply is compatible with the machine.
Check that the machine, the accessories, the supply cable and the
plug are intact, and in the event of damage, inform the retailer
promptly.
The machines have been designed and built for grinding coffee
beans for professional use.
Any other use is to be considered improper and thus dangerous.
7. FIRST START-UP
7.1. Description of commands
KRYO 65/ST
Main switch (Fig. 1-9) with two positions. When switched on, the
machine is on and starts coffee grinding.
KRYO 65/AT
Main switch (Fig. 1-9) has two positions; in position (I), the machine
is on and automatically shuts off when the doser is full enough.
7.2. Grind setting
The manufacturer tests the coffee grinder with a medium grind
setting. The setting depends on the type of coffee used.
- Place a small quantity of coffee beans in the bean hopper
and close the lid;
- Check that the hopper locking slide is open (Fig. 1-4) pushed in)
- Grind a small quantity of coffee:
- Position the filter holder on the filter holder fork (Fig. 1-8),
then pull the dosing lever (Fig. 1a-11) to dispense a dose of
ground coffee;
- Brew some coffee, checking the dispensing time, the
appearance of the coffee and its taste, considering that
excessively course grounds produce light coloured coffee
without a crema, while grounds that are too fine result in
strong, dark coffee without a crema.
- If the coffee does not respond to your desired requirements,
adjust grind fineness by pressing the ring block button (Fig. 2-1)
and turning the regulation knob (Fig. 2-3) counter-clockwise for
a finer grind or clockwise for a coarser grind.
- Repeat the operation until you have obtained the desired
quality of coffee.
Recalibration of the grind is typically only necessary after a change
in coffee. Minor adjustments may be required throughout use to
accommodate for changes in freshness of the beans.
7.3. Adjusting the ground coffee dose
Adjust the dose as followed:
- Turn the knob below the doser (Fig. 1a-12) counter-clockwise
to increase the dose or clockwise to decrease the dose.
- Pull 6 times the lever (Fig. 1a-11) and check the dose each
time. Take care that the dosing star is completely covered
with ground coffee
8. DECOMMISSIONING
8.1. Temporary
- Close the hopper and grind the coffee beans remaining
between the burrs.
- Turn off the main switch and unplug the appliance from the
power source;
- Remove the ground coffee and any coffee beans remaining in
the bean hopper.
- Perform cleaning and maintenance operations;
- Coil up the supply cable and attach it to the machine using
adhesive tape;
- Cover the machine and place it in a dry place, sheltered from
bad weather and to which you have exclusive access.
8.2. Final
In addition to the operations of temporary decommissioning:
- Cut the power cable,
- Pack up the machine using cardboard or similar materials
and hand it over to specialized operators (authorized waste
disposal collectors or dealers in second-hand goods)
9. INFORMATION FOR SERVICE TECHNICIANS
9.1. Replacement of burrs
Although manufactured in tempered steel, the burrs are subject
to wear and tear.
Their lifespan is influenced by the amount of coffee ground, its
hardness and degree of roasting, as well as the quantity and
purity of the coffee beans.
Small stones and various impurities have a marked abrasive
action that significantly reduces the lifespan of the burrs.
When grinding time becomes noticeably longer or the grind
becomes irregular, the burrs should be replaced as follows:
- Pull the hopper locking slide (Fig. 1–4);
- Start the grinder to grind the coffee remaining between the
burrs;
- Once grinding has finished, turn off the machine and unplug
from the power source;
- Empty the bean hopper (Fig. 1–2);
- Remove the regulation knob (Fig. 1–3);
- Turn the upper burr-holder (Fig. 4–1) counter-clockwise until
the head emerges completely;
- Unscrew the screws (Fig. 4–2) and remove the burrs (Fig. 4–3)
from the burr-holder:
- Carefully clean the burr supports, the burr-holder thread and
its housing;
- Position the new burrs in their holders and block them firmly
in place;
- Reassemble the machine, performing the previous steps in
reverse.
- Calibrate the new burrs.
9.2. Calibration of grinder burrs
To be performed after burr replacement
Hold down the adjustment unlock button (Fig. 2-1) and at the
same time slowly turn the adjustment knob (Fig. 2-3) counter-
clockwise until the burrs brush against each other. Turn the
numbered ring (Fig. 2-2) so that the starting point 0 is frontal;
move the adjustment knob (Fig. 2-3) in the opposite direction
(clockwise).

10
KRYO 65 OD
Coffee grinder on demand
1. DESCRIPTION
KRYO 65 OD
Automatic on demand coffee grinder
Legend (Fig. 1b)
1. Hopper lid
2. Bean hopper
3. Adjustment knob
4. Hopper locking slide
5. Protection lid
6. Filter holder button
7. Coffee outlet
8. Filter holder fork
9. Main switch
10. Grounds tray
11. Display
12. Single dose button
13. Double dose button
14. Customized dose button
2. OPERATION
KRYO 65 is equipped with a locking device to secure the bean
hopper (Fig. 5). Lock the device when the grinder is in use.
The locking device is marked on the outside of the bean hopper. If
the slot of the device points to the marking, the bean hopper can
be mounted or removed. To secure the bean hopper turn the slot
to the left.
Press the main switch (Fig. 1-9). The grinding will take place in
two modes.
The modes and the way to activate the grinding are configured in
the software and can be changed by the user if needed.
Do not regrind coffee, which has already been ground.
2.1. Automatic mode
In the “Automatic” mode, the grinder continues to grind until the
pre-programmed dose has been dispensed. If grinding is stopped
during dispensing the dose has been cancelled.
Activation by filter holder:
- Select the dose of coffee requested - single, double or
customized dose (Fig. 1b-12 to 14). The LED of the selected
dose button will be illuminated. The customized dose button
has no LED. The selected dose will be shown in the display.
- Place the filter holder in the filter holder fork (Fig. 1-8) by
pressing the filter holder button (Fig. 1b-6) once.
- The grinder runs the predefined time and stops automatically.
- To cancel before, press the selected button again on the
keypad. The grinding cannot be continued.
- Level out the coffee contained in the filter and tamp the coffee
with the tamper;
- Check that there are no coffee grounds on the rim of the
filter holder.
- Alternatively and if selected in the menu <Pre-Selection
“No”>the dose can be selected with the filter holder.
- Place the filter holder in the filter holder fork (Fig. 1-8) by
pushing the filter holder button (Fig. 1b-6) once for a single
dose and twice for a double dose. The selected dose will be
shown in the display and the LED on the button of the
selected dose will be illuminated. In this mode no customized
dose is available.
- The grinder runs the predefined time and stops automatically.
- To cancel before, press any button on the keypad. The grinding
cannot be continued.
- Level out the coffee contained in the filter and tamp the coffee
with the tamper;
- Check that there are no coffee grounds on the rim of the
filter holder.
Activation by keypad:
- Place the filter holder in the filter holder fork (Fig. 1-8).
- Select the dose of coffee requested - single, double or
customized dose (Fig. 1b-12 to 14). The LED of the selected
dose glows. The customized dose button has no LED.
The selected dose will also be shown in the display.
- The grinder runs the predefined time and stops automatically.
- To cancel before, press the selected button again on the
keypad. The grinding cannot be continued.
- Level out the coffee contained in the filter and tamp the coffee
with the tamper;
- Check that there are no coffee grounds on the rim of the
filter holder.
2.2. On Demand mode
In the “On demand” mode the grinding may be paused during
dispensing and restarted.
Activation by filter holder:
- Select the dose of coffee requested - single, double or
customized dose (Fig. 1b-12 to 14). The LED of the selected
dose will be illuminated. The customized dose button has no
LED.
The selected dose will also be shown in the display
- Place the filter holder in the filter holder fork (Fig. 1-8) and
press it to the filter holder button (Fig. 1b-6).
- The grinder runs the predefined time and stops automatically.
- To pause the grinding before its finished dispensing, release
the filter holder button, reactivate the dispensing by pressing
and holding the filter holder button.
- To cancel before its finished dispensing, release the filter
holder button, than press any button on the keypad.
- Level out the coffee contained in the filter and tamp the
coffee with the tamper;
- Check that there are no coffee grounds on the rim of the
filter holder.
Activation by keypad:
- Place the filter holder in the filter holder fork (Fig. 1-8).
- Select the dose of coffee requested - single, double or
customized dose (Fig. 1b-12 to 14). The LED of the selected
dose will be illuminated. The customized dose button has no
LED.
The selected dose will also be shown in the display
- The grinder runs the predefined time and stops automatically.
- To interrupt before its finished grinding, press the same
button of the keypad. The LED blinks now. The grinding can
be continued by pressing the same button again.
The grinding will be stopped with any other button and
cannot be continued.
- Level out the coffee contained in the filter and tamp the
coffee with the tamper;
- Check that there are no coffee grounds on the rim of the
filter holder.

11
3. MAINTENANCE
Maintenance operations should be carried out with the machine
turned off and with the plug removed from the power source.
We recommend the cleaning products you can buy from us.
Do not use metallic or abrasive tools, such as steel wool, metal
brushes, needles, etc., or detergents (alcohol etc.), but simply a
damp cloth or sponge.
3.1. Daily
- Clean the housing and the grounds tray.
- Clean fork area for the filter holder.
- Clean the coffee outlet with a brush.
3.2. Periodically or after intense use
Empty the bean hopper, and clean it of oily residues left by the
coffee with a mild soap solution. Rinse thoroughly!
Waste materials used for processing or maintenance, if not
biodegradable or pollutant, should be placed in separate
containers and taken to suitable collection centers.
3.3. Burr replacement
KRYO 65 OD has an integrated counter, which informs the user
after the predefined amount of coffee is grinded, that the burrs
have to be replaced.
This alert can be activated by the service technician during the
commissioning. We recommend activating the alarm.
The burr replacement has to be done by a qualified service
technician only.
Please get in contact with your local sales organization.
4. TROUBLESHOOTING
Inspection that can be carried out by the user
For any type of problem or difficulty not specified here, unplug the
machine, refrain from making attempts to repair or inspect the
machine yourself and contact an authorized service technician.
A) The machine does not turn on:
- Check that it is plugged in;
- Check that there is power being supply and that the automatic
circuit breaker or main switch is turned on;
- Check the condition of the plug and supply cable, and if they
are damaged have them replaced by a qualified technician.
B) Coffee is not ground:
- Check that there are coffee beans in the bean hopper;
- Check that the hopper locking slide is open (lever inwards)
C) Long grinding time
- Check the grind setting;
- Have the burrs replaced by qualified staff.
5. TECHNICAL DATA
Version
KRYO 65 OD
Machine size
mm
L.220 - D.356 - H.575
Net weight of machine
kg
13
Production
g/s
3.5
Bean hopper capacity
g
1300
Identification details, specifications plate (Fig. 3)
1. Manufacturer
2. Model and version
3. Voltage
4. EC Conformity mark
5. Serial number
6. Pin
7. Total absorption
8. - -
9. - -
10. - -
11. Frequency
12. Conformity marks
13. Date of manufacture
6. INSTALLATION
A qualified technician must perform installation.
The machine is delivered ready for installation according to the
data on the plate Fig. 3.
Check that the main power supply is compatible with the machine.
Check that the machine, the accessories, the supply cable and the
plug are intact, and in the event of damage, inform the retailer
promptly.
The machines have been designed and built for grinding coffee
beans for professional use.
Any other use is to be considered improper and thus dangerous.
7. FIRST START-UP
7.1. Description of commands
Main switch (Fig. 1-9) with two positions; when switched on, the
machine is ready for coffee grinding.
7.2. First startup
KRYO 65 OD has a startup menu to select the personal preferences
of the operator, when switched on for the first time. Operator has
to choose the language, the mode, the pre-selection and the way to
activate the grinding. After choosing the preferences, the display
will show a message “Do Calibration”. The calibration has to be
done with the procedure shown in the software structure under
Counter/Burrs/Calibration.
This message will be shown after each preparation up to the time,
the calibration has been done.
7.3. Grind setting
The grinders are tested by the manufacturer with a medium grind
setting. The setting depends on the type of coffee used.
- Place a small quantity of coffee beans in the bean hopper
and close the lid;
- Check that the hopper locking slide is open (Fig. 1–4)
- Position the filter holder on the filter holder fork (Fig. 1-8)
and grind coffee;
- Brew some coffee, checking the dispensing time, the
appearance of the coffee and its taste, considering that
excessively course grounds produce light coloured coffee
without a crema, while grounds that are too fine result in
strong, dark coffee without a crema.
- If the coffee does not respond to your desired requirements,
adjust grind fineness by pressing the ring block button (Fig. 2-1)
and turning the regulation knob (Fig. 2-3) counter-clockwise for
a finer grind or clockwise for a coarser grind.
- Repeat the operation until you have obtained the desired
quality of coffee.
Recalibration of the grind is typically only necessary after a change
in coffee. Minor adjustments may be required throughout use to
accommodate for changes in freshness of the beans.

12
8. DECOMMISSIONING
8.1. Temporary
- Close the hopper and grind the coffee beans remaining between
the burrs.
- Turn off the switch and unplug the appliance from the power
source;
- Remove any coffee beans remaining in the bean hopper.
- Perform cleaning and maintenance operations;
- Coil up the supply cable and attach it to the machine using
adhesive tape;
- Cover the machine and place it in a dry place, sheltered from
bad weather and to which you have exclusive access.
8.2. Final
In addition to the operations of temporary decommissioning:
- Cut the power cable,
- Pack up the machine using cardboard or similar materials
and hand it over to specialized operators (authorized waste
disposal collectors or dealers in second-hand goods)
9. INFORMATION FOR SERVICE TECHNICIANS
9.1. Replacement of burrs
Although manufactured in tempered steel, the burrs are subject
to wear and tear.
Their lifespan is influenced by the amount of coffee ground, its
hardness and degree of roasting, as well as the quantity and
purity of the coffee beans.
Small stones and various impurities have a marked abrasive
action which significantly reduces the lifespan of the burrs.
When grinding time becomes noticeably longer or the grind
becomes irregular, the burrs should be replaced as follows:
- Pull the hopper locking slide (Fig. 1–4);
- Start the grinder to grind the coffee remaining between the
burrs;
- Once grinding has finished, turn off the machine and unplug
from the power source;
- Empty the bean hopper (Fig. 1–2);
- Remove the regulation knob (Fig. 1–3);
- Turn the upper burr-holder (Fig. 4–1) counter-clockwise until
the head emerges completely;
- Unscrew the screws (Fig. 4–2) and remove the burrs (Fig. 4–3)
from the burr-holder:
- Carefully clean the burr supports, the burr-holder thread and
its housing;
- Position the new burrs in their holders and block them firmly
in place;
- Reassemble the machine, performing the previous steps in
reverse.
- Calibrate the new burrs.
9.2. Calibration of grinder burrs
To be performed after burr replacement
The grinders are tested with a medium grind setting, and need to
be readjusted. This operation should be carried out with the bean
hopper empty.
Remove the protection lid (Fig. 1b-5), hold down the adjustment
unlock button (Fig. 2-1) and at the same time slowly turn the
adjustment knob (Fig. 2-3) counter-clockwise until the burrs
brush against each other. Release the button, turn the numbered
ring (Fig. 2-2) so that the starting point 0 is frontal; move the
adjustment knob (Fig. 2-3) in the opposite direction (clockwise).
9.3. Technician menu
Must be performed by a qualified technician.
The access to the technician menu is given by switching off the
grinder. Switch on the main switch (Fig. 1-9) while pressing the
confirmation button.
10. SOFTWARE
KRYO 65 OD has three menus to operate with.
10.1 Use of Buttons
To configure the KRYO 65 OD the dose buttons will be used with
an additional function.
The single dose button (Fig. 1b-12) will be used as “-“button, the
double dose button (Fig. 1b-13) as “+”button and both buttons to
browse through the menu. The customized dose button (Fig. 1b-
14) is used as confirmation or ESC-button depending on the
menu accessed.
10.2 Dosing menu
In the dosing menu the amount of coffee dispensed by one button
can be changed.
- Press the selected button for 3 seconds
- Change the value of the specific button
- Confirm the change with the confirmation button
10.3 Barista menu
Open the “Barista Menu” by pressing the confirmation button
(Fig. 1-14) for 5 seconds.
Any additional information is given in the software tree below.
10.4 Technician menu
Must be performed by a qualified technician.
The parameters with the grey background are only accessible for
the service technician
The access to this menu is given in another chapter of the manual.

13
Software
Dosing
Single
Time to grind the single dose in seconds
Double
Time to grind the double dose in seconds
Customized
Time to grind the customized dose in seconds
ESC
Leave the menu
Mode
Automatic
Sets the grinder in the “Automatic” mode, the grinding cannot be paused during dispensing
On Demand
Sets the grinder in the “On Demand” mode, the grinding can be paused during dispensing
ESC
Leave the menu
Start dose
by keyboard
The grinding will be started by pressing the requested button
by filter holder
The grinding will be started by the filter holder when touching the filter holder button.
Preselection
The preselection is only available in the Automatic mode.
With “Yes” the dose selection will be done by the keypad;
“No” means the dose selection will be done by pushing the filter holder to the filter holder button once for a single dose or two times for a double dose.
A customized dose is not available with preselection.
ESC
Leave the menu
Language
English, Deutsch …
Select the language – Italiano, English, Deutsch, Français, Espanol or Portugues and confirm
ESC
Leave the menu
Counters
Total
Single
Displays the total number of single dose prepared. Not resettable
Double
Displays the total number of double dose prepared. Not resettable
Customized
Displays the total number of customized dose prepared. Not resettable
ESC
Leave the menu
Counter
Single
Displays the number of single dose prepared since the last reset
Double
Displays the number of double dose prepared since the last reset
Customized
Displays the number of customized dose prepared since the last reset
Reset
Resets all dose counters
ESC
Leave the menu
Burrs
Calibration
The adjustment of the grinder is done with this submenu and starts with the confirmation. Do the calibration after finding the right coarseness!
Grinding
Starts to grind coffee for a defined time. The coffee must be scaled. Take three samples and calculate the average.
Weight
The amount of scaled coffee will be adjusted here and confirmed
Alarm
Amount of coffee in kg when the burrs have to be changed. With “0” the alarm is disabled
Counter
Shows the amount of coffee grinded in kg
Reset
Resets the burr counter
ESC
Leave the menu
ESC
Leave the menu
ESC
Leave the menu

14
DEUTSCH
KRYO 65/ST KRYO 65/AT
Kaffeemühle mit Dosierer
1. BESCHREIBUNG
KRYO 65/ST
Kaffeemühle mit manueller Ein- und Ausschaltung
KRYO 65/AT
Automatische Kaffeemühle mit manueller Ein- und
Ausschaltmöglichkeit
Legende (Fig. 1a)
1. Bohnenbehälterdeckel
2. Bohnenbehälter
3. Regler
4. Bohnenbehälterverschluss
5. Dosiererdeckel
6. Dosierer
7. Kaffeepresser
8. Siebträgeraufnahmegabel
9. Hauptschalter
10. Auffangschale
11. Dosierhebel
12. Einstellknopf für Dosiermenge
2. FUNKTIONSWEISE
Der Bohnenbehälter der KRYO 65 ist mit einem Verschluss zum
Sichern im Betrieb ausgestattet (Fig. 5). Der Verschluss muss
geschlossen sein, wenn die Mühle benützt wird.
Der Verschluss ist an der Aussenseite des Bohnenbehälters markiert.
Wenn der Schlitz des Verschluss zur Markierung zeigt, kann der
Bohnenbehälter abgenommen oder montiert werden. Um den
Bohnenbehälter zu verriegeln, wird der Schlitz nach links gedreht.
KRYO 65/ST
Kaffee nach Bedarf durch Betätigen des Hauptschalters (Fig. 1-9)
mahlen.
KRYO 65/AT
Hauptschalter (Fig. 1-9) betätigen; der Mahlvorgang wird
automatisch durchgeführt und schaltet ab, wenn Dosierer
genügend gefüllt ist.
Es wird empfohlen, immer nur die für den sofortigen Bedarf
notwendige Menge zu vermahlen, da zu lange aufbewahrter
gemahlener Kaffee an Frische und Aroma verliert.
Bereits gemahlenen Kaffee nicht nochmals mahlen.
- Siebträger in die Aufnahmegabel (Fig. 1-8) einsetzen,
Dosierhebel (Fig. 1a -11) ein- oder mehrmals kräftig zu sich
ziehen und wieder loslassen, jedes Betätigen des
Dosierhebels entspricht einer Portion.
- Kaffee im Sieb glattstreichen, Siebträger unter den
Kaffeepresser (Fig. 1a-7) schieben und den Kaffee nicht allzu
kräftig festdrücken.
- Darauf achten, dass keine Kaffeereste auf dem Rand des
Siebträgers verbleiben.
3. REINIGUNG UND PFLEGE
Reinigungsarbeiten immer bei ausgeschaltetem Gerät vornehmen
und den Netzstecker aus der Steckdose ziehen.
Wir empfehlen die Reinigungsmittel, die bei uns gekauft werden
können.
Keine metallischen oder scheuernden Hilfsmittel wie Stahlwolle,
Stahlbürsten, Nadeln etc. und auch keine aggressiven
Reinigungsmittel (Alkohol etc.) verwenden, sondern ein feuchtes
Tuch oder einen feuchten Schwamm.
3.1. Tägliche Reinigung
- Mühlengehäuse und Auffangschale reinigen.
- Dosierbereich unter dem Dosierer reinigen.
- Kaffeeauswurf mit einem Pinsel reinigen
3.2. Regelmässige Pflege und Reinigung nach
intensivem Gebrauch
Bohnenbehälter entleeren und fettige Kaffeerückstände mit einer
milden Seifenlauge entfernen. Sorgfältig spülen!
Für Reinigung und Pflege verwendete Stoffe, die nicht biologisch
abbaubar bzw. umweltschädlich sind, in getrennten Behältern den
Abfallsammelstellen abgeben.
4. PROBLEME UND LÖSUNGEN
Vom Bediener durchführbare Kontrollen
Bei allen anderen nicht spezifizierten Defekten oder Problemen
den Netzstecker ziehen, jedoch keine direkten Reparaturen oder
Kontrollen vornehmen, sondern den technischen Kundendienst
hinzuziehen.
A) Das Gerät lässt sich nicht einschalten:
- Prüfen, ob der Netzstecker eingesteckt ist.
- Prüfen, ob Netzstrom vorhanden, der FI-Schalter nicht
herausgesprungen und der Hauptschalter am Gerät
eingeschaltet ist.
- Netzstecker und Anschlusskabel auf Funktionstüchtigkeit
prüfen. Bei Beschädigungen vom Fachmann austauschen
lassen.
B) Die Mühle mahlt nicht:
- Prüfen, ob der Bohnenbehälter mit Kaffeebohnen gefüllt ist.
- Prüfen, ob der Bohnenbehälterverschluss offen ist
(Verschluss nach innen).
C) Das Mahlen dauert zu lange:
- Mahlgradeinstellung kontrollieren.
- Mahlscheiben vom Fachmann austauschen lassen.
D) Die Dosierung ist ungleichmässig:
- Dosierer und Pulverauswurf sorgfältig reinigen.
- Prüfen, ob der Dosierhebel frei beweglich ist und sich
komplett verschieben lässt.
5. TECHNISCHE DATEN
Versionen
KRYO 65/ST
KRYO 65/AT
Abmessungen
mm
L.220 - B.385 - H.575
Nettogewicht
kg
13
Leistung
kg/h
7-9
Inhalt Bohnenbehälter
g
1300
Einstellung der Dosierung
g
5-10
Kenndaten auf dem Typenschild (Fig. 3)
1. Hersteller
2. Modell und Version
3. Spannung
4. CE-Kennzeichnung
5. Seriennummer
6. Pin
7. Anschlussleistung
8. - -
9. - -
10. - -

15
11. Frequenz
12. Konformitätszeichen
13. Produktionsdatum
6. INSTALLATION
Die Installation muss von einem qualifizierten Techniker
vorgenommen werden.
Das Gerät wird installationsbereit gemäss den Kenndaten in Fig. 3
geliefert.
Sicherstellen, dass die Anschlussleitung dieselben Eigenschaften
wie das Gerät hat.
Mühle, Zubehörteile, Anschlusskabel und Stecker auf Schäden
prüfen und gegebenenfalls umgehend den Händler informieren.
Das Gerät wurde für das Mahlen von Kaffeebohnen im
professionellen Einsatz konzipiert und gebaut.
Jede andere Verwendung gilt als nicht bestimmungsgemäss und
ist gefährlich.
7. INBETRIEBNAHME
7.1. Beschreibung der Bedienelemente
KRYO 65/ST
Hauptschalter (Fig. 1-9) mit zwei Stellungen. In Stellung (I) wird
die Stromzufuhr aktiviert und der Mahlvorgang gestartet.
KRYO 65/AT
Hauptschalter (Fig. 1-9) mit zwei Stellungen. In Stellung (I) wird
die Stromzufuhr aktiviert. Der Mahlvorgang wird automatisch
durchgeführt
7.2. Mahlgradjustierung
Die Kaffeemühle wird vom Hersteller mit einer mittleren
Mahlgradeinstellung ausgeliefert. Welcher Mahlgrad gewählt
wird, hängt von der verwendeten Kaffeesorte ab.
- Eine kleine Menge Kaffeebohnen in den Bohnenbehälter
einfüllen und den Deckel schliessen.
- Prüfen, ob der Behälter offen ist (Bohnenbehälterverschluss
(Fig. 1-4) eingeschoben).
- Eine kleine Portion Kaffee mahlen:
- Siebträger in die Aufnahmegabel (Fig. 1-8) einsetzen und
Dosierhebel (Fig. 1a-11) betätigen, um die gemahlene Portion
Kaffee zu entnehmen.
- Einen Kaffee zubereiten und dabei die Brühdauer, die Farbe
und den Geschmack kontrollieren. Ein zu grober Mahlgrad
ergibt hellen Kaffee ohne Crema, während ein zu feiner
Mahlgrad starken, dunklen Kaffee ohne Crema ergibt.
- Fällt der Kaffee nicht wunschgemäss aus, Mahlgrad durch
Drücken des Verriegelungsknopfs (Fig. 2-1) und Drehen des
Reglers (Fig. 2-3) gegen den Uhrzeigersinn für einen feineren
Mahlgrad bzw. im Uhrzeigersinn für einen gröberen Mahlgrad
einstellen.
- Vorgang so lange wiederholen, bis die gewünschte
Kaffeequalität erreicht ist.
Eine Mahlgradjustierung ist normalerweise nur beim Wechsel
des Kaffees notwendig. Kleinere Anpassungen können während
der gesamten Benutzung aufgrund unterschiedlicher Frische der
Kaffeebohnen erforderlich sein.
7.3. Einstellung der Dosierung
Zum Einstellen der Dosierung wie folgt vorgehen:
- Um die Menge zu erhöhen, den Knopf (Fig. 1a–12) unter dem
Dosierer gegen den Uhrzeigersinn drehen, zum Reduzieren im
Uhrzeigersinn drehen.
- Den Dosierhebel (Fig. 1a-11) 6 mal betätigen und jedes Mal
die Portion prüfen. Es ist darauf achten, dass dabei der
Dosierstern komplett mit Kaffeepulver bedeckt ist.
8. STILLLEGUNG
8.1. Vorübergehend
- Bohnenbehälter schliessen und die zwischen den
Mahlscheiben verbliebenen Bohnen mahlen.
- Gerät abschalten und Netzstecker aus der Steckdose ziehen.
- Gemahlenen Kaffee und eventuell im Bohnenbehälter
verbliebene Bohnen entfernen.
- Reinigung durchführen.
- Stromkabel aufwickeln und mit Klebeband am Gerät fixieren.
- Gerät abdecken und an einem trockenen, witterungsgeschützten
und sicheren Ort aufbewahren.
8.2. Endgültig
Zusätzlich zur vorübergehenden Stilllegung ist Folgendes
vorzunehmen:
- Anschlusskabel durchschneiden,
- Gerät mit Karton oder anderem Material verpacken und der
zuständigen Stelle übergeben (autorisierte Abfallentsorgung
oder Rücknahmestelle für Altgeräte).
9. INFORMATION FÜR DEN KUNDENDIENST
9.1. Mahlscheibenwechsel
Die Mahlscheiben sind zwar aus gehärtetem Stahl gefertigt,
nutzen sich aber mit der Zeit ab.
Ihre Lebensdauer ist von der gemahlenen Kaffeemenge, von
Härte und Röstgrad der Kaffeebohnen sowie von der Reinheit des
Mahlgutes abhängig.
Steinchen und andere Verunreinigungen haben eine stark
scheuernde Wirkung, die die Lebensdauer der Mahlscheiben
beträchtlich verkürzen kann.
Wenn der Mahlvorgang ungewöhnlich lange dauert oder das
Mahlergebnis unregelmässig ausfällt, sind die Mahlscheiben wie
folgt zu wechseln:
- Bohnenbehälterverschluss (Fig. 1-4) betätigen.
- Mühle starten, um die zwischen den Mahlscheiben
verbliebenen Bohnen zu mahlen.
- Nach Ende des Mahlvorgangs Gerät ausschalten und
Anschlusskabel abziehen.
- Bohnenbehälter (Fig. 1-2) entleeren.
- Regler (Fig. 1-3) entfernen.
- Oberen Mahlscheibenhalter (Fig. 4-1) gegen den Uhrzeigersinn
drehen, bis der Block komplett herausgefahren ist.
- Schrauben (Fig. 4-2) lösen und Mahlschreiben (Fig. 4-3) aus
der Halterung nehmen.
- Auflageflächen der Mahlscheiben sowie Gewinde und Sitz
des Mahlscheibenhalters sorgfältig reinigen.
- Die neuen Mahlscheiben in die entsprechenden Halterungen
einsetzen und fixieren.
- Alle Teile in umgekehrter Reihenfolge wieder montieren.
- Die neuen Mahlscheiben kalibrieren.
9.2. Kalibrierung der Mahlscheiben
Nach Mahlscheibenwechsel durchführen
Den Verriegelungsknopf (Fig. 2-1) gedrückt halten und gleichzeitig
den Regler (Fig. 2-3) langsam gegen den Uhrzeigersinn drehen, bis
sich die Mahlscheiben berühren. Den nummerierten Ring (Fig. 2-2) in
Nullstellung drehen und so einstellen, dass die 0 nach vorne zeigt.
Dann den Regler (Fig. 2-3) in die Gegenrichtung (im Uhrzeigersinn)
drehen.

16
KRYO 65 OD
On Demand Kaffeemühle
1. BESCHREIBUNG
KRYO 65 OD
Automatische On Demand Kaffeemühle
Legende (Fig. 1b)
1. Bohnenbehälterdeckel
2. Bohnenbehälter
3. Regler
4. Bohnenbehälterverschluss
5. Schutzabdeckung
6. Siebträgertaste
7. Kaffeeauswurf
8. Siebträgeraufnahmegabel
9. Hauptschalter
10. Auffangschale
11. Display
12. Taste für Einzelportion
13. Taste für Doppelte Portion
14. Taste für kundenspezifische Portion
2. FUNKTIONSWEISE
Die Bohnenbehälter der KRYO 65 ist mit einem Verschluss zum
Sichern im Betrieb ausgestattet (Fig. 5). Der Verschluss muss
geschlossen sein, wenn die Mühle benützt wird.
Der Verschluss ist an der Aussenseite des Bohnenbehälters markiert.
Wenn der Schlitz des Verschluss zur Markierung zeigt, kann der
Bohnenbehälter abgenommen oder montiert werden. Um den
Bohnenbehälter zu verriegeln, wird der Schlitz nach links gedreht.
Hauptschalter (Fig. 1-9) betätigen. Der Mahlvorgang wird in zwei
Betriebsarten durchgeführt.
Die Betriebsart und wie der Mahlvorgang gestartet wird, ist in der
Software festgelegt und kann bei Bedarf vom Bediener geändert
werden.
Bereits gemahlenen Kaffee nicht nochmals mahlen.
2.1. Automatik Modus
Im “Automatik” Modus mahlt die Kaffeemühle bis die gewählte
Portion zubereitet ist. Wird die Zubereitung gestoppt, wird diese
abgebrochen.
Start mit dem Siebträger:
- Portion auswählen – Einfach, Doppelt oder Spezifisch.
Die LED der gewählten Taste leuchtet, die spezifische Taste
hat keine LED.
Die gewählte Portion wird auch auf dem Display angezeigt.
- Siebträger in die Aufnahmegabel (Fig. 1-8) einsetzen und
Siebträgertaste (Fig. 1b-6) einmal betätigen.
- Die Kaffeemühle läuft während der eingestellten Zeit und
stoppt automatisch.
- Zum vorzeitigen Abbrechen die gewählte Taste erneut
betätigen. Der Mahlvorgang kann nicht fortgesetzt werden.
- Kaffee im Sieb glattstreichen und mit dem Kaffeepresser
festdrücken.
- Darauf achten, dass keine Kaffeereste auf dem Rand des
Siebträgers verbleiben.
- Alternativ und wenn dies im Menu eingestellt wurde
<Vorwahl „Nein“>, kann die Portion mit dem Siebträger
ausgewählte werden.
- Siebträger in die Aufnahmegabel (Fig. 1-8) einsetzen und die
Siebträgertaste (Fig. 1b-6) damit betätigen. Siebträgertaste
für eine einfache Portion einmal betätigen, für eine doppelte
Portion zweimal. Die gewählte Portion wird im Display
angezeigt und die LED der Taste der gewählten Portion
leuchtet. In diesem Modus gibt es keine spezifische Portion.
- Die Kaffeemühle läuft während der eingestellten Zeit und
stoppt automatisch.
- Zum vorzeitigen Abbrechen eine Taste betätigen. Der
Mahlvorgang kann nicht fortgesetzt werden.
- Kaffee im Sieb glattstreichen und mit dem Kaffeepresser
festdrücken.
- Darauf achten, dass keine Kaffeereste auf dem Rand des
Siebträgers verbleiben.
Start mit Tastatur:
- Siebträger in die Aufnahmegabel (Fig. 1-8) einsetzen
- Portion auswählen – Einfach, Doppelt oder Spezifisch.
Die LED der gewählten Taste leuchtet, die spezifische Taste
hat keine LED.
Die gewählte Portion wird auch auf dem Display angezeigt.
- Die Kaffeemühle läuft während der eingestellten Zeit und
stoppt automatisch.
- Zum vorzeitigen Abbrechen die gewählte Taste erneut
betätigen. Der Mahlvorgang kann nicht fortgesetzt werden.
- Kaffee im Sieb glattstreichen und mit dem Kaffeepresser
festdrücken.
- Darauf achten, dass keine Kaffeereste auf dem Rand des
Siebträgers verbleiben.
2.2. On Demand Modus
Im “On Demand” Modus kann der Mahlvorgang unterbrochen
und fortgesetzt werden.
Start mit dem Siebträger:
- Portion auswählen – Einfach, Doppelt oder Spezifisch.
Die LED der gewählten Taste leuchtet, die spezifische Taste
hat keine LED.
Die gewählte Portion wird auch auf dem Display angezeigt.
- Siebträger in die Aufnahmegabel (Fig. 1-8) einsetzen und
Siebträgertaste (Fig. 1b-6) betätigen.
- Die Kaffeemühle läuft während der eingestellten Zeit und
stoppt automatisch.
- Um den Mahlvorgang zu unterbrechen, den Siebträgertaster
lösen, den Mahlvorgang durch erneutes Betätigen des
Siebträgertasters fortsetzen.
- Um den Mahlvorgang abzubrechen, den Siebträgertaster
lösen und eine Taste der Tastatur betätigen.
- Kaffee im Sieb glattstreichen und mit dem Kaffeepresser
festdrücken.
- Darauf achten, dass keine Kaffeereste auf dem Rand des
Siebträgers verbleiben.
Start mit Tastatur:
- Siebträger in die Aufnahmegabel (Fig. 1-8) einsetzen
- Portion auswählen – Einfach, Doppelt oder Spezifisch.
Die LED der gewählten Taste leuchtet, die spezifische Taste
hat keine LED.
Die gewählte Portion wird auch auf dem Display angezeigt.
- Die Kaffeemühle läuft während der eingestellten Zeit und
stoppt automatisch.
- Um den Mahlvorgang zu unterbrechen, die gewählte
Portionstaste erneut betätigen, den Mahlvorgang durch
weiteres Betätigen der Portionstaste fortsetzen.
- Der Mahlvorgang wird mit jeder anderen Taste abgebrochen
und kann nicht fortgesetzt werden.
- Kaffee im Sieb glattstreichen und mit dem Kaffeepresser
festdrücken.
- Darauf achten, dass keine Kaffeereste auf dem Rand des
Siebträgers verbleiben.

17
3. REINIGUNG UND PFLEGE
Reinigungsarbeiten immer bei ausgeschaltetem Gerät
vornehmen und den Netzstecker aus der Steckdose ziehen.
Wir empfehlen die Reinigungsmittel, die bei uns gekauft werden
können.
Keine metallischen oder scheuernden Hilfsmittel wie Stahlwolle,
Stahlbürsten, Nadeln etc. und keine aggressiven
Reinigungsmittel (Alkohol etc.) verwenden, sondern ein feuchtes
Tuch oder einen feuchten Schwamm.
3.1. Tägliche Reinigung
- Mühlengehäuse und Auffangschale reinigen.
- Bereich um Siebträgergabel reinigen
- Kaffeeauswurf mit einem Pinsel reinigen
3.2. Regelmässige Pflege und Reinigung nach
intensivem Gebrauch
Bohnenbehälter entleeren und fettige Kaffeerückstände mit einer
milden Seifenlauge entfernen. Sorgfältig spülen!
Für Reinigung und Pflege verwendete Stoffe, die nicht biologisch
abbaubar bzw. umweltschädlich sind, in getrennten Behältern
den Abfallsammelstellen abgeben.
3.3. Mahlscheibenersatz
KRYO 65 OD enthält einen Zähler, der nach einer eingestellten
Kaffeemenge den Bediener informiert, dass die Mahlscheiben
ersetzt werden müssen.
Die Warnung wird durch den Servicetechniker bei der Inbetriebnahme
eingestellt. Wir empfehlen, die Warnung zu aktivieren.
Der Ersatz der Mahlscheiben darf nur von einem qualifizierten
Servicetechniker durchgeführt werden.
Bitte setzen Sie sich mit Ihrem Händler in Verbindung.
4. PROBLEME UND LÖSUNGEN
Vom Bediener durchführbare Kontrollen
Bei allen anderen nicht spezifizierten Defekten oder Problemen
den Netzstecker ziehen, jedoch keine direkten Reparaturen oder
Kontrollen vornehmen, sondern den technischen Kundendienst
hinzuziehen.
A) Das Gerät lässt sich nicht einschalten:
- Prüfen, ob der Netzstecker eingesteckt ist.
- Prüfen, ob Netzstrom vorhanden, der FI-Schalter nicht
herausgesprungen und der Hauptschalter am Gerät
eingeschaltet ist.
- Netzstecker und Anschlusskabel auf Funktionstüchtigkeit
prüfen. Bei Beschädigungen vom Fachmann austauschen
lassen.
B) Die Mühle mahlt nicht:
- Prüfen, ob der Bohnenbehälter mit Kaffeebohnen gefüllt ist.
- Prüfen, ob der Bohnenbehälterverschluss offen ist
(Verschluss nach innen).
C) Das Mahlen dauert zu lange:
- Mahlgradeinstellung kontrollieren.
- Mahlscheiben vom Fachmann austauschen lassen.
5. TECHNISCHE DATEN
Versionen
KRYO 65 OD
Abmessungen
mm
L.220 - B.356 - H.575
Nettogewicht
kg
13
Leistung
g/s
3.5
Inhalt Bohnenbehälter
g
1300
Kenndaten auf dem Typenschild (Fig. 3)
1. Hersteller
2. Modell und Version
3. Spannung
4. CE-Kennzeichnung
5. Seriennummer
6. Pin
7. Anschlussleistung
8. - -
9. - -
10. - -
11. Frequenz
12. Konformitätszeichen
13. Produktionsdatum
6. INSTALLATION
Die Installation muss von einem qualifizierten Techniker
vorgenommen werden.
Das Gerät wird installationsbereit gemäss den Kenndaten in Fig. 3
geliefert.
Sicherstellen, dass die Anschlussleitung dieselben Eigenschaften
wie das Gerät hat.
Mühle, Zubehörteile, Anschlusskabel und Stecker auf Schäden
prüfen und gegebenenfalls umgehend den Händler informieren.
Das Gerät wurde für das Mahlen von Kaffeebohnen im
professionellen Einsatz konzipiert und gebaut.
Jede andere Verwendung gilt als nicht bestimmungsgemäss und
ist gefährlich.
7. INBETRIEBNAHME
7.1. Beschreibung der Bedienelemente
Hauptschalter (Fig. 1-9) mit zwei Stellungen. In Stellung (I) wird
die Stromzufuhr aktiviert und die Kaffeemühle ist betriebsbereit.
7.2. Erster Start
KRYO 65 OD enthält ein Menu um die persönlichen Einstellungen des
Bedieners festzulegen, welches beim ersten Einschalten erscheint.
Der Bediener kann die Sprache, die Betriebsart, die Vorwahl und die
Art und Weise, wie die Mahlung gestartet wird, einstellen. Danach
erscheint im Display „Bitte Kalibrieren“. Die Kalibrierung muss
gemäss Beschreibung Zähler/Mahlscheiben/Kalibrierung in der
Softwarestruktur durchgeführt werden.
Die Displaymeldung erscheint nach jeder Zubereitung, bis die
Kalibrierung durchgeführt wurde.
7.3. Mahlgradjustierung
Die Kaffeemühle wird vom Hersteller mit einer mittleren
Mahlgradeinstellung ausgeliefert. Welcher Mahlgrad gewählt
wird, hängt von der verwendeten Kaffeesorte ab.
- Eine kleine Menge Kaffeebohnen in den Bohnenbehälter
einfüllen und Deckel schliessen.
- Prüfen, ob der Behälter offen ist (Fig. 1-4).
- Siebträger in die Aufnahmegabel (Fig. 1-8) einsetzen und
Kaffee mahlen
- Einen Kaffee zubereiten und dabei die Brühdauer, die Farbe
und den Geschmack kontrollieren. Ein zu grober Mahlgrad
ergibt hellen Kaffee ohne Crema, während ein zu feiner
Mahlgrad starken, dunklen Kaffee ohne Crema ergibt.

18
- Fällt der Kaffee nicht wunschgemäss aus, Mahlgrad durch
Drücken des Verriegelungsknopfs (Fig. 2-1) und Drehen des
Reglers (Fig. 2-3) gegen den Uhrzeigersinn für einen feineren
Mahlgrad bzw. im Uhrzeigersinn für einen gröberen
Mahlgrad einstellen.
- Vorgang so lange wiederholen, bis die gewünschte
Kaffeequalität erreicht ist.
Eine Mahlgradjustierung ist normalerweise nur beim Wechsel
des Kaffees notwendig. Kleinere Anpassungen können während
der gesamten Benutzung aufgrund unterschiedlicher Frische der
Kaffeebohnen erforderlich sein.
8. STILLLEGUNG
8.1. Vorübergehend
- Bohnenbehälter schliessen und die zwischen den Mahlscheiben
verbliebenen Bohnen mahlen.
- Gerät abschalten und Netzstecker aus der Steckdose ziehen.
- Im Bohnenbehälter verbliebene Bohnen entfernen.
- Reinigung durchführen.
- Stromkabel aufwickeln und mit Klebeband am Gerät fixieren.
- Gerät abdecken und an einem trockenen, witterungsgeschützten
und sicheren Ort aufbewahren.
8.2. Endgültig
Zusätzlich zur vorübergehenden Stilllegung ist Folgendes
vorzunehmen:
- Anschlusskabel durchschneiden,
- Gerät mit Karton oder anderem Material verpacken und der
zuständigen Stelle übergeben (autorisierte Abfallentsorgung
oder Rücknahmestelle für Altgeräte).
9. INFORMATION FÜR DEN KUNDENDIENST
9.1. Mahlscheibenwechsel
Die Mahlscheiben sind zwar aus gehärtetem Stahl gefertigt,
nutzen sich aber mit der Zeit ab.
Ihre Lebensdauer ist von der gemahlenen Kaffeemenge, von
Härte und Röstgrad der Kaffeebohnen sowie von der Reinheit des
Mahlgutes abhängig.
Steinchen und andere Verunreinigungen haben eine stark
scheuernde Wirkung, die die Lebensdauer der Mahlscheiben
beträchtlich verkürzen kann.
Wenn der Mahlvorgang ungewöhnlich lange dauert oder das
Mahlergebnis unregelmässig ausfällt, sind die Mahlscheiben wie
folgt zu wechseln:
- Trichterverschlusshebel (Fig. 1-4) betätigen.
- Mühle starten, um die zwischen den Mahlscheiben
verbliebenen Bohnen zu mahlen.
- Nach Ende des Mahlvorgangs Gerät ausschalten und
Anschlusskabel abziehen.
- Bohnenbehälter (Fig. 1-2) entleeren.
- Regler (Fig. 1-3) entfernen.
- Oberen Mahlscheibenhalter (Fig. 4-1) gegen den Uhrzeigersinn
drehen, bis der Block komplett herausgefahren ist.
- Schrauben (Fig. 4-2) lösen und Mahlschreiben (Fig. 4-3) aus
der Halterung nehmen.
- Auflageflächen der Mahlscheiben sowie Gewinde und Sitz
des Mahlscheibenhalters sorgfältig reinigen.
- Die neuen Mahlscheiben in die entsprechenden Halterungen
einsetzen und fixieren.
- Alle Teile in umgekehrter Reihenfolge wieder montieren.
- Die neuen Mahlscheiben kalibrieren.
9.2. Kalibrierung der Mahlscheiben
Nach einem Mahlscheibenwechsel durchführen
Schutzabdeckung (Fig. 1-5) entfernen, Verriegelungsknopf (Fig.
2-1) gedrückt halten und gleichzeitig Regler (Fig. 2-3) langsam
gegen den Uhrzeigersinn drehen, bis sich die Mahlscheiben
berühren. Verriegelungsknopf loslassen, nummerierten Ring (Fig.
2-2) in Nullstellung drehen und so einstellen, dass die 0 nach
vorne zeigt. Dann den Regler (Fig. 2-3) in die Gegenrichtung (im
Uhrzeigersinn) drehen.
9.3 Techniker Menu
Muss von einem qualifizierten Techniker durchgeführt werden!
Um ins Techniker–Menu zu gelangen, muss die Mühle
ausgeschaltet werden. Danach den Hauptschalter (Fig. 1–9)
betätigen und dabei die Bestätigungstaste gedrückt halten.
10. SOFTWARE
KRYO 65 OD hat drei unterschiedliche Menus
10.1 Bedeutung der Tasten
Die Tasten der KRYO 65 OD werden für die Programmierung mit
zusätzlichen Funktionen verwendet.
Die Taste der Einzelportion (Fig. 1b-12) wird als <->Taste
verwendet, die Doppelportion(Fig. 1b-13) als <+>Taste und beide
zum Blättern im Menu. Die kundenspezifische Taste (Fig. 1b-14)
wird als Bestätigung oder ESC-Taste je nach Menupunkt
verwendet.
10.2 Dosier-Menu
Im Dosier-Menu wird die Mahlmenge der Portionstasten geändert.
- Gewünschten Portionstaster für 3 Sekunden betätigen
- Wert des gewählten Taster anpassen
- Anpassung mit Bestätigungstaster sichern
10.3 Barista Menu
Das Barista-Menu wird durch Betätigen der ESC-Taste (Fig. 1b-
14) für 5 Sekunden geöffnet.
Weitere Information ist im Software-Baum enthalten.
10.4 Techniker Menu
Muss von einem qualifizierten Techniker durchgeführt werden!
Die grau hinterlegten Parameter sind nur für den Servicetechniker
zugänglich.
Der Zugang zu diesem Menu ist an einer anderen Stelle dieser
Bedienungsanleitung beschrieben.

19
Software
Dosierung
Einfach
Zeit, in Sekunden, in der die einfache Portion gemahlen wird.
Doppelt
Zeit, in Sekunden, in der die doppelte Portion gemahlen wird.
Kundenspezifisch
Zeit, in Sekunden, in der die kundenspezifische Portion gemahlen wird.
ESC
Menu verlassen
Modus
Automatik
Setzt die Kaffeemühle in den „Automatik”-Modus, der Mahlvorgang kann nicht unterbrochen werden.
On Demand
Setzt die Kaffeemühle in den „On Demand”-Modus, der Mahlvorgang kann unterbrochen werden.
ESC
Menu verlassen
Start Dosierung
mit Tastatur
Der Mahlvorgang wird durch Betätigen der gewünschten Portionsgrösse gestartet.
mit Siebträger
Der Mahlvorgang wird mit dem Siebträger gestartet, wenn dieser den Siebträgertaster betätigt.
Vorwahl
Die Vorwahl ist nur im Automatik-Modus verfügbar.
“Ja” die Portionengrösse wird auf der Tastatur ausgewählt;
“Nein” die Portionengrösse wird durch Betätigung der Siebträgertaste mit dem Siebträger ausgewählt. Für eine einfache Portion Siebträgertaste einmal
betätigen, für eine doppelte Portion Siebträgertaste zweimal betätigen.
Die kundenspezifische Portion steht bei der Vorwahl nicht zur Verfügung.
ESC
Menu verlassen
Sprache
English, Deutsch …
Auswahl der Sprache – Italiano, English, Deutsch, Français, Espanol oder Portugues und bestätigen
ESC
Menu verlassen
Zaehler
Total
Einfach
Zeigt die Gesamtanzahl der zubereiteten Einzelportionen – nicht rücksetzbar
Doppelt
Zeigt die Gesamtanzahl der zubereiteten doppelten Portionen – nicht rücksetzbar
Kundenspezifisch
Zeigt die Gesamtanzahl der zubereiteten kundenspezifischen Portionen – nicht rücksetzbar
ESC
Menu verlassen
Zaehler
Einfach
Zeigt die Anzahl der zubereiteten Einzelportionen seit dem letzten Reset
Doppelt
Zeigt die Anzahl der zubereiteten doppelten Portionen seit dem letzten Reset
Kundenspezifisch
Zeigt die Anzahl der zubereiteten kundenspezifischen Portionen seit dem letzten Reset
Reset
Setzt alle Portionszähler zurück
ESC
Menu verlassen
Mahlscheiben
Kalibrierung
Die Mühle wird mit diesem Untermenu eingestellt und beginnt nach der Bestätigung. Erst wenn der Mahlgrad des Kaffees passend ist, wird die
Kalibrierung durchgeführt.
Mahlen
Mahlt eine bestimmte Zeit Kaffee. Der gemahlene Kaffee wird gewogen. Drei Durchgänge wägen und den Durchschnitt berechnen.
Gewicht
Die Menge des gemahlenen Kaffee wird hier eingestellt und bestätigt.
Alarm
Kaffeemenge in kg , nach der die Mahlscheiben ersetzt werden sollen. Ist der Wert auf „0“, ist der Alarm nicht aktiv.
Zaehler
Zeigt die Menge des gemahlenen Kaffee in kg
Reset
Setzt den Mahlscheibenzähler zurück
ESC
Menu verlassen
ESC
Menu verlassen
ESC
Menu verlassen

20
FRANCAIS
KRYO 65/ST
KRYO 65/AT
Machine pour la mouture et le dosage du café
1. DESCRIPTION
KRYO 65/ST
Moulin à café avec allumage et extinction en mode manuel;
KRYO 65/AT
Moulin à café fonctionnant en mode automatique avec allumage et
extinction possibles en mode manuel.
Légende (Fig. 1a)
1. Couvercle de trémie
2. Trémie à grains
3. Poignée
4. Fermeture de trémie
5. Couvercle du doseur
6. Doseur
7. Presse-café
8. Fourche de référence
9. Interrupteur général
10. Bac de récupération de poudre
11. Levier doseur
12. Poignée dosage
2. FONCTIONNEMENT
La trémie à grains de la KRYO 65 est équipée d’un système de
verrouillage (Fig. 5) qui doit être fermé lors du fonctionnement de
la machine.
Le système de verrouillage est signalé par un repère sur le côté
extérieur de la trémie à grains. Lorsque la fente du système de
verrouillage est en face du repère, la trémie à grains peut être
retirée ou montée. Pour verrouiller la trémie à grains, il faut
tourner la fente vers la gauche.
KRYO 65/ST
Moudre le café en appuyant sur l’interrupteur général (Fig. 1-9)
KRYO 65/AT
Appuyer sur l’interrupteur général (Fig. 1-9), après quoi la
mouture est effectuée en mode automatique.
Il est recommandé de moudre la quantité de café nécessaire au
besoin immédiat car le café moulu laissé trop longtemps inutilisé
perd sa fraîcheur et son arôme.
Ne pas moudre une seconde fois le café déjà moulu.
- Placer le porte-filtre dans la fourche de référence (Fig. 1-8),
tirer vers soi par un mouvement ferme puis relâcher le levier
doseur (Fig. 1a-11) une ou plusieurs fois selon les doses qui
doivent être extraites (chaque mouvement du levier
correspond à une dose).
- Niveler le café contenu dans le filtre, placer le porte-filtre
sous le presse-café (Fig. 1a-7) et soulever en douceur pour
rendre le café compact ;
- Contrôler que le bord du porte-filtre est exempt de café moulu.
3. ENTRETIEN
Pour effectuer les opérations d’entretien, la machine doit être
éteinte et la prise d’alimentation débranchée.
Nous recommandons les produits de nettoyage en vente chez nous.
Pour le nettoyage, ne pas utiliser d’outils métalliques ou abrasifs
de type tampon à récurer, brosses métalliques, aiguilles, etc., ni
de détergents, (alcool etc.). Utiliser plutôt un chiffon ou une
éponge humide.
3.1. Quotidien
- Nettoyer la structure et le bac de récupération de poudre.
- Nettoyer la zone de dosage placée sous le récipient de café.
- Nettoyer la sortie du café à l'aide d'une brosse.
3.2. Périodique ou après usage intensif
Vider le compartiment à grains et le nettoyer pour en extraire
tous les résidus huileux laissés par le café à l'aide d'une solution
savonneuse douce. Rincer soigneusement!
Les matériaux de rebut utilisés pour le travail ou l’entretien, s’ils
ne sont pas biodégradables ou polluants, doivent être entreposés
dans des conteneurs séparés et éliminés dans des centres de
recyclage spécialisés.
4. INCONVÉNIENTS ET REMÈDES
Opérations de contrôle pouvant être effectuées par l’utilisateur
Pour tout autre type d’anomalie ou d’inconvénient non spécifié,
débrancher la prise de courant, s’abstenir d’intervenir directement
dans la réparation ou la vérification et s’adresser au service
technique d’assistance qualifié.
A) La machine ne s’allume pas :
- contrôler si la prise est branchée ;
- Contrôler le courant du réseau d’alimentation ainsi que le
branchement du disjoncteur ou de l’interrupteur général ;
- Contrôler l’état de la prise ou du câble d’alimentation, en cas
d’endommagement, les faire remplacer par du personnel
qualifié.
B) La machine ne moud pas le café :
- Contrôler la présence de café en grains dans le récipient ;
- Contrôler l’ouverture du levier de fermeture de trémie (levier
vers l’intérieur)
C) Durée de mouture prolongée
- Contrôler le réglage de la mouture ;
- Faire remplacer les meules par du personnel qualifié.
D) Les doses ne sont pas uniformes :
- Nettoyer soigneusement le doseur et le bec de sortie du café
- Contrôler le parcours complet et libre du levier doseur.
5. CARACTÉRISTIQUES TECHNIQUES
Versions
KRYO 65/ST
KRYO 65/AT
Dimensions de la machine
mm
L.220 - P.385 - H.575
Poids net de la machine
kg
13
Production
kg/h
7-9
Capacité du Trémie à grains
g
1300
Réglage des doses
g
5-10
Schéma d’identification des données de la plaque (Fig. 3)
1. Fabricant
2. Modèle et version
3. Tension
4. Marquage de conformité CE
5. Numéro de série
6. Pin
7. Absorption totale
8. - -
9. - -
10. - -
11. Fréquence
12. Marques de conformité
13.
Date de fabrication
La page est en cours de chargement...
La page est en cours de chargement...
La page est en cours de chargement...
La page est en cours de chargement...
La page est en cours de chargement...
La page est en cours de chargement...
La page est en cours de chargement...
La page est en cours de chargement...
La page est en cours de chargement...
La page est en cours de chargement...
La page est en cours de chargement...
La page est en cours de chargement...
La page est en cours de chargement...
La page est en cours de chargement...
La page est en cours de chargement...
La page est en cours de chargement...
La page est en cours de chargement...
La page est en cours de chargement...
La page est en cours de chargement...
La page est en cours de chargement...
La page est en cours de chargement...
La page est en cours de chargement...
La page est en cours de chargement...
La page est en cours de chargement...
-
 1
1
-
 2
2
-
 3
3
-
 4
4
-
 5
5
-
 6
6
-
 7
7
-
 8
8
-
 9
9
-
 10
10
-
 11
11
-
 12
12
-
 13
13
-
 14
14
-
 15
15
-
 16
16
-
 17
17
-
 18
18
-
 19
19
-
 20
20
-
 21
21
-
 22
22
-
 23
23
-
 24
24
-
 25
25
-
 26
26
-
 27
27
-
 28
28
-
 29
29
-
 30
30
-
 31
31
-
 32
32
-
 33
33
-
 34
34
-
 35
35
-
 36
36
-
 37
37
-
 38
38
-
 39
39
-
 40
40
-
 41
41
-
 42
42
-
 43
43
-
 44
44


Rancilio KRYO 65 OD Manuel utilisateur
- Catégorie
- Moulins à café
- Taper
- Manuel utilisateur
- Ce manuel convient également à
dans d''autres langues
- italiano: Rancilio KRYO 65 OD Manuale utente
- English: Rancilio KRYO 65 OD User manual
- español: Rancilio KRYO 65 OD Manual de usuario
- Deutsch: Rancilio KRYO 65 OD Benutzerhandbuch
- português: Rancilio KRYO 65 OD Manual do usuário
Documents connexes
Autres documents
-
Camry CR 4443 Mode d'emploi
-
Crem Coffee Pulse Mode d'emploi
-
Mesko MS 4465 Mode d'emploi
-
Adler AD 4446 Mode d'emploi
-
-
Petra M 20.07 Fiche technique
-
Camry CR 4439 Mode d'emploi
-
DeLonghi Coffee Grinder DCG49 Series Manuel utilisateur
-
-
la Pavoni Tritasassi Le manuel du propriétaire