Magene P325CS Mode d'emploi
- Catégorie
- Accessoires de vélo
- Taper
- Mode d'emploi

Dual-protocol Crank
Power Meter
Quick Start Guide

NOTE
If your bicycle brake caliper is installed under bottom
bracket, it is necessary to confirm the compatibility
between the product and the bicycle frame before
installation, so as to avoid unnecessary loss. Please
contact the dealer or customer service department for
the operation method of compatibility test to confirm
that the product is compatible with your frame.

P1-8
P9-15
P16-23
P24-31
P32-39
P40-47
P48-55
P56-61
P62-67
P68-74
.................................
.................................
.................................
.................................
.................................
.................................
.................................
.................................
.................................
.................................
INDEX
日
本語

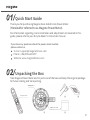
Quick Start Guide
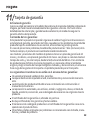
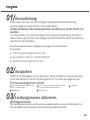
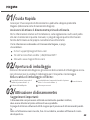
Unpacking the Box
Thank you for purchasing Magene Dual-Sided Crank Power Meter.
(Hereinafter referred to as Magene Power Meter).
For information regarding crank installation and adjustment not covered in this-
guide, please refer to your bicycle dealer's instruction manual.
Take Magene Power Meter and its parts out of the box and keep the original package
for future storing and transporting.
E-mail: support@magenefitness.com
Phone: (+86)400-662-8297
Website: www.magenefitness.com
If you have any questions about the power meter module,
please contact us.
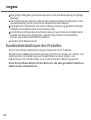
Left power crank
Charging line
Right power crank
1

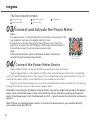
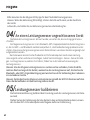
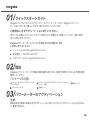
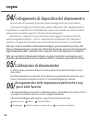
Connect and Activate the Power Meter
Connect the Power Meter Device
Note:
The box should contain:
The power meter is not activated and cannot be used normally; the
new product must be activated for the first time.
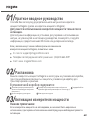
Android users to enter the google Store(iPhone users from the
Appstore) to search for the "Magene Utility" app and download it.
Follow the prompts to activate your power meter.
Note:
If the activation fails, please click back to enter the device
search list and reconnect to activate.
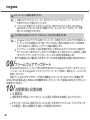
Magene Power Meter can be connected to power device after activation.
Typically, most bike computers can search for and add power meter equipment in the settings
through the settings>sensors>new>sensor>power meter.
Note:When searching for the Magene Power Meter, step on the pedal connected to the power
meter crank so that the power meter can detect the torque therefore waking up the power
meter from Sleep mode, start the Bluetooth or ANT + signal broadcast and wait for a device to
connect.
Note:If there are multiple power meters in the current environment, you need to identify
your power meter by ANT+ ID.
Magene Power Meter is a Bluetooth and ANT+ dual-protocol power meter that is compatible
with ANT+ and Bluetooth devices that support the standardized power meter protocol. Using this
protocol the power meter's measured data can be viewed and recorded.
Quick start Guide Accessory Bag
Charging line
Right power crank
2
Left power crank
Scan to download
Magene Utility

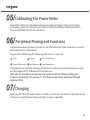
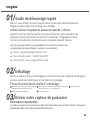
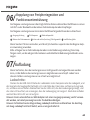
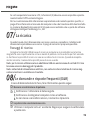
Calibrating The Power Meter
Charging
Peripheral Pairing and Functions
Zero offset calibration will calibrate the power meter to 0 power when at rest. When
calibrating, please turn the left crank in the vertical ground down state and use ANT+
Device or MACENE UTILITY for calibration.
Magene Power Meter wirelessly transmits ride information to a bike computer or receiver
that support ANT+ or Bluetooth.
Magene Power Meter logs the following information as you ride.
This product transmits the following information wirelessly to cycle computers or receiv-
ers that support ANT+ or Bluetooth LE connections.
Note:The 4,5,6 wireless receiver can only be used in part of the Apps of Magene.
If you are purchasing LITE version, 4 / 5 / 6 features need to be purchased through
Magene Utility.
When you find that the power meter is unable to search for a connection, the power meter
may have run out of power. Please charge it as soon as possible.
Power
Torque Effectiveness
Cadence
Pedal Balance
Remaining Battery
Pedal Smoothness
3

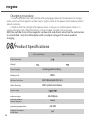
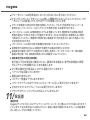
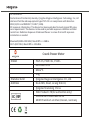
Product Specifications
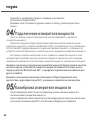
Charging procedure:
Left Crank Power
Power Accuracy
Weight
Power Supply rechargeable battery
200h
ANT+Bluetooth BLE 4.2
IPX7 splash resistance
Working Life
Water Proofing
Wireless Interface
power range
cadence range
external cadence
sensor magnets
operating temperature
reuqires zero-point
calibration yes
none
20-240rpm
-10-50C
Right Crank Power
1. Insert one end of the USB interface of the charging cable into the computer or charger,
and a section of the magnetic suction head is slightly close to the power meter body to make it
absorb naturally.
2.Confirm that the red light of the power meter is always on, and the power meter is in
normal charging state. When the battery is fully charged, the light will turn green.
NOTE:Do not short circuit the magnetic suction end, and do not adsorb on the metal when
it is electrified . Only the USB adapter with an output voltage of 5V can be used for
charging.
4

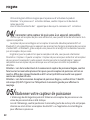
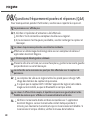
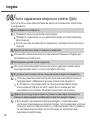
Q&A
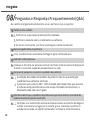
Please refer to the following if you have any questions in the process of using
Magene Power Meter.
If none of the above is applicable or the problem is not solved,please consult
online customer service or dealers
Check to see if activation has been performed.
Check whether the bike computer or software has been connected.
If the connection cannot be made, please charge your power meter.
Do zero offset calibration by your bike computer or Magene Utility.
Please place the bicycle on the flat ground, make sure the left crank is
straight down and try again.
Undisplayed power.
The power has obvious deviation.
Zero point calibration failure.
Torque Effectiveness/Pedal Balance/Pedal Smoothness of right crank power
meter is 0 .
Use the Magene Utility to check if the right side is connected. After static
setting the crank 1 min, don't touch it Rotate the crank to see if the
connection state is restored, if not, check the battery power.
If the problem occurs after the upgrade fails, check that the ID of the
right crank(see the ant+ID number on the
sticker on the crank) appears in the device list, if so, click the connection,
upgrade the device and re-check the
connection status.
5

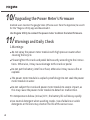
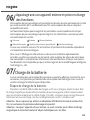
Upgrading the Power Meter's Firmware
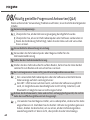
Warnings and Daily Check
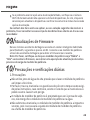
1.Warnings:
Do not spray the power meter module with high pressure water when
cleaning the bicycle.
Android users to enter the google Store (iPhone users from the Appstore) to search
for the "Magene Utility app and download it.
Use Magene Utility to connect the power meter to obtain the latest firmware.
Please tighten the crank and pedal bolts exactly according to the instruc-
tions. Otherwise, it may cause damage to the crank or pedal.
Do not put the battery into fire or heat, otherwise it may cause a fire or
explode.
The power meter module is a splash-proof design.Do not soak the power
meter module in water.
Do not subject the crank and power meter module to severe impact, as
this may cause the power meter module to detach or malfunction.
In temperatures below-(minus) 10℃, the battery life will decay rapidly.
Use neutral detergent when washing cranks. Use of alkaline or acidic
detergents or thinners may shorten the life of the sensor case.
6

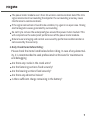
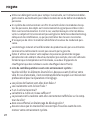
2.Daily Check Items Before Riding:
The power meter module users the 2.4G wireless communication band.The 2.4G
signal environment surrounding the objector the surrounding area may cause
interference to communications.
If the signal connection is found to be unstable, try again in an open area. Strong
electromagnetic waves generated by surrounding.
Do not try to remove the waterproof glue around the power meter module! This
will compromise the waterproof performance of the power meter module.
Please check the items listed below before riding. In case of any abnormal-
ity, it is recommended to seek professional technicians for maintenance
and debugging.
Are there any cracks in the crank arms?
Are the fastening sections fixed securely?
Are the bearing sections fixed securely?
Are there any abnormal noises?
Is there sufficient charge remaining in the battery?
Natural wear and aging and normal use caused by performance deterioration is
not covered by the warranty.
7

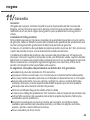
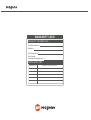
WARRANTY CARD
Warranty Clause product:
Warranty Clause:
The following situations are not covered by warranty:
Thank you for purchasing Magene Dual-Sided Crank Power Meter. Please carefully
read the Warranty Clause.
Beyond the warranty period.
No valid warranty certificate.
Damage caused by improper use and maintenance.
The product code on the warranty card does not match the product.
Unauthorized maintenance, modification, use of parts other than the product.
Damage caused by irresistible factors.
Damage caused by not using or installing the product in accordance with the
instructions.
Alter warranty card without authorization.
Other failures and damages caused by non-product design, manufacturing,
quality, etc.
Wear and dirt caused by normal operation, such as scratch, bump, etc.
After the warranty expires, we continue to provide maintenance service for
which will be charged related service fee.
The warranty period for Magene chainring is 360 days from the activation data.
The warranty period for Magene power meter and crank is 720 days from the
activation date.
The warranty does not cover any problem that is caused by: conditions, malfunc-
tions or damage not resulting from defects in material or workmanship. The fees of
shipping back to us for repair shall not be reimbursed and no fees shall be charged
for our shipping back to you.
This product has passed the strict quality inspection. Failure caused by product
quality problem under normal use, we will give free warranty within the warranty
period.
8The company retains the rights to modify and explain above-mentioned contents.

感谢您购买迈金双协议曲柄功率计(简称迈金功率计)。
左功率曲柄(包含左功率模块-a)
快速入门指南 配件袋
右功率曲柄(包含右功率模块-b和齿盘-c) 充电线
本说明书中未提示的曲柄安装、调节及使用信息,请遵循Shimano或您的自行车经销商提
供的信息。
从包装箱内取出迈金功率计及配件,并且务必保留保护包装箱用于运输、储存。
功率计不激活的状态,无法正常使用;新产品首次使用必须进行激活。
关于迈金功率计的产品咨询和疑问,请联系我们。
电子邮箱: support@magenefitness.com
售后电话:(+86)400 -662-8297
网站:www.magenefitness.com
产品咨询及售后
官方唯—渠道
9
快速入门指南
开箱
激活功率计
请务必激活功率计后方可使用。
包装箱内包含:
重要提示:

安卓用户需要进入Google store(IOS用户使用App-
store)搜索“Magene Utility”安装并激活。
注意:如激活失败,请点击返回,进入设备搜索列表后
重新连接激活。
功率计激活后,可尝试连接功率设备;
零点校准将校准功率计静止状态下的0功率值;
迈金功率计为蓝牙、ANT+双协议曲柄功率计,可与支持标准功率协议的ANT+与蓝
牙设备兼容,通过这些设备可以查看和记录功率计所测得数据。
通常码表类产品可通过设置-传感器-新增传感器-功率计来搜索并添加功率计设
备, 具体操作步骤请查看您所使用的功率计设备使用说明。
校准时,请将左曲柄处于垂直地面朝下的状态 ,使用ANT +码表或迈金助手进行校准。
注意:搜索并连接迈金功率计时,请踩踏曲柄数周,唤醒功率计进入工作状态,开始
蓝牙或ANT+信号广播,并等待码表等设备连接。
注意:连接迈金功率计时,请根据左曲柄贴纸上的ANT+ID号与功率计设备进行连接。
10
连接功率计设备
校准功率计

迈金功率计可记录您骑行过程中的以下参数信息:
充电步骤:
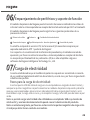
如果您购买的是LITE版本,4/5/ 6功能需通过迈金助手APP 单独购买。
当您发现功率计无法搜索连接,可能功率计电池已经耗尽,此时请尽快充电。
输出功率
扭矩效益
踏频
左右(功率)平衡
电池电量
踩踏平顺度
迈金功率计通过无线方式将骑行中的数据信息传送至 ANT +或蓝牙连接的自行车
码表或接收器。
有关显示以上信息及具体操作方法,请参阅您的自行车码表或接收器的手册,其中
参数4/5/ 6的Bluetooth接收,仅能用于迈金智能科技有限公司的部分软件。
将充电线USB接口—端插入电脑或充电器,磁吸头部分分别靠近左右功率模块使其
接通,观察充电指示LED 灯,红灯点亮,表示正在充电,充满后,LED 由红色转为绿色。
注意:只可使用输出电压为5v的USB适配器进行充电,过高的电压会造成产品损坏。
注意:通电状态下,请勿将磁吸充电头短接或与金属接触。
11
外设配对及功能支持
充电

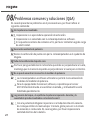
使用过程中如有问题,请参见以下内容:
1.检查是否已经执行激活操作
2.检查是否与码表或软件连接
3.如始终无法连接,请充电后重试
使用码表或迈金助手进行零点校准
请竖直于地面放稳自行车,保持左曲柄垂直于地面后重试
1.所用码表或软件不支持功率计数据的显示
功率无显示
功率有明显偏差
零点校准失败
无法搜索、连接功率计
扭矩效益,左右功率平衡,踩踏平顺度右边显示为0
2.运行软件的设备有可能所用ANT+ USB 传感器损坏或者没有安好,蓝牙有可
能没有打开
1.使用迈金助手检查右侧是否连接,静置曲柄1 分钟后,转动曲柄,看连接状态
是否恢复,未恢复则请检查电池电量
12
常见问题及解答(Q&A)

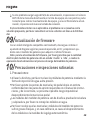
1.注意事项:
使用支持蓝牙的智能手机按照03的操作步骤下载安装迈金助手,通过迈金助手与功
率计连接以获取最新固件。
请严格按照说明书要求的扭力锁紧曲柄和脚踏螺栓,否则有可能造成曲柄或脚踏
脱落造成危险。
清洗曲柄时请使用中性洗涤剂,使用碱性洗涤剂或稀释剂可能导致功率模块外壳
寿命缩短。
清洁自行车时请勿使用高压喷水的方式冲洗功率模块。
功率计模块为防喷溅设计,请勿将功率计模块浸泡在水中。
请勿使曲柄和功率计模组遭受严重撞击,这将造成功率计模组脱落或应变计失效。
2.如该问题是在升级失败之后出现,检查右曲柄的ANT+ID 号是否出现在设备
列表,如果是,则点击连接,进行设备升级,升级后重新检查连接状态。
如果以上内容均不适用,或建议的解决方案未解决问题,请咨询在线客服
或经销商。
注意:固件升级请保证功率计电量为“中”、“高”状态,或在功率计充电过
程进行升级操作。
13
固件更新
注意事项及日常检查

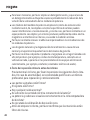
2.骑行前日常检查项目:
功率计模组使用2.4G无线通信系统,物体或周围讯号环境可能会对通信造成干扰,
如发现请在空旷地带再次尝试。物体和环境可能会产生强烈的电磁波和干扰,这可
能会导致错误的测量。
请勿在高温或潮湿的场所(例如高温天气放置在封闭车辆内,或者暖气、电油汀等
加热电气周边)长期使用或存放。
请勿尝试将功率模块周围的防水胶去除。
紧固部分是否牢固?
轴承是否牢固?
是否有任何异常噪音?
电池余量充足吗?
功率和踏频是否正确显示在自行车码表上?
是否已经执行零偏移校准?
在开始骑行之前请确认曲柄无龟裂现象。
因正常使用及老化所产生的自然居损及性能劣化不在保修范围内。
骑车前请检查下面所列的项目。当有异常时,建议寻求专业技师的帮助进行维
修和调试。
14

保修条款:
三包内容:
以下情况不属于三包范围:
产品售后服务期限:
本公司保留上述内容的修改权和解释权。
感谢您购买迈金双协议曲柄功率计,请认真阅读以下条款。请认真填写此卡,并妥善保管,以确保产
品得到有效保修。
本公司为产品提供终身售后服务。
产品超出质保期后 ,产品故障维修时只收取人工与配件成本费 ,人为损坏只收取人工与配件成本费 。
本产品已通过严格的质量检验,根据本保修卡说明,凡正常使用情况下由产品质量问题造成的故障,
在质保期限内,我们将予以免费保修。
功率计模组和曲柄部分质保期限为24个 ,盘片部分质保期限为12个月。以出售时间为准,无出售时
间,以出厂日期为准。产品质保返修需使用原厂包装并选择指定物流运输,否则将由用户承担运费或
运输造成的损失。
购买之日起 7天内(含),出现产品本身的质量问题,无条件退换。
超出三包有效期限。
因使用、维护及保管不当造成的任何损坏。
未按照说明书使用或安装造成的产品损坏。
未经授权的维修、误用、碰撞、疏忽、滥用、进液、事故、改动、不明确的使用非本产品配件。
擅自涂改三包凭证。
无有效的三包凭证及有效发票。
三包凭证上的产品编号或编码与商品实物不相符 。
其他非产品本身设计、制造、质量等问题而导致的故障和损坏。
正常使用造成的磨损、脏污如:划痕,以及因接触化学试剂、接触尖锐物体、掉落、挤压等人为因素导
致的损坏。
不可抗拒因素造成的损坏。
15
保修卡

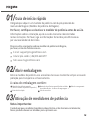
Guia de início rápido
Abrir embalagem
Ativação de medidores de potência
Notas importantes:
A caixa de embalagem contém:
Obrigado por adquirir um medidor de potência com duplo protocolo de
manivela de Magene (Medidor de potência de Magene).
Por favor, certifique-se de ativar o medidor de potência antes de usá-lo.
Informações sobre a instalação, ajuste e uso da manivela não solicitadas
nestas instruções. Por favor, siga as informações fornecidas pela Shimano ou
por seu revendedor de bicicletas.
O estado em que o medidor de potência não está ativo e não funciona corretamente;
Novos produtos devem ser ativados para o primeiro uso.
Retire o medidor de potência e os acessórios da caixa e mantenha sempre a caixa de
proteção para transporte e armazenamento.
E-mail: support@magenefitness.com
Celular pós-venda: (+86)400-662-8297
Site: www.magenefitness.com
Para consultas e perguntas sobre o medidor de potência de Magene,
por favor, entre em contato conosco.
Manivela de potência esquerda
(inclui o módulo de potência esquerdo-a)
Guia de início rápido Saco de acessórios
Cabo de carregamento
Manivela de potência esquerda (Inclui o módulo
de potência direito - b e discos de engrenagem - c
16

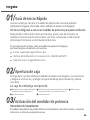
Calibração do medidor de potência
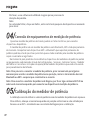
Conexão de equipamentos de medição de potência
A calibração zero irá calibrar o valor de potência zero do medidor de potência em repouso.
Para calibrar, coloque a manivela esquerda em posição vertical com o solo voltado para
baixo e use o ANT + cronômetro ou o assistente de Magene para a calibração.
Por favor, use o software de utilidade magene para o processo de
ativação do produto.
Nota:
Se a ativação falhar, clique em Voltar, entre na lista de pesquisa do dispositivo e reconecte
para ativar.
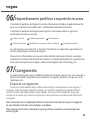
Quando o medidor de potência é ativado, podem ser feitas tentativas para conectar
dispositivos de potência.
Normalmente para produtos de cronômetro, dispositivos de medidores de potência podem
ser pesquisados e adicionados através de Configurações - Sensores - Adicionar Sensor - Medidor
de Potência. Consulte as instruções de operação do medidor de potência que você está usando
para procedimentos detalhados.
Nota: Para procurar e conectar o medidor de potência, pisar na manivela por algumas
semanas para acordar o medidor de potência em operação, iniciar a transmissão do sinal
Bluetooth ou ANT+ e esperar que cronômetro se conecte.
Nota: Para conectar o medidor de potência de Magene, por favor siga o número ANT+ID no
adesivo da manivela esquerda para conectar ao dispositivo de medição de potência.
O medidor de potência é um medidor de potência com Bluetooth, ANT+ de duplo protocolo
de manivela. Compatível com dispositivos ANT+ e Bluetooth que suportam protocolos de
potência padrão, estes dispositivos permitem que os dados medidos pelo medidor de potência
sejam visualizados e registrados.
17
La page est en cours de chargement...
La page est en cours de chargement...
La page est en cours de chargement...
La page est en cours de chargement...
La page est en cours de chargement...
La page est en cours de chargement...
La page est en cours de chargement...
La page est en cours de chargement...
La page est en cours de chargement...
La page est en cours de chargement...
La page est en cours de chargement...
La page est en cours de chargement...
La page est en cours de chargement...
La page est en cours de chargement...
La page est en cours de chargement...
La page est en cours de chargement...
La page est en cours de chargement...
La page est en cours de chargement...
La page est en cours de chargement...
La page est en cours de chargement...
La page est en cours de chargement...
La page est en cours de chargement...
La page est en cours de chargement...
La page est en cours de chargement...
La page est en cours de chargement...
La page est en cours de chargement...
La page est en cours de chargement...
La page est en cours de chargement...
La page est en cours de chargement...
La page est en cours de chargement...
La page est en cours de chargement...
La page est en cours de chargement...
La page est en cours de chargement...
La page est en cours de chargement...
La page est en cours de chargement...
La page est en cours de chargement...
La page est en cours de chargement...
La page est en cours de chargement...
La page est en cours de chargement...
La page est en cours de chargement...
La page est en cours de chargement...
La page est en cours de chargement...
La page est en cours de chargement...
La page est en cours de chargement...
La page est en cours de chargement...
La page est en cours de chargement...
La page est en cours de chargement...
La page est en cours de chargement...
La page est en cours de chargement...
La page est en cours de chargement...
La page est en cours de chargement...
La page est en cours de chargement...
La page est en cours de chargement...
La page est en cours de chargement...
La page est en cours de chargement...
La page est en cours de chargement...
La page est en cours de chargement...
La page est en cours de chargement...
La page est en cours de chargement...
La page est en cours de chargement...
-
 1
1
-
 2
2
-
 3
3
-
 4
4
-
 5
5
-
 6
6
-
 7
7
-
 8
8
-
 9
9
-
 10
10
-
 11
11
-
 12
12
-
 13
13
-
 14
14
-
 15
15
-
 16
16
-
 17
17
-
 18
18
-
 19
19
-
 20
20
-
 21
21
-
 22
22
-
 23
23
-
 24
24
-
 25
25
-
 26
26
-
 27
27
-
 28
28
-
 29
29
-
 30
30
-
 31
31
-
 32
32
-
 33
33
-
 34
34
-
 35
35
-
 36
36
-
 37
37
-
 38
38
-
 39
39
-
 40
40
-
 41
41
-
 42
42
-
 43
43
-
 44
44
-
 45
45
-
 46
46
-
 47
47
-
 48
48
-
 49
49
-
 50
50
-
 51
51
-
 52
52
-
 53
53
-
 54
54
-
 55
55
-
 56
56
-
 57
57
-
 58
58
-
 59
59
-
 60
60
-
 61
61
-
 62
62
-
 63
63
-
 64
64
-
 65
65
-
 66
66
-
 67
67
-
 68
68
-
 69
69
-
 70
70
-
 71
71
-
 72
72
-
 73
73
-
 74
74
-
 75
75
-
 76
76
-
 77
77
-
 78
78
-
 79
79
-
 80
80


Magene P325CS Mode d'emploi
- Catégorie
- Accessoires de vélo
- Taper
- Mode d'emploi
dans d''autres langues
- italiano: Magene P325CS Guida utente
- español: Magene P325CS Guía del usuario
- Deutsch: Magene P325CS Benutzerhandbuch
- português: Magene P325CS Guia de usuario
- 日本語: Magene P325CS ユーザーガイド
Autres documents
-
Pioneer SGY-PM900H90 Guide d'installation
-
Bontrager RIDEtime Elite Computer/Duo Trap S Sensor Le manuel du propriétaire
-
-
-
 Stages cycling Stages Power Manuel utilisateur
-
Yamaha PW-SE Original Instructions Manual
-
Matrix CXM Le manuel du propriétaire
-
WUBEN E62 Manuel utilisateur
