La page est en cours de chargement...

- 4 L supports (B)
- 4 supports en L (B)
- 2 angle brackets (C)
- 2 montants en angle (C)
- 2 upper legs (D)
- 2 pattes supérieures (D)
- 2 lower legs (E)
- 2 pattes d’ajustement (E)
- 1 wall mounting bracket Proslat version (H)
- 1 support pour mur Proslat (H)
- 1 crossmember (G)
- 1 montant central (G)
PIÈCES FOURNIES / COMPONENTS
- 1 x 1.5” bamboo top (A) / surface en bambou de 38mm (A)
- 10 x wood screws, hex head 5/16 x 1“ / vis à bois 5/16 x 1-1/4”
- 4 x wood screws, hex head 5/16 x 2-1/2” / vis à bois 5/16 x 2-1/2”
- 8 x bolts, hex head 1/4” x 2-3/4“ / boulons à tête hexagonale 1/4” x 2-3/4“
- 2 x bolts, hex head 1/4 x 2-1/2” / boulons à tête hexagonale 1/4 x 2-1/2”
- 10 x nuts, hex 1/4” / écrous 1/4“
- 1 x drill bit to pre-drill holes in bamboo top* / mèche pour pré-percer les trous dans la surface en bambou*
*Make sure the spacer is on tight before pre-drilling / S’assurer que l’espaceur est bien serré avant de pré-percer
- 4 wall mounting brackets standard version (F)
- 4 supports pour mur standard (F)
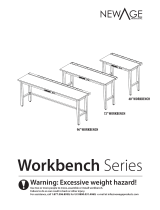
WORK BENCH
BANC DE TRAVAIL
PLEASE DO NOT TAKE THIS PRODUCT BACK TO THE STORE!
PLEASE CALL: 1-888-691-2944 or EMAIL info@proslat.com
SVP, NE PAS RAPPORTER CE PRODUIT AU MAGASIN!
VEUILLEZ NOUS CONTACTER AU 1-888-691-2944 ou info@proslat.com

Insert lower leg (E) into upper leg (D) and
bolt together with 5/16" X 2-3/4" bolt and
nut. Hand tighten at this stage as you may
have to adjust your nal height once
assembled. Repeat with other leg.
Insérer la patte d’ajustement (E) dans la patte
supérieure (D) de façon à ce que les trous
soient du même sens. Serrez légerement le
boulon à tête hexagonale 5/16” X 2-3/4” dans
l’écrou an de pouvoir ajuster facilement la
hauteur du banc de travail à la n de
l’installation. Répéter avec l’autre patte.
Placer la surface en bambou (A) contre le sol et position-
ner les pattes assemblées à deux 2” du devant de la
surface. Pré-percer les trous avec la mèche fournie. Visser
avec les vis à bois 1-1/4”. (Une paire de main de plus est
suggérée pour cette étape)
*Les écrous doivent être orientés vers le mur.
Lie your bamboo top (A) upside down and position your
front legs 2" from the front lip. Pre-drill holes with
supplied drill bit. Screw in using 1-1/4" hex screws. (An
extra set of hands for this step is suggested)
*Nuts should be facing towards the wall.
Installer les supports en angle (C) avec un boulon
à tête hexagonale 5/16”-18 X 2-1/2“ dans le
dernier trou de chaque patte supérieure (D) et
dans la surface en bambou avec les vis 5/16 X
1-1/4”.
First install your angle brackets
(C) on both legs using 5/16" X
2-1/2" to upper leg (C) and 5/16" X
1-1/4" into bamboo work-surface
(A).
STEP/ÉTAPE 1
STEP/ÉTAPE 3 STEP/ÉTAPE 4
STEP/ÉTAPE 2
RIGHT SIDE/CÔTÉ DROIT
LEFT SIDE/CÔTÉ GAUCHE
x 2
Assemble the
crossmember (G) to
each leg using L
brackets (B) and 5/16" X
2-3/4" bolts. Tighten
with wrench as
illustrated.
Ensure all bolts are on
the same side.
Joindre les pattes au
montant central (G) à
l’aide des supports en
L(B). Serrer huit (8)
boulons 5/16 x 2-3/4”
avec les écrous tel
qu’illustré. S’assurer de
bien les serrer.
Assurez-vous que tous
les écrous sont du
même côté.

Positionner le support pour mur Proslat (H) dans le
mur à la hauteur désirée. Appuyer la surface en
bambou (A) contre le support.
Fixer la surface en bambou (A) au support pour mur
Proslat (H) à l’aide de 4 vis à tête hexagonale 5/16”x
1-1/4”. Une fois vissé, ajuster la hauteur avec les
pattes inférieures (E).
If you are installing this workbench into a
Proslat wall, place the wall support (H) into you
wall to the desired height. Place the bamboo
top (A) on the Proslat bracket (H).
Screw the wall support into the bamboo top (A)
with 5/16 x 1-1/4" hex screws. Once screwed
adjust the height with the lower legs (E).
If you are installing this workbench
on a wall without Proslat, rst nd
your stud locations on your wall and
mark them. Screw the 4 wall
supports using 5/16” X 2-1/2” screws
into the studs. The work bench will
lay on top of the supports. Once
done place your workbench on the
supports against the wall and screw
into the bamboo top (A). Once
screwed adjust the height with the
lower legs (E).
Si vous installez le banc de travail sur
un mur standard, trouvez d’abord les
montants du mur et marquez leur
positionnement. Vissez un support en
utilisant les vis à tête hexagonale
5/16” X 2-1/2” dans chaque montant
contre lesquels le banc de travail sera
appuyé à la hauteur désirée. Une fois
terminé, installez votre banc de travail
contre le mur et vissez les supports
dans la surface en bambou (A).
Ajustez la hauteur à l’aide des pattes
d’ajustement (E).
STEP/ÉTAPE 5 (VERSION STANDARD)
STEP/ÉTAPE 5 (VERSION PROSLAT)

This document details the Proslat Limited Warranty for all new work bench purchased anywhere in North America. This Limited
Warranty extends only to the rst retail purchaser of the cabinet.
Limited Warranty. Proslat warrants its cabinets against defects in material or workmanship for a period of ten (10) year from the date of
purchase. Proslat will replace any defective work bench as long as it was installed and maintained according to the printed instructions.
Any Proslat work bench replaced under the terms of the Limited Warranty inherits the remaining warranty period from the original
purchase.
Exlusions. The Proslat Limited Warranty does not cover the following:
- Damage that results from improper installation or misuse or abuse;
- Damage due to acts of God, re, or accident;
- Damage that results from overloading cabinet;
- The cost of labor or accessory materials; and
- Shipping cost to return defective products.
Limitations of Warranty. The above Limited Warranty is the exclusive warranty for Proslat work bench.
Proslat disclaims all other warranties, express or implied, including any implied warranties or merchantability, tness for particular
purpose or otherwise. If you live in an area where consumer law prohibits this disclaimer, the above Limited Warranty will not extend the
time period of any such implied warranty.
Obtaining Limited Warranty Service :
For warranty service, call 1-888-691-2944 or email info@proslat.com . You will need your original proof of purchase and photos to
illustrate the claimed defect.
GARANTIE LIMITÉE DU BANC DE TRAVAIL PROSLAT.
Proslat garantit à l’acheteur original que son produit est exempt de défauts de matériaux ou de main d’œuvre pour une
période de dix (10) ans à partir de la date d’achat. Proslat remplacera tout banc de travail défectueux en autant que les
conditions d’installation et d’entretien inscrites dans le manuel d’instructions sont respectées. Dans le cas d’un
remplacement du produit encore sous garantie, la période de garantie restante à partir de la date d’achat originale
s’appliquera.
Exclusions. La présente garantie ne couvre pas :
1.les dommages causés par une installation inadéquate, un usage inapproprié ou abusif; un cas fortuit ou accidentel tel
qu’un incendie ou
2. une inondation;
3. les éraures, chocs ou ssures n’aectant pas la résistance du produit;
4. la surcharge de la capacité maximale de charge du produit; les dommages en surface causés par une interaction
5. chimique;
6. les frais de main d’œuvre et de matériaux
7. les frais d’expédition pour le retour ou l’échange d’un produit défectueux
LIMITATION DE LA GARANTIE. CETTE GARANTIE S’APPLIQUE EXCLUSIVEMENT AU BANC DE TRAVAIL PROSLAT ET
REMPLACE TOUT AUTRE GARANTIE EXPRESSE OU IMPLICITE, INCLUANT TOUTE GARANTIE DE QUALITÉ MARCHANDE ET
D’ADAPTATION À UN USAGE PARTICULIER. CERTAINES JURIDICTIONS NE PERMETTENT PAS LES LIMITATIONS OU EXCLUSIONS
ÉNONCÉES CI-DESSUS ET, PAR CONSÉQUENT, CES LIMITATIONS OU EXCLUSIONS POURRAIENT NE PAS S’APPLIQUER.
POUR OBTENIR LE SERVICE PRÉVU PAR LA GARANTIE, APPELEZ SANS FRAIS AU CANADA ET AUX ÉTATS-UNIS AU
1-888-691-2944 OU CONTACTEZ-NOUS PAR COURRIEL À info@proslat.com . Vous devrez fournir une preuve d’achat
original ainsi que des photos illustrant la réclamation.
/