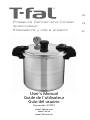
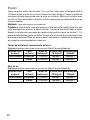
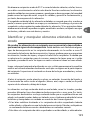
Tefal P3105231 Manuel utilisateur
- Catégorie
- Autocuiseurs
- Taper
- Manuel utilisateur

www.t-falusa.com
www.t-fal.ca
www.t-fal.com.mx
User’s Manual
Guide de l’utilisateur
Guía del usuario
Para modelo : P31052
EN
FR
ES
Pressure Canner and Cooker
Autocuiseur
Enlatadora y olla a presión

3
1
2
1 2 3
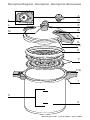
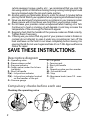
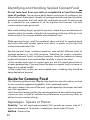
Descriptive Diagram - Description - Descripción de las piezas
*depending on model - *selon le modèle - *según modelo
A
G
D
B
C
E
N
F(a)
F(b)
H
I*
J
K
L
M
O

Fig 3a*
Fig 4
2
3
1
3
Fig 6
Fig 7
Fig 1
3
1
2
1 2 3
Fig 5
Fig 8 Fig 9
Fig 10
Fig 12
3
1
2
1 2 3
Fig 14
3
1
2
1 2 3
Fig 13
3
1
2
1 2 3
Fig 11bis
Fig 2
3
1
2
1 2 3
Fig 3b*
Fig 11
*depending on model - *selon le modèle - *según modelo

1
EN
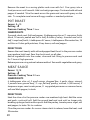
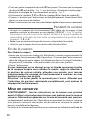
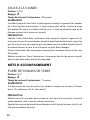
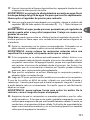
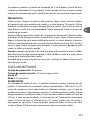
IMPORTANT SAFEGUARDS
When using pressure cookers, basic safety precautions should always be
followed :
1. Read all instructions.
2. Do not touch hot surfaces. Use handles or knobs.
3. Close supervision is necessary when the pressure cooker is used near
children.
4. Do not place the pressure cooker in a heated oven.
5. Extreme caution must be used when moving a pressure cooker containing
hot liquids.
6. Only use the pressure cooker for the intended use.
7. This appliance cooks under pressure. Improper use may result in a scalding
injury. Make certain unit is properly closed before operating. See “Operating
Instructions”.
8. Do not fill the unit over 2/3 full. When cooking foods that expand during
cooking such as rice or dried vegetables, do not fill the unit over 1/3 full.
Overfilling may cause a risk of clogging the vent pipe and developing excess
pressure. See “Food Preparation Instructions”.
9. Be aware that certain foods, such as applesauce, cranberries, pearl
barley, oatmeal or other cereals, split peas, noodles, macaroni, rhubarb, or
spaghetti can foam, froth, and sputter, and clog the pressure release device
(steam vent). These foods should not be cooked in a pressure cooker.
10. Always check the pressure release devices for clogging before use.
11. Do not open the pressure cooker until the unit has cooled and all internal
pressure has been released. If the handles are difficult to push apart, this
indicates that the cooker is still pressurized – do not force it open. Any
pressure in the cooker can be hazardous. See “Operating Instructions”.
12. Do not use this pressure cooker for pressure frying with oil.
13. When the normal operating pressure is reached, turn the heat down so that
all the liquid, which creates the steam, does not evaporate.
14. Always pour a minimum amount of at least 2 L (64 oz) of liquid in the unit.
See «Operating Instructions.
15. For food that expands during cooking, such as rice, dried vegetables or fruit
compotes, never fill your pressure cooker over one third. For some soups, like
pumpkin or courgette, leave your pressure cooker to cool down for a few
minutes, then cool it down entirely by placing it in a bowl of cold water.
16. Always be aware that certain foods, such as cranberries, spelt, millet,
currants, etc., can create moss and squirt, clogging the pressure-relief device
(vent). These foods should not be cooked in a pressure cooker.
17. Never make a recipe with animal milk in your pressure cooker.
18. Do not use rock salt in your pressure cooker, but rather add table salt when
the cooking is nearly finished.
19. When cooking large pieces of meat and food with a surface skin layer

2
(whole sausages, tongue, poultry, etc.) : we recommend that you prick the
skin using a knife or fork before cooking. During cooking, boiling liquid could
become trapped under the skin and create spatters.
20. Alcohol vapors are flammable. Bring to a boil for about 2 minutes before
placing the lid. Watch your appliance when preparing alcoholbased recipes.
21. Never use aluminium foil unsecured on a container in your pressure cooker.
Always secure with string. Never use cling film in your pressure cooker.
22. Do not leave your pressure cooker unsupervised when heating oil or fats.
Continuing to heat a smoking oil will degrade it and may increase the
temperature of the oil enough for flames to appear.
23. Regularly check that the handles of the pressure cooker are fitted correctly.
Tighten them if necessary
24. If during use you notice that any part of your pressure cooker is broken or
cracked, do not attempt to open it under any circumstances; turn off the
heat and leave on the hob to cool down completely before moving it or
opening the lid. Do not use it again and take it to a T-FAL Approved Service
Center for repair.
SAVE THESE INSTRUCTIONS.
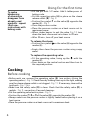
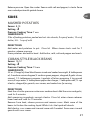
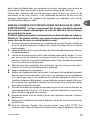
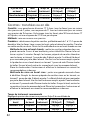
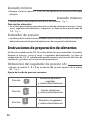
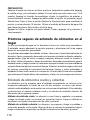
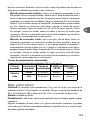
Descriptive diagram
A - Operating valve
B - Steam release outlet
C - Pressure indicator
D - Safety valve (under the lid cen-
tral knob)
E - Short lid handle
F(a) - Lid position indicator
F(b) - Lid position indicator located
on the handles of the pot
G - Pressure gauge
H - Lid gasket
I - Canning rack
J - Short pot handle
K - Pot
L - Operating valve position marker
M - Lid central knob
N - Stop
O - Maximum levels (max 1/3 - max
2/3)
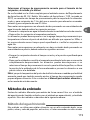
Compulsory checks before each use
Checking the operating valve

3
EN
Check that the draining hole of the operating valve is not obstructed.
Checking the safety valve
Check that the bearing of the safety valve can move (use a batonet).
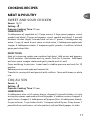
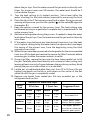
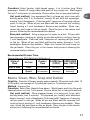
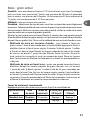
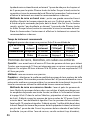
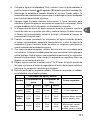
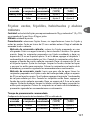
Characteristics
Base diameter of the pressure cooker according to
model number Basic specifications:
Upper operating pressure: 103 kPa/15 psi.
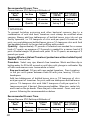
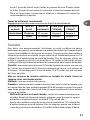
Compatible heat sources
• On a gas hob, the flame must never
exceed the diameter of the pressure
cooker base.
• Make sure your pressure cooker is
centered on the heat source.
• Do not use pressure canner and cooker on other electrical hobs.
• Do not use pressure canner and cooker on any outdoor heat source such
as a gas burner for a turkey fryer. This type of burner will soften the canner
causing the bottom to warp. It may also result in property damage and/or
personal injury. In addition, the food may not be safely processed.
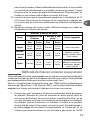
Capacity Ø Pot Ø Base Model Material of
pot and lid
20,8L/22Qt 31 cm 19 cm
P31052
Aluminium
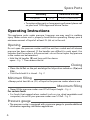
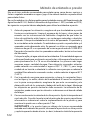
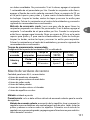
USING
POTHOLDERS
GAS SEALED
PLATE
ELECTRIC
CERAMIC
HALOGEN INDUCTION
ELECTRIC
COIL

4
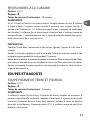
Spare Parts
Accessory Reference number
Lid gasket 22 Qt US-7114001204
• To replace other parts or have repairs performed, please call
on your local T-FAL Approved Service Center.
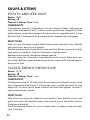
Operating Instructions
This appliance cooks under pressure. Improper use may result in scalding
injury. Make certain unit is properly closed before operating. Always pour a
minimum amount of liquid of at least 2 L (64 oz) in the unit.
Opening
Do not open the pressure cooker until the unit has cooled and all internal
pressure has been released. If the handles are difficult to push apart, this
indicates that the cooker is still pressurized – do not force it open. Any pressure
in the cooker can be hazardous.
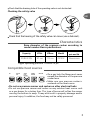
• Hold the lid handles (E) and turn until the device
opens - Fig. 1. Then remove the lid.
Closing
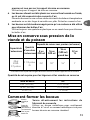
• Place the lid flat on the pot and align the lid position indicators (F(a) and
F(b)).
• Turn the lid until it is closed. - Fig. 2.
Minimum filling
• Always put at least 64 oz (2 L) of liquid in the pressure cooker when in use.
Maximum filling
• Never fill the pressure cooker over 2/3 of the pot height - Fig. 4.
For certain foods
• For foods that expand when cooked (such as rice, dried vegetables and
compotes), do not fill your pressure cooker over 1/3 full - Fig. 4.
Pressure gauge
• The pressure cooker is equipped with a pressure gauge to provide additional
information regarding sterilisation applications.

5
EN
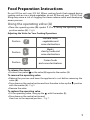
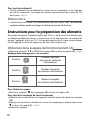
Food Preparation Instructions
Do not fill the unit over 2/3 full. When cooking foods that expand during
cooking such as rice or dried vegetables, do not fill the unit over 1/3 full. Over
filling may cause a risk of clogging the steam release outlet and developing
excess pressure.
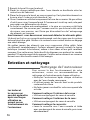
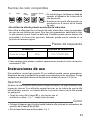
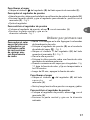
Using the operating valve (A)
• Place the operating valve (A) symbol 1, 2 or 3 facing the operating valve
position marker (L) - Fig 6.
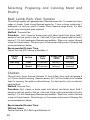
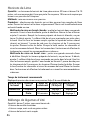
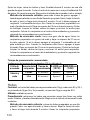
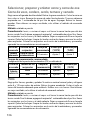
Adjusting the Valve for Your Cooking Operations
Position
1 2
3
1 2 3
Delicate foods,
vegetables and
some sterilisations
Position
1 2
3
1 2 3
Meats,
starchy foods and
some sterilisations
Position
1 2
3
1 2 3
Frozen foods
and some sterilisations
To release the steam
• Position the symbol on the valve (A) opposite the marker (L).
To remove the operating valve
• Release the pressure and leave the appliance to cool before removing the
valve (A).
• Press down on the central section and turn the valve to line up the
.
.
position
with the marker (L) - Fig 5
• Remove the valve.
To replace the operating valve
• Fit the operating valve, lining up the
.
.
with the marker (L).
• Press down on the central section and
then turn to the required position - Fig 7.

6
Using for the first time
• Fill the pot with 1/2 water. Add 4 tablespoons of
baking soda.
• Put the operating valve (A) in place on the steam
release outlet (B) - Fig. 5.
• Position the symbol 1 on the valve (A) opposite the
marker (L) - Fig 7.
• Close the pressure cooker.
• Place the pressure cooker on a heat source set to
maximum power.
• When steam begins to exit the valve Fig 12, turn
down the heat source and set a timer to 20 min.
• After 20 min., turn off your heat source.
To release the steam
• Position the symbol on the valve (A) opposite the
marker (L).
• Empty then clean the pressure cooker using soapy
water.
To replace the operating valve
• Fit the operating valve, lining up the
.
.
with the
marker (L).
• Press down on the central section and then turn to
the required position.
Cooking
Before cooking
• Before each use, remove the operating valve (A) (see section «Using the
operating valve») - Fig. 5. Check these by holding them up to the light, making
sure the steam release outlet is not clogged - Fig. 11. If necessary, clean with a
tooth pick - Fig. 11bis.
• Make sure the safety valve (D) is clean. Check that the safety valve (D) is
mobile. - Fig. 9 : see section «Care and cleaning».
• Put the operating valve back in place - Fig. 5.
• Position the symbol 1, 2 or 3 of the valve (A) opposite the marker (L).
• Always make sure the pressure cooker is tightly sealed before placing it on a
heat source.
• Place the pressure cooker on a heat source set to maximum heat.
To make
blackening
of aluminium
disappear from
already used
products : repeat
«first use»
instructions with
baking soda.

7
EN
During cooking
• When the operating valve (A) releases steam in a continuous manner, giving
off a regular sound (PSSSCHT), lower the heat - Fig. 12, adjust the output
of your heat source so that the needle of the pressure gauge remains in the
green zone that corresponds to the valve position: 1, 2 or 3.
• Set a timer to the cooking time listed in the recipe.
• Once the cooking time is over, turn off the heat.
End of cooking
To release the steam:
• Once the heat source has been switched off gradually, turn the operating
valve (A) to position . Make sure that the cooker is positioned so that the
steam is directed away from you. When the pressure
indicator (C) drops : your pressure cooker is no longer under pressure.
• Open the pressure cooker.
If you notice any food or liquid starting to spray out from the valve
when you are releasing steam: set the selector to the cooking initial
position, wait a minute and then gradually turn the operating valve
again, making sure that nothing else spurts out.
Warning: Never use force when removing the lid. Wait for the pressure
indicator to drop down completely and remove the operating valve.
Canning
WARNING: Read the instructions on pressure cooking before using
your pressure cooker/canner for canning. General information on
pressure canning.
The US Department of Agriculture recommends pressure canning as the only
safe way to can meats, fish, poultry and vegetables.
Fruits and tomatoes may be canned using the boiling water bath method in a
conventional cooking pot, but pressure canning saves time and energy.
Use conventional cooking pots for canning marinades and fruits.
Sometimes, it is better to can foods separately (meat and vegetables, for
example) and then reheat them together later.
HOW TO PRESSURE CAN USING GLASS JARS:
WARNING: Only use standard jars intended for home canning. The
name of the manufacturer of these jars is embedded in the glass.
Never use jars that contained store-bought products.
Warning: Never pressure sterilize foods containing sugar, sugar syrup
or other sweetening liquid.
*depending on model

8
1. Make sure the jars and lids do not have any cracks, chips or sharp edges.
Dispose of any damaged jars and lids.
2. Wash the jars and lids in warm soapy water. Rinse thoroughly.
3. Let the jars stand under hot water before filling them. There is no need
to sterilize the jars before pressure canning. Place the metal lids in hot or
boiling water according to the manufacturer’s instructions.
4. Select fresh, firm ingredients (not overripe). Sort according to size and
ripeness.
5. Wash and prepare ingredients.
6. Put the ingredients into the jars. Most ingredients can be put into the
jars while raw. Press down raw ingredients, because these tend to shrink
when cooked. Ingredients can be pre-cooked or partially pre-cooked before
being canned. Warm ingredients should not be pressed down after being
filled into jars.
7. Finish filling the jars by adding juice or water, leaving appropriate head
space of 1/4-inch to 1 1/2-inches, as indicated in the recipe or canning
instructions.
8. Remove air bubbles by sliding a spatula along the inside of the jars.
9. Clean the rims of the jars and attach the lids according to the
manufacturer’s instructions.
10. For hot foods, you can bring the water to 180 degrees F. ahead of time, but
be careful not to bring the water to a boil. Add 1 tbsp. of vinegar or cream
of tartar to prevent the water from staining the interior of the pressure
canner.
11. Place the jars on the canning rack in the pressure canner. It does not
matter if the jars touch each other - Fig. 3a*.
Always place jars on canning rack ; never place jars directly on the bottom
of pressure canner or on other jars.
Note: the 22Qt-litre pressure canner comes with two canning racks and allows
one rack to be placed above the other, making it possible to process 2 rows of
250 ml (= 8oz) and 500 ml (= 16 oz) jars. Place one rack at the bottom of the
pressure canner and the other on the first row of jars - Fig. 3b
12.
Close the pressure canner. When properly closed, the lid and pot handles
are aligned.
13. Position the symbolof the valve (A) opposite the marker (L) - Fig 7.
Place the pressure cooker on high heat until steam begins to exit the
steam release outlet. Continue letting pressure cooker release steam for
10 minutes.
14. After 10 minutes, position the recommended symbol 1, 2 or 3 of the
valve (A) opposite the marker (L).

9
EN
15. When the operating valve releases steam in a continuous manner,
giving off a regulator sound (PSSSCHT), lower the heat – Fig.12, adjust
the output of your heat source so that the needle of the pressure gauge
remains in the zone that corresponds to the valve position: 1, 2 or 3.
WARNING: Cooking times must be strictly adhered to and the pressure
canner should not be placed in a draft while cooking. Canning can take
from 45 to 90 minutes in a large pressure canner filled to full capacity.
16.
The sterilisation time begins once the operating valve starts to release
some steam.
17. Once the sterilisation time has elapsed, turn off the heat source and allow
the pressure cooker to cool down.
WARNING: Do not rapidly cool the pressure cooker/canner by
submerging it in water or letting it stand under a tap of running water.
Never remove the operating valve to reduce pressure.
18.
Once the pressure has dropped completely, position the symbol of the
valve (A) opposite the marker (L) - Fig 7. Remove the lid carefully.
WARNING: Steam may cause scalding and the operating valve may be
very hot. Protect your hands with oven mitts.
NB : You may hear a whistling noise when moving the operating valve. If no
steam exits the pressure cooker, this is caused by air re-entering the device.
19. Remove the jars with a jar tong. Place them on a hot plate/trivet or several
folded dish towels.
WARNING: Never place the hot jars on a cold or wet surface, this could
cause them to break.
20.
Seal the jars if they do not seal automatically. Even if no liquid has escaped
during the canning process, seal the jar as it is. Do not add liquid, as this
would mean having to restart the canning process from the beginning.
Fruits and vegetables that are not completely covered by the liquid may
turn brown, but they will be properly preserved.
21. Let the jars cool. Keep the jars upright and away from any drafts.
22. After 12 hours, remove the screw-on metal rings from the jars.
If a ring is difficult to remove, cover it with a hot, damp towel for 1 minute to
make the metal expand. After 1 minute, the ring should come off easily. If the
ring still does not come off easily, leave it in place.
WARNING: Never remove rings with force. You risk breaking the
gasket.
23.
Make sure the jars do not have any leaks and that the seals are air-tight.
If the lid is made of metal, make sure it is air-tight by tapping it lightly
with a spoon. If this makes a clear sound, the jar is well sealed. If the lid
domes towards the inside and does not budge when it is tapped, this also
indicates that it the gasket is air-tight.

10
WARNING: If a jar is not sealed or has a leak, use its contents
immediately or restart the canning process within 24 hours.
24.
Wipe the jars with a damp cloth and then dry them. Attach labels
displaying the date and contents. Keep the jars in a cold, dry place.
WARNING: The jars should not be exposed to freezing conditions, as
this may cause the liquid to expand and break the glass.
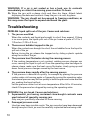
Troubleshooting
PROBLEM: liquid spills out of the jars. Causes and solutions:
1. The jars are overfilled.
When the contents and liquid are brought to a boil, they expand. If there
is no more space, the liquid spills out of the jar. Leave a space of 1/2 to 1
1/2-inches (1.25 to 2.5 cm).
2. There are air bubbles trapped in the jar.
When the contents are brought to a boil, the air bubbles force the liquid to
spill out of the jar.
Before closing the jar, release the trapped air by sliding a plastic spatula
along the inside of the jar.
3. The pressure level fluctuates during the canning process.
If the cooking temperature is not constant, sudden pressure changes can
occur, causing the liquid to spill out. Once the operating valve has begun to
release steam, make sure the heat source fluctuates, slowly going up and
down. Avoid pressure changes caused by the heat source.
4. The pressure drops rapidly after the canning process.
If the pressure is reduced too quickly, for example by placing the pressure
cooker under cold running water or frequently moving the operating valve,
the internal pressure may fall too quickly in both the pressure cooker and the
jars, making the liquid spill out.
Let the pressure cooker cool at room temperature. After 40 to 45 minutes,
check if the pressure has dropped by moving the operating valve.
PROBLEM: the jars break. Causes and solutions:
1. Supermarket jars having contained store-bought contents were
used instead of specialty canning jars.
Only use jars specifically intended for home canning.
2. Damaged jars were used.
Used jars may have invisible cracks. The jars may also have been damaged
during transport. Each jar must be carefully inspected before being used.

11
EN
3. The jars were placed directly on the bottom of the pressure canner
and not on the caning rack.
Always use the canning rack.
4. The hot jars were placed on a wet or cold surface, or they were
exposed to drafts of air.
Place the jars on a dry, heat-proof surface at room temperature or on a
dry, folded kitchen towels. Avoid air drafts.
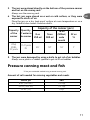
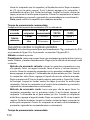
Capacity
of the
canner
Quantity
of water in
the canner
Capacity of the canner (jars)
8 oz
250 ml
16 oz
500 ml
16 oz
(500ml)
wide
mouth
32 oz
1L
22qt
20.8L
37 pints
3 1/2 pints
2L 24* 18* 16* 7
5. The jars were damaged by using a knife to get rid of air bubbles.
Always use a plastic or rubber spatula to get rid of air bubbles.
Pressure canning meat and fish
*If the jars are double-stacked using a second canning rack.
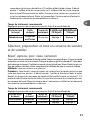
Amount of salt needed for canning vegetables and meats
Size of jar Salt
8 oz (250 ml) 1/4 tsp.
16 oz (500 ml) 1/2 tsp.
32 oz (1L) 1tsp.

12
How to close the jars
Carefully follow the instructions given by
the lid manufacturer.
Use a metal ring with an air-tight coating
and a screw on metal ring that fits standard
canning jars.
1. Fill the jar. Wipe down the rim.
2. Place the metal disks in hot or boiling
water according to the manufacturer’s
instructions.
3. Place the disk on the jar, making sure that it
is placed directly on the glass and creating
an air-tight gasket.
4. Screw on the ring using only the strength of your hands. Do not use any
tools to screw the ring closed. If the ring is screwed too tightly, this may
cause the disk to warp.
5. When canned properly, this jar will seal itself automatically. Do not
retighten the ring once the jar is removed from the pressure canner as
they eventually will be removed when storing the canned food.
Warning: know how to detect spoiled foods
A leaky jar or a damaged lid are signs that the jar’s contents may have spoiled.
Check if the contents have an odd colour or give off a strange smell.
Never taste food you think is spoiled. Dispose of immediately. Certain foods
may contain botulinum toxin (causing botulism) even if their smell and taste
appear normal. For this reason, boil non-acidic vegetables and meats for
10 minutes before eating. Other canned foods should also be boiled before
being eaten.
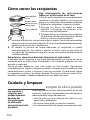
Care and Cleaning
Cleaning the pressure cooker
To ensure the correct operation of your pressure
cooker, follow these cleaning and maintenance
recommendations after each use:
• Clean the pressure cooker after each use with warm,
soapy water.
• Never use bleach or products containing chlorine.
• Do not overheat your pot when empty.
How to clean the inside of the pot:
• Use a sponge and dish soap.
How to clean the outside of the pot:
• Use a sponge and dish soap.
Screw-on
metal ring
Metal disk
for air-tight
gasket (lid)
Creates seal
here
The stains and
scratches which
may appear
after long use do
not affect the
operation of the
pressure cooker.

13
EN
How to clean the lid:
• Wash the lid under running, lukewarm water using a
sponge and dish soap, then rinse thoroughly.
How to clean the lid gasket:
• After each use, clean the gasket (H) and the part of
the cover in which it fits.
• Wash the gasket under running, lukewarm water using
a sponge and dish soap, then rinse thoroughly.
• To put the gasket back in place, see illustration
- Fig. 8.
How to clean the operating valve (A):
• Remove the operating valve (A): see section «Use of
operating valve».
• Clean the operating valve (A) under running water
- Fig. 10.
How to clean the steam release outlet (B):
• Remove the valve (A) - Fig. 5.
• Hold the lid against the light to make sure the steam
release outlet is not clogged. If needed, clean it with a
tooth pick - Fig. 11-11bis.
How to clean the safety valve (D):
• Clean the part of the safety valve located on the
underside of the lid by passing it under running water.
• Also check that the safety valve works properly by
using a cotton swab (for example), to press down hard
on the centre of the pipe, a part that should move -
Fig. 9.
• Make sure the valve functions properly by pressing
lightly on the end that should lift easily.
Cleaning the pressure gauge:
• Never remove the pressure gauge.
• Use a dry, clean cloth.
• Do not use any solvents.
• Never put the pressure gauge under water or in the
dishwasher.
How to replace the gasket:
• Change the gasket on your pressure cooker once a
year or if it shows any signs of splitting or damage.
• Always use an original T-FAL gasket suitable to your
model.
How to store your pressure cooker:
• Turn the lid upside down and place on the pot.
To remove dark
spots from the
aluminum, repeat
the procedure for
«First use» and add
2 tablespoons of
baking soda.
To keep your
pressure cooker
in good condition
longer, do not
overheat it when it
is empty.
You must have your
pressure cooker
checked in a T-FAL
approved service
center after 10
years of use.
Do not put your
pressure cooker in
the dishwasher.
Never use a sharp
or pointed object
to carry out this
operation.

14
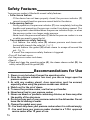
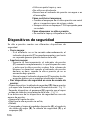
Safety Features
Your pressure cooker is fitted with several safety features:
• Safe closure feature:
- If the device has not been properly closed, the pressure indicator (C)
cannot rise and therefore pressure cannot build in the device.
• Safe opening feature:
- During operation, the pressure indicator (C) rises completely, locking the
handles and preventing the pressure cooker from being opened. This
locking system is deactivated when the pressure indicator drops, i.e. when
the pressure cooker is no longer under pressure.
- Never touch the pressure indicator (C) while the pressure cooker is in use
or while you want to open the lid.
• Two overpressure safety features:
- First feature: the safety valve (D) releases pressure and steam exits
horizontally towards the outer lid - Fig 13.
- Second feature: the gasket (H) allows steam to escape all around the
pot - Fig 14.
If one of the overpressure safety features is triggered:
• Turn off the heat source;
• Let the pressure cooker cool down;
• Open it;
• Check and clean the operating valve (A), the steam release outlet (B), the
safety valve (D) and the gasket (H).
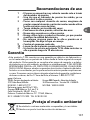
Recommendations for Use
1 - Steam is very hot when it leaves the operating valve.
2 - Once the pressure indicator has risen, you can no longer open the
pressure cooker.
3 - As with any cooking utensil, close supervision must be ensured,
especially when using the pressure cooker near children.
4 - Watch out for the jet of steam.
5 - To move the pressure cooker, use the two pot handles.
6 - Never leave food in your pressure cooker.
7 - Never use bleach or products containing chlorine, as these may alter
the quality of the aluminum.
8 - Do not put any part of your pressure cooker in the dishwasher. Do not
leave the lid soaking in water.
9 - Change the gasket every year.
10 - You must only clean your pressure cooker when it is cold and empty.
11 - You must have your pressure cooker checked in a T-FAL approved
service center after 10 years of use.

15
EN
Warranty
• This T-FAL product is warranted against defects in workmanship and material
for a period of TWO YEARS from the date that the product is originally
purchased. This warranty is not applicable to replacement parts or damage
to the product resulting from misuse, accidents or alterations to the product.
T-FAL SHALL NOT BE LIABLE FOR INCIDENTAL OR CONSEQUENTIAL
DAMAGES, HOWEVER CAUSED. Some states do not allow the inclusion or
limitation of incidental or consequential damages, so the above exclusion
may not apply to you. If service becomes necessary within the warranty
period, please contact us Monday – Friday, 8am to 5pm EST at 1-800-527-
7727.
www.t-fal.com
T-FAL - Customer Service Groupe SEB Canada - Customer Service
2121 Eden Road, Millville 345 Passmore Ave. - Toronto ON - CANADA
NJ 08332 - 1-800-527-7727 M1V3N8 - 1800.418.3325
Monday-friday 8.30 am - 5.30 pm
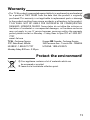
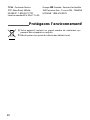
Protect the environment!
Your appliance contains a lot of materials which can
be recovered or recycled.
Leave it at a local waste collection point.

16
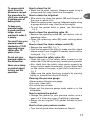
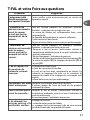
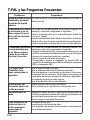
T-FAL and Your Frequently Asked Questions
Problems Suggestion
The pressure cooker
has been heated
under pressure
without liquid inside:
Have your pressure cooker checked by an approved
service center.
The pressure
indicator does not
rise and no steam is
released through the
valve during cooking:
This is normal during the first few minutes. However, if
this persists, check that:
- the heat source is sufficiently strong. If not, increase it.
- the quantity of liquid in the pot is sufficient.
- the pressure cooker is properly closed.
- the gasket and edge of the pot are not damaged.
The pressure
indicator has risen
and no steam is
released through the
valve during cooking:
This is normal during the first few minutes.
However, if this persists, check that :
- Turn off the heat, let the pressure cooker cool at room
temperature until the pressure indicator drops down.
- Never touch the pressure indicator.
- Check and clean the operating valve (A), the steam
release outlet (B), the safety valve (D) and the gasket
(H).
If steam leaks from
around the lid, check: The lid is properly closed.
The lid gasket is properly affixed.
The gasket is in good condition, replace it if necessary.
The lid, gasket, gasket housing on the lid, safety valve
and operating valve are all clean.
The edge of the pot is not damaged.
Food has been
burned in the
pressure cooker:
Let the pot soak before cleaning.
Never use bleach or products containing chlorine.
You cannot open
the lid: Turn off the heat, let the pressure cooker cool at room
temperature until the pressure indicator drops down.
Never touch the pressure indicator.
If the food is not
cooked or is burned,
check:
The cooking time.
The power of the heat source.
If the operating valve is properly attached.
The quantity of liquid.

17
EN
COOKING RECIPES
MEAT & POULTRY
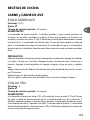
SWEET AND SOUR CHICKEN
Serves: 10-12
Setting : 2
Pressure Cooking Time: 10 min
INGREDIENTS
3 tablespoons of vegetable oil, 2 large onions, 2 large green peppers, cored,
seeded and diced, 2 large red peppers, cored, seeded and diced, 5 pounds
boneless chicken thighs, trimmed and cut into 2” pieces, 5 tablespoons soy
sauce, 3 cups of sweet & sour sauce or duck sauce, 3 tablespoons apple-cider
vinegar, 6 tablespoons water, 3 teaspoons garlic powder, 4 scallions, white &
green parts sliced thin.
DIRECTIONS
Heat oil in pressure cooker over medium high heat. Add onions and peppers.
Cook 2 minutes. Add chicken and soy sauce. Cook for 3 minutes. Add sweet
and sour sauce, vinegar, water and garlic powder and stir well.
Cover and bring to pressure. Lower heat to stablize pressure and cook for 10
minutes.
Release pressure and open and remove lid.
Transfer to serving dish and garnish with scallions. Serve with brown or white
rice.
COQ AU VIN
Serves: 8
Setting : 2
Pressure Cooking Time: 12 min
INGREDIENTS
4 tablespoons olive oil, 8 ounces bacon, chopped, 6 pounds chicken, cut into
serving-size pieces, seasoned with salt & pepper, 2 medium onions, chopped, 4
garlic cloves, chopped, 4 tablespoons all-purpose flour, 4 tablespoons brandy,
4 cups red wine, 1 cup chicken broth, 1 teaspoon dried thyme, 2 bay leaves, 1
pound button mushrooms, cut into quarters, salt and black pepper, to taste.
La page est en cours de chargement...
La page est en cours de chargement...
La page est en cours de chargement...
La page est en cours de chargement...
La page est en cours de chargement...
La page est en cours de chargement...
La page est en cours de chargement...
La page est en cours de chargement...
La page est en cours de chargement...
La page est en cours de chargement...
La page est en cours de chargement...
La page est en cours de chargement...
La page est en cours de chargement...
La page est en cours de chargement...
La page est en cours de chargement...
La page est en cours de chargement...
La page est en cours de chargement...
La page est en cours de chargement...
La page est en cours de chargement...
La page est en cours de chargement...
La page est en cours de chargement...
La page est en cours de chargement...
La page est en cours de chargement...
La page est en cours de chargement...
La page est en cours de chargement...
La page est en cours de chargement...
La page est en cours de chargement...
La page est en cours de chargement...
La page est en cours de chargement...
La page est en cours de chargement...
La page est en cours de chargement...
La page est en cours de chargement...
La page est en cours de chargement...
La page est en cours de chargement...
La page est en cours de chargement...
La page est en cours de chargement...
La page est en cours de chargement...
La page est en cours de chargement...
La page est en cours de chargement...
La page est en cours de chargement...
La page est en cours de chargement...
La page est en cours de chargement...
La page est en cours de chargement...
La page est en cours de chargement...
La page est en cours de chargement...
La page est en cours de chargement...
La page est en cours de chargement...
La page est en cours de chargement...
La page est en cours de chargement...
La page est en cours de chargement...
La page est en cours de chargement...
La page est en cours de chargement...
La page est en cours de chargement...
La page est en cours de chargement...
La page est en cours de chargement...
La page est en cours de chargement...
La page est en cours de chargement...
La page est en cours de chargement...
La page est en cours de chargement...
La page est en cours de chargement...
La page est en cours de chargement...
La page est en cours de chargement...
La page est en cours de chargement...
La page est en cours de chargement...
La page est en cours de chargement...
La page est en cours de chargement...
La page est en cours de chargement...
La page est en cours de chargement...
La page est en cours de chargement...
La page est en cours de chargement...
La page est en cours de chargement...
La page est en cours de chargement...
La page est en cours de chargement...
La page est en cours de chargement...
La page est en cours de chargement...
La page est en cours de chargement...
La page est en cours de chargement...
La page est en cours de chargement...
La page est en cours de chargement...
La page est en cours de chargement...
La page est en cours de chargement...
La page est en cours de chargement...
La page est en cours de chargement...
La page est en cours de chargement...
La page est en cours de chargement...
La page est en cours de chargement...
La page est en cours de chargement...
La page est en cours de chargement...
La page est en cours de chargement...
La page est en cours de chargement...
La page est en cours de chargement...
La page est en cours de chargement...
La page est en cours de chargement...
La page est en cours de chargement...
La page est en cours de chargement...
La page est en cours de chargement...
La page est en cours de chargement...
La page est en cours de chargement...
La page est en cours de chargement...
La page est en cours de chargement...
La page est en cours de chargement...
La page est en cours de chargement...
La page est en cours de chargement...
La page est en cours de chargement...
La page est en cours de chargement...
La page est en cours de chargement...
La page est en cours de chargement...
La page est en cours de chargement...
La page est en cours de chargement...
La page est en cours de chargement...
La page est en cours de chargement...
La page est en cours de chargement...
La page est en cours de chargement...
La page est en cours de chargement...
La page est en cours de chargement...
La page est en cours de chargement...
La page est en cours de chargement...
La page est en cours de chargement...
La page est en cours de chargement...
La page est en cours de chargement...
La page est en cours de chargement...
La page est en cours de chargement...
-
 1
1
-
 2
2
-
 3
3
-
 4
4
-
 5
5
-
 6
6
-
 7
7
-
 8
8
-
 9
9
-
 10
10
-
 11
11
-
 12
12
-
 13
13
-
 14
14
-
 15
15
-
 16
16
-
 17
17
-
 18
18
-
 19
19
-
 20
20
-
 21
21
-
 22
22
-
 23
23
-
 24
24
-
 25
25
-
 26
26
-
 27
27
-
 28
28
-
 29
29
-
 30
30
-
 31
31
-
 32
32
-
 33
33
-
 34
34
-
 35
35
-
 36
36
-
 37
37
-
 38
38
-
 39
39
-
 40
40
-
 41
41
-
 42
42
-
 43
43
-
 44
44
-
 45
45
-
 46
46
-
 47
47
-
 48
48
-
 49
49
-
 50
50
-
 51
51
-
 52
52
-
 53
53
-
 54
54
-
 55
55
-
 56
56
-
 57
57
-
 58
58
-
 59
59
-
 60
60
-
 61
61
-
 62
62
-
 63
63
-
 64
64
-
 65
65
-
 66
66
-
 67
67
-
 68
68
-
 69
69
-
 70
70
-
 71
71
-
 72
72
-
 73
73
-
 74
74
-
 75
75
-
 76
76
-
 77
77
-
 78
78
-
 79
79
-
 80
80
-
 81
81
-
 82
82
-
 83
83
-
 84
84
-
 85
85
-
 86
86
-
 87
87
-
 88
88
-
 89
89
-
 90
90
-
 91
91
-
 92
92
-
 93
93
-
 94
94
-
 95
95
-
 96
96
-
 97
97
-
 98
98
-
 99
99
-
 100
100
-
 101
101
-
 102
102
-
 103
103
-
 104
104
-
 105
105
-
 106
106
-
 107
107
-
 108
108
-
 109
109
-
 110
110
-
 111
111
-
 112
112
-
 113
113
-
 114
114
-
 115
115
-
 116
116
-
 117
117
-
 118
118
-
 119
119
-
 120
120
-
 121
121
-
 122
122
-
 123
123
-
 124
124
-
 125
125
-
 126
126
-
 127
127
-
 128
128
-
 129
129
-
 130
130
-
 131
131
-
 132
132
-
 133
133
-
 134
134
-
 135
135
-
 136
136
-
 137
137
-
 138
138
-
 139
139
-
 140
140
-
 141
141
-
 142
142


Tefal P3105231 Manuel utilisateur
- Catégorie
- Autocuiseurs
- Taper
- Manuel utilisateur
dans d''autres langues
- español: Tefal P3105231 Manual de usuario
Autres documents
-
Fagor SPLENDID PRESSURE COOKER Manuel utilisateur
-
 Zavor 124677 Mode d'emploi
-
Fagor 918060251 Mode d'emploi
-
 Zavor .Pressure Cooker514 Manuel utilisateur
-
 Zavor 124682 Manuel utilisateur
-
Fagor America 918010053 Manuel utilisateur
-
-
-
-


