Kichler 12606WH Manuel utilisateur

Taper
Manuel utilisateur
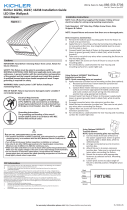
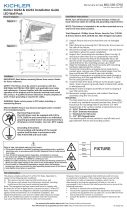
INSTALLATION INSTRUCTIONS
LED Step Light
Models: 12656/CP300480 (dimmable), 12606/CP300386 (non-dimmable)
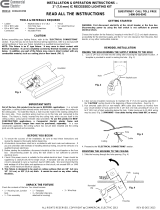
WARNING: Turn off power.
IMPORTANT: Before you start, NEVER attempt any work without shutting
off the electricity until the work is done.
a) Go to the main fuse or circuit breaker box in your home. Place
the main power switch in the “OFF” position.
b) Unscrew the fuse(s), or switch “OFF” the circuit breaker
switch(s), that control the power to the fixture or room that you
are working in.
NOTES:
 Suitable for interior dry or damp locations only. Not suitable for exterior use.
 

electrician is recommended.
 
 
 
electronic low voltage dimmers.
 
switch box (not supplied).
The box capacity must be 14 cubic inches or larger. Metal or plastic
boxes are acceptable.
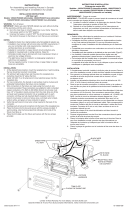
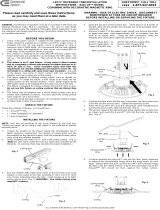
INSTALLATION:
 
mounting, the box must be mounted vertically.
2. For optimum light output when wall mounted, the receptacle box
centerline should be 18” above the floor.
 
receptacle box.
4. For new construction, the drywall or wall surface must be in place and
preferably finished before the fixture can be installed.
 
connectors provided. These connectors are suitable for solid or stranded

have 1/2” of insulation cleanly removed from the ends. Grip wire firmly
and push each exposed conductor into an available port on each
connector until they are fully inserted. Match insulation color from
branch circuit wires to colors on fixture wires. Join black wire to black,
white to white, and green or bare conductor to green.
6. Verify that each branch circuit wire is fully inserted to the back of the
connector.
 
 
wall mounting, note the fixture label that indicates which side of the
fixture must face up.
9. Place the trim plate over thexture and secure with the two screws provided.
INSTRUCTIONS D’INSTALLATION
Éclairage de marche DEL
Modèles : 12656/CP300480 (à intensité variable), 12606/CP300386 (à
intensité non variable)
AVERTISSEMENT :
IMPORTANT: TOUJOURS couper le courant avant de commencer le travail

a) Localiser le coffret à fusibles ou le disjoncteur du domicile.
Mettre l’interrupteur principal en position d’Arrêt.
 


REMARQUES :
 

 



 

 
 

 
ou une boîte de commande (non fourni).
 

INSTALLATION :
 

 


 

 

luminaire.
 









 

7. Pousser soigneusement tous les fils et les connecteurs dans la partie

 
cas d’une installation murale, prendre note des informations sur

trouver vers le haut.
 
fournies.
















INSTRUCTIONS
For Assembling and Installing Fixtures in Canada
Pour L’assemblage et L’installation Au Canada
  • Page 1 1

Kichler 12606WH Manuel utilisateur

Taper
Manuel utilisateur

dans d''autres langues