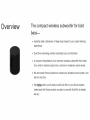
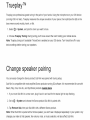
Sonos Sub Mini Manuel utilisateur

Taper
Manuel utilisateur
Overview
The
compact wireless subwoof
er
for
bo
ld
bass-
Instantly adds a dimension
of
deep bass impact to your audio listening
experience.
Dual force-canceling woofers neutralize buzz and distortio
n.
A compact interpretation
of
our premium wireless subwoofer that's ideal
for a small or medium-sized room, and low to moderate volume levels.
Mix and match Sanos products to create your wireless sound system, and
add on any time.
See
SetuP-
when you'
re
ready to add Sub Mini to your Sanos system
(make sure the Sanos product you plan to use wi
th
Sub Mini is already
set up
).
Controls
and
buttons
Center tunnel
Ethernet port
AC power (mains) input
Status light
Join button
Efficiently moves air to maximize bass .
Use
an
Ethernet cable if you want to connect
to
a
router (optional) .
Use only the suppli
ed
power cord to connect
to
a
power outlet. (Usi
ng
a
th
i
rd
party power cord wi
ll
void your warranty.)
Be
sure to use the proper
power adapter for your country .
Displays the product's connection
to
WiFi,
indicates when the volume is muted, and signals
errors.
Learn
more
If the light
is
distracting, you can turn it off
in
your
room's settings .
Press
to
connect during setup.
Select
a location
For the best sound experience, place Sub Mini upright near the speaker you're going to use it wi
th
. The center
tunnel
can
face in
any
direction.
If
you place Sub Mini again
st
a wall
or
your furniture, leave enough clearance for air to move freely through the
center tunnel.
Note: Make sure the speaker you're pairing Sub Mini with is already set up
in
your system before you add Sub
Mini.
Lea
rn
more about compatible products.
Connect
the cables
0
0
Attach the power cord and p
lu
g in Sub Min
i.
Download the Sanos app from the app store if you
don't already have
it.
You
'
ll
use it to set up and
control your Sanos system. See SetuR for more
information.
Trueplay
Trueplay puts professional-grade tuning in the palm
of
your hands. Using the microphone on your iOS device
(running iOS 8 or later), Trueplay measures the
un
ique acoustics of your space, then optimizes the EQ so the
bass never sounds muddy, harsh, or flat.
1. Select
-p
> System, and pick the room you want to
tu
ne.
2. Choose Trueplay Tuning. During tuning you'll move around the room holding your mobile device.
Note: Trueplay tuning isn't available if
Vo
iceOver is enabled on your iOS device. Turn VoiceOver off in your
device sett
in
gs before tuning your speakers.
Change
speaker pairing
You
can easily change the Sonos product Sub Mini was paired wi
th
during setup.
Sub Mini is compatible with most amplifi
ed
Son
os
products running S2 software. It's recommended for use wi
th
Beam, Ray, One, One SL, and Symfonisk products.
Learn
more
1.
If you move Sub Mini to a n
ew
room, plug it back in and wait for the status
li
ght to stop flashing.
2.
Go to
-p
> System and choose the Sonos product Sub Mini is paired with.
3. Tap Remove Sub, then pair Sub Mini with a different Sonos product.
Note: When Sub Mi
ni
is
paired with a Sonos speaker, you won't see it displayed separately
in
your system. Any
changes you make
to
that speaker, like volume, mute, or music selection, will also affect Sub Mini.
Specifications
Feature
AUDIO
Amplifier
Woofers
Architecture
Frequency response
Digital processing
Adjustable EQ
Power and Connectivity
Wireless connectivity
Ethernet port
Power supply
Memory
CPU
Supported products
Description
Two Class-D digital amplifiers.
Two
6"
force-canceling woofers positioned face-to-
face
to
minimize buzz, rattle, and distortion.
Sealed cabinet neutralizes distortion and enhances
the bass response.
Plays down to 25
Hz.
A blend
of
equalization and advanced limiting
algorithms allows Sub Mini to produce the deep rich
bass normally associated with much larger sub-
woofers.
Audio setting automatically equalize to balance Sub
Mini and the paired Sonos product(s). Use the Sonos
app to manually adjust bass and volume.
Connects to Wi
Fi
network with any 802.11 a/b/g/n 2.4
or 5 GHz broadcast-capable router.
10/100 port for hardwiring
to
your router.
Auto switching, 100-240 V, 50/60 Hz internal power
supply
4
GB
SDRAM
4 GB NV
Dual core architecture
ARM Cortex-A9 processor, ARM Cortex-M4 processor
At least one amplified, non-portable product, such as
Sonos Beam, Ray, One, One SL,
or
Symfonisk. Learn
more
GENERAL
Dimensions
(H
x D)
Weight
Operating temperature
Storage temperature
Package contents
Colors
Finish
* Specifications subject to change without notice.
9.1
in
x 12 in (305 mm x 230 mm)
14 lb
(6
.
35
kg)
32
° to 104° F
(0
to 40° C)
-13 to 158° F (-25° to 70° C)
Sub Mini, power cable (6 ft/2 m
),
and Quickstart
Guide.
Bl
ack, White
Matte
Important safety informat
ion
1.
Read these instructions.
2.
Keep these instructions.
3.
Heed all warnings.
4.
Follow all instructions.
5.
Do not use this apparatus near water.
6.
Clean only with dry soft cloth. Household cleaners
or
solvents can damage the finish on your Sones
products.
7.
Do not block any vent
il
ation openings. Install in accordance with the manufacturer's instructions.
8.
Do not install near any heat sources such as radiators, heat registers, stoves,
or
other apparatus that
produce heat.
9.
Protect the power cable from being walked
on
or
pinched, particularly at plugs, convenience receptacles,
and the point where they exit from the apparatus.
10. Only use attachments/accessories specified by the manufacture
r.
11.
Unplug this apparatus during lightning storms
or
when unused for long periods
of
time.
12. This product does not have any user-serviceable parts. Do not open
or
disassemble
or
attempt to repair it
or replace any components. Refer all servicing
to
Sones qualified service personnel. Servicing is requir
ed
when the apparatus has been damaged
in
any way, such as power-supply cable
or
plug is damaged, liquid
has been spilled
or
objects have fa
ll
en into
th
e apparatus, the apparatus has been exposed to rain
or
moisture, does not operate normally, or has been dropped.
13. The Mains plug should be readily available to disconnect the equipment.
14. Warni
ng
: To reduce the risk
of
fire
or
electric shock, do not expose this apparatus to rain
or
moisture.
15. Do not expose apparatus to dripping
or
splash
in
g and do not place objects filled with liquids, such as vases,
on the apparatus.
Hear higher highs,
feel lower lows for
a more
1mmers1ve
sound experience.
Status Light
0
Join
Button
Customer Support
sonos
.com/support
User
Guide
sonos.com/guides/s
ubm
i
ni
Terms
of
Use.
license
and
Warranty
www.sonos.com/
legal/terms-of-use
C
2022
Sonos. Inc. All
rights
reserved. Sonos•,
Sonos
Sub
Mini,
and
Sub
Mini
are
trademarks
or
registered
trademarks
of
Sonos,
Inc. •Reg. U.S. Pat. &
TM
Off.
1!]!114[il
~'fi!
640·00845-A
i!i~W
Important Product Information
For
End
User
Li
cense Agreement and additional produ
ct
information:
www
.sonos.co
m/
guid
es
Regulatory Informati
on
CANA
DA
The installer
of
this
radio
equipment
must
ensure
that
the
product
is
located such
that
it
does
not
emit
RF
field in excess
of
Health
Canada limits
for
the
general population;
consult
Safety
Code
6, obtainable
from
Health Canada's
Web
site www.hc-sc.gc.ca/rpb.
As
mentioned
before,
the
installer
cannot
control
the
antenna orientation. However,
they
could
place
the
complete
product
in a
way
that
causes
the
problem
mentioned
above.
The device
for
operation in
the
band
5150-5250
MHz
is
only
for
indoor
use
to
reduce
the
potential
for
harmful interference
to
co-
channel mobile satellite systems.
Be advised
that
high-power
radars are allocated
as
primary
users
[I.e.
priority
users)
of
the
bands
5250-5350
MHz
and
5650-5850
MHz
and
that
these
radars
could
cause interference and/or
damage
to
LE-LAN devices.
This
class B digital apparatus complies with ISED CAN ICES-3(8), NMB-3(8), RSS-GEN,
and
RSS-24 7. Operation is
subject
to
the
following
two
conditions: (1)
this
device
may
not
cause interference.
and
(2)
this
device
must
accept
any
interference, including
interference
that
may
cause undesired operation
of
the
device.
L'lnstallateur
du
present
materiel radio
doit
veiller a
ce
que
le
produit
soit
place
ou
oriente
de
man
iere a n'emettre
aucun
champ
radioelectrique superieur
aux
Ii
mites
fixees
pour
le grand public
par
le ministere
fe
deral Santa Canada
cons
ultez
le
Code de securite 6
sur
le
site
Web
de
Sante Canada a l'adresse : www.hc-sc.gc.ca/rpb.
Comme
indique au
paravant
l'installateur
ne
peut
pas
co
n
tr0ler
!'orientation
de
l'antenne.
II
peut
neanmoins
placer
le
produit
to
ut
entier
de
maniere a
provoquer
le
probleme
decrit
ci-dessus.
Les dispositifs fonctionnant dans la
bande
5150-5250
MHz
sont
reserves uniquement
pour
une
utilisation a l'interieur afin de reduire
les risques
de
brouillage prejudiciable aux
systemes
de
satellites
mobi
l
es
utilisant les
memes
ca
nau
x.
Les utilisateurs
de
radars
de
haute puissance
sont
designes utilisateurs principaux (c.-a-d., qu'ils ont la priorite)
pour
les
bandes
5250-
5350
MHz
et
5650-5850
MHz
et
que
ces
radars pourraient causer
du
brouillage et/ou
des
dommages
aux dispositifs
LA
N
-EL
Cet
appareil numerique
de
classe
Best
conforme
a ISED CAN ICES-3(8), a NMB-3(8), a RSS-GEN
et
a RSS-247.
Son
fonctionneme
nt
est
soumis
aux deux conditions suivantes:
(1)
Cet
appareil
ne
dolt
pas
creer
d'interferences nuisibles. (2)
Cet
appareil
doit
to
ler
er
toutes
les
interferences re~ues, y
compris
l
es
interferences
pouvant
entrainer
un
fonctionnement
indesirable.
RF
Exposure
Requirements
To
comply
with
FCC
and
Industry Canada exposure essential requirements, a minimum separation distance
of
20cm
(8 inches) is
required
between
the
equipment
and
the
body
of
the
user
or
nearby
persons.
Exigences
en
matiere d'exposition aux radiofrequences
Pour satisfaire
aux
exigences essentielles
de
la FCC
et
d'lndustrie Canada
concernant
!'exposition,
une
distance
minimum
de
20
cm
(8
pouces)
doit
etre
respectee entre l'equipement
et
l'utilisateur
ou
des
personnes
se
trouvant
a proximite.
This
device complies
with
p
art
15
of
the
FCC rules. Operation
is
subject
to
the
following
two
conditions:
(1)
This
device
may
not
cause h
armfu
l interference,
and
(2)
this
device
must
accept
any
interfer
ence
received,
inc
luding in
te
rf
erence
that
may
cause undesired operation.
Important
Safety
Information
1. Read these instructions.
2.
Keep these instructions.
3.
Heed all warnings.
4.
Follow all instructions.
5.
Do
not
use
this
apparatus
near
water.
6. Clean
only
with
dry
soft
cloth. Household cleaners
or
solvents
can
damage
the
finish
on
your
Sonos
components.
7.
Do
not
block
any ventilation openings. Install
in
accordance
with
the
manufacturer's instructions.
8.
Do
not
install near
any
heat
sources
such
as radiators,
heat
registers, stoves,
or
other
apparatus
that
produce heat.
9. Protect
the
power
cable
from
being walked
on
or
pinched, particularly
at
plugs, convenience receptacles,
and
the
point
where
they
exit
from
the
apparatus.
1
O.
Only
use attachments/accessories specified
by
the
manufacturer.
11.
Unplug
this
apparatus during lightning
storms
or
when
unused
for
long
periods
of
time.
12.
Refer all servicing
to
Sonos
qualified service personnel. Servicing is required
when
the
apparatus has
been damaged in
any
way, such
as
power-supply cable
or
plug
is damaged, liquid has
been
spilled
or
objects
have fallen
into
the
apparatus,
the
apparatus has
been
exposed
to
rain
or
moisture,
does
not
operate normally,
or
has
been
dropped.
13.
The
Mains plug should
be
readily available
to
disconnect
the
equipment.
A 14. _Warning:
To
reduce
the
risk
of
fire
or
electric shock,
do
not
expose
this
apparatus
to
rain
or
~
moisture.
15.
Do
not
expose apparatus
to
dripping
or
splashing
and
do
not
place
objects
filled
with
liquids, such
as
vases,
on
the
apparatus.
Caution:
Replacement
of
fuses replaceable only
by
service personnel (refer
to
service documentation).
Warning
to
service
personnel:
Caution: Double pole/neutral fusing.
Caution:
Fuse
maybe located in the Neutral conductor due
to
the non-polarized plug.
1111111111111111111111
IIIIII
Ill Ill
640-00516
Rev F
  • Page 1 1
  • Page 2 2
  • Page 3 3
  • Page 4 4
  • Page 5 5
  • Page 6 6
  • Page 7 7
  • Page 8 8
  • Page 9 9
  • Page 10 10
  • Page 11 11
  • Page 12 12
  • Page 13 13
  • Page 14 14
  • Page 15 15
  • Page 16 16

Sonos Sub Mini Manuel utilisateur

Taper
Manuel utilisateur

dans d''autres langues