La page est en cours de chargement...

English
2
French
13
Spanish
25
OWNER’S MANUAL
We’re here to help.
We want you to have an exceptional project building experience.
If you have questions or need support, please get in touch.
1-800-447-8638 | [email protected]
Tell us about your experience.
Your opinion counts. And we’re always looking for ways to
improve. Share your feedback so we can keep growing and
innovating for you. www.kregtool.com/feedback
WARNING Every user must read and follow instructions and safety
precautions in this manual. Failure to do so could result in serious injury.
Save manual for future reference.
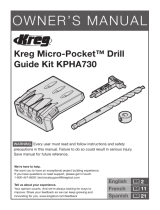
Kreg Micro-Pocket™ Drill
Guide Kit KPHA530

2
Safety Precautions
WARNING Before using a power tool with this product, read, and follow the
tool manufacturer’s instructions and safety precautions in addition to the safety
precautions below to reduce risk of serious injury from hazards such as re,
electric shock, or rotating drill bit.
■ Always wear personal protective equipment recommended by the
manufacturer of the power tool you are using, such as eye, hearing, or
respiratory protection.
■ The drill bit is sharp. Handle with care.
■ Do not allow familiarity gained from frequent use of your tools to replace
safe work practices. A moment of carelessness is sufcient to cause severe
injury.
■ Avoid awkward hand positions where a sudden slip could cause contact
with the rotating bit.
■ When drilling, always ensure workpiece is clamped securely. It is dangerous
to hold workpiece in place by hand.
WARNING Do not operate this tool or any machinery while under the inuence
of drugs, alcohol, or medications.
WARNING This product can expose you to chemicals including Acrylonitrile
and other chemicals, which are known to the State of California to cause
cancer and reproductive harm. For more information go to
www.P65Warnings.ca.gov.
Table of Contents
Safety Precautions. . . . . . . . . 2
Pre-Installation/Pre-Assembly. . . 3
Assembly/Setup . . . . . . . . . . 4
Operation – Drilling Your First
Pocket Hole . . . . . . . . . . . . 5
Operation – Drilling and Driving
Pocket-Hole Screws . . . . . . . . 8
Accessories . . . . . . . . . . . 11

3
Pre-Installation/Pre-Assembly
Review this section before you begin. Ensure you have all parts listed below.
If any item appears missing or lost, do not use this product. Contact Technical
Support or return product to place of purchase.
A
C
B
D
Part Description
A KPHA530 Kreg Micro-Pocket™ Drill Guide
B Easy-Set Micro-Pocket Drill Bit
C Material Thickness Gauge/Hex Wrench
D Easy-Set Micro-Pocket Stop Collar

4
Assembly/Setup
a. Remove existing drill guide from the Kreg Jig 520 by squeezing the tabs
(1) on both sides and sliding the drill guide out of the carriage.
b. Insert the Micro-Pocket Drill Guide (A) into the carriage of the Kreg Jig
520 by squeezing the tabs (1) on both sides and sliding into the carriage.
1
A

5
Operation – Drilling Your First Pocket
Hole
1
Determine the Material Thickness and Set the
Stop Collar
a. Use the material thickness gauge (C) to determine the material thickness
range.
b. Set the stop collar (D) by placing it on the drill bit (B) and aligning
the window of the stop collar (D) with the material thickness range
determined in step a.
c. Use the hex wrench (C) to lock the stop collar (D) into place on the drill
bit (B).
B
C
D

6
2
Adjust the Drill Guide
Adjust the drill guide by pressing both tabs (1) on the guide and sliding it to the
measurement setting (2) that corresponds with your material thickness.
2
1

7
3
Position your Workpiece
There are two different methods for aligning your Kreg Jig with your workpiece:
■ For a workpiece narrower than 1-1/4" wide it is recommended to place
each pocket hole 3/8" from the edge, if possible. To do this, mark 3/8" from
each edge as the center of the pocket hole and align one of the numbered
pocket-hole drill guides (number 1, 2, or 3) and drill the rst pocket hole.
Then, re-position to the second mark and repeat the drilling process.
■ For a workpiece between 1-1/4" to 2-1/4", use the board centering mark A
and drilling pocket-holes 1 and 2.
■ For a workpiece between 2-1/4" and 3-1/2", use board centering mark B
and drilling pocket-holes 1, 2, and 3.
■ For wider workpieces such as a drawer box side, it is recommended
that the pocket-holes be spaced at 3/4" center-to-center spacing. For
workpieces such as panels, it is recommended that the pocket-hole
spacing be 1/2" to 1-1/4" from the edge and then every 4" to 6".
1 2 3 A B C
Board Width Center Mark Drill Guide
1-1/4" to 2-1/4" A 1 and 2
1-1/4" to 2-1/4" C 2 and 3
2-1/4" to 3-1/2" B 1, 2, and 3
Place your workpiece in the jig and squeeze the handle repeatedly until your
workpiece is held securely in the jig. Proceed to the Operation - Drilling and
Driving Pocket-Hole Screws section to start drilling.

8
Operation – Drilling and Driving
Pocket-Hole Screws
1
Drill Pocket Holes
WARNING When drilling, always ensure the workpiece is clamped securely.
a. Place your prepared drill bit (B) with stop collar (D) into your drill.
b. Insert your drill bit into the drill guide (1) and bring your drill up to speed
before contacting the workpiece to ensure correct rotation of the drill bit.
c. Drill until the stop collar (D) stops going any deeper due to contact
between the stop collar (D) and drill guide (1). Remove the drill bit (B) from
the drill guide while the drill bit is still rotating.
d. When done drilling pocket hole(s), pull the trigger (2) to release the
clamping pressure, and then remove your workpiece.
2
1
B
D

9
2
Drive Screws
a. Your Micro-Pocket™ Drill Guide Kit is designed to work with SPS type
screw heads. Ensure you are using the correct screw size according to
this chart:
Gauged Material
Thickness
Easy-Set
Stop Collar
Material
Thickness Stop
Screw Length
1/2 Range 1/2 1/2 1" (25 mm)
3/4 Range 3/4 3/4 1-1/4" (32 mm)
3/4 3/4 1-1/2" (38 mm)
1-1/2 Range 1½ 1½ 2-1/2" (64 mm)
For more information on screw selections, go to www.Kregtool.com/
Screws or simply scan the QR code on the side of your sample screw
package.
Note For some material in the 1/2" range, it may be necessary to use
the SPS-F075 screw to prevent the tip of the screw from exiting the
workpiece.
Note If your material thickness falls in the range, use the same
setup techniques as the 3/4" range with a 1-1/2" screw.
b. Clamp joints in place to ensure a better nished joint. These examples
show face joints and edge joints.

10
2
Drive Screws (continued)
WARNING When drilling, always ensure the workpiece is clamped securely.
c. Place your screw on your driver tip, position the screw in the pocket hole,
and drive the screw until it is fully seated without overdriving.

11
Accessories
KPHA750 Pocket-Hole Jig Docking Station

06/2020 104692 V1
EXPLORE. BUILD. SHARE.
We’re makers just like you.
That’s why we love to see what you’re working on.
Share with the community and get inspired!
#madewithKreg
Get free plans, project resources, and more.
kregtool.com and buildsomething.com

GUIDE D’UTILISATEUR
Nous sommes là pour vous aider.
Nous voulons que votre projet de construction se déroule de manière optimale.
Si vous avez des questions ou si vous avez besoin d’aide, n’hésitez pas à nous contacter.
1800447-8638 | [email protected]
Parlez-nous de votre expérience.
Votre opinion compte. Et nous sommes toujours à la recherche de moyens de nous améliorer.
Partagez vos commentaires an que nous puissions continuer à croître et à innover,
pour vous. www.kregtool.com/feedback
AVERTISSEMENT Chaque utilisateur doit lire et suivre les instructions et les
précautions de sécurité de ce manuel. Respectez cette consigne an d’éviter tout
risque de blessures graves. Conservez le manuel pour une utilisation ultérieure.
Ensemble de guide-foret Kreg
Micro-Pocket™ KPHA530

14
Précautions de sécurité
AVERTISSEMENT Avant d’utiliser un outil électrique avec ce produit, veuillez
lire et suivre les instructions et les précautions de sécurité du fabricant de
l’outil, en plus des précautions de sécurité ci-dessous, an de réduire le risque
de blessures graves dues à des risques comme le feu, les chocs électriques ou
les mèches de forage rotatives.
■ Portez toujours l’équipement de protection individuelle recommandé par le
fabricant de l’outil électrique que vous utilisez, par exemple une protection
pour les yeux, les tympans ou les voies respiratoires.
■ La mèche de forage est tranchante. Manipulez-la avec précaution.
■ Faites attention lorsque vous devenez familier avec l’outil en raison d’une
utilisation fréquente. Employez systématiquement des pratiques de
travail sécuritaires. Un moment d’inattention est sufsant pour causer des
blessures graves.
■ Évitez de positionner vos mains de manière maladroite, car un glissement
soudain pourrait causer un contact avec la mèche en rotation.
■ Lors du perçage, assurez-vous toujours que la pièce soit solidement ancrée
en place. Il est dangereux de tenir une pièce en place à l’aide de votre main.
AVERTISSEMENT N’utilisez pas cet outil ou toute autre machine sous
l’inuence de drogues, d’alcool ou de médicaments.
AVERTISSEMENT Ce produit peut vous exposer à des produits chimiques,
notamment l’acrylonitrile ou d’autres types dont l’État de Californie reconnait
être cancérigènes et nocifs pour la reproduction. Pour en savoir plus, visitez
www.P65Warnings.ca.gov.
Table des matières
Précautions de sécurité . . . . . 14
Avant l’assemblage . . . . . . . 15
Assemblage/Configuration . . . 16
Fonctionnement – Votre premier
perçage à angle . . . . . . . . . 17
Fonctionnement – Perçage et
utilisation des vis pour perçage
àangle . . . . . . . . . . . . . . 20
Accessoires . . . . . . . . . . . 23

15
Avant l’assemblage
Consultez cette section avant de commencer. Assurez-vous d’avoir toutes
les pièces énumérées ci-dessous. Si un article semble manquant ou perdu,
n’utilisez pas ce produit. Contactez le support technique ou retournez le produit
où vous l’avez acheté.
A
C
B
D
Pièce Description
A Guide-foret Kreg Micro-Pocket™ KPHA530
B Mèche pour micro-forage à réglage facile
C Jauge d’épaisseur des matériaux/Clé hexagonale
D Bague d’arrêt pour micro-forage à réglage facile

16
Assemblage/Configuration
a. Retirez le guide-foret existant du Kreg Jig 520 en pressant les languettes
(1) des deux côtés et en faisant glisser le guide-foret hors du chariot.
b. Insérez le guide-foret pour micro-forage (A) dans le chariot du Kreg Jig
520 en pressant les languettes (1) des deux côtés et en le faisant glisser
dans le chariot.
1
A

17
Fonctionnement – Votre premier
perçage à angle
1
Déterminez l’épaisseur du matériau et fixez la
bague d’arrêt
a. Utilisez la jauge d’épaisseur de matériau (C) pour déterminer la plage
d’épaisseur du matériau.
b. Réglez la bague d’arrêt (D) en la plaçant sur la mèche (B) et en alignant
la fenêtre de la bague d’arrêt (D) avec la plage d’épaisseur du matériau
déterminée à l’étape a.
c. Utilisez la clé hexagonale (C) pour bloquer la bague d’arrêt (D) en place
sur la mèche (B).
B
C
D

18
2
Ajustez le gabarit de perçage
Ajustez le gabarit de perçage en appuyant sur les deux languettes (1) du gabarit
et en le faisant glisser jusqu’au réglage de mesure (2) qui correspond à votre
épaisseur de matériau.
2
1

19
3
Positionnez votre pièce de travail
Il existe deux méthodes différentes pour aligner votre gabarit Kreg avec votre pièce:
■ Pour une pièce plus étroite que 1 1/4po (32mm) de largeur, il est
recommandé de placer chaque trou à 3/8po (9,5 mm) du bord, si possible.
Pour ce faire, faites une marque à 3/8po (9,5 mm) de chaque bord du
centre du trou et alignez l’un des guide-forets numérotés (1, 2 ou 3) et
percez le premier trou. Ensuite, repositionnez-vous sur la deuxième marque
et répétez le processus de perçage.
■ Pour une pièce entre 1 1/4po (32mm) et 2 1/4po (57 mm), utilisez le
repère de centrage de la planche A et percez les trous 1 et 2.
■ Pour une pièce entre 2 1/4po (57 mm) et 3 1/2po (89 mm), utilisez le
repère de centrage de la planche B et percez les trous 1, 2 et 3.
■ Pour les pièces plus larges telles que le côté d’un tiroir, il est recommandé
d’espacer les trous de 3/4po (19 mm) de centre à centre. Pour les pièces
comme des panneaux, il est recommandé que l’espacement des trous soit
de 1/2 à 1 1/4po (13 mm à 32 mm) du bord et ensuite tous les 4 à 6po
(10 à 15 cm).
1 2 3 A B C
Largeur de la planche Marque centrale Guide-foret
1 1/4po à 2 1/4po (32mm à 57mm) A 1 et 2
1 1/4po à 2 1/4po (32mm à 57mm) C 2 et 3
2 1/4po à 3 1/2po (57mm à 89mm) B 1, 2 et 3
Placez votre pièce dans le gabarit et serrez la poignée à plusieurs reprises
jusqu’à ce que votre pièce soit bien maintenue dans le gabarit. Passez à la
section Fonctionnement – Perçage et utilisation des vis pour perçage
àangle an de commencer le perçage.

20
Fonctionnement – Perçage et utilisation
des vis pour perçage àangle
1
Perçage à angle
AVERTISSEMENT Lors du perçage, assurez-vous toujours que la pièce de
travail est solidement ancrée en place.
a. Placez votre mèche de forage préparée (B) avec la bague d’arrêt placée
(D) dans la mèche.
b. Insérez votre mèche dans le guide-foret (1) et mettez votre perceuse en
marche avant de toucher la pièce pour vous assurer que la mèche tourne
correctement.
c. Percez jusqu’à ce que la bague d’arrêt (D) cesse d’aller plus profond en
raison du contact entre la bague d’arrêt (D) et le guide-foret (1). Retirez la
mèche (B) du guide-foret pendant que la mèche est encore en rotation.
d. Lorsque vous avez ni de percer le ou les trous, appuyez sur la languette
(2) pour relâcher la pression de serrage, puis retirez votre pièce.
2
1
B
D
/
