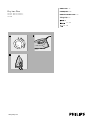
Philips GC130 Le manuel du propriétaire
- Catégorie
- Fers
- Taper
- Le manuel du propriétaire
Ce manuel convient également à


2
ENGLISH
Important
For optimal safety, first read these instructions before you are going to use the iron:
- The user must not leave the iron unattended while it is connected to the supply.
- This appliance is not intended for use by young children or infirm persons without
supervision.
- Young children should be supervised to ensure that they do not play with the
appliance.
- The soleplate of the iron can become extremely hot and may cause burns if
touched.
- Never use the appliance if it is damaged in any way.
- After finished ironing or even when you leave the iron for a while, unplug from the
wall socket and put the iron on its heel.
- If the mains cord is damaged, it must be replaced by Philips, a service centre
authorised by Philips or similarly qualified persons in order to avoid a hazard.
Before first use
1 Check if the voltage rating on the typeplate corresponds to the mains supply
in your home.
2 Remove any sticker or protective foil from the soleplate and clean it with a
soft cloth.
The iron may give out some smoke when using it for the first time. After a short while
this will cease.
Setting the temperature
1 Put the iron on its heel.
2 Set the temperature dial to the required ironing temperature by turning it to
the position of the temperature indicator (fig. 1).
- Check the garment label for the required ironing temperature.
- 1 Synthetic fabrics (e.g. acrylic, viscose, polyamide, polyester)
- 1 Silk
- 2 Wool
- 3 Cotton, linen
- When you do not know what kind of fabric(s) the article is made of, try to iron on a
spot which will be invisible when you wear it.
- Silk, woolen and synthetic materials: iron the reverse side of the fabric to prevent
shiny spots.
- Start ironing the articles that require the lowest ironing temperature, such as those
made of synthetic fibers.
3 Put the mains plug in an earthed wall socket.
Ironing
1 Set the temperature dial to the recommended position.
See section 'Setting the temperature'.
2 Types GC141, GC130 and GC125 only:
Allow the iron to heat up for two minutes before you start ironing.
If you set the temperature dial to a lower setting after ironing at a high temperature,
allow the iron to cool down for five minutes before you recommence ironing.
3 Types GC147, GC146, GC137, GC136 and GC135 only:
Start ironing when the amber temperature pilot light has first gone out and then come
on again (fig. 2).
B
The amber pilot light will come on from time to time during ironing.
Cleaning and maintenance
1 Remove the mains plug from the wall socket and let the iron cool down.
2 Wipe the soleplate with a damp cloth and a non-abrasive (liquid) cleaner.
Keep the soleplate smooth: avoid hard contact with metal objects.
3 Clean the upper part of the appliance with a damp cloth.
4239 000 47785
2/14

3
Storage
1 Remove the mains plug from the wall socket.
2 Wind the mains cord around the cord storage facility (fig. 3
3 Always store the iron standing on its heel in a safe and dry place.
Guarantee & service
If you need information or if you have a problem, please visit the Philips Web site at
www.philips.com or contact the Philips Customer Care Centre in your country (you
will find its phone number in the worldwide guarantee leaflet). If there is no Customer
Care Centre in your country, turn to your local Philips dealer or contact the Service
Department of Philips Domestic Appliances and Personal Care BV.
Trouble shooting guide
This chapter summarizes the most common problems you could encounter with your
iron. Please read the different sections for more details. If you are unable to solve the
problem, please contact the nearest Philips Service Centre or one of its
representatives. See the worldwide guarantee leaflet for telephone numbers of the
Philips Helpdesk or visit our website at www.philipsonline.com.
Solution
Check the mains cord, the plug
and the wall socket.
See setting the temperature
section for appropriate
temperature setting.
Possible cause(s)
Connection problem.
The temperature control
dial is probably set at
minimum position.
Problem
The iron is plugged in
but the soleplate is cold.
High Rating (for Hong Kong and Saudi Arabia only)
Rated Current
4.3-4.6A
Rated wattage
950-1100W
Rated voltage
220-240V
Low Rating (for Saudi Arabia only)
Rated Wattage
750-1000W
Rated Current
6.8-7.9A
Rated voltage
110-127V
Rated frequency
~50-60Hz
Rated frequency
~50-60Hz
4239 000 47785
3/14

4
FRANÇAIS
Important
Avant d'utiliser l'appareil, lisez soigneusement ces instructions pour une sécurité
optimale.
- Ne laissez jamais le fer à repasser sans surveillance pendant qu'il est branché.
- Cet appareil n'est pas destiné à être utilisé par des enfants ou par des personnes
handicapées sans surveillance.
- Faites bien attention à ce que les enfants ne puissent pas jouer avec le fer.
- La semelle du fer à repasser peut devenir très chaude et donc peut causer des
brûlures si vous la touchez.
- N'utilisez jamais le fer à repasser s'il est endommagé d'une façon quelconque.
- Lorsque vous avez fini de repasser ou même si vous laissez le fer pour un bref
instant, débranchez-le et placez-le sur son talon.
- Si le cordon d'alimentation est endommagé, il ne doit être remplacé que par Philips,
par un Centre Service Agréé Philips ou par des personnes qualifiées pour éviter tout
accident.
Avant la première utilisation
1 Vérifiez que la tension indiquée sous l'appareil correspond bien à la tension de
votre secteur.
2 Retirez toute étiquette ou film de protection et nettoyez la semelle avec un
chiffon doux.
Le fer peut fumer légèrement quand on le branche pour la première fois. Cela cessera
après un bref instant.
Réglage de la température
1 Posez le fer à repasser sur son talon.
2 Mettez le bouton de réglage de la température sur la position souhaitée
(fig. 1).
- Vérifiez l'étiquette d'instructions de repassage pour vérifier la température
necessaire de repassage.
- 1 Tissus synthétiques (par ex. acrylique, viscose, polyamide, polyester).
- 1 Soie
- 2 Laine
- 3 Coton, lin
- Si vous ne connaissez pas la composition de l'article, essayez la température qui
convient le mieux sur un endroit qui reste invisible quand le vêtement est porté.
- Articles en soie coton et synthétiques: repassez à l'envers pour éviter de les lustrer.
- Commencez à repasser les articles qui exigent la plus faible température tels que
ceux en fibres synthétiques.
3 Branchez la fiche dans la prise de courant.
Repassage
1 Mettez le bouton de réglage de la température sur la position conseillée.
Voir le chapitre "Réglage de la température".
2 Modèles GC141, GC130 et GC125 uniquement:
Laissez le fer chauffer pendant deux minutes avant de commencer à repasser.
Si vous réglez le fer sur un réglage de température inférieur après avoir repassé à une
température plus élevée, laissez le fer refroidir pendant cinq minutes avant de
recommencer le repassage.
3 Modèles GC141, GC146, GC137, GC136 et GC135 uniquement:
Commencez à repasser dès que le témoin lumineux de température orange s'éteint
puis s'allume à nouveau (fig. 2).
B
Le témoin lumineux s'allume et s'éteint de temps en temps.
Nettoyage et entretien
1 Débranchez l'appareil et laissez-le refroidir.
2 Nettoyez la semelle avec un chiffon humide et un détergent (liquide) non-
abrasif.
Maintenez la semelle lisse: évitez le contact dur avec des objets métalliques.
3 Nettoyez la partie supérieure du fer à repasser avec un chiffon humide.
4239 000 47785
4/14

5
Rangement
1 Débranchez la fiche de la prise de courant.
2 Enroulez le cordon d'alimentation autour de l'emplacement de rangement du
cordon (fig. 3).
3 Rangez toujours le fer sur son talon et dans un endroit sec.
Garantie et service
Pour plus d'informations, visitez notre Philips Web site : www.philips.com ou veuillez
contacter le Service Consommateurs Philips de votre pays (vous trouverez le numéro
de téléphone dans le dépliant sur la garantie internationale). S'il n'y a aucun Service
Consommateurs Philips dans votre pays, contactez votre distributeur ou le Service
Department de Philips Domestic Appliances and Personal Care BV.
En cas de problèmes
Ce chapitre résume les problèmes les plus courants problèmes susceptibles d'être
rencontrés. Lisez les sections suivantes pour plus de détails. Si vous ne pouvez pas
résoudre le problème, contactez votre revevendeur ou un Centre Service Agréé
Philips. Vous trouverez les numéros de téléphone utiles dans le dépliant sur la garantie
internationnale ou visitez notre site Web à www.philipsonline.com.
4239 000 47785
5/14

6
BAHASA MELAYU
Penting
Untuk keselamatan yang optimum, baca dahulu arahan sebelum anda hendak
menggunakan seterika.
- Pengguna tidak boleh tinggalkan alat seterika yang disambung pada punca utama
eletrik tanpa pengawasan.
- Peralatan ini tidak dicadangkan untuk digunakan oleh kanak-kanak atau orang yang
lemah tanpa pengawasan.
- Kanak-kanak perlu diawasi untuk memastikan mereka tidak bermain dengan
peralatan.
- Tapak seterika boleh menjadi terlampau panas dan menyebabkan terbakar jika
disentuh.
- Jangan gunakan peralatan jika terdapat kerosakan.
- Selepas selesai menggosok atau apabila anda tinggalkan seterika seketika, tanggalkan
plag di dinding dan letakkan seterika di tapaknya.
- Jika wayar utama rosak, ia mesti digantikan oleh Philips, pusat servis yang dibenarkan
oleh Philips atau pihak-pihak yang telah diluluskan bagi mengelakkan bahaya.
Sebelum penggunaan pertama
1 Periksa sama ada kadar kiraan voltan di atas plat jenis selaras dengan punca
utama eletrik di rumah anda.
2 Buka apa-apa pelekat atau kertas pelindung dari tapak peralatan dan
bersihkannnya dengan kain yang lembut.
Seterika mungkin akan mengeluarkan asap jika digunakan untuk kali pertama. Sebentar
kemudian ia akan berhenti.
Penyediaan suhu
1 Letakkan seterika di atas tapaknya.
2 Setkan dail suhu kepada suhu seterikaan yang dikehendaki dengan
memutarkannya kepada kedudukan penanda suhu (GB. 1).
- Periksa label pakaian yang dikehendaki oleh suhu seterika.
- 1 Fabrik sintetik (cth. serabut tiruan, viskosa, polyamide, polister)
- 1 Sutera
- 2 Bulu haiwan
- 3 Kapas, linen
- Apabila anda tidak tahu jenis fabrik ia diperbuat daripada, cuba seterikakan di tempat
yang mana ia akan sukar dilihat apabila anda memakainya.
- Sutera, bulu haiwan dan bahan-bahan sintetik: seterikakan di belakang fabrik tersebut
untuk mengelakkan tompokan berkilat.
- Mulakan seterika bahan yang memerlukan suhu yang paling rendah, seperti bahan
yang diperbuat daripada fiber.
3 Letakkan plag utama di soket dinding bersambung bumi.
Seterikaan
1 Setkan dail suhu kepada kedudukan yang disarankan.
Lihat bahagian 'Penyediaan suhu'.
2 Jenis GC141, GC130 dan GC125 sahaja.
Biarkan seterika dipanaskan sehingga dua minit sebelum anda mula menggosok.
Jika anda setkan dail suhu kepada set yang rendah selepas menggosok di suhu yang
tinggi, biarkan seterika sejuk selama lima minit sebelum anda menyambung menggosok.
3 Jenis GC147, GC146, GC137, GC136 dan GC135 sahaja.
Mulakan menggosok apabila lampu kuning panduan suhu yang pertama padam dan
kemudian menyala kembali (GB. 2).
B
Lampu kuning panduan akan menyala daripada masa ke masa semasa menggosok.
Pembersihan dan penyelenggaraan
1 Cabutkan plag utama dari soket dinding dan biarkan seterika sejuk.
2 Lapkan tapak plat dengan kain lembab dan pencuci (cecair) lembut.
Jaga tapak plat supaya licin dan rata: elakkan tersentuh dengan benda-benda logam.
3 Bersihkan bahagian atas peralatan dengan kain lembab.
4239 000 47785
6/14

7
Pengstoran
1 Cabutkan plag utama dari soket dinding.
2 Gulungkan tali wayar utama keliling tempat kemudahan menyimpan talian
(GB.3).
3 Selalu simpan seterika berdiri atas tapak di tempat yang selamat dan kering.
Jaminan dan servis
Jika anda memerlukan maklumat atau menghadapi masalah, sila lawati Laman Philips
Web di www.philips.com atau di Pusat Penjagaan Pengguna Philips di negara anda
(anda akan mendapati nombor telefonnya di helaian jaminan seluruh dunia). Jika tiada
Pusat Khidmat Pengguna di negara anda, pergi ke kedai pembekal Philips tempatan
atau hubungi Servis Jabatan Peralatan Tempatan Philips dan Penjagaan BV Persendirian.
Panduan penyelesaian masalah
Bab ini akan meringkaskan masalah yang mungkin kerap akan anda hadapi dengan
seterika ini. Sila baca bahagian lain untuk maklumat lanjut. Jika anda tidak dapat
menyelesaikan masalah, sila hubungi Pusat servis Philips atau salah seorang daripada
wakilnya. Lihat helaian jaminan seluruh dunia untuk mendapatkan nombor telefon Meja
Bantuan Philips atau lawati laman di www.philipsonline.com
4239 000 47785
7/14

8
Ti’ng ViŸt
QUAN TR°NG
[◊ an toøn tuyŸt {i, trıÎc h’t h¡y {„c nh˘ng hıÎng dÕn nøy trıÎc khi b¬n sƒp dÒng
bøn lø (bøn Úi):
- NgıÏi dÒng kh‰ng {ıÔc {◊ bøn lø b· kh‰ng trong khi nfl {¡ {ıÔc ni vøo nguÊn {iŸn.
- [Ê {iŸn nøy kh‰ng cfl ˚ {◊ dÒng bÌi tr— nh· ho»c nh˘ng ngıÏi {au y’u mø kh‰ng
cfl s˙ hıÎng dÕn ch‹ b¿o.
- Tr— nh· n‘n {ıÔc khuy‘n b¿o {◊ {¿m b¿o chng kh‰ng chÍi vÎi {Ê {iŸn nøy.
- M»t cÚa bøn lø cfl th◊ trÌ n‘n v‰ cÒng nflng vø cfl th◊ g…y n‘n bfi b·ng (ph·ng) n’u
sÏ, ch¬m vøo.
- Kh‰ng bao giÏ dÒng {Ê {iŸn nøy n’u nfl bfi h·ng b`t k¸ do cæch nøo.
- Sau khi lø xong ho»c ngay c¿ khi b¬n b· ng· bøn lø mÈt læt, thæo cht cƒm kh·i Á {iŸn
tıÏng vø {»t bøn lø {ˆng tr‘n ch…n cÚa nfl.
-
Nóu dÇy Ûiõn b† h∑ h•ng, bÜn nìn thay dÇy Ûiõn tÜi trung tÇm bÖo hÅnh Philips hoãc cÄc
trung tÇm bÖo hÅnh do Philips µy quyònhoãc nhªng n¨i c° khÖ nÑng vÅ trùnh Û´ t∑¨ng
tº Ûô trÅnh gÇy nguy hiôm.
TR≥©C KHI DØNG LâN [âU
1 Ki◊m tra xem {iŸn æp ghi tr‘n bi◊n ghi s hiŸu cfl cÒng vÎi {iŸn æp
nguÊn {iŸn trong nhø b¬n kh‰ng.
2 Thæo b· cæc tem dæn ho»c gi`y b„c b¿o vŸ Ì m»t bøn løvø lau s¬ch nfl
b≈ng mi’ng v¿i m÷m.
Bøn lø cfl th◊ cfl cht khfli khi dÒng nfl lÀn {Àu ti‘n. Sau mÈt læt khfli s" h’t.
[ÜT NHIóT [ß
1 [»t bøn lø {ˆng tr‘n ch…n cÚa nfl.
2 V»n nm v»n nhiŸt {È tÎi nhiŸt {È lø y‘u cÀu b≈ng cæch xoay nfl tÎi vfi
tr⁄ cÚa d`u hiŸu nhiŸt {È (xem h.1).
- Ki◊m tra nh¡n hiŸu quÀn æo {◊ bi’t nhiŸt {È lø y‘u cÀu.
-
1 Cæc lo¬i v¿i sÔi tÁng hÔp (v⁄ dÙ acrylic, viscose, polyamide, polyester)
-
1 TÍ lÙa (silk)
-
2 Len (wool)
-
3 V¿i sÔi b‰ng (cotton), v¿i lanh (linen)
- Khi b¬n kh‰ng bi’t {Ê {fl løm b≈ng lo¬i høng g¤, h¡y th¯ lø vøo mÈt chË mø s" kh‰ng
nh¤n th`y khi b¬n m»c nfl.
- V¿i tÍ lÙa (silk), v¿i len ho»c v¿i sÔi tÁng hÔp: lø m»t træi cÚa lo¬i høng {fl{◊ trænh cfl
nh˘ng v’t bflng. [◊ trænh nh˘ng v’t , trænh dÒng chˆc n√ng phun nıÎc.
- Bƒt {Àu lø nh˘ng mfln {Ê y‘u cÀu nhiŸt {È lø th`p nh`t, nhı lø cæc thˆ løm b≈ng sÔi
tÁng hÔp.
3 Cƒm cht cƒm {iŸn vøo Á {iŸn tıÏng cfl ti’p {`t.
C|CH L}
1 [»t nm v»n nhiŸt {È tÎi vfi tr⁄ {¡ {ıÔc khuy‘n.
Xem phÀn ‘[»t nhiŸt {È’.
2 Ri‘ng lo¬i GC141, GC130 vø GC125:
[◊ bøn lø nflng l‘n trong hai pht trıÎc khi b¬n bƒt {Àu lø.
N’u b¬n {»t nm v»n nhiŸt {È tÎi mˆc th`p hÍn sau khi lø Ì nhiŸt {È cao, {◊ bøn lø
nguÈi {i trong n√m pht trıÎc khi b¬n l¬i bƒt {Àu lø.
3 Ri‘ng lo¬i GC147, GC146, GC137, GC136 vø GC135:
Bƒt {Àu lø khi {–n t⁄n hiŸu nhiŸt {È møu vøng v˜a tƒt {i vø rÊi l¬i hiŸn sæng (xem h.2).
B
[–n t⁄n hiŸu møu vøng s" th‹nh tho¿ng l¬i hiŸn l‘n trong khi {ang lø.
LAU CHØI V} B~O QU~N
1 Thæo cht cƒm {iŸn kh·i Á {iŸn tıÏng vø {◊ bøn lø nguÈi {i.
2 Lau m»t bøn lø b≈ng mi’ng v¿i Ãm vø b≈ng ch`t r¯a (nıÎc) kh‰ng √n
m‡n.
Gi˘ cho m»t bøn lø trÍn tru: trænh va ch¬m m¬nh vÎi nh˘ng vŒt b≈ng kim lo¬i.
3 Lau chÒi phÀn b‘n tr‘n cÚa bøn lø b≈ng mi’ng v¿i Ãm.
4239 000 47785
8/14

9
CàT GI∑
1 Thæo cht cƒm kh·i Á {iŸn tıÏng.
2 Cun d…y ni {iŸn v‡ng quanh chË {◊ gi˘ d…y {iŸn (xem h.3)
3 Lu‰n lu‰n c`t gi˘ bøn lø {ˆng th∆ng tr‘n ch…n cÚa nfl Ì chË kh‰ ræo vø
an toøn.
B~O [~M & S∂A CH∑A
N’u b¬n cÀn bi’t tin tˆc ho»c n’u b¬n cfl v`n {÷ g¤, h¡y th√m {fia {i◊m m¬ng lıÎi cÚa
h¡ng Philips Ì www.philips.com ho»c li‘n hŸ vÎi Trung t…m PhÙc vÙ Khæch høng cÚa
h¡ng Philips Ì nıÎc b¬n (b¬n s" t¤m th`y s {iŸn tho¬i cÚa h„ Ì tÏ b¿o {¿m khƒp th’
giÎi). N’u kh‰ng cfl Trung t…m PhÙc vÙ Khæch høng Ì nıÎc b¬n, h¡y t¤m tÎi {¬i l˚ cÚa
h¡ng Philips Ì {fia phıÍng b¬n ho»c li‘n hŸ vÎi v√n ph‡ng S¯a ch˘a cæc [Ê DÒng
[iŸn Cæ nh…n vø Gia {¤nh cÚa h¡ng Philips.
H≥¨NG DãN TR≤C TRÜC Kº THUåT
ChıÍng nøy tflm tƒt nh˘ng v`n {÷ th‰ng thıÏng nh`t b¬n cfl th◊ g»p ph¿i vÎi bøn lø
cÚa b¬n. H¡y {„c cæc phÀn khæc nhau {◊ bi’t chi ti’t th‘m. N’u b¬n kh‰ng th◊ gi¿i
quy’t {ıÔc v`n {÷, h¡y li‘n hŸ vÎi Trung t…m S¯a ch˘a gÀn nh`t cÚa h¡ng Philips
ho»c mÈt trong nh˘ng {¬i diŸn cÚa h„.
H¡y xem tÏ b¿o {¿m khƒp th’ giÎi {◊ t¤m s {iŸn tho¬i cÚa Dfich vÙ S¯a ch˘a cÚa h¡ng
Philips ho»c th√m {fia {i◊m m¬ng lıÎi cÚa chng t‰i Ì www.philips.com.
4239 000 47785
9/14

10
●
●
●●
●●●
4239 000 47785
10/14

11
4239 000 47785
11/14

12
4239 000 47785
12/14

13
4239 000 47785
13/14

14
4239 000 47785
14/14
-
 1
1
-
 2
2
-
 3
3
-
 4
4
-
 5
5
-
 6
6
-
 7
7
-
 8
8
-
 9
9
-
 10
10
-
 11
11
-
 12
12
-
 13
13
-
 14
14


Philips GC130 Le manuel du propriétaire
- Catégorie
- Fers
- Taper
- Le manuel du propriétaire
- Ce manuel convient également à
dans d''autres langues
- English: Philips GC130 Owner's manual
Documents connexes
-
Philips GC130/00 Product Datasheet
-
-
-
-
-
Philips GC8962/46 Une information important
-
Philips GC6833/36 Une information important
-