NewAge Products 41100 Manuel utilisateur
- Taper
- Manuel utilisateur

48” 72”
56”
84”
Accessories PRO 3.0
Sink and Faucet
48in, 56in, 72in
Display Wall Shelf Sets
Slatwall
Backsplash
Kit
Slatwall
Accessories
Kit
16sqft. Diamond
Plate Slatwall Kit

Pro 3.0 Series
Garage Sink Cabinet
STOP
ATTENTION: Is your cabinet damaged?
Need help or spare parts? For fastest service,
contact NewAge Products at 1-877-306-8930;
or suppor[email protected].
Do not return to the retailer.
Use two or more people to move, assemble, or
install cabinets to avoid back injury. Do not leave
children unattended near cabinets. High risk
of tipping if cabinets are installed incorrectly:
securely attach cabinets to the wall to avoid
serious injury. For assistance, call 1.877.306.8930;
for U.K 0800.031.4069: e-mail at info@
newageproducts.com.
Warning: Excessive weight hazard!
*.1#"

2
Parts Supplied
Weight Capacity
Unpacking
• Begin by placing the package on a protected at surface.
• Remove all cardboard, foam packaging material and clear plastic bags.
• Dispose / recycle all packaging materials.
• Verify all the contents in the box and gather the required tools.
See “Parts Supplied” and “Tools Needed” in the following sections
Sink Install Kit
Sink 1
Faucet Assembly 1
Top Washer with Sealing Gasket 1
2” Sealing Gasket 1
Threaded Reducer 1
Plastic Fastening Sleeve 1
Drain Body
1
4 -1/4” Rubber Washer
1
Drain Locking Nut
1
Plastic Tailpiece Washer
1
Tailpiece
1
Tailpiece Locking Nut
1
Removable Strainer
1
Anti-Friction Ring
1
Hot(Red) / Cold(Blue) Braided Hoses
1of Each Color
$BCJOFU-FH
-FWFMJOH'PPU
$BCJOFU#PEZ
(BSEFO)PTF"EBQUFS
)BSEXBSF1BDL
Faucet
Assembly
Sink
Sealing
Gasket
Top Washer
with
Sealing Gasket
Plastic
Fastening
Sleeve
Threaded
Reducer
Braided
Hose
Installation Requirements
• For best results, NewAge recommends that this unit be installed by a licensed, professional plumber.
• Please read instructions before beginning installation.
• Make sure that you have all the tools and supplies needed to complete the installation.
• Pressure of supply water: 0.05MPa - 1.0MPA, if greater than 1.0MPa please install pressure reducing valve.
• Temperature of supply water must be less than 90c
Drain
Locking Nut
4 -1/4”
Rubber Washer
Drain Body
Tailpiece
Locking Nut
Plastic
Tailpiece
Washer
Tailpiece
Removable
Strainer
Anti-Friction
Ring
Cabinet Leg
M10 x 65mm
Leveling Foot
Key
Cabinet Body
Garden Hose
Adapter
Hardware
Pack
4 X
4 X
4 X
2 X
4 X
4 X
16 X 4 X 16 X
200 lbs.
200 lbs.
Max 400 lbs.

3
Tools Needed
1 x Plumbers Putty
1 x 12” Magnetic Leveler
1 x #2 Phillips Bit
1 x Tape Measure
1 x 7/16” socket
1 x Cordless Power Drill
1 x Stud Finder
1 x Pencil
1 x Set
Square
1 x Hammer Drill
1 x Masonry Bit
1 x Adjustable wrench
1 x 7/16” Socket driver
wrench
1 x #2 Phillips
Head Screwdriver
1 x #3 Phillips
Head Screwdriver
[optional for masonry]
1
12 3
2
3
Manufacturer Warranty Limited Lifetime
1. Service calls to correct the installation of any NewAge products or to instruct you how to use or install them.
2. Damage resulting from improper handling or shipping of products, or products damaged by accident, misuse, abuse, re,
ood, improper installation, acts of God, neglect, corrosion, modication or mishandling.
3. Products damaged by improperly loading beyond the specied maximum weight capacity outlined in the instructions provided
with the product.
4. Repairs or replacement when your product is used in other than normal, single-family household use, such as a commercial
environment, or handled in anyway inconsistent with the installation instructions included with the product.
5. Cosmetic damage, including scratches, dings, dents or cracks in paint that do not aect the structural or functional capability
of the product.
6. Surfaces damaged due to chemical interaction resulting in corrosion of paint or metal.
7. Replacement parts for NewAge products outside Canada and the United States.
8. Replacement keys or locking mechanisms.
9. Loss of product contents due to theft, re, ood, accident or acts of God.
10. Shipping or freight fees to deliver replacement products or to return defective products.
11. Any labor costs during the limited warranty period.
When this product is installed, operated and maintained according to the instructions attached to or furnished with the product,
NewAge Products Inc. will replace the defective product or parts if the part fails as a result of defective materials or workmanship
for the Lifetime of the product.
NEWAGE PRODUCTS INC. WILL NOT PAY FOR:
IMPLIED WARRANTIES, INCLUDING TO THE EXTENT APPLICABLE WARRANTIES OF MERCHANTABILITY OR FITNESS FOR A PARTICULAR
PURPOSE, ARE EXCLUDED TO THE EXTENT LEGALLY PERMISSIBLE. ANY IMPLIED WARRANTIES THAT MAY BE IMPOSED BY LAW ARE LIMITED
TO ONE YEAR, OR THE SHORTEST PERIOD ALLOWED BY LAW. SOME STATES AND PROVINCES DO NOT ALLOW LIMITATIONS OR EXCLUSIONS
ON HOW LONG AN IMPLIED WARRANTY OF MERCHANTABILITY OR FITNESS LASTS, SO THE ABOVE LIMITATIONS OR EXCLUSIONS MAY NOT
APPLY TO YOU. THIS WARRANTY GIVES YOU SPECIFIC LEGAL RIGHTS, AND YOU MAY ALSO HAVE OTHER RIGHTS WHICH VARY FROM STATE
TO STATE OR PROVINCE TO PROVINCE
DISCLAIMER OF IMPLIED WARRANTIES; LIMITATION OF REMEDIES

4
Installing Feet
Parts Needed.
4X Cabinet Legs
Foot Attachment
Screws
4X Levelling
Foot
1
Stand & level feet.
Open cabinet, remove any shelves
or loose items.
5
Align foot with edge of cabinet. Screw
in 4 x foot attachment screws using #3
Phillips Bit
3
Flip cabinet upside down,
locate holes at corners.
2
Repeat step 3 for each corner.
4

5
Installing the Faucet and Sink
Add top washer with sealing gasket
to faucet assembly and insert braided
hoses through faucet hole on top side
of sink
Parts Needed.
Faucet
Assembly
Sealing
Gasket
Top Washer
with S
ealing
Gasket
Sink
Plastic
Fastening
Sleeve
From the bottom of the sink add the
sealing gasket, and tighten the plas-
tic fastening sleeve.
Sealing Gasket
Plastic Fastening
Sleeve
Threaded
Reducer
Sealing Gasket
Plastic Fastening
Sleeve
Braided
Hose
1
Along the bottom side edges of the
sink, insert four 4mm x 15mm bolts
half way.
3
2
Once the screws have been inserted
half way, place sink into opening.
Align screws underneath sink with
hole openings on cabinet.
4
Push the sink top to either sit ush
to the back of the cabinet or ush
to the front of the cabinet
5

6
Option 1
Option 2
Tighten Screws to secure sink to
cabinet.
Move cabinet to position
67
Installing the Faucet and Sink (cont.)

7
Installing the Sink Drain
Insert the drain body into drain
opening and press into plumber’s
putty.
Apply a thin bead of plumber’s putty
to the perimeter of the drain
opening on the inside of the sink.
Drain Locking Nut
Anti-Friction Ring
Rubber Washer
From the bottom of the sink add the
rubber washer, anti-friction ring and
tighten the drain locking nut
Tailpiece
Tailpiece Locking Nut
Tailpiece Washer
4
5
Clean o excess plumbers putty from
inside of sink and around the drain.
From the bottom of the sink add the
tailpiece washer, tailpiece and
tighten with the tailpiece locking nut.
Parts Needed.
Tailpiece
1
23
Drain
Locking Nut
Drain Body
Plastic
Tailpiece
Washer
Tailpiece
Locking Nut
Anti-Friction
Ring
4 -1/4”
Rubber Washer
Drain Locking Nut
Anti-Friction Ring
Rubber Washer
Tailpiece Locking Nut
Tailpiece
Tailpiece Washer

8
Use plumbers putty to stop any
water leaks around drain opening.
Turn on water and check for leaks
around drain opening.
9
10
Attach the sink drain tailpiece to the
drain pipe outlet
6
7
For assistance connecting sink to
plumbing system please contact
your local contractor or plumber.
Fasten the (red) hot water braided
hose to the hot water intake angle
valve, and the (blue) cold water
braided hose to the cold water
intake angle valve.
Water Intake
Angle Valve
Water Intake
Angle Valve
Note: The hot and cold supply hoses included with this faucet are for use with 3/8” compression stops. If your
stops are a dierent size or type, purchase adapters at your local plumbing supply store or home building center.
8
Installing the Sink Drain (cont.)
Access to water intake valves is
provided by the back wall opening
and bottom of cabinet.

9
Securing Cabinets to Wall
1
Level cabinet
Gather parts.
2
Align cabinet
to stud marks.
• Follow steps 3 to 5.
• Drill 4 pilot holes through the
perforated strip with hammer drill &
masonry bit.
• Use 4 x (
2 ¼” x ¼” )Tapcon Concrete
Anchor into wall. (Not Included)
• OR 4 x (#10 x 2” )Screw with 3/16”
masonry plug into wall. (Not Included)
• Follow Step 6.
Use stud nder to locate the studs
and mark the wall with a pencil.
4
3
4x Wall Screw
(1/4” x 2.5”)
4x Wall Washer
(1/4”)
5
Place cabinet tight
against the wall.
X4
6
Masonry.
Drill 4 wall screws and washers
through perforated holes into studs.
Sink Cabinet: 4 wall screws and 4 washers
Note: Wall hanging brackets are not designed to support the weight of a loaded
cabinet. Cabinets must be secured to the wall using supplied 1/4” x 2.5” lag screws.

10
Hanging Cabinets on Wall
Planning the general position of cabinets.
Step A. Determine the height o the ground you would like the base and locker
cabinets to be and make a horizontal mark at this position.
Step B. Next mark the width of each cabinet in the intended position and ensure
the wall studs fall at least 1.25” in from the edge of the cabinets. This will
ensure there is no interference with the edges of the cabinet and the
wall bracket when hanging the cabinet on the wall.
Note: Ensure there are two studs for the locker to be mounted on as it is easiest to
start the installation with the locker rst. Due to the spacing of the wall studs it is
possible that some base or wall cabinets will only have one stud they will attach
to; This is acceptable as long as the cabinet is bolted to another securely mounted
cabinet.
Parts Needed.
Lag Screw
(1/4” x 2.5”)
Wall Bracket
Height from Floor
Floor
Wall
studs
must fall
1.25” or
more
from
sides of
cabinet
Wall
studs
must fall
1.25” or
more
from
sides of
cabinet
A
A
B
B
Width of Cabinets
Wall Stud
Cabinet Width
Cabinet Layout
2
1
Use stud nder to locate the studs
and mark the wall with a pencil.
Wall Washer
(1/4”x0.9-in)

11
Planning the general position of cabinets. (cont.)
Step C. Measuring up from the line marked in Step A, make a horizontal mark
at the following heights where they intersect the wall stud marks to
determine where the top of the cabinet will be (and where the
hanging bracket will be installed).
1. Locker: Measure 80” vertically from base line and mark at stud locations.
2. Base: Measure 32.25” vertically from base line and mark at stud locations.
3. Wall cabinets: Measure 80” vertically from base line and mark at stud
locations (if installing ush with top of locker).
Step D. Ensure the cabinets will be at a suitable working height and that your
wall cabinets are not out of reach.
Note: The working surface of the base cabinets will be 1.25” higher than
the cabinet with the top installed.
3
Height from Floor
Floor
Locker & Wall 80”
Base Cabinets 32.25”
A
C
C
Hanging Cabinets on Wall (cont.)

12
Hanging Cabinets on Wall (cont.)
4
Hanging cabinets on wall.
Align the top of the wall hanging brackets with the lines marked for
the position of the top of the cabinets(Step C) and attach
the brackets securely into the studs using the supplied
lag bolts and washers.
Note: It is possible to oset the bracket to one side or the other if the bracket
is positioned close to the edge of the intended cabinet position by using the
secondary hole positions on the bracket.
Height from Floor
Floor
Locker & Wall 80”
Base Cabinets 32.25”
A
C
C
WALL
WALL
5
Lift cabinet into place over the brackets and
ush with the wall, and lower into place.
WARNING: Wall backets are not designed to support the weight of a loaded cabinet.
Cabinets must be secured to the wall using supplied 1/4” x 2.5” lag screws.

13
Fastening Cabinets
Note:
Fasten additional cabinets to
initial securely mounted cabinet.
Note:
Remove all drawers before
fastening cabinets.
1
Align bolts, tighten lightly.
Using a 12 inch magnetic level, align the cabinets and tighten all bolts.
2
Parts Needed.
Lock Nut
(1/4”)
Washer
(1/4”)
Hex Bolt
(1/4 x 5/8”)
4 X EACH
CABINET
Bolt each subsequent
cabinet to the previous
one using the supplied ¼”
x 5/8” hex bolts and lock
nuts provided in each base
and wall cabinet.

14
Option of Using a Garden Hose
1
Attach garden hose by threading on
to adaptor.
Unscew the aerator from faucet.
Screw on the garden hose adaptor to
the threaded end of faucet
2
Garden Hose
Garden Hose
Adaptor
3

15
Série Pro 3.0
Cuve de Lavage avec
cabinet
ATTENTION: Est votre armoire endommagée?
Avez vous besoin d’aide ou de pièces de rechange?
Contactez NewAge Products a 1-877-306-8930; ou
suppor[email protected].
Ne pas retourner au détaillant.
Déplacer, assembler ou installer les armoires et armoires-vestiaires
avec l’aide de deux personnes ou plus. Dans le cas contraire, il
pourrait en découler des blessures au dos ou autre. Ne pas laisser
les enfants sans surveillance près des armoires. Risque élevé de
basculement si les armoires ne sont pas installées correctement
: Fixer solidement les armoires au mur pour éviter des blessures
graves.Pour obtenir de l’aide, composer le 1.877.306.8930; au R.-
U., composer le 0800.031.4069; ou envoyer un courriel à l’adresse
info@newageproducts.com.
AVERTISSEMENT: Risque de poids excessif!
ARRÊT
*.1#"

16
Pièces fournies
Capacité de poides
Déballage
• Commencer par placer la boîte sur une surface plate recouverte.
• Retirer tout le carton, le matériel d’emballage en mousse et les sacs en plastique transparent.
• Mettre au rebus ou recycler tous les matériaux d’emballage.
• Vérier tout le contenu de la boîte et rassembler les outils nécessaires.
Voir Pièces fournies et Outils nécessaires ci-dessous.
Quantités
Évier 1
Asemblée de robinet 1
Rondelle en caoutchouc 1
Joint d’étanchéité - 2 pouce 1
Reducteur leté 1
Douille de xation en plastique 1
Panier de vidange 1
4 -1/4”Rondelle à caoutchouc 1
Anneau d’about 1
Écrou de vidange 1
Rondelle en plastique 1
Rallonge d’about 1
Contre-écrou 1
Tuyau tressé 2
Jambe de cabinet 4
Pied réglable (M10 x 65mm) 4
Armoire 1
Package de Pièces fournis 1
Passoire 1
Asemblée
de robinet
Évier
Joint
d’étanchéité
Reducteur
leté
Tuyau
tressé
Guides d’installation
•Pour de meilleurs résultats, NewAge recommande que cette unité soit installée par un plombier professionnel autorisé.
• Veuillez lire les instructions avant de commencer l’installation.
• Assurez-vous d’avoir tous les outils et les fournitures nécessaires pour compléter l’installation.
• Pression de l’eau d’alimentation: 0.05MPa - 1.0MPA, si supérieure à 1.0MPa, installez une soupape de réduction de pres-
sion.
• La température de l’eau d’alimentation doit être inférieure à 90 ° C
Écrou de
vidange
4 -1/4”
Rondelle
à caoutchouc
Panier de
vidange
Contre-écrou
Rondelle en
plastique
Rallonge
d’about
Passoire
Anneau d’about
Jambe de cabinet
Pied réglable
(M10 x 65mm)
Clé
Armoire
Package de
Pièces fournis
4 X
4 X
2 X
4 X
4 X
16 X 4 X 16 X
Adaptateur pour
boyau d’arrosage
Douille de
xation en
plastique
Rondelle
en caoutchouc
200 lbs.
200 lbs.
Max 400 lbs.

17
Outils nécessaires
1 x Mastic
1 x
vérin magnétique
de 12 po
1 x Tete Philips nº 2
1 x Ruban à mesurer
1 x douille de
7/16 po
1 x Perceuse sans l
1 x localisateur de
montants
1 x Crayon
1 x Équerre
1 x marteau
perforateur
1 x meche
à maçonnerie
1 x clé ajustable
1 x clé a douilles
de 7/16 po
1 x cle a douilles
de 8mm
1 x Tournevis à
tête Philips n° 2
1 x Tournevis à
tête Philips n° 3
[facultatif pour la maçonnerie]
1
12 3
2
3
Garantie limitée d’un an oerte par le fabricant
1. Les visites d’un réparateur pour corriger l’installation de produits NewAge ou pour expliquer comment les utiliser ou les installer.
2. Les dommages résultant de produits endommagés suite à un accident, une mauvaise utilisation, un abus, un incendie, une inondation, une mauvaise
installation, une catastrophe naturelle, une négligence, une modication ou une mauvaise manipulation.
3. Les réparations ou le remplacement d’un produit lorsque ce dernier est utilisé ailleurs que dans une résidence unifamiliale normale, comme dans un
environnement commercial, ou lorsque le produit est manipulé en contradiction avec les instructions d’installation fournies avec le produit.
4. Les surfaces endommagées par suite d’une interaction chimique.
5. Les pièces de rechange pour des produits se trouvant à l’extérieur du Canada, des États-Unis ou du Royaume-Uni.
6. La perte du contenu des produits pour cause de vol, d’incendie, d’inondation, d’accident ou de catastrophe naturelle.
7. Les frais d’expédition ou de livraison des produits de rechange ou de retour des produits défectueux.
8. Les frais de main-d’œuvre pendant la période de la garantie limitée.
Si ce produit a été installé, utilisé et entretenu conformément aux instructions jointes au produit, ou fournies avec
celui-ci, NewAge Products Inc. remplacera les pièces ou articles défectueux si la défaillance de la pièce en question
résulte d’un défaut de pièce ou de main-d’œuvre, et ce, pendant un an à compter de la date d’achat du produit.
NEWAGE PRODUCTS INC. N’ASSUMERA PAS LES COÛTS SUIVANTS :
LES GARANTIES IMPLICITES, Y COMPRIS LES GARANTIES APPLICABLES DE QUALITÉ MARCHANDE OU DE CONFORMITÉ À UN
USAGE PARTICULIER, SONT EXCLUES DANS LA LIMITE OÙ LA LOI LE PERMET. TOUTE GARANTIE IMPLICITE QUI POURRAIT ÊTRE
IMPOSÉE PAR LA LOI DOIT SE LIMITER À UN AN, OU À LA PÉRIODE LA PLUS COURTE PERMISE PAR LA LOI. CERTAINS ÉTATS AINSI
QUE CERTAINES PROVINCES NE PERMETTENT PAS LES LIMITATIONS OU LES EXCLUSIONS SUR LA DURÉE D’UNE GARANTIE
IMPLICITE DE QUALITÉ MARCHANDE OU DE CONFORMITÉ À UN USAGE PARTICULIER. PAR CONSÉQUENT, IL EST POSSIBLE QUE
LES LIMITATIONS CI-DESSUS NE S’APPLIQUENT PAS À VOUS. CETTE GARANTIE VOUS DONNE DES DROITS LÉGAUX PARTICULIERS
ET VOUS POURRIEZ ÉGALEMENT DISPOSER D’AUTRES DROITS VARIANT SELON L’ÉTAT OU LA PROVINCE
EXONÉRATION DE GARANTIES IMPLICITES; LIMITATION DE RECOURS

18
Installation des pieds
Pièces nécessaires.
4X Jambes de cabinet
Foot Attachment
Screws
4X Pied réglable
(M10 x 65mm)
1
Remettre à l’endroit et niveler.
Ouvrir l’armoire et retirer les
étagères ou les objets en vrac.
5
Aligner le pied sur le bord de l’armoire.
Visser4 vis à sécurités dans les trous
ultilisant un tête de vis Philips #3
3
Retourner l’armoire et
repérer les trous dans les coins.
2
Répéter l’étape 3 pour chaque coin.
4
La page est en cours de chargement...
La page est en cours de chargement...
La page est en cours de chargement...
La page est en cours de chargement...
La page est en cours de chargement...
La page est en cours de chargement...
La page est en cours de chargement...
La page est en cours de chargement...
La page est en cours de chargement...
La page est en cours de chargement...
La page est en cours de chargement...
La page est en cours de chargement...
La page est en cours de chargement...
La page est en cours de chargement...
La page est en cours de chargement...
La page est en cours de chargement...
La page est en cours de chargement...
La page est en cours de chargement...
La page est en cours de chargement...
La page est en cours de chargement...
La page est en cours de chargement...
La page est en cours de chargement...
La page est en cours de chargement...
La page est en cours de chargement...
La page est en cours de chargement...
La page est en cours de chargement...
La page est en cours de chargement...
La page est en cours de chargement...
La page est en cours de chargement...
La page est en cours de chargement...
La page est en cours de chargement...
La page est en cours de chargement...
La page est en cours de chargement...
La page est en cours de chargement...
La page est en cours de chargement...
La page est en cours de chargement...
La page est en cours de chargement...
La page est en cours de chargement...
La page est en cours de chargement...
La page est en cours de chargement...
La page est en cours de chargement...
La page est en cours de chargement...
La page est en cours de chargement...
La page est en cours de chargement...
La page est en cours de chargement...
La page est en cours de chargement...
La page est en cours de chargement...
La page est en cours de chargement...
La page est en cours de chargement...
La page est en cours de chargement...
La page est en cours de chargement...
La page est en cours de chargement...
La page est en cours de chargement...
La page est en cours de chargement...
La page est en cours de chargement...
La page est en cours de chargement...
La page est en cours de chargement...
La page est en cours de chargement...
La page est en cours de chargement...
La page est en cours de chargement...
La page est en cours de chargement...
La page est en cours de chargement...
La page est en cours de chargement...
La page est en cours de chargement...
La page est en cours de chargement...
La page est en cours de chargement...
La page est en cours de chargement...
La page est en cours de chargement...
La page est en cours de chargement...
La page est en cours de chargement...
-
 1
1
-
 2
2
-
 3
3
-
 4
4
-
 5
5
-
 6
6
-
 7
7
-
 8
8
-
 9
9
-
 10
10
-
 11
11
-
 12
12
-
 13
13
-
 14
14
-
 15
15
-
 16
16
-
 17
17
-
 18
18
-
 19
19
-
 20
20
-
 21
21
-
 22
22
-
 23
23
-
 24
24
-
 25
25
-
 26
26
-
 27
27
-
 28
28
-
 29
29
-
 30
30
-
 31
31
-
 32
32
-
 33
33
-
 34
34
-
 35
35
-
 36
36
-
 37
37
-
 38
38
-
 39
39
-
 40
40
-
 41
41
-
 42
42
-
 43
43
-
 44
44
-
 45
45
-
 46
46
-
 47
47
-
 48
48
-
 49
49
-
 50
50
-
 51
51
-
 52
52
-
 53
53
-
 54
54
-
 55
55
-
 56
56
-
 57
57
-
 58
58
-
 59
59
-
 60
60
-
 61
61
-
 62
62
-
 63
63
-
 64
64
-
 65
65
-
 66
66
-
 67
67
-
 68
68
-
 69
69
-
 70
70
-
 71
71
-
 72
72
-
 73
73
-
 74
74
-
 75
75
-
 76
76
-
 77
77
-
 78
78
-
 79
79
-
 80
80
-
 81
81
-
 82
82
-
 83
83
-
 84
84
-
 85
85
-
 86
86
-
 87
87
-
 88
88
-
 89
89
-
 90
90
NewAge Products 41100 Manuel utilisateur
- Taper
- Manuel utilisateur
dans d''autres langues
- English: NewAge Products 41100 User manual
Documents connexes
-
NewAge Products 56641 Manuel utilisateur
-
NewAge Products 56641 Manuel utilisateur
-
 NewAge Products 51803 Mode d'emploi
-
 NewAge Products 52014 Mode d'emploi
-
 NewAge Products 63274 Mode d'emploi
-
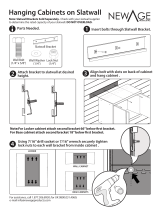 NewAge Products 50979 Guide d'installation
-
NewAge Products 50369 Mode d'emploi
-
 NewAge Products 50500 Le manuel du propriétaire
-
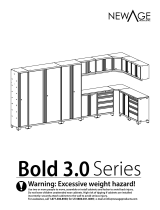 NewAge Products 50011 Manuel utilisateur
-
 NewAge Products 60000 Manuel utilisateur
Autres documents
-
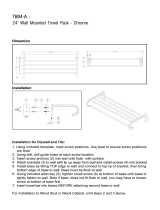 MODONA TB04-A Guide d'installation
-
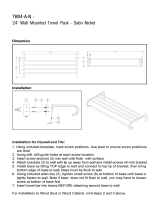 MODONA TB04-A-N Guide d'installation
-
 T'nB ACDI032978 Fiche technique
-
 Newage 10-Outlet Power Strip Manuel utilisateur
-
 Usl SK19303-PW Guide d'installation
-
CANARMNA IPL417A01 Manuel utilisateur
-
 Newage 56 Manuel utilisateur
-
Elements M902-45-RU MO Mode d'emploi
-
Vita CLASSIC 3×5 Keyhole Composting Garden Mode d'emploi
-
HyLoft 00291 Mode d'emploi


