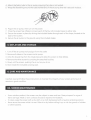
Kodak Large Inflatable Screen Manuel utilisateur
- Taper
- Manuel utilisateur

User
Manual
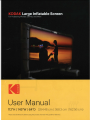
112"H
I 145"W I
64"0
(284.48
cm
I 368.3
cm
I 162.56 cm)
Please read
all
directions before using the product and retain this guide for reference.

CONTENTS
1
INTRODUCTION
3
2
PARTS
3
3
SAFETY
PRECAUTIONS
4
4
SETUP
4-5
5
DEFLATION
AND
STORAGE
5
6
CARE
AND
MAINTENANCE
5-6
A.
SCREEN
MAINTENANCE 5
B.
USING
THE
REPAIR
PATCHES
6
C.
AIR
PUMP
MAINTENANCE 6
7
CUSTOMER
SERVICE
6
8
WARRANTY
7
2

1.
INTRODUCTION
Thank you for purchasing the
KODAK
Large Inflatable Screen. This User Guide
is
intended
to
provide
you with guidelines
to
ensure that operation
of
this
product
is
safe and does not pose risk
to
the
user.
Any use that does not
conform
to
the guidelines described
in
this User Guide may void the limited
warranty.
Please read
all
directions before using the
product
and retain this guide for reference. This
product
is
intended for household use only.
This
product
is
covered by a limited one-year warranty. Coverage
is
subject
to
limits and exclusions.
See warranty for details.
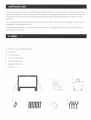
2. PARTS
A.
KODAK
Large Inflatable Screen
B.
Air Pump
C.
Carrying Case
D.
Air Pump Stakes
(2)
E.
Screen Stakes
(8)
F.
Repair Patches
(4)
G.
Rope
(4)
A.
D.
//
C.
3

3.
SAFETY PRECAUTIONS
• This
product
should only be installed by
an
adult. Keep
all
electrical parts away from children.
• Keep
all
electrical lines, radios, speakers and other electrical devices away from the inflatable screen
and the air
pump
or risk serious electric shock.
•
Do
not place the screen near or under overhead electrical lines or risk serious electric shock.
•
Do
not immerse the screen or air
pump
in
water.
• The air
pump
is
a high volume device, and
is
capable
of
moving a lot
of
air very quickly. When
us
ing
the air
pump
, keep
in
mind the following:
- Place the air
pump
in
an
area where it will not suck
in
dirt
or leaves.
- Keep away
from
water.
- Keep away
from
high-traffic areas.
- Keep away from children.
• Only use the provided air
pump
for inflation
• The air
pump
is
not a toy. It should only be used under the direct supervision
of
a
competent
adult.
• This
product
is
intended for domestic and
outdoor
use only.
• When
in
use, adult supervision
is
required.
• Keep
all
parts away from open flames and other heat sources.
•
Do
not attach or leave any items on/inside the product.
•
Do
not
jump
off
of
or
onto
the product.
•
Do
not use this
product
in
public areas or
as
a rental.
•
Do
not use
in
windy conditions.
•
Do
not leave the
product
out
in
the rain.
•
Do
not open or try
to
service the air
pump
. If the air
pump
needs servicing, take it
to
a
qualified professional.
• Clearly mark the path
of
the power cord
to
avoid tripping and/or damage by yard
equipment
such
as
lawn mowers,
etc
.
•
Do
not leave air
pump
unattended.
•
Do
not cover the air intakes when the air
pump
is
being used and
do
not
insert small objects into
any part
of
the air pump.
•
We
do
not recommend using extension cords with this product.
• Disconnect the air
pump
from the power source when moving the screen.
•
To
reduce the risk
of
fire or electric shock,
do
not
use the air
pump
with any solid-state speed
control device.
• Securely stake the air
pump
and screen into the ground before u
se.
4.
SETUP
1.
Remove the screen and
all
other parts from the box, making sure the parts in the box
matc
h those
listed
in
the Parts section
of
this manual.
2.
Connect the white screen
to
the inflatable frame by
connect
ing
the
attached buckles.
3.
Unroll and unfold the screen
body
in
the center
of
the area where you would like
to
use i
t.
4

4.
Attach the fabric
tube
to
the air pump, ensuring the
tube
is
not twisted.
5.
Wrap the drawstring around the
tube
and the end
of
the air pump, then tie it securely
in
place.
6.
Plug
in
the air pump, then turn on the power.
7. Once the screen has inflated,
connect
each
of
the four
(4)
included ropes
to
either side.
8. Secure the screen
in
place by driving the included stakes through each
of
the loops, located at the
base
of
the screen.
9.
Secure the air
pump
to
the ground using the included stakes.
5. DEFLATION AND STORAGE
1.
Turn off the air
pump
and unplug it from the outlet
2.
Remove
all
stakes
in
the screen and air pump.
3.
Untie the drawstring from the intake
tube
and allow the screen
to
fully deflate.
4.
Remove the white screen by undoing the attached buckles.
5. Slowly roll the screen, pushing the air
out
as
you
do
so.
6.
Store inside the included carrying case.
6. CARE AND MAINTENANCE
Carefully read and follow these instructions
to
maintain the integrity
of
your screen and ensure it
remains
in
good
condition.
6A.
SCREEN MAINTENANCE
•
As
an
outdoor
product, the screen may be subject
to
wear and tear. Always inspect for signs
of
fabric damage. Weak or torn surfaces should be repaired immediately.
•
To
clean, wipe the screen with a
dry
cloth, or a cloth dampened with a neutral, sanitizing solution.
• Never store the screen while it
is
wet. Allow it
to
dry
before rolling it up, or risk the growth
of
mildew
or other bacteria.
5


KODAKPHOTOPLUS.
COM
The Kodak trademark. logo and trade dress are used under license from Eastman Kodak Company.
All
other products. brand names. company names and logos are trademarks
of
their respective
owners. used merely
to
identify their respective products. and are not meant
to
connote
any
sponsorship, endorsement or approval.
Distributed by C&A Marketing, Inc
..
114
lived
Lane
East,
Edison.
NJ
08837
USA,
C&A Marketing
UK
LTD,
167
Hermitage
Road.
Crusader Industrial Estate. London N4
1LZ.
UK
©2019. C&A
IP
Holdings,
LLC.
All Rights Reserved. Made
In
China.

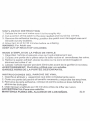
VINYL
P.A.TCH
INSTR.UCTIC>N
1.
Deflate
the
item
and
make
sure
it
is
thoroughly
dry.
2.
Cut
a
portion
of
the
patch
to
the
size
needed
and
round
the
corners.
3.
Remove
the
adhesive
backing
,position
the
patch
over
damaged
area
and
Smooth
out
any
bubbles
.
4.
Allow
item
to
sit
for
30
minutes
before
re
-
inflating
.
VVARNING:
For
Adult
use.
KEEP
C>UT
C>F
RE.A.CH
C>F
CHILDR.EN-
NIC>DE
D'ENIPLC>I
DE
L.A.
PIE.CE
DE
VINVLE
1 .
Degonflez
I
'article
et
assurez:
-
vous
qu'il
soit
entierement
sec.
2.
Coupez:
une
partie
de
la
piece
salon
la
taille
voulue
et
arrondissez:
les
coins.
3.
Retirez:
le
papier
adhesif,
placez:
la
piece
sur
la
zone
endommagee
et
eliminez:
les
bulles
d'
air.
4 .
Laissez:
I '
article
reposer
pendant
30minutes
avant
de
le
gonfler
a
nouveau
.
A.VER.TISSENIENT:
D<>lt
Atre
utlllse
par
us,
aclult~-
G.A.RDEZ
HORS
DE
L.A.
PORTEE
DES
ENFA.N
"
TS.
INSTR.UC:C:IC>NES
DEL
P.A.R.C:HE
DE
VINIL
1 .
Desinfle
el
atrfculo
y
asegurese
qua
este
completamente
seco.
.2.
Corte
una
parte
del
parche
al
tamano
necesario
y
redondee
las
esquinas.
3.
Remueva
la
parte
adhesiva.
coloque
el
parche
sobre
el
area
danada
y
elinime
las
burbujas.
4.
Deja
reposar
el
artfculo
por
30
minutes
antes
de
inflar
de
nuevo.
A.DVER.TENC:IA.:Para
use>
adult<>.
MA.NTENGA.
FLIER.A.
DEL
A.LC:A.NCE
DE
LOS
NINOS.
3L-O
-
 1
1
-
 2
2
-
 3
3
-
 4
4
-
 5
5
-
 6
6
-
 7
7
-
 8
8
-
 9
9


Kodak Large Inflatable Screen Manuel utilisateur
- Taper
- Manuel utilisateur
dans d''autres langues
Autres documents
-
Step2 Play Yard Inflatable Bouncer™ Assembly Instructions
-
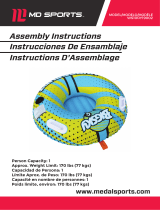
MD Sports WS100Y19012 Manuel utilisateur
-
-
-
 Big Sky Carvers WS100Y19002 Mode d'emploi
-
-
-
