La page est en cours de chargement...

SNC407
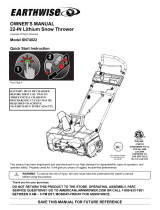
SNC407
P0802731-02, Rev B


1 Description.........................................4
1.1 Purpose.............................................................. 4
1.2 Overview........................................................... 4
1.3 Packing list........................................................ 4
2 General appliance safety
warnings.............................................4
2.1 Training..............................................................4
2.2 Preparation.........................................................4
2.3 Operation........................................................... 5
2.4 Maintenance.......................................................5
2.5 Recommended ambient temperature range:...... 6
3 Symbols on the product.................... 6
4 Risk levels...........................................6
5 Environmentally safe battery
disposal...............................................6
6 Proposition 65....................................7
7 Installation......................................... 7
7.1 Unpack the machine.......................................... 7
7.2 Install the upper handle......................................7
7.3 Install the middle handle....................................8
7.4 Install the chute deflector.................................. 8
7.5 Install the chute control rod...............................8
7.6 Install the battery pack.......................................8
7.7 Remove the battery pack................................... 9
8 Operation........................................... 9
8.1 Cold weather operation......................................9
8.2 Blue LED light...................................................9
8.3 Start the machine............................................... 9
8.4 Stop the machine............................................. 10
8.5 Adjust the discharge chute...............................10
8.6 Adjust the chute deflector................................10
8.7 Operation tips...................................................11
9 Maintenance.....................................11
9.1 General maintenance........................................11
9.2 Replace the scraper.......................................... 11
9.3 Replace the impeller........................................ 11
9.4 Store the machine............................................ 13
10 Troubleshooting...............................13
11 Technical data..................................14
12 Limited warranty............................ 14
13 Exploded view..................................15
3
English EN

1 DESCRIPTION
1.1 PURPOSE
This machine is used to remove and clear away snow from
sidewalks, driveways and other paved ground-level surfaces.
1.2 OVERVIEW
1
2
3
4
5
6
7
8
9
10
11
12
13
14
1Handle bar
2Bail Lever
3Chute control rod
4Upper handle
5Middle handle
6Lower handle
7Scraper
8Impeller
9LED lights
10 Discharge chute
11 Battery door
12 Chute deflector
13 Chute deflector angle control handle
14 Safety switch button
1.3 PACKING LIST
1Snow thrower bare
tool
2Chute deflector
assembly
4Control rod assembly
5Upper handle
assembly
6Middle handle
assembly
6Manual
2 GENERAL APPLIANCE
SAFETY WARNINGS
WARNING
Read all safety warnings and all instructions. Failure to
follow the warnings and instructions may result in electric
shock, fire and/or serious injury.
Save all warnings and instructions for future reference.
The term “appliance" in the warnings refers to your battery-
operated (cordless) snow thrower.
2.1 TRAINING
• Do not allow children under the age of 14 to operate this
tool. Children who are 14 years of age or older must read
and understand the operating instructions and safety rules
in this manual and must be trained and supervised by a
parent.
• Read the operating and service instruction manual
carefully. Be thoroughly familiar with the controls and
the proper use of the appliance. Know how to stop the
unit and disengage the controls quickly.
• Never allow children to operate the appliance. Never
allow adults to operate the appliance without proper
instruction.
• Keep the area of operation clear of all persons,
particularly small children, and pets.
• Exercise caution to avoid slipping or falling, especially
when operating in reverse.
• Do not use on graveled surfaces.
• Dress Properly – Do not wear loose clothing or jewelry.
They can be caught in moving parts.
• Wear rubber boots when operating the appliance.
• Operation of the appliance in the hand-held position is
unsafe, except in accordance with the special instructions
for such use provided in the operator’s manual.
2.2 PREPARATION
• Thoroughly inspect the area where the appliance is to be
used and remove all doormats, sleds, boards, wires, and
other foreign objects.
• Do not operate the appliance without wearing adequate
winter garments. Wear footwear, which will improve
footing on slippery surfaces.
• Adjust the housing height to clear gravel or crushed rock
surface.
• Never attempt to make any adjustments while the
appliance is running (except where specifically
recommended by manufacturer).
• Always wear safety glasses or eye shields during
operation or while performing an adjustment or repair to
protect eyes from foreign objects that may be thrown
from the appliance.
• Prevent unintentional starting. Ensure the switch is in the
off-position before connecting to battery pack, picking up
4
English
EN

or carrying the appliance. Carrying the appliance with
your finger on the switch or energizing appliance that
have the switch on invites accidents.
• Disconnect the battery pack from the appliance before
making any adjustments, changing accessories, or storing
appliance. Such preventive safety measures reduce the
risk of starting the appliance accidentally.
• When battery pack is not in use, keep it away from other
metal objects, like paper clips, coins, keys, nails, screw or
other small metal objects, that can make a connection
from one terminal to another. Shorting the battery
terminals together may cause burns or a fire.
• Under abusive conditions, liquid may be ejected from the
battery; avoid contact. If contact accidentally occurs,
flush with water. If liquid contacts eyes, additionally seek
medical help. Liquid ejected from the battery may cause
irritation or burns.
2.3 OPERATION
• Do not put hands or feet near or under rotating parts.
Keep clear of the discharge opening at all times.
• Exercise extreme caution when operating on or crossing
gravel drives, walks, or roads. Stay alert for hidden
hazards or traffic.
• After striking a foreign object, turn the machine off and
remove the battery pack, and then inspect it for damage.
Repair any damage before restarting and using the
machine.
• If the appliance should start to vibrate abnormally, stop
the machine and check immediately for the cause.
Vibration is generally a warning of trouble.
• Stop the machine whenever you leave the operating
position, before unclogging the collector/impeller housing
or discharge guide, and when making any repairs,
adjustments, or inspections.
• When cleaning, repairing, or inspecting, make certain the
collector/impeller and all moving parts have stopped.
• Exercise extreme caution when operating on slopes.
• Never operate the appliance without proper guards, keep
other safety protective devices in place and working.
• Never direct the discharge toward people or areas where
property damage can occur. Keep children and others
away.
• Don’t Overreach – Keep proper footing and balance at all
times.
• Do not overload the machine capacity by attempting to
clear snow at too fast a rate.
• Don’t Force appliance – It will perform better and safer at
the rate for which it was designed.
• Never operate the appliance at high transport speeds on
slippery surfaces. Use care when reversing.
• Never direct discharge at bystanders or allow anyone in
front of the appliance.
• Disengage power to the collector/impeller when the
appliance is transported or not in use.
• Use only attachments and accessories approved by the
manufacturer of the appliance (such as wheel weights,
counterweights, or cabs).
• Never operate the appliance without good visibility or
light. Always be sure of your footing, and keep a firm
hold on the handles.
• Walk, never run.
• Clearing a Clogged Discharge Chute.
• Hand contact with the rotating impeller inside the
discharge chute is the most common cause of injury
associated with appliances. Never use your hand to clean
out the discharge chute. To clear the chute:
1. SHUT THE ENGINE(Motor) OFF!
2. Wait 10 seconds to be sure the impeller blades have
stopped rotating.
3. Always use a clean-out tool, not your hands.
• If the appliance strikes a foreign object follow these
steps:
1. Stop the appliance. Release the switch.
2. Remove the battery pack.
3. Inspect for damage.
4. Repair any damage before restarting and operating
the appliance.
2.4 MAINTENANCE
• Check shear bolts; engine-mounted bolt, etc., at frequent
intervals for proper tightness to be sure the appliance is in
safe working condition.
• Always refer to owner’s guide instructions for important
details if the appliance is to be stored for an extended
period.
• Store Idle appliances Indoors – When not in use, the
appliances should be stored indoors in a dry, locked-up
place – out of reach of children.
• Check shear bolts and other bolts at frequent intervals for
proper tightness to be sure the equipment is in safe
working condition.
• Run the appliance a few minutes after throwing snow to
prevent freeze-up of the collector/impeller.
• Do not use a battery pack or appliance that is damaged or
modified. Damaged or modified batteries may exhibit
unpredictable behavior resulting in fire,explosion or
risk of injury.
• Do not expose a battery pack or appliance to fire or
excessive temperature space. Exposure to fire or
temperature above 265°F (130°C) may cause explosion.
• Follow all charging instructions and do not charge the
battery pack or appliance outside of the temperature range
specified in the instructions. Charging improperly or at
temperatures outside of the specified range may damage
the battery and increase the risk of fire.
• Recharge only with the charger specified by the
manufacturer. A charger that is suitable for one type of
battery pack may create a risk of fire when used with
another battery pack.
5
English EN

• Use appliances only with specifically designated battery
packs. Use of any other battery packs may create a risk of
injury and fire.
• Have servicing performed by a qualified repair person
using only identical replacement parts. This will ensure
that the safety of the product is maintained.
• Do not modify or attempt to repair the appliance or the
battery pack (as applicable) except as indicated in the
instructions for use and care.
• Maintain appliance with care - follow instructions for
changing accessories.
• Maintain or replace safety and instructions labels, as
necessary.
2.5 RECOMMENDED AMBIENT
TEMPERATURE RANGE:
Item Temperature
Snow Thrower storage tem-
perature range
1.4 ˚F (-17 ˚C) ~ 113 ˚F (45
˚C)
Snow Thrower operation
temperature range
1.4 ˚F (-17 ˚C) ~ 113 ˚F (45
˚C)
Battery charging temperature
range
39 ˚F (4 °C) ~ 104 ˚F (40 ˚C)
Charger operation tempera-
ture range
39 ˚F (4 °C) ~ 104 ˚F (40 ˚C)
Battery discharging tempera-
ture range
1.4 ˚F (-17 ˚C) ~ 113 ˚F (45
˚C)
Battery storage temperature
range
32 °F (0 °C) ~ 113 °F (45
°C)
3 SYMBOLS ON THE PRODUCT
Some of the following symbols may be used on this tool.
Please study them and learn their meaning. Proper
interpretation of these symbols will allow you to operate the
tool better and safer.
Symbol Explanation
Direct current
Precautions that involve your safety.
Read and understand all instructions
before operating the product, and fol-
low all warnings and safety instruc-
tions.
Wear eye protection.
Thrown objects can ricochet and re-
sult in personal injury or property
damage. Wear protective clothing and
boots.
Symbol Explanation
Keep bystanders a safe distance from
the machine.
Keep hands away from the discharge
area.
Stay away from moving parts. Keep
all guards and shields in place.
Keep feet out of impeller. Keep feet
away from rotating impeller.
Stop the motor and remove the bat-
tery before leaving the product.
4 RISK LEVELS
The following signal words and meanings are intended to
explain the levels of risk associated with this product.
SYM-
BOL
SIGNAL MEANING
DANGER Indicates an imminently haz-
ardous situation, which, if not
avoided, will result in death
or serious injury.
WARNING Indicates a potentially hazard-
ous situation, which, if not
avoided, could result in death
or serious injury.
CAUTION Indicates a potentially hazard-
ous situation, which, if not
avoided, may result in minor
or moderate injury.
CAUTION (Without Safety Alert Sym-
bol) Indicates a situation that
may result in property dam-
age.
5 ENVIRONMENTALLY SAFE
BATTERY DISPOSAL
The toxic and corrosive materials below are in the batteries
used in this machine: Lithium-Ion, a toxic material.
6
English
EN

WARNING
Discard all toxic materials in a specified manner to prevent
contamination of the environment. Before discarding
damaged or worn out Li-ion battery, contact your local
waste disposal agency, or the local Environmental
Protection Agency for information and specific instructions.
Take the batteries to a local recycling and/or disposal center,
certified for lithium-ion disposal.
WARNING
If the battery pack cracks or breaks, with or without leaks,
do not recharge it and do not use. Discard it and replace
with a new battery pack. DO NOT TRY TO REPAIR IT! To
prevent injury and risk of fire, explosion, or electric shock,
and to avoid damage to the environment:
• Cover the terminals of the battery with heavy-duty
adhesive tape.
• DO NOT try to remove or destroy any of the battery
pack components.
• DO NOT try to open the battery pack.
• If a leak develops, the released electrolytes are
corrosive and toxic. DO NOT get the solution in the
eyes or on skin, and do not swallow it.
• DO NOT put these batteries in your regular household
trash.
• DO NOT incinerate.
• DO NOT put them where they will become part of any
waste landfill or municipal solid waste stream.
• Take them to a certified recycling or disposal center.
6 PROPOSITION 65
WARNING
This product contains a chemical known to the state of
California to cause cancer, birth defects or other
reproductive harm. Some dust created by power sanding,
sawing, grinding, drilling, and other construction activities
contains chemicals known to cause cancer, birth defects or
other reproductive harm. Some examples of these chemicals
are:
• Lead from lead-based paints;
• Crystalline silica from bricks and cement and other
masonry products;
• Arsenic and chromium from chemically treated lumber.
Your risk of exposure to these chemicals varies depending
on how often you do this type of work. To reduce your
exposure to these chemicals, work in a well-ventilated area,
and work with approved safety equipment, such as dust
masks that are specially designed to filter out microscopic
particles.
Save these instructions.
7 INSTALLATION
WARNING
Do not change or make accessories that are not
recommended by the manufacturer.
WARNING
Do not connect to power supply until you assemble all the
parts.
7.1 UNPACK THE MACHINE
WARNING
Make sure that you correctly assemble the machine before
use.
WARNING
• If parts of the machine are damaged, do not use the
machine.
• If you do not have all the parts, do not operate the
machine.
• If parts are damaged or missing, contact the service
center.
1. Open the package.
2. Read the documentation provided in the box.
3. Remove all the unassembled parts from the box.
4. Remove the machine from the box.
5. Discard the box and packing material in compliance with
local regulations.
WARNING
For your personal safety, do not insert battery before the
tool is assembled completely.
7.2 INSTALL THE UPPER HANDLE
4
5
15
16
7
English EN

1. Align the holes in the middle handle (5) and the upper
handle (4).
2. Put the bolts (15) through the holes.
3. Tighten the handle knobs (16) onto the bolts (15).
4. Do the same operation on the other side.
7.3 INSTALL THE MIDDLE HANDLE
5
6
16 35
1. Align the holes in the middle handle (5) and the lower
handle (6).
2. Put the bolts (15) through the middle handle (5) and the
lower handle (6).
3. Tighten the handle knob (16) onto the bolt (35).
4. Repeat for left/right side.
7.4 INSTALL THE CHUTE
DEFLECTOR
12
17
18
19
12
20
1. Align the tabs (17) on to the slots (18) on one side first.
2. Once you have engaged one tab on one slot push until
you hear a click. Repeat on other side.
3. Push the chute deflector (12).
4. Make sure that the tabs (17) engage the slots (18) on the
two sides.
5. Make sure that the posts (19) engage the holes (20) on the
two sides.
7.5 INSTALL THE CHUTE CONTROL
ROD
21
23
22
1. Align the holes in the upper chute control rod (21) and
lower chute control rod (23).
2. Put the hitch pin (22) through the holes.
3
19
3. Align the arrows in the discharge chute and snow thrower
deck. Make sure the discharge chute faces forward.
4. Put the end of the chute control rod (3) straight through
the hole (19) in the bracket. Keep the grip handle down.
5. Push the chute control rod (21) into the hole (19) behind
the deck.
6. Turn the grip handle left and right to make sure that the
discharge chute moves in the same direction.
7.6 INSTALL THE BATTERY PACK
1133
8
English
EN

WARNING
• If the battery pack or charger is damaged, replace the
battery pack or the charger.
• Stop the machine and wait until the engine stops before
you install or remove the battery pack.
• Read, know, and follow the instructions in the battery
and charger manual.
1. Open the battery door (11).
2. Align the ribs on the battery pack (33) with the grooves in
the battery compartment.
3. Push the battery pack (33) into the battery compartment
until the battery pack (33) locks into place.
4. When you hear a click, the battery pack (33) is installed.
5. Close the battery door (11).
7.7 REMOVE THE BATTERY PACK
1. Open the battery door (11).
2. Push and hold the battery release button.
3. Remove the battery pack (33) from the machine.
8 OPERATION
WARNING
Wear eye protection during operation.
8.1 COLD WEATHER OPERATION
The safe battery operation temperature ranges from 1°F
(-17°C) to 113°F (45°C).
WARNING
Do not store or charge battery outside.
Battery must be charged and stored indoors prior to use of the
machine.
If the machine does not start:
• remove the battery pack from the machine,
• charge the battery pack to 15 minutes in warm area, or
when the charging light turns green.
• Install the battery pack back in the unit.
8.2 BLUE LED LIGHT
34
1. LED light flashes blue if the battery voltage is low. Place
the battery in a room temperature area and charge until
the green charger light is flashing green.
2. Blue LED light (34) is always on if the battery
temperature is low. Bring the Battery and Charger in to a
warm area. Place the Battery in the charger and allow for
the battery to reach room temperature or when the light
on the charger is flashing Green. Once charger is flashing
green, take the battery and place it in the unit to begin
work.
8.3 START THE MACHINE
14
9
2
9
English EN

1. While holding the safety switch button (14), pull the bail
lever (2) to start the machine.
2. LED headlights (9) will automatically turn on when unit
is started.
NOTE
Lower the scraper to the ground to remove the snow.
WARNING
Keep bystanders a safe distance from the machine.
WARNING
Examine the work area. Remove all stones, sticks, wire,
bones, and other debris that can ricochet because of the
rotating impeller.
8.4 STOP THE MACHINE
2
1. Release the bail lever (2) to stop the machine.
2. At the same time, the LED lights (9) can be turned off.
WARNING
Wait until the impeller fully stops before you start the
machine again. Do not quickly turn the machine off and on.
WARNING
Remove the battery after you complete the work.
8.5 ADJUST THE DISCHARGE CHUTE
10
3
You can adjust the discharge chute 180° to change the snow
direction.
1. Turn the grip handle (3) left to move the discharge chute
(10) to the right.
2. Turn the grip handle (3) right to move the discharge chute
(10) to the left.
8.6 ADJUST THE CHUTE DEFLECTOR
12
You can adjust the chute deflector up and down to change the
throwing distance of the snow.
WARNING
Release the bail switch before you adjust the chute
deflector.
WARNING
Do not push the deflector so far forward that a gap shows
between the deflector and the chute.
1. Push and hold the trigger on the chute deflector.
2. Move the chute deflector (12) up to increase the snow
distance.
3. Move the chute deflector (12) down to decrease the snow
distance.
10
English
EN

8.7 OPERATION TIPS
• If it is possible, clear the snow with the direction of the
wind.
• In strong winds, lower the chute deflector to direct the
snow to the ground.
• When you complete the work, let the machine operate for
a while to prevent ice formation in the discharge chute.
• If the snow is deeper than 8", decrease the speed and let
the machine work at its own rhythm.
• Do not use the scraper to remove compact snow and ice.
9 MAINTENANCE
WARNING
Remove the battery pack from the machine before
maintenance.
CAUTION
Use only approved replacement parts.
CAUTION
Do not let brake fluids, gasoline, petroleum-based materials
touch the plastic parts. Chemicals can cause damage to the
plastic, and make the plastic unserviceable.
CAUTION
Do not use strong solvents or detergents on the plastic
housing or components.
9.1 GENERAL MAINTENANCE
• Before each use, examine the machine for damaged,
missing, or loose parts such as screws, nuts, bolts and
caps.
• Tighten all the fasteners and caps correctly.
• Clean the remaining snow on the machine with a brush.
9.2 REPLACE THE SCRAPER
24
24
25
WARNING
Use only approved replacement scrapers.
WARNING
Wear heavy gloves or wind cloth around the impeller when
you touch the impeller.
1. Remove the screws (24) from each side plate.
2. Remove and discard the old scraper (8).
3. Install the new scraper (8).
4. Put in the mounting screw (25) and spacers and tighten
them.
9.3 REPLACE THE IMPELLER
WARNING
Use only approved replacement scrapers.
1. Remove the 5 screws (24) and side wear pad (26) that
secure the right side cover (31).
11
English EN

2. Remove the nut (27).
3. Remove the 5 screws (24) and side wear pad(26) that
secure the left side cover (31).
4. Remove the belt (28).
5. Using a socket wrench, remove the large pulley (29).
6. Remove the screws (24) that secure the left side plate.
24
7. Pull the axle (30) and remove the old impeller, install the
new impeller.
30
8. Reinstall the nut (27) and right side cover.
27
24
31
27
28
29
32 26
9. Reinstall the left side plate (32), large pulley (29), belt
(28) and left side cover (31).
12
English
EN

9.4 STORE THE MACHINE
• Clean the machine before storage.
• Make sure the motor is not hot when you store the
machine.
• Make sure that the machine does not have loose or
damaged parts. If it is necessary, do these steps/
instructions:
• Replace the damaged parts.
• Tighten the bolts.
• Speak to a person at an approved service center.
• Store the machine in a dry area.
• Make sure that children cannot come near the machine.
10 TROUBLESHOOTING
Problem Possible
cause
Solution
The handle is
not in posi-
tion.
The bolts are
not engaged
correctly.
Adjust the height of the
handle and make sure that
the knobs and bolts are
aligned correctly.
Problem Possible
cause
Solution
The machine
does not start.
The battery is
not charged.
Charge the battery by fol-
lowing the procedures in
the battery and charger
manual.
The switch is
defective.
Have the switch replaced by
an authorized service cen-
ter.
Battery is too
cold.
Remove battery from snow
thrower. Place battery on
charger and allow to charge
for 10 minutes or until the
changing light turns green.
Remove from charger and
install in snow thrower for
use.
Blue LED
light is Flash-
ing - Battery
is in Low
Voltage Pro-
tection.
Bring the Battery and
Charger in to a warm area.
Place the Battery in the
charger and allow for the
battery to reach room tem-
perature or when the light
on the charger is flashing
Green. Once charger is
flashing green, take the bat-
tery and place it in the unit
to begin work.
Blue LED
light is al-
ways on -
Battery Tem-
perature is
Low.
Bring the Battery and
Charger in to a warm area.
Place the Battery in the
charger and allow for the
battery to reach room tem-
perature or when the light
on the charger is flashing
Green. Once charger is
flashing green, take the bat-
tery and place it in the unit
to begin work.
Battery may
require serv-
ice or re-
placement.
Call toll free helpline, at
1-855-345-3934 or replace
battery.
The engine is
on, but the im-
peller does not
turn.
The belt is
damaged.
Replace the belt.
A thin layer of
snow stays be-
hind.
The scraper is
damaged.
Replace the scraper.
* If you cannot find the solution to these problems, call
1-855-345-3934 .
13
English EN

11 TECHNICAL DATA
Voltage 60V
No load speed 1800 RPM
Clearing width 20 in. (50.8 cm)
Clearing depth 10 in. (25.4 cm)
Impeller size 16 in. (40.6 cm)
Weight (without battery
pack)
32 lbs (14.5kg)
Battery LB60A00 / LB60A03 /
LB60A01 / LB60A02 /
LB604 and other BAC series
Charger CAC801 and other CAC ser-
ies
12 LIMITED WARRANTY
M
E
I
L
L
E
U
R
D
A
N
S
S
A
C
A
T
É
G
O
R
I
E
•
M
E
J
O
R
E
N
C
L
A
S
E
B
E
S
T
I
N
C
L
A
S
S
GARANTIE OUTIL &
BATTERIE • GARANTÍA PARA
HERRAMIENTAS Y BATERÍAS
Greenworks hereby warranties this product, to the original
purchaser with proof of purchase, for a period of four (4)
years against defects in materials, parts or workmanship.
Greenworks, at its own discretion will repair or replace any
and all parts found to be defective, through normal use, free
of charge to the customer. This warranty is valid only for
units which have been used for personal use that have not
been hired or rented for industrial/commercial use, and that
have been maintained in accordance with the instructions in
the owners’ manual supplied with the product from new.
ITEMS NOT COVERED BY WARRANTY:
1. Any part that has become inoperative due to misuse,
commercial use, abuse, neglect, accident, improper
maintenance, or alteration; or
2. The unit, if it has not been operated and/or maintained in
accordance with the owner's manual; or
3. Normal wear;
4. Routine maintenance items such as lubricants, blade
sharpening;
5. Normal deterioration of the exterior finish due to use or
exposure.
HELPLINE:
Warranty service is available by calling our toll-free helpline,
at 1-855-345-3934 .
TRANSPORTATION CHARGES:
Transportation charges for the movement of any power
equipment unit or attachment are the responsibility of the
purchaser. It is the purchaser’s responsibility to pay
transportation charges for any part submitted for replacement
under this warranty unless such return is requested in writing
by Greenworks.
USA address: Canadian address:
Greenworks Tools Greenworks Tools Canada Inc.
P.O. Box 1238 P.O. Box 93095, Newmarket,
Ontario
Mooresville, NC 28115 L3Y 8K3
14
English
EN

13 EXPLODED VIEW
1
6
9
78
234 5
No. Part No. Qty Description
1 R0201918-00 1 Belt
2 R0203139-00 1 Impeller assembly
3 R0201917-00 1 Drive wheel
4 R0203138-00 1 PCB board
5 R0200284-00 1 Cam Lock Assembly
6 R0202047-00 1 Wheel Assembly
7 R0200166-00 1 Control Rod Assembly
8 R0200173-00 1 Chute Deflector Assembly
9 R0200282-00 1 Scraper Kit
15
English EN

1 Description.......................................17
1.1 But................................................................... 17
1.2 Aperçu............................................................. 17
1.3 Liste du contenu de l’emballage......................17
2 Avertissements généraux de
sécurité de l'appareil.......................17
2.1 Formation.........................................................17
2.2 Préparation.......................................................17
2.3 Utilisation........................................................ 18
2.4 Entretien...........................................................18
2.5 La plage de température ambiante
recommandée :.................................................19
3 Symboles figurant sur la
machine............................................ 19
4 Niveaux de risques...........................20
5 Élimination des batteries sans
danger pour l'environnement.........20
6 Proposition 65..................................20
7 Installation....................................... 21
7.1 Déballer la machine.........................................21
7.2 Installez la poignée supérieure........................ 21
7.3 Installez la poignée du milieu..........................21
7.4 Installez le déflecteur de la goulotte................21
7.5 Installez la tige de commande de la goulotte...22
7.6 Installez la batterie...........................................22
7.7 Retirez le bloc-batterie.....................................22
8 Utilisation.........................................22
8.1 Utilisation par temps froid...............................22
8.2 Voyant DEL bleu............................................. 23
8.3 Démarrer la machine....................................... 23
8.4 Arrêter la machine........................................... 24
8.5 Réglez la goulotte d'éjection............................24
8.6 Réglez le déflecteur de la goulotte.................. 24
8.7 Conseils sur l'utilisation...................................24
9 Entretien...........................................24
9.1 Entretien général..............................................25
9.2 Remplacez le grattoir.......................................25
9.3 Remplacez la turbine....................................... 25
9.4 Entreposer la machine..................................... 26
10 Dépannage........................................26
11 Données techniques......................... 27
12 Garantie limitée...............................27
13 Vue éclatée........................................28
16
Français
FR

1 DESCRIPTION
1.1 BUT
Cette machine est utilisée pour enlever et déblayer la neige
des trottoirs, allées et autres surfaces pavées au niveau du sol.
1.2 APERÇU
1
2
3
4
5
6
7
8
9
10
11
12
13
14
1Guidon
2Levier de verrouillage
3Tige de commande de la goulotte
4Partie supérieure du guidon
5Poignée centrale
6Poignée inférieure
7Grattoir
8Turbine
9Lumière DEL
10 Goulotte d'éjection
11 Couvercle de la batterie
12 Déflecteur de la goulotte
13 Poignée de contrôle de l'angle du déflecteur de
goulotte
14 Bouton de sécurité de l’interrupteur
1.3 LISTE DU CONTENU DE
L’EMBALLAGE
1Souffleuse à neige
Outil seulement 2Ensemble du
déflecteur de goulotte
4Ensemble de la tige de
commande
5Ensemble de la partie
supérieure du guidon
6Assemblage de la
poignée centrale
7Manuel
2 AVERTISSEMENTS
GÉNÉRAUX DE SÉCURITÉ DE
L'APPAREIL
AVERTISSEMENT
Lisez tous les avertissements de sécurité et toutes les
instructions. Le non-respect de ces avertissements et de ces
instructions peut entraîner un choc électrique, un incendie
et/ou des blessures graves.
Conservez tous les avertissements et instructions pour
référence ultérieure.
Le terme « appareil » dans les avertissements fait référence à
votre souffleuse à neige à piles (sans fil).
2.1 FORMATION
• Ne laissez pas un enfant de moins de 14 ans utiliser cet
outil. Les enfants de 14 ans ou plus doivent lire et
comprendre les instructions d'utilisation et les règles de
sécurité contenues dans ce manuel et doivent être formés
et supervisés par un parent.
• Lisez attentivement le mode d’emploi et le manuel
d’utilisation. Familiarisez-vous totalement avec les
commandes et l’utilisation correcte de l’appareil.
Apprenez comment arrêter l'appareil et désengager
rapidement les commandes.
• Ne laissez jamais des enfants utiliser l’appareil. Ne
laissez jamais des adultes qui n’ont pas reçu une
instruction appropriée utiliser l’appareil.
• Garder la zone d'opération à l'écart de toute personne, en
particulier les jeunes enfants et les animaux domestiques.
• Faites preuve de prudence pour éviter le glissement ou la
chute, surtout en opération en marche arrière.
• N’utilisez pas sur des surfaces caillouteuses.
• Habillez-vous correctement – Ne portez pas de vêtements
amples ou de bijoux. Ils pourraient se coincer dans les
pièces en mouvement.
• Portez des bottes adéquates lorsque vous utilisez
l’appareil.
• L’utilisation de l’appareil soutenue dans la main est
dangereuse, sauf en conformité avec les instructions
spéciales pour cette utilisation fournies dans le manuel
d'utilisation.
2.2 PRÉPARATION
• Inspectez soigneusement la zone où l’appareil doit être
utilisé et enlevez tous les paillassons, traîneaux, planches,
fils et autres corps étrangers.
17
Français
FR

• N’utilisez pas l’appareil sans porter de vêtements d’hiver
adéquats. Portez des chaussures qui amélioreront la
stabilité sur les surfaces glissantes.
• Ajustez la hauteur du carter pour dégager le gravier ou la
surface rocheuse écrasée.
• Ne tentez jamais d’effectuer des ajustements pendant que
l’appareil est en marche (sauf si le fabricant le
recommande).
• Portez toujours des lunettes de sécurité ou des protections
oculaires pendant le fonctionnement ou tout en effectuant
un réglage ou une réparation pour protéger les yeux des
corps étrangers qui peuvent être jetés de l’appareil.
• Évitez tout démarrage accidentel. Assurez-vous que
l'interrupteur est en position d'arrêt avant de brancher la
batterie, de soulever ou de transporter l'appareil. Le fait
de porter l'appareil avec un doigt sur l'interrupteur ou
d'alimenter l'appareil dont l'interrupteur est en marche
risque de provoquer des accidents.
• Retirez la batterie de l'outil électrique avant d'effectuer
des réglages, de changer des accessoires ou de ranger la
machine. De telles mesures de sécurité préventives
réduisent le risque d'un démarrage accidentel de la
machine.
• Lorsque le bloc-batterie n'est pas utilisé, éloignez-le des
autres objets métalliques, comme des attaches trombones,
des pièces de monnaie, des clés, des clous, des vis ou
autres petits objets métalliques qui peuvent établir une
connexion d'une borne à une autre. Le court-circuitage
des bornes de la batterie peut provoquer des brûlures ou
un incendie.
• Dans des conditions abusives, du liquide peut être éjecté
de la batterie; évitez tout contact. En cas de contact
accidentel, rincez avec de l’eau. En cas de contact avec
les yeux, consultez également un médecin. Le liquide
s'échappant des batteries peut causer des irritations ou des
brûlures.
2.3 UTILISATION
• Ne mettez pas les mains ou les pieds près ou sous des
pièces rotatives. En tout temps, se tenir à l'écart de
l'ouverture de déchargement.
• Faites preuve d’extrême prudence lors de l’utilisation sur
ou en traversant des voies en gravier, des chemins ou des
routes. Restez vigilant pour les dangers cachés ou la
circulation.
• Après avoir heurté un objet étranger, éteignez la machine
et retirez la batterie, puis inspectez-la pour identifier les
dommages. Réparez toutes les pièces endommagées avant
de redémarrer et d'utiliser l’outil électrique.
• Si l’appareil devait commencer à vibrer anormalement,
arrêtez la machine et vérifiez immédiatement la cause. En
général, les vibrations sont un signe de défaillance.
• Arrêtez la machine chaque fois que vous quittez la
position de fonctionnement, avant de nettoyer la
souffleuse, la turbine ou la goulotte d'éjection, et en
effectuant des réparations, des ajustements ou des
inspections.
• Lors du nettoyage, de la réparation ou de l’inspection,
assurez-vous que la turbine et toutes les pièces mobiles
sont arrêtées.
• Faites preuve d’extrême prudence lorsque vous déneigez
des pentes.
• Ne jamais utiliser l’appareil sans les protections
adéquates, gardez les autres dispositifs de protection de
sécurité en place et en fonction.
• Ne dirigez jamais la décharge vers des personnes ou des
zones où des dommages matériels peuvent survenir.
Éloignez les enfants et les autres.
• Ne vous penchez pas trop, gardez un bon équilibre en tout
temps.
• Ne surchargez pas la capacité de la machine en essayant
de déneiger à un rythme trop rapide.
• Ne forcez pas l’appareil - il fera mieux le travail et sera
plus sécuritaire au rythme pour lequel il a été conçue.
• N'utilisez pas l'appareil à des vitesses élevées de
déplacement sur des surfaces glissantes. Prenez soin en
marche arrière.
• Ne dirigez jamais la décharge sur des passants ou
n’autorisez personne devant l’appareil.
• Débranchez l’alimentation de la turbine lorsque l’appareil
est transporté ou non utilisé.
• N’utilisez que des pièces jointes et des accessoires
approuvés par le fabricant de l’appareil (comme les poids
des roues, les contrepoids ou les cabines).
• N’utilisez jamais l’appareil sans bonne visibilité ni
lumière. Soyez toujours sûr de votre prise de pied, et
maintenez une prise ferme sur les poignées.
• Travaillez en marchant, jamais en courant.
• Nettoyage d’une goulotte d'éjection obstruée.
• Le contact de la main avec la turbine rotative à l’intérieur
de la goulotte d'éjection est la cause la plus fréquente de
blessures associées à l’appareil. N’utilisez jamais votre
main pour nettoyer la goulotte d'éjection. Pour dégager la
goulotte :
1. METTEZ L’APPAREIL (LE MOTEUR) À OFF !
2. Attendez 10 secondes pour être sûr que la turbine a
cessé de tourner.
3. Utilisez toujours une brosse, pas vos mains.
• Si l’appareil frappe un corps étranger, procédez comme
suit :
1. Arrêtez l'appareil. Relâchez l'interrupteur.
2. Retirez le bloc-batterie.
3. Vérifiez qu'elle n'est pas endommagée.
4. Réparer tout dommage avant de redémarrer et
d’utiliser l’appareil.
2.4 ENTRETIEN
• Vérifier les boulons de cisaillement ; les boulons montés
sur le moteur, etc., à intervalles réguliers pour une bonne
étanchéité et s’assurer que l’appareil est en bon état de
fonctionnement.
18
Français
FR

• Référez-vous toujours aux instructions du Guide du
propriétaire pour des détails importants si l’appareil doit
être stockée pendant une période prolongée.
• Entreposez l’appareil à l’intérieur – lorsqu’il n’est pas
utilisé, l’appareil doit être entreposé à l’intérieur dans un
endroit sec et verrouillé – hors de portée des enfants.
• Vérifiez tous les écrous de cisaillement, les boulons et vis
à intervalles fréquents pour vous assurer que l'équipement
est bien serré et en bon état de fonctionnement.
• Faites marcher l’appareil quelques minutes après avoir
jeté de la neige pour empêcher le gel de la turbine.
• N'utilisez pas une batterie ou un appareil endommagé ou
modifié. Les bloc-batteries endommagés ou modifiés
peuvent présenter un fonctionnement imprévisible et
provoquer un incendie, une explosion ou un risque de
blessure.
• N’exposez pas une batterie ou un appareil au feu ou à une
température excessive. L'exposition au feu ou une
température supérieure à 130°C (265°F) peut provoquer
une explosion.
• Suivez toutes les instructions de recharge et ne rechargez
pas le bloc-batterie ou l'appareil en dehors de la plage de
température spécifiée dans ces instructions. Un
rechargement incorrect ou à des températures en dehors
de la plage spécifiée peut endommager la batterie et
augmenter le risque d'incendie.
• Rechargez uniquement avec le chargeur spécifié par le
fabricant. Un chargeur adapté à un type de batterie peut
créer un risque d'incendie lorsqu'il est utilisé avec une
autre batterie.
• Utilisez les appareils uniquement avec des batteries
spécialement conçues à cet effet. L'utilisation de toutes
autres batteries peut créer un risque de blessure et
d'incendie.
• Faites effectuer l'entretien par un réparateur qualifié en
n'utilisant que des pièces de rechange identiques. Cela
garantira le maintien de la sécurité du produit.
• Ne modifiez pas ou n'essayez pas de réparer l'appareil ou
le bloc-batterie (selon le cas) sauf en conformité avec les
instructions d'utilisation et d'entretien indiquées dans ce
manuel.
• Entretenez l’appareil avec soin. Suivez les instructions
pour changer les accessoires.
• Maintenez ou remplacez les décalques de sécurité et
d'instructions au besoin.
2.5 LA PLAGE DE TEMPÉRATURE
AMBIANTE RECOMMANDÉE :
Article Température
Plage de température d’en-
treposage de la souffleuse à
neige
1,4 ˚F (-17 ˚C) ~ 113 ˚F (45
˚C)
Plage de température de
fonctionnement de la souf-
fleuse à neige
1,4 ˚F (-17 ˚C) ~ 113 ˚F (45
˚C)
Article Température
Plage de température de re-
chargement de la batterie
39 ˚F (4 ˚C) ~ 104 ˚F (40 ˚C)
Plage de température de
fonctionnement du chargeur
39 ˚F (4 ˚C) ~ 104 ˚F (40 ˚C)
Plage de température de dé-
chargement de la batterie
1,4 ˚F (-17 ˚C) ~ 113 ˚F (45
˚C)
Plage de température d’en-
treposage de la batterie
32 °F (0 °C) ~ 113 °F (45
°C)
3 SYMBOLES FIGURANT SUR
LA MACHINE
Certains des symboles suivants peuvent être utilisés sur cet
outil. Veuillez les étudier et apprendre leur signification. Une
bonne interprétation de ces symboles vous permettra de
mieux utiliser l'outil et de manière plus sécuritaire.
Symbole Explication
Courant direct
Précautions destinées à assurer la sé-
curité.
Lisez et comprenez toutes les instruc-
tions avant d'utiliser cette machine, et
suivez tous les avertissements et les
consignes de sécurité.
Portez des lunettes enveloppantes.
Les objets projetés peuvent ricocher
et causer des blessures corporelles ou
des dommages matériels. Portez des
vêtements et des bottes de protection.
Tenez les personnes présentes à une
distance de sécurité de la machine.
Éloignez vos mains de la zone de dé-
charge.
Éloignez-vous des pièces mobiles.
Gardez toutes les protections et bouc-
liers en place.
Tenez les pieds hors de la turbine.
Éloignez les pieds de la turbine rota-
tive.
Arrêtez le moteur et retirez le bloc-
batterie avant de laisser la machine.
19
Français
FR

4 NIVEAUX DE RISQUES
Les termes de mise en garde suivants et leur signification ont
pour but d'expliquer les niveaux de risques associés à
l'utilisation de ce produit.
SYM-
BOLE
SIGNAL SIGNIFICATION
DANGER Indique une situation danger-
euse imminente qui, si elle
n’est pas évitée, peut entraîner
la mort ou des blessures
graves.
AVERTISSE-
MENT
Indique une situation poten-
tiellement dangereuse qui, si
elle n’est pas évitée, peut en-
traîner la mort ou des bles-
sures graves.
MISE EN
GARDE
Indique une situation poten-
tiellement dangereuse qui, si
elle n'est pas évitée, pourrait
causer des blessures mineures
ou modérées.
MISE EN
GARDE
(Sans symbole d’alerte de sé-
curité) indique une situation
pouvant entraîner des dom-
mages matériels.
5 ÉLIMINATION DES
BATTERIES SANS DANGER
POUR L'ENVIRONNEMENT
Les matières toxiques et corrosives ci-dessous se trouvent
dans les batteries utilisées dans cette machine : Lithium-ion,
une substance toxique.
AVERTISSEMENT
Éliminez toutes les substances toxiques d'une manière
spécifiée afin de prévenir la contamination de
l'environnement. Avant de jeter une batterie au lithium-ion
endommagée ou usée, contactez votre agence locale
d'élimination des déchets ou l'agence locale de protection de
l'environnement pour obtenir des informations et des
instructions spécifiques. Apportez les batteries à un centre
local de recyclage ou d'élimination certifié pour
l'élimination de batteries au lithium-ion.
AVERTISSEMENT
Si la batterie se fend ou se brise, avec ou sans fuites, ne la
rechargez pas et ne l'utilisez pas. Jetez-la et remplacez-la
par une nouvelle batterie. N'ESSAYEZ PAS DE LA
RÉPARER ! Pour prévenir les blessures et les risques
d'incendie, d'explosion ou de décharge électrique, et pour
éviter tout dommage à l'environnement :
• Couvrez les bornes de la batterie avec du ruban adhésif
résistant.
• NE PAS essayer d'enlever ou de détruire les composants
de la batterie.
• NE PAS essayer d'ouvrir ou de réparer la batterie.
• En cas de fuite, les électrolytes rejetés sont corrosifs et
toxiques. NE laissez PAS entrer la solution dans les
yeux ou en contact avec la peau et ne l’avalez pas.
• NE PAS jeter vos batteries usagées dans votre poubelle
à ordures ménagères.
• N’incinérez PAS les batteries.
• NE LES Mettez PAS dans un endroit où ils feront partie
d'un site d'enfouissement de déchets ou d'un flux de
déchets solides municipaux.
• Emmenez-les dans un centre de recyclage ou
d'élimination certifié.
6 PROPOSITION 65
AVERTISSEMENT
Ce produit contient un produit chimique connu dans l'état
de Californie comme étant une cause de cancer, de
malformations congénitales ou d'autres problèmes de
reproduction. Certaines poussières produites par le ponçage
mécanique, le sciage, le meulage, le perçage et d'autres
activités de construction contiennent des produits chimiques
connus pour causer le cancer, des malformations
congénitales ou d'autres problèmes de reproduction. Voici
quelques exemples de ces produits chimiques :
• Plomb provenant de peintures à base de plomb;
• Silice cristalline provenant de briques, de ciment et
d'autres produits de maçonnerie;
• Arsenic et chrome provenant de bois traité
chimiquement.
Votre risque d'exposition à ces produits chimiques varie
selon la fréquence à laquelle vous faites ce type de travail.
Pour réduire votre exposition à ces produits chimiques,
travaillez dans un endroit bien ventilé et utilisez un
équipement de sécurité approuvé, comme des masques anti-
poussière spécialement conçus pour filtrer les particules
microscopiques.
Conservez ces instructions.
20
Français
FR
1/44