


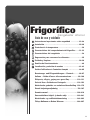
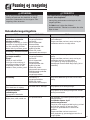
2
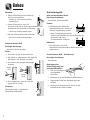
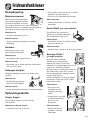
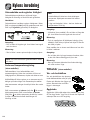
Important Safety Instructions
To reduce risk of fire, electric shock, serious injury
or death when using your refrigerator, follow these
basic precautions, including the following:
1. Read all instructions before using the refrigerator.
2. Observe all local codes and ordinances.
3. Be sure to follow earthing instructions.
4. Check with a qualified electrician if you are not sure
this appliance is properly earthed.
5. Do not earth to a gas line.
6. Do not earth to a cold-water pipe.
7. Refrigerator is designed to operate on a separate
220-240 volt, 10 amp., 50 HZ cycle line.
8. Do not modify plug on power cord. If plug does not
fit electrical outlet, have proper outlet installed by a
qualified electrician.
9. Do not use a two-prong adapter, extension cord or
power strip.
10. Do not tamper with refrigerator controls.
11. Do not service or replace any part of refrigerator
unless specifically recommended in Use & Care
Guide or published user-repair instructions. Do not
attempt service if instructions are not understood or
if they are beyond personal skill level.
12. Always disconnect refrigerator from electrical supply
before attempting any service. Disconnect power
cord by grasping the plug, not the cord.
13. Install refrigerator according to Installation
Instructions. All connections for water, electrical
power and earthing must comply with local codes
and be made by licensed personnel when required.
14. Keep your refrigerator in good condition. Bumping
or dropping refrigerator can damage refrigerator or
cause refrigerator to malfunction or leak. If damage
occurs, have refrigerator checked by qualified
service technician.
15. A qualified service technician must replace worn
power cords and/or loose plugs.
16. Always read and follow manufacturer’s storage and
ideal environment instructions for items being stored
in refrigerator.
17. Your refrigerator should not be operated in the
presence of explosive fumes.
18. Children should not climb, hang or stand on any
part of the refrigerator.
19. Clean up spills or water leakage associated with
water installation.
20. The appliance is not intended for use by young
children or infirm persons without supervision.
21. Young children should be supervised to ensure that
they do not play with the appliance.
WARNING
SAVE THESE INSTRUCTIONS FOR FUTURE REFERENCE
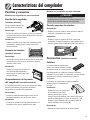
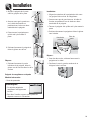
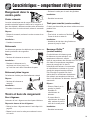
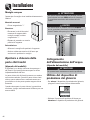
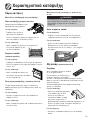
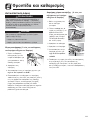
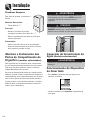
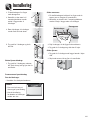
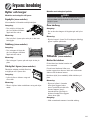
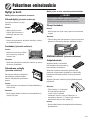
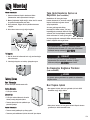
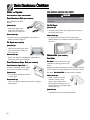
Installing Your Refrigerator
These instructions were provided to aid you in the installation of your unit. The manufacturer cannot be responsible
for improper installation.
Steps to Follow...
A qualified engineer must connect refrigerator in accordance with these installation instructions.
Measure door opening and depth and width of refrigerator. Remove handles or doors if required. Engineer must
also do the following:
1. Follow local water and electrical company connection regulations.
2. Complete water supply connection before electrical supply connections.
Service to or replacement of power cord must be performed by a qualified engineer.
Note:
When writing or calling about a service problem, please include the following information:
a. Your name, address and telephone number; d. A clear description of the problem you are having;
b. Model number and serial number; e. Proof of purchase (sales receipt)
c. Name and address of your dealer or engineer;

3
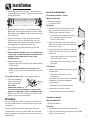
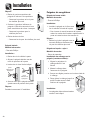
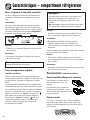
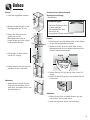
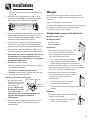
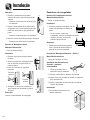
Installation
Your refrigerator was packed carefully for shipment.
Remove and discard shelf packaging and tape. Do not
remove the serial plate.
Measuring the Opening
When installing your refrigerator, measure carefully. 1.3
cm (
1
⁄2”) of air space should be provided for the top and
back of the refrigerator.
Subflooring or floor coverings (i.e. carpet, tile, wood
floors, rugs) may make your opening smaller than
anticipated.
Some clearance may be gained by using the leveling
procedure under Leveling.
Important: If refrigerator is to be installed into a
recess where the top of the refrigerator is completely
covered, use dimensions from floor to top of hinge cap
to verify proper clearance.
Transporting Your Refrigerator
• NEVER transport refrigerator on its side. If an
upright position is not possible, lay refrigerator on its
back. Allow refrigerator to sit upright for
approximately 30 minutes before plugging it in to
assure oil returns to the compressor. Plugging the
refrigerator in immediately may cause damage to
internal parts.
• Use an appliance dolly when moving refrigerator.
ALWAYS truck refrigerator from its side or
back–NEVER from its front.
• Protect outside finish of refrigerator during transport
by wrapping cabinet in blankets or inserting padding
between the refrigerator and dolly.
• Secure refrigerator to dolly firmly with straps or
bungee cords. Thread straps through handles when
possible. Do not over-tighten. Over-tightening
restraints may dent or damage outside finish.
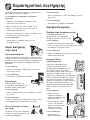
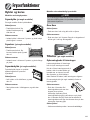
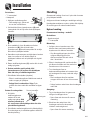
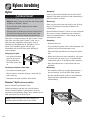
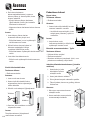
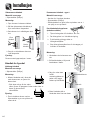
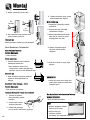
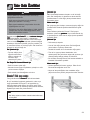
Leveling
To protect property and refrigerator from
damage, observe the following:
• Protect vinyl or other flooring with cardboard, rugs,
or other protective material.
• Do not use power tools when performing leveling
procedure.
CAUTION
To enhance the appearance and maintain performance,
the refrigerator should be level. (side to side)
Materials Needed:
•
3
⁄8” hex head driver
• Carpenter’s level
1. Remove toe grille.
• Grasp firmly and pull
outward to unclip.
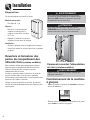
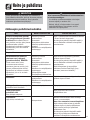
To be done by a qualified engineer only.
WARNING
Contact a qualified engineer to perform this task.
WARNING
How to Remove and Replace
Door and Hinges
Contact a qualified engineer to perform this task.
WARNING
How to Connect the Water
Supply (select models)
60 cm deep models
Note: Trim corners of countertop to a 45° angle if
countertop has 25 mm overhang. Provide 5 mm
clearance on both sides of refrigerator, and allow
7 mm on top for ease of installation and leveling.
No minimum clearance is required at the rear of the
cabinet.
Location
• Do not install refrigerator near oven, radiator or
other heat source. If not possible, shield refrigerator
with cabinet material.
• Do not install where temperature falls below 13° C
or rises above 95° C. Malfunction may occur at this
temperature.
• Refrigerator is designed for indoor household
application only.
Notes:
• Complete any required water supply connection
before leveling.
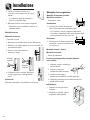
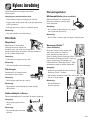
• Some models only have adjustment screws (A).

For pullout drawer only:
1. Turn both stabilizing
legs clockwise until
firmly against floor.
Turn roller
adjustment screws 2
to 3 times counterclockwise so that the full
weight of refrigerator rests on stabilizing legs.
2. Replace toe grille. See markings on inside of toe
grille to insure proper placement.
Roller Adjustment Screw
Stabilizing
Leg
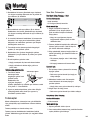
4
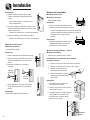
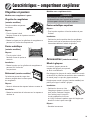
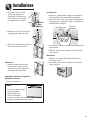
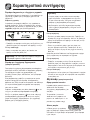
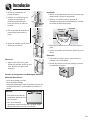
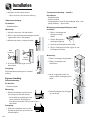
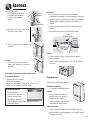
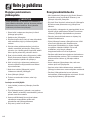
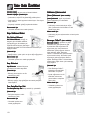
Installation
CC
A
B
A
B
4. Using the carpenter’s level, make sure front of
refrigerator is 6 mm or approximately one half
bubble higher than back of refrigerator and that
the refrigerator is level from side to side.
5. Turn stabilizing legs (C) clockwise until firmly
against floor.
6. Freezer drawer models only: Turn adjustment
screws (A) counterclockwise to allow the full
weight of the refrigerator to rest on the
stabilizing legs.
7. Replace the toe grille.
• Align the toe grille mounting clips with the lower
cabinet slots.
• Snap bottom portion into place first. Press
down on top of grille until top portion snaps into
place.
2. Using hex head driver, turn the front adjustment
screws (A) on each side to raise or lower the front
of the refrigerator.
Handles
If not installed, the handle is located in the interior of
the fresh food section or attached to the back of your
refrigerator.
Remove and discard handle packaging and tape.
Handle design varies from refrigerator to refrigerator.
Please reference the appropriate instructions for your
model below.
3. Select models also have rear adjustment screws
(B). Using the hex head driver, turn each of these
adjustment screws (B) to raise or lower the rear of
the refrigerator.
Fresh Food Handles
Front Mount Handle - Style 1
Materials Needed:
• Phillips screwdriver
•
5
⁄16” hex head driver
To Install:
1. Remove 0.6 cm hex head screws from
door face with hex head driver, and
Phillips screw from top of door.
• If reversing door, remove door plugs
from opposite side of door and
insert in screw holes.
2. Align handle holes with screw holes on
door face and secure with two door face
screws from step 1.
3. Locate handle trim in literature pack and
install over top and bottom of handle, as
illustrated.
• Secure top handle trim with remaining
screw removed in step 1.
• Snap bottom trim over bottom portion
of handle.
To Remove:
1. Remove top handle trim by removing top
handle screw.
• Retain trim and screw for later
replacement.
2. Pry bottom handle trim from handle with
screwdriver flat blade wrapped in
masking tape.
• Retain trim for later replacement.
3. Remove two hex head screws.
• Retain screws for later replacement.
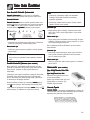
Side Mount Handle
Materials Needed:
• Phillips screwdriver
To Install:
1. Remove screws from the side of the door.
2. Align the side mount handle with the pre-drilled
holes in the door panel.

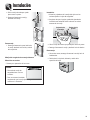
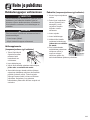
5
Installation
3. Insert the screws in the sequence as
shown.
4. Ensure the door handle is snug to the
door panel.
To Remove:
Reverse installation procedure.
Upper
Handle
Lower
Handle
1
3
2
4
Freezer Handles
Partial-Width Handle
Materials Needed:
• Phillips screwdriver
To Install:
1. Install handle by fastening with
screws removed from edge of door.
• If reversing freezer door, remove
door plugs from top edge of door
and insert into screw holes.
To Remove:
1. Remove handle screws with Phillips
screwdriver and retain screws for
later use.
Front Mount Handle - Style 2
Materials Needed:
• Gloves to protect hands
Attach Extensions to Handle: (select models)
1. Align handle and
extension as shown.
2. Place extension in
handle opening.
3. Apply slight pressure
to both sides of the extension piece.
4. Slide extension until it stops on inside edge of
handle.
5. Grasp the handle firmly and slide
down.
1. Grasp the lower part of the handle
firmly, slide up, lift and remove from
the surface.
To Remove:
4. Rotate the handle so that the
handle is flat against the door.
Notes:
• There is a slight curve to
this style of freezer
handle.
• For proper installation, be
sure handle is oriented as shown.
Front Mount Freezer Handle
Materials Needed:
• Gloves to protect hands.
To Install:
1. The handles are to be oriented
as shown.
2. Align door handle clip with the
door studs.
3. Ensure the large hole in the
mounting clip is positioned
down on both ends of the
handle.
Door
Stud

6
Installation
To Install:
1. Align drawer handle clips to the left of the studs
attached to the freezer drawer.
2. Ensure the large hole in the mounting clip is
positioned to the right on both ends of the handle.
3. Rotate the handle so the left base is flat against
the door.
4. Grasp the handle firmly and slide handle to the
right.
Handle
Clip
Door
Stud
To Remove:
1. With both hands, firmly grasp the handle toward
the right side.
2. Slide toward the left, lift and remove from the
surface.
Handle Removal
Euro Handles
This handle style is installed at the factory
Materials Needed:
•
3
⁄32” Allen wrench
To Remove:
• Remove set screw from handle
mounting post using
3
⁄32” Allen
wrench.
• Repeat the procedure on all posts
to remove the handle.
To Replace:
• Align handle with the mounting posts.
• Fully tighten all set screws to secure handle
in place.
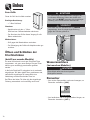
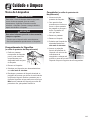
Opening and Closing Your
Fresh Food Doors
(select models)
Your new refrigerator is uniquely
designed with two fresh food doors.
Either door can be opened or closed
independently of one another.
There is a vertically-hinged section
on the left fresh food door. When
the left door is closed, the hinged
section automatically forms a seal
between the two doors when both
doors are closed.
When the left door is opened, the hinged seal
automatically folds inward so that it is out of the way.
To avoid electrical shock which can cause severe
personal injury or death, DO NOT attempt to
remove the hinged seal from the fresh food
section.
WARNING
To avoid possible product damage, ALWAYS verify
that the hinged seal is folded against the edge of
the door prior to closing.
CAUTION
Vertically
Hinged Seal
Contact a qualified engineer to perform this task.
WARNING
How to Connect the Water
Supply (select models)
Ice Maker Operation
• To turn ice maker On push arm down from locked
position.
• Lift arm up and lock into position to turn ice maker
Off.

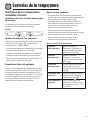
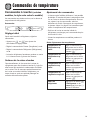
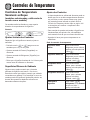
Temperature Controls
Touch Temperature Controls
(select models, style varies by model)
The controls are located at the top front of the
refrigerator compartment.
Control
Initial Control Settings
After plugging the refrigerator in, set the controls.
• Pressing the or pads adjusts the controls
to the desired setting.
• The temperature control range for both
compartments is 1 through 7 (coldest).
• Set the Freezer control on 4.
• Set the Refrigerator control on 4.
• Let the refrigerator run at least 8 to 12 hours before
adding food.
Warm Cabinet Surfaces
At times, the front of the refrigerator cabinet may be
warm to the touch. This is a normal occurrence that
helps prevent moisture from condensing on the
cabinet. This condition will be more noticeable when
you first start the refrigerator, during hot weather and
after excessive or lengthy door openings.
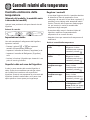
Adjusting the Controls
• 24 hours after adding food, you may decide that one
or both compartments should be colder or warmer. If
so, adjust the control(s) as indicated in the
Temperature Control Guide table below. See page 12
for instructions on checking compartment
temperature.
• Except when starting the refrigerator, do not change
either control more than one number at a time.
• Allow 24 hours for temperatures to stabilize.
Temperature Control Guide
Refrigerator too warm
Refrigerator too cold
Freezer too warm
Freezer too cold
Turn control OFF
Set the Refrigerator control
to next higher number by
pressing the pad.
Set the Refrigerator control
to next lower number by
pressing the pad.
Set the Freezer control to
next higher number by
pressing the pad.
Set the Freezer control to
next lower number by
pressing the pad.
Press the Refrigerator or
freezer pad until a dash
(—) appears in the display.
7

8
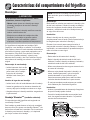
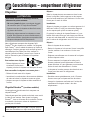
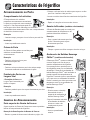
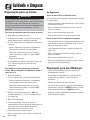
Fresh Food Features
Shelves
Your refrigerator has either Spill-Catcher™ or non-
sealed Shelves. The Spill-Catcher™ shelves have a spill
retainer edge which allows for easier clean up and
some are equipped with the Easy Glide
TM
slide out
feature. To slide out (select models), grasp the front of
the shelf and pull forward. Push in the shelf to return
to the original position.
To Remove a Shelf:
• Slightly tilt up the
front and lift up the
rear of the shelf, then
pull the shelf straight
out.
To Lock the Shelf Into Another Position:
• Tilt up the front edge of the shelf.
• Insert the hooks into the desired frame openings and
let the shelf settle into place.
• Be sure the shelf is securely locked at the rear.
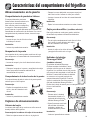
Elevator™ Shelf (select models)
The fresh food compartment is equipped with an
Elevator™ shelf.
This shelf can be adjusted up or down without having
to be unloaded of its contents. To adjust an Elevator™
shelf, pull out the knob on the crank handle. Rotate the
crank clockwise to raise the height of the shelf, and
counterclockwise to lower the height of the shelf.
To avoid personal injury or property damage,
observe the following:
• Never attempt to adjust a shelf that is loaded with
food (except in the case of the Elevator™ shelf).
• Confirm shelf is secure before placing items on
shelf.
• Handle tempered glass shelves carefully. Shelves
may break suddenly if nicked, scratched, or
exposed to sudden temperature change.
CAUTION
To Remove:
Completely unload the shelf and pull the shelf forward.
When the shelf stops, press up on the tabs located
underneath its outside edges, then continue pulling
forward, clear of the frame.
To Install:
Align the shelf to the frame and push it all the way
back. (There is no need to depress the tabs for
reinstallation).
In ordinary use, the Elevator™ shelf frame assembly
does not require removal. Though unlikely, and not
recommended, the correct removal procedure is as
follows:
To Remove:
• Unload the shelf completely.
• Remove glass shelf by pulling forward. When shelf
stops lift up and continue pulling forward.
• Manually move the two rear latches toward the shelf
center.
• While supporting the entire shelf and frame from
underneath, lift slightly and rotate the assembly
approximately 30° to allow the rear mechanism to
clear the vertical rear side rails.
• The entire assembly can then be moved forward and
clear of the refrigerator compartment.
To Install:
• Reverse the removal procedure. Be sure the shelf is
in a level position.
• When the sliding shelf is pushed to the rear, it will
reposition the rear latches to their correct operating
position.
Note: Do not raise the shelf to the very top of the
vertical rails, as the shelf may become jammed.
Latches
Slide Out
EasyGlide Shel
fEasyGlide Shelf
TM
(style may vary)

9
Fresh Food Features
Door Storage
Dairy Compartment
The Dairy Compartment provides
convenient door storage for
spreadable items such as butter
and margarine. This compartment
can be moved to different locations to accommodate
storage needs. To use the dairy compartment, raise the
cover.
To Remove:
• Raise the cover, pull upward and tilt out.
To Install:
• Reverse above procedure.
Door Buckets
Door Buckets can be moved to meet storage
needs.
To Remove:
• Slide bucket up and pull straight
out.
To Install:
• Slide bucket in and down until firmly seated in the
door liner.
Full-Width Door Shelf
Full-Width Door Shelf removes for easy cleaning.
To Remove:
• Slide shelf up and pull
straight out.
To Install:
• Reverse above procedure.
Storage Drawers
Crisper Top
The Crisper Top serves as the lower fresh food shelf.
To Remove the Crisper Top:
• Remove crisper drawers as indicated on page 11.
• Place hand under the frame to push up the glass. Lift
glass out.
• Lift frame from refrigerator liner rails.
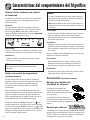
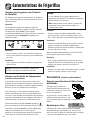
Beverage Chiller™
(select models)
The Beverage Chiller™ keeps
beverages and other items cooler
than the rest of the fresh food
section. A cold air inlet allows air from the freezer
section to pass into the beverage chiller.
The Beverage Chiller™ control is located
on the left wall of the fresh food
compartment. The control adjusts the
amount of cold air allowed in to the
beverage chiller. For a cooler temperature
in the Beverage Chiller™ slide the control
down.
To Remove:
• First remove the pick off
shelf to the left of the
Beverage Chiller™.
• Firmly hold each side of
beverage chiller, lift up
and away from door liner.
To Install:
• Reverse above procedure.
To Install:
• Repeat above instructions in reverse order.
Snack Drawer (select models)
The Snack Drawer can be used for
storage of miscellaneous items or
extra produce.
To Remove:
• Pull drawer out to full extension. Tilt up
front of drawer and pull straight out.
To Install:
• Insert drawer into frame rails and push back into
place.

10
Fresh Food Features
Humidity-Controlled Crisper Drawers
The Crisper Drawers provide a higher humidity
environment for fresh fruit and vegetable storage.
Controls
The Crisper Controls regulate the amount of humidity
in the crisper drawer. Slide the control toward the Fruit
setting when storing produce with outer skins. Slide
the control toward the Vegetable setting when storing
leafy produce.
Note: For best results, keep the crisper drawers
tightly closed.
To Remove:
• Pull drawer out to full extension. Tilt up front of
drawer and pull straight out.
To Install:
• Insert drawer into frame rails and push back into
place.
Temperature-Controlled Drawer
(select models)
The deli drawer is a full-width drawer with adjustable
temperature control. This drawer can be used for large
party trays, deli items, beverages or miscellaneous
items.
There is a temperature control which adjusts the
amount of cold air allowed into the drawer. The
control is located on the right side of the drawer.
Depending on your model, it is either on the front of
the drawer or under the lid.
Set the control to cheese or to provide a normal
refrigerator temperature. Set the drawer on the
meats or setting when a temperature colder than
the main refrigerator compartment is desired. Use the
coldest setting when storing meats.
To Remove:
• Lift lid (select models). Pull drawer out to full
extension. Tilt up front of drawer and pull straight
out.
To Install:
• Push metal glide rails to the back of the refrigerator
(select models). Place drawer onto rails and slide
drawer back until it falls into place.
Some models feature a divider to organize the drawer
into sections.
To Remove:
• Pull drawer completely out and raise the front of the
divider to unhook it from the rear wall of the drawer
and lift it out.
To Install:
• Hook back of divider over rear wall of the drawer and
lower into place.
Notes:
• Cold air directed to the drawer can decrease
refrigerator temperature. Refrigerator control may
need to be adjusted.
• Do not place leafy vegetables in the drawer.
Colder temperatures could damage leafy produce.
Accessories (select models)
Wine Trivet/Can Rack
The Wine Trivet/Can Rack
accessory fits in the deli drawer or
on a shelf.
Bottles or cans can be laid
crosswise, or a single bottle may be
laid in the center depression.
Egg Cradle
The Egg Cradle (style may vary/select models) holds a
“dozen-plus” eggs. It can be removed to carry to work
area or to be washed.

11
Freezer Features
Accessories (select models)
Ice Cube Tray
The Ice Cube Tray provides an area
to freeze cubes for manual
dispensing of ice.
To release ice cubes from tray, hold tray upside down
over a storage container and twist both ends of tray
until cubes release.
The Ice Service Rack (select models) holds the ice
cube tray.
To Install:
• Slide L-shaped groove of shelf
down over back wall screw.
Push rack back until screw is
stopped in L-shaped groove
(1). Slide front portion of shelf
over front wall screw (2).
To Remove:
• Perform above steps in reverse order.
Shelves and Baskets
Models with swing freezer door:
Freezer Shelf (select models)
Select models have a shelf divider.
To Remove:
• Pull shelf out to full
extension. Tilt up front of
shelf and pull straight out.
To Install:
• Insert shelf into freezer liner rails and push to back
of compartment.
Wire Basket (select models)
To Remove:
• Pull basket out to full
extension. Tilt up front of
basket and pull straight out.
To Install:
• Insert basket into freezer liner rails and push back
into place.
Freezer Door Shelf (select models)
The Freezer Door Shelf provides
convenient storage for frozen food
items in freezer door.
To Remove:
• Lift shelf from side liner tabs and pull
out.
To Install:
• Fit ends of shelf on liner tabs and slide down.
1
2
2
1
Upper Wire Basket
To Remove:
• Pull upper basket out to full extension and lift out to
remove.
To Install:
• Slide upper basket into freezer. Make sure that rear
of basket hooks behind rail catch.
To prevent accidental child entrapment or
suffocation risk, do not remove the divider in the
top freezer basket.
DANGER
Models with pullout freezer drawer:

12
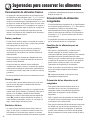
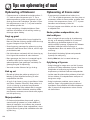
Food Storage Tips
Fresh Food Storage
• The fresh food compartment of a refrigerator should
be kept between 1°-4° C with an optimum
temperature of 3° C. To check the temperature, place
an appliance thermometer in a glass of water and
place in the center of the refrigerator. Check after 24
hours. If the temperature is above 4° C adjust the
controls as explained on page 7.
• Avoid overcrowding the refrigerator shelves. This
reduces the circulation of air around the food and
results in uneven cooling.
Fruits and Vegetables
• Storage in the crisper drawers traps humidity to help
preserve the fruit and vegetable quality for longer
time periods (see page 10).
• Sort fruits and vegetables before storage and use
bruised or soft items first. Discard those showing
signs of decay.
• Always wrap odorous foods such as onions and
cabbage so the odor does not transfer to other foods.
• While vegetables need a certain amount of humidity
to remain fresh, too much humidity can shorten
storage times (especially leafy vegetables). Drain
vegetables well before storing.
• Wait to wash fresh produce until right before use.
Meat and Cheese
• Raw meat and poultry should be wrapped securely
so leakage and contamination of other foods or
surfaces does not occur.
• Occasionally mold will develop on the surface of
hard cheeses (Swiss, Cheddar, Parmesan). Cut off at
least an inch around and below the moldy area. Keep
your knife or instrument out of the mold itself. Do
not try to save individual cheese slices, soft cheese,
cottage cheese, cream, sour cream or yogurt when
mold appears.
Dairy Food
• Most dairy foods such as milk, yogurt, sour cream
and cottage cheese have freshness dates on their
cartons for appropriate length of storage. Store these
foods in the original carton and refrigerate
immediately after purchasing and after each use.
Frozen Food Storage
• The freezer compartment of a refrigerator should be
kept at approximately -18° C. To check the
temperature, place an appliance thermometer
between the frozen packages and check after 24
hours. If the temperature is above -18° C, adjust the
control as described on page 7.
• A freezer operates more efficiently when it is at least
two-thirds full.
Packaging Foods for Freezing
• To minimize dehydration and quality deterioration use
aluminum foil, freezer wrap, freezer bags or airtight
containers. Force as much air out of the packages as
possible and be sure they are tightly sealed. Trapped
air can cause the food to dry out, change color and
develop an off-flavor (freezer burn).
• Overwrap fresh meats and poultry with suitable
freezer wrap prior to freezing.
• Do not refreeze meat that has completely thawed.
Loading the Freezer
• Avoid adding too much warm food to the freezer at
one time. This overloads the freezer, slows the rate of
freezing and can raise the temperature of frozen
foods.
• Leave space between the packages so cold air can
circulate freely, allowing food to freeze as quickly as
possible.
• Avoid storing hard-to-freeze foods such as ice cream
and orange juice on the freezer door shelves. These
foods are best stored in the freezer interior where the
temperature varies less with door openings.

13
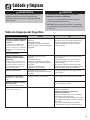
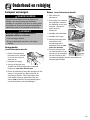
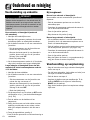
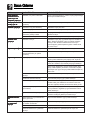
Care and Cleaning
PART
Smooth or Textured Painted
Doors and Exterior
(select models)
Damage to finish due to improper
use of cleaning products or
non-recommended products
is not covered under this
product’s warranty.
Cabinet Interior
Stainless Steel Doors
and Exterior (select models)
Important:
Damage to stainless steel
finish due to improper use
of cleaning products or
non-recommended products
is not covered under this
product’s warranty.
Door Gaskets
Condenser Coil
Remove base grille to access.
Condenser Fan Outlet Grille
See back of refrigerator.
Accessories
Shelves, buckets,
drawers, etc.
To avoid personal injury or property damage,
observe the following:
• Read and follow manufacturer’s directions for all
cleaning products.
• Do not place buckets, shelves or accessories in
dishwasher. Cracking or warping of accessories
may result.
CAUTION
DO NOT USE
Abrasive or harsh cleaners
Ammonia
Chlorine bleach
Concentrated detergents
or solvents
Metal or plastic-textured
scouring pads
Abrasive or harsh cleaners
Ammonia
Chlorine bleach
Concentrated detergents or
solvents
Metal or plastic-textured
scouring pads
Vinegar-based products
Citrus-based cleaners
DO
Use 4 tablespoons of baking soda dissolved in 1
quart (1 liter) warm, soapy water.
Rinse surfaces with clean, warm water and dry
immediately to avoid water spots.
Use warm, soapy water and a soft, clean cloth or
sponge.
Rinse surfaces with clean, warm water and dry
immediately to avoid water spots.
To polish and help prevent fingerprints, follow with
Stainless Steel Magic Spray (part no. 20000008*).
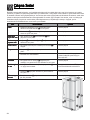
Refrigerator Cleaning Chart
Abrasive or harsh cleaners
Metal or plastic-textured
scouring pads
Anything other than a vacuum
cleaner
A dishwasher
Use a vacuum cleaner hose nozzle.
Use a vacuum cleaner hose nozzle with brush
attachment.
Follow removal and installation instructions from
appropriate feature section.
Allow items to adjust to room temperature.
Dilute mild detergent and use a soft, clean cloth or
sponge for cleaning.
Use a plastic bristle brush to get into crevices. Rinse
surfaces with clean, warm water.
Dry glass and clear items immediately to avoid spots.
Use warm, soapy water and a soft, clean cloth or
sponge.
To avoid electrical shock which can cause severe
personal injury or death, disconnect power to
refrigerator before cleaning. After cleaning,
reconnect power.
WARNING

14
Care and Cleaning
Removing Odors From
Refrigerator
1. Remove all food and turn the refrigerator OFF.
2. Disconnect power to the refrigerator.
3. Clean the walls, floor, ceiling of cabinet interior,
drawers, shelves and gaskets according to the
instructions on page 13.
4. Dilute mild detergent and brush solution into
crevices using a plastic bristle brush. Let stand for
five minutes. Rinse surfaces with warm water. Dry
surfaces with a soft, clean cloth.
5. Wash and dry all bottles, containers and jars.
Discard spoiled or expired items.
6. Wrap or store odor-causing foods in tightly sealed
containers to prevent recurring odors.
7. Reconnect power to refrigerator and return food to
refrigerator.
8. Allow the refrigerator to cool.
9. After 24 hours, check if odor has been eliminated.
If odor is still present:
1. Remove drawers and place on top shelf of
refrigerator.
2. Pack refrigerator and freezer sections – including
doors – with crumpled sheets of black and white
newspaper.
3. Place charcoal briquettes randomly on crumpled
newspaper in both freezer and refrigerator
compartments.
4. Close doors and let stand 24 to 48 hours.
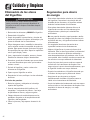
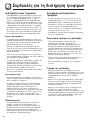
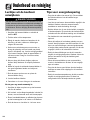
Energy Saving Tips
• Avoid overcrowding refrigerator shelves. This reduces
air circulation around food and causes refrigerator to
run longer.
• Avoid adding too much warm food to refrigerator at
one time. This overloads compartments and slows
rate of cooling.
• Do not use aluminum foil, wax paper, or paper
toweling as shelf liners. This decreases air flow and
causes refrigerator to run less efficiently.
• A freezer that is two-thirds full runs most efficiently.
• Locate refrigerator in coolest part of room. Avoid
areas of direct sunlight, or near heating ducts,
registers or other heat producing appliances. If this is
not possible, isolate exterior by using a section of
cabinet.
• Clean door gaskets every three months according to
cleaning instructions. This will assure that door seals
properly and refrigerator runs efficiently.
• Take time to organize items in refrigerator to reduce
time that door is open.
• Be sure your doors are closing securely by leveling
refrigerator as instructed in your installation
instructions.
• Clean condenser coils as indicated in the cleaning
instructions every three months. This will increase
energy efficiency and cooling performance.
To avoid electrical shock which can cause severe
personal injury or death, disconnect power to
refrigerator before cleaning. After cleaning,
reconnect power.
WARNING

15
Care and Cleaning
To avoid electrical shock which can cause severe
personal injury or death, disconnect power to
refrigerator before replacing light bulb. After
replacing light bulb, reconnect power.
WARNING
To avoid personal injury or property damage,
observe the following:
• Allow light bulb to cool.
• Wear gloves when replacing light bulb.
CAUTION
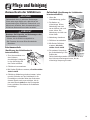
Replacing Light Bulbs
Fresh Food Section
(style of light shield varies)
1. Slide clear light shield
toward back of
compartment to release
from light assembly.
2. Remove light bulbs.
3. Replace with appliance
bulbs no greater than 40 watts.
4. Replace light shield by aligning edge of shield with
control housing. Slide shield toward front of
refrigerator until it locks into place on ‘T’ shape
locking tab. Do not force shield beyond locking
point. Doing so may damage light shield.
Freezer (style of light shield varies)
1. Reach behind the light
cover.
2. With firm pressure, press
forward on the notches at
the back of the cover and
pull down. The cover will
open from the back.
3. Remove the cover.
4. Remove light bulb.
5. Replace bulb with
appliance bulb no
greater than 40 watts.
6. Insert front tabs of light
cover into slots in freezer
liner and snap rear
portion over light
assembly until rear tab
engages.

16
Care and Cleaning
Upon your return:
After a short vacation or absence:
For models with automatic ice makers:
• Reconnect the water supply and turn on supply valve.
• Monitor water connection for 24 hours and correct
leaks if necessary.
• Restart the ice maker.
• Discard at least the first three ice harvests.
After a long vacation or absence:
• If your refrigerator has an automatic ice maker,
reconnect the water supply and turn on supply valve.
• Plug the refrigerator back in and reset controls
(see page 8).
• Monitor water connection for 24 hours and correct
leaks, if necessary.
• Restart the ice maker.
• Discard ice produced within the first 12 hours (at
least the first three harvests).
Preparing to move:
• Follow the above instructions for long
vacations/absences, through step 6.
• Secure all loose items such as shelves and drawers
by taping them securely in place to prevent damage.
• Tape the doors shut.
• Use an appliance dolly when moving the refrigerator.
ALWAYS truck the refrigerator from its side or back
- NEVER from its front.
• Be sure the refrigerator stays in an upright position
during moving.
If your refrigerator has a dispenser and there is any
possibility that the temperature can drop below
freezing where the refrigerator is located, the water
supply system (including the water tank and the
water valve) must be drained by a qualified servicer.
CAUTION
For short vacations or absences (three months or
less):
1. Remove all perishables.
2. If no one will be checking in on the refrigerator
during your absence, remove all frozen items also.
3. If your refrigerator has an automatic ice maker:
• Shut off the water supply to the ice maker at
least one day ahead of time.
• After the last load of ice drops, raise the wire
shut off arm to the OFF position.
• Empty the ice bin.
4. If the room temperature will drop below 13° C,
follow the instructions for longer absences.
For long vacations, absences (more than three
months) OR if the room temperature will drop
below 13° C:
1. Remove food.
2. If your refrigerator has an automatic ice maker:
• Shut off the water supply to the ice maker at
least one day ahead of time.
• After the last load of ice drops, raise the wire
shut off arm to the OFF position.
• Empty the ice bin.
3. Turn the Freezer control to OFF.
4. Unplug the refrigerator.
5. Thoroughly clean the interior of both compartments
with a baking soda solution and a clean, soft cloth
(four tablespoons of baking soda in one quart of
warm water).
6. Dry thoroughly.
7. Leave the doors open to prevent the formation of
mold and mildew.
Preparing for Vacation

17
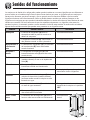
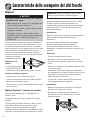
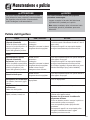
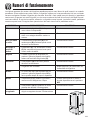
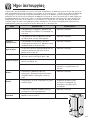
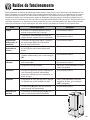
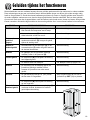
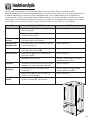
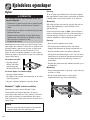
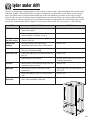
Operating Sounds
Improvements in refrigeration design may produce sounds in your new refrigerator that are different or were not
present in an older model. These improvements were made to create a refrigerator that is better at preserving food,
is more energy efficient, and is quieter overall. Because new refrigerators run quieter, sounds may be detected that
were present in older refrigerators, but were masked by higher sound levels. Many of these sounds are normal.
Please note that the surfaces adjacent to a refrigerator, such as hard walls, floors and cabinetry may make these
sounds seem even louder. The following are some of the normal sounds that may be noticed in a new refrigerator.
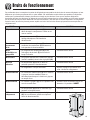
SOUND
Clicking
Air rushing or
whirring
Gurgling or
boiling sound
Thumping
Vibrating noise
Buzzing
Humming
Hissing or
popping
POSSIBLE CAUSE
• Freezer control (A) clicks when starting or
stopping compressor.
• Motorized device (B) sounds like an electric
clock and snaps in and out.
• Freezer fan (C) and condenser fan (D) make
this noise while operating.
• Evaporator (E) and heat exchanger (F)
refrigerant makes this noise when flowing.
• Ice cubes from ice maker (select models) drop
into ice bucket (G).
• Compressor (H) makes a pulsating sound
while running.
• Refrigerator is not level.
• Ice maker water valve (I) hookup (select
models) buzzes when ice maker fills with
water.
• Ice maker (J) is in the ‘on’ position without
water connection.
• Compressor (H) can make a high-pitched hum
while operating.
• Defrost heater (K) hisses, sizzles or pops when
operational.
SOLUTION
• Normal operation
• Normal operation
• Normal operation
• Normal operation
• Normal operation
• Normal operation
• See pages 3-4 for details on how to
level your refrigerator.
• Normal operation
• Stop sound by raising ice maker arm
to OFF position.
• Normal operation
• Normal operation
J
G
A
F
C
I
E
K
D
H
B
B

18
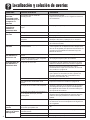
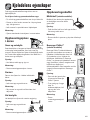
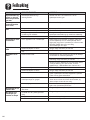
Troubleshooting
PROBLEM
Freezer control and
lights are on, but
compressor is not
operating
Crisper drawer
temperature is too
warm
Refrigerator does
not operate
Refrigerator still
won’t operate
Food temperature
is too cold
Food temperature
is too warm
Refrigerator has
an odor
Water droplets
form on outside
of refrigerator
POSSIBLE CAUSES
Refrigerator is in defrost mode.
Control settings are too low.
Refrigerator is not plugged in.
Control is not on.
Fuse is blown, or circuit breaker needs
to be reset.
Power outage has occurred.
Refrigerator is malfunctioning.
Condenser coils are dirty.
Refrigerator or freezer controls are set
too high.
Door is not closing properly.
Controls need to be adjusted.
Condenser coils are dirty.
Rear air grille is blocked.
Door has been opened frequently, or has
been opened for long periods of time.
Food has recently been added.
Compartment is dirty or has odor-
causing food.
Check gaskets for proper seal.
Humidity levels are high.
Controls require adjustment.
WHAT TO DO
Normal operation.
Wait 40 minutes to see if refrigerator restarts.
See page 7 to adjust controls.
Plug in refrigerator.
See page 7 to adjust your controls.
Replace any blown fuses.
Check circuit breaker and reset, if necessary.
Call local power company listing to report outage.
Unplug refrigerator and transfer food to another
refrigerator. If another refrigerator is not available,
place dry ice in freezer section to preserve food.
Warranty does not cover food loss.
Contact service for assistance.
Clean according to the chart on page 13.
See page 8 to adjust your controls.
Refrigerator is not level. See page 3 for details on how
to level your refrigerator.
Check gaskets for proper seal. Clean, if necessary,
according to the chart on page 13.
Check for internal obstructions that are keeping door
from closing properly (i.e. improperly closed drawers,
ice buckets, oversized or improperly stored
containers, etc.)
See page 8 to adjust your controls.
Clean according to the chart on page 13.
Check the positioning of food items in refrigerator to
make sure grille is not blocked. Rear air grilles are
located under crisper drawers.
Reduce time door is open.
Organize food items efficiently to assure door is open
for as short a time as possible.
Allow time for recently added food to reach
refrigerator or freezer temperature.
Clean according to instructions on page 14.
Clean according to the chart on page 13.
Normal during times of high humidity.
See page 7 to adjust your controls.

19
Troubleshooting
PROBLEM
Water droplets form
on inside of
refrigerator
Refrigerator or ice
maker makes
unfamiliar sounds
or seems too loud
Crisper drawers
do not close freely
Refrigerator runs
too frequently
POSSIBLE CAUSES
Humidity levels are high or door has
been been opened frequently.
Check gaskets for proper seal.
Normal operation.
Contents of drawer, or positioning of
items in the surrounding compartment
could be obstructing drawer.
Drawer is not in proper position.
Refrigerator is not level.
Drawer channels are dirty or need
treatment.
Doors have been opened frequently or
for long periods of time.
Humidity or heat in surrounding area is
high.
Food has recently been added.
Refrigerator is exposed to heat by
environment or by appliances nearby.
Condenser coils are dirty.
Controls need to be adjusted.
Door is not closing properly.
Normal Operation
See page 8 to adjust your controls.
Reduce time door is open.
Organize food items efficiently to assure door is open
for as short a time as possible.
Clean, if necessary, according to the chart on page 13.
See page 17.
Reposition food items and containers to avoid
interference with the drawers.
See page 10 for proper drawer placement.
See page 3 for details on how to level your
refrigerator.
Clean drawer channels with warm, soapy water.
Rinse and dry thoroughly.
Apply a thin layer of petroleum jelly to drawer
channels.
Reduce time door is open.
Organize food items efficiently to assure door is open
for as short a time as possible.
Allow interior environment to adjust for period the
door has been opened.
Normal operation.
Allow time for recently added food to reach
refrigerator or freezer temperature.
Evaluate your refrigerator’s environment. Refrigerator
may need to be moved to run more efficiently.
Clean, if necessary, according to the chart on page 13.
See page 8 to adjust your controls.
Refrigerator is not level. See page 3 for details on how
to level your refrigerator.
Check gaskets for proper seal.
Clean, if necessary, according to the chart on page 13.
Check for internal obstructions that are keeping door
from closing properly (i.e. improperly closed drawers,
ice buckets, oversized or improperly stored
containers, etc.)
See Operating Sounds on page 17.
WHAT TO DO
La page est en cours de chargement...
La page est en cours de chargement...
La page est en cours de chargement...
La page est en cours de chargement...
La page est en cours de chargement...
La page est en cours de chargement...
La page est en cours de chargement...
La page est en cours de chargement...
La page est en cours de chargement...
La page est en cours de chargement...
La page est en cours de chargement...
La page est en cours de chargement...
La page est en cours de chargement...
La page est en cours de chargement...
La page est en cours de chargement...
La page est en cours de chargement...
La page est en cours de chargement...
La page est en cours de chargement...
La page est en cours de chargement...
La page est en cours de chargement...
La page est en cours de chargement...
La page est en cours de chargement...
La page est en cours de chargement...
La page est en cours de chargement...
La page est en cours de chargement...
La page est en cours de chargement...
La page est en cours de chargement...
La page est en cours de chargement...
La page est en cours de chargement...
La page est en cours de chargement...
La page est en cours de chargement...
La page est en cours de chargement...
La page est en cours de chargement...
La page est en cours de chargement...
La page est en cours de chargement...
La page est en cours de chargement...
La page est en cours de chargement...
La page est en cours de chargement...
La page est en cours de chargement...
La page est en cours de chargement...
La page est en cours de chargement...
La page est en cours de chargement...
La page est en cours de chargement...
La page est en cours de chargement...
La page est en cours de chargement...
La page est en cours de chargement...
La page est en cours de chargement...
La page est en cours de chargement...
La page est en cours de chargement...
La page est en cours de chargement...
La page est en cours de chargement...
La page est en cours de chargement...
La page est en cours de chargement...
La page est en cours de chargement...
La page est en cours de chargement...
La page est en cours de chargement...
La page est en cours de chargement...
La page est en cours de chargement...
La page est en cours de chargement...
La page est en cours de chargement...
La page est en cours de chargement...
La page est en cours de chargement...
La page est en cours de chargement...
La page est en cours de chargement...
La page est en cours de chargement...
La page est en cours de chargement...
La page est en cours de chargement...
La page est en cours de chargement...
La page est en cours de chargement...
La page est en cours de chargement...
La page est en cours de chargement...
La page est en cours de chargement...
La page est en cours de chargement...
La page est en cours de chargement...
La page est en cours de chargement...
La page est en cours de chargement...
La page est en cours de chargement...
La page est en cours de chargement...
La page est en cours de chargement...
La page est en cours de chargement...
La page est en cours de chargement...
La page est en cours de chargement...
La page est en cours de chargement...
La page est en cours de chargement...
La page est en cours de chargement...
La page est en cours de chargement...
La page est en cours de chargement...
La page est en cours de chargement...
La page est en cours de chargement...
La page est en cours de chargement...
La page est en cours de chargement...
La page est en cours de chargement...
La page est en cours de chargement...
La page est en cours de chargement...
La page est en cours de chargement...
La page est en cours de chargement...
La page est en cours de chargement...
La page est en cours de chargement...
La page est en cours de chargement...
La page est en cours de chargement...
La page est en cours de chargement...
La page est en cours de chargement...
La page est en cours de chargement...
La page est en cours de chargement...
La page est en cours de chargement...
La page est en cours de chargement...
La page est en cours de chargement...
La page est en cours de chargement...
La page est en cours de chargement...
La page est en cours de chargement...
La page est en cours de chargement...
La page est en cours de chargement...
La page est en cours de chargement...
La page est en cours de chargement...
La page est en cours de chargement...
La page est en cours de chargement...
La page est en cours de chargement...
La page est en cours de chargement...
La page est en cours de chargement...
La page est en cours de chargement...
La page est en cours de chargement...
La page est en cours de chargement...
La page est en cours de chargement...
La page est en cours de chargement...
La page est en cours de chargement...
La page est en cours de chargement...
La page est en cours de chargement...
La page est en cours de chargement...
La page est en cours de chargement...
La page est en cours de chargement...
La page est en cours de chargement...
La page est en cours de chargement...
La page est en cours de chargement...
La page est en cours de chargement...
La page est en cours de chargement...
La page est en cours de chargement...
La page est en cours de chargement...
La page est en cours de chargement...
La page est en cours de chargement...
La page est en cours de chargement...
La page est en cours de chargement...
La page est en cours de chargement...
La page est en cours de chargement...
La page est en cours de chargement...
La page est en cours de chargement...
La page est en cours de chargement...
La page est en cours de chargement...
La page est en cours de chargement...
La page est en cours de chargement...
La page est en cours de chargement...
La page est en cours de chargement...
La page est en cours de chargement...
La page est en cours de chargement...
La page est en cours de chargement...
La page est en cours de chargement...
La page est en cours de chargement...
La page est en cours de chargement...
La page est en cours de chargement...
La page est en cours de chargement...
La page est en cours de chargement...
La page est en cours de chargement...
La page est en cours de chargement...
La page est en cours de chargement...
La page est en cours de chargement...
La page est en cours de chargement...
La page est en cours de chargement...
La page est en cours de chargement...
La page est en cours de chargement...
La page est en cours de chargement...
La page est en cours de chargement...
La page est en cours de chargement...
La page est en cours de chargement...
La page est en cours de chargement...
La page est en cours de chargement...
La page est en cours de chargement...
La page est en cours de chargement...
La page est en cours de chargement...
La page est en cours de chargement...
La page est en cours de chargement...
La page est en cours de chargement...
La page est en cours de chargement...
La page est en cours de chargement...
La page est en cours de chargement...
La page est en cours de chargement...
La page est en cours de chargement...
La page est en cours de chargement...
La page est en cours de chargement...
La page est en cours de chargement...
La page est en cours de chargement...
La page est en cours de chargement...
La page est en cours de chargement...
La page est en cours de chargement...
La page est en cours de chargement...
La page est en cours de chargement...
La page est en cours de chargement...
La page est en cours de chargement...
La page est en cours de chargement...
La page est en cours de chargement...
La page est en cours de chargement...
La page est en cours de chargement...
La page est en cours de chargement...
La page est en cours de chargement...
La page est en cours de chargement...
La page est en cours de chargement...
La page est en cours de chargement...
La page est en cours de chargement...
La page est en cours de chargement...
La page est en cours de chargement...
La page est en cours de chargement...
La page est en cours de chargement...
La page est en cours de chargement...
La page est en cours de chargement...
La page est en cours de chargement...
La page est en cours de chargement...
La page est en cours de chargement...
La page est en cours de chargement...
La page est en cours de chargement...
La page est en cours de chargement...
La page est en cours de chargement...
La page est en cours de chargement...
La page est en cours de chargement...
La page est en cours de chargement...
La page est en cours de chargement...
La page est en cours de chargement...
La page est en cours de chargement...
La page est en cours de chargement...
La page est en cours de chargement...
La page est en cours de chargement...
La page est en cours de chargement...
La page est en cours de chargement...
La page est en cours de chargement...
La page est en cours de chargement...
La page est en cours de chargement...
La page est en cours de chargement...
La page est en cours de chargement...
La page est en cours de chargement...
La page est en cours de chargement...
La page est en cours de chargement...
La page est en cours de chargement...
La page est en cours de chargement...
La page est en cours de chargement...
La page est en cours de chargement...
La page est en cours de chargement...
La page est en cours de chargement...
La page est en cours de chargement...
La page est en cours de chargement...
La page est en cours de chargement...
La page est en cours de chargement...
La page est en cours de chargement...
La page est en cours de chargement...
La page est en cours de chargement...
La page est en cours de chargement...
La page est en cours de chargement...
La page est en cours de chargement...
La page est en cours de chargement...
La page est en cours de chargement...
La page est en cours de chargement...
La page est en cours de chargement...
La page est en cours de chargement...
La page est en cours de chargement...
La page est en cours de chargement...
La page est en cours de chargement...
La page est en cours de chargement...
La page est en cours de chargement...
La page est en cours de chargement...
La page est en cours de chargement...
La page est en cours de chargement...
La page est en cours de chargement...
-
 1
1
-
 2
2
-
 3
3
-
 4
4
-
 5
5
-
 6
6
-
 7
7
-
 8
8
-
 9
9
-
 10
10
-
 11
11
-
 12
12
-
 13
13
-
 14
14
-
 15
15
-
 16
16
-
 17
17
-
 18
18
-
 19
19
-
 20
20
-
 21
21
-
 22
22
-
 23
23
-
 24
24
-
 25
25
-
 26
26
-
 27
27
-
 28
28
-
 29
29
-
 30
30
-
 31
31
-
 32
32
-
 33
33
-
 34
34
-
 35
35
-
 36
36
-
 37
37
-
 38
38
-
 39
39
-
 40
40
-
 41
41
-
 42
42
-
 43
43
-
 44
44
-
 45
45
-
 46
46
-
 47
47
-
 48
48
-
 49
49
-
 50
50
-
 51
51
-
 52
52
-
 53
53
-
 54
54
-
 55
55
-
 56
56
-
 57
57
-
 58
58
-
 59
59
-
 60
60
-
 61
61
-
 62
62
-
 63
63
-
 64
64
-
 65
65
-
 66
66
-
 67
67
-
 68
68
-
 69
69
-
 70
70
-
 71
71
-
 72
72
-
 73
73
-
 74
74
-
 75
75
-
 76
76
-
 77
77
-
 78
78
-
 79
79
-
 80
80
-
 81
81
-
 82
82
-
 83
83
-
 84
84
-
 85
85
-
 86
86
-
 87
87
-
 88
88
-
 89
89
-
 90
90
-
 91
91
-
 92
92
-
 93
93
-
 94
94
-
 95
95
-
 96
96
-
 97
97
-
 98
98
-
 99
99
-
 100
100
-
 101
101
-
 102
102
-
 103
103
-
 104
104
-
 105
105
-
 106
106
-
 107
107
-
 108
108
-
 109
109
-
 110
110
-
 111
111
-
 112
112
-
 113
113
-
 114
114
-
 115
115
-
 116
116
-
 117
117
-
 118
118
-
 119
119
-
 120
120
-
 121
121
-
 122
122
-
 123
123
-
 124
124
-
 125
125
-
 126
126
-
 127
127
-
 128
128
-
 129
129
-
 130
130
-
 131
131
-
 132
132
-
 133
133
-
 134
134
-
 135
135
-
 136
136
-
 137
137
-
 138
138
-
 139
139
-
 140
140
-
 141
141
-
 142
142
-
 143
143
-
 144
144
-
 145
145
-
 146
146
-
 147
147
-
 148
148
-
 149
149
-
 150
150
-
 151
151
-
 152
152
-
 153
153
-
 154
154
-
 155
155
-
 156
156
-
 157
157
-
 158
158
-
 159
159
-
 160
160
-
 161
161
-
 162
162
-
 163
163
-
 164
164
-
 165
165
-
 166
166
-
 167
167
-
 168
168
-
 169
169
-
 170
170
-
 171
171
-
 172
172
-
 173
173
-
 174
174
-
 175
175
-
 176
176
-
 177
177
-
 178
178
-
 179
179
-
 180
180
-
 181
181
-
 182
182
-
 183
183
-
 184
184
-
 185
185
-
 186
186
-
 187
187
-
 188
188
-
 189
189
-
 190
190
-
 191
191
-
 192
192
-
 193
193
-
 194
194
-
 195
195
-
 196
196
-
 197
197
-
 198
198
-
 199
199
-
 200
200
-
 201
201
-
 202
202
-
 203
203
-
 204
204
-
 205
205
-
 206
206
-
 207
207
-
 208
208
-
 209
209
-
 210
210
-
 211
211
-
 212
212
-
 213
213
-
 214
214
-
 215
215
-
 216
216
-
 217
217
-
 218
218
-
 219
219
-
 220
220
-
 221
221
-
 222
222
-
 223
223
-
 224
224
-
 225
225
-
 226
226
-
 227
227
-
 228
228
-
 229
229
-
 230
230
-
 231
231
-
 232
232
-
 233
233
-
 234
234
-
 235
235
-
 236
236
-
 237
237
-
 238
238
-
 239
239
-
 240
240
-
 241
241
-
 242
242
-
 243
243
-
 244
244
-
 245
245
-
 246
246
-
 247
247
-
 248
248
-
 249
249
-
 250
250
-
 251
251
-
 252
252
-
 253
253
-
 254
254
-
 255
255
-
 256
256
-
 257
257
-
 258
258
-
 259
259
-
 260
260
-
 261
261
-
 262
262
-
 263
263
-
 264
264
-
 265
265
-
 266
266
-
 267
267
-
 268
268
-
 269
269
-
 270
270
-
 271
271
-
 272
272
-
 273
273
-
 274
274
-
 275
275
-
 276
276
-
 277
277
-
 278
278
-
 279
279
-
 280
280
-
 281
281
-
 282
282
-
 283
283
-
 284
284
-
 285
285
-
 286
286
-
 287
287
-
 288
288


Amana 5GX0FHTXAF Mode d'emploi
- Taper
- Mode d'emploi
- Ce manuel convient également à
dans d''autres langues
- italiano: Amana 5GX0FHTXAF Guida utente
- español: Amana 5GX0FHTXAF Guía del usuario
- Nederlands: Amana 5GX0FHTXAF Gebruikershandleiding
- português: Amana 5GX0FHTXAF Guia de usuario
- dansk: Amana 5GX0FHTXAF Brugervejledning
- svenska: Amana 5GX0FHTXAF Användarguide