
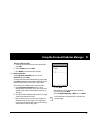
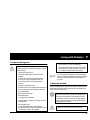
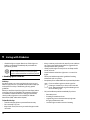
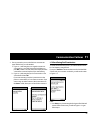
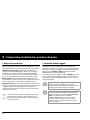
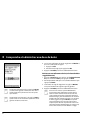
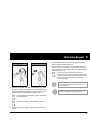
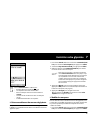
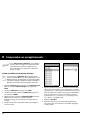
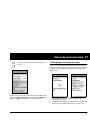
More actions
Temp basal
My records
R
ettings
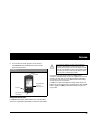
Suspend
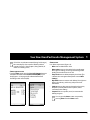
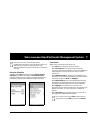
User Guide
GUIDE DE L’UTILISATEUR
Insulin Management System
Système de gestion de l’insuline
www.MyOmniPod.ca
www.MonOmniPod.ca
Insulin Management System
Système de gestion de l’insuline
Manufactured by / Fabriqué par:
Insulet Corporation
9 Oak Park Drive
Bedford, MA 01730 USA
Distributed by / Distribué par:
GlaxoSmithKline Inc.
7333 Mississaugua Road
Mississaugua, Ontario
Canada L5N 6L4
1 855 POD INFO (1 855 763 4636)
647-788-3132 (Outside of Canada)
www.MyOmniPod.ca
www.MonOmniPod.ca
© 2013 Insulet Corporation. All rights reserved. Printed in USA.
© 2013 GlaxoSmithKline Inc. All rights reserved.
OmniPod® is a registered trademark of Insulet Corporation,
used under license by GlaxoSmithKline Inc.
FreeStyle® is a registered trademark of Abbott Diabetes Care Inc.
Third-party trademarks used herein are the trademarks of their
respective owners.
PDM imagery is for illustrative purposes only. PDM screens may
vary based on model or user settings.
Model: CAT45E
15546-AW Rev. A
© 2013 Insulet Corporation. Tous droits réservés. Imprimé au USA.
© 2013 GlaxoSmithKline Inc. Tous droits réservés.
OmniPod® est une marque déposée d’Insulet Corporation,
utilisée sous license par GlaxoSmithKline Inc.
FreeStyle® est une marque deposee de Abbott Diabetes Care Inc.
Les marques de commerce tierces utilisees dans cet ouvrage sont
la propriete de leurs detenteurs respectifs.
Les images du GPD ne servent qu’à titre d’exemple. Les écrans du
GPD peuvent varier selon le modèle ou les réglages de l’utilisateur.
Model: CAT45F
User Guide/Guide de l’utilisateur
CAT45E / CAT45F


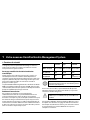
Contacts and Important Information
o
Name
Address
Telephone and Fax
Email Address
Name
Address
Telephone and Fax
Email Address
Name
Address
Telephone Number(s)
Policy Number
Name
Address
Telephone and Fax
Email Address
OmniPod System Start Date: ____________________________
PDM Model: CAT45E Serial Number: __________________
Distributor:
GlaxoSmithKline Inc.
7333 Mississauga Road, Mississauga, Ontario, Canada
L5N 6L4
Customer Care:
Please call 1 855 POD INFO (1 855 763 4636).
When outside of Canada, please call 647-788-3132.
Visit www.myOmniPod.ca for additional information and resources.
Doctor
Nurse/Educator
Health Insurance
Pharmacy

Copyright © 2013 GlaxoSmithKline Inc. All rights reserved
OmniPod® is a registered trademark of Insulet Corporation
, used under license by GlaxoSmithKline Inc.
FreeStyle® is a registered trademark of Abbott Diabetes Care Inc.
Apidra® is a registered trademark of Aventis Pharma S.A.
Humalog® is a registered trademark of Eli Lily and Company Corp.
Third-party trademarks used herein are the tr
ademarks of their respective owners.
15546-AW Rev A

iii
Contents
Introduction. . . . . . . . . . . . . . . . . . . . . . . . . . . . . . . . . . . . . . . . . . . . . . . . viii
About This User Guide . . . . . . . . . . . . . . . . . . . . . . . . . . . . . . . . . . . . . . . . . viii
Symbols. . . . . . . . . . . . . . . . . . . . . . . . . . . . . . . . . . . . . . . . . . . . . . . . . . . . viii
Conventions and Terms . . . . . . . . . . . . . . . . . . . . . . . . . . . . . . . . . . . . . . ix
Important Information . . . . . . . . . . . . . . . . . . . . . . . . . . . . . . . . . . . . . . . ix
Indication . . . . . . . . . . . . . . . . . . . . . . . . . . . . . . . . . . . . . . . . . . . . . . . . . . . . ix
Contraindications . . . . . . . . . . . . . . . . . . . . . . . . . . . . . . . . . . . . . . . . . . . . ix
Your Role: Safely Using the OmniPod System . . . . . . . . . . . . . . . . . . . xi
1 Your New OmniPod Insulin Management System . . . . . . . . . . 1
Insulin Delivery with the OmniPod System. . . . . . . . . . . . . . . . . . . . . . 1
How Does the OmniPod System Work? . . . . . . . . . . . . . . . . . . . . . . . . . 2
No tubing . . . . . . . . . . . . . . . . . . . . . . . . . . . . . . . . . . . . . . . . . . . . . . . . . . . . 2
Suggested bolus calculation . . . . . . . . . . . . . . . . . . . . . . . . . . . . . . . . . 2
Carb presets. . . . . . . . . . . . . . . . . . . . . . . . . . . . . . . . . . . . . . . . . . . . . . . . . . 2
A fully-integrated design with blood glucose monitoring . . . . 3
Personalizing your System . . . . . . . . . . . . . . . . . . . . . . . . . . . . . . . . . . . 3
The Pod . . . . . . . . . . . . . . . . . . . . . . . . . . . . . . . . . . . . . . . . . . . . . . . . . . . . . . . . . 4
The Personal Diabetes Manager. . . . . . . . . . . . . . . . . . . . . . . . . . . . . . . . . 4
Buttons that program and control the OmniPod System . . . . . 5
Primary screens . . . . . . . . . . . . . . . . . . . . . . . . . . . . . . . . . . . . . . . . . . . . . . 6
Safety Features. . . . . . . . . . . . . . . . . . . . . . . . . . . . . . . . . . . . . . . . . . . . . . . . . . 8
Automatic priming, safety checks, and insertion . . . . . . . . . . . . . 8
Occlusion detection. . . . . . . . . . . . . . . . . . . . . . . . . . . . . . . . . . . . . . . . . . 8
Alerts and alarms. . . . . . . . . . . . . . . . . . . . . . . . . . . . . . . . . . . . . . . . . . . . . 8
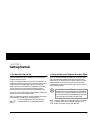
2 Getting Started . . . . . . . . . . . . . . . . . . . . . . . . . . . . . . . . . . . . . . . . . . . . 9
The OmniPod Starter Kit . . . . . . . . . . . . . . . . . . . . . . . . . . . . . . . . . . . . . . . . . 9
Set Up the Personal Diabetes Manager (PDM) . . . . . . . . . . . . . . . . . . . 9
Turn on the PDM . . . . . . . . . . . . . . . . . . . . . . . . . . . . . . . . . . . . . . . . . . . . 10
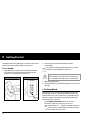
The Setup Wizard . . . . . . . . . . . . . . . . . . . . . . . . . . . . . . . . . . . . . . . . . . . . . . 10
Enter your PDM ID. . . . . . . . . . . . . . . . . . . . . . . . . . . . . . . . . . . . . . . . . . . 11
Select the ID screen color. . . . . . . . . . . . . . . . . . . . . . . . . . . . . . . . . . . . 11
Set date and time . . . . . . . . . . . . . . . . . . . . . . . . . . . . . . . . . . . . . . . . . . . 11
Enter basal settings. . . . . . . . . . . . . . . . . . . . . . . . . . . . . . . . . . . . . . . . . . 11
Enter blood glucose sound setting and BG goal. . . . . . . . . . . . . 12
Set the suggested bolus calculator. . . . . . . . . . . . . . . . . . . . . . . . . . 12
Enter target blood glucose value. . . . . . . . . . . . . . . . . . . . . . . . . . . . 12
Enter minimum BG allowed for use in bolus calculation. . . . . 13
Enter insulin-to-carbohydrate ratio. . . . . . . . . . . . . . . . . . . . . . . . . . 13
Enter correction factor . . . . . . . . . . . . . . . . . . . . . . . . . . . . . . . . . . . . . . 14
Set reverse correction . . . . . . . . . . . . . . . . . . . . . . . . . . . . . . . . . . . . . . . 14
Enter the duration of insulin action. . . . . . . . . . . . . . . . . . . . . . . . . . 14
Select bolus increment and enter maximum bolus. . . . . . . . . . 15
Set extended bolus doses . . . . . . . . . . . . . . . . . . . . . . . . . . . . . . . . . . . 15
Set low reservoir advisory . . . . . . . . . . . . . . . . . . . . . . . . . . . . . . . . . . . 15
Set expiration notification. . . . . . . . . . . . . . . . . . . . . . . . . . . . . . . . . . . 15

Contents
iv
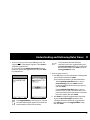
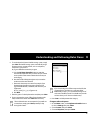
3 Understanding and Adjusting Basal Rates . . . . . . . . . . . . . . . . 17
What Is a Basal Rate? . . . . . . . . . . . . . . . . . . . . . . . . . . . . . . . . . . . . . . . . . . . 17
Personalized Basal Programs . . . . . . . . . . . . . . . . . . . . . . . . . . . . . . . . . . . 17
Create a basal program. . . . . . . . . . . . . . . . . . . . . . . . . . . . . . . . . . . . . . 18
Enable an existing basal program . . . . . . . . . . . . . . . . . . . . . . . . . . . 20
Change, rename, copy, or delete a basal program . . . . . . . . . . . 21
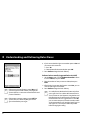
Temporary Basal Rates and Presets . . . . . . . . . . . . . . . . . . . . . . . . . . . . . 23
What is a temporary basal rate? . . . . . . . . . . . . . . . . . . . . . . . . . . . . . 23
Enable a one-time temporary basal rate. . . . . . . . . . . . . . . . . . . . . 24
Cancel a one-time temporary basal rate . . . . . . . . . . . . . . . . . . . . . 25
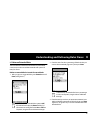
Create a temporary basal preset. . . . . . . . . . . . . . . . . . . . . . . . . . . . . 25
Enable an existing temporary basal preset . . . . . . . . . . . . . . . . . . 26
Cancel an active temporary basal preset . . . . . . . . . . . . . . . . . . . . 27
Change, rename, or delete a temporary basal preset . . . . . . . . 27
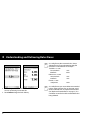
Maximum Basal Rate . . . . . . . . . . . . . . . . . . . . . . . . . . . . . . . . . . . . . . . . . . . 28
What is the maximum basal rate?. . . . . . . . . . . . . . . . . . . . . . . . . . . . 28
Change the maximum basal rate . . . . . . . . . . . . . . . . . . . . . . . . . . . . 28
4 Understanding and Delivering Bolus Doses. . . . . . . . . . . . . . . 29
What Is a Bolus? . . . . . . . . . . . . . . . . . . . . . . . . . . . . . . . . . . . . . . . . . . . . . . . . 29
Bolus Dose Options . . . . . . . . . . . . . . . . . . . . . . . . . . . . . . . . . . . . . . . . . . . . 30
Suggested Bolus Calculator . . . . . . . . . . . . . . . . . . . . . . . . . . . . . . . . . . . . 30
How a suggested bolus is calculated . . . . . . . . . . . . . . . . . . . . . . . . 31
Deliver a Normal Bolus . . . . . . . . . . . . . . . . . . . . . . . . . . . . . . . . . . . . . . . . . 32
Deliver a bolus when suggested bolus calculator is On. . . . . . 32
Deliver a bolus manually (suggested bolus calc is Off). . . . . . . 34
Deliver an Extended Bolus. . . . . . . . . . . . . . . . . . . . . . . . . . . . . . . . . . . . . . 35
Deliver an extended bolus instead of a normal bolus. . . . . . . . 35
Cancel Active Boluses . . . . . . . . . . . . . . . . . . . . . . . . . . . . . . . . . . . . . . . . . . 37
Replace an Extended Bolus. . . . . . . . . . . . . . . . . . . . . . . . . . . . . . . . . . . . . 37
Bolus Presets . . . . . . . . . . . . . . . . . . . . . . . . . . . . . . . . . . . . . . . . . . . . . . . . . . . 38
Create a bolus preset . . . . . . . . . . . . . . . . . . . . . . . . . . . . . . . . . . . . . . . . 39
Enable an existing bolus preset. . . . . . . . . . . . . . . . . . . . . . . . . . . . . . 39
Change, rename, or delete a bolus preset . . . . . . . . . . . . . . . . . . . 40
Cancel an active bolus preset. . . . . . . . . . . . . . . . . . . . . . . . . . . . . . . . 40
Carb Presets . . . . . . . . . . . . . . . . . . . . . . . . . . . . . . . . . . . . . . . . . . . . . . . . . . . . 40
Create a carb preset . . . . . . . . . . . . . . . . . . . . . . . . . . . . . . . . . . . . . . . . . 40
Change or edit a carb preset. . . . . . . . . . . . . . . . . . . . . . . . . . . . . . . . . 41
Delete a carb preset . . . . . . . . . . . . . . . . . . . . . . . . . . . . . . . . . . . . . . . . . 42
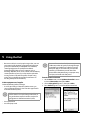
5 Using the Pod. . . . . . . . . . . . . . . . . . . . . . . . . . . . . . . . . . . . . . . . . . . . . 43
The Pod Change Process . . . . . . . . . . . . . . . . . . . . . . . . . . . . . . . . . . . . . . . 43
Gather equipment and supplies. . . . . . . . . . . . . . . . . . . . . . . . . . . . . 44
Deactivate the current Pod . . . . . . . . . . . . . . . . . . . . . . . . . . . . . . . . . . 44
Fill a new Pod. . . . . . . . . . . . . . . . . . . . . . . . . . . . . . . . . . . . . . . . . . . . . . . . 46
Select the infusion site. . . . . . . . . . . . . . . . . . . . . . . . . . . . . . . . . . . . . . . 49
Insert cannula and begin insulin delivery. . . . . . . . . . . . . . . . . . . . 53
Check Pod Status. . . . . . . . . . . . . . . . . . . . . . . . . . . . . . . . . . . . . . . . . . . . . . . 55
Suspend Insulin Delivery . . . . . . . . . . . . . . . . . . . . . . . . . . . . . . . . . . . . . . . 55
Resume Insulin Delivery. . . . . . . . . . . . . . . . . . . . . . . . . . . . . . . . . . . . . . . . 57
Avoid Infusion Site Infections. . . . . . . . . . . . . . . . . . . . . . . . . . . . . . . . . . . 58
Get the Most From Your Pod . . . . . . . . . . . . . . . . . . . . . . . . . . . . . . . . . . . 58
Avoid extreme temperatures . . . . . . . . . . . . . . . . . . . . . . . . . . . . . . . . 58
Water and your Pod . . . . . . . . . . . . . . . . . . . . . . . . . . . . . . . . . . . . . . . . . 58
Safe storage . . . . . . . . . . . . . . . . . . . . . . . . . . . . . . . . . . . . . . . . . . . . . . . . . . . . 59

Contents
v
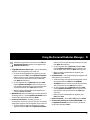
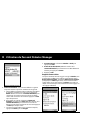
6 Using the Personal Diabetes Manager . . . . . . . . . . . . . . . . . . . . 61
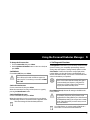
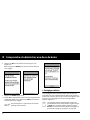
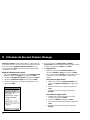
The ID Screen . . . . . . . . . . . . . . . . . . . . . . . . . . . . . . . . . . . . . . . . . . . . . . . . . . 61
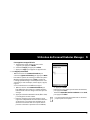
The Status Screen . . . . . . . . . . . . . . . . . . . . . . . . . . . . . . . . . . . . . . . . . . . . . . 61
Insulin gauge and display . . . . . . . . . . . . . . . . . . . . . . . . . . . . . . . . . . . 62
PDM settings . . . . . . . . . . . . . . . . . . . . . . . . . . . . . . . . . . . . . . . . . . . . . . . . 62
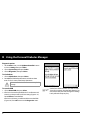
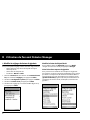
The System Setup Menu . . . . . . . . . . . . . . . . . . . . . . . . . . . . . . . . . . . . . . . 63
Reset the Date or Time . . . . . . . . . . . . . . . . . . . . . . . . . . . . . . . . . . . . . . . . . 63
Reset the time. . . . . . . . . . . . . . . . . . . . . . . . . . . . . . . . . . . . . . . . . . . . . . . 64
Reset the date . . . . . . . . . . . . . . . . . . . . . . . . . . . . . . . . . . . . . . . . . . . . . . . 64
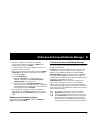
Change Bolus and Basal Settings. . . . . . . . . . . . . . . . . . . . . . . . . . . . . . . 64
Bolus calcs. . . . . . . . . . . . . . . . . . . . . . . . . . . . . . . . . . . . . . . . . . . . . . . . . . . 65
Ratios/factors/targets . . . . . . . . . . . . . . . . . . . . . . . . . . . . . . . . . . . . . . . 66
Temp basal . . . . . . . . . . . . . . . . . . . . . . . . . . . . . . . . . . . . . . . . . . . . . . . . . . 68
Extended. . . . . . . . . . . . . . . . . . . . . . . . . . . . . . . . . . . . . . . . . . . . . . . . . . . . 68
Bolus increment. . . . . . . . . . . . . . . . . . . . . . . . . . . . . . . . . . . . . . . . . . . . . 68
Max bolus . . . . . . . . . . . . . . . . . . . . . . . . . . . . . . . . . . . . . . . . . . . . . . . . . . . 68
Max basal rate. . . . . . . . . . . . . . . . . . . . . . . . . . . . . . . . . . . . . . . . . . . . . . . 68
Alerts and Reminders . . . . . . . . . . . . . . . . . . . . . . . . . . . . . . . . . . . . . . . . . . 68
Set alerts and reminders . . . . . . . . . . . . . . . . . . . . . . . . . . . . . . . . . . . . 70
Change Blood Glucose Meter Settings . . . . . . . . . . . . . . . . . . . . . . . . . 72
Change BG goal limits. . . . . . . . . . . . . . . . . . . . . . . . . . . . . . . . . . . . . . . 72
Manage the blood glucose tags list . . . . . . . . . . . . . . . . . . . . . . . . . 72
Change BG sound . . . . . . . . . . . . . . . . . . . . . . . . . . . . . . . . . . . . . . . . . . . 73
Customize the Personal Diabetes Manager . . . . . . . . . . . . . . . . . . . . 73
Set PDM options . . . . . . . . . . . . . . . . . . . . . . . . . . . . . . . . . . . . . . . . . . . . 74
Set Diagnostic Functions. . . . . . . . . . . . . . . . . . . . . . . . . . . . . . . . . . . . . . . 75
Diagnostic options . . . . . . . . . . . . . . . . . . . . . . . . . . . . . . . . . . . . . . . . . . 76
Set a Reminder to Vibrate . . . . . . . . . . . . . . . . . . . . . . . . . . . . . . . . . . . . . . 77
Get the Most from Your PDM. . . . . . . . . . . . . . . . . . . . . . . . . . . . . . . . . . . 77
Keep it handy . . . . . . . . . . . . . . . . . . . . . . . . . . . . . . . . . . . . . . . . . . . . . . . 77
Communicating with the Pod. . . . . . . . . . . . . . . . . . . . . . . . . . . . . . . 77
Water and your PDM . . . . . . . . . . . . . . . . . . . . . . . . . . . . . . . . . . . . . . . . 77
Avoid extreme temperatures. . . . . . . . . . . . . . . . . . . . . . . . . . . . . . . . 78
Electrical interference . . . . . . . . . . . . . . . . . . . . . . . . . . . . . . . . . . . . . . . 78
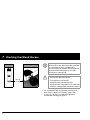
7 Checking Your Blood Glucose . . . . . . . . . . . . . . . . . . . . . . . . . . . . 79
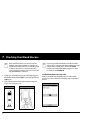
The Built-in FreeStyle® Blood Glucose Meter . . . . . . . . . . . . . . . . . . . 79
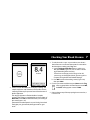
The FreeStyle® Blood Glucose Test Strips . . . . . . . . . . . . . . . . . . . . . . . 80
Important test strip information. . . . . . . . . . . . . . . . . . . . . . . . . . . . . 80
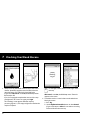
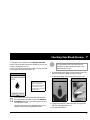
The FreeStyle® Control Solution . . . . . . . . . . . . . . . . . . . . . . . . . . . . . . . . 80
When to perform a control solution test. . . . . . . . . . . . . . . . . . . . . 81
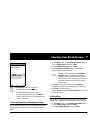
Check that the meter and test strips are working. . . . . . . . . . . . 81
Control solution expiration date. . . . . . . . . . . . . . . . . . . . . . . . . . . . . 81
Ensure accurate control solution results. . . . . . . . . . . . . . . . . . . . . 81
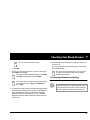
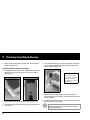
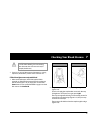
Performing a Control Solution Test. . . . . . . . . . . . . . . . . . . . . . . . . . . . . 82
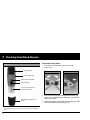
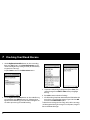
Performing a Blood Glucose Reading . . . . . . . . . . . . . . . . . . . . . . . . . . 85
Prepare the lancing device . . . . . . . . . . . . . . . . . . . . . . . . . . . . . . . . . . 86
Insert the blood glucose test strip . . . . . . . . . . . . . . . . . . . . . . . . . . . 87
Set the blood glucose test strip code. . . . . . . . . . . . . . . . . . . . . . . . 88
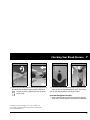
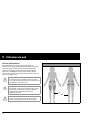
Lance your forearm, upper arm, or hand . . . . . . . . . . . . . . . . . . . . 90
Fill the blood glucose test strip with blood . . . . . . . . . . . . . . . . . . 91
Remove the lancet . . . . . . . . . . . . . . . . . . . . . . . . . . . . . . . . . . . . . . . . . . 94
Blood Glucose Results and the Suggested Bolus
Calculator . . . . . . . . . . . . . . . . . . . . . . . . . . . . . . . . . . . . . . . . . . . . . . . . . . . . . . 94
Entering Blood Glucose Readings Manually. . . . . . . . . . . . . . . . . . . . 95

Contents
vi
Editing Tags . . . . . . . . . . . . . . . . . . . . . . . . . . . . . . . . . . . . . . . . . . . . . . . . . . . . 95
Low and High Blood Glucose Readings. . . . . . . . . . . . . . . . . . . . . . . . . 97
Low readings . . . . . . . . . . . . . . . . . . . . . . . . . . . . . . . . . . . . . . . . . . . . . . . . 97
High readings . . . . . . . . . . . . . . . . . . . . . . . . . . . . . . . . . . . . . . . . . . . . . . . 97
Important Health-Related Information . . . . . . . . . . . . . . . . . . . . . . . . . 98
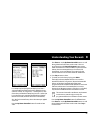
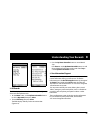
8 Understanding Your Records . . . . . . . . . . . . . . . . . . . . . . . . . . . . . 99
Record Keeping . . . . . . . . . . . . . . . . . . . . . . . . . . . . . . . . . . . . . . . . . . . . . . . . 99
Special symbols in record screens . . . . . . . . . . . . . . . . . . . . . . . . . . . 99
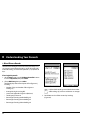
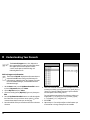
Insulin Delivery Records . . . . . . . . . . . . . . . . . . . . . . . . . . . . . . . . . . . . . . . 100
View insulin delivery records . . . . . . . . . . . . . . . . . . . . . . . . . . . . . . . 100
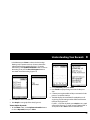
Blood Glucose Records . . . . . . . . . . . . . . . . . . . . . . . . . . . . . . . . . . . . . . . . 102
View single-day trends . . . . . . . . . . . . . . . . . . . . . . . . . . . . . . . . . . . . . 102
View multiple-day trends. . . . . . . . . . . . . . . . . . . . . . . . . . . . . . . . . . . 103
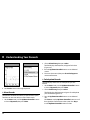
Alarm Records. . . . . . . . . . . . . . . . . . . . . . . . . . . . . . . . . . . . . . . . . . . . . . . . . 104
Carbohydrate Records. . . . . . . . . . . . . . . . . . . . . . . . . . . . . . . . . . . . . . . . . 104
All Records . . . . . . . . . . . . . . . . . . . . . . . . . . . . . . . . . . . . . . . . . . . . . . . . . . . . 105
User Information/Support. . . . . . . . . . . . . . . . . . . . . . . . . . . . . . . . . . . . . 105
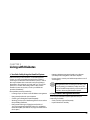
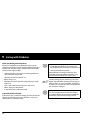
9 Living with Diabetes . . . . . . . . . . . . . . . . . . . . . . . . . . . . . . . . . . . . 107
Your Role: Safely Using the OmniPod System. . . . . . . . . . . . . . . . . . 107
Daily Diabetes Management Activities . . . . . . . . . . . . . . . . . . . . . . . . 107
Check your blood glucose frequently. . . . . . . . . . . . . . . . . . . . . . . 108
Inspect the infusion site daily. . . . . . . . . . . . . . . . . . . . . . . . . . . . . . . 108
Prepare for Emergencies . . . . . . . . . . . . . . . . . . . . . . . . . . . . . . . . . . . . . . 109
Water and Your Pod . . . . . . . . . . . . . . . . . . . . . . . . . . . . . . . . . . . . . . . . . . . 109
Traveling and Vacationing. . . . . . . . . . . . . . . . . . . . . . . . . . . . . . . . . . . . . 110
Plan for changing time zones. . . . . . . . . . . . . . . . . . . . . . . . . . . . . . . 110
Take enough supplies . . . . . . . . . . . . . . . . . . . . . . . . . . . . . . . . . . . . . . 110
Minimize airport security delays. . . . . . . . . . . . . . . . . . . . . . . . . . . . 110
Keep supplies accessible . . . . . . . . . . . . . . . . . . . . . . . . . . . . . . . . . . . 111
Avoid lows, highs, and DKA. . . . . . . . . . . . . . . . . . . . . . . . . . . . . . . . . . . . 111
General precautions . . . . . . . . . . . . . . . . . . . . . . . . . . . . . . . . . . . . . . . . 112
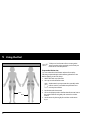
Hypoglycemia (Low Blood Glucose) . . . . . . . . . . . . . . . . . . . . . . . . 112
Symptoms of hypoglycemia. . . . . . . . . . . . . . . . . . . . . . . . . . . . . . . . 112
To avoid hypoglycemia (low blood glucose). . . . . . . . . . . . . . . . 112
To treat hypoglycemia (low blood glucose). . . . . . . . . . . . . . . . . 113
Examples of fast-acting foods . . . . . . . . . . . . . . . . . . . . . . . . . . . . . . 114
Hyperglycemia (high blood glucose) . . . . . . . . . . . . . . . . . . . . . . . 116
Diabetic ketoacidosis (DKA) . . . . . . . . . . . . . . . . . . . . . . . . . . . . . . . . 119
Handling Special Situations . . . . . . . . . . . . . . . . . . . . . . . . . . . . . . . . . . . 120
Sick days. . . . . . . . . . . . . . . . . . . . . . . . . . . . . . . . . . . . . . . . . . . . . . . . . . . . 120
Exercising, playing sports, or working hard . . . . . . . . . . . . . . . . . 121
X-rays, MRIs, and CT scans . . . . . . . . . . . . . . . . . . . . . . . . . . . . . . . . . . 121
Surgery or hospitalization . . . . . . . . . . . . . . . . . . . . . . . . . . . . . . . . . . 121
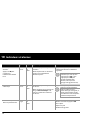
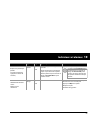
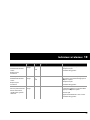
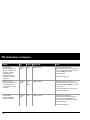
10 Alerts and Alarms . . . . . . . . . . . . . . . . . . . . . . . . . . . . . . . . . . . . . 123
Safety Checks . . . . . . . . . . . . . . . . . . . . . . . . . . . . . . . . . . . . . . . . . . . . . . . . . 123
Blood Glucose Meter Alerts. . . . . . . . . . . . . . . . . . . . . . . . . . . . . . . . . . . . 123
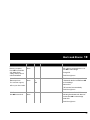
Alarms. . . . . . . . . . . . . . . . . . . . . . . . . . . . . . . . . . . . . . . . . . . . . . . . . . . . . . . . . 126
Advisory Alarms . . . . . . . . . . . . . . . . . . . . . . . . . . . . . . . . . . . . . . . . . . . . 126
Hazard Alarms. . . . . . . . . . . . . . . . . . . . . . . . . . . . . . . . . . . . . . . . . . . . . . 126
Manual Shut-off of a Hazard Alarm . . . . . . . . . . . . . . . . . . . . . . . . . . . . 132
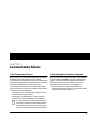
11 Communication Failures. . . . . . . . . . . . . . . . . . . . . . . . . . . . . . . 133
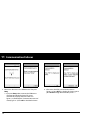
The Communication Process . . . . . . . . . . . . . . . . . . . . . . . . . . . . . . . . . . 133
Failure During Pod Activation or Operation . . . . . . . . . . . . . . . . . . . 133
Failure During Pod Deactivation. . . . . . . . . . . . . . . . . . . . . . . . . . . . . . . 135

Contents
vii
Failure During Request for Status . . . . . . . . . . . . . . . . . . . . . . . . . . . . . 136
Failure During Bolus Cancellation . . . . . . . . . . . . . . . . . . . . . . . . . . . . . 137
Appendix. . . . . . . . . . . . . . . . . . . . . . . . . . . . . . . . . . . . . . . . . . . . . . . . . . 139
Pod Care and Maintenance . . . . . . . . . . . . . . . . . . . . . . . . . . . . . . . . . . . 139
Storage. . . . . . . . . . . . . . . . . . . . . . . . . . . . . . . . . . . . . . . . . . . . . . . . . . . . . 139
Cleaning . . . . . . . . . . . . . . . . . . . . . . . . . . . . . . . . . . . . . . . . . . . . . . . . . . . 139
Personal Diabetes Manager Care and Maintenance . . . . . . . . . . . 139
Storage. . . . . . . . . . . . . . . . . . . . . . . . . . . . . . . . . . . . . . . . . . . . . . . . . . . . . 139
Cleaning and disinfecting . . . . . . . . . . . . . . . . . . . . . . . . . . . . . . . . . . 140
Replacing Batteries. . . . . . . . . . . . . . . . . . . . . . . . . . . . . . . . . . . . . . . . . 141
If the PDM becomes submerged in water . . . . . . . . . . . . . . . . . . 143
If you drop the PDM. . . . . . . . . . . . . . . . . . . . . . . . . . . . . . . . . . . . . . . . 143
Storage and Supplies. . . . . . . . . . . . . . . . . . . . . . . . . . . . . . . . . . . . . . . . . . 144
Ordering Supplies. . . . . . . . . . . . . . . . . . . . . . . . . . . . . . . . . . . . . . . . . . . . . 144
Suggested Bolus Calculator Examples and Guidelines . . . . . . . . 144
Meal bolus calculation . . . . . . . . . . . . . . . . . . . . . . . . . . . . . . . . . . . . . 145
Insulin-on-board (IOB) calculation. . . . . . . . . . . . . . . . . . . . . . . . . . 145
Examples of suggested bolus calculations . . . . . . . . . . . . . . . . . 145
Calculator guidelines. . . . . . . . . . . . . . . . . . . . . . . . . . . . . . . . . . . . . . . 147
OmniPod System Options and Settings . . . . . . . . . . . . . . . . . . . . . . . 148
Pod Specifications. . . . . . . . . . . . . . . . . . . . . . . . . . . . . . . . . . . . . . . . . . . . . 149
Accuracy Test Results. . . . . . . . . . . . . . . . . . . . . . . . . . . . . . . . . . . . . . . . . . 150
Flow rate error . . . . . . . . . . . . . . . . . . . . . . . . . . . . . . . . . . . . . . . . . . . . . . . . 150
Personal Diabetes Manager Specifications . . . . . . . . . . . . . . . . . . . . 150
Blood Glucose Meter Specifications . . . . . . . . . . . . . . . . . . . . . . . . . . . 151
OmniPod System Label Symbols. . . . . . . . . . . . . . . . . . . . . . . . . . . . . . 152
Personal Diabetes Manager Icons . . . . . . . . . . . . . . . . . . . . . . . . . . . . . 153
OmniPod System Notice Concerning Interference . . . . . . . . . . . . 153
Electromagnetic Compatibility. . . . . . . . . . . . . . . . . . . . . . . . . . . . . . . . 154
Limited Warranty for the Personal Diabetes Manager . . . . . . . . . 158
Privacy Code . . . . . . . . . . . . . . . . . . . . . . . . . . . . . . . . . . . . . . . . . . . . . . . . . . 159
You and Your Healthcare Provider. . . . . . . . . . . . . . . . . . . . . . . . . . . . . 159
Glossary . . . . . . . . . . . . . . . . . . . . . . . . . . . . . . . . . . . . . . . . . . . . . . . . . . 161
Index . . . . . . . . . . . . . . . . . . . . . . . . . . . . . . . . . . . . . . . . . . . . . . . . . . . . . 167

viii
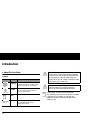
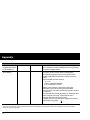
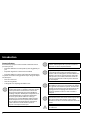
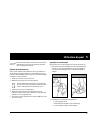
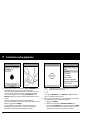
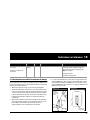
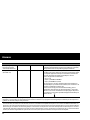
■ About This User Guide
Symbols
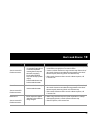
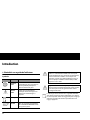
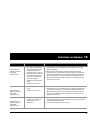
Symbol Te r m Meaning
Warning
Describes potential serious adverse
reactions, or indicates conditions that
could cause death or serious injury.
Caution
Indicates conditions that could cause
minor or moderate injury to you or
damage to the device.
Note
Provides helpful information.
Tip
Offers a suggestion for successful
use of the OmniPod
®
Insulin
Management System.
This User Guide is intended for use only with PDM
model CAT45E. To learn which version of the PDM
you have, turn it over. On the back of the PDM, look
for “CAT45E.” If you see it, this is the correct User
Guide. If you do not see “CAT45E” on the back of the
PDM, please call Customer Care.
This User Guide is periodically updated. Visit
www.myomnipod.ca to see the most recent
version and to find other helpful information.
Screen displays shown in this User Guide are for
illustrative purposes only and should not be considered
suggestions for user settings. Consult with your
healthcare provider to determine the appropriate
settings for you.
Introduction

Introduction
ix
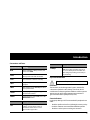
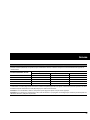
Conventions and Terms
Important Information
Indication
The OmniPod
®
Insulin Management System is intended for
subcutaneous (below the skin) delivery of insulin at set and
variable rates for the management of diabetes mellitus in persons
requiring insulin and for the quantitative measurement of
glucose in fresh whole capillary blood (in vitro).
Contraindications
Insulin pump therapy is NOT recommended for people who are
either:
• Unable to perform at least four (4) blood glucose tests per day
• Unable to maintain contact with their healthcare provider
• Unable to use the System according to instructions
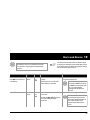
Convention/Term Meaning
Bold
Names of buttons, soft keys, menus, and
screens are in bold.
Italics
Words in italics are defined in the
Glossary at the end of this User Guide.
Press
Press and release a button or soft key.
Hold
Keep pressing a button until its function is
complete.
Menu
A list of options on the PDM. Options allow
you to perform tasks.
Screen
Displays programming, operating, and
alarm/alert information.
Button
A physical button on the PDM, such as the
Home/Power button.
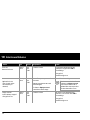
Convention/Term Meaning
Icon
An image on the PDM screen that
indicates a menu option or item of
information. A table of screen icons
appears in the Appendices.
Soft keys
A row of three unlabeled buttons on the
PDM whose label or function appears on
the screen directly above the button. The
label changes depending on the task you
are performing.
This device is for prescription use only.
Convention/Term Meaning

Introduction
x
Do not use the integrated FreeStyle® Blood Glucose Monitoring
System for:
• Testing on newborns
•
Testing arterial blood
• Diagnosing of or screening for diabetes mellitus
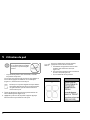
The OmniPod System is designed to use rapid-
acting U-100 insulin. The following U-100 rapid-
acting insulin analogs have been tested and found
to
be safe for use in the Pod: NovoRapid, Humalog®,
or Apidra®. NovoRapid is compatible with the
OmniPod System for use up to 72 hours (3 days).
Bef
ore using a different insulin with the OmniPod
System, check the insulin drug label to make sure
it can be used with a pump. Refer to the insulin
labeling and follow your health
care provider's
directions for how often to replace the Pod.
Not recommended for individuals with hearing
loss.
Always verify ability to hear Pod/PDM alerts
and alarms.
The Pod and PDM may be affected by strong radi-
ation or magnetic fields. Before having an X-ray, MRI,
or CT scan (or any similar test or procedure), remove
your Pod and put it and the PDM outside the
treatment area. Check with your healthcare provider
for Pod removal guidelines.
Please read all the instructions provided in this
User Guide
and practice the blood glucose testing
procedures before using the System. Monitor your
blood glucose with the guidance of your healthcare
provider. Undetected hyperglycemia or
hypoglycemia can result without proper monitoring.
If you are unable to use the System according to
in
structions, you may be putting your health and
safety at risk. Talk with your healthcare provider if
you have questions or concerns about using the
System properly.
This device is intended for self-testing by the user.
If you are having symptoms that are not consistent
with y
our blood glucose test and you have followed all
instructions described in this User Guide, call your
healthcare professional.

Introduction
xi
■ Your Role: Safely Using the OmniPod System
Work with your healthcare provider to establish diabetes
management guidelines and settings that best fit your needs.
These may include:
Insulin-to-Carbohydrate Ratio (IC): Number of
grams of
carbohydrate covered by one unit of insulin. For example, if your
insulin-to-carbohydrate ratio is 1:15, then you need to deliver one
unit of insulin to cover every fifteen grams of carbohydrate you
eat.
Correction or Sensitivity Factor: Ho
w much one unit of insulin
will lower blood glucose. For example, if your sensitivity factor is
2.8, one unit of insulin will lower your blood glucose by
2.8 mmol/L.
Target Blood Glucose Value: The
blood glucose level you want
to achieve. For example, you may want to keep your blood
glucose close to 5.6 mmol/L.
Duration of Insulin Action: The
length of time that insulin
remains active and available in your body after a correction or
meal bolus.
Your individual needs influence th
e initial settings you and your
healthcare provider will enter into the Personal Diabetes
Manager (PDM) during setup (see Chapter 2, Getting Started).
Your healthcare provider must help you enter these initial
s
ettings. Soon you will enter and change your own settings
with confidence and ease. The OmniPod System is more user-
friendly than most electronic devices you use every day. In fact,
technology is what makes the OmniPod System so easy to use.
Your healthcare provider is a valuable resource. You will rely on
h
im or her for a lot of critical information about your OmniPod
System, especially during the first few weeks and months.
When you have questions about diabetes management after
starting on the OmniPod System, do not hesitate to talk with
your healthcare provider. For nonmedical emergencies or for
technical questions about your OmniPod System setup or
operation, you can call Customer Care 24 hours a day, 7 days a
week.
Customer Care:
Please call customer care at 1 855 POD INFO (1 855 7634636).
When
outside of Canada, please call 647-788-3132.This user
guide is periodically updated. Please visit www.MyOmniPod.ca
to see the most recent version and to find other helpful
information.

Introduction
xii
Your healthcare provider will give you all the tools and training
you need to be successful with the OmniPod Insulin
Management System. However, in the end, your success
depends on YOU. You must become actively involved in your
own diabetes management to enjoy the outstanding control,
freedom, and flexibility that is possible with the OmniPod
System.
Being actively involved means:
• Frequently monitoring blood glucose levels
• Learning how to operate your OmniPod System and
practicing proper techniques
• Visiting your healthcare provider
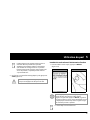
Do NOT attempt to use the OmniPod® Insulin
Management System before you receive training
from your healthcare provider. Inadequate training
could put your health and safety at risk.

1
CHAPTER 1
Your New OmniPod Insulin Management System
■ Insulin Delivery with the OmniPod System
The OmniPod
®
Insulin Management System is an innovative
continuous insulin delivery system that provides all the proven
benefits of c
ontinuous subcutaneous insulin infusion (CSII) therapy
in a way no conventional insulin pump can. The System’s
innovative design and features allows you to live your life—
and manage your diabetes—with unprecedented freedom,
co
mfort, convenience, and ease.
The long-term health benefits of better blood glucose control
ar
e well known. Maintaining near-normal blood glucose levels
can help you live a longer, healthier life with fewer diabetes-
related complications. The OmniPod System also has many
practical, everyday benefits, including convenience, freedom,
flex
ibility, and ease of use.
Continuous insulin delivery most closely mimics the insulin
release of a healthy pancreas. Since the landmark 10-year
Diabetes Control and Complications Trial (DCCT), the long-
term health benefits of maintaining near-normal blood
glucose levels have been widely recognized.
Continuous insulin delivery at preset rates eliminates the need
for injections and the interruptions that come with them. In
addition, with the OmniPod System, insulin delivery can be
changed with the press of a button to adapt to snacks or
unexpected changes in daily routine. The OmniPod System is a
great option for people with diabetes who require insulin.
The OmniPod System works much like the pancreas of a person
without diabet
es by delivering insulin in two ways:
• A small, constant, background supply of insulin (called a basal
ra
te) is delivered automatically at a programmed rate, all day
and night.
• An extra dose of insulin (called a bolus) can be delivered
when you need it to match the carbohydrates in a meal or
snack or to correct a high blood glucose.

Your New OmniPod Insulin Management System
2
1
■ How Does the OmniPod System Work?
The Pod is a small, lightweight, self-adhesive device that you fill
with insulin and wear directly on your body. The Pod delivers
precise, personalized doses of insulin into your body through a
small flexible tube (called a cannula), based on instructions that
you program into its wireless companion, the Personal Diabetes
Manager. The cannula is inserted only once with each Pod.
The Personal Diabetes Manager (PDM) is a wireless, handheld
device tha
t:
• Programs the Pod with your personaliz
ed insulin-delivery
instructions
• Wirelessly monitors the Pod’s operation
• Incorporates a FreeStyle® blood glucose meter
With just two parts, you’ll enjoy all the func
tionality and benefits
of continuous insulin delivery and blood glucose monitoring.
Plus you’ll enjoy the safety, convenience, and freedom of:
No tubing
There is no tubing connecting the Pod to the PDM. You wear the
Pod comfortably and discreetly under your clothes. You can carry
the PDM separately in a backpack, briefcase, or purse. With the
OmniPod Insulin Management System, you don’t have to worry
about snagging, tangling, or feeling tethered by tubing.
Suggested bolus calculation
Calculating bolus doses has never been easier. After you check
your blood glucose, enter the carbs for your snack or meal. Based
on your individual settings, the System displays a suggested
bolus dose. You can accept the suggestion, change it, or cancel it.
Carb presets
To make carbohydrate counting easier, the OmniPod System
includes “carb presets.” You can enter your favorite foods, snacks,
or entire meals as “carb presets.” Presets contain the grams of
carbohydrate in the food item or meal. Next time you eat this
same food, you don’t have to count the carbs; just select your
carb preset and the System does the calculating for you. The
System stores up to 36 carb presets.

Your New OmniPod Insulin Management System
3
1
Automated cannula insertion
With the OmniPod System, you don’t have to insert the infusion
set ma
nually or carry around a separate inserter. You simply press
a button on the PDM and the Pod’s automated insertion system
safely and consistently inserts the cannula beneath the skin,
virtually pain free. It then begins delivering insulin according to
your programmed basal rate.
A fully-integrated design with blood glucose monitoring
With a fully integrated two-part design, there’s no need to carry
separ
ate infusion sets, reservoirs, or inserters. It’s all integrated
into the Pod. With the PDM, you can check your blood glucose
level using FreeStyle® blood glucose test strips, but without the
hassle of carrying a separate blood glucose meter.
If you prefer to use another blood glucose meter, you can enter
the
readings manually into the PDM.
Record keeping
Another convenient part of the OmniPod System is record
ke
eping. Paper charts are useful, but sometimes they can be
inconvenient to carry or use. The data storage system in the
Personal Diabetes Manager (PDM) displ
ays up to 90 days’ worth
of information. This includes blood glucose readings, basal rates
and bolus doses, carbohydrates, and alarms.
Personalizing your System
You can personalize your OmniPod System in other ways, too:
•Enter and name basal programs
•
Name and save temporary basal presets
• Add your own customized reminders
• Enter your name, phone number, doctor’s name and
number, and other emergency information

Your New OmniPod Insulin Management System
4
1
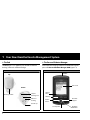
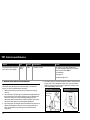
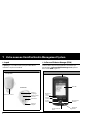
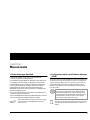
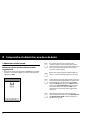
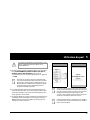
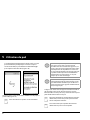
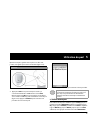
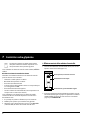
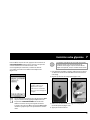
■ The Pod
The Pod (Figure 1-1) is applied to your skin with an adhesive
backing, similar to an adhesive bandage.
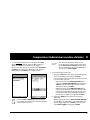
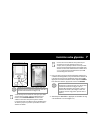
■ The Personal Diabetes Manager
All Pod operations are programmed and controlled through the
palm-sized Personal Diabetes Manager (PDM; Figure 1-2).
To p
Bottom
Needle cap
Viewing window
Fill port
Figure 1-1
Adhesive
backing
Housing vent
Figure 1-2
Up/Down
Controller
User Info/
Support
Soft Key
Label
Soft Keys
Home/
Power
USB Port
Test Strip Port
LCD Screen

Your New OmniPod Insulin Management System
5
1
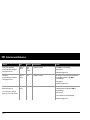
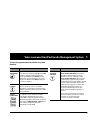
Buttons that program and control the OmniPod System
Button Action
Home/
Power
Pressing and holding turns the PDM on and off.
When the PDM is on, pressing this button
(quickly/briefly) displays the Home screen, from
which you can choose a menu item or view the
Status screens (shown later in this chapter).
Up/Down
Controller
Pressing and releasing scrolls through a list of
available menu options or numbers, so you can
pick the one you want. Holding the button
scrolls faster.
Soft Keys
Soft key labels and functions depend on the
menu or screen you are viewing. The label
appears on the screen directly above the
physical button you press. Select, Save, and
Back are just three examples of the soft key
labels on your PDM.
Button Action
User Info/
Support
Pressing opens a User Info/Support screen that
displays additional information about the
current screen you are viewing. The User Info/
Support icon appears when additional
information can be viewed. It may be displayed
at the top of the screen, to the right of an event
detail (such as a suggested bolus), or to the right
of a record item (such as a BG history record).
(See “Personal Diabetes Manager Icons” in the
Appendix).
In addition, pressing and holding this button for
2 seconds
enables a “bright mode” on the PDM
screen.

Your New OmniPod Insulin Management System
6
1
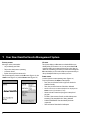
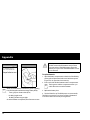
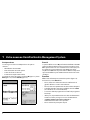
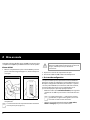
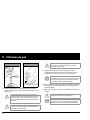
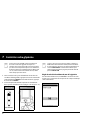
Primary screens
Messages on the screen either:
• Let you identify your PDM
•
Tell you how the System is operating
• List menu choices
• Explain how to perform certain tasks
The System’s primary screens are the ID scr
een (Figure 1-3), the
Status s
creen (Figure 1-4), and the Home screen (Figure 1-6).
ID screen
The System displays an ID screen to make the PDM easy to
identify when you first turn it on. You can personalize the ID
screen by adding your name and choosing its color. (See , for
details on customizing your PDM.) You must acknowledge the
ID screen before you can use the PDM. It is important that you
always identify the PDM as yours before you use it.
Status screen
Lists the System’s current operating status (Figure 1-4).
From top to bottom, the Status scr
een displays:
• Time, date, and result of last blood glucose checked or
ent
ered manually
• Time, date, and total amount of last bolus delivered
• Amount of Insulin on Board (IOB) will be displayed on
Status screen (if calculator in use)
• Name and rate of active basal program or temp basal
program
• “Ext bolus,” the amount of insulin, and the delivery time
remaining if an extended bolus is being delivered
• “INSULIN SUSPENDED” if insulin delivery has been
suspended
• Time and date of when the Pod will expire
Figure 1-3
Figure 1-4
La page est en cours de chargement...
La page est en cours de chargement...
La page est en cours de chargement...
La page est en cours de chargement...
La page est en cours de chargement...
La page est en cours de chargement...
La page est en cours de chargement...
La page est en cours de chargement...
La page est en cours de chargement...
La page est en cours de chargement...
La page est en cours de chargement...
La page est en cours de chargement...
La page est en cours de chargement...
La page est en cours de chargement...
La page est en cours de chargement...
La page est en cours de chargement...
La page est en cours de chargement...
La page est en cours de chargement...
La page est en cours de chargement...
La page est en cours de chargement...
La page est en cours de chargement...
La page est en cours de chargement...
La page est en cours de chargement...
La page est en cours de chargement...
La page est en cours de chargement...
La page est en cours de chargement...
La page est en cours de chargement...
La page est en cours de chargement...
La page est en cours de chargement...
La page est en cours de chargement...
La page est en cours de chargement...
La page est en cours de chargement...
La page est en cours de chargement...
La page est en cours de chargement...
La page est en cours de chargement...
La page est en cours de chargement...
La page est en cours de chargement...
La page est en cours de chargement...
La page est en cours de chargement...
La page est en cours de chargement...
La page est en cours de chargement...
La page est en cours de chargement...
La page est en cours de chargement...
La page est en cours de chargement...
La page est en cours de chargement...
La page est en cours de chargement...
La page est en cours de chargement...
La page est en cours de chargement...
La page est en cours de chargement...
La page est en cours de chargement...
La page est en cours de chargement...
La page est en cours de chargement...
La page est en cours de chargement...
La page est en cours de chargement...
La page est en cours de chargement...
La page est en cours de chargement...
La page est en cours de chargement...
La page est en cours de chargement...
La page est en cours de chargement...
La page est en cours de chargement...
La page est en cours de chargement...
La page est en cours de chargement...
La page est en cours de chargement...
La page est en cours de chargement...
La page est en cours de chargement...
La page est en cours de chargement...
La page est en cours de chargement...
La page est en cours de chargement...
La page est en cours de chargement...
La page est en cours de chargement...
La page est en cours de chargement...
La page est en cours de chargement...
La page est en cours de chargement...
La page est en cours de chargement...
La page est en cours de chargement...
La page est en cours de chargement...
La page est en cours de chargement...
La page est en cours de chargement...
La page est en cours de chargement...
La page est en cours de chargement...
La page est en cours de chargement...
La page est en cours de chargement...
La page est en cours de chargement...
La page est en cours de chargement...
La page est en cours de chargement...
La page est en cours de chargement...
La page est en cours de chargement...
La page est en cours de chargement...
La page est en cours de chargement...
La page est en cours de chargement...
La page est en cours de chargement...
La page est en cours de chargement...
La page est en cours de chargement...
La page est en cours de chargement...
La page est en cours de chargement...
La page est en cours de chargement...
La page est en cours de chargement...
La page est en cours de chargement...
La page est en cours de chargement...
La page est en cours de chargement...
La page est en cours de chargement...
La page est en cours de chargement...
La page est en cours de chargement...
La page est en cours de chargement...
La page est en cours de chargement...
La page est en cours de chargement...
La page est en cours de chargement...
La page est en cours de chargement...
La page est en cours de chargement...
La page est en cours de chargement...
La page est en cours de chargement...
La page est en cours de chargement...
La page est en cours de chargement...
La page est en cours de chargement...
La page est en cours de chargement...
La page est en cours de chargement...
La page est en cours de chargement...
La page est en cours de chargement...
La page est en cours de chargement...
La page est en cours de chargement...
La page est en cours de chargement...
La page est en cours de chargement...
La page est en cours de chargement...
La page est en cours de chargement...
La page est en cours de chargement...
La page est en cours de chargement...
La page est en cours de chargement...
La page est en cours de chargement...
La page est en cours de chargement...
La page est en cours de chargement...
La page est en cours de chargement...
La page est en cours de chargement...
La page est en cours de chargement...
La page est en cours de chargement...
La page est en cours de chargement...
La page est en cours de chargement...
La page est en cours de chargement...
La page est en cours de chargement...
La page est en cours de chargement...
La page est en cours de chargement...
La page est en cours de chargement...
La page est en cours de chargement...
La page est en cours de chargement...
La page est en cours de chargement...
La page est en cours de chargement...
La page est en cours de chargement...
La page est en cours de chargement...
La page est en cours de chargement...
La page est en cours de chargement...
La page est en cours de chargement...
La page est en cours de chargement...
La page est en cours de chargement...
La page est en cours de chargement...
La page est en cours de chargement...
La page est en cours de chargement...
La page est en cours de chargement...
La page est en cours de chargement...
La page est en cours de chargement...
La page est en cours de chargement...
La page est en cours de chargement...
La page est en cours de chargement...
La page est en cours de chargement...
La page est en cours de chargement...
La page est en cours de chargement...
La page est en cours de chargement...
La page est en cours de chargement...
La page est en cours de chargement...
La page est en cours de chargement...
La page est en cours de chargement...
La page est en cours de chargement...
La page est en cours de chargement...
La page est en cours de chargement...
La page est en cours de chargement...
La page est en cours de chargement...
La page est en cours de chargement...
La page est en cours de chargement...
La page est en cours de chargement...
La page est en cours de chargement...
La page est en cours de chargement...
La page est en cours de chargement...
La page est en cours de chargement...
La page est en cours de chargement...
La page est en cours de chargement...
La page est en cours de chargement...
La page est en cours de chargement...
La page est en cours de chargement...
La page est en cours de chargement...
La page est en cours de chargement...
La page est en cours de chargement...
La page est en cours de chargement...
La page est en cours de chargement...
La page est en cours de chargement...
La page est en cours de chargement...
La page est en cours de chargement...
La page est en cours de chargement...
La page est en cours de chargement...
La page est en cours de chargement...
La page est en cours de chargement...
La page est en cours de chargement...
La page est en cours de chargement...
La page est en cours de chargement...
La page est en cours de chargement...
La page est en cours de chargement...
La page est en cours de chargement...
La page est en cours de chargement...
La page est en cours de chargement...
La page est en cours de chargement...
La page est en cours de chargement...
La page est en cours de chargement...
La page est en cours de chargement...
La page est en cours de chargement...
La page est en cours de chargement...
La page est en cours de chargement...
La page est en cours de chargement...
La page est en cours de chargement...
La page est en cours de chargement...
La page est en cours de chargement...
La page est en cours de chargement...
La page est en cours de chargement...
La page est en cours de chargement...
La page est en cours de chargement...
La page est en cours de chargement...
La page est en cours de chargement...
La page est en cours de chargement...
La page est en cours de chargement...
La page est en cours de chargement...
La page est en cours de chargement...
La page est en cours de chargement...
La page est en cours de chargement...
La page est en cours de chargement...
La page est en cours de chargement...
La page est en cours de chargement...
La page est en cours de chargement...
La page est en cours de chargement...
La page est en cours de chargement...
La page est en cours de chargement...
La page est en cours de chargement...
La page est en cours de chargement...
La page est en cours de chargement...
La page est en cours de chargement...
La page est en cours de chargement...
La page est en cours de chargement...
La page est en cours de chargement...
La page est en cours de chargement...
La page est en cours de chargement...
La page est en cours de chargement...
La page est en cours de chargement...
La page est en cours de chargement...
La page est en cours de chargement...
La page est en cours de chargement...
La page est en cours de chargement...
La page est en cours de chargement...
La page est en cours de chargement...
La page est en cours de chargement...
La page est en cours de chargement...
La page est en cours de chargement...
La page est en cours de chargement...
La page est en cours de chargement...
La page est en cours de chargement...
La page est en cours de chargement...
La page est en cours de chargement...
La page est en cours de chargement...
La page est en cours de chargement...
La page est en cours de chargement...
La page est en cours de chargement...
La page est en cours de chargement...
La page est en cours de chargement...
La page est en cours de chargement...
La page est en cours de chargement...
La page est en cours de chargement...
La page est en cours de chargement...
La page est en cours de chargement...
La page est en cours de chargement...
La page est en cours de chargement...
La page est en cours de chargement...
La page est en cours de chargement...
La page est en cours de chargement...
La page est en cours de chargement...
La page est en cours de chargement...
La page est en cours de chargement...
La page est en cours de chargement...
La page est en cours de chargement...
La page est en cours de chargement...
La page est en cours de chargement...
La page est en cours de chargement...
La page est en cours de chargement...
La page est en cours de chargement...
La page est en cours de chargement...
La page est en cours de chargement...
La page est en cours de chargement...
La page est en cours de chargement...
La page est en cours de chargement...
La page est en cours de chargement...
La page est en cours de chargement...
La page est en cours de chargement...
La page est en cours de chargement...
La page est en cours de chargement...
La page est en cours de chargement...
La page est en cours de chargement...
La page est en cours de chargement...
La page est en cours de chargement...
La page est en cours de chargement...
La page est en cours de chargement...
La page est en cours de chargement...
La page est en cours de chargement...
La page est en cours de chargement...
La page est en cours de chargement...
La page est en cours de chargement...
La page est en cours de chargement...
La page est en cours de chargement...
La page est en cours de chargement...
La page est en cours de chargement...
La page est en cours de chargement...
La page est en cours de chargement...
La page est en cours de chargement...
La page est en cours de chargement...
La page est en cours de chargement...
La page est en cours de chargement...
La page est en cours de chargement...
La page est en cours de chargement...
La page est en cours de chargement...
La page est en cours de chargement...
La page est en cours de chargement...
La page est en cours de chargement...
La page est en cours de chargement...
La page est en cours de chargement...
La page est en cours de chargement...
La page est en cours de chargement...
La page est en cours de chargement...
La page est en cours de chargement...
La page est en cours de chargement...
La page est en cours de chargement...
La page est en cours de chargement...
La page est en cours de chargement...
La page est en cours de chargement...
La page est en cours de chargement...
La page est en cours de chargement...
La page est en cours de chargement...
La page est en cours de chargement...
La page est en cours de chargement...
La page est en cours de chargement...
La page est en cours de chargement...
La page est en cours de chargement...
La page est en cours de chargement...
La page est en cours de chargement...
La page est en cours de chargement...
La page est en cours de chargement...
La page est en cours de chargement...
La page est en cours de chargement...
La page est en cours de chargement...
La page est en cours de chargement...
La page est en cours de chargement...
La page est en cours de chargement...
La page est en cours de chargement...
La page est en cours de chargement...
La page est en cours de chargement...
La page est en cours de chargement...
La page est en cours de chargement...
La page est en cours de chargement...
La page est en cours de chargement...
La page est en cours de chargement...
La page est en cours de chargement...
La page est en cours de chargement...
La page est en cours de chargement...
La page est en cours de chargement...
La page est en cours de chargement...
La page est en cours de chargement...
La page est en cours de chargement...
-
 1
1
-
 2
2
-
 3
3
-
 4
4
-
 5
5
-
 6
6
-
 7
7
-
 8
8
-
 9
9
-
 10
10
-
 11
11
-
 12
12
-
 13
13
-
 14
14
-
 15
15
-
 16
16
-
 17
17
-
 18
18
-
 19
19
-
 20
20
-
 21
21
-
 22
22
-
 23
23
-
 24
24
-
 25
25
-
 26
26
-
 27
27
-
 28
28
-
 29
29
-
 30
30
-
 31
31
-
 32
32
-
 33
33
-
 34
34
-
 35
35
-
 36
36
-
 37
37
-
 38
38
-
 39
39
-
 40
40
-
 41
41
-
 42
42
-
 43
43
-
 44
44
-
 45
45
-
 46
46
-
 47
47
-
 48
48
-
 49
49
-
 50
50
-
 51
51
-
 52
52
-
 53
53
-
 54
54
-
 55
55
-
 56
56
-
 57
57
-
 58
58
-
 59
59
-
 60
60
-
 61
61
-
 62
62
-
 63
63
-
 64
64
-
 65
65
-
 66
66
-
 67
67
-
 68
68
-
 69
69
-
 70
70
-
 71
71
-
 72
72
-
 73
73
-
 74
74
-
 75
75
-
 76
76
-
 77
77
-
 78
78
-
 79
79
-
 80
80
-
 81
81
-
 82
82
-
 83
83
-
 84
84
-
 85
85
-
 86
86
-
 87
87
-
 88
88
-
 89
89
-
 90
90
-
 91
91
-
 92
92
-
 93
93
-
 94
94
-
 95
95
-
 96
96
-
 97
97
-
 98
98
-
 99
99
-
 100
100
-
 101
101
-
 102
102
-
 103
103
-
 104
104
-
 105
105
-
 106
106
-
 107
107
-
 108
108
-
 109
109
-
 110
110
-
 111
111
-
 112
112
-
 113
113
-
 114
114
-
 115
115
-
 116
116
-
 117
117
-
 118
118
-
 119
119
-
 120
120
-
 121
121
-
 122
122
-
 123
123
-
 124
124
-
 125
125
-
 126
126
-
 127
127
-
 128
128
-
 129
129
-
 130
130
-
 131
131
-
 132
132
-
 133
133
-
 134
134
-
 135
135
-
 136
136
-
 137
137
-
 138
138
-
 139
139
-
 140
140
-
 141
141
-
 142
142
-
 143
143
-
 144
144
-
 145
145
-
 146
146
-
 147
147
-
 148
148
-
 149
149
-
 150
150
-
 151
151
-
 152
152
-
 153
153
-
 154
154
-
 155
155
-
 156
156
-
 157
157
-
 158
158
-
 159
159
-
 160
160
-
 161
161
-
 162
162
-
 163
163
-
 164
164
-
 165
165
-
 166
166
-
 167
167
-
 168
168
-
 169
169
-
 170
170
-
 171
171
-
 172
172
-
 173
173
-
 174
174
-
 175
175
-
 176
176
-
 177
177
-
 178
178
-
 179
179
-
 180
180
-
 181
181
-
 182
182
-
 183
183
-
 184
184
-
 185
185
-
 186
186
-
 187
187
-
 188
188
-
 189
189
-
 190
190
-
 191
191
-
 192
192
-
 193
193
-
 194
194
-
 195
195
-
 196
196
-
 197
197
-
 198
198
-
 199
199
-
 200
200
-
 201
201
-
 202
202
-
 203
203
-
 204
204
-
 205
205
-
 206
206
-
 207
207
-
 208
208
-
 209
209
-
 210
210
-
 211
211
-
 212
212
-
 213
213
-
 214
214
-
 215
215
-
 216
216
-
 217
217
-
 218
218
-
 219
219
-
 220
220
-
 221
221
-
 222
222
-
 223
223
-
 224
224
-
 225
225
-
 226
226
-
 227
227
-
 228
228
-
 229
229
-
 230
230
-
 231
231
-
 232
232
-
 233
233
-
 234
234
-
 235
235
-
 236
236
-
 237
237
-
 238
238
-
 239
239
-
 240
240
-
 241
241
-
 242
242
-
 243
243
-
 244
244
-
 245
245
-
 246
246
-
 247
247
-
 248
248
-
 249
249
-
 250
250
-
 251
251
-
 252
252
-
 253
253
-
 254
254
-
 255
255
-
 256
256
-
 257
257
-
 258
258
-
 259
259
-
 260
260
-
 261
261
-
 262
262
-
 263
263
-
 264
264
-
 265
265
-
 266
266
-
 267
267
-
 268
268
-
 269
269
-
 270
270
-
 271
271
-
 272
272
-
 273
273
-
 274
274
-
 275
275
-
 276
276
-
 277
277
-
 278
278
-
 279
279
-
 280
280
-
 281
281
-
 282
282
-
 283
283
-
 284
284
-
 285
285
-
 286
286
-
 287
287
-
 288
288
-
 289
289
-
 290
290
-
 291
291
-
 292
292
-
 293
293
-
 294
294
-
 295
295
-
 296
296
-
 297
297
-
 298
298
-
 299
299
-
 300
300
-
 301
301
-
 302
302
-
 303
303
-
 304
304
-
 305
305
-
 306
306
-
 307
307
-
 308
308
-
 309
309
-
 310
310
-
 311
311
-
 312
312
-
 313
313
-
 314
314
-
 315
315
-
 316
316
-
 317
317
-
 318
318
-
 319
319
-
 320
320
-
 321
321
-
 322
322
-
 323
323
-
 324
324
-
 325
325
-
 326
326
-
 327
327
-
 328
328
-
 329
329
-
 330
330
-
 331
331
-
 332
332
-
 333
333
-
 334
334
-
 335
335
-
 336
336
-
 337
337
-
 338
338
-
 339
339
-
 340
340
-
 341
341
-
 342
342
-
 343
343
-
 344
344
-
 345
345
-
 346
346
-
 347
347
-
 348
348
-
 349
349
-
 350
350
-
 351
351
-
 352
352
-
 353
353
-
 354
354
-
 355
355
-
 356
356
-
 357
357
-
 358
358
-
 359
359
-
 360
360
-
 361
361
-
 362
362
-
 363
363
-
 364
364
-
 365
365
-
 366
366
-
 367
367
-
 368
368
-
 369
369
-
 370
370
-
 371
371
-
 372
372
-
 373
373
-
 374
374
-
 375
375
-
 376
376
-
 377
377
-
 378
378
-
 379
379
-
 380
380
-
 381
381
-
 382
382
-
 383
383
-
 384
384
-
 385
385
-
 386
386
-
 387
387
-
 388
388


OmniPod FreeStyle Blood Glucose MonitoringSystem Manuel utilisateur
- Taper
- Manuel utilisateur
- Ce manuel convient également à
dans d''autres langues
Autres documents
-
Fora G40 Le manuel du propriétaire
-
 Fora Diamond GD50 Le manuel du propriétaire
-
Abbott AlphaTrak Manuel utilisateur
-
 ACCU-CHECK Aviva Combo Manuel utilisateur
-
Lifescan Fast Take Manuel utilisateur
-
-
Accu-Chek Tender infusion set Mode d'emploi
-
-
Lifescan ONETOUCH ULTRASMART Le manuel du propriétaire
-
Fluke IDA-6 Manuel utilisateur

