8
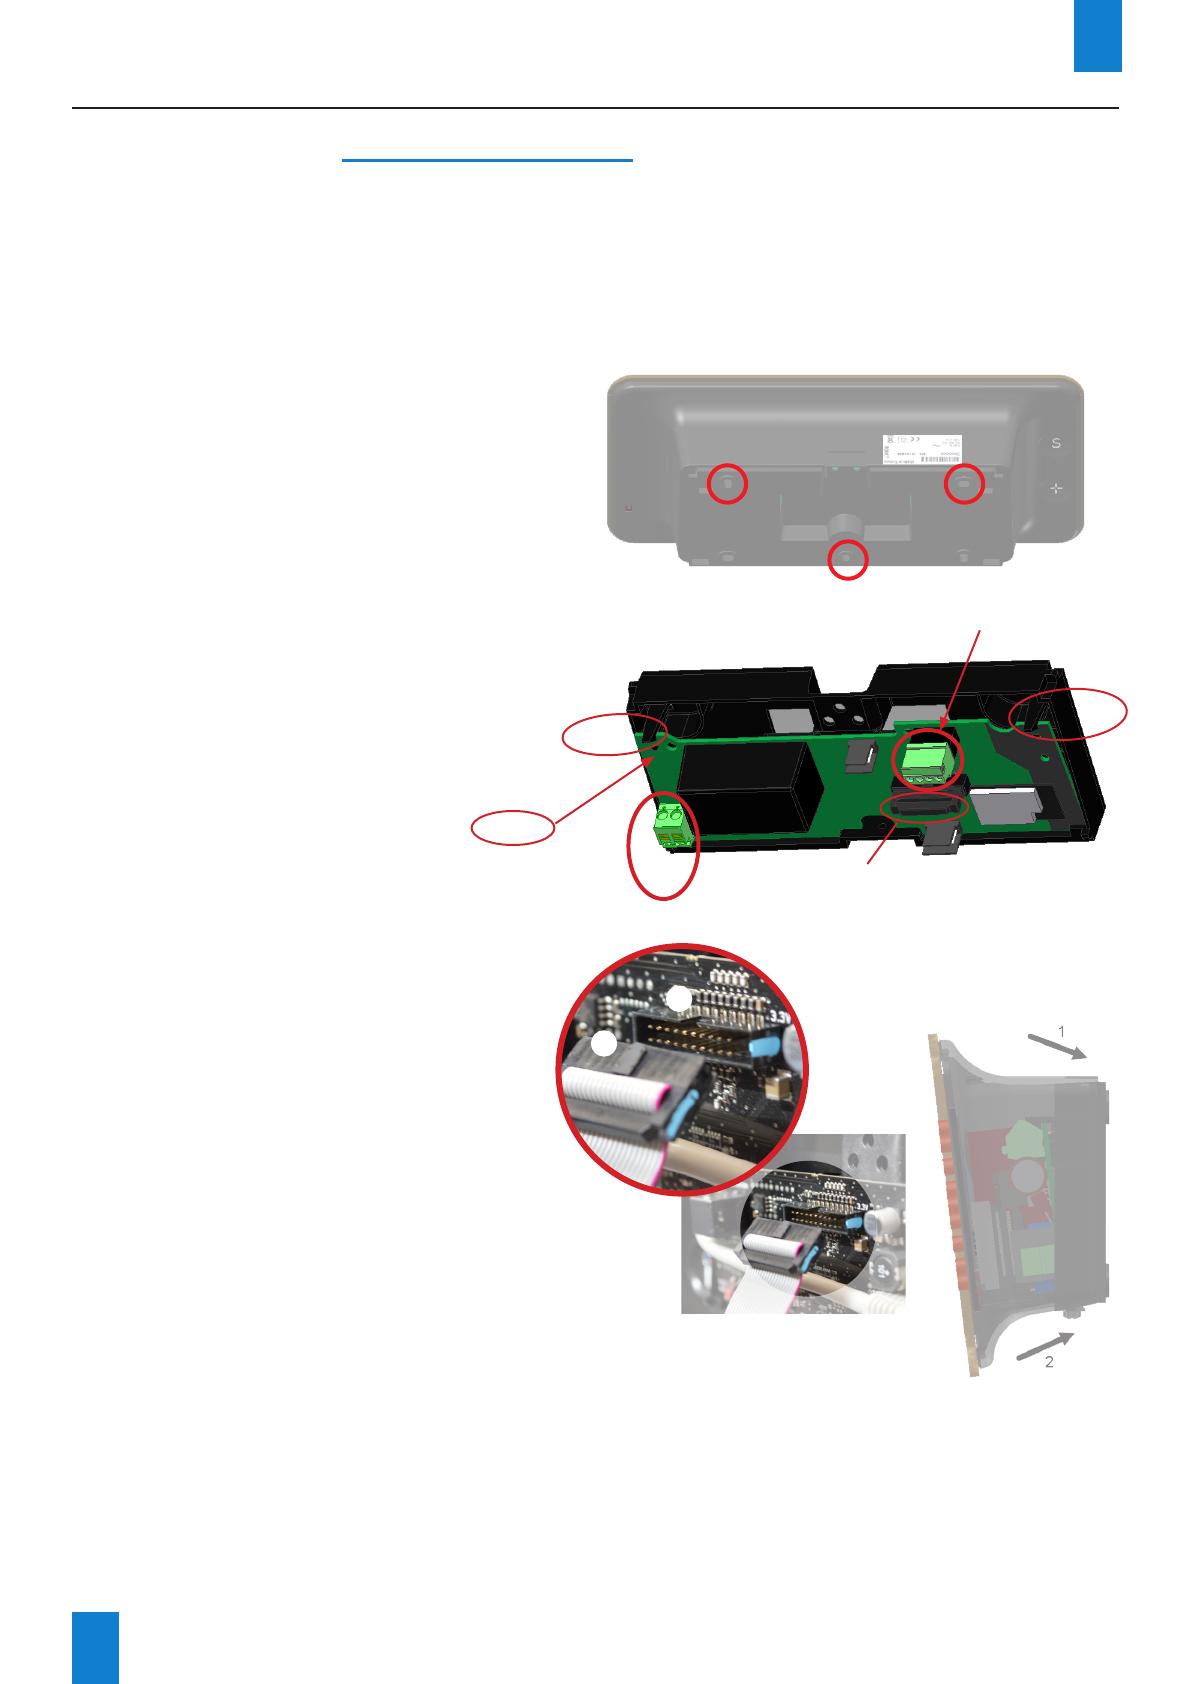
2) Insert the 240VAC power cable:
• From above: cut through the upper
part of the casing u and insert the
cable at the back. .
• From behind: dedicated area v.
3) Clip the electronic board into the wall
bracket. Insert the lower part of the electronic
board into the back of the wall bracket, then
push the upper part of the board into the
back of the bracket until it clicks w.
4) Connect the 240 VAC power cable to the
electronic board connector x.
5) Secure the power cable to the electronic
board using a plastic tie (mounting holes
provided in the electronic board).
6) Connect the ribbon from the LED modules
(clock casing) to the electronic board y.
ATTENTION: To avoid damaging the
product, please, watch for the orientation
of the flat cable connector. For that
purpose the connector is keyed (A).
7) Attach the clock to the wall bracket by
inserting the upper part of the clock into the
back of the bracket in the slots provided,
then press the clock in until it clicks.
Secure the clock to the bracket at the bottom,
using the mounting screw provided.
Ensure that the cables are not pinched.
during this operation.
II – Installation Style NTP/Wi-Fi
2.1 Wall mounting – Style 5-5S-7-7D-7E-7S
The illustrations below refer to the Style 5 clock. However, the installation process shown here also
applies to Styles 5S, 7, 7S, 7D and 7E. Refer to the Technical specifications on page 34 for clock
dimensions.
1) Fix the wall bracket to the wall using the 3 (Ø 4mm) screws supplied.along with the 3 wall plugs
(Ø6 mm). Use a 6mm drill bit.
EN
8) The clock may be subsequently detached from the bracket by lifting the lower part of the clock
outwards, then removing the upper part.
9) Clean the clock using an anti-static cloth.
Important : about double face installation on support bracket, refer to the manual supports,
ref.: 607847 (included with the bracket).
u
v
Back view
x
Power connector
Timer keypad connector
w
w
Wall bracket +
electronic board
y
Right side
cutaway view
A
A


