
TOOLS for n Version2/Cubase AI 4
TOOLS for n Version2/Cubase AI 4
ES
EN
DE
FR
EnglishDeutschFrançaisEspañol

English
2
TOOLS for n Version2/Cubase AI 4 Installation Guide
SPECIAL NOTICES
Yamaha makes no representations or warranties with regard to any problems while attempting to copy the disks or software and
cannot be held responsible for the results of attempts to copy the data.
• The software included in the TOOLS for n Version2 CD-ROM and this Installation Guide are the exclusive copyrights of Yamaha
Corporation.
• The software included in the Cubase AI 4 DVD-ROM and the copyrights thereof are under exclusive ownership by Steinberg Media
Technologies GmbH.
Note that Yamaha does not offer technical support for the DAW software in the DVD-ROM.
• Use of the software and this manual is governed by the license agreement which the purchaser fully agrees to upon breaking the
seal of the software packaging. (Please read carefully the Software License Agreement on page 19 to 22 of this manual before
installing the software.)
• Copying of the software or reproduction of this manual in whole or in part by any means is expressly forbidden without the written
consent of the manufacturer.
•Yamaha makes no representations or warranties with regard to the use of the software and documentation and cannot be held
responsible for the results of the use of this manual and the software.
• These disks are NOT for audio/visual purpose. Do not attempt to play the disks on a CD/DVD player. Doing so may result in
irreparable damage to your audio CD/DVD player.
• The software included in the TOOLS for n Version2 CD-ROM may be revised and updated without prior notice. Make sure to check
and download the latest version of the software from the following site.
•For information about the minimum system requirements and latest information of Cubase AI 4, check the web site below.
• Future upgrades of application and system software and any changes in specifications and functions will be announced separately.
• The screen displays as illustrated in this manual are for instructional purposes, and may appear somewhat different from the
screens which appear on your computer.
Copying of the commercially available musical data including but not limited to MIDI data and/or audio data is strictly prohibited except
for your personal use.
• Windows is the registered trademark of Microsoft
®
Corporation.
• Apple, Mac and Macintosh are trademarks of Apple Inc., registered in the U.S. and other countries.
• FireWire and the FireWire symbol are trademarks of Apple, Inc., registered in the U.S. and other countries. The FireWire
logo is a trademark of Apple, Inc.
The company names and product names in this Installation Guide are the trademarks or registered trademarks of their
respective companies.
http://www.yamahasynth.com/download/
http://www.yamahasynth.com/

English
About the Disks Included in the Package
3
TOOLS for n Version2/Cubase AI 4 Installation Guide
The software on these disks is for the Windows and Macintosh operating system. Refer to page 4 (for Windows) or page 5 (for Macintosh) to
install the software.
Before breaking the seal of the disk’s packaging, please read carefully the “Software License Agreement for TOOLS for n Version2” and
“Software License Agreement for Cubase AI 4” on page 20 to 22 of this guide.
1
Verify that your system meets the operating requirements of the software. .............page 4
2
Install Cubase AI 4. ............................page 6
3
Install TOOLS for n Version2. ............page 6
4
Start up the software.
For subsequent operations, refer to the owner’s manual for the n8/n12 and Cubase AI 4 (online help/PDF manual).
NOTE
·To view PDF files, you must install Adobe Reader on your computer.
If you do not have Adobe Reader, you can download the application from the Adobe website at the following URL:
Quick solutions/Reference materials
· Changing the driver settings ..........page 14
· Uninstalling or re-installing the driver
Windows XP: .........................page 9
Windows Vista: ......................page 11
Macintosh: .............................page 13
· Resolving communication problems with the n8/n12
Refer to the section “Troubleshooting” in the n8/n12 Owner’s Manual.
Table of Contents
About the Disks Included in the Package ................. 3
Operating System (OS) ............................................ 3
CD/DVD-ROM Installation Procedure....................... 3
Disk Contents ........................................................... 4
System Requirements for Software .......................... 4
About the Cubase AI 4 DVD-ROM ........................... 6
Installation ................................................................ 6
About the TOOLS for n Version2 CD-ROM.............. 6
Installation(Windows XP) .......................................... 7
Installation(Windows Vista)..................................... 10
Installation(Macintosh) ........................................... 12
Changing settings after installation......................... 14
Using multiple devices compatible with Yamaha
Steinberg FW Driver ............................................ 16
Hints for using audio data (Windows) .....................17
Troubleshooting......................................................17
License Agreement for TOOLS for n Version2 .......19
License Agreement for Cubase AI 4....................... 20
About the Disks Included in the Package
Operating System (OS)
CD/DVD-ROM Installation Procedure
http://www.adobe.com

English
About the Disks Included in the Package
4
TOOLS for n Version2/Cubase AI 4 Installation Guide
The disks contain the following software and data.
●
TOOLS for n Version2
●
Cubase AI 4
The system requirements below are necessary for installing software included in the accessory disks (TOOLS for n Version2 and
Cubase AI 4).
NOTE
· Note that the system requirements may be slightly different from those described below depending on the particular operating system.
· For details on minimum requirements for other DAW software, refer to the respective owner’s manual.
■
Windows
TOOLS for n Version2
Windows XP Professional SP2 or later/XP Home Edition
SP2 or later
• Recommended system requirements (*2)
• Minimum system requirements (*2)
Windows Vista (32bit)
• Recommended system requirements (*2)
• Minimum system requirements (*2)
*1 The computer must have an IEEE 1394 (FireWire or
i.LINK, etc.) connector. If there is no connector, install an
IEEE1394 interface card (PCI or PC). For details, refer to
the following URL:
*2 The system requirements listed here apply when playing
audio/MIDI data of the following specifications on the
included Cubase AI 4 installed to a computer connected
to an n8/n12. These may differ depending on the particu-
lar DAW you are using.
Disk Contents
Software Name Contents
TOOLS for n Version2
TOOLS for n Version2 consists of two software components: Yamaha Steinberg FW Driver and n Extension. Yamaha Steinberg FW
Driver enables audio/MIDI signals to be transferred between a computer and the n8/n12 via IEEE1394 cables. Up to three devices
compatible with Yamaha Steinberg FW Driver can be used simultaneously. Keep in mind that up to two devices can be connected
when the Sample Rate is set to 88.2 kHz or 96 kHz. Using n Extension, you can link the n8/n12 with Cubase versions such as
Cubase 4.5 and Cubase AI 4.5 that support the Link functions between both of them. The TOOLS for n Version2 Installer installs
these two software components.
Software Name Contents
Cubase AI 4
Cubase AI 4 is a special version developed for Yamaha products, based on Steinberg Cubase 4, which is very popular among a wide
range of users.
Cubase AI 4 features an Advanced Integration function that integrates various hardware devices, including the Yamaha n series, and
provides an integrated operational environment.
Cubase AI 4 also features the following content data that is carefully selected from the Yamaha MOTIF ES series, Yamaha’s synthe-
sizer flagship models:
• MIDI Drum Style: Twenty project files of rhythm patterns that cover a wide range of genres, such as R&B and rock
(Windows) \Cubase AI 4 for Windows\Additional Content\Yamaha Content\Drum Styles
(Macintosh) /Cubase AI 4 for MacOS X/Additional Content/Yamaha Content/Drum Styles
•AUDIO LOOP: More than 480 audio loop files that contain ready-to-use rhythm loops
(Windows) \Cubase AI 4 for Windows\Additional Content\Yamaha Content\Loops
(Macintosh) /Cubase AI 4 for MacOS X/Additional Content/Yamaha Content/Loops
• DEMO SONG: \Demo Project\Start Aeye.cpr
System Requirements for Software
OS
Windows XP Professional SP2 or later/XP Home Edition
SP2 or later/Vista (32 bit)
Computer
Core/Pentium/Celeron family CPU, with an S400
(400 Mbps) IEEE1394 (FireWire) or i.LINK terminal (*1).
Hard Disk
Free disk space of 100 MB or more; high-speed hard
disk
CPU : Core 2 Duo 1.66 GHz or more
Memory : 512 MB or more
CPU : Pentium 1.4 GHz or more, or Celeron
1.7 GHz or more
Memory : 512 MB or more
CPU : Core 2 Duo 2.13 GHz or more
Memory : 2 GB or more
CPU : Pentium 2.0 GHz or more
Memory : 512 MB or more
http://www.yamahasynth.com/

English
About the Disks Included in the Package
5
TOOLS for n Version2/Cubase AI 4 Installation Guide
NOTE
· When using a laptop or notebook computer, a built-in IEEE1394 ter-
minal may not be available. If this is the case, install an appropriate
PC interface card.
Cubase AI 4.5
IMPORTANT
•A DVD drive is required for installation.
• In order to have continuous use of Cubase AI 4, including sup-
port and other benefits, you will need to register the software and
activate your software license by starting it while the computer is
connected to the Internet.
■
Macintosh
TOOLS for n Version2
• Recommended system requirements
(*1)
• Minimum system requirements (*1)
*1 The system requirements listed here apply when playing
audio/MIDI data of the following specifications on the
included Cubase AI 4 installed to a computer connected
to an n8/n12. These may differ depending on the particu-
lar DAW you are using.
Cubase AI 4.5
IMPORTANT
•A DVD drive is required for installation.
• In order to have continuous use of Cubase AI 4, including sup-
port and other benefits, you will need to register the software and
activate your software license by starting it while the computer is
connected to the Internet.
Recommended system requirements
Frequency/resolution: 44.1 kHz/24 bit
Audio playback tracks: 16
Audio recording tracks: 1
MIDI playback tracks: 18
MIDI Remote Control/Automation
Send effects (plug-in): 3
Insert effects (plug-in): 9
Plug-in synthesizer: 2
Latency: about 6 msec
Minimum system requirements
Frequency/resolution: 44.1 kHz/24 bit
Audio playback tracks: 15
MIDI Remote Control/Automation
Send effects (plug-in): 3
Insert effects (plug-in): 9
Plug-in synthesizer: none
Latency: about 50 msec
OS:
Windows XP Professional/XP Home Edition/Vista (32 bit)
CPU:
Pentium/Athlon 1.4 GHz or more
Memory:
512 MB or more
Image
resolution:
1280 x 800 - full color
Hard disk:
1 GB or more
OS
Mac OS X 10.4.x (Mac OS X 10.4.9 or later for Intel-
based Macintosh computer), Mac OS X 10.5.x
Hard Disk
Free disk space of 50 MB or more; high-speed hard
disk
CPU : PowerPC G5 2.0 GHz Dual or higher, or
Core Solo 1.5 GHz or more
Memory : 1 GB or more
CPU : PowerPC G4 1 GHz or more
Memory : 512 MB or more
Recommended system requirements
Frequency/resolution: 44.1 kHz/24 bit
Audio playback tracks: 16
Audio recording tracks: 1
MIDI playback tracks: 18
MIDI Remote Control/Automation
Send effects (plug-in): 3
Insert effects (plug-in): 9
Plug-in synthesizer: 2
Latency: about 5 msec
Minimum system requirements
Frequency/resolution: 44.1 kHz/24 bit
Audio playback tracks: 15
MIDI Remote Control/Automation
Send effects (plug-in): 3
Insert effects (plug-in): 9
Plug-in synthesizer: none
Latency: about 50 msec
OS:
Mac OS X 10.4.x, Mac OS X 10.5.x
CPU:
PowerPC G4 1 GHz or Core Solo 1.5 GHz or more
Memory:
512 MB or more
Image
resolution:
1280 x 800 - full color
Hard disk:
1 GB or more

English
About the Cubase AI 4 DVD-ROM
6
TOOLS for n Version2/Cubase AI 4 Installation Guide
NOTE
· If you have already installed a version of Cubase compatible with the Link function, such as Cubase 4.5, the instructions for “Installing Cubase AI 4” are
not necessary. Jump to the next section “Installing TOOLS for n Version2.”
IMPORTANT
• Before breaking the seal of the Cubase AI 4 DVD-ROM package,
please read carefully the Steinberg Software End User License
Agreement (EULA) on page 20 of this manual. By opening the
disk package, you indicate your agreement with the use terms of
the software and concurrence with the Software End User
License Agreement.
1
Start the computer and log on to the Administrator
account.
2
Insert the Cubase AI 4 DVD-ROM into the DVD-ROM
drive.
3
For Windows, open the “Cubase AI 4 for Windows”
folder and double-click on the “Cubase AI 4.msi” file.
For Macintosh, open the “Cubase AI 4 for MacOS X”
folder and double-click on the “Cubase AI 4.mpkg”
file.
Follow the on-screen instructions to install Cubase AI 4.
NOTE
· In order to have continuous use of Cubase AI 4, including support
and other benefits, you will need to register the software and to acti-
vate your software license by starting it while the computer is con-
nected to the Internet. Click the “Register Now” button shown when
the software is started, then fill in all required fields for registration. If
you do not register the software, you will be unable to use it after a
limited period of time expires.
CAUTION
•Keep in mind that noise may be generated when installing or
uninstalling the TOOLS for n Version2. Before performing either
of these operations, make sure to lower the output level of each
device.
TOOLS for n Version2 consists of two software components:
Yamaha Steinberg FW Driver and n Extension. Yamaha Stein-
berg FW Driver enables audio/MIDI signals to be transferred
between a computer and the n8/n12 via IEEE1394 cables. Up
to three devices compatible with Yamaha Steinberg FW Driver
can be used simultaneously. Keep in mind that up to two
devices can be connected when the Sample Rate is set to
88.2 kHz or 96 kHz. Using n Extension, you can link the n8/n12
with Cubase versions such as Cubase 4.5 and Cubase AI 4.5
that support the Link functions between both of them. The
TOOLS for n Version2 Installer installs these two software com-
ponents.
About the Cubase AI 4 DVD-ROM
Installation
About the TOOLS for n Version2 CD-ROM
If using mLAN Driver/mLAN Tools with Windows:
· If you are using mLAN Driver/mLAN Tools V1.6.2, update
them to V1.6.3 (or higher) before installing TOOLS for n
Version2. This is necessary because the Yamaha Stein-
berg FW Driver cannot work properly with the mLAN
Driver/mLAN Tools V1.6.2 installed.
· When using Yamaha Steinberg FW Driver, make sure to
disable the mLAN Driver. If this is enabled (on), Yamaha
Steinberg FW Driver cannot work because the mLAN
Driver uses the IEEE1394 interface.
· When using the mLAN Driver, make sure to turn off any
devices compatible with Yamaha Steinberg FW Driver or
disconnect them from the computer before enabling the
mLAN driver.
· Note that you may not need to disable the mLAN driver
when the computer is equipped with multiple IEEE1394
interfaces and a device compatible with Yamaha Stein-
berg FW driver is connected to the different IEEE1394
interface from the other used by the mLAN driver.

English
About the TOOLS for n Version2 CD-ROM
7
TOOLS for n Version2/Cubase AI 4 Installation Guide
Preparing to install
1
Make sure that the power to the n8/n12 is turned off.
2
Using an IEEE1394 cable, connect the n8/n12 directly
to the computer (without using a hub), and discon-
nect all other IEEE1394 devices from the computer.
3
Start the computer and log on to the Administrator
account.
4
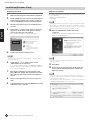
Select [Start] (
➝
[Settings])
➝
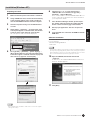
[Control Panel]. If the
control panel appears as shown below, click “Switch
to Classic View” in the upper left of the window.
All control panels and icons will be displayed.
5
Go to [System]
➝
[Hardware]
➝
[Driver Signing]
➝
[Driver Signing Options], and select the radio button
to the left of “Ignore - Install the software anyway and
don’t ask for my approval” and click [OK].
NOTE
· After completing the installation, make sure to restore the original
setting if necessary.
6
Check that no “!” or “x” marks appear next to
“IEEE1394 Bus host controllers” in ([System]
➝
[Hardware]
➝
) [Device Manager].
If one of these marks is shown, the IEEE1394/i.LINK con-
nection cannot be used. Refer to the owner’s manual of
your computer for details.
7
Close the Device Manager window, System Proper-
ties window and Control Panel by clicking the [OK]
button or the Close button ([X]) of the windows.
8
Exit any open applications and close all open win-
dows.
9
Insert the TOOLS for n Version2 CD-ROM into the CD-
ROM drive.
Software Installation
The installer will install the following two software components
to your computer.
· Yamaha Steinberg FW Driver
· n Extension
NOTE
· Use the Cancel button or Close button to quit the installation. Quitting
by using the [Ctrl]+[Alt]+[Delete] buttons or by turning off the power
while installation is in process can result in problems since the instal-
lation is terminated without performing a proper uninstall.
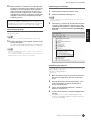
10
Open the CD-ROM, then double-click the file
“setup.exe.”
A “Welcome to the InstallShield Wizard for TOOLS for n
Version2” window appears.
11
Click [Next].
Installation(Windows XP)

English
About the TOOLS for n Version2 CD-ROM
8
TOOLS for n Version2/Cubase AI 4 Installation Guide
12
Follow the on-screen instructions in the Setup win-
dow for Yamaha Steinberg FW Driver, n Extension
appearing in order.
NOTE
· If the same version of each software component has already been
installed in your computer, the installation window of the correspond-
ing software will not appear.
· If a message “The software you are installing has not passed Win-
dows Logo Testing” appears, click [Continue Anyway]. You do not
need to abort the installation. If the message does not appear, pro-
ceed to the next step.
13
When installation is complete, a message indicating
so appears. If restarting of the computer is necessary
following successful completion of the installation,
make sure that the radio button to the left of “Yes, I
want to restart my computer now” is selected, then
click [Finish] to restart the computer. If restarting the
computer is unnecessary, click [Finish] to exit the
installation process.
Initial settings of driver
After you’ve installed TOOLS for n Version2, perform the initial
settings of the driver.
NOTE
·A dialog box may appear asking you whether you wish to connect to
Windows Update. In this case, select the radio button to the left of
“Not at this time,” then click [Next].
14 The “Found New Hardware Wizard” window appears.
Select the radio button next to “Install the software
automatically [Recommended],” then click [Next].
15 When installation is complete, a message indicating
so appears.
Click [Finish].
NOTE
· If multiple IEEE1394 interfaces have been installed to the computer,
the wizard appears several times. Exit the wizard each time.
16 Connect the n8/n12 to the computer, then turn on the
power to the n8/n12.
The “Found New Hardware Wizard” window is displayed.
17 Select the radio button next to “Install the software
automatically [Recommended],” then click [Next].
18 When installation is complete, a message indicating
so appears.
Click [Finish].
19 The “Found New Hardware Wizard” window appears.
Select the radio button next to “Install the software
automatically [Recommended],” then click [Next].
20 When installation is complete, a message indicating
so appears.
Click [Finish].
21 The “Found New Hardware Wizard” window appears.
Select the radio button next to “Install the software
automatically [Recommended],” then click [Next].
22 When installation is complete, a message indicating
so appears.
Click [Finish].
The n8/n12 [COMP] indicator will flash sequentially, then
will stop when the initial settings have been completed.
NOTE
· When a new IEEE1394 interface is installed to the computer or the
other devices compatible with Yamaha Steinberg FW Driver is con-
nected to the computer, the “Found New Hardware Wizard” window
will appear. In that case, finish the wizard in the same way as
described here.
When canceling the installation:
If you’ve cancelled an installation before it is complete, the
software may not have been installed properly. To install the
software properly, resume the procedure from Step 10.
Bus driver initial settings
Initial Settings of n series FW Driver
WDM MIDI driver initial settings
WDM Audio driver initial settings

English
About the TOOLS for n Version2 CD-ROM
9
TOOLS for n Version2/Cubase AI 4 Installation Guide
Confirming the installation
1 Select [Control Panel] from the Start menu.
2 Double-click on the System icon to call up the Sys-
tem Properties window.
3 Select the Hardware tab and click [Device Manager].
4 Click on the [+] mark next to “Sound, video and game
controllers,” and confirm that “Yamaha n series FW,”
“Yamaha Steinberg FW Bus,” “Yamaha Steinberg FW
WDM Audio” and “Yamaha Steinberg FW WDM MIDI”
are listed.
Uninstalling the Software
To uninstall TOOLS for n Version2, you must remove the follow-
ing two software components:
· Yamaha Steinberg FW Driver
· n Extension
1 Make sure the POWER switch on the n8/n12 is set to
OFF, exit from any open applications and close all
open windows.
2 From the Start menu, select ([Settings] ➝) [Control
Panel] ➝ [Add or Remove Programs] to display the
Add or Remove Programs panel.
3 Click “Change or Remove Programs” located in the
upper left, then select “Yamaha Steinberg FW Driver,”
“Yamaha n Extension” from the list in the right panel.
4 To uninstall the software, click [Change or Remove] /
[Remove].
Follow the instructions to remove the software.

English
About the TOOLS for n Version2 CD-ROM
10
TOOLS for n Version2/Cubase AI 4 Installation Guide
Preparing to install
1 Make sure that the power to the n8/n12 is turned off.
2 Using an IEEE1394 cable, connect the n8/n12 directly
to the computer (without using a hub), and discon-
nect all other IEEE1394 devices from the computer.
3 Start the computer and log on to the Administrator
account.
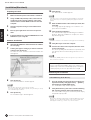
4 Select [Start] ➝ [Control Panel]. If the control panel
appears as shown below, click “Switch to Classic
View” in the upper left of the window.
All control panels and icons will be displayed.
5 Double-click the Device Manager icon.
NOTE
· If the “User Account Control” window appears, click [Continue]. A
dialog box appears.
6 Check that no “!” or “x” marks appear next to
“IEEE1394 Bus host controllers.”
If one of these marks is shown, the IEEE1394/i.LINK con-
nection cannot be used. Refer to the owner’s manual of
your computer for details.
7 Click the Close button ([x]) at the top right of the
Device Manager window, then click the Close button
([x]) at the top right of the Control Panel window to
close it.
8 Exit any open applications and close all open win-
dows.
9 Insert the TOOLS for n Version2 CD-ROM into the CD-
ROM drive of your computer.
Software Installation
The installer will install the following two software components
to your computer.
· Yamaha Steinberg FW Driver
· n Extension
NOTE
· Use the Cancel button or Close button to quit the installation. Quitting
by using the [Ctrl]+[Alt]+[Delete] buttons or by turning off the power
while installation is in process can result in problems since the instal-
lation is terminated without performing a proper uninstall.
10 Open the CD-ROM then double-click the file
“setup.exe.”
A “Welcome to the InstallShield Wizard for TOOLS for n
Version2” window appears.
NOTE
· If the “User Account Control” window appears, click [Continue]. A
dialog box appears.
11 Click [Next].
12 Follow the on-screen instructions in the Setup win-
dow for Yamaha Steinberg FW Driver, n Extension
appearing in order.
NOTE
· If the same version of each software component has already been
installed in your computer, the installation window of the correspond-
ing software will not appear.
· If the “Windows Security” window appears, confirm that the publisher
is “YAMAHA CORPORATION,” then click [Install].
Installation(Windows Vista)

English
About the TOOLS for n Version2 CD-ROM
11
TOOLS for n Version2/Cubase AI 4 Installation Guide
13 When installation is complete, a message indicating
so appears. If restarting of the computer is necessary
following successful completion of the installation,
make sure that the radio button to the left of “Yes, I
want to restart my computer now” is selected, then
click [Finish] to restart the computer. If restarting the
computer is unnecessary, click [Finish] to exit the
installation process.
Initial settings of driver
After you’ve installed TOOLS for n Version2, perform the initial
settings of the driver.
NOTE
· If the “User Account Control” window appears, click [Continue].
14 Connect the n8/n12 to the computer, then turn on the
power to the n8/n12.
The n8/n12 [COMP] indicator will flash sequentially, then
will stop when the initial settings have been completed.
NOTE
· If the n8/n12 [COMP] indicator does not light even if you wait for a
while, restart the computer.
· If the “User Account Control” window appears when you install a new
IEEE1394 interface to the computer, click [Continue].
Confirming the installation
1 Select [Control Panel] from the Start menu.
2 Double-click the Device Manager icon.
NOTE
· If the “User Account Control” window appears, click [Continue]. A
dialog box appears.
3 Click on the [+] mark next to “Sound, Video and game
controllers” and confirm that “Yamaha n series FW,”
“Yamaha Steinberg FW Bus,” “Yamaha Steinberg FW
WDM Audio” and “Yamaha Steinberg FW WDM MIDI”
are listed.
Uninstalling the Software
To uninstall TOOLS for n Version2, you must remove the follow-
ing two software components:
· Yamaha Steinberg FW Driver
· n Extension
1 Make sure that the power to the n8/n12 is turned off.
Exit any open applications and close all open win-
dows.
2 From the Start menu, select [Control Panel] ➝ [Pro-
grams and Features] to display the Uninstall or
change a program panel.
3 Select “Yamaha Steinberg FW Driver,” “Yamaha n
Extension” from the list.
4 To uninstall the software, click [Uninstall]/[Uninstall/
Change].
If the “User Account Control” window appears, click
[Continue]. A dialog box appears. Follow the instructions
to remove the software.
When canceling the installation
If you’ve cancelled an installation before it is complete, the
software may not have been installed properly. To install the
software properly, resume the procedure from Step 10.

English
About the TOOLS for n Version2 CD-ROM
12
TOOLS for n Version2/Cubase AI 4 Installation Guide
Preparing to install
1 Make sure that the power to the n8/n12 is turned off.
2 Using an IEEE1394 (Firewire) cable, connect the n8/
n12 directly to the computer (without using a hub),
and disconnect all other IEEE1394 devices from the
computer.
3 Start the computer and log in to the Administrator
account.
4 Exit any open applications and close all open win-
dows.
5 Insert the TOOLS for n Version2 CD-ROM into the CD-
ROM drive of your computer.
Software Installation
6 Open the CD-ROM, then double-click the file “TOOLS
for n V2.mpkg.”
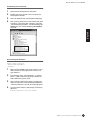
7 A dialog box appears asking if you want to install the
software. Click [Continue].
The “Welcome to the TOOLS for n Version2 Installer” win-
dow appears.
8 Click [Continue].
The “Select Destination” window appears.
NOTE
· Only the boot disk can be selected for the installer.
· If you are using Mac OS X 10.5 (Leopard), click [Continue] to call up
the “Installation Type” window.
9 Click [Continue].
The “Installation Type” window appears.
10 Click [Install].
The “Authenticate” window appears.
NOTE
· If an older version of the Yamaha Steinberg FW Driver has already
been installed in your computer, [Update] may appear instead of
[Install].
11 Enter the Administrator name and the password, then
click [OK].
A message appears prompting you to restart the com-
puter after the installation.
12 Click [Continue Installation].
The “Install” window appears indicating the installation
progress. When the installation is complete, the “Finish
Up” window appears.
NOTE
· Installation cannot be canceled after clicking [Continue Installation].
13 Click [Restart] to restart the computer.
14 Connect the n8/n12 to the computer, then turn on the
power to the n8/n12.
The n8/n12 [COMP] indicator will flash sequentially, and
then will stop when the initial settings have been com-
pleted.
NOTE
· If the n8/n12 [COMP] indicator does not light even if you wait for a
while, restart the computer.
Confirming the installation
1 From the hard disk to which the OS is installed (usu-
ally Macintosh HD), click [Applications] ➝ [Utilities],
then double-click [Audio MIDI Setup].
The “Audio MIDI Setup” window appears.
2 Click [Audio Devices], then select “Yamaha Steinberg
FW” from the pull-down menu in [Properties For].
The current audio settings are shown in the [Audio Input]
and [Audio Output] fields.
NOTE
· By selecting “Yamaha Steinberg FW” for [Default Output] in System
Settings, you can output audio signals of the system sounds and
audio player software (e.g., iTunes, etc.) from the n8/n12.
Installation(Macintosh)
When canceling the installation
If you’ve cancelled an installation before it is complete, the
software may not have been installed properly. To install the
software properly, resume the procedure from Step 6.
Audio MIDI Setup (Audio Devices)

English
About the TOOLS for n Version2 CD-ROM
13
TOOLS for n Version2/Cubase AI 4 Installation Guide
Uninstalling the Software
To uninstall TOOLS for n Version2, you must remove the follow-
ing two software components:
· Yamaha Steinberg FW Driver
· n Extension
Remove the following folders and files from the boot disk (usu-
ally Macintosh HD).
/Applications/Yamaha/FWDriver/
Yamaha Steinberg FW Control Panel.app
YamahaFWCM.app
/Library/Application Support/Yamaha/FWDriver/HAL/
YamahaFWHAL.bundle
/Library/Audio/MIDI Devices/Yamaha/Images/
FW_10000D.tiff
FW_10000E.tiff
FW_110006.tiff
FW_110007.tiff
FW_110008.tiff
FW_110009.tiff
/Library/Audio/MIDI Drivers/
YamahaFWMIDI.plugin
/Library/LaunchAgents/
com.yamaha.YamahaFWCM.plist
/Library/PreferencePanes/
Yamaha Steinberg FW.prefPane
/Library/Preferences/
com.yamaha.FWDriver.plist
/Library/Receipts/
YamahaFWAudioDriver.pkg
YamahaFWCM.pkg
YamahaFWCP.pkg
YamahaFWDriverplist.pkg
YamahaFWEnabler.pkg
YamahaFWHAL.pkg
YamahaFWMIDIIcon.pkg
YamahaFWMIDIPlugIn.pkg
/System/Library/Extensions/
YamahaFWAudioDriver.kext
/System/Library/Frameworks/
YamahaFWEnabler.framework
/User/{Account name}/Library/Preference/
com.yamaha.YamahaFWCM.plist
* “{Account name}” indicates the account name when Yamaha Stein-
berg FW Driver is installed.
Remove the following folders and files from the boot disk
(usually Macintosh HD).
/ Library/Application Support/Steinberg/Components/
yamaha_n.bundle
yamaha_n_u.bundle
/ Library/Application Support/Steinberg/Project Template/
Yamaha n8 multi channel recording.cpr
Yamaha n8 stereo channel recording.cpr
Yamaha n12 multi channel recording (5.1).cpr
Yamaha n12 multi channel recording.cpr
Yamaha n12 stereo channel recording (5.1).cpr
Yamaha n12 stereo channel recording.cpr
This completes the uninstallation of TOOLS for n Version2.
Removing Yamaha Steinberg FW Driver
Removing n Extension

English
Changing settings after installation
14
TOOLS for n Version2/Cubase AI 4 Installation Guide
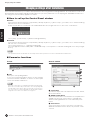
This Control Panel window lets you set basic n8/n12 parameters when using Yamaha Steinberg FW Driver. The Control Panel consists of the
General window, n8/n12 window and About window which lets you set the parameters such as sampling rate and WORD CLOCK Sour ce.
The settings here are immediately applied to the n8/n12.
■ How to call up the Control Panel window
Windows:
·From the Device filed on the Device Setup window (called up via [Device] ➝ [Device Setup...]) of Cubase, select “Yamaha Steinberg
FW ASIO” then select “Control Panel.”
· Double-click the driver icon indicated on the Taskbar Notification area, or right-click the icon, then select “Control Panel.”
· Select [Start] ➝ [Control Panel] ➝ [Yamaha Steinberg FW Driver].
Macintosh:
·From the Device filed on the Device Setup window (called up via [Device] ➝ [Device Setup...]) of Cubase, select “Yamaha Steinberg
FW” then select “Control Panel.”
· Select [System Preference...] ➝ [Yamaha Steinberg FW]
· Select the Application folder ➝ Utility folder ➝ Audio MIDI Setup ➝ Set “Properties” to “Yamaha Steinberg FW”, then click [Configure
Device]
NOTE
· The explanations below use Windows are an example, but the basic operation is the same for both Windows and Macintosh.
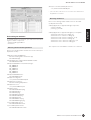
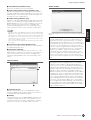
■ Parameter functions
Overall
1 Tab
Calls up the corresponding window.
To close the Control Panel window, click the “X” at the top right
corner of the window on Windows, or click the “X” at the top left
corner of the window on Macintosh.
NOTE
· When two or three devices compatible with Yamaha Steinberg FW
Driver are connected in daisy-chain fashion, the corresponding tabs
are indicated for each device. When the same two or three devices
are connected, the corresponding tabs are indicated with numbers
assigned to each device. For details, refer to page 16.
General window
1 Sample Rate
Specifies the sample rate of the n8/n12 from 44.1 kHz, 48 kHz,
88.2 kHz and 96 kHz.
2 WORD CLOCK Master
Selects the master device of the Word Clock. This parameter is
available only when two or three devices compatible with
Yamaha Steinberg FW Driver are connected in daisy-chain
fashion.
3 Clock Source
Selects the word clock source of the device selected in the
WORD CLOCK Master. For the n8/n12, only “Internal” can be
selected.
Changing settings after installation
Driver icon
1
1
2
3
4
6
5
78

English
Changing settings after installation
15
TOOLS for n Version2/Cubase AI 4 Installation Guide
4 ASIO Buffer Size (Windows only)
Determines the buffer size for the ASIO driver.
5 Input Latency/Output Latency (Windows only)
Indicates the delay time for the audio input/output in millisec-
ond units. Audio latency differs depending on the value of the
ASIO Buffer Size. The lower the value of the ASIO Buffer Size,
the lower the value of Audio Latency.
6 Audio Routing (Windows only)
Click this to call up the WDM Audio Routing window. From this
window, you can determine the input/output jack used for the
WDM Audio driver. In each section, the upper box selects the
device (only when two or three devices compatible with
Yamaha Steinberg FW Driver are connected in daisy-chain
fashion) and the lower box selects the input or output jacks.
NOTE
· The device name of the WDM Audio driver is “Yamaha Steinberg FW
WDM Audio.” This parameter specifies which jacks accept the input
signals sent to a computer and to which jacks the output signals from
the computer are sent. The input channels are stereo channels. The
output channels are six consecutive channels from the stereo chan-
nels set in the output port setting.
· When using the Surround Monitoring, set “Monitor L/R” for the output
port setting.
7 Place Icon In the taskbar (Windows only)
When this checkmark is entered, the driver icon is indicated on
the Taskbar Notification area.
8 Reset Device Number
Clicking this resets the indication order of the devices on the
DAW software. For details, refer to page 16. This operation is
only effective when two or more devices compatible with
Yamaha Steinberg FW Driver are connected in daisy-chain
fashion.
n8/n12 window
1 Firmware Version
Indicates the firmware version of the IEEE1394. Clicking
[Check for Updates] will call up the website from which you
can download the latest firmware program.
2 Identify
Clicking this will cause the CUBASE READY indicator on the
currently controlled n8/n12 to flash. This operation lets you
confirm which device is actually controlled from a computer
when two or more devices are daisy-chain connected.
About window
This window indicates the version of the Yamaha Steinberg FW
Driver.
2
1
Word Clock
In a typical digital audio system, the signal referred to as
“word clock” is used to synchronize the process timing of
audio signals between multiple devices. If the word clock is
not transferred correctly, click noise may occur or recording
may not be successful. Normally, one device transmits a
reference word clock signal, and the other devices receive
this word clock signal and synchronize to it. The transmit-
ting device is called the “word clock master” and the
receiving devices are called “word clock slaves”. Some
devices compatible with Yamaha Steinberg FW Driver can
function as the word clock slave. Select the word clock
source of the word clock signal in the Clock Source param-
eter.
Setting the audio driver buffer size
Noise produced when using applications such as DAW
software can affect audio recording and/or playback. In
most cases, you can solve these problems by adjusting the
audio buffer size (Audio Buffer Size). The buffer size can
usually be adjusted via the audio driver setup window in the
application. (When using ASIO compatible software for
Windows, the buffer size can be adjusted in the ASIO Buffer
Size parameter via the Control Panel of the Yamaha Stein-
berg FW Driver.) While the higher buffer size reduces load
to the computer CPU but produces latency (time lag) dur-
ing recording/playback, the smaller buffer size may result in
noise or the sound cutting off. Make sure to set the buffer
size to an appropriate value depending on the performance
of your computer, the number of audio/MIDI tracks being
recorded/played back on the DAW software, the number of
plug-in software, and so on.

English
Using multiple devices compatible with Yamaha Steinberg FW Driver
16
TOOLS for n Version2/Cubase AI 4 Installation Guide
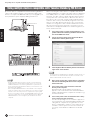
Up to three devices compatible with Yamaha Steinberg FW Driver
can be used simultaneously. By connecting them in daisy-chain
fashion to a computer via IEEE1394 cables, you can upgrade your
music production system simply by adding other devices.
NOTE
· Keep in mind that up to two devices can be connected when the
Sample Rate is set to 88.2 kHz or 96 kHz. Even if you connect an
additional third device, the last recognized device (other than the
device specified as the Word Clock master) connected to the com-
puter will not be available.
· Even if multiple IEEE1394 interfaces are installed on the computer,
make sure to daisy-chain connect all devices to the jacks of a single
interface. This is necessary since the computer can only recognize
devices connected to a specific, single IEEE1394 interface jack, and
cannot recognize devices connected to different jacks of different
IEEE1394 interfaces even though they are installed on the same
computer.
When connecting two or three devices compatible with Yamaha
Steinberg FW Driver to a computer, the order of devices displayed
in the DAW (Cubase etc.) will be maintained even if the power is
turned off. The order of devices will be reproduced when turning
on the power of the connected devices. When the same two or
three devices are connected, a unique number (indicated at the
end of the device name) is automatically assigned to each of the
devices, in the order with which the devices are connected. The
number once assigned to a device will be maintained even if it is
disconnected or the power is turned off. If you want to reset the
order of devices displayed in DAW or the number assignment, fol-
low the instructions below.
1 Turn off the power of all the connected devices com-
patible with Yamaha Steinberg FW Driver then discon-
nect all the IEEE1394 cables.
2 Call up the Control Panel of the Yamaha FW Driver
window then click the [General] tab.
3 Click the [Reset Device Number] button at the bottom
right corner of this window.
NOTE
· The [Reset Device Number] button is available only when all the con-
nected devices are turned off. When any device is turned on, this
button is dimmed and cannot be clicked.
4 Daisy-chain connect two or three devices compatible
with Yamaha Steinberg FW Driver to the computer in
the desired order.
5 Turn on the power of the first device connected
directly to the computer.
Wait until the tab corresponding to the first device
appears on the Control Panel of the Yamaha FW Driver
window, indicating that the computer has actually recog-
nized the first device.
6 Turn on the power of the second device that is daisy-
chain connected to the first device.
The tab corresponding to the second device appears on
the Control Panel of the Yamaha FW Driver window, indi-
cating that the computer has recognized the second
device. If a third device has been connected to this sec-
ond device, turn the power on in the same manner. As
necessary, set the Word Clock Master to the desired
device.
Using multiple devices compatible with Yamaha Steinberg FW Driver
1
2
IEEE1394 terminal
n8/n12
MOTIF XS series
MOTIF-RACK XS

English
Hints for using audio data (Windows)
17
TOOLS for n Version2/Cubase AI 4 Installation Guide
For optimum use of the audio functions, we recommend you make the following settings. These settings minimize possible audio problems,
such as drop outs, glitches and noise.
● Set the DMA mode (high-speed transfer mode) of the
hard disk to on
Windows Vista
Select [Control Panel] ➝ [Device Manager] (➝ [Continue] in
the “User Account Control” window) ➝ “IDE ATA/ATAPI control-
lers”, then double-click “ATA Channel 0” and open [Advanced
Settings]. Check (enable) “Enable DMA” in the “Device Proper-
ties” section.
Windows XP
Select [Control Panel] ➝ [System] ➝ [Hardware] ➝ [Device
Manager] ➝ “IDE ATA/ATAPI controllers”, then double-click
“Primary IDE Channel” and “Secondary IDE Channel”, open
[Advanced Settings]. Set “Transfer Mode” in the “Device” sec-
tion to “DMA if available.”
● Set Processor Scheduling to “Background services”
Windows Vista
Select [Control Panel] ➝ [System] ➝ [Advanced system set-
tings] in the upper left of the window (➝ [Continue] in the “User
Account Control” window) ➝ [Advanced] ➝[Settings] in the
“Performance” section ➝ [Advanced] and select the radio but-
ton to the left of “Background services” in the “Processor
scheduling” section.
Windows XP
Select [Control Panel] ➝ [System] ➝ [Advanced] ➝ [Settings]
in the “Performance” section ➝ [Advanced] and select the
radio button to the left of “Background services” in the “Pro-
cessor scheduling” section.
● Set the Visual Effects options to “best performance”
Windows Vista
Select [Control Panel] ➝ [System] ➝ [Advanced system set-
tings] in the upper left of the window (➝ [Continue] in the “User
Account Control” window) ➝ [Advanced] ➝[Settings] in the
“Performance” section ➝ [Visual Effects] and select the radio
button to the left of “Adjust for best performance.”
Windows XP
Select [Control Panel] ➝ [System] ➝ [Advanced] ➝ [Settings]
in the “Performance” section ➝ [Visual Effects] and select the
radio button to the left of “Adjust for best performance.”
● Set Remote Assistance to off
Windows Vista
Select [Control Panel] ➝ [System] ➝ [Remote settings] in the
upper left of the window (➝ [Continue] in the “User Account
Control” window) ➝ [Remote] and uncheck “Allow Remote
Assistance connections....”
Windows XP
Select [Control Panel] ➝ [System] ➝ [Remote] and uncheck
“Allow Remote Assistance invitations....”
● Enable the Classic Start menu
Right-click on an empty space on the task bar and select
[Properties] ➝ [Start Menu], then select the radio button to the
left of “Classic Start menu.”
● Disable transition effects
Windows Vista
Select [Control Panel] ➝ [Ease of Access Center] ➝ “Make it
easier to focus on tasks”, then check (enable)
“Turn off all unnecessary animations (when possible)” in the
“Adjust time limits and flashing visuals” section.
Windows XP
Select [Control Panel] ➝ [Display] ➝ [Appearance] ➝
[Effects...], and un-check (disable) “Use the following
transition effect for menus and tooltips.”
● Disable SpeedStep
TM
Refer to “Troubleshooting” in the n8/n12 Owner’s Manual.
● Disconnect your computer from the Internet
Select [Control Panel] ➝ [Network and Sharing Center]/[Man-
age network connections] and right-click “Disable.”
■ If an error message appears
Refer to “Error Messages” in the n8/n12 Owner’s Manual.
■ No sound, incorrect sound
Refer to “Troubleshooting” in the n8/n12 Owner’s Manual.
Hints for using audio data (Windows)
Troubleshooting

English
Troubleshooting
18
TOOLS for n Version2/Cubase AI 4 Installation Guide
Information for Users on Collection and Disposal of Old Equipment
This symbol on the products, packaging, and/or accompanying documents means that used electrical and
electronic products should not be mixed with general household waste.
For proper treatment, recovery and recycling of old products, please take them to applicable collection
points, in accordance with your national legislation and the Directives 2002/96/EC.
By disposing of these products correctly, you will help to save valuable resources and prevent any potential
negative effects on human health and the environment which could otherwise arise from inappropriate
waste handling.
For more information about collection and recycling of old products, please contact your local municipality,
your waste disposal service or the point of sale where you purchased the items.
[For business users in the European Union]
If you wish to discard electrical and electronic equipment, please contact your dealer or supplier for further
information.
[Information on Disposal in other Countries outside the European Union]
This symbol is only valid in the European Union. If you wish to discard these items, please contact your local
authorities or dealer and ask for the correct method of disposal.

English
License Agreement for TOOLS for n Version2
19
TOOLS for n Version2/Cubase AI 4 Installation Guide
ATTENTION
SOFTWARE LICENSE AGREEMENT
PLEASE READ THIS SOFTWARE LICENSE AGREEMENT (“AGREEMENT”) CAREFULLY BEFORE USING THIS SOFTWARE. YOU ARE ONLY PERMITTED TO
USE THIS SOFTWARE PURSUANT TO THE TERMS AND CONDITIONS OF THIS AGREEMENT. THIS AGREEMENT IS BETWEEN YOU (AS AN INDIVIDUAL OR
LEGAL ENTITY) AND YAMAHA CORPORATION (“YAMAHA”).
BY DOWNLOADING, INSTALLING, COPYING, OR OTHERWISE USING THIS SOFTWARE YOU ARE AGREEING TO BE BOUND BY THE TERMS OF THIS
LICENSE. IF YOU DO NOT AGREE WITH THE TERMS, DO NOT DOWNLOAD, INSTALL, COPY, OR OTHERWISE USE THIS SOFTWARE. IF YOU HAVE DOWN-
LOADED OR INSTALLED THE SOFTWARE AND DO NOT AGREE TO THE TERMS, PROMPTLY DELETE THE SOFTWARE.
1. GRANT OF LICENSE AND COPYRIGHT
Yamaha hereby grants you the right to use one copy of the software program(s)
and data (“SOFTWARE”) accompanying this Agreement. The term SOFTWARE
shall encompass any updates to the accompanying software and data. The
SOFTWARE is owned by Yamaha and/or Yamaha’s licensor(s), and is protected
by relevant copyright laws and all applicable treaty provisions. While you are
entitled to claim ownership of the data created with the use of SOFTWARE, the
SOFTWARE will continue to be protected under relevant copyrights.
·You may use the SOFTWARE on a single computer.
·You may make one copy of the SOFTWARE in machine-readable form for
backup purposes only, if the SOFTWARE is on media where such backup
copy is permitted. On the backup copy, you must reproduce Yamaha’s copy-
right notice and any other proprietary legends that were on the original copy
of the SOFTWARE.
·You may permanently transfer to a third party all your rights in the SOFT-
WARE, provided that you do not retain any copies and the recipient reads
and agrees to the terms of this Agreement.
2. RESTRICTIONS
·You may not engage in reverse engineering, disassembly, decompilation or
otherwise deriving a source code form of the SOFTWARE by any method
whatsoever.
·You may not reproduce, modify, change, rent, lease, or distribute the SOFT-
WARE in whole or in part, or create derivative works of the SOFTWARE.
·You may not electronically transmit the SOFTWARE from one computer to
another or share the SOFTWARE in a network with other computers.
·You may not use the SOFTWARE to distribute illegal data or data that violates
public policy.
·You may not initiate services based on the use of the SOFTWARE without
permission by Yamaha Corporation.
Copyrighted data, including but not limited to MIDI data for songs, obtained
by means of the SOFTWARE, are subject to the following restrictions which
you must observe.
· Data received by means of the SOFTWARE may not be used for any com-
mercial purposes without permission of the copyright owner.
· Data received by means of the SOFTWARE may not be duplicated, trans-
ferred, or distributed, or played back or performed for listeners in public
without permission of the copyright owner.
· The encryption of data received by means of the SOFTWARE may not be
removed nor may the electronic watermark be modified without permission
of the copyright owner.
3. TERMINATION
This Agreement becomes effective on the day that you receive the SOFTWARE
and remains effective until terminated. If any copyright law or provisions of this
Agreement is violated, the Agreement shall terminate automatically and imme-
diately without notice from Yamaha. Upon such termination, you must immedi-
ately destroy the licensed SOFTWARE, any accompanying written documents
and all copies thereof.
4. DISCLAIMER OF WARRANTY ON SOFTWARE
You expressly acknowledge and agree that use of the SOFTWARE is at your
sole risk. The SOFTWARE and related documentation are provided “AS IS” and
without warranty of any kind. NOTWITHSTANDING ANY OTHER PROVISION
OF THIS AGREEMENT, YAMAHA EXPRESSLY DISCLAIMS ALL WARRANTIES
AS TO THE SOFTWARE, EXPRESS, AND IMPLIED, INCLUDING BUT NOT LIM-
ITED TO THE IMPLIED WARRANTIES OF MERCHANTABILITY, FITNESS FOR A
PARTICULAR PURPOSE AND NON-INFRINGEMENT OF THIRD PARTY
RIGHTS. SPECIFICALLY, BUT WITHOUT LIMITING THE FOREGOING,
YAMAHA DOES NOT WARRANT THAT THE SOFTWARE WILL MEET YOUR
REQUIREMENTS, THAT THE OPERATION OF THE SOFTWARE WILL BE UNIN-
TERRUPTED OR ERROR-FREE, OR THAT DEFECTS IN THE SOFTWARE WILL
BE CORRECTED.
5. LIMITATION OF LIABILITY
YAMAHA’S ENTIRE OBLIGATION HEREUNDER SHALL BE TO PERMIT USE OF
THE SOFTWARE UNDER THE TERMS HEREOF. IN NO EVENT SHALL YAMAHA
BE LIABLE TO YOU OR ANY OTHER PERSON FOR ANY DAMAGES, INCLUD-
ING, WITHOUT LIMITATION, ANY DIRECT, INDIRECT, INCIDENTAL OR CON-
SEQUENTIAL DAMAGES, EXPENSES, LOST PROFITS, LOST DATA OR OTHER
DAMAGES ARISING OUT OF THE USE, MISUSE OR INABILITY TO USE THE
SOFTWARE, EVEN IF YAMAHA OR AN AUTHORIZED DEALER HAS BEEN
ADVISED OF THE POSSIBILITY OF SUCH DAMAGES. In no event shall
Yamaha’s total liability to you for all damages, losses and causes of action
(whether in contract, tort or otherwise) exceed the amount paid for the SOFT-
WARE.
6. THIRD PARTY SOFTWARE
Third party software and data (“THIRD PARTY SOFTWARE”) may be attached
to the SOFTWARE. If, in the written materials or the electronic data accompany-
ing the Software, Yamaha identifies any software and data as THIRD PARTY
SOFTWARE, you acknowledge and agree that you must abide by the provi-
sions of any Agreement provided with the THIRD PARTY SOFTWARE and that
the party providing the THIRD PARTY SOFTWARE is responsible for any war-
ranty or liability related to or arising from the THIRD PARTY SOFTWARE.
Yamaha is not responsible in any way for the THIRD PARTY SOFTWARE or your
use thereof.
·Yamaha provides no express warranties as to the THIRD PARTY SOFTWARE.
IN ADDITION, YAMAHA EXPRESSLY DISCLAIMS ALL IMPLIED WARRAN-
TIES, INCLUDING BUT NOT LIMITED TO THE IMPLIED WARRANTIES OF
MERCHANTABILITY AND FITNESS FOR A PARTICULAR PURPOSE, as to
the THIRD PARTY SOFTWARE.
·Yamaha shall not provide you with any service or maintenance as to the
THIRD PARTY SOFTWARE.
·Yamaha is not liable to you or any other person for any damages, including,
without limitation, any direct, indirect, incidental or consequential damages,
expenses, lost profits, lost data or other damages arising out of the use, mis-
use or inability to use the THIRD PARTY SOFTWARE.
7. GENERAL
This Agreement shall be interpreted according to and governed by Japanese
law without reference to principles of conflict of laws. Any dispute or procedure
shall be heard before the Tokyo District Court in Japan. If for any reason a court
of competent jurisdiction finds any portion of this Agreement to be unenforce-
able, the remainder of this Agreement shall continue in full force and effect.
8. COMPLETE AGREEMENT
This Agreement constitutes the entire agreement between the parties with
respect to use of the SOFTWARE and any accompanying written materials and
supersedes all prior or contemporaneous understandings or agr eements, writ-
ten or oral, regarding the subject matter of this Agreement. No amendment or
revision of this Agreement will be binding unless in writing and signed by a fully
authorized representative of Yamaha.
License Agreement for TOOLS for n Version2

English
License Agreement for Cubase AI 4
20
TOOLS for n Version2/Cubase AI 4 Installation Guide
Steinberg
Software End User License Agreement (EULA)
General
All intellectual property rights in the software belong to Steinberg Media Technologies GmbH (hereinafter: “Steinberg”) and its suppliers. Steinberg permits you
only to copy, download, install and use the software in accordance with the terms and conditions of this Agreement. The product may contain product acti-
vation for protection against unlawful copying which permits a permanent use of the software only after the activation process has been totally com-
pleted. The software can be used only together with the Steinberg key (dongle) and/or the Soft-eLicenser; the OEM software can be used only following
registration and Trial Version Software can be used only for a running time of 30 days. You are only entitled to support and the right to upgrades or updates fol-
lowing a personal product registration; however, not for Trial Version Software. Internet access is required for the activation process.
The terms and conditions for use of Steinberg software / hardware by you, the end user (hereinafter termed “Licensee”) appear below. By installing the soft-
ware on your computer you agree to these terms and conditions. Please read the following text carefully in its entirety. If you do not approve these terms and
conditions, you must not install this software.
In this event give back the product back to where you have purchased it (inc. all written material, the complete undamaged packing as well as the enclosed
hardware) immediately but at the latest within 14 days in return for a refund of the purchase price.
1. Definitions
1.1. „Software” includes (i) software files and other computer information of
Steinberg and third parties, (ii) demo songs and audio and video files
contained therein, (iii) written documentation (manual) belonging ther eto
and (iv) all modified versions and copies, which are provided by Stein-
berg in the form of updates, upgrades, patches and enhancements of
Steinberg provided that these are not regulated by another agreement.
1.2. The software and all authorized copies of this software which you make
are the intellectual property of Steinberg Media Technologies GmbH
(hereinafter: “Steinberg”) and their suppliers. The structure, organization
and code of the software constitute valuable trade secrets of Steinberg
and their suppliers. The software is legally protected in particular by the
copyright law of the Federal Republic of Germany and other countries as
well as by international treaties.
2. Grant of License
2.1. Steinberg grants you a non-exclusive license for the use of the softwar e
according to the terms and conditions of this Agreement. You may not
lease, loan or sublicense the software.
2.2. The samples of so-called Loops and MIDI data remain the property of the
respective rights holder (Big Fish Audio Inc., Yamaha Corporation and
other licensors) and are licensed by Steinberg to you only for use in the
creation of a live or recorded performance that includes the licensed sam-
ples as part of a derivative musical work created by the licensed end user.
This license includes the use of the samples and MIDI data, the modifi ca-
tion of the samples or MIDI data and the marketing of the derivative musi-
cal work without infringing any rights of copyright collecting societies and/
or the owners of copyrights in any samples and MIDI data. The samples
or MIDI data may not be included, whether unmodified or as part of a
derivative work, in any sample or MIDI data librar y product.
2.3. If the software is protected by the Steinberg key alone, you may install a
license for the software on one or at most 3 computers which are in your
possession. The software may be used only on one of the computers at
the same time by using the Steinberg key. If the software (i) is protected
by the Soft eLicenser (alone or together with the Steinberg key) or (ii) has
been sold to the first end user together with other software and/or hard-
ware (hereinafter: “OEM software”) or (iii) the software can be used only
for a running time of 30 days (hereinafter: “Trial Version Software”), you
may install and use a license for the software only on one computer which
is in your possession.
2.4. The use of the software within a network is illegal where there is the possi-
bility of a contemporaneous multiple use of the program.
2.5. You are entitled to prepare a backup copy of the software which will not
be used for purposes other than storage purposes.
2.6. You shall have no further right or interest to use the software other than the
limited rights as specified in this Agreement. Steinberg and their suppliers
reserve all rights not expressly granted.
2.7. For Steinberg products including Fraunhofer mp3 coding technology, the
following reference from Thomson Licensing S.A. is effective: Supply of
this product does not convey a license nor imply any right to distribute
content created with this product in revenue-generating broadcast sys-
tems (terrestrial, satellite, cable and/or other distribution channels),
streaming applications (via Internet, intranets and/or other networks),
other content distribution systems (pay-audio or audio-on-demand appli-
cations and the like) or on physical media (compact discs, digital versatile
discs, semiconductor chips, hard drives, memory cards and the like). An
independent license for such use is required.
For details please visit http://mp3licensing.com
3. Activation of the Software
3.1. Steinberg may use a compulsory activation of the software and a compul-
sory product registration of the OEM software for license control to protect
the software against unlawful copying. If you do not accept the ter ms and
conditions of this Agreement, the software will not work.
3.2. In such a case the product including the software may only be returned
within 14 days following acquisition of the product. Upon return a claim
according to § 11 shall not apply.
4. Support, Upgrades and Updates after Product Registration
4.1. You can only receive support, upgrades and updates following the per-
sonal product registration. Support is provided only for the current version
and for the previous version during one year after publication of the new
version. Steinberg can modify and partly or completely adjust the extent
of the support (hotline, fora on the website etc.), upgrades and updates at
any time. In case of Trial Version Software, there exists no product regis-
tration or any support, upgrades or updates.
4.2. The product registration is possible during the activation process or at
any time later through the Internet. In such a process you are asked to
agree to the storage and use of your personal data (name, address, con-
tact, email-address, date of birth and license data) for the purposes spec-
ified above. Steinberg may also forward these data to engaged third
parties, in particular distributors, for support purposes and for the verifica-
tion of the upgrade or update right.
4.3. If you provide an address outside the EU, the data also can be transferred
to third parties in countries which do not ensure an adequate level of data
protection comparable to that applying within the EU.
5. Licence module (Steinberg key and/or Soft eLicenser)
5.1. Steinberg uses a hardware device connected through the USB connec-
tion of a computer (hereinafter “Steinberg key”) and/or a protection
scheme (hereinafter “Soft eLicenser”) for license control (hardware and/or
software dongle) in the case of many products. The Steinberg key and/or
Soft eLicenser permanently saves the license information and regulates
access to the software. If a Steinberg key is required for the use of the
software, then the Steinberg key must be connected physically to the
computer through the USB interface.
5.2. For the activation of the software, updates or upgrades of the software the
computer which is connected to the Steinberg key and/or using the Soft
eLicenser or using the OEM software must be connected to the server of
SIA Syncrosoft through the Internet. If the product was delivered with the
Steinberg key, the license information was already transferred to the Stein-
berg key. If the product was delivered with a product card (without the
Steinberg key), the activation codes of the enclosed product card must
be entered manually by the user upon installation and the license infor ma-
tion must be exchanged with the server of SIA Syncrosoft.
License Agreement for Cubase AI 4
La page est en cours de chargement...
La page est en cours de chargement...
La page est en cours de chargement...
La page est en cours de chargement...
-
 1
1
-
 2
2
-
 3
3
-
 4
4
-
 5
5
-
 6
6
-
 7
7
-
 8
8
-
 9
9
-
 10
10
-
 11
11
-
 12
12
-
 13
13
-
 14
14
-
 15
15
-
 16
16
-
 17
17
-
 18
18
-
 19
19
-
 20
20
-
 21
21
-
 22
22
-
 23
23
-
 24
24


Yamaha n12 Guide d'installation
- Taper
- Guide d'installation
dans d''autres langues
- italiano: Yamaha n12 Guida d'installazione
- English: Yamaha n12 Installation guide
- español: Yamaha n12 Guía de instalación
- Deutsch: Yamaha n12 Installationsanleitung
- русский: Yamaha n12 Инструкция по установке
- Nederlands: Yamaha n12 Installatie gids
- português: Yamaha n12 Guia de instalação
- dansk: Yamaha n12 Installationsvejledning
- polski: Yamaha n12 Instrukcja instalacji
- čeština: Yamaha n12 instalační příručka
- svenska: Yamaha n12 Installationsguide
- Türkçe: Yamaha n12 Yükleme Rehberi
- suomi: Yamaha n12 Asennusohje
- română: Yamaha n12 Ghid de instalare
Documents connexes
-
Yamaha n12 Guide d'installation
-
Yamaha XS6 Guide d'installation
-
-
-
-
Yamaha CL5/CL3/CL1 Guide d'installation
-
-
Yamaha MOTIF XS8 Le manuel du propriétaire
-
-
