La page est en cours de chargement...

Cabinets
Workbenches
Mobile Utility Cart
72in Wall Mounted Rack
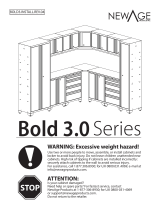
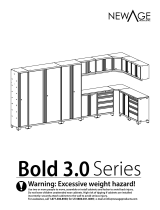
PRO 3.0 Series


Pro 3.0 Series
*.1#"
STOP
ATTENTION*TZPVSDBCJOFUEBNBHFE
/FFEIFMQPSTQBSFQBSUT 'PSGBTUFTUTFSWJDF
DPOUBDU/FX"HF1SPEVDUTBU
PSTVQQPSU!OFXBHFQSPEVDUTDPN
%POPUSFUVSOUPUIFSFUBJMFS
6TFUXPPSNPSFQFPQMFUPNPWFBTTFNCMFPS
JOTUBMMDBCJOFUTBOEMPDLFSUPBWPJECBDLJOKVSZ
%POPUMFBWFDIJMESFOVOBUUFOEFEOFBSDBCJOFUT
)JHISJTLPGUJQQJOHJGDBCJOFUTBSFJOTUBMMFE
JODPSSFDUMZTFDVSFMZBUUBDIDBCJOFUTUPUIF
XBMMUPBWPJETFSJPVTJOKVSZ'PSBTTJTUBODFDBMM
GPS6,FNBJMBU
JOGP!OFXBHFQSPEVDUTDPN
Warning: Excessive weight
hazard!

INDEX
Unpacking:
5PPMT/FFEFE
1BSUT-JTU
1BSUT*ODMVEFE
8PSLUPQT
8FJHIU$BQBDJUZ
8BSSBOUZ
Installation Options
Planning Installation and Layout for:
'MPPS*OTUBMMBUJPO
$BTUFS*OTUBMMBUJPO
8BMM.PVOU*OTUBMMBUJPO
4MBUXBMM*OTUBMMBUJPO
$PSOFS$BCJOFU*OTUBMMBUJPO
Hanging Wall Cabinets:
6TJOH4VQQMJFE8BMM#SBDLFUT
0O4MBUXBMM
Securing Wall Cabinets:
5P8BMM
5P0UIFS$BCJOFUT
4UBDLJOH
Installing Worktop:
/PSNBMJOTUBMMBUJPOPODBCJOFUT
6TJOH4VQQPSU#SBDLFUT
General Assembly:
'FFU-FWFMMJOHDBCJOFUT
$BTUFST
$MPTFU3PE
4IFMWFT
-JHIU7BMBODF
6UJMJUZIPMF
ATTENTION*TZPVSDBCJOFUEBNBHFE
/FFEIFMQPSTQBSFQBSUT 'PSGBTUFTUTFSWJDF
DPOUBDUNewAge Products BU1-877-306-8930
PSsupport@newageproducts.com.
Do notSFUVSOUPUIFSFUBJMFS

Tools Needed
1 x w.BHOFUJD-FWFMFS
1 x 1IJMMJQT#JU
1 x 5BQF.FBTVSF
1 x wTPDLFU
1 x $PSEMFTT1PXFS%SJMM
1 x 4UVE'JOEFS
1 x 1FODJM1 x 4FU
4RVBSF
1 x )BNNFS%SJMM 1 x .BTPOSZ#JU
1 x "EKVTUBCMFXSFODI
1 x w4PDLFUESJWFS
XSFODI
1 x NNw4PDLFUESJWFS
XSFODI
1 x 1IJMMJQT
IFBETDSFXESJWFS
1 x 1IJMMJQT
IFBETDSFXESJWFS
[optional for masonry]
Unpacking
t #FHJOCZQMBDJOHUIFQBDLBHFPOBDPWFSed aUTVSGBDF
t 3FNPWFBMMDBSECPBSEGPBNQBDLBHJOHNBUFSJBMBOEDMFBSQMBTUJDCBHT
t %JTQPTFSFDZDMFBMMQBDLBHJOHNBUFSJBMT
t 7FSJGZBMMUIFDPOUFOUTJOUIFCPYBOEHBUIFSUIFSRVJSFEUPPMT4FFi5PPMT3FRVJSFEwBOE
i1BSUT4VQQMJFEwMJTUT

Parts included in Hardware Pack
Parts Supplied
Type Hardware
MulƟ-Use
and Sport
Lockers
Mobile
Locker
Wall Corner Wall
Two-Door
Base
MulƟfuncƟon
Five-Drawer
Tool
#8 x 5/8" Wood Screw 2008444
1/4" ID x 1/2" OD Washer 18 28 12 8 12 12 12
1/4" Lock Nut 8 20 4 0 4 4 4
1/4" x 0.9" Fender Washer 4444444
1/4" x 2.5" Wall Screw 8 8 8 12 8 8 8
1/4"-20 x 5/8" Hex Bolts 10 20 4 8 4 4 4
Foot AƩachment Screws 17 0 0 0 17 17 17
Keys 2222222
Light Valence Bolts 0022000
Light Valence Nuts 0022000
Shelf Clips 221860000
PlasƟc Hole Caps 16080000
Adustable Level
ing Feet 4000444
Power C
ord Grommet - 2in 1100100
4in Swivel Casters 0200000
4in SWIVEL Casters with Brakes 0200000
Adjustable Shelves 4210000
Cabinet Leg 4000444
Closet Rod 1100000
Closet Rod Brackets with MulƟ-Peg Hoo
k
2200000
EVA Foam Drawer Liners 0000135
Garbage Bin 0000010
Light Valence 0011000
NewAge Logo 1100000
Parts Bins 00000240
Long Drawer Dividers 0000008
Short Drawer Dividers 0000008
Side Support Bracket 1 002000
Easy Wall Hanging Brackets 2222222
Hardware Pack
AddiƟonal Hardware
Included
Components
Included Brackets
8BTIFS
wYw
8PPE4DSFX
Yw
4IFMG$MJQT
8BMM4DSFX
wYw
)FY#PMU
wYw
-JHIU7BMFODF
/VU.
-JHIU7BMFODF
#PMU.YNN
'PPU
"UUBDINFOU
4DSFXT
-PDL/VU
w
'FOEFS8BTIFS
wYJO
-FWFMMJOH
-FH

Cabinetry Net Weights
Individual Parts
)FJHIU"EKVTUBCMF
4UFFM-FWFMJOH-FHT
,FZ
%SBXFS%JWJEFST
8BMM#SBDLFU
'VMM8JEUI
"EKVTUBCMF
4IFMWFT
$MPUIFT
3PEBOE
)PPLT
4VQQPSU#SBDLFU
-JHIU7BMBODF
$BTUFST
/FX"HF-PHP
3VCCFS
(SPNNFU
w8PSLUPQ'JUTPWFS$BCJOFUT
w8PSLUPQ'JUTPWFS$BCJOFUT
w8PSLUPQ'JUTPWFS$BCJOFU
w$PSOFS8PSLUPQ
Worktops
Size Cabinet Net Weight (Lbs)
28in 2-Door Base Cabinet 95
42in 2-Door Base Cabinet 121
28in 5-Drawer Tool Cabinet 173
42in 5-Drawer Tool Cabinet 281
Mobile Locker 166
28in DƵůƟͲ&ƵŶĐƟŽŶĂůĂďŝŶĞƚ 172

Manufacturer Warranty Limited Lifetime
4FSWJDFDBMMTUPDPSSFDUUIFJOTUBMMBUJPOPGBOZ/FX"HFQSPEVDUTPSUPJOTUSVDUZPVIPXUPVTFPSJOTUBMMUIFN
%BNBHFSFTVMUJOHGSPNJNQSPQFSIBOEMJOHPSTIJQQJOHPGQSPEVDUTPSQSPEVDUTEBNBHFECZBDDJEFOUNJTVTFBCVTF, rF
oodJNQSPQFSJOTUBMMBUJPOBDUTPG(PEOFHMFDUDPSSosion, modicaUJPOPSNJTIBOEMJOH
1SPEVDUTEBNBHFECZJNQSPQFSMZMPBEJOHCFZond the specied maximum wFJHIUDBQBDJUZPVUMJOFEJOUIFJOTUSVDUJPOTQSPWJEFE
XJUIUIFQSPEVDU
3FQBJSTPSSFQMBDFNFOUXIFOZPVSQSPEVDUJTVTFEJOPUIFSUIBOOPSNBMTJOHMFGBNJMZIPVTFIPMEVTFTVDIBTBDPNNFSDJBM
FOWJSPONFOUPSIBOEMFEJOBOZXBZJODPOTJTUFOUXJUIUIFJOTUBMMBUJPOJOTUSVDUJPOTJODMVEFEXJUIUIFQSPEVDU
$PTNFUJDEBNBHFJODMVEJOHTDSBUDIFTEJOHTEFOUTPSDSBDLTJOQBJOUUIBt do not aFDUUIFTUSVDUVSBMPSGVODUJPOBMDBQBCJMJUZ
PGUIFQSPEVDU
4VSGBDFTEBNBHFEEVFUPDIFNJDBMJOUFSBDUJPOSFTVMUJOHJODPSSPTJPOPGQBJOUPSNFUBM
3FQMBDFNFOUQBSUTGPS/FX"HFQSPEVDUTPVUTJEF$BOBEBBOEUIF6OJUFE4UBUFT
3FQMBDFNFOULFZTPSMPDLJOHNFDIBOJTNT
-PTTPGQSPEVDUDPOUFOUTEVFUPUIFGU, rF, oodBDDJEFOUPSBDUTPG(PE
4IJQQJOHPSGSFJHIUGFFTUPEFMJWFSSFQMBDFNFOUQSPEVDUTPSUPSFUVSOEFGFDUJWFQSPEVDUT
"OZMBCPSDPTUTEVSJOHUIFMJNJUFEXBSSBOUZQFSJPE
8IFOUIJTQSPEVDUJTJOTUBMMFEPQFSBUFEBOENBJOUBJOFEBDDPSEJOHUPUIFJOTUSVDUJPOTBUUBDIFEUPPSGVSOJTIFEXJUIUIFQSPEVDU
/FX"HF1SPEVDUT*ODXJMMSFQMBDFUIFEFGFDUJWFQSPEVDUPSQBSUTJGUIFQBSUGBJMTBTBSFTVMUPGEFGFDUJWFNBUFSJBMTPSXPSLNBOTIJQ
GPSUIF-JGFUJNFPGUIFQSPEVDU
NEWAGE PRODUCTS INC. WILL NOT PAY FOR:
*.1-*&%8"33"/5*&4*/$-6%*/(505)&&95&/5"11-*$"#-&8"33"/5*&40'.&3$)"/5"#*-*5:03'*5/&44'03"1"35*$6-"3
163104&"3&&9$-6%&%505)&&95&/5-&("--:1&3.*44*#-&"/:*.1-*&%8"33"/5*&45)"5.":#&*.104&%#:-"8"3&-*.*5&%
500/&:&"3035)&4)035&451&3*0%"--08&%#:-"840.&45"5&4"/%1307*/$&4%0/05"--08-*.*5"5*0/403&9$-64*0/4
0/)08-0/("/*.1-*&%8"33"/5:0'.&3$)"/5"#*-*5:03'*5/&44-"454405)&"#07&-*.*5"5*0/403&9$-64*0/4.":/05
"11-:50:065)*48"33"/5:(*7&4:0641&$*'*$-&("-3*()54"/%:06.":"-40)"7&05)&33*()548)*$)7"3:'30.45"5&
5045"5&031307*/$&501307*/$&
DISCLAIMER OF IMPLIED WARRANTIES; LIMITATION OF REMEDIES
Weight
Capacity
MCT
MCT
MCT
#BTF$BCJOFUT
.BYMCT
MCT
MCT
8BMM$BCJOFUT
.BYMCT
MCT
5PPM$BCJOFUT
.BYMCT
MCT
MCT
MCT
MCT
MCT
MCT
4QMJU$BCJOFUT
.BYMCT
MCT
MCT
MCT
MCT
5
MCT
MCT
MCT
-PDLFST
.BYMCT
MCT
MCT
MCT
MCTQFSGPPU
MCTQFS4FUPG
MCTQFSw$BTUFS
MCTQFS4FUPG
NJOVTXFJHIUPG
DBCJOFU
/05&$MBJNFEXFJHIUDBQBDJUJFTBSFPOMZXJUI
/FX"HFXPSLUPQTJOTUBMMFE

Installation options for Cabinets
Wall mount on slatwall using slat-
wall bracket. See page 9.
2
Wall mount using supplied wall
mounting brackets. See page 9.
Floor mount with adjustable
levelling legs. See page 8.
Important information: Please read
before beginning installation.
Floor mount with casters and adjustable
leveling legs. Note: Casters can not be
installed on Locker cabinets. See page 8.
Corner cabinet installation. Note:
Corner cabinets can be installed using
all installation options. See page 10.
3
1
5
4
• Layouts shown are only examples.
Based on customers purchase,
cabinets can be congured in a
variety of dierent layouts.
• Locate wall studs prior to installation.
• Consider the location of electrical
outlets when planning layout.
• Measure height for wall cabinets.
• Base cabinets can be mounted
ush front or ush back with Locker
cabinets.

Floor Mount Installation
1
Hang wall cabinets. See full
instructions on pages 9-14.
2
Attach feet/casters to cabinets. See full
feet installation on pages 22 & 23.
Plan layout before installing
cabinets
• Cabinets must be secured to wall.
• Casters can not be installed on
locker cabinets.
5
4
Attach cabinets together. See fastening
cabinets step on page 16.
Secure all cabinets to wall. See page 15
for full instructions.
Attach worktop. See pages 18 - 19 for
full instructions.
3
4 X Each Cabinet

Wall Mount
Plan layout before installing
cabinets
• Cabinets must be secured to wall
Hang wall cabinets. See full
instructions on pages 9-14.
Attach cabinets together. See fastening
cabinets step on page 16.
Secure all cabinets to wall. See page 15
for full instructions.
Attach worktop. See pages 18-19 for
full instructions.
4 X Each Cabinet
1
2
3
4

Corner Cabinet Installation
1
Hang wall cabinets. See full
instructions on pages 9-14.
2
Attach feet/casters to cabinets. See
full feet installation on pages 22 & 23.
Note: Casters can not be installed on
locker cabinets.
Install corner worktop and cabinets. See
page 20.
Attach cabinets together. See fastening
cabinets step on page 16.
Secure all cabinets to wall. See page15
for full instructions.
Attach worktop. See pages 18-19 for
full instructions.
3
4 X Each Cabinet
4
5
6

Hanging Cabinets on Wall
Planning the general position of cabinets.
Step A. Determine the height o the ground you would like the base and locker
cabinets to be and make a horizontal mark at this position.
Step B. Next mark the width of each cabinet in the intended position and ensure
the wall studs fall at least 1.25” in from the edge of the cabinets. This will
ensure there is no interference with the edges of the cabinet and the
wall bracket when hanging the cabinet on the wall.
Note: Ensure there are two studs for the locker to be mounted on as it is easiest to
start the installation with the locker rst. Due to the spacing of the wall studs it is
possible that some base or wall cabinets will only have one stud they will attach
to; This is acceptable as long as the cabinet is bolted to another securely mounted
cabinet.
Parts Needed.
-BH4DSFX
wYw
8BMM#SBDLFU
)FJHIUGSPN'MPPS
'MPPS
8BMM
TUVET
NVTUGBMM
wPS
NPSF
GSPN
TJEFTPG
DBCJOFU
8BMM
TUVET
NVTUGBMM
wPS
NPSF
GSPN
TJEFTPG
DBCJOFU
A
A
B
B
8JEUIPG$BCJOFUT
8BMM4UVE
$BCJOFU8JEUI
$BCJOFU-BZPVU
2
1
Use stud nder to locate the studs
and mark the wall with a pencil.
'FOEFS8BTIFS
wYJO

Planning the general position of cabinets. (cont.)
Step C. Measuring up from the line marked in Step A, make a horizontal mark
at the following heights where they intersect the wall stud marks to
determine where the top of the cabinet will be (and where the
hanging bracket will be installed).
1. Locker: Measure 80” vertically from base line and mark at stud locations.
2. Base: Measure 32.25” vertically from base line and mark at stud locations.
3. Wall cabinets: Measure 80” vertically from base line and mark at stud
locations (if installing ush with top of locker).
Step D. Ensure the cabinets will be at a suitable working height and that your
wall cabinets are not out of reach.
Note: The working surface of the base cabinets will be 1.25” higher than
the cabinet with the top installed.
3
)FJHIUGSPN'MPPS
'MPPS
-PDLFS8BMMw
#BTF$BCJOFUTw
A
C
C
Hanging Cabinets on Wall (cont.)

Hanging Cabinets on Wall (cont.)
4
Hanging cabinets on wall.
Align the top of the wall hanging brackets with the lines marked for
the position of the top of the cabinets(Step C) and attach
the brackets securely into the studs using the supplied
lag bolts and washers.
Note: It is possible to oset the bracket to one side or the other if the bracket
is positioned close to the edge of the intended cabinet position by using the
secondary hole positions on the bracket.
)FJHIUGSPN'MPPS
'MPPS
-PDLFS8BMMw
#BTF$BCJOFUTw
A
C
C
WALL
WALL
5
Lift cabinet into place over the brackets and
ush with the wall, and lower into place.

Attach bracket to slatwall at desired
height.
Align bolt with slots on back of cabinet
and hang cabinet .
Note:For Locker cabinet attach second
bracket 66” below rst bracket.For Base
cabinet attach second bracket 18” below
rst bracket.
2
3
Note: Slatwall Brackets GPSVTFXJUITUBOEBSEwTMBUXBMMSold Separately. $IFDLXJUIZPVS
TMBUXBMMTVQQMJFSUPEFUFSNJOFUIFSBUFEDBQBDJUZPGZPVSTMBUXBMMDO NOT OVERLOAD.
Hanging Cabinets on Slatwall
1
Insert bolts through slatwall bracket.
Parts Needed.
8BMM#PMU
wYw
8BMM8BTIFS
w
4MBUXBMM#SBDLFU
-PDL/VU
w
Align bolt with slots on back of cabinet
and hang cabinet .
3

Securing Cabinets to Wall
1
Level cabinet
Gather parts.
2
Align cabinet
to stud marks.
• Follow steps 3 to 5.
• Drill 4 pilot holes through the
perforated strip with hammer drill &
masonry bit.
• Use 4 x (
2 ¼” x ¼” )Tapcon Concrete
Anchor into wall. (Not Included)
• OR 4 x (#10 x 2” )Screw with 3/16”
masonry plug into wall. (Not Included)
• Follow Step 6.
Use stud nder to locate the studs
and mark the wall with a pencil.
4
3
8BMM4DSFX
wYw
8BMM8BTIFS
w
5
Place cabinet tight
against the wall.
X4
6
Masonry.
Drill 4 wall screws and washers
through perforated holes into studs.
Wall & Locker:XBMMTDSFXTBOEXBTIFST
Corner Wall:XBMMTDSFXTBOEXBTIFST
Base & Tool Cabinet:XBMM4DSFXTBOEXBTIFST
Note: Wall brackets are not designed to support the weight of a loaded cabinet.
Cabinets must be secured to the wall using supplied 1/4” x 2.5” lag screws.
Note:
%POPUMPBEDBCJOFU
without rst securJOHUP
UIFXBMM

Fastening Cabinets
Note:
'BTUFOBEEJUJPOBMDBCJOFUTUP
JOJUJBMTFDVSFMZNPVOUFEDBCJOFU
Note:
3FNPWFBMMESBXFSTCFGPSF
GBTUFOJOHDBCJOFUT
1
Align bolts, tighten lightly.
Level cabinets and tighten all bolts.
2
Parts Needed.
-PDL/VU
w
8BTIFS
w
)FY#PMU
Yw
4 X EACH
CABINET
WARNING: Wall backets are not designed to support the weight of a loaded cabinet.
Cabinets must be secured to the wall using supplied 1/4” x 2.5” lag screws.
Bolt each subsequent
cabinet to the previous
one using the supplied ¼”
x 5/8” hex bolts and lock
nuts provided in each base
and wall cabinet.

Stacking Cabinets
1
Locate punch holes on adjoining
surface and insert bolts.
Tighten all bolts
2
Attach cabinets using the supplied
1/4” x 5/8” hex bolts, washers, and
nuts.
Position a second base cabinet on
top of an existing base cabinet.
3
I
Parts Needed.
9 -PDL/VU
w
9 8BTIFS
w
9)FY#PMU
wYw
4

Mounting the Worktop
1
Optional: For locker support bracket.
X4 X2
X2
X2
Locate 2 punch holes both sides.
2
Drill into the worktop using the #8 x 5/8” wood screws.
X2
Use 2 washers & #8 x 5/8” wood screws.
Provided in the locker packaging.
Place worktop on cabinets.
3
1/121