If your AiMesh router cannot find RP-AX58 nearby or
synchronization fails, please check followings and try again.
i.
Download AiMesh - supported fireware at:
https://www.asus.com/AiMesh/.
ii.
Launch a web GUI. You will be redirected to the
ASUS Setup Wizard. If not, navigate to http://www.
asusrouter.com.
iii.
Go to Administration > Firmware Upgrade. Click
Choose File, and upload the AiMesh-supported
firmware.
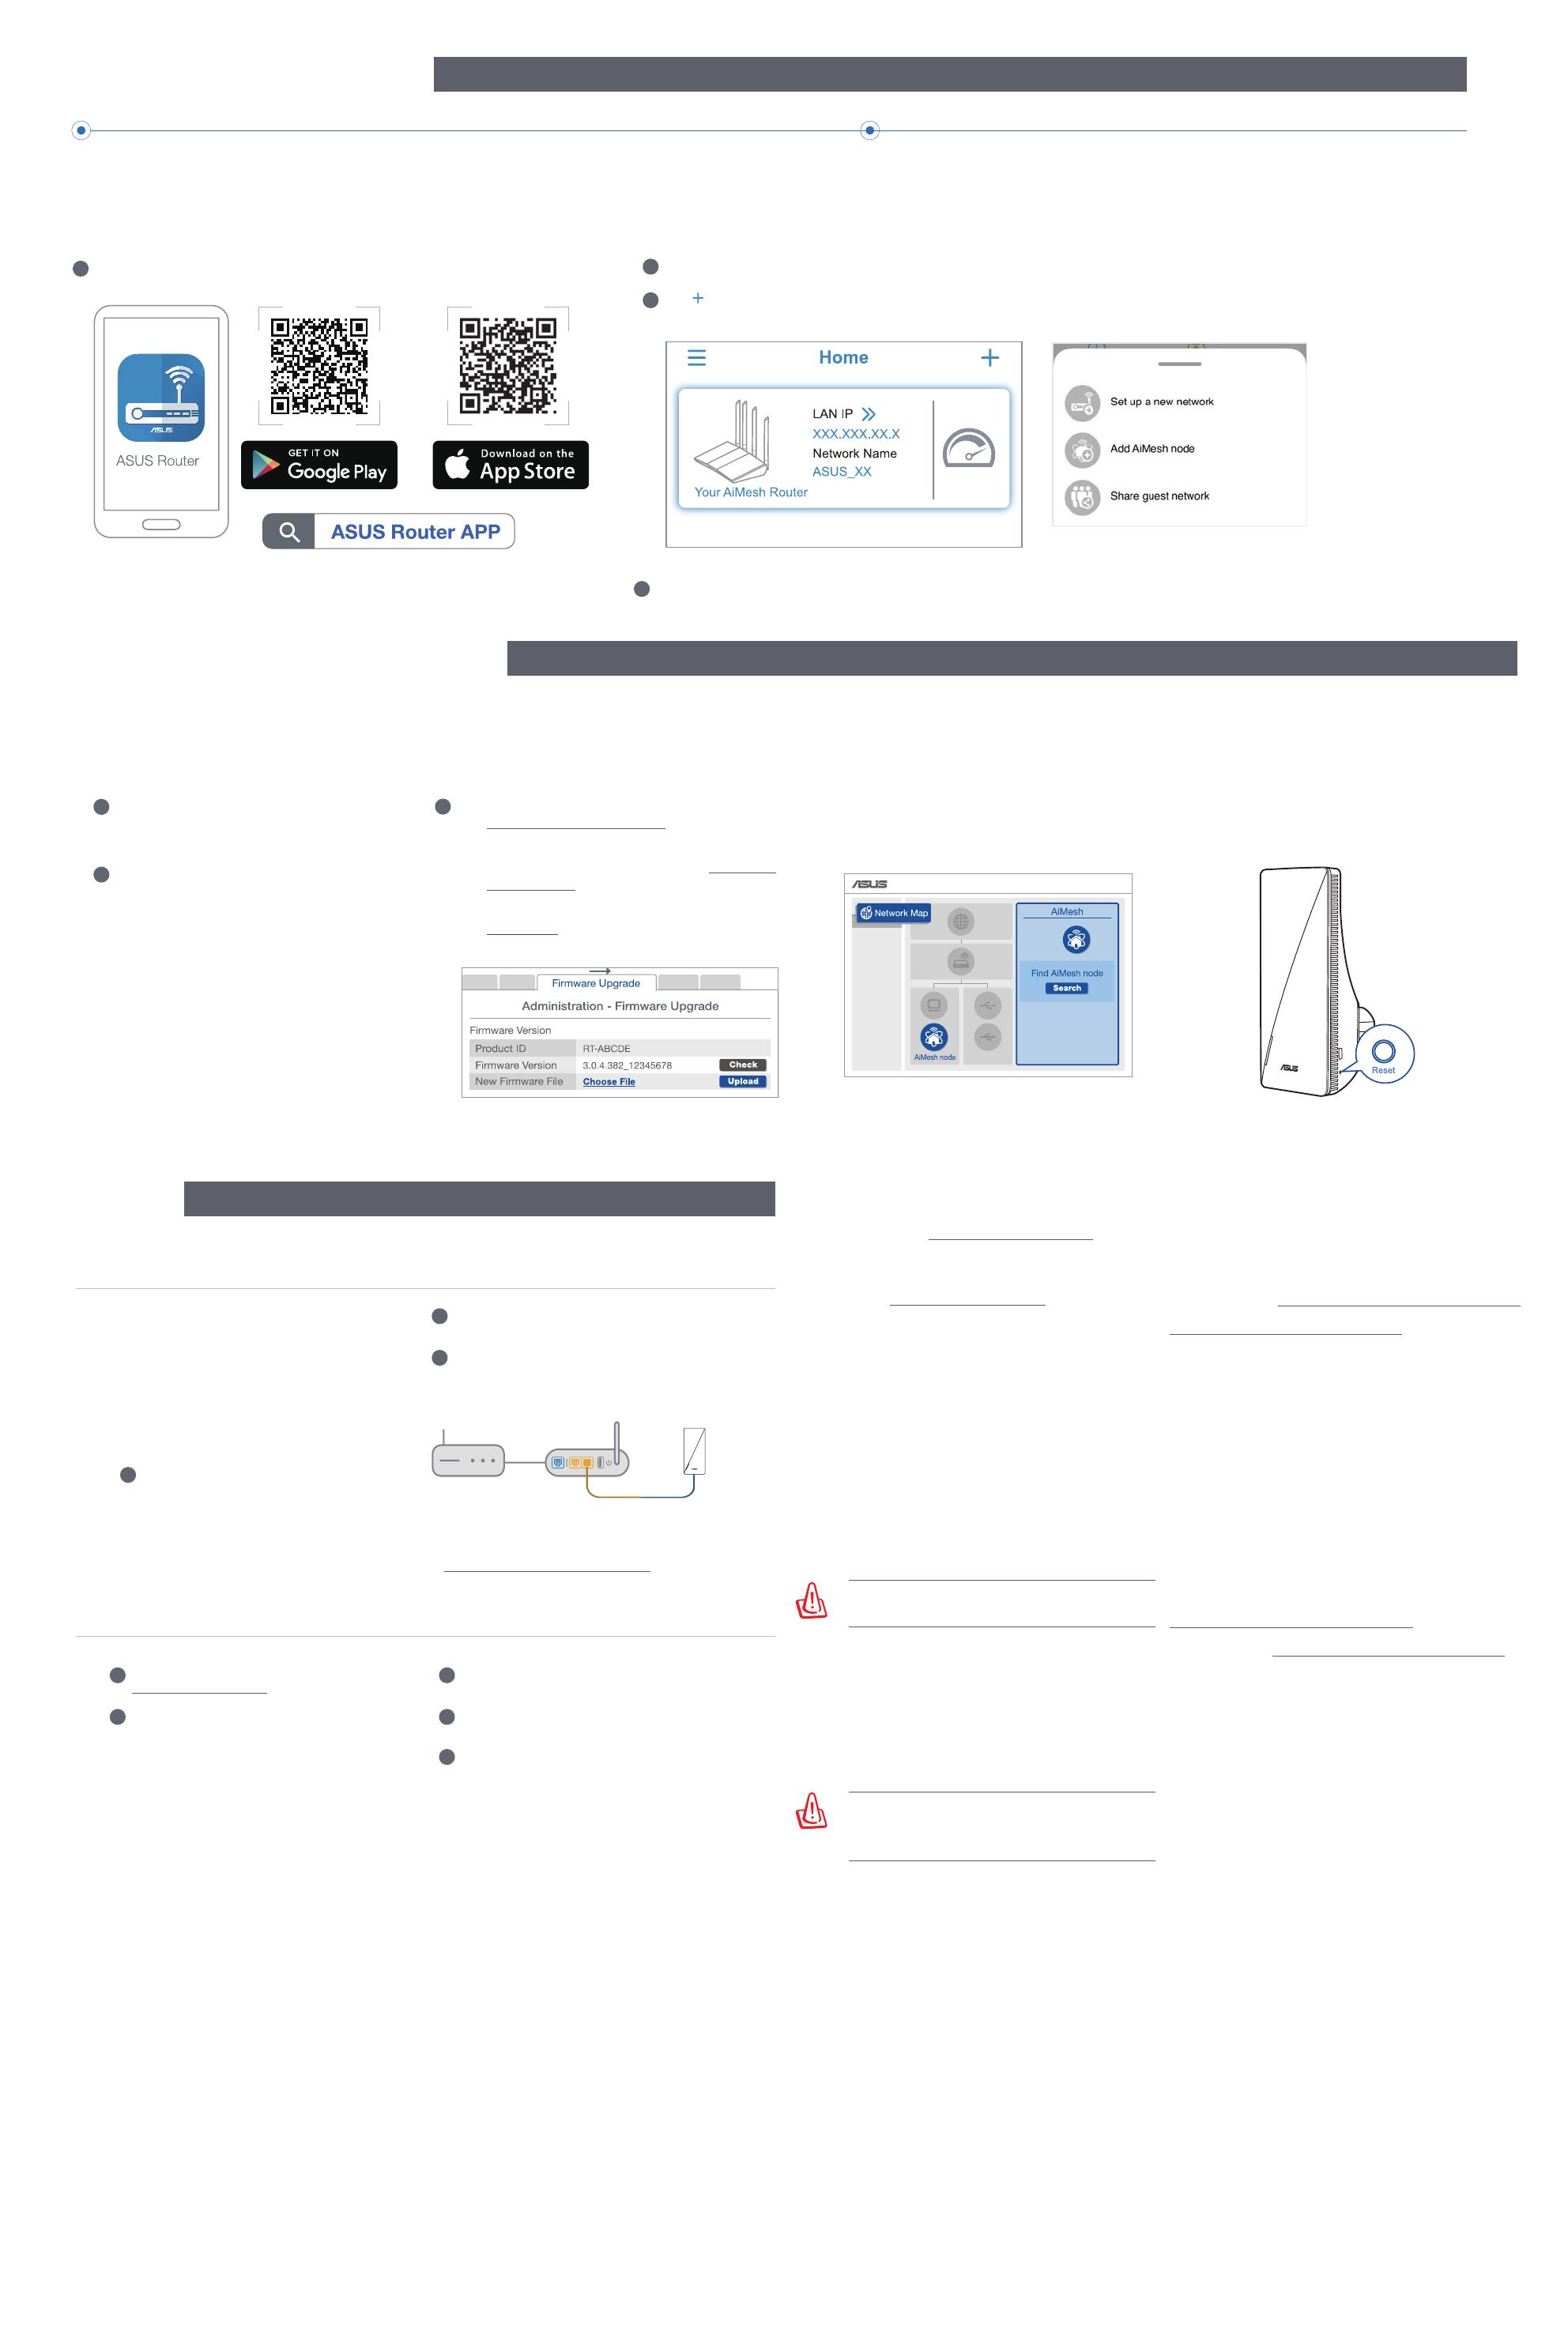
iv. After the firmware is uploaded, please go to the
Network Map page to check and make sure that the
AiMesh icon shows up.
v. Use a pin to press the reset button on your RP-AX58
for at least 5 seconds. Release the reset button when
the power LED is flashing slowly.
Q1
A: Yes. AiMesh system supports both wireless
and wired connection between an AiMesh router
and node to maximize throughput and stability.
AiMesh analyzes the wireless signal strength
for each frequency band available, and then
determines automatically whether a wireless or
wired connection is best to serve as the inter-router
connection backbone.
To know more about ASUS AiMesh, please go to https://www.asus.com/AiMesh/.
FAQ
TROUBLE SHOOTING
FREQUENTLY ASKED QUESTIONS
a
Plug RP-AX58 into a power outlet near your
router/AP. Ensure that it is within 3 meters from
the AiMesh router.
b
Your AiMesh router is upgraded to AiMesh-
supported firmware.
Could I setup wired connection between AiMesh routers and nodes (Ethernet
backhaul)?
1 Follow the setup steps to establish a connection
between the AiMesh router and RP-AX58 via WiFi first.
2 Place the RP-AX58 in an ideal location for the best
coverage. Run an Ethernet cable from the LAN port of
the AiMesh router to the Ethernet backhaul port of RP-
AX58.
3 AiMesh system will auto-select the best
path for data transmission, whether wired
or wireless.
ASUS Recycling/Takeback Services
ASUS recycling and takeback programs come from our commitment to the highest
standards for protecting our environment. We believe in providing solutions for you to
be able to responsibly recycle our products, batteries, other components, as well as the
packaging materials. Please go to http://csr.asus.com/english/Takeback.htm for the detailed
recycling information in dierent regions.
REACH
Complying with the REACH (Registration, Evaluation, Authorisation, and Restriction of
Chemicals) regulatory framework, we published the chemical substances in our products at
ASUS REACH website at http://csr.asus.com/english/REACH.htm
Federal Communications Commission Statement
This device complies with Part 15 of the FCC Rules. Operation is subject to the following
two conditions:
• This device may not cause harmful interference.
• This device must accept any interference received, including interference that may
cause undesired operation.
This equipment has been tested and found to comply with the limits for a class B digital de-
vice, pursuant to part 15 of the FCC Rules. These limits are designed to provide reasonable
protection against harmful interference in a residential installation.
This equipment generates, uses and can radiate radio frequency energy and, if not
installed and used in accordance with the instructions, may cause harmful interference
to radio communications. However, there is no guarantee that interference will not occur
in a particular installation. If this equipment does cause harmful interference to radio
or television reception, which can be determined by turning the equipment o and on,
the user is encouraged to try to correct the interference by one or more of the following
measures:
• Reorient or relocate the receiving antenna.
• Increase the separation between the equipment and receiver.
• Connect the equipment into an outlet on a circuit dierent from that to which the
receiver is connected.
• Consult the dealer or an experienced radio/TV technician for help.
WARNING! Any changes or modications not expressly approved by the
party responsible for compliance could void the user’s authority to operate
the equipment.
This device is restricted for indoor use.
Prohibition of Co-location
This device and its antenna(s) must not be co-located or operating in conjunction with any
other antenna or transmitter.
IMPORTANT NOTE:
Radiation Exposure Statement: This equipment complies with FCC radiation exposure
limits set forth for an uncontrolled environment. End users must follow the specic
operating instructions for satisfying RF exposure compliance. To maintain compliance with
FCC exposure compliance requirement, please follow operation instruction as documented
in this manual.
WARNING! This equipment must be installed and operated in accordance
with provided instructions and the antenna(s) used for this transmitter must
be installed to provide a separation distance of at least 44 cm from all persons
and must not be co-located or operating in conjunction with any other
antenna or transmitter.
Compliance Statement of Innovation, Science and Economic
Development Canada (ISED)
This device complies with Innovation, Science and Economic Development Canada licence
exempt RSS standard(s). Operation is subject to the following two conditions: (1) this device
may not cause interference, and (2) this device must accept any interference, including
interference that may cause undesired operation of the device.
Operation in the band 5150–5250 MHz is only for indoor use to reduce the potential for
harmful interference to co-channel mobile satellite systems.
CAN ICES-003(B)/NMB-003(B)
Radio Frequency (RF) Exposure Information
The radiated output power of the ASUS Wireless Device is below the Innovation, Science
and Economic Development Canada radio frequency exposure limits. The ASUS Wireless
Device should be used in such a manner such that the potential for human contact during
normal operation is minimized.
This equipment should be installed and operated with a minimum distance of 25 cm
between the radiator any part of your body.
This device has been certied for use in Canada. Status of the listing in the Innovation,
Science and Economic Development Canada’s REL (Radio Equipment List) can be found at
the following web address: http://www.ic.gc.ca/eic/site/ceb-bhst.nsf/eng/h_tt00020.html
Additional Canadian information on RF exposure also can be found at the following web:
https://www.ic.gc.ca/eic/site/smt-gst.nsf/eng/sf08792.html
Déclaration de conformité de Innovation, Sciences et Développement
économique Canada (ISED)
Le présent appareil est conforme aux CNR d’Innovation, Sciences et Développement
économique Canada applicables aux appareils radio exempts de licence. L’exploitation est
autorisée aux deux conditions suivantes : (1) l’appareil ne doit pas produire de brouillage,
et (2) l’utilisateur de l’appareil doit accepter tout brouillage radioélectrique subi, même si le
brouillage est susceptible d’en compromettre le fonctionnement.
La bande 5150 – 5250 MHz est réservée uniquement pour une utilisation à l’intérieur an de
réduire les risques de brouillage préjudiciable aux systèmes de satellites mobiles utilisant
les mêmes canaux.
CAN ICES-003(B)/NMB-003(B)
Informations concernant l’exposition aux fréquences radio (RF)
La puissance de sortie émise par cet appareil sans l est inférieure à la limite d'exposition
aux fréquences radio d'Innovation, Sciences et Développement économique du Canada
(ISED). Utilisez l'appareil sans l de façon à minimiser les contacts humains lors d'un
fonctionnement normal.
Cet équipement doit être installé et utilisé avec un minimum de 25 cm de distance entre la
source de rayonnement et votre corps.
L'utilisation de cet appareil est autorisée au Canada. Pour consulter l'entrée correspondant
à l'appareil dans la liste d'équipement radio (REL - Radio Equipment List) d'Innovation,
Sciences et Développement économique du Canada, rendez-vous sur :
http://www.ic.gc.ca/eic/site/ceb-bhst.nsf/eng/h_tt00020.html
Pour des informations supplémentaires concernant l'exposition aux fréquences radio au
Canada, rendez-vous sur : https://www.ic.gc.ca/eic/site/smt-gst.nsf/eng/sf08792.html
For product available in the US/Canada market, only channel 1~11 can be operated. Selec-
tion of other channels is not possible.
Pour les produits disponibles aux États-Unis et au Canada, seuls les canaux 1 à 11 peuvent
être utilisés. La sélection d’autres canaux n’est pas possible.
Operations in the 5.15-5.25GHz band are restricted to indoor usage only.
Safety Notices
• Use this product in environments with ambient temperatures between 0°C(32°F) and
40°C(104°F).
• Refer to the rating label on the bottom of your product and ensure your power adapter
complies with this rating.
• DO NOT place on uneven or unstable work surfaces. Seek servicing if the casing has
been damaged.
• DO NOT place or drop objects on top and do not shove any foreign objects into the
product.
• DO NOT expose to or use near liquids, rain, or moisture. DO NOT use the modem during
electrical storms.
• DO NOT cover the vents on the product to prevent the system from getting overheated.
• DO NOT use damaged power cords, accessories, or other peripherals.
• If the Adapter is broken, do not try to x it by yourself. Contact a qualied service techni-
cian or your retailer.
• To prevent electrical shock hazard, disconnect the power cable from the electrical outlet
before relocating the system.
LAN to LAN (Ethernet backhaul) port
c
STEPS
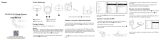
Download the ASUS Router App.
If you already have an AiMesh router and you are going to create an AiMesh system, please download and install ASUS
Router App for RP-AX58 setup.
SETUP METHODS Set up RP-AX58 as an AiMesh Node
Q2 How to set up the Access Point(AP) mode on an ASUS WiFi Range Extender?
1 Launch a web browser and enter
http://www.asusrouter.com.
2 If you are logging into the Web GUI for the first time,
you will be automatically directed to the Quick Internet
Setup (QIS) page. Click Advanced Settings.
3 Click Choose operation mode, then click
Access Point(AP) mode.
4 Click Automatic IP, then click to set up
the SSIDs separately.
5 For the first time, you’ll need to set up
the username and password for your RP-
AX58. When typing is done, click Next.
Access Point(AP) mode setting is finished.
Follow the onscreen instructions to set up your AiMesh router.
2
1
Tap and select Add AiMesh node.
3
Select RP-AX58 and follow the onscreen instructions to complete the setup.
4