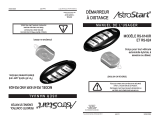
DSE RF612 AIR Guide d'installation
- Catégorie
- Systèmes vidéo de voiture
- Taper
- Guide d'installation

RF612 AIR
Télédémarreur pour véhicule à bouton poussoir
Extension de portée uni et bidirectionnelle
Version 612A-1
Version 612A-1
GUIDE D’INSTALLATION
INSTALLATION GUIDE
ÉTAPE 1 - CODER LES MANETTES
Le module peut accepter jusqu’à 3 télécommandes en mémoire.
Dès que le module est alimenté
(branché), les DEL sur le module et
sur l’antenne (optionel) commencent
à clignoter.
Mettre l’Ignition à On, appuyer 1 fois
sur le bouton de programmation, un
clignotement et un coup de klaxon se
manifestent. Mettre l’Ignition à Off.
Mettre l’Ignition à On, appuyer 1 fois
sur le bouton de programmation,
2 clignotements et 2 coups de klaxon
se manifestent. Mettre l’Ignition à Off.
À l’intérieur d’une minute, mettre
l’Ignition à On, appuyer et relâcher
3 fois la pédale de frein, les DEL
conrment en clignotant rapidement.
Immédiatement appuyer sur le bouton
Lock (Barrer) de chacune des télécom-
mandes ( max 3 ), les feux de position ou
le klaxon * se manifestent pour conrmer
chacune des programmations.
Mettre l’Ignition à Off.
ÉTAPE 2 - CODER DES MANETTES ADDITIONNELLES
Appuyer une fois sur le bouton Débarrer
de la manette existante.
Répéter les points 4, 5 et 6 de l’étape
1 ci-dessus.
NOTE :
Lorsqu’une nouvelle manette est codée,
toutes les manettes existantes devront être
codées en même temps.
APPRENTISSAGE DU SIGNAL DE TACH **OBLIGATOIRE **
Démarrer avec la clé, laisser
tourner le moteur au ralenti.
• Appuyer et tenir les boutons
Barrer et Débarrer.
• Relâcher les dès que les feux
de positions commencent à
clignoter.
Ceux-ci vont clignoter 6 fois,
faire une pause et clignoter une
dernière fois pour conrmer que
le signal de tach est perçu
correctement avec 1 coup de
klaxon* (mode automatique).
NOTE : Dans le cas d’une
transmission manuelle, ce
seront 6 coups de klaxon.
Mettre l’Ignition à Off.
STEP 1 - CODING AM / FM TRANSMITTERS
The system can store up to 3 different remote control codes in memory.
LED on the module and antenna are
ashing when the unit is power on.
Turn the Ignition On, press the
programming button once, you see
and hear 1 parking light and horn
conrmation, turn Ignition Off.
Turn Ignition back On, press the
programming button once, you see
and hear 2 parking light and horn
conrmations, turn Ignition Off.
Within one minute, turn Ignition On
and within 3 seconds tap the foot brake
3 times, the LED on the module and
the antenna will blink rapidly.
Press the Lock button of each transmitter
you want to code one after the other.
When the unit receives the transmitter
conrmation it will ash the parking lights
and sound the horn* each time.
Ignition Off.
STEP 2 - CODING ADDITIONAL TRANSMITTERS (with existing transmitter)
Press Unlock button of the existing
transmitters.
Repeat step 4, 5 & 6 of the above
section.
NOTE :
Everytime you re-code a new transmitter
you must code all existing transmitters in
the same time or the older transmitters will
be bumped off for security reason
TACH LEARNING ** MANDATORY **
Key Start / LED stays solid.
• Press and hold the Lock +
Unlock buttons on the re-
mote transmitter until the
parking lights start ashing.
• Then re-lease the buttons.
Parking lights will ash 6 times,
pause and 1 time if the tach si-
gnal is read correctly. You will
then hear 1 horn conrmation* (if
horn wire is connected). The tach
is programmed
NOTE : in manual transmission
mode the process will be the
same, except of 1 horn conr-
mation, you will hear 6 horn
conrmation
Ignition Off
IGN
IGN
IGN
IGN
IGN
IGN
OFF
OFF
OFF
OFF
OFF
OFF
OFF
OFF
1
1
1
1
1
1
2
2
3
3
4
4
4
4
5
5
6
6
2
2
2
2
3
3
3
3
x1
x1
x1
x1
1 min
1 min
x3
x3
*Optionel
*Optional
*Optionel
*Optional
x1
x1
RF612 AIR
Remote Start for Push Start Vehicle
Range Extender 1 Way / 2 Way

GUIDE D’INSTALLATION RF612 AIR
INSTALLATION GUIDE RF612 AIR
CONTOURNEMENT DE L’ALARME / MODE VOITURIER (VALET)
Tourner la clé de contact à la position
On et en moins de 6 sec.
Tenir le bouton de programmation.
L’alarme et l’anti-démarreur seront mis
hors-fonction (advenant la perte ou
le mauvais fonctionnement de la télécom-
mande). La sirène ou le klaxon arrêtera de
sonner.
Le DEL restera allumé pendant 5 sec
et s’éteindra pendant 5 sec et ainsi de
suite.
Pour annuler, répéter les étapes 1 et 2 précédentes. Deux piaulements et
deux clignotements conrmeront que l’opération est réussie.
POUR PROGRAMMER LES OPTIONS
Appuyer une fois sur le bouton Unlock
(Débarrer) de la manette déjà codée.
Mettre l’Ignition à On et à Off.
Tenir sur le bouton de programmation
jusqu’à ce que les feux de positions et
le klaxon se manifestent, puis relâcher
(approximativement 5 secondes).
Appuyer sur le bouton Lock
pour choisir la table 1, Unlock
pour la 2, Mute
Aux (Silence) pour la 3
et Start
pour la 4.
Une fois que la table est choisie, appuyer le
bouton de programmation le nombre de
fois équivalent à l’option choisie. Les feux de
position et le klaxon* se manifestent à
chaque fois que le bouton est appuyé.
Appuyer sur les boutons de la manette
selon l’option choisie.
POUR PASSER D’UNE TABLE À UNE AUTRE
Répéter les points 3, 4, 5 & 6 ci-haut
POUR SORTIR DU MODE DE PROGRAMMATION **OBLIGATOIRE**
Répéter les points 2 & 3 ci-haut.Les feux de stationnement vont clignoter 5 fois pour n de conrmation.
OVERRIDE / VALET / EMERGENCY
Turn the key to Ign On & within 6 sec. Press & hold the programming button.
Siren or horn will stop sounding, alarm and
starter kill will be cancelled instantly in case
of lost or malfunction of the transmitter.
The LED will stay On then Off in a cycle
of 5 seconds.
To reactivate the alarm function, repeat step 1 and 2 . System will chirp Twice (2)
with 2 parking light ash to conrm.
GET IN PROGRAMMING OPTIONS
Press Unlock once.
Turn Ign On then Off.
Hold the programming button until
5 chirps or ashes
Press Lock
for table 1, Unlock
for table 2, Mute
Aux or Option for
table 3 and Start
for table 4.
Once a table is selected, press programming
button the number of times to the chosen
option.
Press remote button accordingly to the
selected feature
TO SELECT ANOTHER TABLE
Repeat points 3, 4, 5 & 6
TO EXIT PROGRAMMING ** MANDATORY **
Repeat points 2 & 3. Parking lights will ash 5 times to conrm the end of the operation.
GUIDE
Ouvrir idatalink.com/rs, cliquer sur Véhicules couverts pour s’assurer que le logiciel couvre la liste de
véhicules voulus
Choisir Programmer votre module,
programmer par véhicule et choisir
la marque de voiture, le modèle et
l’année.
Dans Choisissez une installation,
choisir Converteur/Récepteur-RF.
Dans Choisissez un dispositif, choisir
DSE et choisir Modèle RF612.
INSTALLATION GUIDE
Go to idatalink.com /rs , check the Vehicle Coverage to make sure the RF iDatalink rmware is
available for the car you are working on
Flash your bypass module, Flash by
vehicle and select your car make,
model and year. In the Select an install,
choose the RF-Converter / Receiver.
In the Select a device, choose DSE.
In the Select product, choose RF-612
In the Select an installation mode,
choose DSE- RF Kit
IGN
IGN
IGN
IGN
OFF
OFF
1
1
1
1
1
1
4
4
4
4
2
2
2
2
2
2
5
5
5
5
6
6
3
3
3
3
3
3
Version 612A-1
Version 612A-1

GUIDE D’INSTALLATION RF612 AIR
INSTALLATION GUIDE RF612 AIR
Version 612A-1
Version 612A-1
TABLE 1 FONCTIONS
DÉFAUT
APPUYER SUR LOCK
APPUYER SUR UNLOCK
APPUYER
SUR 3
e
BOUTON
APPUYER SUR START
1.01
Réinitialisation Dernières préférences Préférences par défaut
1.02
Temps de marche 20 minutes 15 minutes 10 minutes 3 minutes
1.03
Démarrage de nuit 6 minutes 10 minutes 15 minutes 20 minutes
1.04
Verrouillage par ign/frein Désactivé Activé Unlock seulement Lock seulement
1.05
Impulsion déverrouillage 1 fois 2 fois Unlock
1.06
Mode antidémarreur Actif (détecte ignition) Passif (détecte ignition)
1.07
Mode alarme Désactivé Activé
1.08
Passif (automatique) Désactivé Activé Toujours activé
1.09
Avec ou sans verrouillage Sans Avec
1.10
N/A
1.11
Clignotement du Del Activé Désactivé
1.12
N/A
1.13
Diagnostique alarme Sélectionné Relevé des 6 derniers événements, voir annexes
1.14
Diagnostique démarreur Sélectionné Relevé des 6 derniers événements, voir annexes
1.15
Mode démarrage Normal
*Quick start
*Quick Start avec tach
TABLE 2 FONCTIONS
DÉFAUT
APPUYER SUR LOCK
APPUYER SUR UNLOCK
APPUYER
SUR 3
e
BOUTON
APPUYER SUR START
2.01
Impulsion de valise Impulsion standard
2.02
Porte coulissante aux 2 Impulsion standard
2.03
Porte coulissante aux 1 Impulsion standard
2.04
Enclenchement Valise Démarrage
2.05
Valet/contournement Par bouton poussoir 6 fois pédale de frein
2.06
Type de carburant Gaz Diesel (voir 2.07)
2.07
Sélection mode Diesel Minuterie Bougie de préchauffage
2.08
Durée de retardement 8 sec 12 sec 15 sec 20 sec
2.09 Verrouillage des portes après démarrage Désactivé Activé
Activé après démarrage
seulement
2.10
Tentative de démarrage 1 essai
*2 essais *3 essais
2.11 *Mode turbo *45 sec *60 sec *90 sec *120 sec
2.12
Sélection sorties AUX Valise Portes coulissantes et valise
2.13
N/A
2.14
Détection entrée de valise pour
transmission manuelle
Hors fonction En fonction
TABLE 3 FONCTIONS
DÉFAUT
APPUYER SUR LOCK
APPUYER SUR UNLOCK
APPUYER
SUR 3
e
BOUTON
APPUYER SUR START
3.01 Sélection Klaxon Klaxon
3.02 Durée Klaxon Défaut Allongé Allongé -3ms Allongé +3ms
3.03 Conrmation Klaxon Activé Activé au 2e Lock Muet complet
Muet seulement
sur UNLOCK
3.04 Conrmation sonore au démarrage Désactivé Activé
3.05 Choix du bouton Start Standard
Appuyer Lock
et après Start
Appuyer 2 fois Start
3.06 Rebarrage sécuritaire
Activé avec
mode Alarme
Désactivé avec
mode Alarme
Activé sans alarme
(entrée de porte doit
être connecté)
3.07 Impulsion avant ignition 1.5 sec 0.5 sec 3 sec
3.08
Mode voiturier par ignition
Seulement quand système est désarmé
Désactivé Activé Ignition On 5 Fois
3.09
*Réglage du mode transmission manuelle
*Moteur arrêté à la
fermeture de porte
*Moteur arrêté par télécom-
mande avec délai de 2 min
*10 sec délai après
fermeture des portes
*20 sec délai après
fermeture de porte
3.10 *Réglage du mode transmission manuelle *Avec verrouillage des portes *Sans verrouillage
3.11 Débarrer prioritaire porte conducteur Désactivé Activé Utilisé seulement avec RS232 Data Port
3.12 Choix sortie Passkey Sécuritaire Non sécuritaire Utilisé seulement avec RS232 Data Port
3.13 Débarrer portière démarrage à dist. Hors fonction En fonction Utilisé seulement avec RS232 Data Port
3.14 *Réglage manuel d’activation du démarrage *Démarrage standard *Surdémarrage +2 sec
TABLE 4 FONCTIONS
DÉFAUT
APPUYER SUR LOCK
APPUYER SUR UNLOCK
APPUYER
SUR 3
e
BOUTON
APPUYER SUR START
4.01
Sélection de la sortie du Passkey Passkey standard Passkey négatif en conduisant
4.02
Sélection sortie réarmement 2003 GM Hors fonction
Téléverrouillage avec le moteur
en marche
4.03
Ignorer le plafonnier 60 sec Désactivé Activé
4.04
Diagnostique du plafonnier 4 coups Activé Désactivé
4.05 *Choix du temps de crankage *Minimum .07 sec *Minimum 0.9 sec *Minimum 1.2 sec *Minimum 1.5 sec
4.06 *Choix du temps de crankage *Maximum 10 sec *Maximum 3.5 sec
4.07-08
N/A
4.09
Arrêt des feux de stationnement
après 3 minutes
Désactivé Activé
4.10
Sélection des fonctions du bouton
Option/ Silence
Muet Valise Arrêt
4.11-12-13
N/A
4.14
Pulse de réarmement Standard Avant pulse de verrouillage
4.15
Désarmer/Déverrouiller Standard Gwr + Ignition Gwr + Ignition + Acc Gwr + Acc
En choisissant *Quick Start, les fonctions avec une * ne seront pas valides (cancelées).
TABLE 1 FONCTIONS
DEFAULT
PRESS LOCK
PRESS UNLOCK PRESS 3
RD
BUTTON PRESS START
1.01
Reset Mode
Go to last setting Go to default setting
1.02
Running Time Mode
20 minutes 15 minutes 10 minutes 3 minutes
1.03
Cold Start Timer Mode
6 minutes 10 minutes 15 minutes 20 minutes
1.04
Ignition Lock / Foot Brake
Disable Enable Unlock only Lock only
1.05
Door Lock / Unlock Pulse
Single pulse Double pulse Unlock
1.06 Starter Kill Mode Active (detect ignition) Passive (detect ignition)
1.07 Alarm Mode Disable Enable
1.08 Last Door Arming Disable Enable All Time Enable
1.09 Last Door Arming Without door lock With door lock
1.10 N/A
1.11 LED ash Enable Disable
1.12 N/A
1.13 Diagnostic mode alarm Select This will reproduce the last 6 triggered zone events
1.14 Diagnostic mode for remote stater Select This will reproduce the last 6 start failure events
1.15 Remote start Standard *Quick start *Quick Start with tach
TABLE 2 FONCTIONS
DEFAULT
PRESS LOCK
PRESS UNLOCK PRESS 3
RD
BUTTON PRESS START
2.01 Trunk Pulse Regular pulse
2.02 Sliding Doors Aux 2 ( Mute 1.5 sec ) Regular pulse
2.03 Sliding Doors Aux 1 ( Unlock 1.5 sec ) Regular pulse
2.04 Trigger input Trunk Start
2.05 Valet / Override Via push button 6 times Foot Brake
2.06 Fuel Type Selection Gaz Diesel (go to 2.07)
2.07 Detection mode Timer Glow Plug
2.08 Diesel Timer Selection 8 sec 12 sec 15 sec 20 sec
2.09 When Remote Start Door Relock Disable Enable Enable after start only
2.10 Numbers of Tries for Start Attempt One try
*
Two tries
*
Three tries
2.11
*
Turbo mode timer adjustment
*
45 sec
*
60 sec
*
90 sec
*
120 sec
2.12 Auxiliary Output Selection Trunk release Sliding Doors & Trunk Enable
2.13 N/A
2.14
Trunk input detect for
manual transmission
Disable Enable
TABLE 3 FONCTIONS
DEFAULT
PRESS LOCK
PRESS UNLOCK PRESS 3
RD
BUTTON PRESS START
3.01 Horn / Siren Selection Horn
3.02 Horn Setting Default Extended Extended - 3ms Extended +3ms
3.03 Horn Conrmation Chirp Enable
Chirps only when lock
button is pressed a second time
Full mute Mute only on Unlock
3.04 Horn Ignition Monitor Disable Enable
3.05 Start Mode for TX Regular Start
Safe Start
Press Lock then Start
Safe Start
Press Start 2 Times
3.06 Safety Auto Relock Enable with Alarm mode Disable with Alarm mode
Enable with no alarm
(door input must be
connected)
3.07 Pulse Before Ignition 1.5 sec 0.5 sec 3 sec
3.08
Ignition Valet
when system is disarmed only
Disable
Enable
Ignition On 5 Times
3.09
*
Manual Transmission Setting
*
Automatic Shut Off
*
Shut Off by TX
with 2 min. Delay
*
10 sec delay after
door close
*
20 sec delay after
door close
3.10
*
Manual Transmission Setting
*
With door lock
*
Without door lock
3.11 Unlock Driver Door Disable Enable To be used only with RS232 Data Port
3.12 Passkey Output Selection Passkey Secure Non-Secure To be used only with RS232 Data Port
3.13 Protocol unlock while remote start Disable Enable To be used only with RS232 Data Port
3.14
*
Manual Setting Cranking
*
Standard Crank
*
Overcrank +2 sec
TABLE 4 FONCTIONS
DEFAULT
PRESS LOCK
PRESS UNLOCK PRESS 3
RD
BUTTON PRESS START
4.01 Passkey Output Passkey Standard Stay ground with ignition
4.02 Rearm Wire Output 2003 GM Disable
Enable to remote lock when
engine running
4.03 Domelight Bypass 60 sec. Disable Enable
4.04 Dome Diagnostic 4 Chirp Enable Disable
4.05
*
Crank Time Adjustments
*
Min cranking 0.7 sec
*
Min cranking 0.9 sec
*
Min cranking 1.2 sec
*
Min cranking 1.5 sec
4.06
*
Crank Time Adjustments
*
Max cranking 10 sec
*
Max cranking 3.5 sec
4.07-08 N/A
4.09 Parking light off after 3 min Disable Enable
4.10 Mute button selection Mute Trunk Stop
4.11-
12-13
N/A
4.14 Arm pulse Standard Before lock pulse
4.15 Disarm / Unlock Standard Gwr + Ignition Gwr + Ignition + Acc Gwr + Acc
By choosing *Quick Start, the functions with a * will not be valid.

GUIDE D’INSTALLATION RF612 AIR
INSTALLATION GUIDE RF612 AIR
SCHÉMA
DIAGRAM
Version 612A-1
Version 612A-1
6
7
8
9
10
11
6
7
8
9
10
11
1
2
3
4
5
1
2
3
4
5
1
No function
2
Programming switch
3
Black / Ground
Purple / Ground when running (GWR)
Blue / Ignition
Red / 12 V
4
ADS = with jumper
Fortin = no jumper
5
Am = with Jumper
Fm = no jumper
6
Telematic port for smart phone
7
RRS-232 Data port for ADS / Fortin by-pass
8
LED
9
Antenna Am / FM 2W
10
Black loop : Uncut = Manual transmission
Cut = Automatic transmission
11
Blue loop : To cut when starter kicks-in when key off
1
Pas de fonction
2
Bouton de programmation
3
Noir / Masse
Mauve / GWR
Bleu / Ignition
Rouge / 12 V
4
ADS = avec jumper
Fortin = sans jumper
5
Am = avec jumper
Fm = sans jumper
6
Port télématique pour téléphone intelligent
7
RS-232 Port Data pour module de contournement
ADS et Fortin
8
DEL
9
Antenne Am / FM 2W
10
Boucle noire : Intact = Manuelle
Coupée = Automatique
11
Boucle bleue : couper au cas où le démarreur donne
un coup en mettant la clé à la position d’arrêt.

RF612 AIR
Télédémarreur pour véhicule à bouton poussoir
Extension de portée uni et bidirectionnelle
Version 612A-1
Version 612A-1
GUIDE D’INSTALLATION
INSTALLATION GUIDE
ÉTAPE 1 - CODER LES MANETTES
Le module peut accepter jusqu’à 3 télécommandes en mémoire.
Dès que le module est alimenté
(branché), les DEL sur le module et
sur l’antenne (optionel) commencent
à clignoter.
Mettre l’Ignition à On, appuyer 1 fois
sur le bouton de programmation, un
clignotement et un coup de klaxon se
manifestent. Mettre l’Ignition à Off.
Mettre l’Ignition à On, appuyer 1 fois
sur le bouton de programmation,
2 clignotements et 2 coups de klaxon
se manifestent. Mettre l’Ignition à Off.
À l’intérieur d’une minute, mettre
l’Ignition à On, appuyer et relâcher
3 fois la pédale de frein, les DEL
conrment en clignotant rapidement.
Immédiatement appuyer sur le bouton
Lock (Barrer) de chacune des télécom-
mandes ( max 3 ), les feux de position ou
le klaxon * se manifestent pour conrmer
chacune des programmations.
Mettre l’Ignition à Off.
ÉTAPE 2 - CODER DES MANETTES ADDITIONNELLES
Appuyer une fois sur le bouton Débarrer
de la manette existante.
Répéter les points 4, 5 et 6 de l’étape
1 ci-dessus.
NOTE :
Lorsqu’une nouvelle manette est codée,
toutes les manettes existantes devront être
codées en même temps.
APPRENTISSAGE DU SIGNAL DE TACH **OBLIGATOIRE **
Démarrer avec la clé, laisser
tourner le moteur au ralenti.
• Appuyer et tenir les boutons
Barrer et Débarrer.
• Relâcher les dès que les feux
de positions commencent à
clignoter.
Ceux-ci vont clignoter 6 fois,
faire une pause et clignoter une
dernière fois pour conrmer que
le signal de tach est perçu
correctement avec 1 coup de
klaxon* (mode automatique).
NOTE : Dans le cas d’une
transmission manuelle, ce
seront 6 coups de klaxon.
Mettre l’Ignition à Off.
STEP 1 - CODING AM / FM TRANSMITTERS
The system can store up to 3 different remote control codes in memory.
LED on the module and antenna are
ashing when the unit is power on.
Turn the Ignition On, press the
programming button once, you see
and hear 1 parking light and horn
conrmation, turn Ignition Off.
Turn Ignition back On, press the
programming button once, you see
and hear 2 parking light and horn
conrmations, turn Ignition Off.
Within one minute, turn Ignition On
and within 3 seconds tap the foot brake
3 times, the LED on the module and
the antenna will blink rapidly.
Press the Lock button of each transmitter
you want to code one after the other.
When the unit receives the transmitter
conrmation it will ash the parking lights
and sound the horn* each time.
Ignition Off.
STEP 2 - CODING ADDITIONAL TRANSMITTERS (with existing transmitter)
Press Unlock button of the existing
transmitters.
Repeat step 4, 5 & 6 of the above
section.
NOTE :
Everytime you re-code a new transmitter
you must code all existing transmitters in
the same time or the older transmitters will
be bumped off for security reason
TACH LEARNING ** MANDATORY **
Key Start / LED stays solid.
• Press and hold the Lock +
Unlock buttons on the re-
mote transmitter until the
parking lights start ashing.
• Then re-lease the buttons.
Parking lights will ash 6 times,
pause and 1 time if the tach si-
gnal is read correctly. You will
then hear 1 horn conrmation* (if
horn wire is connected). The tach
is programmed
NOTE : in manual transmission
mode the process will be the
same, except of 1 horn conr-
mation, you will hear 6 horn
conrmation
Ignition Off
IGN
IGN
IGN
IGN
IGN
IGN
OFF
OFF
OFF
OFF
OFF
OFF
OFF
OFF
1
1
1
1
1
1
2
2
3
3
4
4
4
4
5
5
6
6
2
2
2
2
3
3
3
3
x1
x1
x1
x1
1 min
1 min
x3
x3
*Optionel
*Optional
*Optionel
*Optional
x1
x1
RF612 AIR
Remote Start for Push Start Vehicle
Range Extender 1 Way / 2 Way

GUIDE D’INSTALLATION RF612 AIR
INSTALLATION GUIDE RF612 AIR
CONTOURNEMENT DE L’ALARME / MODE VOITURIER (VALET)
Tourner la clé de contact à la position
On et en moins de 6 sec.
Tenir le bouton de programmation.
L’alarme et l’anti-démarreur seront mis
hors-fonction (advenant la perte ou
le mauvais fonctionnement de la télécom-
mande). La sirène ou le klaxon arrêtera de
sonner.
Le DEL restera allumé pendant 5 sec
et s’éteindra pendant 5 sec et ainsi de
suite.
Pour annuler, répéter les étapes 1 et 2 précédentes. Deux piaulements et
deux clignotements conrmeront que l’opération est réussie.
POUR PROGRAMMER LES OPTIONS
Appuyer une fois sur le bouton Unlock
(Débarrer) de la manette déjà codée.
Mettre l’Ignition à On et à Off.
Tenir sur le bouton de programmation
jusqu’à ce que les feux de positions et
le klaxon se manifestent, puis relâcher
(approximativement 5 secondes).
Appuyer sur le bouton Lock
pour choisir la table 1, Unlock
pour la 2, Mute
Aux (Silence) pour la 3
et Start
pour la 4.
Une fois que la table est choisie, appuyer le
bouton de programmation le nombre de
fois équivalent à l’option choisie. Les feux de
position et le klaxon* se manifestent à
chaque fois que le bouton est appuyé.
Appuyer sur les boutons de la manette
selon l’option choisie.
POUR PASSER D’UNE TABLE À UNE AUTRE
Répéter les points 3, 4, 5 & 6 ci-haut
POUR SORTIR DU MODE DE PROGRAMMATION **OBLIGATOIRE**
Répéter les points 2 & 3 ci-haut.Les feux de stationnement vont clignoter 5 fois pour n de conrmation.
OVERRIDE / VALET / EMERGENCY
Turn the key to Ign On & within 6 sec. Press & hold the programming button.
Siren or horn will stop sounding, alarm and
starter kill will be cancelled instantly in case
of lost or malfunction of the transmitter.
The LED will stay On then Off in a cycle
of 5 seconds.
To reactivate the alarm function, repeat step 1 and 2 . System will chirp Twice (2)
with 2 parking light ash to conrm.
GET IN PROGRAMMING OPTIONS
Press Unlock once.
Turn Ign On then Off.
Hold the programming button until
5 chirps or ashes
Press Lock
for table 1, Unlock
for table 2, Mute
Aux or Option for
table 3 and Start
for table 4.
Once a table is selected, press programming
button the number of times to the chosen
option.
Press remote button accordingly to the
selected feature
TO SELECT ANOTHER TABLE
Repeat points 3, 4, 5 & 6
TO EXIT PROGRAMMING ** MANDATORY **
Repeat points 2 & 3. Parking lights will ash 5 times to conrm the end of the operation.
GUIDE
Ouvrir idatalink.com/rs, cliquer sur Véhicules couverts pour s’assurer que le logiciel couvre la liste de
véhicules voulus
Choisir Programmer votre module,
programmer par véhicule et choisir
la marque de voiture, le modèle et
l’année.
Dans Choisissez une installation,
choisir Converteur/Récepteur-RF.
Dans Choisissez un dispositif, choisir
DSE et choisir Modèle RF612.
INSTALLATION GUIDE
Go to idatalink.com /rs , check the Vehicle Coverage to make sure the RF iDatalink rmware is
available for the car you are working on
Flash your bypass module, Flash by
vehicle and select your car make,
model and year. In the Select an install,
choose the RF-Converter / Receiver.
In the Select a device, choose DSE.
In the Select product, choose RF-612
In the Select an installation mode,
choose DSE- RF Kit
IGN
IGN
IGN
IGN
OFF
OFF
1
1
1
1
1
1
4
4
4
4
2
2
2
2
2
2
5
5
5
5
6
6
3
3
3
3
3
3
Version 612A-1
Version 612A-1

GUIDE D’INSTALLATION RF612 AIR
INSTALLATION GUIDE RF612 AIR
Version 612A-1
Version 612A-1
TABLE 1 FONCTIONS
DÉFAUT
APPUYER SUR LOCK
APPUYER SUR UNLOCK
APPUYER
SUR 3
e
BOUTON
APPUYER SUR START
1.01
Réinitialisation Dernières préférences Préférences par défaut
1.02
Temps de marche 20 minutes 15 minutes 10 minutes 3 minutes
1.03
Démarrage de nuit 6 minutes 10 minutes 15 minutes 20 minutes
1.04
Verrouillage par ign/frein Désactivé Activé Unlock seulement Lock seulement
1.05
Impulsion déverrouillage 1 fois 2 fois Unlock
1.06
Mode antidémarreur Actif (détecte ignition) Passif (détecte ignition)
1.07
Mode alarme Désactivé Activé
1.08
Passif (automatique) Désactivé Activé Toujours activé
1.09
Avec ou sans verrouillage Sans Avec
1.10
N/A
1.11
Clignotement du Del Activé Désactivé
1.12
N/A
1.13
Diagnostique alarme Sélectionné Relevé des 6 derniers événements, voir annexes
1.14
Diagnostique démarreur Sélectionné Relevé des 6 derniers événements, voir annexes
1.15
Mode démarrage Normal
*Quick start
*Quick Start avec tach
TABLE 2 FONCTIONS
DÉFAUT
APPUYER SUR LOCK
APPUYER SUR UNLOCK
APPUYER
SUR 3
e
BOUTON
APPUYER SUR START
2.01
Impulsion de valise Impulsion standard
2.02
Porte coulissante aux 2 Impulsion standard
2.03
Porte coulissante aux 1 Impulsion standard
2.04
Enclenchement Valise Démarrage
2.05
Valet/contournement Par bouton poussoir 6 fois pédale de frein
2.06
Type de carburant Gaz Diesel (voir 2.07)
2.07
Sélection mode Diesel Minuterie Bougie de préchauffage
2.08
Durée de retardement 8 sec 12 sec 15 sec 20 sec
2.09 Verrouillage des portes après démarrage Désactivé Activé
Activé après démarrage
seulement
2.10
Tentative de démarrage 1 essai
*2 essais *3 essais
2.11 *Mode turbo *45 sec *60 sec *90 sec *120 sec
2.12
Sélection sorties AUX Valise Portes coulissantes et valise
2.13
N/A
2.14
Détection entrée de valise pour
transmission manuelle
Hors fonction En fonction
TABLE 3 FONCTIONS
DÉFAUT
APPUYER SUR LOCK
APPUYER SUR UNLOCK
APPUYER
SUR 3
e
BOUTON
APPUYER SUR START
3.01 Sélection Klaxon Klaxon
3.02 Durée Klaxon Défaut Allongé Allongé -3ms Allongé +3ms
3.03 Conrmation Klaxon Activé Activé au 2e Lock Muet complet
Muet seulement
sur UNLOCK
3.04 Conrmation sonore au démarrage Désactivé Activé
3.05 Choix du bouton Start Standard
Appuyer Lock
et après Start
Appuyer 2 fois Start
3.06 Rebarrage sécuritaire
Activé avec
mode Alarme
Désactivé avec
mode Alarme
Activé sans alarme
(entrée de porte doit
être connecté)
3.07 Impulsion avant ignition 1.5 sec 0.5 sec 3 sec
3.08
Mode voiturier par ignition
Seulement quand système est désarmé
Désactivé Activé Ignition On 5 Fois
3.09
*Réglage du mode transmission manuelle
*Moteur arrêté à la
fermeture de porte
*Moteur arrêté par télécom-
mande avec délai de 2 min
*10 sec délai après
fermeture des portes
*20 sec délai après
fermeture de porte
3.10 *Réglage du mode transmission manuelle *Avec verrouillage des portes *Sans verrouillage
3.11 Débarrer prioritaire porte conducteur Désactivé Activé Utilisé seulement avec RS232 Data Port
3.12 Choix sortie Passkey Sécuritaire Non sécuritaire Utilisé seulement avec RS232 Data Port
3.13 Débarrer portière démarrage à dist. Hors fonction En fonction Utilisé seulement avec RS232 Data Port
3.14 *Réglage manuel d’activation du démarrage *Démarrage standard *Surdémarrage +2 sec
TABLE 4 FONCTIONS
DÉFAUT
APPUYER SUR LOCK
APPUYER SUR UNLOCK
APPUYER
SUR 3
e
BOUTON
APPUYER SUR START
4.01
Sélection de la sortie du Passkey Passkey standard Passkey négatif en conduisant
4.02
Sélection sortie réarmement 2003 GM Hors fonction
Téléverrouillage avec le moteur
en marche
4.03
Ignorer le plafonnier 60 sec Désactivé Activé
4.04
Diagnostique du plafonnier 4 coups Activé Désactivé
4.05 *Choix du temps de crankage *Minimum .07 sec *Minimum 0.9 sec *Minimum 1.2 sec *Minimum 1.5 sec
4.06 *Choix du temps de crankage *Maximum 10 sec *Maximum 3.5 sec
4.07-08
N/A
4.09
Arrêt des feux de stationnement
après 3 minutes
Désactivé Activé
4.10
Sélection des fonctions du bouton
Option/ Silence
Muet Valise Arrêt
4.11-12-13
N/A
4.14
Pulse de réarmement Standard Avant pulse de verrouillage
4.15
Désarmer/Déverrouiller Standard Gwr + Ignition Gwr + Ignition + Acc Gwr + Acc
En choisissant *Quick Start, les fonctions avec une * ne seront pas valides (cancelées).
TABLE 1 FONCTIONS
DEFAULT
PRESS LOCK
PRESS UNLOCK PRESS 3
RD
BUTTON PRESS START
1.01
Reset Mode
Go to last setting Go to default setting
1.02
Running Time Mode
20 minutes 15 minutes 10 minutes 3 minutes
1.03
Cold Start Timer Mode
6 minutes 10 minutes 15 minutes 20 minutes
1.04
Ignition Lock / Foot Brake
Disable Enable Unlock only Lock only
1.05
Door Lock / Unlock Pulse
Single pulse Double pulse Unlock
1.06 Starter Kill Mode Active (detect ignition) Passive (detect ignition)
1.07 Alarm Mode Disable Enable
1.08 Last Door Arming Disable Enable All Time Enable
1.09 Last Door Arming Without door lock With door lock
1.10 N/A
1.11 LED ash Enable Disable
1.12 N/A
1.13 Diagnostic mode alarm Select This will reproduce the last 6 triggered zone events
1.14 Diagnostic mode for remote stater Select This will reproduce the last 6 start failure events
1.15 Remote start Standard *Quick start *Quick Start with tach
TABLE 2 FONCTIONS
DEFAULT
PRESS LOCK
PRESS UNLOCK PRESS 3
RD
BUTTON PRESS START
2.01 Trunk Pulse Regular pulse
2.02 Sliding Doors Aux 2 ( Mute 1.5 sec ) Regular pulse
2.03 Sliding Doors Aux 1 ( Unlock 1.5 sec ) Regular pulse
2.04 Trigger input Trunk Start
2.05 Valet / Override Via push button 6 times Foot Brake
2.06 Fuel Type Selection Gaz Diesel (go to 2.07)
2.07 Detection mode Timer Glow Plug
2.08 Diesel Timer Selection 8 sec 12 sec 15 sec 20 sec
2.09 When Remote Start Door Relock Disable Enable Enable after start only
2.10 Numbers of Tries for Start Attempt One try
*
Two tries
*
Three tries
2.11
*
Turbo mode timer adjustment
*
45 sec
*
60 sec
*
90 sec
*
120 sec
2.12 Auxiliary Output Selection Trunk release Sliding Doors & Trunk Enable
2.13 N/A
2.14
Trunk input detect for
manual transmission
Disable Enable
TABLE 3 FONCTIONS
DEFAULT
PRESS LOCK
PRESS UNLOCK PRESS 3
RD
BUTTON PRESS START
3.01 Horn / Siren Selection Horn
3.02 Horn Setting Default Extended Extended - 3ms Extended +3ms
3.03 Horn Conrmation Chirp Enable
Chirps only when lock
button is pressed a second time
Full mute Mute only on Unlock
3.04 Horn Ignition Monitor Disable Enable
3.05 Start Mode for TX Regular Start
Safe Start
Press Lock then Start
Safe Start
Press Start 2 Times
3.06 Safety Auto Relock Enable with Alarm mode Disable with Alarm mode
Enable with no alarm
(door input must be
connected)
3.07 Pulse Before Ignition 1.5 sec 0.5 sec 3 sec
3.08
Ignition Valet
when system is disarmed only
Disable
Enable
Ignition On 5 Times
3.09
*
Manual Transmission Setting
*
Automatic Shut Off
*
Shut Off by TX
with 2 min. Delay
*
10 sec delay after
door close
*
20 sec delay after
door close
3.10
*
Manual Transmission Setting
*
With door lock
*
Without door lock
3.11 Unlock Driver Door Disable Enable To be used only with RS232 Data Port
3.12 Passkey Output Selection Passkey Secure Non-Secure To be used only with RS232 Data Port
3.13 Protocol unlock while remote start Disable Enable To be used only with RS232 Data Port
3.14
*
Manual Setting Cranking
*
Standard Crank
*
Overcrank +2 sec
TABLE 4 FONCTIONS
DEFAULT
PRESS LOCK
PRESS UNLOCK PRESS 3
RD
BUTTON PRESS START
4.01 Passkey Output Passkey Standard Stay ground with ignition
4.02 Rearm Wire Output 2003 GM Disable
Enable to remote lock when
engine running
4.03 Domelight Bypass 60 sec. Disable Enable
4.04 Dome Diagnostic 4 Chirp Enable Disable
4.05
*
Crank Time Adjustments
*
Min cranking 0.7 sec
*
Min cranking 0.9 sec
*
Min cranking 1.2 sec
*
Min cranking 1.5 sec
4.06
*
Crank Time Adjustments
*
Max cranking 10 sec
*
Max cranking 3.5 sec
4.07-08 N/A
4.09 Parking light off after 3 min Disable Enable
4.10 Mute button selection Mute Trunk Stop
4.11-
12-13
N/A
4.14 Arm pulse Standard Before lock pulse
4.15 Disarm / Unlock Standard Gwr + Ignition Gwr + Ignition + Acc Gwr + Acc
By choosing *Quick Start, the functions with a * will not be valid.

GUIDE D’INSTALLATION RF612 AIR
INSTALLATION GUIDE RF612 AIR
SCHÉMA
DIAGRAM
Version 612A-1
Version 612A-1
6
7
8
9
10
11
6
7
8
9
10
11
1
2
3
4
5
1
2
3
4
5
1
No function
2
Programming switch
3
Black / Ground
Purple / Ground when running (GWR)
Blue / Ignition
Red / 12 V
4
ADS = with jumper
Fortin = no jumper
5
Am = with Jumper
Fm = no jumper
6
Telematic port for smart phone
7
RRS-232 Data port for ADS / Fortin by-pass
8
LED
9
Antenna Am / FM 2W
10
Black loop : Uncut = Manual transmission
Cut = Automatic transmission
11
Blue loop : To cut when starter kicks-in when key off
1
Pas de fonction
2
Bouton de programmation
3
Noir / Masse
Mauve / GWR
Bleu / Ignition
Rouge / 12 V
4
ADS = avec jumper
Fortin = sans jumper
5
Am = avec jumper
Fm = sans jumper
6
Port télématique pour téléphone intelligent
7
RS-232 Port Data pour module de contournement
ADS et Fortin
8
DEL
9
Antenne Am / FM 2W
10
Boucle noire : Intact = Manuelle
Coupée = Automatique
11
Boucle bleue : couper au cas où le démarreur donne
un coup en mettant la clé à la position d’arrêt.
-
 1
1
-
 2
2
-
 3
3
-
 4
4
-
 5
5
-
 6
6
-
 7
7
-
 8
8


DSE RF612 AIR Guide d'installation
- Catégorie
- Systèmes vidéo de voiture
- Taper
- Guide d'installation
dans d''autres langues
- English: DSE RF612 AIR Installation guide
Documents connexes
Autres documents
-
 AstroStart RS-614XR Manuel utilisateur
-
 AstroStart RSS-5325 Le manuel du propriétaire
-
Orbit OB-3681 Le manuel du propriétaire
-
 Autostart GS-2471TW Le manuel du propriétaire
-
Directed Electronics PS-3655E-FM Manuel utilisateur
-
 Intratone 12-0113 Guide d'installation
-
Orbit OB-2482 Le manuel du propriétaire
-
 PolarStart GS-1875FM Manuel utilisateur
-
Fortin Evo One T-HARNAIS CHR 5 Manuel utilisateur
-


