Britax KIDFIX Le manuel du propriétaire
- Catégorie
- Sièges de voiture
- Taper
- Le manuel du propriétaire

-1-
G
B
N
L
F
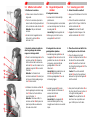
User instructions
We are pleased that our RÖMER
KIDFIX may accompany your child
safely through a new stage of his or
her life.
In order to protect your child
correctly, the RÖMER KIDFIX must
always be used and installed as
described in these instructions.
If you have any further questions
regarding its use, please feel free to
contact us.
BRITAX RÖMER
Kindersicherheit GmbH
Contents
1. Suitability .......................................2
2. Use in the vehicle ..........................3
2.1 with the KIDFIX locking arms
into the ISOFIX fastening points
in the vehicle (semi-universal) 4
2.2 with the vehicle's 3-point
seatbelt (universal) ..................5
3. Adjusting the child seat ................6
3.1 Adjusting the height of the
headrest ..................................7
3.2 Reclining position of the
backrest ...................................8
4. Installation in the vehicle .............9
4.1 Fastening with the KIDFIX
locking arms ..........................10
4.2 Removal with KIDFIX locking
arms ......................................13
4.3 Making sure that the child seat
with the KIDFIX locking arms is
installed correctly ..................14
4.4 Fastening with the vehicle's
3-point seatbelt ......................14
Gebruiksaanwijzing
Gefeliciteerd met de aankoop van de
RÖMER KIDFIX: de juiste keuze om
uw kind veilig door een nieuwe
levensfase te begeleiden.
De RÖMER KIDFIX moet voor een
juiste bescherming van uw kind
altijd zo worden gebruikt en
gemonteerd als in deze
gebruiksaanwijzing beschreven.
Als u nog vragen hebt over het
gebruik, neem dan contact met ons
op.
BRITAX RÖMER
Kindersicherheit GmbH
Inhoud
1. Geschiktheid ................................ 2
2. Gebruik in de auto ........................3
2.1 Met de KIDFIX-
bevestigingsarmen aan de
ISOFIX-bevestigingspunten in
de auto (semi-universeel) ......4
2.2 Met de driepuntsgordel van
de auto (universeel) ...............5
3. Het kinderzitje afstellen ...............6
3.1 Instelling van de hoogte van de
hoofdsteun .............................7
3.2 Ruststand van de rugleuning .8
4. Inbouw in de auto..........................9
4.1 Bevestiging met de KIDFIX-
bevestigings-armen ..............10
4.2 Uitbouw met KIDFIX-
bevestigingsarmen ...............13
4.3 Zo is het autokinderzitje met de
KIDFIX-bevestigingsarmen juist
ingebouwd ............................14
4.4 Bevestigen met de
driepuntsgordel van de auto 14
Mode d'emploi
Nous sommes heureux que notre
RÖMER KIDFIX puisse accompagner
votre enfant en toute sécurité pendant
un nouveau chapitre de sa vie.
Pour protéger efficacement votre
enfant, le RÖMER KIDFIX doit
impérativement être utilisé et
installé de la manière décrite dans
le présent mode d’emploi.
Pour toute question complémentaire,
ne pas hésiter à nous contacter.
BRITAX RÖMER
Kindersicherheit GmbH
Table des matières
1. Habilitation .....................................2
2. Utilisation dans le véhicule ..........3
2.1 avec les bras d'enclenchement
KIDFIX sur les points de fixation
ISOFIX dans le véhicule
(semi-universel) ......................4
2.2 avec la ceinture à 3 points du
véhicule (universel) .................5
3. Réglage du siège enfant ...............6
3.1 Réglage en hauteur de
l'appui-tête ...............................7
3.2 Position de couchage du
dossier ....................................8
4. Montage dans le véhicule .............9
4.1 Fixation des bras
d'enclenchement KIDFIX ......10
4.2 Démontage des bras
d'enclenchement KIDFIX ......13
4.3 Montage correct de votre siège
enfant avec les bras
d'enclenchement KIDFIX ......14
4.4 Fixation avec la ceinture à 3
points du véhicule .................14
RÖMER KIDFIX

N
L
G
B
F
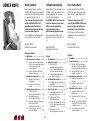
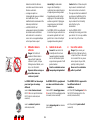
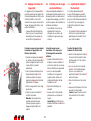
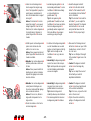
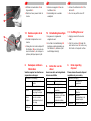
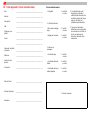
1. Suitability
Certification
*ECE = European Standard for Safety
Equipment
• The child safety seat has been
designed, tested and certified to the
requirements of the European
Standard for Child Safety
Equipment (ECE R 44/04). The seal
of approval E (in a circle) and the
approval number are located on the
approval label (sticker on the child
safety seat).
• The RÖMER KIDFIX has been
tested and approved as a
combination of seat cushion and
backrest.
RÖMER
Child safety
seat
Tested and certified
according to
ECE* R 44/04
Group Body weight
KIDFIX ll+lll 15 to 36 kg
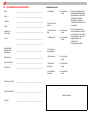
1. Geschiktheid
Goedkeuring
*ECE = Europese norm voor
veiligheidsuitrusting
• Het autokinderzitje is ontworpen,
gecontroleerd en goedgekeurd
overeenkomstig de eisen in de
Europese norm voor
veiligheidsvoorzieningen voor
kinderen (ECE R 44/04). Het
keurmerk E (in een rondje) en het
goedkeuringsnummer bevinden
zich op het goedkeuringslabel
(sticker op het autokinderzitje).
• De RÖMER KIDFIX is als
combinatie van zitkussen en
rugleuning getest en goedgekeurd.
RÖMER
autokinder-
zitje
Controle en goedkeuring
conform ECE* R 44/04
Groep Lichaamsgewicht
KIDFIX ll+lll 15 t/m 36 kg
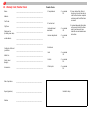
1. Habilitation
Homologation
*ECE = norme européenne pour les
équipements de sécurité
• Le siège auto est conçu, contrôlé et
homologué conformément aux
exigences de la norme européenne
pour les équipements de sécurité
pour enfants (ECE R 44/04). Le
signe de contrôle E (dans un cercle)
et le numéro d’homologation se
trouvent sur l’étiquette
d’homologation (autocollant sur le
siège auto).
• Le RÖMER KIDFIX est testé et
homologué en tant que combinaison
de coussin d'assise et de dossier.
Attention !
Aucun des deux
RÖMER
Siège auto
Examen et homologation
selon ECE* R 44/04
Groupe Poids
KIDFIX ll+lll 15 à 36 kg
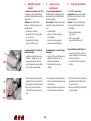
5. Securing your child in the
vehicle ..........................................15
5.1 Securing your child ................16
5.2 Checklist to ensure that your
child is buckled up correctly ..18
6. Using the drink holder ................19
7. Care instructions .........................20
7.1 Cleaning ................................20
7.2 Removing the cover ..............21
7.3 Re-fitting the cover ................22
8. Notes regarding disposal 2...........2
9. 2-year warranty ............................23
10. Warranty Card / Transfer Check 27
5. Beveiliging van uw kind in de
auto .............................................15
5.1 De gordel bij uw kind omdoen 16
5.2 Zo is uw kind goed beveiligd 18
6. Gebruik van de bekerhouder ....19
7. Onderhoudshandleiding ............20
7.1 Reiniging ..............................20
7.2 De bekleding verwijderen .....21
7.3 De bekleding bevestigen ......22
8. Instructies voor de afvoer .........22
9. 2 jaar garantie .............................23
10. Garantiekaart/overdrachts
controle .......................................26
5. Protection de votre enfant
dans le véhicule ..........................15
5.1 Attacher votre enfant .............16
5.2 Voici comment votre enfant
est bien protégé ....................18
6. Utilisation du porte-gobelet .......19
7. Consignes d’entretien ................20
7.1 Nettoyage ..............................20
7.2 Retrait de la housse ..............21
7.3 Remise en place de la
housse ..................................22
8. Remarques relatives à
l’élimination .................................22
9. 2 ans de garantie .........................23
10. Carte de garantie /
Procès-verbal de remise ............25

-3-
G
B
N
L
F
Caution! Neither of these two parts
may be used in combination with
other seat cushions or backrests.
• This approval shall be invalidated if
you make any modifications to the
child safety seat. No modifications
may be made to the child safety
seat other than by the
manufacturer.
• Use the RÖMER KIDFIX
exclusively for securing your child in
your vehicle. It is in no way suitable
as a seat or toy in the home.
2. Use in the vehicle
Danger! If you secure your
child in the child seat with only
a 2-point belt, then in the event
of an accident this may cause
serious injuries to your child,
possibly resulting in death.
Never use it in combination
with a 2-point belt!
The RÖMER KIDFIX is approved for
two different methods of
installation:
with the KIDFIX locking arms 15 into
the ISOFIX fastening points in the
vehicle (semi-universal).
with the vehicle's 3-point seatbelt
(universal)
Voorzichtig! De beide delen
mogen niet afzonderlijk in
combinatie met andere zitkussens
of rugleuningen worden gebruikt.
• De goedkeuring vervalt zodra er
wijzigingen in het autokinderzitje
worden aangebracht. Wijzigingen
mogen alleen door de fabrikant
worden uitgevoerd.
• De RÖMER KIDFIX mag uitsluitend
ter bescherming van uw kind in de
auto worden gebruikt. Het is niet
geschikt om in huis als stoeltje of
speelgoed te worden gebruikt
2. Gebruik in de auto
Gevaar! Als uw kind in het
kinderzitje slechts met een
tweepuntsgordel is beveiligd,
dan kan het daardoor bij een
ongeval zwaar gewond of zelfs
gedood worden.
Nooit in combinatie met een
tweepuntsgordel gebruiken!
De RÖMER KIDFIX is goedgekeurd
voor twee verschillende soorten
inbouw:
met de KIDFIX-bevestigingsarmen
15 aan de ISOFIX-bevestigingspunten
in de auto (semi-universeel).
met de driepuntsgordel van de auto
(universeel)
éléments ne doit être utilisé en
association avec d'autres coussins
d'assise ou dossiers.
• Le siège auto perd son
homologation dès que vous réalisez
des modifications. Toute
modification doit exclusivement être
réalisée par le fabricant.
• Le RÖMER KIDFIX est
exclusivement réservé à l’installation
sécuritaire de votre enfant dans
votre véhicule. Il ne convient en
aucun cas à un usage domestique
en tant que chaise ou jouet.
2. Utilisation dans le
véhicule
Danger ! Si l'enfant est
seulement attaché dans le
siège enfant à l'aide d'une
ceinture à 2 points, il risque
d'être gravement blessé, voire
tué, en cas d'accident.
Ne jamais utiliser ce siège en
association avec une
ceinture à 2 points !
Le RÖMER KIDFIX est homologué
pour deux types de montage
différents:
avec les bras d'enclenchement
KIDFIX 15 sur les points de fixation
ISOFIX dans le véhicule (semi
universel).
avec la ceinture à 3 points du
véhicule (universel)

N
L
G
B
F
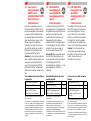
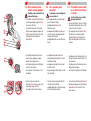
2.1 with the KIDFIX
locking arms into
the ISOFIX
fastening points in the
vehicle
(semi-universal)
The additional fastening system with
the KIDFIX locking arms is based on
semi-universal approval. The seat
may be used only in those vehicles
cited in the enclosed vehicle type list.
This type list is constantly updated.
The latest version can be obtained
from us or from www.britax-roemer.de.
Caution! In the listed vehicles we
cannot always guarantee fastening
with KIDFIX locking arms for all body
heights. Please observe the
instructions in the type list.
You can use your child car seat as
follows:
(Please observe the regulations applicable to
your particular country).
1) Use is permitted on a rearward-facing vehicle
seat (e.g. in a van or minibus) only if the vehicle
seat is also approved for use by adults. The seat
may not be in the area of effect of an airbag.
3) If there is a front airbag: slide back all the way
or nearly so, observe any instructions in vehicle
owner's manual.
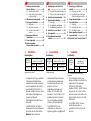
in the direction of travel yes
against the direction of travel no 1)
on seats featuring:
ISOFIX fastening points
(between seat surface and
backrest)
yes 3)
2.1 Met de KIDFIX-
bevestigingsarm
en aan de ISOFIX-
bevestigingspunten in
de auto
(semi-universeel)
De extra bevestiging met de KIDFIX-
bevestigingsarmen is mogelijk dankzij
een goedkeuring voor semi-universele
toepassing. Het zitje mag alleen
worden gebruikt in auto's die in de
bijgevoegde lijst met autotypen
worden vermeld. Deze typelijst wordt
continu bijgewerkt. De meest actuele
versie kunt u bij ons aanvragen of
vindt u op www.britax-roemer.de.
Voorzichtig! Bij de genoemde auto's
komt het voor dat wij niet voor alle
lichaamsgrootten kunnen garanderen
dat bevestiging met KIDFIX-
bevestigingsarmen mogelijk is. Let op
de aanwijzingen in de lijst met
autotypen.
Het autokinderzitje kan als volgt
worden gebruikt:
(Houd u aan de in uw land geldende
voorschriften.)
1) Het gebruik is alleen toegestaan op een
achterwaarts gerichte zitplaats (bijv. bus,
minibus) die ook voor het vervoer van
volwassenen is toegestaan. Er mag op deze
zitplaats geen airbag aanwezig zijn.
3) bij airbag voorin: ver naar achteren schuiven,
evt. de instructies in het handboek van uw auto
in acht nemen.
in de rijrichting ja
tegen de rijrichting in nee 1)
op stoelen met:
ISOFIX-bevestigingspunten
(tussen zitting en rugleuning)
ja 3)
2.1 avec les bras
d'enclenchement
KIDFIX sur les
points de fixation ISOFIX
dans le véhicule
(semi-universel)
La fixation supplémentaire avec les
bras d'enclenchement KIDFIX se fait
via une homologation semi-universelle.
Le siège ne doit être utilisé que dans
les véhicules figurant dans la liste des
types de véhicules en annexe. Cette
liste des types est constamment
complétée. Pour obtenir la version la
plus récente, veuillez nous contacter
directement ou consulter notre site
Internet www.britax-roemer.de.
Attention !
Pour les véhicules figurant
dans cette liste, il peut arriver que nous
ne puissions pas assurer la fixation
avec bras d'enclenchement KIDFIX
pour toutes les tailles. Veuillez prêter
attention aux remarques portées sur la
liste.
Voici comment vous pouvez utiliser
le siège auto:
(Veuillez respecter les directives en vigueur
dans votre pays)
1) L'utilisation sur un siège dirigé dos à la route
(p. ex. van, minibus) n'est autorisée que si celui-
ci convient également au transport d'adultes. Ce
siège ne doit pas être protégé par un airbag.
3) Avec un airbag frontal : reculez le siège le
plus possible. Le cas échéant, respectez les
consignes contenues dans le manuel de votre
véhicule.
dans le sens de la marche oui
dans le sens contraire de la marche non 1)
sur les sièges avec: points de
fixation ISOFIX (entre la
surface d'assise et le dossier)
oui 3)

-5-
G
B
N
L
F
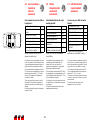
2.2 with the vehicle's
3-point seatbelt
(universal)
You can use your child car seat as
follows:
(Please observe the regulations
applicable to your particular country)
1) Use is permitted on a rearward-facing vehicle
seat (e.g. in a van or minibus) only if the vehicle
seat is also approved for use by adults. The seat
may not be in the area of effect of an airbag.
2) The safety belt must be approved to ECE R
16 or a comparable standard (see test label on
belt with an "E" or "e" in a circle).
3) If there is a front airbag: slide back all the way
or nearly so, observe any instructions in vehicle
owner's manual.
4) Cannot be used if the vehicle seat is
equipped with only a 2-point belt.
in the direction of travel yes
against the direction of travel no 1)
with 2-point belt no
with 3-point belt 2) yes
on front passenger seat yes 3)
on outer rear seat yes
on centre rear seat (with 3-
point belt)
yes 4)
2.2 Met de
driepuntsgordel
van de auto
(universeel)
Het autokinderzitje kan als volgt
worden gebruikt:
(Houd u aan de in uw land geldende
voorschriften.)
1) Het gebruik is alleen toegestaan op een
achterwaarts gerichte zitplaats (bijv. bus,
minibus) die ook voor het vervoer van
volwassenen is toegestaan. Er mag op deze
zitplaats geen airbag aanwezig zijn.
2) De gordel dient overeenkomstig ECE R 16 (of
een vergelijkbare norm) goedgekeurd te zijn. Dit
is bijv. herkenbaar aan de omcirkelde "E", "e" op
het controlelabel van de gordel.
3) bij airbag voorin: ver naar achteren schuiven,
evt. de instructies in het handboek van uw auto
in acht nemen.
4) Gebruik is niet mogelijk als er alleen een
tweepuntsgordel aanwezig is.
in de rijrichting ja
tegen de rijrichting in nee 1)
met tweepuntsgordel nee
met driepuntsgordel 2) ja
op de passagiersstoel ja 3)
op de achterbank aan de
buitenkant
ja
op de achterbank in het
midden (met driepuntsgordel)
ja 4)
2.2 avec la ceinture à
3 points du
véhicule
(universel)
Voici comment vous pouvez utiliser
le siège auto :
(Veuillez respecter les directives en
vigueur dans votre pays)
1) L'utilisation sur un siège dirigé dos à la route
(p. ex. van, minibus) n'est autorisée que si celui-
ci convient également au transport d'adultes. Ce
siège ne doit pas être protégé par un airbag.
2) La ceinture doit être homologuée selon ECE
R 16 (ou une norme comparable) ce qui est par
exemple signalé par la lettre "E", "e" insérée
dans un cercle et figurant sur l’étiquette de
contrôle de la ceinture.
3) Avec un airbag frontal : reculez le siège le
plus possible. Le cas échéant, respectez les
consignes contenues dans le manuel de votre
véhicule.
4) Utilisation impossible lorsqu’il n'existe qu'une
ceinture à 2 points.
dans le sens de la marche oui
dans le sens contraire de la
marche
non 1)
avec ceinture à 2 points non
avec ceinture à 3 points 2) oui
sur le siège passager oui 3)
sur les sièges arrière latéraux oui
sur le siège arrière central
(avec ceinture à 3 points)
oui 4)

N
L
G
B
F
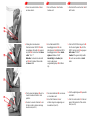
3. Adjusting the child seat
The child seat consists of a seat
cushion 1 and a backrest 2 with an
adjustable headrest 3. This
combination gives your child the
desired protection and comfort.
The backrest 2 is connected to the
seat cushion 1 by an articulated axis
4. The backrest 2 of the child seat can
be adjusted to any inclination of the
vehicle seat. Outside of the car the
backrest 2 is held vertically by a small
notch.
For your protection when
handling the child seat
• Do not use the child seat when it is
free standing, even to test it out.
Caution! The backrest 2 may tip
backward. Always place the child
seat on the vehicle seat before
having your child sit down in it.
• Danger! When swivelling up the
backrest 2, nothing must come
between the backrest 2 and the
seat cushion 1 in the area of the
articulated axis 4.
Caution! You or your child could
pinch your fingers, injuring them.
3. Het kinderzitje afstellen
Het kinderzitje bestaat uit een
zitkussen 1 en een rugleuning 2 met
instelbare hoofdsteun 3. Deze
combinatie biedt uw kind de gewenste
bescherming en comfort.
De rugleuning 2 is door middel van
een scharnieras 4 verbonden met het
zitkussen 1. De rugleuning 2 past zich
traploos aan de hellingshoek van de
autostoel aan. Buiten de auto wordt de
rugleuning 2 met een kleine grendel
verticaal gehouden.
Ter bescherming bij gebruik
van het kinderzitje
• Het kinderzitje mag nooit worden
gebruikt als dit niet is vastgezet -
ook niet om het uit te proberen.
Voorzichtig! De rugleuning 2 kan
naar achteren kantelen. Zet het
kinderzitje altijd eerst op de
autostoel voordat u uw kind erin
plaatst.
• Gevaar! Als de rugleuning 2 wordt
opgeklapt, mag zich in de buurt van
de scharnieras 4 niets tussen
rugleuning 2 en zitkussen 1
bevinden.
Voorzichtig! Uw vingers of die van
uw kind kunnen klem komen te
zitten en gewond raken.
3. Réglage du siège enfant
Le siège enfant se compose d'un
coussin d'assise 1 et d'un dossier 2 à
appuie-tête réglable 3. L'association
des deux éléments offre à votre enfant
la protection et le confort souhaités.
Le dossier 2 est relié au coussin
d'assise 1 au moyen d'un axe
d'articulation 4. Le dossier 2 s'adapte
en continu à l'inclinaison du siège du
véhicule. Le dossier 2 est maintenu en
position verticale par un petit
enclenchement lorsqu'il n'est pas
monté dans le véhicule.
Protection lors de la
manipulation d'un siège
enfant
• Le siège enfant ne doit jamais être
utilisé non installé, même pour
l’essayer.
Attention ! Le dossier 2 risque de
basculer vers l’arrière. Placez
toujours le siège enfant sur le siège
du véhicule avant d’y installer votre
enfant.
• Danger ! Lors du redressement du
dossier 2, aucun objet ne doit se
trouver dans la zone de l’axe
d'articulation 4 entre le dossier 2 et
le coussin d’assise 1.
Attention ! Vous ou votre enfant
risquez par ex. de vous coincer les
doigts ou de vous blesser.

-7-
G
B
N
L
F
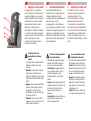
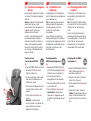
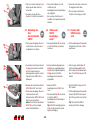
3.1 Adjusting the height of
the headrest
A correctly adjusted headrest 3
ensures that the diagonal seat belt
section 6 is optimally positioned, and
gives your child the desired protection
and comfort. You can engage the
height of the headrest 3 in eleven
positions.
• The headrest 3 must be adjusted so
that there is a space two fingers
wide between the headrest 3 and
your child's shoulders.
To adjust the height of the
headrest 3 to fit your child:
Þ Reach into the adjustment handle 8
on the back of the headrest 3 and
pull it upwards a bit. This unlocks
the headrest.
Þ You can now move the unlocked
headrest 3 to the desired height.
As soon as you release the
adjustment handle 8, the headrest 3
will lock into place.
Þ Place the child seat on the vehicle
seat.
Þ Have your child sit down in the child
seat and check the height.
Caution! Repeat this process until
the headrest 3 is at the optimal
height.
3.1 Instelling van de hoogte
van de hoofdsteun
Een goed afgestelde hoofdsteun 3
waarborgt de optimale positie van de
diagonale gordel 6, en biedt uw kind
de gewenste beveiliging en comfort. U
kunt de hoogte van de hoofdsteun 3 in
elf standen vastklikken.
• De hoofdsteun 3 moet zo zijn
afgesteld dat er tussen de
schouders van uw kind en de
hoofdsteun 3 nog twee vingers
ruimte is.
U kunt de hoogte van de
hoofdsteun 3 als volgt op de
lichaamsgrootte van uw kind
afstellen:
Þ Grijp de instelhendel 8 aan de
achterkant van de hoofdsteun 3
vast en trek deze iets naar boven.
Nu is de hoofdsteun ontgrendeld.
Þ U kunt nu de ontgrendelde
hoofdsteun 3 in de gewenste
hoogte instellen. Zodra u de
instelhendel 8 loslaat, klikt de
hoofdsteun 3 vast.
Þ Plaats het kinderzitje op de
autostoel.
Þ Laat uw kind in het kinderzitje
plaatsnemen en controleer de
hoogte.
Voorzichtig! Herhaal dit proces
totdat de hoofdsteun 3 optimaal is
afgesteld.
3.1 Réglage en hauteur de
l'appui-tête
Un réglage correct de l'appuie-tête 3
garantit le positionnement optimal de
la ceinture diagonale 6 et offre à votre
enfant la protection et le confort
souhaités. Vous pouvez enclencher la
hauteur de l'appuie-tête 3 dans onze
positions différentes :
• L'appuie-tête 3 doit être réglé de
façon à ce que l'on puisse passer
deux doigts entre les épaules de
votre enfant et l'appuie-tête 3.
Procédez comme suit pour adapter
la hauteur de l'appuie-tête 3 à la
taille de votre enfant :
Þ Saisissez la poignée de réglage 8
sur la face arrière de l'appuie-tête 3
et tirez-la légèrement vers le haut.
L'appui-tête est à présent
déverrouillé.
Þ Il est à présent possible de placer
l'appui-tête déverrouillé 3 à la
hauteur souhaitée. Dès que la
poignée de réglage 8 est relâchée,
l'appuie-tête 3 se bloque.
Þ Placez le siège enfant sur le siège
du véhicule.
Þ Faites s'asseoir votre enfant et
contrôlez la hauteur.
Attention ! Renouvelez cette
opération autant de fois que
nécessaire jusqu’à ce que le
réglage de l’appui-tête 3 soit
optimal.

N
L
G
B
F
3.2 Reclining position of the
backrest
The backrest 2 of the child seat can
be adjusted to any inclination of the
vehicle seat.
Tip! The backrest 2 is held vertically
by a small notch. Press the backrest 2
slightly to the rear to release the
notch.
Please note: Optimal protection is
guaranteed only if the vehicle seat is
in an upright position. The backrest 2
of the child seat can be moved
backwards into a reclining position
independently of the vehicle seat.
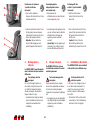
Fastening with the KIDFIX
locking arms 15:
Þ Fasten the RÖMER KIDFIX into the
ISOFIX fastening points 20, as
described in Chapter 4.1.
Þ Grasp the seat surface though the
access slot in the cover.
Þ Pull the adjusting lever 21 upwards
and hold it.
Þ Pull the seat cushion 1 forward.
Caution! The gap between the seat
cushion 1 and the backrest of the
vehicle seat must not be more than
8cm.
3.2 Ruststand van de
rugleuning
De rugleuning 2 van het kinderzitje
past zich traploos aan de hellingshoek
van de autostoel aan.
Tip! De rugleuning 2 wordt met een
kleine grendel verticaal gehouden.
Druk de rugleuning 2 iets naar
achteren om de grendel te
ontgrendelen.
Let op! De beste bescherming is
alleen gewaarborgd als de autostoel
rechtop staat. De rugleuning 2 van het
kinderzitje kan, onafhankelijk van de
autostoel, naar achteren in een
ruststand leunen.
Bevestiging met de
KIDFIX-bevestigingsarmen
15:
Þ Bevestig de RÖMER KIDFIX aan
de ISOFIX-bevestigingspunten 20,
als beschreven in hoofdstuk 4.1.
Þ Pak de zitting vast door de
toegangssleuf van de bekleding.
Þ Trek de instelhendel 21 naar boven
en houd deze vast.
Þ Trek het zitkussen 1 naar voren.
Voorzichtig! De spleet tussen
zitkussen 1 en rugleuning van de
autostoel mag niet breder zijn dan
8cm.
3.2 Position de couchage du
dossier
Le dossier 2 du siège enfant s'adapte
en continu à l'inclinaison du siège du
véhicule.
Astuce ! Le dossier 2 est maintenu en
position verticale par un petit
enclenchement. Poussez légèrement
le dossier 2 vers l'arrière pour
débloquer l'enclenchement.
À noter : La sécurité maximale n'est
garantie que lorsque le siège du
véhicule est en position verticale. Le
dossier 2 du siège enfant peut être
incliné vers l'arrière dans la position
de couchage, indépendamment du
siège du véhicule.
Fixation des bras
d'enclenchement KIDFIX
15:
Þ Fixez le RÖMER KIDFIX aux points
de fixation ISOFIX 20, comme
décrit au chapitre 4.1.
Þ Sur l'assise du siège, passez votre
main dans la fente prévue à cet
effet dans la housse.
Þ Tirez le levier de réglage 21 vers le
haut et maintenez-le dans cette
position.
Þ Tirez le coussin d'assise 1 vers
l'avant.
Attention ! La fente entre le
coussin d'assise 1 et le dossier du
siège du véhicule ne doit pas
dépasser 8 cm de largeur.

-9-
G
B
N
L
F
Fastening with the
vehicle's 3-point seatbelt
(universal)
Þ Fold the out the spacer
bracket 9 on the back of the
backrest 2.
Þ Then incline the backrest 2 to the
rear until the spacer bracket 9 lies
flat against the backrest of the
vehicle seat.
Caution! Do not incline the
backrest 2 beyond the point
indicated by the spacer bracket 9.
4. Installation in the vehicle
The RÖMER KIDFIX can be installed
in the vehicle in two different ways.
For the protection of all
vehicle occupants
In the case of an emergency stop or
an accident unsecured persons or
objects may cause injury to other
vehicle occupants. Please always
check that...
• the backrests of the vehicle seats
are locked (i.e. that a foldable rear
seat bench latch is engaged).
Bevestiging met de
driepuntsgordel van de
auto (universeel)
Þ Klap daarvoor de
afstandshoek 9 aan de achterkant
van de rugleuning 2 uit.
Þ Laat vervolgens de rugleuning 2 zo
ver naar achteren leunen totdat de
afstandshoek 9 vlak tegen de
rugleuning van de autostoel
aankomt.
Voorzichtig! Laat de rugleuning 2
niet verder naar achteren leunen
dan de afstandshoek 9 toestaat.
4. Inbouw in de auto
De RÖMER KIDFIX kan op twee
verschillende manieren in de auto
worden ingebouwd.
Ter bescherming van alle
passagiers
Bij een noodstop of een ongeval
kunnen niet vastgezette voorwerpen
of personen andere passagiers
verwonden. Zorg er daarom altijd voor
dat...
• de rugleuningen van de zitplaatsen
zijn vastgezet (bijv. de neerklapbare
rugleuning van de achterbank
vastklikken);
Fixation avec la ceinture à
3 points du véhicule
(universel)
Þ Pour ce faire, déployez
l'équerre d'écartement 9 sur la face
arrière du dossier 2.
Þ Inclinez à présent le dossier 2 vers
l'arrière jusqu'à ce que l'équerre
d'écartement 9 repose à plat sur le
dossier du siège du véhicule.
Attention ! Ne pas incliner le
dossier 2 davantage que ne le
permet l'équerre d'écartement 9.
4. Montage dans le
véhicule
Le RÖMER KIDFIX peut être monté
dans le véhicule de deux manières
différentes.
Pour protéger tous les
passagers
En cas de freinage d’urgence ou
d’accident, les objets et personnes
non attachés risquent de blesser
d’autres passagers. Veuillez donc
toujours veiller à ce que…
• les dossiers des sièges de voiture
soient verrouillés (enclenchez par
exemple la banquette arrière
rabattable),

N
L
G
B
F
• all heavy or sharp-edged objects in
the vehicle (e.g. on the parcel shelf)
are secured.
• all persons in the vehicle have their
seat belts fastened.
• the child safety seat is always
secured when it is in the vehicle,
even if no child is being transported.
To protect your vehicle
• Some vehicle seat covers of
sensitive materials (e.g. velour,
leather, etc.) may develop wear
marks when child seats are used.
This can be avoided by placing a
blanket or towel under the child
seat.
4.1 Fastening with
the KIDFIX
locking arms
The RÖMER KIDFIX is installed
permanently in the vehicle with the
KIDFIX locking arms.
Your child is then buckled into the
child seat with the vehicle's 3-point
seatbelt.
Þ Clip the two insert guides 16*,
recess facing upwards, to the two
ISOFIX fastening points 20.
Tip! The ISOFIX fastening points
20 are located between the surface
and the backrest of the vehicle seat.
• alle zware of scherpe voorwerpen in
de auto (bijv. op de hoedenplank)
zijn vastgezet;
• alle personen in de auto de gordel
om hebben;
• het kinderzitje in de auto is
vastgezet, ook als er geen kind
word vervoerd.
Ter bescherming van uw auto
• Bepaalde autostoelbekledingen van
gevoelig materiaal (bijv. velours,
leer, etc) kunnen tekenen van
slijtage gaan vertonen door gebruik
van het autokinderzitje. Dit kan
worden voorkomen door
bijvoorbeeld een deken of
handdoek onder het zitje te leggen.
4.1 Bevestiging met
de KIDFIX-
bevestigings-
armen
De RÖMER KIDFIX wordt met
behulp van de KIDFIX-bevestigings-
armen vast in de auto ingebouwd.
Uw kind wordt vervolgens met de
driepuntsgordel van de auto in het
kinderzitje vastgegespt.
Þ Klik de beide kliksystemen 16*, met
de uitsparing naar boven gericht, op
de beide ISOFIX-
bevestigingspunten 20.
Tip! De ISOFIX-bevestigingspunten
20 bevinden zich tussen de zitting
en de rugleuning van de autostoel.
• tous les objets lourds ou à bords
tranchants (par exemple sur la
lunette arrière) soient bien fixés,
• toutes les personnes aient mis leur
ceinture,
• le siège auto soit toujours fixé dans
la voiture même si aucun enfant ne
l’occupe.
Pour protéger votre véhicule
• Sur certaines housses de siège de
véhicule recouvertes d’une matière
délicate (p. ex. velours, cuir, etc.),
l’utilisation de sièges auto risque de
laisser des traces. Pour éviter cela,
vous pouvez recouvrir le siège du
véhicule d'une couverture ou une
serviette, par exemple.
4.1 Fixation des bras
d'enclenchement
KIDFIX
Le RÖMER KIDFIX se monte de
manière fixe dans le véhicule à
l'aide des bras d'enclenchement
KIDFIX.
Ensuite, votre enfant est attaché
dans le siège auto au moyen de la
ceinture à 3 points de votre voiture:
Þ Enclenchez les deux guides
d'insertion 16*, en dirigeant
l'évidement vers le haut, sur les
deux points de fixation ISOFIX 20.
Astuce ! Les points de fixation
ISOFIX 20 se trouvent entre la
surface d'assise et le dossier du
siège du véhicule.

-11-
G
B
N
L
F
* The insert guides make it easier to install the
seat using ISOFIX and prevent the seat cover
from becoming damaged. When not in use, they
should be removed and kept in a safe place. If
your vehicle has folding backrests, remove the
insert guides before folding them down.
Most malfunctions are caused by contamination
in the insert guides and on the hooks. Remedy
such malfunctions by removing this
contamination.
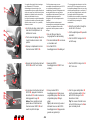
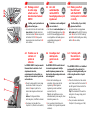
Þ Grasp the seat surface though the
access slot in the cover.
Þ Pull the adjusting lever 21 upwards
and hold it.
Þ Push the KIDFIX locking arms 15
out all the way.
Þ Pivot the KIDFIX locking arms 15
180° to the rear.
Þ Push the green safety button 22
and the red release button 23 on
both KIDFIX locking arms 15
towards each other.
Tip! This ensures that both hooks
on the KIDFIX locking arms 15 are
open and ready to use.
* De kliksystemen zorgen voor een
eenvoudigere inbouw met behulp van ISOFIX
en voorkomen beschadiging van de
stoelbekleding. Wanneer de kliksystemen niet
worden gebruikt, dienen ze verwijderd en
zorgvuldig te worden bewaard. Bij auto’s met
neerklapbare rugleuning moeten de
kliksystemen vóór het neerklappen worden
verwijderd.
Eventuele problemen worden meestal
veroorzaakt door verontreinigde kliksystemen
en haken. De problemen kunnen worden
opgelost door de kliksystemen en haken te
reinigen.
Þ Pak de zitting vast door de
toegangssleuf van de bekleding.
Þ Trek de instelhendel 21 naar boven
en houd deze vast.
Þ Schuif de KIDFIX-
bevestigingsarmen 15 volledig uit.
Þ Zwenk de KIDFIX-
bevestigingsarmen 15 180° naar
achteren.
Þ Druk op beide KIDFIX-
bevestigingsarmen 15 de groene
vergrendelingsknop 22 en de rode
ontgrendelingsknop 23 tegen
elkaar.
Tip! Op die manier zorgt u ervoor
dat beide haken van de KIDFIX-
bevestigingsarmen 15 geopend en
gereed voor gebruik zijn.
* Les guides d'insertion facilitent le montage
avec l'adaptateur ISOFIX et évitent
d'endommager la housse de siège. Il est
recommandé de retirer ces guides d'insertion et
de bien les ranger. Dans les véhicules à dossier
rabattable, les guides d'insertion doivent être
retirés avant de rabattre le dossier.
Les dysfonctionnements sont généralement dus
à la présence de saletés au niveau des guides
d'insertion et des crochets. Pour y remédier,
éliminez les saletés.
Þ Sur l'assise du siège, passez votre
main dans la fente prévue à cet
effet dans la housse.
Þ Tirez le levier de réglage 21 vers le
haut et maintenez-le dans cette
position.
Þ Déployez complètement les bras
d'enclenchement KIDFIX 15.
Þ Basculez les bras d'enclenchement
KIDFIX 15 de 180° vers l'arrière.
Þ Sur les deux bras d'enclenchement
KIDFIX 15, appuyez le bouton de
sécurité vert 22 contre le bouton de
désengagement rouge 23.
Astuce ! Vous garantissez ainsi
que les deux crochets des bras
d'enclenchement KIDFIX 15 sont
ouverts et prêts à l'emploi.

N
L
G
B
F
Þ Take hold of the seat cushion 1 with
both hands.
Þ Push both KIDFIX locking arms 15
into the insert guides 16, until the
KIDFIX locking arms 15 engage on
both sides. "CLICK!"
Caution! The green safety button
22 must now be visible on both
sides.
Þ Pull the adjusting lever 21 upwards
and hold it.
Þ Push the seat cushion 1 to the rear
against the backrest of the vehicle
seat (see 3.3).
Þ Pak het zitkussen 1 met beide
handen vast.
Þ Schuif de beide KIDFIX-
bevestigingsarmen 15 in de
kliksystemen 16, totdat de KIDFIX-
bevestigingsarmen 15 aan beide
zijden vastklikken. 'KLIK!'
Voorzichtig! Aan beide zijden
moet nu de groene
vergrendelingsknop 22 zichtbaar
zijn.
Þ Trek de instelhendel 21 naar boven
en houd deze vast.
Þ Schuif het zitkussen 1 naar
achteren tegen de rugleuning van
de autostoel (zie 3.3).
Þ Prenez le coussin d'asise 1 dans
vos deux mains.
Þ Faites glisser les deux bras
d'enclenchement KID FIX 15 dans
les guidages d'insertion 16, jusqu'à
ce qu'ils 15 s'enclenchent des deux
côtés. "CLIC !"
Attention ! Le bouton de sécurité
vert 22 doit à présent être visible
des deux côtés.
Þ Tirez le levier de réglage 21 vers le
haut et maintenez-le dans cette
position.
Þ Poussez le coussin d'assise 1 vers
l'arrière contre le dossier du siège
du véhicule (voir 3.3).

-13-
G
B
N
L
F
Þ Pull on the seat cushion 1 to ensure
it is engaged on both sides.
Þ Then proceed as described in
Chapter 5.1 (Securing your child).
4.2 Removal with
KIDFIX locking
arms
Þ
Pull the adjusting lever 21 upwards
and pull the seat cushion 1 all the
way forward.
Þ Push the green safety button 22
and the red release button 23 on
both locking arms 15 towards each
other. The KIDFIX locking arms 15
release.
Þ Pivot the KIDFIX locking arms 15
180° forward.
Þ Pull the adjusting lever 21 upwards
and push the KIDFIX locking arms
15 all the way into the seat cushion
1.
Tip! This protects the KIDFIX
locking arms 15 from damage.
Þ Trek aan het zitkussen 1, om te
controleren of de
bevestigingsarmen aan beide zijden
zijn vastgeklikt.
Þ Ga nu verder als beschreven in
hoofdstuk 5.1 (De gordel bij uw kind
omdoen).
4.2 Uitbouw met
KIDFIX-
bevestigings-
armen
Þ
Trek de instelhendel 21 naar boven
en trek het zitkussen 1 helemaal
naar voren.
Þ Druk op beide bevestigingsarmen
15 de groene vergrendelingsknop
22 en de rode ontgrendelingsknop
23 tegen elkaar. De KIDFIX-
bevestigingsarmen 15 worden
ontgrendeld.
Þ Zwenk de KIDFIX-
bevestigingsarmen 15 180° naar
voren.
Þ Trek de instelhendel 21 naar boven
en schuif de KIDFIX-
bevestigingsarmen 15 helemaal in
het zitkussen 1.
Tip! De KIDFIX-bevestigingsarmen
15 zijn op die manier beschermd
tegen beschadiging.
Þ Tirez sur le coussin d'assise 1 pour
vérifier que les deux côtés sont
enclenchés.
Þ Poursuivez comme décrit au
chapitre 5.1 (Attacher votre enfant).
4.2 Démontage des
bras
d'enclenchement
KIDFIX
Þ
Tirez le levier de réglage 21 vers le
haut et tirez le coussin d'assise 1
complètement vers l'avant.
Þ Sur les deux bras d'enclenchement
15, appuyez le bouton de sécurité
vert 22 contre le bouton de
désengagement rouge 23. Les bras
d'enclenchement KIDFIX 15 se
débloquent.
Þ Basculez les bras d'enclenchement
KIDFIX 15 de 180° vers l'avant.
Þ Tirez le levier de réglage 21 vers le
haut et poussez les bras
d'enclenchement KIDFIX 15 à fond
dans le coussin d'assise 1.
Astuce ! Les bras d'enclenchement
KIDFIX 15 sont ainsi protégés
contre toute détérioration.

N
L
G
B
F
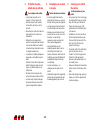
4.3 Making sure that
the child seat
with the KIDFIX
locking arms is installed
correctly
For the safety of your child,
please check that...
• the seat cushion is engaged on
both sides with the KIDFIX locking
arms 15 into the ISOFIX fastening
points 20 and that both green safety
buttons 22 are visible,
4.4 Fastening with
the vehicle's 3-
point seatbelt
The RÖMER KIDFIX is not installed
permanently in the vehicle. It is
simply secured together with your
child using the vehicle's 3-point
seatbelt.
Þ Place the child seat on the vehicle
seat. Make sure that the backrest 2
lies flat against the backrest of the
vehicle seat (see 3.2).
Tip! If the headrest of the vehicle
seat gets in the way, simply turn it
the other way.
Þ Then proceed as described in
Chapter 5.1 (Securing your child).
4.3 Zo is het
autokinderzitje
met de KIDFIX-
bevestigingsarmen juist
ingebouwd
Controleer voor de veiligheid
van uw kind of...
• het zitkussen aan beide zijden met
de KIDFIX-bevestigingsarmen 15 in
de ISOFIX-bevestigingspunten 20
is vastgeklikt en dat beide groene
vergrendelingsknoppen 22
zichtbaar zijn,
4.4 Bevestigen met
de driepunts-
gordel van de
auto
De RÖMER KIDFIX wordt niet vast
in de auto ingebouwd. Het zitje
wordt simpelweg samen met uw
kind met de driepuntsgordel van de
auto vastgezet.
Þ Plaats het kinderzitje op de
autostoel. Zorg ervoor dat de
rugleuning 2 vlak tegen de
rugleuning van de autostoel
aankomt (zie 3.2).
Tip! Als de hoofdsteun van de
autostoel daarbij in de weg zit, draai
deze dan gewoon om.
Þ Ga nu verder als beschreven in
hoofdstuk 5.1 (De gordel bij uw kind
omdoen).
4.3 Montage correct
de votre siège
enfant avec les
bras d'enclenchement
KIDFIX
Vérifiez, pour la protection de
votre enfant, que...
• le coussin d'assise est sécurisé des
deux côtés par fixation des bras
d'enclenchement 15 dans les points
de fixation ISOFIX 20 et que les
deux boutons de sécurité verts 22
sont visibles.
4.4 Fixation avec la
ceinture à 3
points du
véhicule
Le RÖMER KIDFIX n'est pas monté
fixement dans le véhicule. Il est
simplement sécurisé,
conjointement à votre enfant, au
moyen de la ceinture à 3 points de
votre véhicule.
Þ Placez le siège enfant sur le siège
du véhicule. Veillez à ce que le
dossier 2 repose à plat sur le
dossier du siège du véhicule (voir
3.2).
Astuce ! Si l'appuie-tête du
véhicule gêne, il suffit de le tourner.
Þ Poursuivez comme décrit au
chapitre 5.1 (Attacher votre enfant).

-15-
G
B
N
L
F
5. Securing your child in
the vehicle
For the protection of your
child
• As a general rule: The more snugly
the safety belt fits over your child's
body, the safer your child will be.
• Please do not leave your child
unattended in the child safety seat
in the vehicle.
• Installation on the rear seat: Move
the front seat forward far enough
that you child's feet cannot hit the
back rest of the front seat (to
prevent risk of injury).
• The plastic parts of the child safety
seat can heat up in the sun.
Caution! Your child may get burnt.
Protect the child seat against
intensive solar radiation when it is
not actually in use.
• Allow your child to enter and exit the
vehicle only on the side away from
traffic.
• Make stops during longer journeys
to give your child an opportunity to
run about and play.
5. Beveiliging van uw kind
in de auto
Ter bescherming van uw kind
• In principe geldt: Hoe beter de
gordel op het lichaam van uw kind
aansluit, des te groter de veiligheid.
• Laat uw kind nooit zonder toezicht
in het kinderzitje in de auto achter.
• Gebruik op de achterbank: Schuif
de voorstoel zo ver naar voren dat
de voeten van uw kind de
rugleuning van de voorstoel niet
raken (verwondingsgevaar).
• De kunststofdelen van het
kinderzitje worden heet in de zon.
Voorzichtig! Uw kind kan zich
hieraan verbranden. Bescherm het
kinderzitje, wanneer dit tijdelijk niet
wordt gebruikt, tegen intensieve
zonnestraling.
• Laat uw kind alleen in- en
uitstappen aan de zijde van het
trottoir.
• Houd tijdens lange ritten regelmatig
pauzes zodat u tegemoetkomt aan
de bewegingsdrang van uw kind.
5. Protection de votre
enfant dans le véhicule
Pour protéger votre enfant
• Les principes suivants sont à
respecter : Plus la ceinture de
sécurité est proche du corps de
votre enfant, plus celui-ci est en
sécurité.
• Ne laissez pas votre enfant dans le
siège auto dans la voiture sans
surveillance.
• Utilisation sur le siège arrière :
Avancez le siège avant de manière
à ce que les pieds de votre enfant
ne touchent pas le dossier de celui-
ci (risques de blessures).
• Les parties en matière plastique du
siège auto se réchauffent en plein
soleil.
Attention ! Votre enfant risque de se
brûler. Protégez le siège auto des
rayons du soleil lorsque vous ne
l'utilisez pas.
• Ne faites monter ou descendre
votre enfant que du côté du trottoir.
• Lors des longs trajets, aménagez
des pauses afin que votre enfant
puisse se dégourdir les jambes.

N
L
G
B
F
5.1 Securing your child
1. Fasten the vehicle seat belt
Þ Have your child sit down in the child
seat.
Þ Pull out the vehicle seat belt and
guide it in front of your child to the
vehicle seat buckle 10.
Caution! Do not twist the belt.
Þ Engage the buckle tongue in the
vehicle seat buckle 10. CLICK!
2. Place the vehicle seat belt in the
red belt guides on the child seat.
Þ Place the diagonal seat belt
section 6 and lap belt section 11 on
the side of the vehicle seatbelt
buckle 10 under the armrest and
into the light red belt guide 12 of the
seat cushion 1.
Caution! The vehicle seatbelt
buckle 10 must not be positioned
between the light red belt guide 12
and the armrest.
Þ Also place the lap belt section 11 on
the other side of the seat cushion 1
in the light red belt guide 12.
Caution! The lap belt section 11
must lie as low as possible over
your child's hips on both sides.
5.1 De gordel bij uw kind
omdoen
1. Autogordel omdoen
Þ Laat uw kind in het kinderzitje
plaatsnemen.
Þ Trek de autogordel los en leid deze
voor uw kind langs naar het slot van
de autogordel 10.
Voorzichtig! Draai de gordel niet.
Þ Klik de gesp in het slot van de
autogordel 10 vast. KLIK!
2. Autogordel door de rode
gordelgeleiders plaatsen.
Þ Leid de diagonale gordel 6 en de
heupgordel 11 aan de kant van het
gordelslot van de auto 10 onder de
armleuning, door de lichtrode
gordelgeleider 12 van het
zitkussen 1.
Voorzichtig! Het gordelslot van de
auto 10 mag niet tussen de
lichtrode gordelgeleider 12 en de
armleuning liggen.
Þ Leid de heupgordel 11 aan de
andere zijde van het zitkussen 1
ook door de lichtrode
gordelgeleider 12.
Voorzichtig! De heupgordel 11
moet aan beide zijden zo laag
mogelijk over de liezen van uw kind
lopen.
5.1 Attacher votre enfant
1. Positionnez la ceinture.
Þ Faites asseoir votre enfant dans le
siège auto.
Þ Tirez sur la ceinture et passez-la
devant votre enfant jusqu'au fermoir
de la ceinture de votre véhicule 10.
Attention ! Ne pas torsader la
ceinture.
Þ Enclenchez la languette dans le
fermoir de la ceinture 10 du
véhicule. CLIC !
2. Insérez la ceinture du véhicule
dans les guidages de ceinture
rouges sur le siège enfant.
Þ Placez la ceinture diagonale 6 et la
ceinture ventrale 11, situées du
côté du fermoir de la ceinture du
véhicule 10, sous l'accoudoir sur le
guidage rouge clair 12 du coussin
d'assise 1.
Attention ! Le fermoir de la
ceinture du véhicule 10 ne doit pas
se trouver entre le guidage rouge
clair 12 et le dossier.
Þ Introduisez la ceinture ventrale 11
dans le guidage de ceinture rouge
clair 12 situé sur l'autre côté du
coussin d'assise 1.
Attention ! Des deux côtés, la
ceinture ventrale 11 doit passer le
plus bas possible au-dessus de
l’aine de votre enfant.

-17-
G
B
N
L
F
Þ Guide the diagonal seat belt
section 6 into the dark red belt
holder 7 of the headrest 3 until it
lies completely in the belt holder 7
and is not twisted.
Tip! If the backrest 2 conceals the
belt holder 7, you can adjust the
headrest 3 upwards. The diagonal
seat belt section 6 can now be
easily inserted. Now return the
headrest 3 to the proper height.
Þ Make sure that the diagonal seat
belt section 6 runs over your child's
shoulder bone, and not in front of
his or her neck.
Tip! You can still adjust the height
of the headrest 3 again here in the
vehicle.
Þ Caution! The diagonal seat belt
section 6 must run diagonally
backward.
Tip! You can adjust the course of
the belt with your vehicle's
adjustable belt deflector.
Þ Caution! The diagonal seat belt
section 6 must never lead forward
to the vehicle's belt deflector.
Tip! In this case, only use the child
seat on the rear seat.
Þ Tighten the vehicle seat belt by
pulling on the diagonal seat belt
section 6.
Þ Leid de diagonale gordel 6 in de
donkerrode gordelhouder 7 van de
hoofdsteun 3 totdat deze volledig
en niet verdraaid in de
gordelhouder 7 ligt.
Tip! Als de rugleuning 2 de
gordelhouder 7 bedekt, kunt u de
hoofdsteun 3 naar boven verstellen.
Nu kan de diagonale gordel 6
gemakkelijk worden aangebracht.
Zet de hoofdsteun 3 vervolgens
weer terug op de juist hoogte.
Þ Controleer of de diagonale gordel 6
over het sleutelbeen van uw kind
loopt en niet vast tegen de hals ligt.
Tip! U kunt de hoogte van de
hoofdsteun 3 ook nog in de auto
afstellen.
Þ Voorzichtig! De diagonale gordel 6
moet schuin naar achteren lopen.
Tip! U kunt de positie van de gordel
met de instelbare gordelomleider
van uw auto regelen.
Þ Voorzichtig! De diagonale gordel 6
mag nooit naar voren naar de
gordelomleider in de auto lopen.
Tip! Gebruik in dat geval het
kinderzitje alleen op de achterbank.
Þ Trek de autogordel strak door aan
de diagonale gordel 6 te trekken.
Þ Insérez la ceinture diagonale 6
dans le support de sangle rouge
foncé 7 de l'appui-tête 3 jusqu'à ce
qu'elle repose complètement et
sans être torsadée dans le support
de sangle 7.
Astuce ! Si le dossier 2 cache le
support de sangle 7, vous pouvez
bouger l'appui-tête 3 vers le haut.
Maintenant, la ceinture diagonale 6
s'insère facilement. Replacez à
présent l'appui-tête 3 à la bonne
hauteur.
Þ Vérifiez que la ceinture diagonale 6
passe sur le sternum de votre
enfant et non sur son cou.
Astuce ! Vous pouvez maintenant
placer l'appui-tête 3 du véhicule à la
hauteur souhaitée.
Þ Attention ! La ceinture diagonale 6
doit être positionnée en biais vers
l'arrière.
Astuce ! Vous pouvez modifier la
direction de la ceinture à l'aide du
dispositif de réglage de la ceinture
de votre véhicule.
Þ Attention ! La ceinture diagonale 6
ne doit jamais être dirigée vers
l'avant vers le dispositif de réglage
de la ceinture du véhicule.
Astuce ! Dans ce cas, utilisez le
siège enfant uniquement sur le
siège arrière.
Þ Tendez la ceinture en tirant sur la
ceinture diagonale 6.

N
L
G
B
F
5.2 Voici comment votre
enfant est bien protégé
Vérifiez, pour la protection de
votre enfant, que...
• la ceinture ventrale 11 traverse bien
les deux guidages rouges vifs 12
du coussin d'assise,
• la ceinture diagonale 6 traverse
bien les deux guidages rouges vifs
12 du coussin d'assise sur le côté
du fermoir de la ceinture du
véhicule 10,
• la ceinture diagonale 6 traverse
bien les deux guidages rouges
foncés 7 de l'appuie-tête,
• la ceinture diagonale 6 est dirigée
en biais vers l'arrière,
• les ceintures sont tendues et non
torsadées,
• le fermoir de la ceinture du
véhicule 10 ne se trouve pas entre
le guidage rouge vif 12 et
l'accoudoir du coussin d'assise.
5.2 Checklist to ensure that
your child is buckled up
correctly
For the safety of your child,
please check that...
• the lap belt section 11 runs through
the light red belt guides 12 on both
sides of the seat cushion,
• the diagonal seat belt section 6 on
the side of the vehicle seatbelt
buckle 10 also runs through the
light red belt guide 12 of the seat
cushion,
• the diagonal seat belt section 6 runs
through the dark red belt holder 7 of
the headrest,
• the diagonal seat belt section 6 runs
diagonally backward,
• the straps are tight and not twisted,
• the vehicle seatbelt buckle 10 is not
positioned between the light red belt
guide 12 and the armrest of the
seat cushion.
5.2 Zo is uw kind goed
beveiligd
Controleer voor de veiligheid
van uw kind of...
• de heupgordel 11 aan beide zijden
door de twee lichtrode
gordelgeleiders 12 van het
zitkussen loopt;
• de diagonale gordel 6 aan de kant
van het slot van de autogordel 10
ook door de lichtrode
gordelgeleider 12 van het zitkussen
loopt;
• de diagonale gordel 6 door de
donkerrode gordelhouder 7 van de
hoofdsteun loopt;
• de diagonale gordel 6 schuin naar
achteren loopt;
• de gordels goed strak zitten en niet
zijn verdraaid;
• het slot van de autogordel 10 zich
niet tussen de lichtrode
gordelgeleider 12 en de armleuning
van het zitkussen bevindt.

-19-
G
B
N
L
F
6. Using the drink holder
The RÖMER accessories
programme includes a drink holder
24, which can be fitted on the child
seat subsequently.
Caution! In order to prevent injury,
never use the drink holder 24 for...
•hot liquids
• sharp or pointed objects
(e.g. pencils)
• hard or heavy objects
(e.g. aluminium drink cans)
How to fasten the drink holder 24 :
• on the left or right side of the seat
cushion 1. Always on the side away
from the vehicle door.
• on vehicle seats with a level seat
surface.
Þ Push the arm of the drink holder 24
upwards behind the side flange of
the seat cushion 1.
Þ Hook the button 25 into the hole 26
and push it down.
6. Gebruik van de
bekerhouder
Het accessoireprogramma van
RÖMER biedt een bekerhouder 24,
die achteraf aan het kinderzitje kan
worden bevestigd.
Voorzichtig! Om letsel te voorkomen,
gebruikt u de bekerhouder 24 nooit
voor...
• hete vloeistoffen
• scherpe of spitse voorwerpen
(bijv. potloden)
• harde en zware voorwerpen
(bijv. aluminium drinkflessen).
De bekerhouder 24 wordt als volgt
bevestigd:
• Links of rechts aan het zitkussen 1.
Altijd aan de kant die van het
autoportier is afgewend.
• Op autostoelen met vlakke
zittingen.
Þ Schuif de arm van de bekerhouder
24 van onder achter de zijwand van
het zitkussen 1.
Þ Hang de knop 25 in de opening 26
en schuif de knop naar beneden.
6. Utilisation du porte-
gobelet
La gamme d'accessoires de RÖMER
comprend un porte-gobelet 24, qui
peut être monté ultérieurement sur le
siège enfant.
Attention ! Afin d'éviter toute
blessure, n'utilisez jamais le porte-
gobelet 24 pour
• des boissons chaudes
• des objets tranchants ou pointus
(p. ex. crayons)
• des objets durs et lourds
(par ex. canette en alu).
Le porte-gobelet 24 se fixe de la
manière suivante:
• à droite ou à gauche du coussin
d'assise 1. Toujours sur le côté
opposé à la porte du véhicule,
• sur des sièges de véhicule dotés
d'une surface d'assise plane.
Þ Faites coulisser le bras du porte-
gobelet 24 vers le bas derrière la
face latérale du coussin d'assise 1.
Þ Accrochez le bouton 25 dans
l'orifice 26 et poussez-le vers le
bas.

N
L
G
B
F
7. Care instructions
To retain the protective effect
• In an accident at a collision speed
above 10 km/h the child safety seat
could suffer damage which is not
necessarily obvious.
In such cases it is extremely
important that you replace the child
seat. Please dispose of it properly
(see 8).
• Regularly check all important parts
for damage. Ensure the correct
operation of all mechanical
components.
• To prevent damage or breakage,
ensure that the child seat does not
become jammed in the car door,
seat runners, etc.
• Should the child seat be damaged
(for example after dropping it) it
must be inspected by the
manufacturer.
7.1 Cleaning
Please be sure to use only original
RÖMER replacement seat covers, as
the seat cover is important to the
proper functioning of the system.
Replacement seat covers are
available from your retailer and or at
ADAC (German Motoring Club)
branches.
7. Onderhoudshandleiding
Voor het behoud van de
beschermende werking
• Bij ongevallen waarbij de
botssnelheid hoger dan 10 km/u is,
kan het autokinderzitje beschadigd
raken, hoewel de beschadigingen
niet altijd zichtbaar zijn.
Vervang in zo'n geval het kinderzitje
altijd. Voer het zitje volgens de
geldende voorschriften af (zie 8).
• Controleer alle belangrijke
onderdelen regelmatig op
beschadiging. Zorg ervoor dat de
mechanische componenten goed
functioneren.
• Zorg ervoor dat het autokinderzitje
niet tussen harde delen (portier,
stoelrail, etc) klem komt te zitten en
beschadigd raakt.
• Laat een autokinderzitje dat
beschadigd is (bijv. als dit is
gevallen) altijd door de fabrikant
controleren.
7.1 Reiniging
Gebruik uitsluitend een originele
bekleding van RÖMER, aangezien de
bekleding van wezenlijk belang is voor
de werking van het systeem. Losse
bekleding is verkrijgbaar bij de
vakhandel en bij filialen van de ADAC
(de Duitse ANWB).
7. Consignes d’entretien
Pour conserver l’efficacité de
la protection
• En cas de collision à une vitesse
supérieure à 10 km/h, il est possible
que le siège auto soit endommagé,
les dégâts n’étant pas forcément
visibles.
Remplacez impérativement ce
siège auto. Veuillez éliminer
l'ancien siège auto selon la
réglementation (voir 8).
• Contrôlez régulièrement l’état de
toutes les pièces importantes.
Assurez-vous du bon
fonctionnement de toutes les pièces
mécaniques.
• Veillez à ce que le siège auto ne
soit pas coincé entre des objets
durs (porte du véhicule, glissière du
siège, etc.), ce qui risquerait de
l’endommager.
• Faites impérativement contrôler un
siège auto endommagé (par
exemple après une chute) par le
fabricant.
7.1 Nettoyage
Veillez à seulement utiliser une
housse de rechange RÖMER car la
housse représente un élément
fonctionnel essentiel du système. Les
housses de rechange sont disponibles
dans les magasins spécialisés ou
dans une filiale de l’ADAC (automobile
club allemand).
La page est en cours de chargement...
La page est en cours de chargement...
La page est en cours de chargement...
La page est en cours de chargement...
La page est en cours de chargement...
La page est en cours de chargement...
La page est en cours de chargement...
-
 1
1
-
 2
2
-
 3
3
-
 4
4
-
 5
5
-
 6
6
-
 7
7
-
 8
8
-
 9
9
-
 10
10
-
 11
11
-
 12
12
-
 13
13
-
 14
14
-
 15
15
-
 16
16
-
 17
17
-
 18
18
-
 19
19
-
 20
20
-
 21
21
-
 22
22
-
 23
23
-
 24
24
-
 25
25
-
 26
26
-
 27
27


Britax KIDFIX Le manuel du propriétaire
- Catégorie
- Sièges de voiture
- Taper
- Le manuel du propriétaire
dans d''autres langues
- English: Britax KIDFIX Owner's manual
- Nederlands: Britax KIDFIX de handleiding
Documents connexes
-
Britax Kidfix Sict Le manuel du propriétaire
-
Britax-Römer Safefix Plus Le manuel du propriétaire
-
Britax VERSAFIX Le manuel du propriétaire
-
Britax Römer MULTI-TECH II Le manuel du propriétaire
-
Britax Römer MULTI-TECH II User Instructions
-
Britax TRIFIX Le manuel du propriétaire
-
 Britax Romer Eclipse Group 1 Car Seat Manuel utilisateur
-
Britax Kid Le manuel du propriétaire
-
-
mothercare FIRST CLASS Manuel utilisateur