Sena 3S Plus Manuel utilisateur
- Catégorie
- Casques mobiles
- Taper
- Manuel utilisateur

| 3S PLUS
1
3S PLUS
Motorcycle Bluetooth Headset & Intercom
SENA www.senabluetooth.com User’s Guide

| 3S PLUS
2
© 1998-2013 Sena Technologies, Inc. All rights reserved.
Sena Technologies, Inc reserves the right to make any changes and improvements to its product without providing prior
notice.
Sena™ is a trademark of Sena Technologies, Inc. or its subsidiaries in the USA and other countries.
The Bluetooth® word mark and logos are owned by the Bluetooth SIG, Inc. and any use of such marks by Sena is under
license. Other trademarks and tradenames are those of their respective owners.

| 3S PLUS
3
CONTENTS
1. INTRODUCTION
2. PACKAGE CONTENTS
3. INSTALLING THE 3S PLUS ON YOUR HELMET
4. POWERING ON/OFF AND CHARGING
4.1 Powering On
4.2 Powering Off
4.3 Charging
4.4 Low Battery Warning
5. CHECKING THE BATTERY LEVEL
5.1 LED Indicator
5.2 Voice Prompt Indicator
6. PAIRING THE 3S PLUS WITH BLUETOOTH DEVICES
6.1 Mobile Phone Pairing
6.2 Multipoint Mobile Phones Pairing
6.3 Bluetooth Stereo Device Pairing
6.4 Bluetooth GPS Navigation Pairing
7. PAIRING WITH OTHER SMH3 HEADSETS FOR INTERCOM CONVERSATION
8. 3S PLUS CONFIGURATION SETTING
8.1 Enabling/Disabling Voice Activated Phone Answering
8.2 Enabling/Disabling Voice Prompts
8.3 Delete All Bluetooth Pairing Information
8.4 Reset to Factory Default Setting
8.5 Exit Voice Configuration Menu
9. USING THE 3S PLUS
9.1 Volume Adjustment
9.2 Mobile Phone Call Making and Answering
9.3 Intercom Conversation
9.4 Intercom and Mobile Phone Call
9.5 Intercom Failure
9.6 Intercom Reconnection
9.7 Stereo Music
9.8 Function Priority
9.9 Fault Reset
10. FIRMWARE UPGRADE

| 3S PLUS
4
1. INTRODUCTION
Thank you for choosing the Sena 3S PLUS, Motorcycle Bluetooth Headset and Intercom. With the 3S PLUS, you can call
handsfree on your Bluetooth mobile phone, listen to stereo music or voice instructions of GPS navigation by Bluetooth
wirelessly, and have intercom conversations in full duplex with a passenger or other riders.
The 3S PLUS is compliant with the Bluetooth Specification 4.1 supporting the following profiles: Headset Profile, Hands-
Free Profile (HFP), Advanced Audio Distribution Profile (A2DP), and Audio Video Remote Control Profile (AVRCP). Please
check with the manufacturers of other devices to determine their compatibility with this headset.
Please read this user’s guide carefully before using the headset. Also check www.SenaBluetooth.com for the latest version
of the user’s guide and additional information related to Sena Bluetooth products.
The 3S PLUS features:
● Bluetooth handsfree for Bluetooth mobile phones
● Bluetooth stereo headset for Bluetooth stereo devices such as MP3 players
● Bluetooth stereo headset for Bluetooth GPS navigations
● Bluetooth intercom
● Easy operation by two-button
● Installation friendly unibody design
● Firmware upgradeable
Key Specifications:
● Bluetooth 4.1
● Supporting profiles: Headset Profile, Hands-Free Profile (HFP), Advanced Audio Distribution Profile (A2DP), Audio
Video Remote Control Profile (AVRCP)
-------------
*In open terrain

| 3S PLUS
5
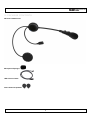
2. PACKAGE CONTENTS
3S PLUS Headset Unit
Microphone Sponges
USB C Power Cable
Velcro Pads for Speakers

| 3S PLUS
6
3. INSTALLING THE 3S PLUS ON YOUR HELMET
1. [picture 3-1]
2. [picture 3-2]
3. [picture 3-3]
Remove the left and right side
cheekpads from the helmet.
Place the speaker-microphone unit
along with the velcro pad to the left
inside surface of the external shell,
centered to your ear.
The boom microphone should be
positioned to face properly towards
your mouth. Please make sure that the
microphone is located close to your
mouth when you wear the helmet.
4. [picture 3-4]
5. [picture 3-5]
6. [picture 3-6]
Place the speaker unit along with the
velcro pad to the right inside surface of
the external shell, centered to your
year in the ear pockets of the helmet
Lift up the helmet top padding from the
back of the helmet and rout the
speaker wires beneath the padding.
Replace the cheeckpads in the helmet
making sure the speaker wiring is
hidden beneath the padding

| 3S PLUS
7
4. POWERING ON/OFF AND CHARGING
4.1 Powering On
Press the (+) Button and the (-) Button at the same time for 1 second to power on. The blue LED turns on and you will hear
ascending beeps and “Hello”.
4.2 Powering Off
Tap the (+) Button and the (-) Button simultaneously. The red LED turns on for about 2 seconds until it turns off completely
and you will hear “Goodbye” and descending beeps.
4.3 Charging
● To charge the 3S PLUS, use the USB Power Cable included in the package by plugging into computer’s USB port or
USB wall charger. USB wall charger is not included in the package, but you can use any USB wall charger in the
market.
● You can use any of the standard micro-USB cables which is mostly adopted by smartphones and general Bluetooth
headsets manufacturers.
● The LED turns on red while charging, and turns to blue when the headset is fully charged. It takes about 2.5 hours to
be fully charged.
● A cigarette charger for the 3S PLUS is separately available as an optional accessory but you can use any micro-USB
car charger in the market.*
4.4 Low Battery Warning
When the battery is low, the blinking blue LED in stand-by mode turns to red and you will hear mid-tone triple beeps and a
voice prompt saying “Low battery”.
--------------------------------
*please contact Sena regarding locally approved agencies Sena accepts.

| 3S PLUS
8
5. CHECKING THE BATTERY LEVEL
You can check the battery level in two different ways when the headset is powering on.
5.1 LED Indicator
When the headset is powering on, the red LED flashes rapidly indicating the battery level.
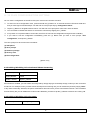
4 flashes = High, 70~100%
3 flashes = Medium, 30~70%
2 flashes = Low, 0~30%
5.2 Voice Prompt Indicator
When you power on the headset, keep pressing the (+) Button and (-) Button simultaneously for about 3 seconds until you
hear three high tone beeps. Then you will hear a voice prompt indicating the battery level. However, if you release the
buttons as soon as the headset turns on, you will not hear the voice prompt for the battery level.

| 3S PLUS
9
6. PAIRING THE SMH3 WITH BLUETOOTH DEVICES
6.1 Mobile Phone Pairing
1. Turn on the 3S PLUS and press the (+) Button for 5 seconds until the LED flashes red and blue alternately and you
hear multiple beeps. You will hear a voice prompt saying “Phone pairing”.
2. Search for Bluetooth devices on your mobile phone. Select the Sena 3S PLUS in the list of the devices detected on
the mobile phone.
3. Enter 0000 for the PIN. Some mobile phones may not ask for the PIN.
4. The mobile phone confirms that pairing has completed and the 3S PLUS is ready to use. You will hear a voice prompt
from the 3S PLUS saying “Your headset is paired”.
5. If the pairing process is not completed within three minutes, the 3S PLUS will return to stand-by mode.
6.2 Multipoint Mobile Phones Pairing
You can simultaneously use two mobile phones which use the mobile phone profile.
1. You can pair the first mobile phone to the 3S PLUS by following the simple procedures in “6.1 Mobile Phone
Pairing”.
2. To pair the second mobile phone, press the (-) Button for 5 seconds until the red LED is rapidly flashing and you hear
multiple beeps.
3. Within 2 seconds, press the (+) Button for 1 second, then the LED turns to blue flashing and the beeps turn to high
tone double beeps. You will hear a voice prompt saying “Multipoint pairing”.
4. Search for Bluetooth devices on your mobile phone. Select the Sena 3S PLUS in the list of the devices detected on
the mobile phone.
5. Enter 0000 for the PIN. Some mobile phones may not ask for the PIN.
6. The mobile phone confirms that pairing has completed and the SMH3 is ready to use. You will hear a voice prompt
from the 3S PLUS saying “Your headset is paired”.
6.3 Bluetooth Stereo Device Pairing
1. If the Bluetooth stereo device is integrated with the mobile phone such as smartphones, you don’t need to pair the 3S
PLUS with it separately. When the SMH3 is paired with the mobile phone, it is also paired as a stereo music device.
2. If you have a stand alone Bluetooth stereo device, follow the pairing procedure separately. The procedure is the same
as the procedure of “6.1 Mobile Phone Pairing”.
Note:
1. If Bluetooth connection between the headset and a mobile phone is disconnected, press the (+) Button for 3 seconds
to recover the Bluetooth connection immediately.

| 3S PLUS
10
2. If Bluetooth connection between the headset and any other Bluetooth devices is disconnected, tap the (+) Button to
recover the Bluetooth connection.
6.4 Bluetooth GPS Navigation Pairing
You can listen to voice instruction from Bluetooth GPS navigation. Some GPS systems use mobile phone profile (HFP,
Hands-Free Profile) and others use stereo music profile (A2DP, Advanced Audio Distribution Profile). Most motorcycle
specific GPS systems use mobile phone profile for turn-by-turn voice instruction. You can simultaneously use a mobile
phone and a GPS which uses mobile phone profile by one of the following procedures.
6.4.1 Multipoint GPS Pairing
If you use GPS only for turn-by-turn voice instructions, not for Bluetooth stereo music streaming, multipoint pairing is
recommended for the GPS connection. Multipoint Bluetooth pairing allows the SMH3 to connect two HFP devices at the
same time: mobile phone and GPS navigation. Follow the steps below to pair the GPS using the multipoint pairing.
1. Turn on the headset and press the (-) Button for 5 seconds until the red LED is rapidly flashing and you hear multiple
beeps.
2. Within 2 seconds, press the (+) Button for 1 second, then the LED turns to blue flashing and the beeps turn to high
tone double beeps. You will hear a voice prompt saying “Multipoint pairing”.
3. Search for Bluetooth devices on the GPS navigation screen. Select the Sena 3S PLUS in the list of the devices
detected on the GPS.
4. Enter 0000 for the PIN.
5. The GPS confirms that pairing has completed and the 3S PLUS is ready to use. You will hear a voice prompt from
the SMH3 saying “Your headset is paired”.
6. If the pairing process is not completed within three minutes, the 3S PLUS will return to stand-by mode.
The pairing diagram for multipoint GPS pairing is shown in the figure below.
7. PAIRING WITH OTHER 3S PLUS HEADSETS FOR INTERCOM
CONVERSATION
The 3S PLUS can be paired with up to three other headsets for Bluetooth Intercom conversation.
1. Turn on the two 3S PLUS headsets (A and B) that you would like to pair with each other.
2. Press and hold the (-) Button of the headset A and B for 5 seconds until red LEDs of the both units start to flash rapidly.
You will hear a voice prompt saying “Intercom pairing”.
3. Wait until the LEDs of both headsets turn to blue and intercom connection is automatically established. The two SMH3
headsets A and B are paired with each other for intercom conversation. If the pairing process is not completed within
one minute, the SMH3 will return to stand-by mode.

| 3S PLUS
11
8. 3S PLUS CONFIGURATION SETTING
You can set the configuration of the 3S PLUS by the voice menu instruction as below.
1. To enter into voice configuration menu, press and hold the (+) Button for 10 seconds until the LED shows solid blue
and you hear high tone double beeps. You will hear a voice prompt saying “Configuration menu”.
2. Tap the (+) Button to navigate between menus. You will hear voice prompts for each menu items as below.
3. You can enable or disable the feature or execute the command by tapping the (-) Button.
4. If any button is not pressed within 10 seconds, the 3S PLUS will exit the configuration and goes back to standby.
5. If you want to exit the configuration immediately, press the (+) Button until you hear a voice prompt, “Exit
configuration”, and tap the (-) Button.
The voice prompt for each menu item is as below:
(1) VOX phone
(2) Voice prompt
(3) Delete all pairings
(4) Factory reset
(5) Exit configuration
[picture 10-1]
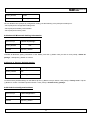
8.1 Enabling/Disabling Voice Activated Phone Answering
Voice Prompt
“VOX phone”
Factory Default
Enable
Enable / Disable
Tap the (-) Button
If this feature is enabled, you can answer incoming calls by simply saying a word loudly enough, unless you are connected
to intercom. For example, when you hear a series of beeps for an incoming call, you can answer the phone by saying “Hello”
or any other word loudly. However, the phone VOX feature does not work if you are connected to intercom. This is enabled
from the factory but you can disable this. If this mode is disabled, you have to tap the (+) Button to answer an incoming call.
8.2 Enabling/Disabling Voice Prompts
Voice Prompt
“Voice prompt”

| 3S PLUS
12
Factory Default
Enable
Enable / Disable
Tap the (-) Button
You can disable voice prompts by configuration setting, but the following voice prompts are always on.
- Voice prompts for configuration setting menu
- Voice prompts for battery level Indicator
- Voice prompts for factory reset
8.3 Delete All Bluetooth Pairing Information
Voice Prompt
“Delete all pairings”
Factory Default
N/A
Execute
Tap the (-) Button
To delete all Bluetooth pairing information of the SMH3, press the (+) Button until you hear a voice prompt, “Delete all
pairings”, and tap the (-) Button to confirm.
8.4 Reset to Factory Default Setting
Voice Prompt
“Factory reset”
Factory Default
N/A
Execute
Tap the (-) Button
To restore factory default settings on the SMH3, tap the (+) Button until you hear a voice prompt, “Factory reset”. Tap the
(-) Button to confirm. The SMH3 powers off with a voice prompt, “Headset reset, goodbye”.
8.5 Exit Voice Configuration Menu
Voice Prompt
“Exit configuration”
Factory Default
N/A
Execute
Tap the (-) Button

| 3S PLUS
13
To exit voice configuration menu and get back to stand-by mode, tap the (+) Button until you hear a voice prompt, “Exit
configuration”. Tap the (-) Button to confirm.
Tap (+) Button
Tap (-) Button
“Vox phone”
Enable / disable
“Voice prompt”
Enable / disable
“Delete all pairings”
Execute
“Factory reset”
Execute
“Exit configuration”
Execute
Voice Configuration Menu & Button Operations

| 3S PLUS
14
9. USING THE 3S PLUS
9.1 Volume Adjustment
You can easily adjust the volume by tapping the (+) Button or the (-) Button. You will hear a beep when the volume reaches
maximum or minimum level. The volume is set and maintained independently at different levels for each audio source even
when you turn off and on the headset. For example, once you set the volume for mobile phone handsfree, it will not change
even if you adjust the volume when you hear Bluetooth MP3 music. So you can always maintain the preferred optimum
volume level for each audio source.
9.2 Mobile Phone Call Making and Answering
1. When you have an incoming call, simply tap the (+) Button to answer the call.
2. You can also answer the incoming call by loudly speaking any word of your choice if Voice Activated Phone
Answering, VOX phone is enabled. (Refer to the next section for details.)
3. To end a call, press the (+) Button for 2 seconds until you hear a mid-tone single beep, or wait for the called person
to end the call.
4. To reject a call, press the (+) Button for 2 seconds until you hear a beep while the phone is ringing.
5. There are several ways to make a phone call:
- Enter numbers on your mobile phone keypad and make a call. Then the call is automatically transferred to the
headset.
- Press the (+) Button for 3 seconds in stand-by mode until you hear a high tone single beep to activate the voice dialing
of your mobile phone. For this, the voice dialing feature must be available on the mobile phone. Refer to your mobile
phone manual for further instruction.
- To redial the last number, press the (-) Button for 3 seconds in stand-by mode until you hear a high tone single beep.
You will hear a voice prompt saying “Last number redial”.
Note:
1. If you are using multipoint mobile phone connection and you have an incoming call from the second phone during the
call of the first phone, then you may still receive the call from second phone. In this case, the call from the first phone is
on waiting mode. If you end a call, then it will automatically guide you to the first phone call.
2. If you are using multipoint connection of mobile phone and GPS, you may not listen to the GPS voice instruction during
the phone call.
9.3 Intercom Conversation
1. You can start an intercom conversation with any of intercom friends by pressing the (-) Button for 1 second.
[picture 11-1]

| 3S PLUS
15
2. To terminate an intercom conversation, press the (-) Button for 1 second again.
[picture 11-2]
9.4 Intercom and Mobile Phone Call
1. When you have an incoming mobile phone call during an intercom conversation, you will hear a ring tone. You can
choose whether to 1) answer the mobile phone call and stop the intercom conversation, or 2) reject the phone call and
stay on the intercom conversation.
● To answer the phone call and stop the intercom conversation, tap the (+) Button. When you hang up the phone call,
the intercom will automatically be recovered.
● To reject the phone call and stay on the intercom conversation, press the (+) Button for 2 seconds until you hear a
beep.
Unlike other motorcycle Bluetooth headsets, this prevents a user from being dropped out of an intercom conversation
by an incoming mobile call.
2. When you have an incoming intercom call during a mobile phone call, you will hear 4 high tone beeps, alerting you that
there is an incoming intercom call. You will also hear a voice prompt saying “Intercom requested”. In this case, the
intercom call does not override the mobile phone call because intercom has lower priority than mobile call. You have to
hang up the mobile phone call to make or receive an intercom call.
9.5 Intercom Failure
When you try to start an intercom conversation with an intercom friend who is already having a mobile phone call with
another person, you will hear a low tone double beep signifying a busy signal. You will also hear a voice prompt saying
“Intercom failed, try again later”. In this case, you have to try again later. On the other hand, the intercom friend will
hear 4 high tone beeps alerting them that there is an incoming intercom call.
9.6 Intercom Reconnection
If your intercom friend goes out of range while having an intercom conversation, you may hear static noise and eventually
the intercom will be disconnected. In this case, the SMH3 automatically tries to reconnect the intercom every 8 seconds.
You will hear high tone double beeps until the intercom is reestablished. If you don’t want to make a reconnection, tap the
(-) Button to stop the attempt.
9.7 Stereo Music
You can listen to stereo music by Bluetooth wireless stereo. The Bluetooth audio device must be paired with the SMH3 by
following the Bluetooth Stereo Device Pairing instructions described in the previous chapter. The SMH3 supports the
Audio/Video Remote Control Profile (AVRCP), so if your Bluetooth audio device also supports the AVRCP, you can use the

| 3S PLUS
16
SMH3 to remotely control music playback. So, You not only can adjust the volume but also use the functions such as play,
pause, next track and previous track.
● To adjust the volume, tap the (+) Button or the (-) Button..
[picture 11-3]
● To play or pause music, press and hold the (+) Button for 1 second until you hear a double beep.
[picture 11-4]
● To track forward or track back, press and hold the (+) Button or the (-) Button for 2 seconds until you hear a
double beep.
[picture 11-5]
9.8 Function Priority
The SMH3 operates in the following order of priority:
(Highest) Mobile Phone,
Intercom, and
(Lowest) Bluetooth Stereo Music
A lower priority function is always interrupted by a higher priority function. For example, stereo music is interrupted by
intercom call, and intercom conversation is interrupted by incoming mobile phone call.
9.9 Fault Reset
When the 3S PLUS is not working properly or is in faulty status for any reason, you may reset by pushing the pin-hole reset
button on the left speaker unit. Insert a paper clip into the reset pin-hole and press the reset button for a second with light
pressure. The SMH3 will be switched off after which time, you have to turn the system back on and try again. However, this
will not restore the headset to factory default settings.


| 3S PLUS
18
Certification and Safety Approvals FCC Compliance Statement
This device complies with part 15 of the FCC rules. Operation is subject to the following two conditions:
(1) This device may not cause harmful interference, and
(2) This device must accept any interference received, including interference that may cause undesired operation.
This equipment has been tested and found to comply with the limits for a Class B digital device pursuant to part 15
of the FCC rules. These limits are designed to provide reasonable protection against harmful interference in a residential
installation. This equipment generates, uses and can radiate radio frequency energy and, if not installed and used in
accordance with the instructions, may cause harmful interference to radio communications. However, there is no
guarantee that interference will not occur in a particular installation. If this equipment does cause harmful interference
to radio or television reception, which can be determined by turning the equipment on and off, the user is encouraged
to try to correct the interference by one or more of the following measures:
-Reorient or relocate the receiving antennae
-Increase the separation between the equipment and the receiver
-Connect the equipment into an outlet on a circuit different from that to which the receiver is connected.
-Consult the dealer or an experienced radio/TV technician for help.
FCC RF Exposure Statement
The highest SAR value reported under this standard during product certification for use next to the head with the
minimum separation distance of 10mm is 0.317W/Kg. This transmitter must not be collocated or operating in
conjunction with any other antenna or transmitter. This product is compliance to FCC RF Exposure requirements and
refers to FCC website https://apps.fcc.gov/oetcf/eas/reports/GenericSearch.cfm search for FCC ID: S7A-SP84, IC:8154A-
SP84.
FCC Caution
Any changes or modifications to the equipment not expressly approved by the party responsible for compliance could
void user’s authority to operate the equipment.
Certification et homologation de sécurité Déclaration de conformité FCC
Cet appareil est en conformité avec la partie 15 des règles de la FCC. Son fonctionnement est soumis aux deux
conditions suivantes :
(1) Cet appareil ne doiㄴㄷt pas créer d’interférences préjudiciables et
(2) Cet appareil doit accepter toutes les interférences reçues, y compris celles qui pourraient entraver son bon
fonctionnement. Cet équipement a été testé et jugé conforme aux limites pour un appareil numérique de classe B,
conformément à la partie 15 des règles de la FCC. Ces limites sont conçues pour fournir une protection raisonnable
contre les interférences nuisibles dans une installation résidentielle. Cet équipement génère et utilise de l’énergie radio

| 3S PLUS
19
fréquence et, s’il n’est pas installé et utilisé conformément. aux instructions, il peut occasionner des interférences
nuisibles au niveau des communications radios. Cependant, il n’existe aucune garantie que ces interférences ne se
produiront pas dans une installation particulière. Si cet équipement génère des interférences nuisibles à la réception
de la radio ou de la télévision (ce qu’il est possible de déterminer en mettant l’équipement hors tension, puis sous
tension), l’utilisateur est invité à suivre une ou plusieurs des mesures suivantes pour corriger le problème des
interférences en prenant l’une des mesures suivantes :
-Modifier l’emplacement ou l’orientation de l’antenne de réception.
-É loigner l’appareil du récepteur.
-Brancher l’appareil sur une prise située sur un circuit différent de celui du récepteur.
-Consulter le revendeur ou un technicien expérimenté pour obtenir de l’aide.
É noncé FCC sur l’exposition aux radiations RF
La valeur DAS la plus élevée rapportée dans le cadre de cette norme lors de la certification du produit pour une
utilisation à côté de la tête avec une distance de séparation minimale de 10mm est de 0.317 W/Kg. Cet émetteur ne
doit pas être colocalisé ni fonctionner avec une autre antenne ou un autre émetteur. Ce produit est conforme aux
exigences d'exposition RF de la FCC et fait référence au site Web de la FCC
https://apps.fcc.gov/oetcf/eas/reports/GenericSearch.cfm recherchez l'ID FCC: S7A-SP84, IC: 8154A-SP84.
Précautions FCC
Tout changement ou modification non expressément approuvé par la partie chargée de la mise en conformité peut
annuler le droit de l’utilisateur à utiliser l’équipement.
Industry Canada(IC) Statement
This device complies with Industry Canada license-exempt RSS standard(s). Operation is subject to the following two
conditions:
(1)this device may not cause interference, and
(2)this device must accept any interference, including interference that may cause undesired operation of the device.
Le present appareil est conforme aux CNR d’Industrie Canada applicables aux appareils radio exempts de licence.
L’exploitation est autorisee aux deux conditions suivantes :
(1) l’appareil ne doit pas produire de brouillage, et
(2) l’utilisateur de l’appareil doit accepter tout brouillage radioelectrique subi, meme si le brouillage est susceptible
d’en compromettre le fonctionnement.
-
 1
1
-
 2
2
-
 3
3
-
 4
4
-
 5
5
-
 6
6
-
 7
7
-
 8
8
-
 9
9
-
 10
10
-
 11
11
-
 12
12
-
 13
13
-
 14
14
-
 15
15
-
 16
16
-
 17
17
-
 18
18
-
 19
19


Sena 3S Plus Manuel utilisateur
- Catégorie
- Casques mobiles
- Taper
- Manuel utilisateur
dans d''autres langues
- English: Sena 3S Plus User manual
Documents connexes
Autres documents
-
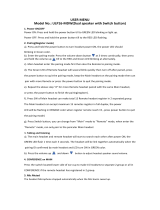
 LEXIN ET Com Mode d'emploi
-
Sena Technologies SP82 Manuel utilisateur
-
N-Com B602 R Series Blue Tooth RCS Motorcycle Helmet Manuel utilisateur
-
 Porta Phone ULP16-MDW Mode d'emploi
-
 Porta Phone ULP16-MSW Manuel utilisateur
-
Scosche SBTFM1 Manuel utilisateur
-
 Porta Phone ULP16-MS Single Speaker Mode d'emploi
-
 Porta Phone ULP16-RS Mode d'emploi
-
 Blinc Bluetooth Compatible Helmet Manuel utilisateur
-
VTech DS6771-3 Manuel utilisateur


