Jenn-Air JMW3430WP00 Le manuel du propriétaire
- Catégorie
- Micro-ondes
- Taper
- Le manuel du propriétaire
Ce manuel convient également à

JENN-AIR_BUILT-INCONVECTION
MICROWAVEOVEN
CUISSONPARCONVECTIONJENN-AII_
'_iii
______________
______________
______________
______________
______________
______________
______________
______________
______________
______________
______________
______________
_____________________________________________________________________________________________________________________________________________________________________________________________________________________________________________________________________________________________________________________________________________________________________________________________________________________________________________________________________________________________________________________________________________________________________________________________________________________________________________________________________________________________________________________________________________________________________________
____________________________________________________________________________________________________________________________________________________________________________________________________________________________________________________________________________________________________________________________________________________________________________________________________________________________________________________________________________________________________________________________________________________________________________________________________________________________________________________________________________________________________________________________________________________________________________
Use&CareGuide
For questions about features, operation/performance, parts, accessories, or service in the U.S.A., call:
1-800-JennAir (1-800-536-6247) or visit our website at www.jennair.com.
In Canada, call: 1-800-807-6777, or visit our website at www.jennair.ca.
Guide d'utilisationetd'entretien
Au Canada, pour assistance, installation ou service, composez le 1-800-807-6777 ou visitez notre site web a www.jennair.ca.
Table of Contents/Table des matieres ................... 2
Models/ModUles JMW3430
JENN-AIR°
W10233422A

TABLEOF CONTENTS
BUILT-IN MICROWAVE OVEN SAFETY ....................................... 3
Electrical Requirements ............................................................... 5
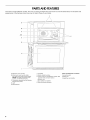
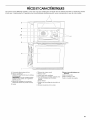
PARTS AND FEATURES ................................................................ 6
Turntable ...................................................................................... 7
Convection Grid (on some models) ............................................ 7
Grilling Grid (on some models) ..................................................... 7
TEFLON ®tCoated Crisper Pan and Handle ................................ 7
MICROWAVE OVEN CONTROL .................................................... 8
Touch Panel ................................................................................. 9
Display .......................................................................................... 9
Interactive Touch Display ............................................................. 9
Menu Demonstration .................................................................. 10
Kitchen Timer ............................................................................. 10
Setup Menu ................................................................................ 10
BUILT-IN MICROWAVE OVEN USE ........................................... 12
Food Characteristics .................................................................. 12
Cooking Guidelines .................................................................... 13
Cookware and Dinnerware ........................................................ 13
Aluminum Foil and Metal ........................................................... 13
Microwave Cooking Power ........................................................ 14
View Foods ................................................................................. 14
Built-in Foods ............................................................................. 14
Sensor Cook ............................................................................... 14
Cooking Functions ..................................................................... 15
My Creations .............................................................................. 15
MICROWAVE OVEN USE ............................................................ 15
Cook ........................................................................................... 15
Reheat ........................................................................................ 16
SpeedCook Foods ..................................................................... 16
Auto Convection Conversion ..................................................... 17
Convect Bake ............................................................................. 18
Convect Roast ............................................................................ 18
Defrost ........................................................................................ 18
Steam ......................................................................................... 19
Melt ............................................................................................. 20
Soften ......................................................................................... 20
Boil & Simmer ............................................................................. 21
Grill & Broil .................................................................................. 21
Keep Warm ................................................................................. 22
Browning Pan ............................................................................. 22
BUILT-IN MICROWAVE OVEN CARE ......................................... 23
General Cleaning ........................................................................ 23
TROUBLESHOOTING .................................................................. 24
ASSISTANCE OR SERVICE ......................................................... 25
WAR RANTY .................................................................................. 26
TABLEDESMATIERES
SI_CURITI_ DU FOUR .&,MICRO-ONDES ENCASTRI_ ............... 28
Specifications electriques .......................................................... 30
PII=CES ET CARACTI_RISTIQUES .............................................. 31
Plateau rotatif ............................................................................. 32
Grille de convection (sur certains modeles) ............................... 32
Grille de cuisson au gril (sur certains modeles) ......................... 32
Plat &croustiller et poignee avec rev_tement
TEFLON®t(sur certains modeles) ............................................... 32
MODULE DE COMMANDE DU FOUR .&MICRO-ONDES ........ 33
Tableau de commande tactile.................................................... 34
Affichage ..................................................................................... 34
Afficheur tactile interactif............................................................ 34
Demonstration de menu ............................................................. 35
Minuterie de cuisine ................................................................... 35
Menu de reglage ......................................................................... 35
UTILISATION DU FOUR .&,MICRO-ONDES ENCASTRI_ .......... 37
Caracteristiques des aliments .................................................... 38
Guide de cuisson ........................................................................ 38
Ustensiles de cuisson et vaisselle .............................................. 38
Papier d'aluminium et metal ....................................................... 39
Puissance de cuisson des micro-ondes .................................... 39
Voir les aliments ......................................................................... 40
Aliments pre-programm6s ......................................................... 40
Cuisson par detection ................................................................ 40
Fonctions de cuisson ................................................................. 40
Mes creations ............................................................................. 41
UTILISATION DU FOUR .& MICRO-ONDES ............................... 42
Cuisson ....................................................................................... 42
Rechauffage ............................................................................... 43
Aliments &cuisson rapide .......................................................... 43
Conversion automatique pour cuisson par convection ............ 45
Cuisson au four par convection ................................................. 45
R6tissage par convection .......................................................... 46
Decong61ation ............................................................................ 46
Cuisson & la vapeur .................................................................... 47
Faire fondre ................................................................................ 48
Ramollir ....................................................................................... 48
Faire bouillir et mijoter ................................................................ 49
Grillades et cuisson au gril ......................................................... 50
Maintien au chaud ...................................................................... 50
Plat &brunir ................................................................................ 51
ENTRETIEN DU FOUR .&MICRO-ONDES ENCASTRI_ ............ 52
Nettoyage gen6ral ...................................................................... 52
DI_PAN NAGE................................................................................. 53
ASSISTANCE OU SERVICE ......................................................... 54
GARANTIE ..................................................................................... 55
2

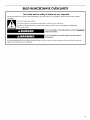
BUILT-INMICROWAVE OVEN SAFETY
Your safety and the safety of others are very important.
We have provided many important safety messages in this manual and on your appliance. Always read and obey all safety
messages.
This is the safety alert symbol.
This symbol alerts you to potential hazards that can kill or hurt you and others.
All safety messages will follow the safety alert symbol and either the word "DANGER" or "WARNING."
These words mean:
You can be killed or seriously injured if you don't immediately
follow instructions.
You can be killed or seriously injured if you don't follow
instructions.
All safety messages will tell you what the potential hazard is, tell you how to reduce the chance of injury, and tell you what can
happen if the instructions are not followed.

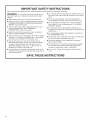
iMPORTANT SAFETY iNSTRUCTiONS
When using electrical appliances basic safety precautions should be
WARNING: To reduce the risk of burns, electric shock,
fire, injury to persons, or exposure to excessive microwave
energy:
m Read all instructions before using the microwave oven.
m Read and follow the specific "PRECAUTIONS TO AVOID
POSSIBLE EXPOSURE TO EXCESSIVE MICROWAVE
ENERGY" found in this section.
m The microwave oven must be grounded. Connect only to
properly grounded outlet. See "GROUNDING
INSTRUCTIONS" found in this section.
m Install or locate the microwave oven only in accordance
with the provided Installation Instructions.
m Some products such as whole eggs in the shell and sealed
containers - for example, closed glass jars - may explode
and should not be heated in the microwave oven.
m Use the microwave oven only for its intended use as
described in this manual. Do not use corrosive chemicals
or vapors in the microwave oven. This type of oven is
specifically designed to heat, cook, or dry food. It is not
designed for industrial or laboratory use.
m Oversized foods or oversized metal utensils should not be
inserted in the microwave oven as they may create a fire or
risk of electric shock.
followed, including the following:
[] Do not clean with metal scouring pads. Pieces can burn off
the pad and touch electrical parts involving a risk of electric
shock.
[] Do not store any materials, other than manufacturer's
recommended accessories, in this oven when not in use.
[] Do not operate the microwave oven if it has a damaged
cord or plug, if it is not working properly, or if it has been
damaged or dropped.
[] Do not deep fry in oven. Microwavable utensils are not
suitable and it is difficult to maintain appropriate deep frying
temperatures.
[] Do not use paper products when appliance is operated in
the "PAN BROWN" mode.
[] Do not cover racks or any other part of the oven with metal
foil. This will cause overheating of the oven.
[] As with any appliance, close supervision is necessary
when used by children.
[] The microwave oven should be serviced only by qualified
service personnel. Contact nearest authorized service
company for examination, repair, or adjustment.
[] Do not cover or block any openings on the microwave
oven.
SAVE THESE INSTRUCTIONS

[]
iMPORTANT SAFETY
Liquids, such as water, coffee, or tea are able to be
overheated beyond the boiling point without appearing to be
boiling. Visible bubbling or boiling when the container is
removed from the microwave oven is not always present.
THIS COULD RESULT IN VERY HOT LIQUIDS
SUDDENLY BOILING OVER WHEN THE CONTAINER IS
DISTURBED OR A SPOON OR OTHER UTENSIL IS
INSERTED INTO THE LIQUID.
To reduce the risk of injury to persons:
- Do not overheat the liquid.
- Stir the liquid both before and halfway through heating it.
- Do not use straight-sided containers with narrow necks.
- After heating, allow the container to stand in the
microwave oven for a short time before removing the
container.
- Use extreme care when inserting a spoon or other utensil
into the container.
INSTRUCTIONS
[] Do not store the microwave oven outdoors. Do not use this
product near water - for example, near a kitchen sink, in a
wet basement, or near a swimming pool, and the like.
[] See door surface cleaning instructions in the "Oven Care"
section.
[] To reduce the risk of fire in the oven cavity:
- Do not overcook food. Carefully attend the microwave
oven if paper, plastic, or other combustible materials are
placed inside the oven to facilitate cooking.
- Remove wire twist-ties from paper or plastic bags before
placing bags in oven.
- If materials inside the oven should ignite, keep oven door
closed, turn oven off, and disconnect the power cord, or
shut off power at the fuse or circuit breaker panel.
- Do not use the cavity for storage purposes. Do not leave
paper products, cooking utensils, or food in the cavity
when not in use.
SAVE THESE INSTRUCTIONS
PRECAUTIONS TO AVOID POSSIBLE EXPOSURE TO
EXCESSIVE MICROWAVE ENERGY
(a) Do not attempt to operate this oven with the door open
since open-door operation can result in harmful exposure
to microwave energy. It is important not to defeat or
tamper with the safety interlocks.
(b) Do not place any object between the oven front face and
the door or allow soil or cleaner residue to accumulate on
sealing surfaces.
(c) Do not operate the oven if it is damaged. It is particularly
important that the oven door close properly and that there
is no damage to the:
(1) Door (bent),
(2) Hinges and latches (broken or loosened),
(3) Door seals and sealing surfaces.
(d) The oven should not be adjusted or repaired by anyone
except properly qualified service personnel.
E®ct/' c<s
Observe all governing codes and ordinances. The microwave
oven is connected to both 120-volt sides of the 208/240-volt
circuit required for electrical connections. If the incoming voltage
to the microwave oven is less than 120 volts, cooking times may
be longer. Have a qualified electrician check your electrical
system.
I This device complies with Part 18 of the FCC Rules. I
GROUNDING INSTRUCTIONS
For a permanently connected microwave oven:
The microwave oven must be connected to a grounded,
metallic, permanent wiring system, or an equipment
grounding conductor should be run with the circuit
conductors and connected to the equipment grounding
terminal or lead on the microwave oven.
SAVE THESE INSTRUCTIONS


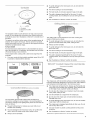
The touch panel houses the control menu and function controls.
The touch pads are very sensitive, and require only a light touch
to activate.
For more information about the individual controls, see their
respective sections in this manual.
Welcome Guide
This appears on the display the first time the oven is powered up.
The Welcome Guide allows you to set up your new oven.
1. Select the language by touching English or Frangais.
2. Select temperature degree units by touching Fahrenheit or
Celsius.
3. Select clock units by touching AM/PM or 24-HOUR (military).
4. Select YES or NO for Daylight Savings - Time Observed.
5. Touch NEXT.
6. Enter current clock time using the on-screen number
keyboard.
7. Touch AM or PM and ANALOG or DIGITAL for clock style.
8. Touch NEXT.
9. Select today's date by using the on-screen number keyboard
and use the buttons "<" and ">" to enter the month and year.
10. Select NEXT.
11. Use the sliding bar to select a screen appearance to match
your oven.
12. Toggle between Orange and Blue to define your accent color.
13. Select DONE. This will save your adjustments.
14. See "Setup Menu" section for more detailed information.
When the oven (s)are in use (active mode), the display shows the
clock, mode, oven temperature and timer, if set. If the timer is not
set, you can set it from this screen.
After approximately 2 minutes of inactivity, the display will go into
standby (sleep) mode and the backlight of the display will dim.
When the oven is in operation, the display will remain active.
During programming, the display shows menus and the
appropriate selections for the respective cooking function.
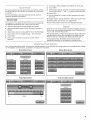
cx,ch ©sy s
From the Home and Modes Menu, all automatic cooking programs can be activated; all manual cooking can be programmed; settings
can be adjusted; and instructions, preparation, and tips can be accessed.
Home Menu Screen Modes Menu Screen
Most Used Modes HR:MIN:SEC Presets
Power Menu Screen Cook Time Menu Screen
Low Medium High
HR:MIN:SEC

The following demonstrates a sequence showing how to cook
from the main menu using the Cook function.
1. Touch the START button or touch the MICROWAVE button
(on combination oven models).
2. Touch the MODES tab to move to the Modes menu.
3. From the Modes menu, touch Cook.
Touch the COOK TIME tab to enter the Cook Time screen.
Enter a cooking length using the on-screen number
keyboard. The time length may not exceed 01:30:00.
4.
Touch the POWER LEVEL tab to move to the Power Level
screen. Use the slider to enter a desired cooking power level
or touch the -10% or +10% buttons. The power level range
must be between 10 and 100%.
High
5.
6. Press START to begin cooking.
7. (Optional) After cook ends, press KEEP WARM. This will start
a new cooking cycle that will keep food warm. The
microwave will run at 10% power for 60 minutes. See "Keep
Warm" section for additional information.
8. (Optional) After cook ends, press ADD 30 SEC. This will
automatically add 30 seconds to the cook time. Press ADD
MORE TIME to go to the Cook Timer screen if necessary.
9. Touch Cancel (or Cancel Microwave on combo models) to
turn off the oven.
The Kitchen Timer is an independent timer not associated with
the Cook Timers.
1. Touch the KITCHEN TIMER button anytime needed.
2. Enter the desired time (- : : -) using the on-screen
number keyboard.
3. Touch CLEAR to clear timer back to (- : : -).
4. Touch START TIMER to initiate the function.
5. Touch CLOSE to hide the Kitchen Timer panel.
While the Kitchen Timer is running, the timer is minimized to
the bar at the right-hand side of the screen.
6. To adjust the Kitchen Timer while it is running, touch ADJUST
and choose "Cancel" or use the on-screen number keyboard
to re-enter a new time.
7. If "Cancel" is touched, the timer is canceled and the panel is
hidden.
8. When the Kitchen Timer is complete, a beep will sound.
9. When time expires, it is possible to add extra time by
touching the Add More Time button. Use the on-screen
number keyboard to enter additional time.
10. To hide the panel, touch OK.
Your oven provides you with the ability to control several of the
default settings and access information through the on screen
display. These include: Button/Screen Lock, Automatically Lock
After Each Use, Clock, Date, Sound Volume, Screen Brightness,
Screen Appearance, Language, Temperature Units, Self-Clean,
Sabbath Mode, Temperature Calibration, Touchscreen
Calibration, Learning Mode, Reset All Settings to Factory
Defaults and Service Information.
To access the Setup menu:
1. Touch SETUP MENU on any screen where available.
2. Use the scroll bar on the right of the screen to view and
access settings.
Button/Screen Lock
The Button/Screen Lock function allows all the buttons to be
locked. This setting is automatically disabled if the Kitchen Timer
is running or the oven is in use.
Touch UNLOCKED at right-hand side of screen beside "Button/
Screen Lock" to lock. Slide bar up on main screen to unlock
button/screen.
Automatically Lock After Each Use
Touch ON/OFF at the right-hand side of screen, beside the
"Automatically Lock After Each Use" option in the Setup Menu to
activate or deactivate this function.
10

Clock
1. From the Setup Menu, touch the button beside Clock.
2. Enter the time using the on-screen number keyboard. A valid
time must be entered in order to save the settings.
3. If Clear is pressed, the clock clears to 00:00
4. Choose AM, PM, or 24-Hour.
5. Touch ON/OFF to toggle between Auto Daylight Savings
Time. When "On," the clock will automatically be adjusted
when daylight saving time occurs.
6. Choose ANALOG or DIGITAL for clock style.
7. Touch SAVE. This will return you to the Clock Screen.
Date
1. From the Setup Menu, touch the button at right-hand side of
screen beside Date.
2. Enter the day using the on-screen number keyboard.
3. Choose the month using the "<" or ">" buttons.
4. Choose the year using the "<" or ">" buttons.
5. Touch SAVE. This will return you to the Clock Screen.
Sound Volume
1. From the Setup Menu, touch the button at right-hand side of
screen beside Sound Volume.
2. Adjust the timer, button press, or alert sounds; use the slider
bar to enter desired sound levels.
3. Touch ON/OFF to toggle between settings for start-up and
shut-down sounds. When "On," the oven will make a sound
when it transitions in and out of idle mode. When "Off," no
sounds will be made.
4. If the Cancel button is touched, the sounds settings will go to
the recommended level.
5. Touch SAVE. This will return you to the Clock Screen.
Screen Theme
1. From the Setup Menu, touch the button at right-hand side of
screen beside Screen Theme.
2. Use the sliding bar to select a screen theme to match your
oven.
3. Toggle between Orange and Blue to define your accent color.
4. Touch SAVE. This will return you to the Clock screen. The
following message will show: "You have selected a new
theme. The oven will reset momentarily. Please wait." It will
take 1 minute to restart the oven with the new settings.
Screen Brightness
1. From the Setup Menu, touch the button beside Screen
Brightness.
2. Use the slider bar to adjust the screen brightness.
3. Choose "Dim The Screen" or "Turn-Off The Screen" for use
when the oven has been idle for 5 minutes.
4. If the Cancel button is touched, the screen brightness will go
to the recommended level and return you to the clock display
screen.
5. Touch SAVE. This will return you to the Clock Screen.
Language
1. From the Setup Menu, touch the button at the right-hand side
of screen beside Language.
2. From the Language Menu, select your language: English or
Fran£;ais.
3. If Cancel button is touched, the language will go back to the
default setting.
4. Touch SAVE. This will return you to the Clock Screen.
Temperature Units
1. From the Setup Menu, touch the button at the right-hand side
of screen beside Temperature Units.
2. Select a temperature unit: Fahrenheit or Celsius. Toggle
between °F/°C.
3. You will remain on the Setup Menu.
Touchscreen Calibration
IMPORTANT: If the buttons on the screen are difficult to touch
accurately, you may need to calibrate the touchscreen. This
process is recommended when the oven is installed under a
counter.
1. From the Setup Menu, touch the button at the right-hand side
of screen beside Touchscreen Calibration.
2. You will be asked to touch and hold 3 targets to calibrate.
3. Touch NEXT.
4. Touch and hold the center of the targets for 2 seconds on the
screen.
5. Test calibration by moving the circle around the screen.
Ensure you can reach all the corners.
6. Touch TRY AGAIN to run calibration again.
7. If Cancel is touched, the Touchscreen Calibration will be
canceled.
8. Touch SAVE. This will return you to the Setup Menu.
Reset All Settings To Factory Defaults
1. From the Setup Menu, touch the button at the right-hand side
of screen beside Reset All Settings to Factory Default.
2. Touch RESET or CANCEL.
3. If Reset is touched, the following sets will be lost: most used
modes/foods, My Creations, Date/Time, and Language. The
Welcome Guide will appear in order to help you reset these
settings.
11

Service Information
For more information, see the "Assistance or Service" section.
1. From the Setup menu, touch the button at right-hand side of
screen beside Service Information.
2. Choose ON or OFF for Demo Mode. The default option is off
when connected to 240V and on when connected to 120V.
3. If Cancel is touched, the Service Information will go back to
the default setting.
4. Touch SAVE. This will return you to the Setup menu.
Most Used
Most Used displays the 3 most recently used cooking modes.
Turntable
1. Press ON or OFF to activate or deactivate the turntable in any
mode that the turntable option is available.
Presets
From the Home tab, choose one of the three available presets by
touching Popcorn, Baked Potato or Beverage.
30 Sec
If the microwave oven is in a manual cook cycle, pressing the
30 Sec button will add 30 seconds of cook time onto the current
cycle. The additional 30 seconds will be added to the cook time
in the display.
If the microwave is idle, pressing the 30 Sec button will begin a
30-second cycle in Cook mode at 100% power. This will be
shown on the status screen.
BUILT-INMICROWAVE OVEN USE
A magnetron in the oven produces microwaves which reflect off
the metal floor, walls and ceiling and pass through the turntable
and appropriate cookware to the food. Microwaves are attracted
to and absorbed by fat, sugar and water molecules in the food,
causing them to move, producing friction and heat which cooks
the food.
• To avoid damage to the microwave oven, do not lean on or
allow children to swing on the microwave oven door.
• To avoid damage to the microwave oven, do not operate
microwave oven when it is empty.
• The turntable must be in place and correct side up when
microwave oven is in use. Do not use if turntable is chipped
or broken. See "Assistance or Service" section to reorder.
• Baby bottles and baby food jars should not be heated in
microwave oven.
• Clothes, flowers, fruit, herbs, wood, gourds, paper, including
brown paper bags and newspaper, should not be dried in
microwave oven.
• Paraffin wax will not melt in the microwave oven because it
does not absorb microwaves.
• Use oven mitts or pot holders when removing containers from
microwave oven.
• Do not overcook potatoes. At the end of the recommended
cook time, potatoes should be slightly firm. Let potatoes
stand for 5 minutes. They will finish cooking while standing.
• Do not cook or reheat whole eggs inside the shell. Steam
buildup in whole eggs may cause them to burst. Cover
poached eggs and allow a standing time.
When microwave cooking, the amount, size and shape, starting
temperature, composition and density of the food affect cooking
results.
Amount of Food
The more food heated at once, the longer the cook time needed.
Check for doneness and add small increments of time if
necessary.
Size and Shape
Smaller pieces of food will cook more quickly than larger pieces,
and uniformly shaped foods cook more evenly than irregularly
shaped food.
Starting Temperature
Room temperature foods will heat faster than refrigerated foods,
and refrigerated foods will heat faster than frozen foods.
Composition and Density
Foods high in fat and sugar will reach a higher temperature, and
will heat faster than other foods. Heavy, dense foods, such as
meat and potatoes, require a longer cook time than the same size
of a light, porous food, such as cake.
12

*_*_*, _ _ _ _ _ • F_ •
Covering
Covering food helps retain moisture, shorten cook time and
reduce spattering. Use the lid supplied with cookware. If a lid is
not available, wax paper, paper towels or plastic wrap approved
for microwave ovens may be used. Plastic wrap should be turned
back at one corner to provide an opening to vent steam.
Condensation on the door and cavity surfaces is normal during
heavy cooking.
Stirring and Turning
Stirring and turning redistribute heat evenly to avoid overcooking
the outer edges of food. Stir from outside to center. If possible,
turn food over from bottom to top.
Arranging
If heating irregularly shaped or different sized foods, arrange the
thinner parts and smaller sized items toward the center. If
cooking several items of the same size and shape, place them in
a ring pattern, leaving the center of the ring empty.
Piercing
Before heating, use a fork or small knife to pierce or prick foods
that have a skin or membrane, such as potatoes, egg yolks,
chicken livers, hot dogs, and sausage. Prick in several places to
allow steam to vent.
Shielding
Use small, flat pieces of aluminum foil to shield the thin pieces of
irregularly shaped foods, bones and foods such as chicken
wings, leg tips and fish tail. See "Aluminum Foil and Metal" first.
Standing Time
Food will continue to cook by the natural conduction of heat even
after the microwave cooking cycle ends. The length of standing
time depends on the volume and density of the food.
Turntable On/Off
For best performance, the turntable should be on during
microwave cooking.
If using oversized cookware that does not turn freely on the
turntable, turn the turntable off. See the "Turntable" section for
additional information.
When microwave cooking with the turntable off, food should be
turned halfway through the cooking process.
Cookware and dinnerware must fit on the turntable. Always use
oven mitts or pot holders when handling because any dish may
become hot from heat transferred from the food. Do not use
cookware and dinnerware with gold or silver trim. Use the
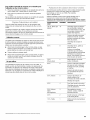
following chart as a guide, then test before using.
MATERIAL RECOMMENDATIONS
Aluminum Foil, See "Aluminum Foil and Metal" section.
Metal
Browning Dish Bottom must be at least 3/16"(5 mm) above
the turntable. Follow manufacturer's
recommendations.
Ceramic Glass,
Glass
Acceptable for use.
MATERIAL RECOMMENDATIONS
China, Follow manufacturer's recommendations.
Earthenware
Melamine Follow manufacturer's recommendations.
Paper: Towels, Use nonrecycled and those approved by
Dinnerware, the manufacturer for microwave oven use.
Napkins
Plastic: Wraps, Use those approved by the manufacturer
Bags, Covers, for microwave oven use.
Dinnerware,
Containers
Pottery and Clay Follow manufacturer's recommendations.
Silicone Follow manufacturer's recommendations.
Bakeware
Straw, Wicker, Do not use in microwave oven.
Wooden
Containers
Styrofoam ®t Do not use in microwave oven.
Wax Paper Acceptable for use.
To Test Cookware or Dinnerware for Microwave Use:
1. Place cookware or dinnerware in microwave oven with
1 cup (250 mL) of water beside it.
2. Cook at 100% cooking power for 1 minute.
Do not use cookware or dinnerware if it becomes hot and the
water stays cool.
Always use oven mitts or pot holders when removing dishes from
the microwave oven.
Aluminum foil and some metal can be used in the microwave
oven. If not used properly, arcing (a blue flash of light) can occur
and cause damage to the microwave oven.
OK for Use
Grids and bakeware supplied with the microwave oven (on some
models), aluminum foil for shielding, and approved meat
thermometers may be used with the following guidelines:
• To avoid damage to the microwave oven, do not allow
aluminum foil or metal to touch the inside cavity walls, ceiling
or floor.
• Always use the turntable.
• To avoid damage to the microwave oven, do not allow
contact with another metal object during microwave cooking.
Do Not Use
Metal cookware and bakeware, gold, silver, pewter, non-
approved meat thermometers, skewers, twist ties, foil liners
such as sandwich wrappers, staples and objects with gold or
silver trim or a metallic glaze should not be used in the
microwave oven.
1-®STYROFOAM is a Registered Trademark of The Dow Chemical Company.
13

Many recipes for microwave cooking specify which cooking
power to use by percent, name or number. For example,
70%=7=Medium-High.
Use the following chart as a general guide for the suggested
cooking power of specific foods.
MICROWAVE COOKING POWER CHART
PERCENT/NAME NUMBER USE
100%, High 10
(default setting)
90%
8O%
Quick heating convenience
foods and foods with high
water content, such as soups,
beverages and most
vegetables.
Cooking small, tender pieces
of meat, ground meat, poultry
pieces and fish fillets.
Heating cream soups.
Heating rice, pasta or
casseroles.
Cooking and heating foods
that need a cook power lower
than high. For example, whole
fish and meat loaf.
70%, 7 Reheating a single serving of
Medium-High food.
60% 6 Cooking sensitive foods such
as cheese and egg dishes,
pudding and custards.
Cooking non-stirrable
casseroles, such as lasagna.
50%, Medium 5 Cooking ham, whole poultry
and pot roasts.
Simmering stews.
40% 4 Melting chocolate.
Heating bread, rolls and
pastries.
30%, Medium- 3 Defrosting bread, fish, meats,
Low, Defrost poultry and precooked foods.
20% 2 Softening butter, cheese, and
ice cream.
10%, Low 1 Taking chill out of fruit.
6. Select the amount of food to be prepared.
7. Press the TIPS & DONENESS button if available to review the
selected settings as well as additional instructions. The Tips
& Doneness option is not available in all modes.
8. Press START to use these settings.
With the "Built-in Foods" wizard module, you can cook a food
without knowing the precise oven settings. Select the type of
foods and other parameters (such as doneness or weight), and
the interface responds with the best cooking settings.
1. From the "Presets" mode or from a cooking function, select
the type of food to be cooked. See "View Foods" section.
2. Press NEXT.
3. Select amount or weight of food. In the "Defrost" Mode,
"Weight Unknown" is shown. Select "Weight Unknown" to
choose a specific food and allow the microwave to estimate
the weight of the food. Then, select the amount of food.
NOTE: Food is measured by either the number of pieces or
by weight.
4. (Optional) For additional information and to select the desired
doneness level, press the TIPS & DONENESS button.
5. (Optional) To adjust the doneness level, press the "+",
"RECOMMENDED," or "-" buttons.
6. Press START. The display will count down the cook time.
When the stop time is reached, the oven will shut off
automatically.
If enabled end-of-cycle tones will sound, then reminder tones
will sound every minute.
7. Touch CANCEL (or CANCEL MICROWAVE on combination
models) to turn off the oven.
During the Sensor Cook function a sensor automatically adjusts
for the cook time and power level.
The microwave oven display will show the time countdown once
the sensor identifies the cooking duration.
If the microwave oven door is opened during a sensor function
the microwave oven will turn off, and any additional operations
will be canceled.
For best cooking performance:
Before using a sensor cook function, make sure power has been
supplied to the microwave oven for at least 2 minutes, the room
temperature is not above 95°F (35°C), and the outside of the
cooking container and the microwave oven cavity are dry.
V®w Fo s
1. From any module with the "View Foods" button available,
press VIEW FOODS.
2. Use the slider on the right side of the screen to see all the
options on the View Foods list.
3. Select the type of food to cook and touch NEXT.
4. If asked to (or needed), enter the weight of the food using the
on-screen number keyboard. Select ounces, pounds or
quantity of food in units.
5. If in Defrost mode, a Weight Unknown option is available.
When using Weight Unknown in Defrost mode, it is possible
to pick an exact food from a list allowing the microwave to
estimate the weight. Press NEXT.
14

1. Touch the MODES tab to move to the Modes menu.
2. From the Modes menu, select one of the following options:
Reheat, Keep Warm, Melt, Soften, Defrost, Steam, Boil/
Simmer, Browning Pan, Cook, Convect Bake, Convect Roast,
Grill/Broil or SpeedCook Foods.
3. Touch the COOK TIME tab to enter the cook time screen.
Enter a cooking length using the on-screen number
keyboard.
4. Touch the POWER LEVEL tab to move to the power screen.
On some modes, to change the power, move the slider to
enter a desired cooking power or touch the -10% or +10%
buttons. The range is shown on the following table.
Mode Default Power/ Range
Temperature
Cook 100% 10-100%
Reheat 100% 10-100%
C. Bake 325°F (163°C) 100-450°F (38-232°C)
C. Roast 325°F (163°C) 225-450°F (107-232°C)
Defrost 20%
Steam
Melt 30%
Soften 20%
Boil/Simmer
Broil/Grill 0% 0-40%
Keep Warm 10%
Browning Pan 100%
5. Touch START.
My Creations allows the customization of cooking processes.
When My Creations is selected from the main menu a list of
existing creations is presented along with the ability to create
more.
1. From the Home tab, touch MY CREATIONS.
If nothing has yet been added to My Creations, a welcome
screen will appear, explaining the feature and providing the
option to create a new entry. It should read: "Save frequent
recipe settings for easy access in the futureF' You may also
link multiple modes together. For example, you can defrost
frozen leftovers for a few minutes, then cook it at a higher
power level.
2. Touch CREATE NEW.
3. Select the desired cooking mode: Reheat, Keep Warm, Melt,
Soften, Defrost, Steam, Boil & Simmer, Browning Pan, Cook,
Convect Bake, Convect Roast or Grill & Broil.
4. Touch NEXT.
5. Enter the cook time length using the on-screen number
keyboard then, press NEXT.
6. Select the desired cooking temperature. Use the slider to
enter a desired cooking temperature or touch the -5°F (-1°C)
or +5°F (+1°C) buttons, then touch NEXT.
7. When available, select the desired cooking power level. Use
the slider to enter a desired cooking power level or press the
buttons -10% or +10% then press NEXT.
8. Touch ADD STAGE to enter new stage information.
9. Review your settings. Touch EDIT to re-enter the settings or
touch DELETE to immediately delete the stage.
10. If the Edit button is chosen, touch RENAME or START.
11. Touch SAVE or SAVE & START.
When saving, you can enter a name for the food using an
on-screen keyboard. Touch the Shift Lock button to make all
letters as capitals (or turn off the feature). Likewise, any letter
typed with Shift Lock button on will be capital. Touch 123...
button to change the on-screen keyboard to show numbers.
Touch DELETE to delete the last character in the text box.
12. Touch OK.
MICROWAVE OVEN USE
Times and cooking power have been preprogrammed for many
common microwavable foods. Use the following chart as a guide.
FOOD QUANTITY
Manual* Default power
level 100%.
Baked Potato
Pierce each one several times with a fork.
Place on a paper towel. Let stand 5 minutes
after cooking.
1-4 potatoes
Frozen entree 10-21 oz (283-
Remove from package. Loosen cover on three 595 g)
sides. Let stand 3 minutes after cooking.
Scrambled eggs
Break eggs into a microwave-safe container
with high sides. Add 1 tbs (15 mL) water per
egg and beat. Cover with plastic wrap and
vent. Stir and let stand 2-3 minutes after
cooking.
1-4 eggs
Popcorn 1.75-3.5 oz
The sensor determines the appropriate bag
popping time of commercially packaged
microwaveable popcorn.
Do not use regular paper bags or glassware.
Pop only 1 package of popcorn at a time.
Follow the manufacturer's instructions. Listen
for popping to slow to 1 pop every 1 or
2 seconds, then stop the cycle. Do not repop
unpopped kernels. For best results, use fresh
bags of popcorn. Cooking results may vary by
brand and fat content.
15

To Use Cook:
1. Touch the START button or touch the MICROWAVE button
(on combination oven models).
2. Touch the MODES tab to move to the Modes menu.
3. From the Modes menu, touch COOK.
4. Choose Cook Time or View Foods from the popup menu.
5. If View Foods is selected, choose one of the foods from the
list. The list shows only the foods appropriate for the Cook
mode. See "View Foods" section.
6. Touch the COOK TIME tab to enter the cook time screen.
Enter a cooking length using the on-screen number keyboard
to set a timer to sound when cooking ends. The time length
may not exceed 01:30:00.
7. Touch the POWER LEVEL tab to move to the Power Level
screen. Use the slider to enter a desired cooking power level
or touch the -10% or +10% buttons. The power level must be
above 10% and may not exceed 100% or an error screen will
appear. The default value is 100%.
8. (Optional) After cook ends, press KEEP WARM button. This
will start a new cooking cycle that will keep food warm. The
microwave will run at 10% power for 60 minutes. See "Keep
Warm" section for additional information.
9. (Optional) After cook ends, press ADD 30 SEC button. This
will automatically add 30 seconds to the cook time. Press
ADD MORE TIME to go to Cook Timer screen if necessary.
10. Touch CANCEL (or CANCEL MICROWAVE on combo
models) to turn off the oven.
Times and cooking powers have been preprogrammed for
reheating a number of food types.
Use the following chart as a guide.
CUSTOM REHEAT CHART
FOOD QUANTITY
Manual* Default power level
100%.
Beverage 1-2 cups (250 mL-
Do not cover. 500 mL)
Casserole 1-4 cups (250 mL-1 L)
Place in microwave-safe container.
Cover with plastic wrap and vent. Stir
and let stand 2-3 minutes after
reheating.
Dinner Plate
Place food on plate. Cover with plastic
wrap and vent. Let stand 2-3 minutes
after reheating.
8-16 oz
(227-454 g).
Pizza Slices 1-3 slices (3 oz [85 g]
Place on a paper towel, each)
Sauce 1-4 cups (250 mL-1 L)
Place in microwave-safe container.
Cover with plastic wrap and vent. Stir
and let stand 2-3 minutes after
reheating.
Soup 1-4 cups (250 mL-1 L)
Place in microwave-safe container.
Cover with plastic wrap and vent. Stir
and let stand 2-3 minutes after
reheating.
*Manual Reheat requires that a cook time and a power level be
entered if using other than 100%.
To Use Reheat:
1. Touch the START button or touch the MICROWAVE button
(on combination oven models).
2. Touch the MODES tab to move to the Modes menu.
3. From the Modes menu, touch REHEAT.
4. Choose Cook Time or View Foods from the popup menu.
5. If View Foods is selected, choose one of the foods from the
list. The list shows only the foods appropriate for the Reheat
mode. See "View Foods" section.
6. Touch the COOK TIME tab to enter the cook time screen.
Enter acooking length using the on-screen number keyboard
to set a timer to sound when cooking ends. The time length
may not exceed 01:30:00.
7. Touch the POWER LEVEL tab to move to the Power Level
screen. Use the slider to enter a desired cooking power level
or touch the -10% or +10% buttons. The power level must be
above 10% and may not exceed 100% or an error screen will
appear. The default value is 100%.
8. Press START to begin cooking.
9. (Optional) After cook ends, press KEEP WARM button. This
will start a new cooking cycle that will keep food warm. The
microwave will run at 10% power for 60 minutes. See "Keep
Warm" section for additional information.
10. (Optional) After cook ends, press ADD 30 SEC button. This
will automatically add 30 seconds to the cook time. Press
ADD MORE TIME to go to Cook Timer screen if necessary.
11. Touch CANCEL (or CANCEL MICROWAVE on combo
models) to turn off the oven.
IMPORTANT: Heated liquids can splash out during and after
heating. A wooden stir stick placed in the cup or bowl during
heating may help avoid this.
The Speed Cook uses the broil element, convection element and
fan, and microwaves. All cycle on and off in intervals.
• Bakeware and the interior oven surfaces, including the door,
will become hot.
• Always use an instant read thermometer to determine
doneness of meat and poultry.
• Use microwave-safe and ovenproof bakeware.
• Do not use covers or containers made of foil, paper, waxed
paper, or plastic not recommended for use in a conventional
oven.
When roasting, meats and poultry may spatter. Plastic oven
bags designed for conventional oven use can be used for
easier cleanup. Follow manufacturer's recommendations.
When using the convection grid, place it directly on the
turntable.
Arrange pieces of food in a single layer on the crisper pan or
baking dish.
Before Speed Cooking, put food in the oven and close the door.
Preheating is not necessary.
To Use SpeedCook:
1. Touch the START button or touch the MICROWAVE button
(on combination oven models).
2. Touch the MODES tab to move to the Modes menu.
3. From the Modes menu, touch SPEEDCOOK FOODS.
4. Select the desired food and press NEXT. See the list of food
of each category on the following chart.
5. Select one of the preset quantities.
6. (Optional) For additional information and to select the desired
doneness level, press the TIPS & DONENESS button. If
desired, press the "+", "RECOMMENDED" or "-" buttons to
adjust the doneness level.
7. Press START to begin cooking.
16

8.
(Optional) After cook ends, press KEEP WARM button. This
will start a new cooking cycle that will keep food warm. The
microwave will run at 10% power for 60 minutes. See "Keep
Warm" section for additional information.
9. (Optional) After cook ends, press ADD 30 SEC button. This
will automatically add 30 seconds to the cook time. Press
ADD MORE TIME to go to Cook Timer screen if necessary.
10. Touch CANCEL (or CANCEL MICROWAVE on combo
models) to turn off the oven.
SETTI NG QUANTITY
Meats
Bone-in pork chops
Boneless beef roast
Boneless ham
Boneless pork chops
Boneless pork roast
Meatloaf
Meatballs
Swiss steak
0.4-1.5 Ib (0.2-0.7 kg)
1.5-5.0 Ib (0.7-2.3 kg)
1.0-4.5 Ib (0.5-2.0 kg)
0.3-1.6 Ib (0.1-0.7 kg)
1.0-5.0 Ib (0.5-2.3 kg)
1.5-2.0 Ib (0.7-0.9 kg)
20 pieces
1.0-2.0 Ib (0.5-0.9 kg)
Poultry
Chicken breast tenders
Chicken breast
Chicken wings
Chicken nuggets
Chicken pieces - with skin
Frozen fried chicken
Turkey breast
Whole chicken
5-20 pieces
0.2-2.0 Ib (0.1-0.9 kg)
0.5-1.5 Ib (0.2-0.7 kg)
6-24 pieces
0.5-2.0 Ib (0.2-0.9 kg)
4-8 pieces
3.0 Ib (1.4 kg)
3.0-5.5 Ib (1.4-2.5 kg)
Seafood
Fish fillets
Fish steaks
Frozen fish sticks
Frozen fish, battered
0.4-1.2 Ib (0.2-0.5 kg)
0.3-1.3 Ib (0.1-0.6 kg)
4-16 pieces
2-8 pieces
Breads
Refrigerated biscuits -
large, 1 pan
Refrigerated biscuits -
small, 1 pan
Cinnamon rolls - large, 1 pan
Cinnamon rolls - small, 1 pan
Crescent rolls - 1 pan
Frozen bread sticks - 1 pan
Garlic/cheese bread - 1 loaf
8 pieces
10 pieces
5 pieces
8 pieces
8 pieces
6 pieces
8 oz (226.8 g)
Vegetables
Baked potatoes
French fries
Frozen onion rings
Frozen potato nuggets
Frozen potato skins
Frozen potato wedges
Roasted vegetables
Sweet potatoes
1-8 potatoes
3-12 oz (85.0-340.2 g)
4-16 oz (113.4-453.6 g)
3-12 oz (85.0-340.2 g)
1-4 servings
1-4 servings
2-8 cups (500-2,000 mL)
1-6 potatoes
Desserts
Brownies -
(8" x 8" [20.3 x 20.3 cm] or
9 x 13" [22.9 x 33 cm] pan)
Cake, bundt cake
Cookie dough - 1 pan
8 cookies
Casserole
Freshly made casserole -
(8" x 8" [20.3 x 20.3 cm] or
9 x 13" [22.9 x 33 cm] pan)
Freshly made lasagna -
(8" x 8" [20.3 x 20.3 cm] pan
Frozen lasagna
4-10 cups (1-2.5 L)
10.0-60.0 oz (284 g-1.7 g)
SETTING QUANTITY
Convenience Food
Bagel bites
Breakfast sandwich
Cheese sticks
Frozen egg rolls
Frozen french toast
Frozen pancakes
Frozen sausage links
Frozen sausage patties
Frozen waffles
Hot dogs
Jalapeno poppers
Nachos - 1 pan
Pizza - reheat
Pizza rolls
Pizza - thin crust
Pizza - thick crust
9 pieces
2 sandwiches
4-16 pieces
1-8 pieces
1-4 pieces
1-4 pieces
2-10 pieces
2-8 pieces
1-4 pieces
2-10 pieces
5-20 pieces
1-4 slices
6-24 pieces
6"-12" (15-30 cm) pizza
6"-12" (15-30 cm) pizza
A. Broil element
B. Convection fan
C. Convection element
D. Convection grid
Auto Convection Conversion uses the convection element, the
broil element and the fan. Hot air is circulated throughout the
oven cavity by the fan. The constantly moving air surrounds the
food to heat the outer portion quickly.
• The convect function may be used to cook small amounts of
food on a single grid.
When the convection element is in use, the cooling fan turns
on and stays on for up to 10 minutes after the cycle is over.
Always use the convection grid placed on turntable.
To avoid damage to the microwave oven, do not cover
turntable or convection grid or baking tray with aluminum foil.
When the broil element is in use, the cooling fan turns on and
stays on for up to 10 minutes after the cycle is over.
Do not use light plastic containers, plastic wrap or paper
products. All heatproof cookware or metal utensils can be
used in convection cooking. Round pizza pans are excellent
for convection cooking.
Use Auto Convection Conversion for items such as souffles,
breads, cookies, angel food cakes, pizza, and most meats
and fish.
• When the convection element is in use, the cooling fan turns
on and stays on for up to 10 minutes after the cycle is over.
Auto Convection Conversion is a function that converts a
standard thermal bake cook time and temperature into an ideal
cook time and temperature for convection cooking.
Convection temperatures and times differ from those of standard
cooking. The oven will automatically reduce standard recipe
temperatures and times for convection cooking.
The conversion may not be exact because foods are grouped in
general categories.
17

Use the following chart as a guide.
AUTO CONVECTION CONVERSION CHART
SETTING FOODS
CONVECT BAKE Casseroles, cakes, baked goods and
cookies.
CONVECT ROAST Whole chicken, turkey, vegetables, pork,
beef roasts
MANUAL
To Use Auto Convection Conversion:
1. From the Home tab, press the AUTO CONVECTION
CONVERSION button.
2. This process will automatically convert your standard recipe
for convection cooking. Select a Convect Conversion mode:
Convect Bake, Convect Roast or Manual (view all manual
modes to skip the recipe update process).
3. Enter standard cooking temperature. Use the slider to enter a
desired cooking temperature or press the buttons -5°F (-1°C)
or +5°F (+1°C).
4. Choose Skip Timer or Set Timer.
5. If Set Timer is choosen, enter standard cooking time using
the on-screen number keyboard.
6. Press NEXT.
7. Press ON or OFF on Reminder button. It reminds you to
check food when 20% of the timer remains.
8. If Skip Timer is chosen, the Cook Timer value will show "Not
Set."
9. Press START to use the converted settings.
Convect Bake uses the convection element and fan.
• Use the convection grid. Place on turntable.
• Use oven mitts as the door and grid will become hot.
Use the following chart as a guide.
FOOD QUANTITY
Manual
Bread 1-2 loaves
Cookies 1 pan
To Use Convect Bake:
1. Touch the START button or touch the MICROWAVE button
(on combination oven models).
2. Touch the MODES tab to move to the Modes menu.
3. From the Modes menu, touch CONVECT BAKE.
4. Choose Cook Time or View Foods from the popup menu.
5. If View Foods is selected, choose one of the foods from the
list. The list shows only the foods appropriate for the Convect
Bake mode. See "View Foods" section.
6. Touch the COOK TIME tab to enter the cook time screen.
Enter a cooking length using the on-screen number keyboard
to set a timer to sound when cooking ends. The time length
may not exceed 12:00:00.
7. From the Temperature tab, adjust the temperature. Use the
slider to enter a desired cooking temperature or press the
buttons -5°F (-1°C) or +5°F (+1°C). The temperature must be
between 100 and 450°F (38 and 232°C).
8. Press START to begin preheating the oven.
9. Place food in oven when preheat signal sounds. The screen
will also prompt you when to insert food.
10. (Optional) After cook ends, press KEEP WARM button. This
will start a new cooking cycle that will keep food warm. The
microwave will run at 10% power for 60 minutes. See "Keep
Warm" section for additional information.
11. (Optional) After cook ends, press ADD 30 SEC button. This
will automatically add 30 seconds to the cook time. Press
ADD MORE TIME to go to Cook Timer screen if necessary.
12. Touch CANCEL (or CANCEL MICROWAVE on combo
models) to turn off the oven.
The Roast function uses the convection element with or without
microwave power. The Manual Roast function requires that atime
and temperature (and microwaves if desired) be entered. The
highest microwave power level that can be used is 30%.
• Use the convection grid with the browning pan underneath to
catch drippings. Place on turntable.
• Use oven mitts as the door and grid will become hot.
FOOD QUANTITY
Manual
Beef roast 2.0-5.0 Ib (0.9-2.3 kg)
To
1.
2.
3.
4.
5.
Use Convect Roast:
Touch the START button or touch the MICROWAVE button
(on combination oven models).
Touch the MODES tab to move to the Modes menu.
From the Modes menu, touch CONVECT ROAST.
Choose Cook Time or View Foods from the popup menu.
If View Foods is selected, choose one of the foods from the
list. The list shows only the foods appropriate for the Convect
Roast mode. See "View Foods" section.
6. Touch the COOK TIME tab to enter the cook time screen.
Enter acooking length using the on-screen number keyboard
to set a timer to sound when cooking ends. The time length
may not exceed 12:00:00.
7. Touch the POWER LEVEL tab to move to the Power Level
screen. Use the slider to enter a desired cooking power level
or touch the -10% or +10% buttons. The power level must be
between 0 and 30%. The default value is 0%.
8. On the Power Level tab, press the TEMPERATURE button on
the bottom of the screen to set the temperature.
9. From the Temperature tab, adjust the temperature. Use the
slider to enter a desired cooking temperature or press the
buttons -5°F (-1°C) or +5°F (+1°C). The temperature must be
between 225 and 450°F (107-232°C).
10. Press START to begin cooking.
11. (Optional) After cook ends, press KEEP WARM button. This
will start a new cooking cycle that will keep food warm. The
microwave will run at 10% power for 60 minutes. See "Keep
Warm" section for additional information.
12. (Optional) After cook ends, press ADD 30 SEC button. This
will automatically add 30 seconds to the cook time. Press
ADD MORE TIME to go to Cook Timer screen if necessary.
13. Touch CANCEL (or CANCEL MICROWAVE on combo
models) to turn off the oven.
18

The Defrost feature can be used, or the microwave oven can be
manually set to defrost by using 20% cook power.
• For optimal results, food should be 0°F (-18°C) or colder
when defrosting.
• Unwrap foods and remove lids (from fruit juice) before
defrosting.
• Shallow packages will defrost more quickly than deep blocks.
• Separate food pieces as soon as possible during or at the
end of the cycle for more even defrosting.
• Foods left outside the freezer for more than 20 minutes or
frozen ready-made food should not be defrosted using the
Custom Defrost feature, but should be defrosted manually.
• Use small pieces of aluminum foil to shield parts of food such
as chicken wings, leg tips and fish tails. See "Aluminum Foil
and Metal" first.
Times and cooking powers have been preprogrammed for
defrosting a number of food types. For each food category a
precise amount of food can be entered or preprogrammed
quantities can be selected.
To Use Defrost:
1. Touch the START button or touch the MICROWAVE button
(on combination oven models).
2. Touch the MODES tab to move to the Modes menu.
3. From the Modes menu, touch DEFROST.
4. Choose Cook Time or View Foods from the popup menu.
5. If View Foods is selected, choose one of the foods from the
list and press NEXT.The list shows only the foods appropriate
for the Defrost mode. See "View Foods" section.
6. Touch the COOK TIME tab to enter the cook time screen.
Enter a cooking length using the on-screen number keyboard
to set a timer to sound when cooking ends. The time length
may not exceed 01:30:00.
7. Press START to begin defrosting.
8. (Optional) After cook ends, press KEEP WARM button. This
will start a new cooking cycle that will keep food warm. The
microwave will run at 10% power for 60 minutes. See "Keep
Warm" section for additional information.
9. (Optional) After cook ends, press ADD 30 SEC button. This
will automatically add 30 seconds to the cook time. Press
ADD MORE TIME to go to Cook Timer screen if necessary.
10. Touch CANCEL (or CANCEL MICROWAVE on combo
models) to turn off the oven.
To Use Defrost with Weight Unknown:
If the precise weight of the food is unknown, use the following
chart as a reference.
FOOD SETTING QUANTITY
Bread Bagel Small 1-8 pieces
Muffin
Roll
Medium 1-6 pieces
Large 1-6 pieces
Small 4-16 pieces
Medium 1-6 pieces
Large 1-6 pieces
Small 2-8 pieces
Medium 1-6 pieces
Large 1-6 pieces
FOOD SETTING QUANTITY
Fish/ Fillet 1-6 pieces
Seafood Steak 1-4 pieces
Shrimp 1-4 cups
(236 mL-1 L)
Scallops 1-4 cups
(236 mL-1 L)
Meat Ground
Chops
Steak
1-4 cups
(236 mL-1
Small 1-6 pieces
Medium 1-6 pieces
Large 1-4 pieces
Small 1-6 pieces
Medium 1-4 pieces
Large 1-2 pieces
L)
Poultry Breast 1-6 pieces
Ground 1-4 cups
(236 mL-1 L)
Pieces Small 1-6 pieces
Medium 1-4 pieces
Large 1-4 pieces
DEFROST PREPARATION CHART
MEAT
Beeh ground, steaks, roast, The narrow or fatty areas of
stew irregular shaped cuts should
be shielded with foil before
Lamb: stew and chops defrosting.
Pork: chops, ribs, roasts, Do not defrost less than
sausage 1¼Ib (113 g) or two 4 oz (113 g)
patties.
Place all meats in microwave-
safe baking dish.
POULTRY
Chicken: whole and cut up
Cornish hens
Turkey: breast
Place in microwave-safe
baking dish, chicken breast
side up.
Remove giblets from whole
chicken.
FISH
Fillets, Steaks, Whole, Place in microwave-safe
Shellfish baking dish.
Steam is a sensor cooking function that uses microwaves to
steam food. Use Steam for foods such as vegetables, fish and
potatoes.
• Times and cooking powers have been preprogrammed for
steaming a number of food types.
• Manual Steam requires that a cook time be entered.
• Use a microwavable steamer.
19

Use the following chart as a guide.
STEAM COOKING CHART
FOOD CATEGORY QUANTITY
Fresh vegetables
Green beans, carrots, cauliflower,
squash, broccoli
Asparagus
Corn on the cob
Spinach
Frozen vegetables
2-6 cups (473 mL-1.4 L)
8-16 oz (227-454 g)
2-4 ears
4-8 cups (1-2 L)
2-6 cups (473 mL-1.4 L)
Fish fillets 0.5-1.5 Ib (227-681 g)
Shrimp 5-8 oz (142-277 g)
Manual 1-4 servings
Potatoes 2-6 cups (473 mL - 1.5 L)
To Use Steam:
1. Touch the START button or touch the MICROWAVE button
(on combination oven models).
2. Touch the MODES tab to move to the Modes menu.
3. From the Modes menu, touch STEAM.
4. Choose Cook Time or View Foods from the popup menu.
5. If View Foods is selected, choose one of the foods from the
list. The list shows only the foods appropriate for the Steam
mode. See "View Foods" section.
6. Touch the COOK TIME tab to enter the cook time screen.
Enter a cooking length using the on-screen number keyboard
to set a timer to sound when cooking ends. The time length
may not exceed 01:30:00.
7. Press START. Once the boiling point is reached, the display
will count down the cook time.
8. (Optional) After cook ends, press KEEP WARM button. This
will start a new cooking cycle that will keep food warm. The
microwave will run at 10% power for 60 minutes. See "Keep
Warm" section for additional information.
9. (Optional) After cook ends, press ADD 30 SEC button. This
will automatically add 30 seconds to the cook time. Press
ADD MORE TIME to go to Cook Timer screen if necessary.
10. Touch CANCEL (or CANCEL MICROWAVE on combo
models) to turn off the oven.
The Melt function may be used to melt your food. Times and
cooking powers have been preprogrammed for a number of food
types. Use the following chart as a guide.
MELT CHART
FOOD QUANTITY
Butter or Margarine 1/2-2sticks
Cheese 8 or 16 oz (225 or 455 g)
Chocolate 1-9 oz (28-255 g)
Marshmallow 5 or 10 oz (140 or 280 g)
Manual Melt Default power level 30%
To use Melt:
1. Touch the START button or touch the MICROWAVE button
(on combination oven models).
2. Touch the MODES tab to move to the Modes menu.
3. From the Modes menu, touch MELT.
4. Choose Cook Time or View Foods from the popup menu.
5. If View Foods is selected, choose one of the foods from the
list. The list shows only the foods appropriate for the Melt
mode. See "View Foods" section.
6. Touch the COOK TIME tab to enter the cook time screen.
Enter acooking length using the on-screen number keyboard
to set a timer to sound when cooking ends. The time length
may not exceed 01:30:00.
7. Press START to begin cooking.
8. (Optional) After cook ends, press KEEP WARM button. This
will start a new cooking cycle that will keep food warm. The
microwave will run at 10% power for 60 minutes. See "Keep
Warm" section for additional information.
9. (Optional) After cook ends, press ADD 30 SEC button. This
will automatically add 30 seconds to the cook time. Press
ADD MORE TIME to go to Cook Timer screen if necessary.
10. Touch CANCEL (or CANCEL MICROWAVE on combo
models) to turn off the oven.
The Soften function may be used to soften your food. Times and
cooking powers have been preprogrammed for a number of food
types. Use the following chart as a guide.
SOFTEN CHART
FOOD QUANTITY
Butter or Margarine 1/2-2sticks
Cream Cheese 3 or 8 oz (85 or 225 g)
Ice cream 16, 32 or 64 oz
(450 g, 900 g or 1.8 kg)
Manual Soften Default power level 20%
To use Soften:
1. Touch the START button or touch the MICROWAVE button
(on combination oven models).
2. Touch the MODES tab to move to the Modes menu.
3. From the Modes menu, touch SOFTEN.
4. Choose Cook Time or View Foods from the popup menu.
5. If View Foods is selected, choose one of the foods from the
list. The list shows only the foods appropriate for the Soften
mode. See "View Foods" section.
6. Touch the COOK TIME tab to enter the cook time screen.
Enter acooking length using the on-screen number keyboard
to set a timer to sound when cooking ends. The time length
may not exceed 01:30:00.
7. Press START to begin cooking.
8. (Optional) After cook ends, press KEEP WARM button. This
will start a new cooking cycle that will keep food warm. The
microwave will run at 10% power for 60 minutes. See "Keep
Warm" section for additional information.
9. (Optional) After cook ends, press ADD 30 SEC button. This
will automatically add 30 seconds to the cook time. Press
ADD MORE TIME to go to Cook Timer screen if necessary.
10. Touch CANCEL (or CANCEL MICROWAVE on combo
models) to turn off the oven.
20
La page est en cours de chargement...
La page est en cours de chargement...
La page est en cours de chargement...
La page est en cours de chargement...
La page est en cours de chargement...
La page est en cours de chargement...
La page est en cours de chargement...
La page est en cours de chargement...
La page est en cours de chargement...
La page est en cours de chargement...
La page est en cours de chargement...
La page est en cours de chargement...
La page est en cours de chargement...
La page est en cours de chargement...
La page est en cours de chargement...
La page est en cours de chargement...
La page est en cours de chargement...
La page est en cours de chargement...
La page est en cours de chargement...
La page est en cours de chargement...
La page est en cours de chargement...
La page est en cours de chargement...
La page est en cours de chargement...
La page est en cours de chargement...
La page est en cours de chargement...
La page est en cours de chargement...
La page est en cours de chargement...
La page est en cours de chargement...
La page est en cours de chargement...
La page est en cours de chargement...
La page est en cours de chargement...
La page est en cours de chargement...
La page est en cours de chargement...
La page est en cours de chargement...
La page est en cours de chargement...
La page est en cours de chargement...
-
 1
1
-
 2
2
-
 3
3
-
 4
4
-
 5
5
-
 6
6
-
 7
7
-
 8
8
-
 9
9
-
 10
10
-
 11
11
-
 12
12
-
 13
13
-
 14
14
-
 15
15
-
 16
16
-
 17
17
-
 18
18
-
 19
19
-
 20
20
-
 21
21
-
 22
22
-
 23
23
-
 24
24
-
 25
25
-
 26
26
-
 27
27
-
 28
28
-
 29
29
-
 30
30
-
 31
31
-
 32
32
-
 33
33
-
 34
34
-
 35
35
-
 36
36
-
 37
37
-
 38
38
-
 39
39
-
 40
40
-
 41
41
-
 42
42
-
 43
43
-
 44
44
-
 45
45
-
 46
46
-
 47
47
-
 48
48
-
 49
49
-
 50
50
-
 51
51
-
 52
52
-
 53
53
-
 54
54
-
 55
55
-
 56
56


Jenn-Air JMW3430WP00 Le manuel du propriétaire
- Catégorie
- Micro-ondes
- Taper
- Le manuel du propriétaire
- Ce manuel convient également à
dans d''autres langues
- English: Jenn-Air JMW3430WP00 Owner's manual
Documents connexes
Autres documents
-
 Euro-Pro Microwave Oven K5345B Manuel utilisateur
-
 Euro-Pro Professional K5345B Le manuel du propriétaire
-
Whirlpool AVM 581/WH Mode d'emploi
-
KitchenAid KMCM 3800 Mode d'emploi
-
JennAir JMW3430IL Le manuel du propriétaire
-
JennAir JMC2430IM Le manuel du propriétaire
-
-
AEG MCC4060E Operating Instructions Manual
-
Aeg-Electrolux MCC4060E-M Manuel utilisateur
-

