La page est en cours de chargement...

14049200
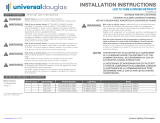
SAFETYWARNINGS IMPORTANT SAFETY INFORMATION
Disconnect power before installation.
DANGER- RISQUE DE CHOC- COUPER L’ALIMENTATION AVANT L’INSTALLATION
LED Retrofit Assembly installation requires
knowledge of luminaires electrical systems. If not qualified, do not
attempt installation. Product must be installed in accordance with NEC
or your local electrical code. If you are not familiar with these codes and
requirements, contact a qualified electrician.
ATTENTION- Risque d’incendie ou de choc électrique. L’installation du kit upgrade
LED exige Ia connaissance des systèmes électriques pour luminaires. Si non qualifié,
ne tentez pas d’installation. Ce produit doit être installé conformément à NEC ou votre
code électrique local. Si vous n’êtes pas familier avec ces codes et ces exigences,
veuillezcontacter un électricien qualifié.
To prevent wiring damage or abrasion, do
not expose wires to the edge of sheet metal or any other sharp objects.
ATTENTION- Pour éviter les dégâts de câblage par l’abrasion, ne pas mettre en contact
les fils électriques avec des bords de tôle ou d’autres objets pointus.
Check the existing wiring for damage
before Installing upgrade assembly. Do not install if existing wires are
damaged.
ATTENTION- Risque d’incendie ou de choc électrique. Vérifier si le câblage existant
n’est pas endommagé avant l’installation du kit upgrade LED. Ne pas installer si des
fils sont endommagés. Luminaire wiring and electrical parts may
be damaged when drilling for installation of the LED upgrade assembly.
Check for enclosed wiring and components.
ATTENTION- Risque d’incendie ou de choc électrique. Câblage électriques peuvent
être endommagés Iors du perçage pour l’installation du kit upgrade LED. Vérifier les
fils et composants.
IL EST INTERDIT DE FAIRE OU DE MODIFIER UNE OUVERTURE DANS UN BOÎTIER
DE CÂBLAGE OU DE COMPOSANTS ÉLECTRIQUES AU COURS DE L’INSTALLATION
DU NÉCESSAIRE.
Install this assembly only in luminaires that
have the construction features and dimensions shown in the photographs
and/or drawings.
ATTENTION- Risque d’incendie ou de choc électrique. lnstallez ce kit seulement dans
les luminaires qui ont les caractéristiques de construction et les dimensions dans les
photographies ou les dessins de Ia page suivante.
xx: 35/3500K, 40/4000K, 50/5000K
Module p/n: LRT8M22L/8xxA
Bluetooth Control:
Included with models having the CT suffix Catalog #: BT-LRT-A
Models without the CT suffix have 12V auxiliary power but no control included.
LED DRIVER COMPATIBILITY REQUIREMENTS
Page 1
www.universaldouglas.com Rev. 3/15/22
1LR14T8-18L8xx-10DU-X 290mA 42V min 120-277V D700C20UNVPWX12-C
LR14T8-18L8xx-10DU-XCT
2LR24T8-36L8xx-10DU-X 590mA 42V min 120-277V D10CC30UNVPWX12-C
LR24T8-36L8xx-10DU-XCT
3LR34T8-54L8xx-10DU-X 890mA 42V min 120-277V D15CC55UNVPWX12-C
LR34T8-54L8xx-10DU-XCT
3LR44T8-72L8xx-10DU-X 1190mA 42V min 120-277V D15CC55UNVPWX12-C
LR44T8-72L8xx-10DU-XCT
Universal Lighting Technologies

14049200
INSTALLATION
BT-LRT-A INSTALLATION
CONNECTION DIAGRAMS
For installation in lensed or parabolic 2’ x2’ or 2’x4’ troffers.Type IC (Insulated Ceiling) or type Non-IC, 40°C
max ambient. Requires minimum 3” depth.
For installation in 4ft or 8ft Vaportight: Lensed, minimum 5” depth and 6.75” width, 40°C max ambient.
One retrofit kit per luminaire.
:Disconnect the power to the fixture.
:Remove existing lamps, ballast cover plate, and ballast. Leave existing wire in place and as long as
possible. Replace lamp holders if necessary.
:Verify that the luminaire is connected to the ground wire from the AC supply.
: Secure the Universal Douglas driver into the fixture. Use a self-tapping screw (not provided) if
necessary.
:Connect existing leads to the driver as shown. The lamps are connected and operated in parallel
for both ends of the lamps. Wiresshould be 18AWG solid conductor with ¼” strip length.
:Connect the BT-LRT-A controller and mount it adjacent to the LED tubes, outside of the ballast
wiring channel in recessed troffers.
:Insert the line and neutral wires into their connectors.
:Replace the ballast cover plate, take care not to pinch wires.
: Insert the lamps with the label side facing the back of the fixture.
:Place relamp label at a visible location in the fixture. Close or replace lens and secure latches or
other fastening means.
:Restore power and confirm lamps are operating properly.
The sensor has a magnet which allows for it to be mounted to the metal tray or panel of the luminaire. The
BT-LRT-A be mounted within the ballast channel where it is completely enclosed in metal. The
leads of the BT-LRT-A are to be connected to the driver as shown in the wiring diagram.
For installation outside of the wiring channel of the fixture the leads should be routed away from the input
power leads and not come in contact with the power leads. Leads should exit the end of the channel and
the sensor be placed between lamps.
LED Lamp
LED Lamp BT-LRT-A
BT-LRT-A Lead Harness
LED Lamp
LED Driver
LEDDriver
LEDDriver
LEDDriver
LEDDriver
Line
120-277V
Line
120-277V
Line
120-277V
Line
120-277V
Neutral
Hot
Neutral
Hot
Neutral
Hot
Neutral
Hot
BT-LRT-A
12V Aux &
0-10Dimming
(if Applicable)
BT-LRT-A
12V Aux &
0-10Dimming
(if Applicable)
LED T8 Tube
LED T8 Tube
LED T8 Tube
LED T8 Tube
LED T8 Tube
LED T8 Tube
LED T8 Tube
LED T8 Tube
LED T8 Tube
LED T8 Tube
Page 2
www.universaldouglas.com Rev. 3/15/22
BT-LRT-A
12V Aux &
0-10Dimming
(if Applicable)
Universal Lighting Technologies
BT-LRT-A
12V Aux &
0-10Dimming
(if Applicable)
/