universal douglas LRK22-23Lyxx-U Manuel utilisateur

Taper
Manuel utilisateur
Universal Lighting Technologies
www.universaldouglas.com Rev. 3/14/22
14042100 Rev I
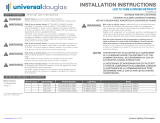
SAFETY WARNINGS IMPORTANT SAFETY INFORMATION
Disconnect power before installation.
DANGER- RISQUE DE CHOC- COUPER L’ALIMENTATION AVANT L’INSTALLATION
LED Retrofit Kit installation requires
knowledge of luminaires electrical systems. If not qualified, do not
attempt installation. Product must be installed in accordance with NEC
or your local electrical code. If you are not familiar with these codes and
requirements, contact a qualified electrician.
ATTENTION- Risque d’incendie ou de choc électrique. Linstallation du kit upgrade
LED exige Ia connaissance des systèmes électriques pour luminaires. Si non qualif,
ne tentez pas dinstallation. Ce produit doit être installé conformément à NEC ou votre
code électrique local. Si vous n’êtes pas familier avec ces codes et ces exigences,
veuillezcontacter un électricien qualifié.
To prevent wiring damage or abrasion, do
not expose wires to the edge of sheet metal or any other sharp objects.
ATTENTION- Pour éviter les dégâts de blage par l’abrasion, ne pas mettre en contact
les fils électriques avec des bords de tôle ou d’autres objets pointus.
Check the existing wiring for damage
before Installing upgrade kit. Do not install if existing wires are damaged.
ATTENTION- Risque d’incendie ou de choc électrique. rifier si le blage existant
n’est pas endommagé avant l’installation du kit upgrade LED. Ne pas installer si des
fils sont endommagés.
Seulement les trous indiqués dans les photographies ou les dessins peuvent être faits
ou altérés pour l’installation du kit upgrade LED. Ne laissez aucun trou ouvert dans le
compartiment électrique.
Install this kit only in luminaires that have
the construction features and dimensions shown in the photographs
and/ or drawings.
ATTENTION- Risque d’incendie ou de choc électrique. lnstallez ce kit seulement dans
les luminaires qui ont les caractéristiques de construction et les dimensions dans les
photographies ou les dessins de Ia page suivante.
Luminaire wiring and electrical parts may
be damaged when drilling for installation of the LED upgrade kit. Check
for enclosed wiring and components.
ATTENTION- Risque d’incendie ou de choc électrique. Câblage électriques peuvent
être endommagés Iors du perçage pour linstallation du kit upgrade LED. Vérifier les
fils et composants.
(2) or (3) Universal Douglas LED Lensed
Modules/Light Bars
(1) Universal Douglas Driver
(1) Black and White Driver Input Extension Wires
(1)Red and Blue Driver Output Extension Wires
(2)Screws supplied per 2’ Light Bar, (3) Screws
supplied per 4’ Light Bar
For installation in a2x2or 2x4’ luminaire,
the following minimum dimensions apply:
3” deep pan
3” wide minimum wiring compartment
43” minimum length to accommodate 4’ light bars; 22”
minimum length to accommodate 2’ light bars
Only one kit is to be installed per luminaire
NOTE: Consult your local authority regarding disposal or recycling procedures of removed ballast and lamps.
For installation into striplights
the following minimum dimensions apply:
Minimum wiring compartment depth: 2.5”
Minimum 3.25” wide flat surface compartment
cover width
43” minimum length to accommodate 4’ light bars,
22” minimum length to accommodate 2’ light bars
(2) Driver Screws (Serrated Washer)
(2) Connectors (Orange 3-Position
or Yellow 4-Position)
(2) Connectors (Red, 2-Position)
(1) Relamp Label
UNPACKING THE KIT
Page 1
Universal Lighting Technologies
www.universaldouglas.com Rev. 3/14/22
KIT MODEL FLUORESCENT LUMINAIRE TYPES FRENCH TRANSLATION
LRK22-23Lyxx-U
2x2 Troffers: Lensed or parabolic, Type IC (Insulated Ceiling) or Type Non-IC, 40°Cmax
ambient,
requiresminimum 3depth, one LRK22 per troffer
2ft or 4ft Wraparound: Lensed or non-lensed, (minimum 8.5width and 2.25depth), 25°C
max
ambient,requiresminimum3widewiringcompartment,one LRK22per 2ft, one or twoLRK22 per 4ft
2ft or 4ft Striplight: Non-lensed, (requires minimum wiring compartment dimensions 2.5depth and 4
width), 25°C max ambient, one LRK22 per 2ft, one or two LRK22 per 4ft striplight
2ft or 4ft Vaportight: Lensed, minimum 5depth and 6.75width, 40°Cmax ambient, one LRK22
per
2ft vaportight, one or twoLRK22 per 4ft
Any surface or pendant mount circular fluorescent luminaire that has a lamp compartment of
overall
32 inches in diameter and 6-3/4 inches depth from the tip of the lens to the luminaire
mounting
surface, suitable for dry and damplocations,and suitablefor 40°C ambient max.
2x2àlentilleou parabolique, Type IC ou de Type NON-IC, températureambiante max.de 40°C,
profondeur
min.de 3
2pi.ou de 4pi. à lentille ou sans lentille enveloppante (largeur min. de 8.5et profondeur de 2.25
),
compartimentde câblage de 3de large min., température ambiante max. de 25°C
2pi ou 4 pi, sans lentille, réglette, (dimensions du compartiment de blage min., 2.5 “de profond, 4
de
large), température ambiante max. de 25°C
Lentille 2 pi.ou 4pi. étanche à la vapeur avec profondeur min. de 5et largeur de 6.75”,
température
ambiante max. de 40°C
Deuxensembles LRK22 pouvant être mons au luminaire de 4pi.de type enveloppant, réglette ou
étanche
àla vapeur.
Tout luminaire fluorescent circulaire pour montage surface ou suspendue et ayant un compartiment à
lampe
d’un diamètretotal de 32 pouceset une épaisseurde 6-3/4 de la pointede la lentilleàla surfacede
montage
du luminaire. Convient aux endroitssecset humides, et convientàune température ambiantemax.de 40 °C.
LRK22-30Lyxx-U
LRK22-23Lyxx-347
LRK22-30Lyxx-347
LRK24-40Lyxx-U
2x4 Troffers: Lensed or parabolic, Type IC (Insulated Ceiling) or Type Non-IC, 40°Cmax
ambient,
requiresminimum 3depth, one LRK24 per troffer
4ft or 8ft Wraparound: Lensed or non-lensed, (minimum 8.5width and 2.25depth), 25°C
max
ambient,requires3wideminimumwiringcompartment,one LRK24per 4ft, one or twoLRK24 per 8ft
4ft or 8ft Striplight: Non-lensed, (minimum wiring compartment dimensions 2.5depth and 4
width),
25°C max ambient, one LRK24 per 4ft, one or two LRK24 per 8ft striplight
4ft or 8ft Vaportight: Lensed, minimum 5depth and 6.75width, 40°Cmax ambient, one LRK24
per
4ft vaportight, one or twoLRK24 per 8ft
Two continuously row mounted, Type IC or Type Non-IC, 1x4 recessed troffers rated for 40°C max
.
ambient with overall 4ft by 11-3/4by 4-1/4lamp compartment and overall 4ft by 3by 1-1/2
wiring
compartment.
2x4àlentilleou parabolique, Type IC ou de Type NON-IC, températureambiante max.de 40°C,
profondeur
min.de 3
4pi.ou8pi,àlentilleousanslentilleenveloppante(largeurmin.de8.5et profondeurde 2.25”),
compartiment
de blage de 3de large min., température ambiante max. de 25°C
4pi ou 8 pi, sans lentille, réglette, (dimensions du compartiment de blage min., 2.5 “de profond, 4
de
large), température ambiante max. de 25°C
Lentille 4 pi.ou 8pi. étanche à la vapeur avec profondeur min. de 5et largeur de 6.75”,
température
ambiante max. de 40°C
Deuxensembles LRK24 pouvant être mons au luminaire de 8pi.de type enveloppant, réglette ou
étanche
àla vapeur.
Montage continu sur 2 rangées, Type IC ou Type Non-IC, chemin lumineux encastré de 1 x 4 cou
pour
des températures ambiantes maximum de 40 °avec compartiment de lampe de 4pi. x 11-3/4x 4-1/4
et
compartimentde câblage de 4pi. x 3x 1-1/2.
LRK24-43Lyxx-U
LRK24-46Lyxx-U
LRK24-60Lyxx-U
LRK24-46Lyxx-347
LRK24-60Lyxx-347
LRK32-30Lyxx-U
2x2 Troffers: Lensed or parabolic, Type IC (Insulated Ceiling), 25°Cmax ambient, requires
minimum
3depth, one kitper troffer
2x2 Troffers: Lensed or parabolic, Type Non-IC Suspended Ceiling, 40°C max ambient,
requires
minimum 3depth, one kitper troffer
2ft or 4ft Wraparound: Lensed or non-lensed, (minimum 8.5width and 2.25depth), 25°C
max
ambient, one kitper wraparound (lampsmounted end-to-end for 4ft)
2ft or 4ft Striplight: Non-lensed, (requires minimum 2.5depth wiring compartment), 25°C
max
ambient, one kitper 2ft or 4ft striplight OR two kitsper 4ft striplight
2ft or 4ft Vaportight: Lensed, minimum 5depth and 6.75width, 25°C max ambient, one kit
per
vaportight (lamps mounted end-to-end for 4ft)
Any surface or pendant mount circular fluorescent luminaire that has a lamp compartment of
overall
32 inches in diameter and 6-3/4 inches depth from the tip of the lens to the luminaire
mounting
surface, suitable for dry and damplocations,and suitablefor 40°C ambient max.
2x2 à lentille ou parabolique, Type IC, température ambiante max. de 25°C , profondeur min. de 3
2x2 à lentille ou parabolique, Plafond suspendue type NON-IC, température ambiante max. de 40°C
,
profondeur min. de 3
2pi.ou de 4pi. à lentille ou sans lentille enveloppante (largeur min. de 8.5et profondeur de 2.25
),
compartimentde câblage de 3de large min., température ambiante max. de 25°C
2pi ou 4 pi, sans lentille, réglette, (dimensions du compartiment de blage min., 2.5 “de profond, 4
de
large), température ambiante max. de 25°C
Lentille 2 pi.ou 4pi. étanche à la vapeur avec profondeur min. de 5et largeur de 6.75”,
température
ambiante max. de 25°C
Deux ensembles LRK12 ou LRK22 pouvant être montés au luminaire de 8pi.de type enveloppant,
réglette
ou étanche àla vapeur.
Tout luminaire fluorescent circulaire pour montage surface ou suspendue et ayant un compartiment à
lampe
d’un diamètretotal de 32 pouceset une épaisseurde 6-3/4 de la pointede la lentilleàla surfacede
montage
du luminaire. Convient aux endroitssecset humides, et convientàune température ambiantemax.de 40 °C.
LRK32-45Lyxx-U
LRK32-30Lyxx-347
LRK32-45Lyxx-347
LRK34-46Lyxx-U
2x4 Troffers: Lensed or parabolic, Type IC (Insulated Ceiling), 25°Cmax ambient, requires
minimum
3” depth, one kit per troffer
2x4 Troffers: Lensed or parabolic, Type Non-IC suspended ceiling, 40°C max ambient,
requires
minimum 3” depth, one kitper troffer
4ft or 8ft Wraparound: Lensed or non-lensed, (minimum 8.5” width and 2.25” depth), 25°C
max
ambient, one kitper 4ft wraparound, one or twokitsper 8ft
4ft or 8ft Striplight: Non-lensed, (minimum wiring compartment dimensions 2.5” depth and 4”
width),
25°C max ambient, one kit per 4ft, one or two kits per 8ft striplight
4ft or 8ft Vaportight: Lensed, minimum 5” depth and 6.75width, 25°C max ambient, one kit per
4ft
vaportight, one or twokitsper 8ft
2x4 à lentille ou parabolique, Type IC, température ambiante max. de 25°C , profondeur min. de 3”
2x4 à lentille ou parabolique, Plafond suspendue type NON-IC, température ambiante max. de 40°C,
profondeur min. de 3”
4pi.ou8pi,àlentilleousanslentilleenveloppante(largeurmin.de8.5” etprofondeurde2.25),
compartiment
de blage de 3” de large min., température ambiante max. de 25°C
4pi ou 8 pi, sans lentille, réglette, (dimensions du compartiment de blage min., 2.5 “de profond, 4” de
large), température ambiante max. de 25°C
Lentille 4 pi. ou 8 pi. étanche à la vapeur avec profondeur min. de 5” et largeur de 6.75,
température
ambiante max. de 25°C
Deux ensembles LRK14 ou LRK24 pouvant être monsau luminaire de 4 pi. de type enveloppant,glette
ou étanche àla vapeur.
LRK34-60Lyxx-U
LRK34-46Lyxx-347
LRK34-60Lyxx-347
SUITABLE LUMINAIRE TYPES
Page 2
Universal Lighting Technologies
www.universaldouglas.com Rev. 3/14/22
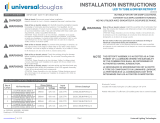
INSTALLATION
: Disconnect power to the fixture.
: Remove existing linear fluorescent tubes as shown
in . Dispose of tubes per local regulations.
: Remove ballast by unscrewingfrom the fixture
and dispose of properly per local regulations.
See .
: Remove wiring compartment to access existing
ballast and set aside. See . : Locate a flat area on the fixture within the wiring
compartment to mount the driver. The driver must
set flush with the fixture for proper thermal manage-
ment. Install the driver where possible using existing
crow’s feet or mounting holes, and the provided two
drill point screws with serrated heads. Ensuredriver is
properly grounded. See .
NOTE: For striplight mounting, it is recommended to
minimize exposed blue and red light bar leads to 3”.
: Cut the leads from the ballast to the socket
housing on both ends of the fixture as shown
in .
NOTE: Cut the leads at the socket housing as
short as possible. Push the leads back behind the
lampholder housing or cap any exposed leads.
Lampholders may be removed but require removal of
lampholder leads.
: Peel liner from double-sided foam tape strips at opposite
corners of light bar. Position light bar approximately at the
centerline of existinglamp sockets and centered between
thesockets as shownin . Applypressure to tem-
porarily affix the light bar.
NOTE:Removeany supportbracketsforU-Bendfluorescent
lamps.Theseare typical in some 2x2 luminaires.
For striplight fixtures, position the lamps on the wiring
compartment cover.
For circular surface or pendant mount luminaires, be careful
to position the light bars so that the branch circuit wiring
insulationwillnot be abraidedor cut.
: For 2x2 or 2x4 luminaire installations, locate latches
on the lens frame and release. Swing lens frame
open and carefully allow lens to hang open as shown
in .
NOTE: For vaportights and lensed wraparound
installations, remove lens and set aside.
NOTE: For striplight and non-lensed wraparound
installations go to Step 3.
: Cut the leads from the input power to ballast.
See .
NOTE: Cut leads at the ballast leaving as much
length as possible to facilitate installation of the
driver. Strip wires as necessary.
Page 3
Universal Lighting Technologies
www.universaldouglas.com Rev. 3/14/22
LED MODULE
LED DRIVER
0-10V
DIMMING
CONTROL
VIOLET
R E D
GREY
LED MODULE
SE R R A TE D HEAD SC R E W
GRO UN D S D R IVER TO H O U S IN G
B LUE
W H I T E
BLAC K
INSTALLATION
: Once positioned, secure light bar to the
fixture with the (6) provided self-tapping
screws as shown in . Repeat for
additional light bars.
CAUTION: Foam tape is temporary for ease of
installation. Do not complete retrofit installation
without securing screws (3 per lamp).
: Recommended mounting pattern.
See .
: Connect red leads from both light bars to the
loose red lead wire with the supplied orange
3-positionconnector by pushing into the open
slot. Repeat for blue leads. See .
: Connect red and blue lead wires to the correct
driver contacts as indicated on the driver label.
See .
: Prepare input power leads by stripping 1/4”.
Connect power lead wires to the correct driver
contacts as indicated on the driver label.
See
NOTE: If the existing black and white lead wires
are too short to reach the new driver position, an
extension can be created using the provided black
and white leads and red two-position connector.
:
: Replace wiringcompartment cover. Dress light
bar leads under the cover. Take care not to pinch
red and blue leads between the cover and fixture.
: Place relamp label at a visible location in the fixture.
Close or replace lens and secure latches or other
fastening means.
Page 4
NOTE: Optional 0-10V Analog Dimming Interface
Use Violet (+)and Gray (-) for connection to 0-10VDC.
Capping Violet and Gray separately provides 100%
light output.
Wiring Violet and Gray together provides minimum
light output.
The dimming control connections on the LED driver
are for Class 2 wiring methods only. Separate the
dimming control field wiringfrom the branch circuit field
wiring in the wiring compartment in accordance with the
National Electrical Code.
  • Page 1 1
  • Page 2 2
  • Page 3 3
  • Page 4 4

universal douglas LRK22-23Lyxx-U Manuel utilisateur

Taper
Manuel utilisateur

dans d''autres langues