LG LGH933-Silver Le manuel du propriétaire
- Catégorie
- Téléphones portables
- Taper
- Le manuel du propriétaire


1
About this user guide
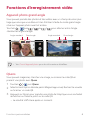
Thank you for choosing this LG product. Please carefully read this user
guide before using the device for the first time to ensure safe and proper
use.
• Always use genuine LG accessories. The supplied items are designed
only for this device and may not be compatible with other devices.
• This device is not suitable for people who have a visual impairment due
to the touchscreen keyboard.
• Descriptions are based on the device default settings.
• Default apps on the device are subject to updates, and support for
these apps may be withdrawn without prior notice. If you have any
questions about an app provided with the device, please contact an
LG Service Centre. For user-installed apps, please contact the relevant
service provider.
• Modifying the device’s operating system or installing software from
unofficial sources may damage the device and lead to data corruption
or data loss. Such actions will violate your LG licence agreement and
void your warranty.
• Some content and illustrations may differ from your device, depending
on the area, service provider, software version, or OS version, and are
subject to change without prior notice.
• Software, audio, wallpaper, images, and other media supplied with
your device are licenced for limited use. If you extract and use these
materials for commercial or other purposes, you may be infringing
copyright laws. As a user, you are fully responsible for the illegal use of
media.
• Additional charges may incur for data services, such as messaging,
uploading,downloading, auto-syncing and location services. To void
additional charges, select a data plan suitable to your needs. Contact
your service provider to obtain additional details.
ENGLISH

2About this user guide
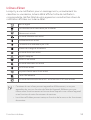
Instructional notices
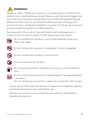
WARNING: Situations that could cause injury to the user and third
parties.
CAUTION: Situations that may cause minor injury or damage to the
device.
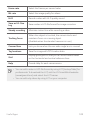
NOTE: Notices or additional information.

3
Table of contents
01
Custom-designed
Features
6 Video recording features
11 Gallery features
18 Floating Bar
21 Audio recording features
23 Fingerprint recognition
26 Face Recognition
30 Voice Recognition
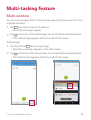
33 Multi-tasking feature
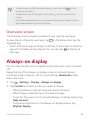
34 Always-on display
35 Quick Help
35 Notes on Water Resistant
Properties
02
Basic Functions
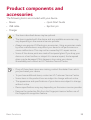
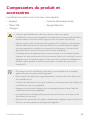
39 Product components and
accessories
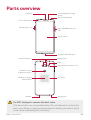
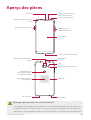
40 Parts overview
43 Turning the power on or off
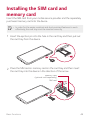
44 Installing the SIM card and
memory card
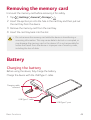
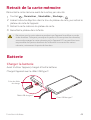
46 Removing the memory card
46 Battery
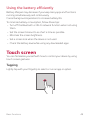
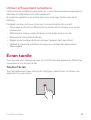
49 Touch screen
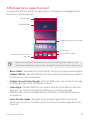
52 Home screen
61 Screen lock
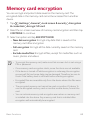
65 Memory card encryption
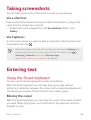
66 Taking screenshots
66 Entering text
72 Content sharing
74 Do not disturb
03
Useful Apps
76 Installing and uninstalling apps
77 App trash
78 App Shortcuts
79 Phone
82 Messaging
88 Camera
110 Gallery
114 Contacts
116 QuickMemo+
118 Clock

4Table of contents
119 Calendar
120 Tasks
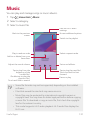
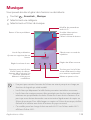
121 Music
122 Calculator
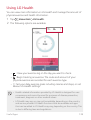
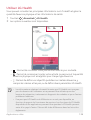
122 LG Health
124 E-mail
125 NextRadio
125 File Manager
126 Smart cleaning
126 LG Mobile Switch
127 Downloads
127 SmartWorld
128 RemoteCall Service
128 Chrome
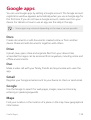
129 Google apps
04
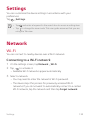
Settings
132 Settings
132 Network
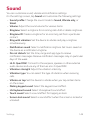
144 Sound
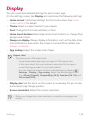
145 Display
147 General
05
Appendix
158 LG Bridge
159 Phone software update
161 Anti-Theft Guide
162 Open Source Software Notice
Information
162 Regulatory information(FCC/IC
ID number, etc.)
162 Trademarks
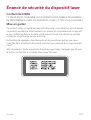
163 Laser safety statement
164 More information
165 FAQ
06
For Your Safety
07
Safety Guidelines
194 LIMITED WARRANTY
STATEMENT

Custom-designed
Features
01

Custom-designed Features 6
Video recording features
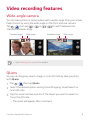
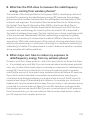
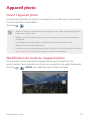
Wide-angle camera
You can take photos or record videos with a wider range than your actual
field of vision by using the wide-angle on the front and rear camera.
Tap
, then tap / or / to switch between the
standard and wide-angle.
Front camera Rear camera
Wide-angle
Standard angle
Wide-angle
Standard angle
• See
Starting the camera
for details.
QLens
You can do shopping, search image, or scan QR code by taking a photo
with QLens.
1
Tap , then tap QLens.
2
Select the desired option among Visual Shopping, Visual Search or
Scan QR code.
3
Tap the screen to take a photo of the object you want to search or
focus the QR code.
• The result will appear after a moment.

Custom-designed Features 7
• This feature is available only when your device is connected to a
network. If you use mobile data, you may be charged for data usage,
depending on your pricing plan.
• For Visual Shopping and Visual Search features, you can select the
desired area from the image that you have taken, and then search it
again.
• This feature is available only when the rear camera is in the Auto mode.
• This feature may not be supported depending on the area or service
provider.
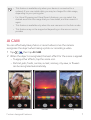
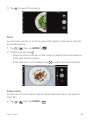
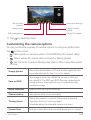
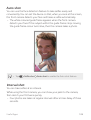
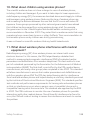
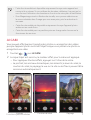
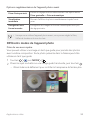
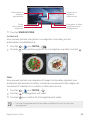
AI CAM
You can effectively take photos or record videos since the camera
recognizes the object when taking a photo or recording a video.
1
Tap , then tap AI CAM.
2
When the object is recognized, the best effect for the scene is applied.
• To apply other effects, tap the scene icon.
• Portrait, pets, foods, sunrise, sunset, scenery, city view, or flowers
can be recognized automatically.
Portrait Sunset Scenery

Custom-designed Features 8
• Associated keywords for the object are displayed on the screen.
Keywords do not appear on the actual photos or videos.
• This feature is available only when the front and rear cameras are in the
Auto mode.
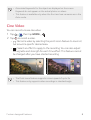
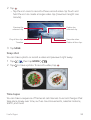
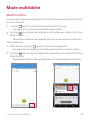
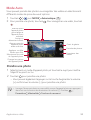
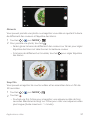
Cine Video
You can record a movie-like video.
1
Tap , then tap MODE .
2
Tap to record a video.
•
: Record a video by selecting the point zoom feature to zoom in/
out around a specific desired area.
•
: Select an effect to apply to the recording. You can also adjust
the vignette and strength for each Cine effect. This feature cannot
be changed after you have started recording.
• The Point zoom feature supports a zoom speed of up to 3x.
• This feature only supports video recordings in standard angle.

Custom-designed Features 9
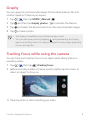
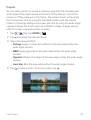
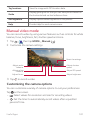
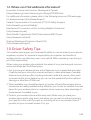
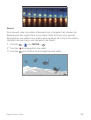
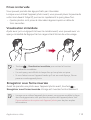
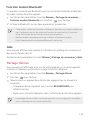
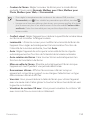
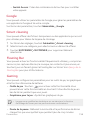
Graphy
You can apply the recommended values for the white balance, ISO and
shutter speed as if taken by an expert.
1
Tap , then tap MODE Manual ( ).
2
Tap and then tap Graphy photos to activate the feature.
3
Tap and select the desired scene from the recommended images.
4
Tap to take a photo.
• This feature is available only in Manual camera mode.
• You can add more scenes by tapping
and downloading the Graphy
app from the Play Store. You may be charged for data usage, depending
on your pricing plan.
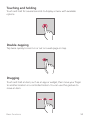
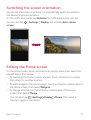
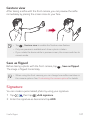
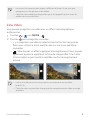
Tracking focus while using the camera
You can track and maintain focus on an object while taking photos or
recording videos.
1
Tap , then tap Tracking focus.
2
Before recording a video or taking a photo, lightly tap the screen to
select an object to focus on.
3
Take the photo or start recording your video.

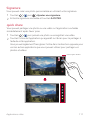
Custom-designed Features 10
• See
Starting the camera
for details.
• To use this feature, select the standard camera (
) for taking photos
or recording videos.
• This feature is unavailable when you use the front camera or the wide-
angle camera.
• This feature is unavailable in the following cases:
- Video size limitation: Resolution is set as UHD 16:9.
- FPS limitation: FPS is set as 60 FPS.
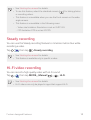
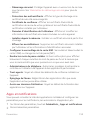
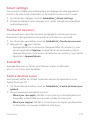
Steady recording
You can use the Steady recording feature to minimize motion blur while
recording a video.
Tap
, then tap Steady recording.
• See
Starting the camera
for details.
• This feature is available only in specific modes.
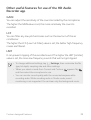
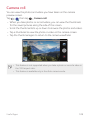
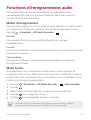
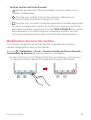
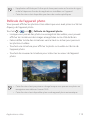
Hi-Fi video recording
You can record a high quality video with Hi-Fi sound.
Tap
, then tap MODE Manual ( ) Hi-Fi.
• See
Starting the camera
for details.
• Hi-Fi videos can only be played in apps that support Hi-Fi.

Custom-designed Features 11
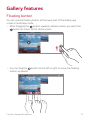
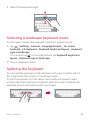
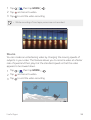
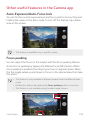
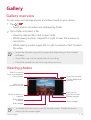
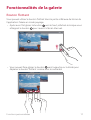
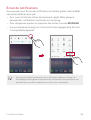
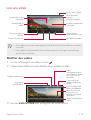
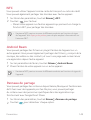
Gallery features
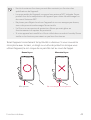
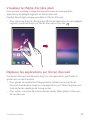
Floating button
You can use the floating button at the lower part of the Gallery app
screen in landscape mode.
• After dragging the
button upwards, release it when you reach the
button to return to the Home screen.
• You can drag the button to the left or right to move the floating
button as desired.

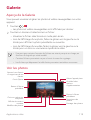
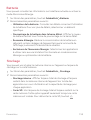
Custom-designed Features 12
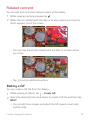
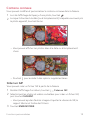
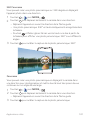
Related content
You can edit and customize related content in the Gallery.
1
While viewing a picture preview, tap .
2
When the icon related with the date or location where you took the
photo appears, touch the screen.
• You can view the photos related with the date or location where
you chose.
• Tap to access additional options.
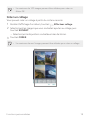
Making a GIF
You can create a GIF file from the Gallery.
1
While viewing an album, tap Create GIF.
2
Select the desired photos and videos to create a GIF file and then tap
NEXT.
• You can add more images and adjust the GIF speed, screen ratio,
and file order.

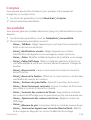
Custom-designed Features 13
3
Tap SAVE.
• A maximum of 100 images can be used to create a GIF file.
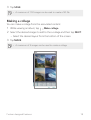
Making a collage
You can make a collage from the associated content.
1
While viewing an album, tap Make collage.
2
Select the desired images to add to the a collage and then tap NEXT.
• Select the desired layout from the bottom of the screen.
3
Tap MAKE.
• A maximum of 9 images can be used to create a collage.

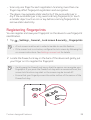
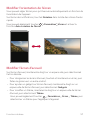
Custom-designed Features 14
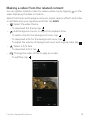
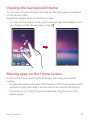
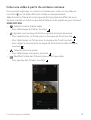
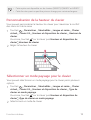
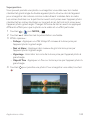
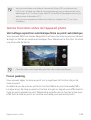
Making a video from the related content
You can gather related content to make a video clip by tapping on the
video displaying the date or location.
Select the theme and background music, adjust caption effects and order
or add date and your signature and then tap SAVE.
•
: Select the video theme.
- To download the theme, tap
.
•
: Add background music or adjust the playback time.
- To select a file for the background music, tap
.
- To download a file for the background music, tap
.
- To adjust the volume of background music and original video, tap
.
•
: Select a font face.
- To download a font, tap
.
•
: Change the order of files to play as a video.
- To add files, tap
.

Custom-designed Features 15
• Download the VASSET app from the Play Store to add video themes,
background music or font faces.
If you use mobile data without Wi-Fi connection, you may be charged
for data usage.
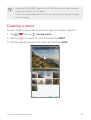
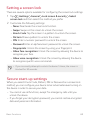
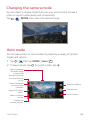
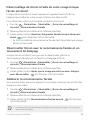
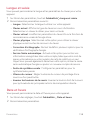
Creating a movie
You can create a new movie by putting images and videos together.
1
Tap , then tap Create movie.
2
Select images or videos for your movie and tap NEXT.
3
Edit the selected images and videos and then tap SAVE.

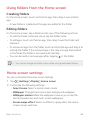
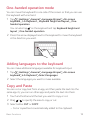
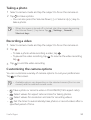
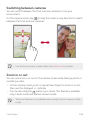
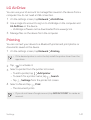
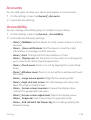
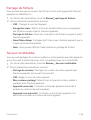
Custom-designed Features 16
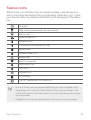
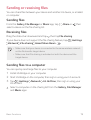
Deleting files
You can select images or videos to delete from your video by tapping
at the top right corner of its thumbnail.
Adding files
You can select images or videos to add after tapping at the bottom
of the screen. You can also select the images or videos you have already
previously added.
• Touch and hold a file, and then tap another file for multiple selection.
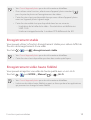
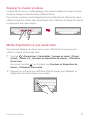
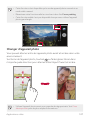
Rearranging files
To rearrange the images and videos, touch and hold the file you want to
move, then dragging it to the desired location.
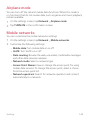
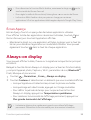
Adding file effects
Tap to add a theme or background music, change the font.
Resetting the movie edits
You can reset the edits made to the movie (e.g. play time) by tapping .
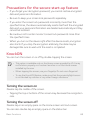
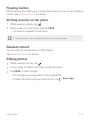
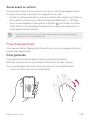
Previewing a file
Check your new video before saving it by tapping . After the playback
time elapses, the next file is played automatically.
• A maximum of 50 images and videos can be used to create a video.
• The playback time for an image is 3 seconds by default and it cannot be
changed. Videos can be trimmed down to a minimum of 1 second.
• This feature may not support some image or video formats.

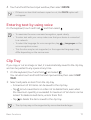
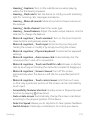
Custom-designed Features 17
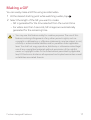
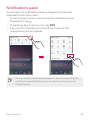
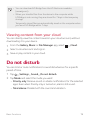
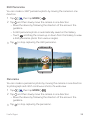
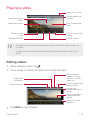
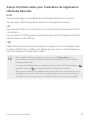
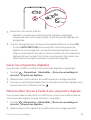
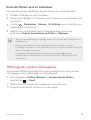
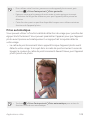
Making a GIF
You can easily make a GIF file using recorded video.
1
At the desired starting point while watching a video, tap .
2
Select the length of the GIF you want to create.
• GIF is generated for the time selected from the current time.
• For videos less than 5 seconds, GIF images are automatically
generated for the remaining time.
• You may use this feature solely for creative purposes. The use of this
feature involving infringement of any other person’s rights, such as
copyright or defamatory or offensive statements, may be subject to civil,
criminal, or administrative liabilities and/or penalties under applicable
laws. You shall not copy, reproduce, distribute, or otherwise make illegal
use of any copyrighted materials without permission of the rightful
owner or copyright holder. To the fullest extent permitted by applicable
law, LG Electronics disclaims all expressed and implied warranties as well
as liabilities associated thereto.

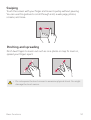
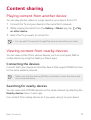
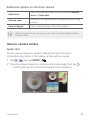
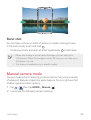
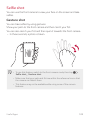
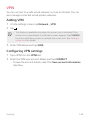
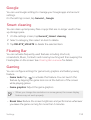
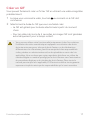
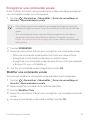
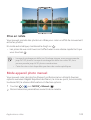
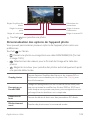
Custom-designed Features 18
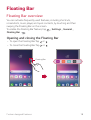
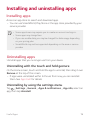
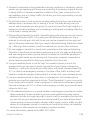
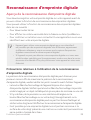
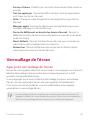
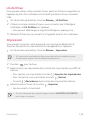
Floating Bar
Floating Bar overview
You can activate frequently used features, including shortcuts,
screenshots, music player, and quick contacts, by touching and then
swiping the Floating Bar on the screen.
To enable the Floating Bar feature, tap
Settings General
Floating Bar
.
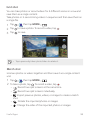
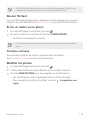
Opening and closing the Floating Bar
• To open the Floating Bar: Tap or .
• To close the Floating Bar: Tap
or .
Floating Bar

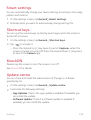
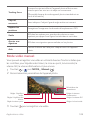
Custom-designed Features 19
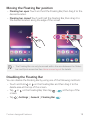
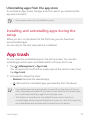
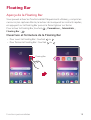
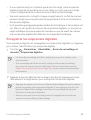
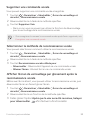
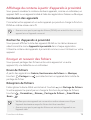
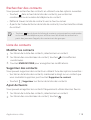
Moving the Floating Bar position
• Floating bar open: Touch and hold the Floating Bar, then drag it to the
desired location.
• Floating bar closed: Touch and hold the Floating Bar, then drag it to
the desired location along the edge of the screen.
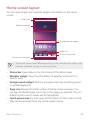
• The Floating Bar can only be moved within the area between the Status
bar and Quick access bar. See
Home screen layout
for details.
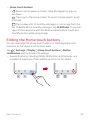
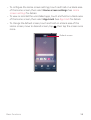
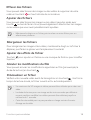
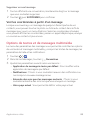
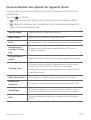
Disabling the Floating Bar
You can disable the Floating Bar by using one of the following methods:
• Touch and hold
or on the Floating Bar and then drag it to the
delete area at the top of the screen.
• Tap
or on the Floating Bar, then tap at the top of the
screen.
• Tap
Settings General Floating Bar .
La page charge ...
La page charge ...
La page charge ...
La page charge ...
La page charge ...
La page charge ...
La page charge ...
La page charge ...
La page charge ...
La page charge ...
La page charge ...
La page charge ...
La page charge ...
La page charge ...
La page charge ...
La page charge ...
La page charge ...
La page charge ...
La page charge ...
La page charge ...
La page charge ...
La page charge ...
La page charge ...
La page charge ...
La page charge ...
La page charge ...
La page charge ...
La page charge ...
La page charge ...
La page charge ...
La page charge ...
La page charge ...
La page charge ...
La page charge ...
La page charge ...
La page charge ...
La page charge ...
La page charge ...
La page charge ...
La page charge ...
La page charge ...
La page charge ...
La page charge ...
La page charge ...
La page charge ...
La page charge ...
La page charge ...
La page charge ...
La page charge ...
La page charge ...
La page charge ...
La page charge ...
La page charge ...
La page charge ...
La page charge ...
La page charge ...
La page charge ...
La page charge ...
La page charge ...
La page charge ...
La page charge ...
La page charge ...
La page charge ...
La page charge ...
La page charge ...
La page charge ...
La page charge ...
La page charge ...
La page charge ...
La page charge ...
La page charge ...
La page charge ...
La page charge ...
La page charge ...
La page charge ...
La page charge ...
La page charge ...
La page charge ...
La page charge ...
La page charge ...
La page charge ...
La page charge ...
La page charge ...
La page charge ...
La page charge ...
La page charge ...
La page charge ...
La page charge ...
La page charge ...
La page charge ...
La page charge ...
La page charge ...
La page charge ...
La page charge ...
La page charge ...
La page charge ...
La page charge ...
La page charge ...
La page charge ...
La page charge ...
La page charge ...
La page charge ...
La page charge ...
La page charge ...
La page charge ...
La page charge ...
La page charge ...
La page charge ...
La page charge ...
La page charge ...
La page charge ...
La page charge ...
La page charge ...
La page charge ...
La page charge ...
La page charge ...
La page charge ...
La page charge ...
La page charge ...
La page charge ...
La page charge ...
La page charge ...
La page charge ...
La page charge ...
La page charge ...
La page charge ...
La page charge ...
La page charge ...
La page charge ...
La page charge ...
La page charge ...
La page charge ...
La page charge ...
La page charge ...
La page charge ...
La page charge ...
La page charge ...
La page charge ...
La page charge ...
La page charge ...
La page charge ...
La page charge ...
La page charge ...
La page charge ...
La page charge ...
La page charge ...
La page charge ...
La page charge ...
La page charge ...
La page charge ...
La page charge ...
La page charge ...
La page charge ...
La page charge ...
La page charge ...
La page charge ...
La page charge ...
La page charge ...
La page charge ...
La page charge ...
La page charge ...
La page charge ...
La page charge ...
La page charge ...
La page charge ...
La page charge ...
La page charge ...
La page charge ...
La page charge ...
La page charge ...
La page charge ...
La page charge ...
La page charge ...
La page charge ...
La page charge ...
La page charge ...
La page charge ...
La page charge ...
La page charge ...
La page charge ...
La page charge ...
La page charge ...
La page charge ...
La page charge ...
La page charge ...
La page charge ...
La page charge ...
La page charge ...
La page charge ...
La page charge ...
La page charge ...
La page charge ...
La page charge ...
La page charge ...
La page charge ...
La page charge ...
La page charge ...
La page charge ...
La page charge ...
La page charge ...
La page charge ...
La page charge ...
La page charge ...
La page charge ...
La page charge ...
La page charge ...
La page charge ...
La page charge ...
La page charge ...
La page charge ...
La page charge ...
La page charge ...
La page charge ...
La page charge ...
La page charge ...
La page charge ...
La page charge ...
La page charge ...
La page charge ...
La page charge ...
La page charge ...
La page charge ...
La page charge ...
La page charge ...
La page charge ...
La page charge ...
La page charge ...
La page charge ...
La page charge ...
La page charge ...
La page charge ...
La page charge ...
La page charge ...
La page charge ...
La page charge ...
La page charge ...
La page charge ...
La page charge ...
La page charge ...
La page charge ...
La page charge ...
La page charge ...
La page charge ...
La page charge ...
La page charge ...
La page charge ...
La page charge ...
La page charge ...
La page charge ...
La page charge ...
La page charge ...
La page charge ...
La page charge ...
La page charge ...
La page charge ...
La page charge ...
La page charge ...
La page charge ...
La page charge ...
La page charge ...
La page charge ...
La page charge ...
La page charge ...
La page charge ...
La page charge ...
La page charge ...
La page charge ...
La page charge ...
La page charge ...
La page charge ...
La page charge ...
La page charge ...
La page charge ...
La page charge ...
La page charge ...
La page charge ...
La page charge ...
La page charge ...
La page charge ...
La page charge ...
La page charge ...
La page charge ...
La page charge ...
La page charge ...
La page charge ...
La page charge ...
La page charge ...
La page charge ...
La page charge ...
La page charge ...
La page charge ...
La page charge ...
La page charge ...
La page charge ...
La page charge ...
La page charge ...
La page charge ...
La page charge ...
La page charge ...
La page charge ...
La page charge ...
La page charge ...
La page charge ...
La page charge ...
La page charge ...
La page charge ...
La page charge ...
La page charge ...
La page charge ...
La page charge ...
La page charge ...
La page charge ...
La page charge ...
La page charge ...
La page charge ...
La page charge ...
La page charge ...
La page charge ...
La page charge ...
La page charge ...
La page charge ...
La page charge ...
La page charge ...
La page charge ...
La page charge ...
La page charge ...
La page charge ...
La page charge ...
La page charge ...
La page charge ...
La page charge ...
La page charge ...
La page charge ...
La page charge ...
La page charge ...
La page charge ...
La page charge ...
La page charge ...
La page charge ...
La page charge ...
La page charge ...
La page charge ...
La page charge ...
La page charge ...
La page charge ...
La page charge ...
La page charge ...
La page charge ...
La page charge ...
La page charge ...
La page charge ...
La page charge ...
La page charge ...
La page charge ...
La page charge ...
La page charge ...
La page charge ...
La page charge ...
La page charge ...
La page charge ...
La page charge ...
La page charge ...
La page charge ...
La page charge ...
La page charge ...
La page charge ...
La page charge ...
La page charge ...
La page charge ...
La page charge ...
La page charge ...
La page charge ...
La page charge ...
La page charge ...
La page charge ...
La page charge ...
La page charge ...
La page charge ...
La page charge ...
La page charge ...
La page charge ...
La page charge ...
La page charge ...
La page charge ...
La page charge ...
La page charge ...
La page charge ...
La page charge ...
La page charge ...
-
 1
1
-
 2
2
-
 3
3
-
 4
4
-
 5
5
-
 6
6
-
 7
7
-
 8
8
-
 9
9
-
 10
10
-
 11
11
-
 12
12
-
 13
13
-
 14
14
-
 15
15
-
 16
16
-
 17
17
-
 18
18
-
 19
19
-
 20
20
-
 21
21
-
 22
22
-
 23
23
-
 24
24
-
 25
25
-
 26
26
-
 27
27
-
 28
28
-
 29
29
-
 30
30
-
 31
31
-
 32
32
-
 33
33
-
 34
34
-
 35
35
-
 36
36
-
 37
37
-
 38
38
-
 39
39
-
 40
40
-
 41
41
-
 42
42
-
 43
43
-
 44
44
-
 45
45
-
 46
46
-
 47
47
-
 48
48
-
 49
49
-
 50
50
-
 51
51
-
 52
52
-
 53
53
-
 54
54
-
 55
55
-
 56
56
-
 57
57
-
 58
58
-
 59
59
-
 60
60
-
 61
61
-
 62
62
-
 63
63
-
 64
64
-
 65
65
-
 66
66
-
 67
67
-
 68
68
-
 69
69
-
 70
70
-
 71
71
-
 72
72
-
 73
73
-
 74
74
-
 75
75
-
 76
76
-
 77
77
-
 78
78
-
 79
79
-
 80
80
-
 81
81
-
 82
82
-
 83
83
-
 84
84
-
 85
85
-
 86
86
-
 87
87
-
 88
88
-
 89
89
-
 90
90
-
 91
91
-
 92
92
-
 93
93
-
 94
94
-
 95
95
-
 96
96
-
 97
97
-
 98
98
-
 99
99
-
 100
100
-
 101
101
-
 102
102
-
 103
103
-
 104
104
-
 105
105
-
 106
106
-
 107
107
-
 108
108
-
 109
109
-
 110
110
-
 111
111
-
 112
112
-
 113
113
-
 114
114
-
 115
115
-
 116
116
-
 117
117
-
 118
118
-
 119
119
-
 120
120
-
 121
121
-
 122
122
-
 123
123
-
 124
124
-
 125
125
-
 126
126
-
 127
127
-
 128
128
-
 129
129
-
 130
130
-
 131
131
-
 132
132
-
 133
133
-
 134
134
-
 135
135
-
 136
136
-
 137
137
-
 138
138
-
 139
139
-
 140
140
-
 141
141
-
 142
142
-
 143
143
-
 144
144
-
 145
145
-
 146
146
-
 147
147
-
 148
148
-
 149
149
-
 150
150
-
 151
151
-
 152
152
-
 153
153
-
 154
154
-
 155
155
-
 156
156
-
 157
157
-
 158
158
-
 159
159
-
 160
160
-
 161
161
-
 162
162
-
 163
163
-
 164
164
-
 165
165
-
 166
166
-
 167
167
-
 168
168
-
 169
169
-
 170
170
-
 171
171
-
 172
172
-
 173
173
-
 174
174
-
 175
175
-
 176
176
-
 177
177
-
 178
178
-
 179
179
-
 180
180
-
 181
181
-
 182
182
-
 183
183
-
 184
184
-
 185
185
-
 186
186
-
 187
187
-
 188
188
-
 189
189
-
 190
190
-
 191
191
-
 192
192
-
 193
193
-
 194
194
-
 195
195
-
 196
196
-
 197
197
-
 198
198
-
 199
199
-
 200
200
-
 201
201
-
 202
202
-
 203
203
-
 204
204
-
 205
205
-
 206
206
-
 207
207
-
 208
208
-
 209
209
-
 210
210
-
 211
211
-
 212
212
-
 213
213
-
 214
214
-
 215
215
-
 216
216
-
 217
217
-
 218
218
-
 219
219
-
 220
220
-
 221
221
-
 222
222
-
 223
223
-
 224
224
-
 225
225
-
 226
226
-
 227
227
-
 228
228
-
 229
229
-
 230
230
-
 231
231
-
 232
232
-
 233
233
-
 234
234
-
 235
235
-
 236
236
-
 237
237
-
 238
238
-
 239
239
-
 240
240
-
 241
241
-
 242
242
-
 243
243
-
 244
244
-
 245
245
-
 246
246
-
 247
247
-
 248
248
-
 249
249
-
 250
250
-
 251
251
-
 252
252
-
 253
253
-
 254
254
-
 255
255
-
 256
256
-
 257
257
-
 258
258
-
 259
259
-
 260
260
-
 261
261
-
 262
262
-
 263
263
-
 264
264
-
 265
265
-
 266
266
-
 267
267
-
 268
268
-
 269
269
-
 270
270
-
 271
271
-
 272
272
-
 273
273
-
 274
274
-
 275
275
-
 276
276
-
 277
277
-
 278
278
-
 279
279
-
 280
280
-
 281
281
-
 282
282
-
 283
283
-
 284
284
-
 285
285
-
 286
286
-
 287
287
-
 288
288
-
 289
289
-
 290
290
-
 291
291
-
 292
292
-
 293
293
-
 294
294
-
 295
295
-
 296
296
-
 297
297
-
 298
298
-
 299
299
-
 300
300
-
 301
301
-
 302
302
-
 303
303
-
 304
304
-
 305
305
-
 306
306
-
 307
307
-
 308
308
-
 309
309
-
 310
310
-
 311
311
-
 312
312
-
 313
313
-
 314
314
-
 315
315
-
 316
316
-
 317
317
-
 318
318
-
 319
319
-
 320
320
-
 321
321
-
 322
322
-
 323
323
-
 324
324
-
 325
325
-
 326
326
-
 327
327
-
 328
328
-
 329
329
-
 330
330
-
 331
331
-
 332
332
-
 333
333
-
 334
334
-
 335
335
-
 336
336
-
 337
337
-
 338
338
-
 339
339
-
 340
340
-
 341
341
-
 342
342
-
 343
343
-
 344
344
-
 345
345
-
 346
346
-
 347
347
-
 348
348
-
 349
349
-
 350
350
-
 351
351
-
 352
352
-
 353
353
-
 354
354
-
 355
355
-
 356
356
-
 357
357
-
 358
358
-
 359
359
-
 360
360
-
 361
361
-
 362
362
-
 363
363
-
 364
364
-
 365
365
-
 366
366
-
 367
367
-
 368
368
-
 369
369
-
 370
370
-
 371
371
-
 372
372
-
 373
373
-
 374
374
-
 375
375
-
 376
376
-
 377
377
-
 378
378
-
 379
379
-
 380
380
-
 381
381
-
 382
382
-
 383
383
-
 384
384
-
 385
385
-
 386
386
-
 387
387
-
 388
388
-
 389
389
-
 390
390
-
 391
391
-
 392
392
-
 393
393
-
 394
394
-
 395
395
-
 396
396
-
 397
397
-
 398
398
-
 399
399
-
 400
400
-
 401
401
-
 402
402
-
 403
403
-
 404
404
-
 405
405
-
 406
406
-
 407
407
-
 408
408
-
 409
409


LG LGH933-Silver Le manuel du propriétaire
- Catégorie
- Téléphones portables
- Taper
- Le manuel du propriétaire
dans d''autres langues
- English: LG LGH933-Silver Owner's manual
Documents connexes
-
LG LMX510WM Le manuel du propriétaire
-
-
LG LGH915.ABLMTN Le manuel du propriétaire
-
-
LG LMV500EM.AZAFBK Manuel utilisateur
-
-
-
LG LGH873U Le manuel du propriétaire
-
-


