X-Micro MusePod Manuel utilisateur
- Catégorie
- Lecteurs MP3 / MP4
- Taper
- Manuel utilisateur
Ce manuel convient également à

MusePod
User Manual

Copyright
Copyright 2004 by X-Micro Technology Corp., All rights reserved. No part of this
publication may be reproduced, transmitted, transcribed, stored in a retrieval
system, or translated into any language or computer language, in any form or
by any means, electronic, mechanical, magnetic, optical, chemical, manual or
otherwise, without the prior written permission of X-Micro Technology Corp.
Disclaimer
X-Micro Technology Corp. makes no representations or warranties, either
expressed or implied, with respect to the contents hereof and specifically
disclaims any warranties, merchantability or fitness for any particular purpose.
Any software described in this manual is sold or licensed "as is". Should the
programs prove defective following their purchase, the buyer (and not this
company, its distributor, or its dealer) assumes the entire cost of all necessary
servicing, repair, and any incidental or consequential damages resulting from
any defect in the software. Further, X-Micro Technology Corp., reserves the
right to revise this publication and to make changes from time to time in the
contents hereof without obligation to notify any person of such revision or
change.
All brand and product names mentioned in this manual are trademarks and/or
registered trademarks of their respective holders.

MusePod
1
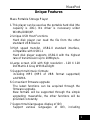
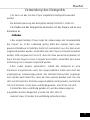
Unique Features
Mass Portable Storage Player
1.This player can be used as the portable hard disk (the
capacity is 20G). No driver is necessary under
WinMe/2000/XP.
2.Unique USB Host Functions
Hard disk player can read the file from the other
standard USB Device
3.High speed transfer, USB2.0 standard interface,
compatible with USB1.1
Hard disk player supports USB2.0 with the highest
rate of transmission up to 20Mbyte/s.
4.Large screen LCD with high resolution - 128 X 128
Dot Matrix 4 Gray With Backlight
5.Support multi music formats:
including MP3 (MP3 of VBR format supported)
and WMA
6.Convenient firmware upgrade
The latest functions can be acquired through the
firmware upgrade.
New formats will be supported through the simple
upgrading; meanwhile, the other functions will be
provided constantly.
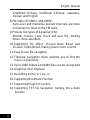
7.Support multi-languages display of ID3
Support various languages of ID3, including

English Manual
2
simplified Chinese, traditional Chinese, Japanese,
Korean and English
8.FM radio (87.5MHz~108.0MHz)
Auto-scan and memorize desired channels are more
convenient to listen to the FM radio.
9.Provide five types of equalizer (EQ):
Normal, Classic, Jazz, Rock and user EQ, making
music more abundant.
10.Supporting 3D effect, 15-level Bass Boost and
15-level Treble Boost, making music more colorful
11.Easy to use file navigation
12.Treeview navigation menu enables you to find the
music conveniently
13.Up to 2000 folders and 9999 files can be recognized
14.Graphical User Interface
15.Recording by Mic or Line_In
16.Supporting Bookmark Function
17.Supporting PlayList Function
18.Supporting TXT file navigation, namely, the e-book
function

MusePod
3
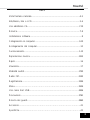
Contents
Front Part and Side Part........................................4-5
Top/Bottom Part and LCD ........................................ 6
Using the AC adapter ..........................................7-11
Charging................................................................7-8
Software Installation ..............................................8-9
Connecting to the computer ..............................10-11
Disconnecting to the Computer .............................. 11
Operations.........................................................12-13
Playing Music.....................................................14-16
Section Repeat..................................................16-17
Browsing................................................................. 18
Mode Switch......................................................18-21
Receive FM Radio.............................................22-23
Record...............................................................24-25
Menu Function...................................................26-35
USB Host Function............................................36-38
Cautions.................................................................. 39
Troubleshooting.................................................40-43
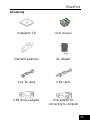
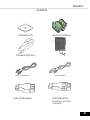
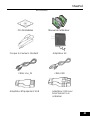
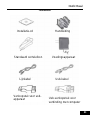
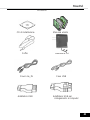
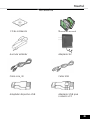
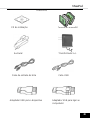
Accessory............................................................... 44
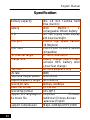
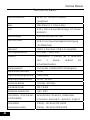
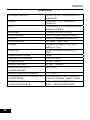
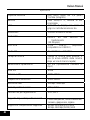
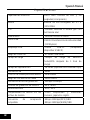
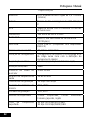
Specification........................................................... 45

English Manual
4
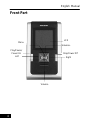
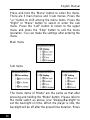
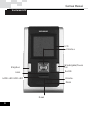
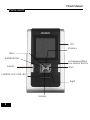
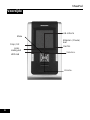
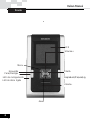
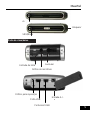
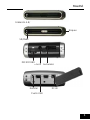
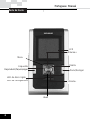
Front Part
LCD
Menu
Stop/Power Off
Right
Play/Pause/
Power On
Left
Volume+
Volume-

MusePod
5
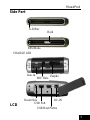
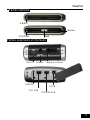
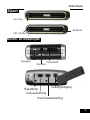
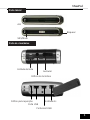
Side Part
LCD
A-B/Rec
SRS/Mode
Hold
CHARGE LED
MIC Hole
Line-In
USB Port
Reset Hole
USB Host Portne
DC-IN
Earpho

English Manual
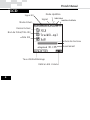
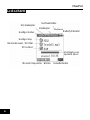
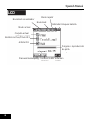
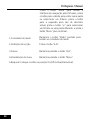
6
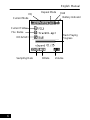
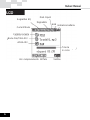
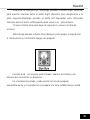
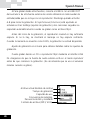
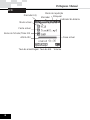
Current Mode
EQ
Re
p
eat Mode
Hold
Batter
y
Indicato
r
Current Folde
r
File Name
ID3 Artist
Track Playing
Progress
Sam
p
lin
g
Rate Bitrate Volume

MusePod
7
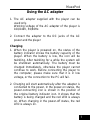
Using the AC adapter
1. The AC adapter supplied with the player can be
used only.
Working voltage of the AC adapter of the player is
100/240V, 50/60Hz.
2. Connect the adapter to the DC jacks of the AC
power and the player
Charging
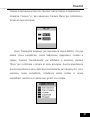
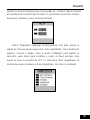
1. When the player is powered on, the status of the
battery indicator shows the battery capacity of the
player. When the battery is low, the icon will be
twinkling. After twinkling for a while the system will
be shutdown automatically. The battery must be
charged immediately, otherwise the player cannot
continue to work. Before connecting the player to
the computer, please make sure that it is in low
voltage, or the connection to the PC will fail.
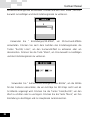
2. Charging will start automatically after the adapter is
connected to the power. In the power-on status, the
power-connecting icon is shown in the position of
the original battery indicator icon. It shows that the
battery is being charged and the red LED is always
on. When charging in the power-off status, the red
LED is always on.

English Manual
8
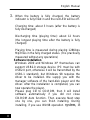
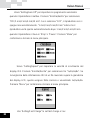
3. When the battery is fully charged, the battery
indicator is fully filled in and the red LED will be off.
Charging time: about 3 hours (after the battery is
fully discharged)
Discharging time (playing time): about 12 hours
(the longest playing time after the battery is fully
charged)
Playing time is measured during playing 128Kbps
Mp3 files in the fully charged status. (It is practically
measured without any operations)
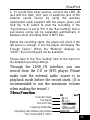
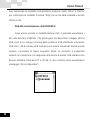
Software Installation
Windows 2000 and Windows XP themselves can
support USB2.0 storage device (PC must be with
USB2.0 port, otherwise it will be transmitted by the
USB1.1 standard), but Windows 98 requires the
driver to be installed. We supply you with the
manager software of the hard-disk player and the
driver. After the installation is completed, you can
now operate the player.
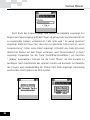
Please plug CD to CD-ROM, then it will install
software automatically if you did not close
CD-ROM Auto function. Then execute Next step
one by one, you can finish installing. During
installing, if you use Win98 operation
system, it

MusePod
9
will setup Win98 driver for HDD player
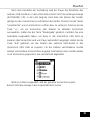
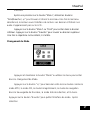
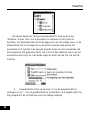
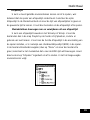
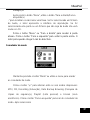
automatically.How to Use Software Managerment
How to Use Software Managerment
If you install software managerment, you can use it
to manager your HDD player.
1.Turn on your player, then connect it to PC, while
PC find device, please execute managerment
software.
2.You can use this software to edit playlist function.
3.You can use this software to change language.
4.You can use this software to download file and
upload file to HDD player.
You can refer to online help in the software to use
this software.

English Manual
10
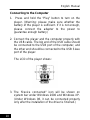
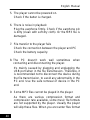
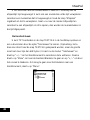
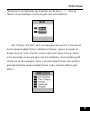
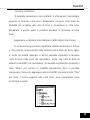
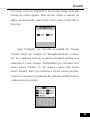
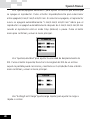
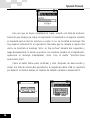
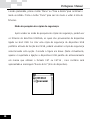
Connecting to the Computer
1. Press and hold the “Play” button to turn on the
player. (Warning: please make sure whether the
battery of the player is sufficient. If it is not enough,
please connect the adapter to the power to
guarantee enough battery)
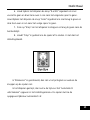
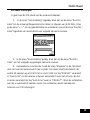
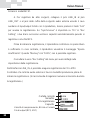
2. Connect the player and the computer properly with
the USB cable. The big end of the USB cable should
be connected to the USB port of the computer, and
the other end should be connected to the USB Slave
port of the player.
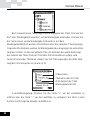
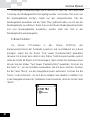
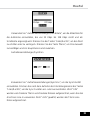
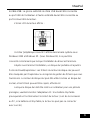
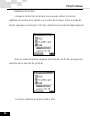
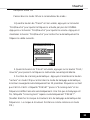
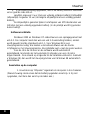
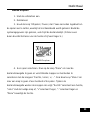
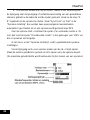
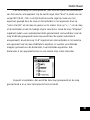
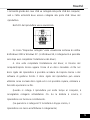
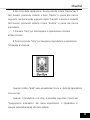
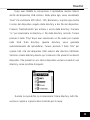
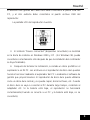
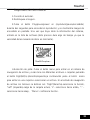
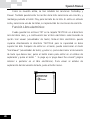
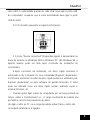
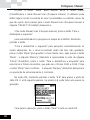
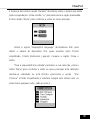
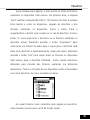
The LCD of the player shows:
3. The “Device connected” icon will be shown on
system bar under Windows 2000 and Windows XP.
(Under Windows 98, it can be connected properly
only after the installation of the driver is finished.)

MusePod
11
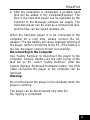
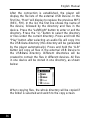
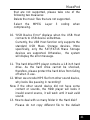
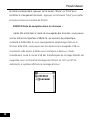
4. After the installation is completed, a portable hard
disk will be added in My Computer/Explorer. The
files in the hard-disk player can be operated by the
Explorer or the Manager software we supply. The
hard-disk player can be used as a normal hard disk,
and the files can be copied, deleted, etc.
When the hard-disk player is to be connected to the
computer for a long time, please connect the AC
adapter. The low battery will cause improper working of
the player. (When connecting to the PC, if the battery is
too low, the player cannot connect successfully)
Disconnecting to the Computer
Use “Safety Remove” to disconnect the player to the
computer, namely, double-click the right corner of the
task bar on PC, select “Safety Remove”. After the
system displays “Removed Hardware Safely”, the USB
cable connected the player to the computer can be
removed.
Warning:
Do not disconnect the player to the computer when the
player is working.
The player can be disconnected only after the
file copying is completed.

English Manual
12
Operations
Operations:
Basic Operations
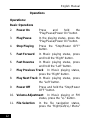
2. Power On Press and hold the
“Play/Pause/Power On” button
3. Play/Pause In the playing status, press the
“Play/Pause/Power On” button.
4. Stop Playing Press the “Stop/Power OFF”
button.
5. Fast Forward In Music playing status, press
and hold the “Right” button.
6. Fast Reverse In Music playing status, press
and hold the “Left” button.
7. Play Previous Track In Music playing status,
press the “Right” button.
8. Play Next Track In Music playing status, press
the “Left” button.
9. Power Off Press and hold the “Stop/Power
OFF” button.
10. Volume Adjustment In Music playing or FM
status, press the “+/-” button.
11. File Selection In the file navigation status,
press the “Right/Left/+/-/ Menu”

MusePod
13
button. Press the “Menu” button
to enter the file navigation
interface, press the “Right”
button to enter a folder or select
a file, press the “Left” button to
exit the current directory, press
the “+/-” button to select the
different file or folder, and press
the “Menu” button to confirm.
12. Mode Switch Press and hold the “Mode”
button to enter the mode switch.
13. Section Definition Press the “A-B” button.
14. Recording Press and hold the “A-B”
button.
15. Menu Display Press and hold the “Menu”
button.
16. Hold button On/Off
10

English Manual
14
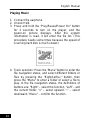
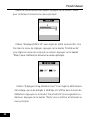
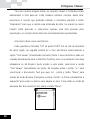
Playing Music
1. Connect the earphone
2. Unlock Hold
3. Press and hold the “Play/Pause/Power On” button
for 2 seconds to turn on the player, and the
power-on picture displays. After the system
information is read, it will enter the file list. (This
procedure needs some times because the speed of
scanning hard disk is much slower.)
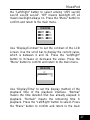
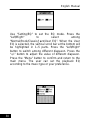
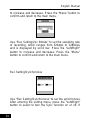
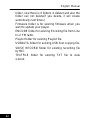
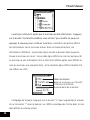
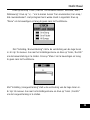
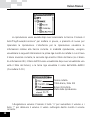
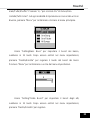
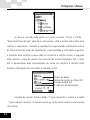
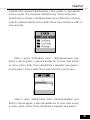
4. Track selection: Press the “Menu” button to enter the
file navigation status, and select different folders or
files by pressing the “Right/Left/+/-” button, then
press the “Menu” to enter a folder or select a file to
play. In the file navigation status, the definitions of
buttons are: “Right” – select the function, “Left” – exit
the current folder, “+” – select upward, “-” – select
downward, “Menu” – confirm the function.

MusePod
15
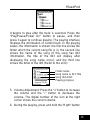
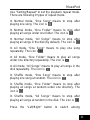
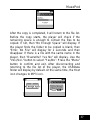
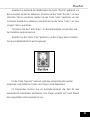
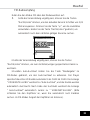
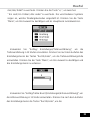
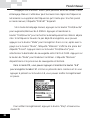
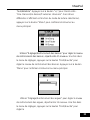
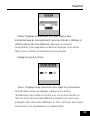
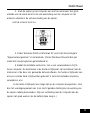
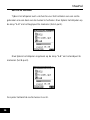
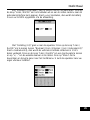
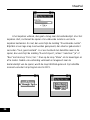
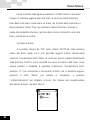
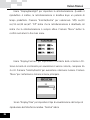
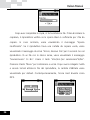
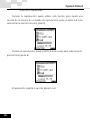
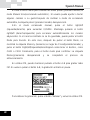
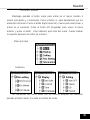
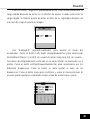
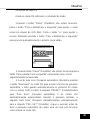
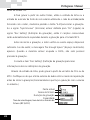
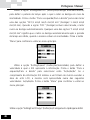
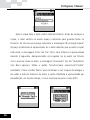
It begins to play after the track is selected. Press the
“Play/Pause/Power On” button to pause, and then
press it again to continue playing. The playing interface
displays the information of current track. In the playing
status, the information is shown: the first line shows the
folder which the current song file is in; the second line
shows the name of the song (If this song has ID3
information, the title of the ID3 will display after
displaying the song name once); and the third line
shows the Artist of the ID3 (Refer to the LCD)
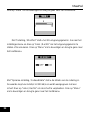
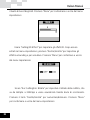
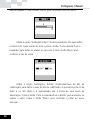
5. Volume Adjustment: Press the “+” button to increase
the volume and the “-“ button to decrease the
volume. The digital number of the icon at the right
corner shows the current volume.
6. During the playing, press and hold the “Right” button
Folder name
Song name or ID3 Title
Song ID3 Artist
Playing progress

English Manual
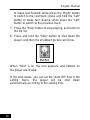
16
to make fast forward, while press the “Right” button
to switch to the next track; press and hold the “Left”
button to make fast reverse, while press the “Left”
button to switch to the previous track.
7. Press the “Stop” button to stop playing, and return to
the file list.
8. Press and hold the “Stop” button to shut down the
player, and then the shutdown picture will show.
When “Hold” is on, the icon appears, and buttons on
the player are invalid.
In the stop status, you can set the “Auto Off” time in the
setting menu, the player will be shut down
automatically according to the setting time.

MusePod
17
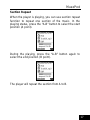
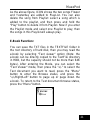
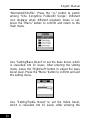
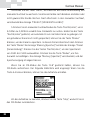
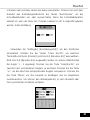
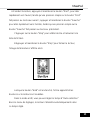
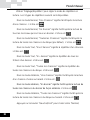
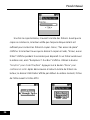
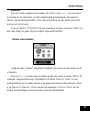
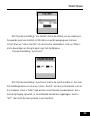
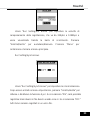
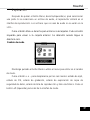
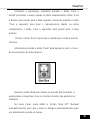
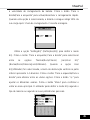
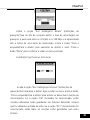
Section Repeat
When the player is playing, you can use section repeat
function to repeat one section of the music. In the
playing status, press the “A-B” button to select the start
position (A point).
During the playing, press the “A-B” button again to
select the end position (B point).
The player will repeat the section from A to B.

English Manual
18
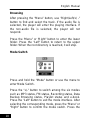
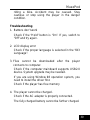
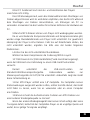
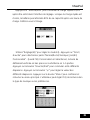
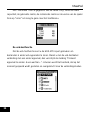
Browsing
After pressing the “Menu” button, use “Right/Left/+/ -”
button to find and select the track. If the audio file is
selected, the player will enter the playing interface. If
the non-audio file is selected, the player will not
respond.
Press the “Menu” or “Right” button to enter the lower
folder. Press the “Left” button to return to the upper
folder. When the root directory is reached, it will stop.
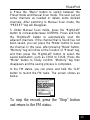
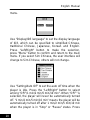
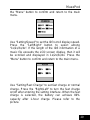
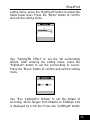
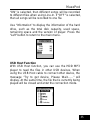
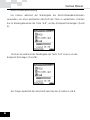
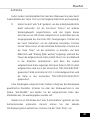
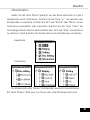
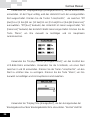
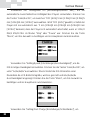
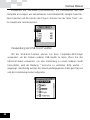
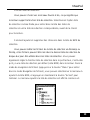
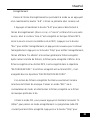
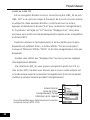
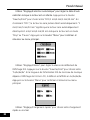
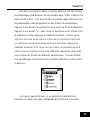
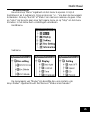
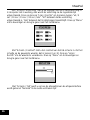
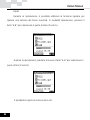
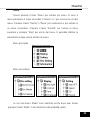
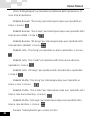
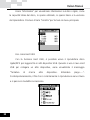
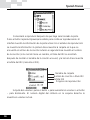
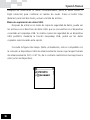
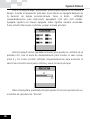
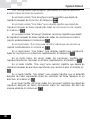
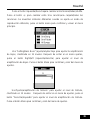
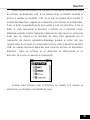
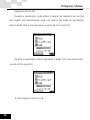
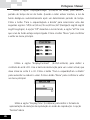
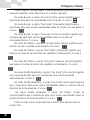
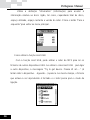
Mode Switch
Press and hold the “Mode” button or use the menu to
enter Mode Switch.
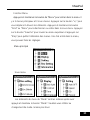
Press the “+/-” button to switch among the six modes
such as MP3 status, FM status, Recording status, Data
Backup Browsing status, Playlist status and e-book.
Press the “Left” button to exit the mode interface. After
selecting the corresponding mode, press the “Menu” or
“Right” button to confirm the mode switch. Press the
La page charge ...
La page charge ...
La page charge ...
La page charge ...
La page charge ...
La page charge ...
La page charge ...
La page charge ...
La page charge ...
La page charge ...
La page charge ...
La page charge ...
La page charge ...
La page charge ...
La page charge ...
La page charge ...
La page charge ...
La page charge ...
La page charge ...
La page charge ...
La page charge ...
La page charge ...
La page charge ...
La page charge ...
La page charge ...
La page charge ...
La page charge ...
La page charge ...
La page charge ...
La page charge ...
La page charge ...
La page charge ...
La page charge ...
La page charge ...
La page charge ...
La page charge ...
La page charge ...
La page charge ...
La page charge ...
La page charge ...
La page charge ...
La page charge ...
La page charge ...
La page charge ...
La page charge ...
La page charge ...
La page charge ...
La page charge ...
La page charge ...
La page charge ...
La page charge ...
La page charge ...
La page charge ...
La page charge ...
La page charge ...
La page charge ...
La page charge ...
La page charge ...
La page charge ...
La page charge ...
La page charge ...
La page charge ...
La page charge ...
La page charge ...
La page charge ...
La page charge ...
La page charge ...
La page charge ...
La page charge ...
La page charge ...
La page charge ...
La page charge ...
La page charge ...
La page charge ...
La page charge ...
La page charge ...
La page charge ...
La page charge ...
La page charge ...
La page charge ...
La page charge ...
La page charge ...
La page charge ...
La page charge ...
La page charge ...
La page charge ...
La page charge ...
La page charge ...
La page charge ...
La page charge ...
La page charge ...
La page charge ...
La page charge ...
La page charge ...
La page charge ...
La page charge ...
La page charge ...
La page charge ...
La page charge ...
La page charge ...
La page charge ...
La page charge ...
La page charge ...
La page charge ...
La page charge ...
La page charge ...
La page charge ...
La page charge ...
La page charge ...
La page charge ...
La page charge ...
La page charge ...
La page charge ...
La page charge ...
La page charge ...
La page charge ...
La page charge ...
La page charge ...
La page charge ...
La page charge ...
La page charge ...
La page charge ...
La page charge ...
La page charge ...
La page charge ...
La page charge ...
La page charge ...
La page charge ...
La page charge ...
La page charge ...
La page charge ...
La page charge ...
La page charge ...
La page charge ...
La page charge ...
La page charge ...
La page charge ...
La page charge ...
La page charge ...
La page charge ...
La page charge ...
La page charge ...
La page charge ...
La page charge ...
La page charge ...
La page charge ...
La page charge ...
La page charge ...
La page charge ...
La page charge ...
La page charge ...
La page charge ...
La page charge ...
La page charge ...
La page charge ...
La page charge ...
La page charge ...
La page charge ...
La page charge ...
La page charge ...
La page charge ...
La page charge ...
La page charge ...
La page charge ...
La page charge ...
La page charge ...
La page charge ...
La page charge ...
La page charge ...
La page charge ...
La page charge ...
La page charge ...
La page charge ...
La page charge ...
La page charge ...
La page charge ...
La page charge ...
La page charge ...
La page charge ...
La page charge ...
La page charge ...
La page charge ...
La page charge ...
La page charge ...
La page charge ...
La page charge ...
La page charge ...
La page charge ...
La page charge ...
La page charge ...
La page charge ...
La page charge ...
La page charge ...
La page charge ...
La page charge ...
La page charge ...
La page charge ...
La page charge ...
La page charge ...
La page charge ...
La page charge ...
La page charge ...
La page charge ...
La page charge ...
La page charge ...
La page charge ...
La page charge ...
La page charge ...
La page charge ...
La page charge ...
La page charge ...
La page charge ...
La page charge ...
La page charge ...
La page charge ...
La page charge ...
La page charge ...
La page charge ...
La page charge ...
La page charge ...
La page charge ...
La page charge ...
La page charge ...
La page charge ...
La page charge ...
La page charge ...
La page charge ...
La page charge ...
La page charge ...
La page charge ...
La page charge ...
La page charge ...
La page charge ...
La page charge ...
La page charge ...
La page charge ...
La page charge ...
La page charge ...
La page charge ...
La page charge ...
La page charge ...
La page charge ...
La page charge ...
La page charge ...
La page charge ...
La page charge ...
La page charge ...
La page charge ...
La page charge ...
La page charge ...
La page charge ...
La page charge ...
La page charge ...
La page charge ...
La page charge ...
La page charge ...
La page charge ...
La page charge ...
La page charge ...
La page charge ...
La page charge ...
La page charge ...
La page charge ...
La page charge ...
La page charge ...
La page charge ...
La page charge ...
La page charge ...
La page charge ...
La page charge ...
La page charge ...
La page charge ...
La page charge ...
La page charge ...
La page charge ...
La page charge ...
La page charge ...
La page charge ...
La page charge ...
La page charge ...
La page charge ...
-
 1
1
-
 2
2
-
 3
3
-
 4
4
-
 5
5
-
 6
6
-
 7
7
-
 8
8
-
 9
9
-
 10
10
-
 11
11
-
 12
12
-
 13
13
-
 14
14
-
 15
15
-
 16
16
-
 17
17
-
 18
18
-
 19
19
-
 20
20
-
 21
21
-
 22
22
-
 23
23
-
 24
24
-
 25
25
-
 26
26
-
 27
27
-
 28
28
-
 29
29
-
 30
30
-
 31
31
-
 32
32
-
 33
33
-
 34
34
-
 35
35
-
 36
36
-
 37
37
-
 38
38
-
 39
39
-
 40
40
-
 41
41
-
 42
42
-
 43
43
-
 44
44
-
 45
45
-
 46
46
-
 47
47
-
 48
48
-
 49
49
-
 50
50
-
 51
51
-
 52
52
-
 53
53
-
 54
54
-
 55
55
-
 56
56
-
 57
57
-
 58
58
-
 59
59
-
 60
60
-
 61
61
-
 62
62
-
 63
63
-
 64
64
-
 65
65
-
 66
66
-
 67
67
-
 68
68
-
 69
69
-
 70
70
-
 71
71
-
 72
72
-
 73
73
-
 74
74
-
 75
75
-
 76
76
-
 77
77
-
 78
78
-
 79
79
-
 80
80
-
 81
81
-
 82
82
-
 83
83
-
 84
84
-
 85
85
-
 86
86
-
 87
87
-
 88
88
-
 89
89
-
 90
90
-
 91
91
-
 92
92
-
 93
93
-
 94
94
-
 95
95
-
 96
96
-
 97
97
-
 98
98
-
 99
99
-
 100
100
-
 101
101
-
 102
102
-
 103
103
-
 104
104
-
 105
105
-
 106
106
-
 107
107
-
 108
108
-
 109
109
-
 110
110
-
 111
111
-
 112
112
-
 113
113
-
 114
114
-
 115
115
-
 116
116
-
 117
117
-
 118
118
-
 119
119
-
 120
120
-
 121
121
-
 122
122
-
 123
123
-
 124
124
-
 125
125
-
 126
126
-
 127
127
-
 128
128
-
 129
129
-
 130
130
-
 131
131
-
 132
132
-
 133
133
-
 134
134
-
 135
135
-
 136
136
-
 137
137
-
 138
138
-
 139
139
-
 140
140
-
 141
141
-
 142
142
-
 143
143
-
 144
144
-
 145
145
-
 146
146
-
 147
147
-
 148
148
-
 149
149
-
 150
150
-
 151
151
-
 152
152
-
 153
153
-
 154
154
-
 155
155
-
 156
156
-
 157
157
-
 158
158
-
 159
159
-
 160
160
-
 161
161
-
 162
162
-
 163
163
-
 164
164
-
 165
165
-
 166
166
-
 167
167
-
 168
168
-
 169
169
-
 170
170
-
 171
171
-
 172
172
-
 173
173
-
 174
174
-
 175
175
-
 176
176
-
 177
177
-
 178
178
-
 179
179
-
 180
180
-
 181
181
-
 182
182
-
 183
183
-
 184
184
-
 185
185
-
 186
186
-
 187
187
-
 188
188
-
 189
189
-
 190
190
-
 191
191
-
 192
192
-
 193
193
-
 194
194
-
 195
195
-
 196
196
-
 197
197
-
 198
198
-
 199
199
-
 200
200
-
 201
201
-
 202
202
-
 203
203
-
 204
204
-
 205
205
-
 206
206
-
 207
207
-
 208
208
-
 209
209
-
 210
210
-
 211
211
-
 212
212
-
 213
213
-
 214
214
-
 215
215
-
 216
216
-
 217
217
-
 218
218
-
 219
219
-
 220
220
-
 221
221
-
 222
222
-
 223
223
-
 224
224
-
 225
225
-
 226
226
-
 227
227
-
 228
228
-
 229
229
-
 230
230
-
 231
231
-
 232
232
-
 233
233
-
 234
234
-
 235
235
-
 236
236
-
 237
237
-
 238
238
-
 239
239
-
 240
240
-
 241
241
-
 242
242
-
 243
243
-
 244
244
-
 245
245
-
 246
246
-
 247
247
-
 248
248
-
 249
249
-
 250
250
-
 251
251
-
 252
252
-
 253
253
-
 254
254
-
 255
255
-
 256
256
-
 257
257
-
 258
258
-
 259
259
-
 260
260
-
 261
261
-
 262
262
-
 263
263
-
 264
264
-
 265
265
-
 266
266
-
 267
267
-
 268
268
-
 269
269
-
 270
270
-
 271
271
-
 272
272
-
 273
273
-
 274
274
-
 275
275
-
 276
276
-
 277
277
-
 278
278
-
 279
279
-
 280
280
-
 281
281
-
 282
282
-
 283
283
-
 284
284
-
 285
285
-
 286
286
-
 287
287
-
 288
288
-
 289
289
-
 290
290
-
 291
291
-
 292
292
-
 293
293
-
 294
294
-
 295
295
-
 296
296
-
 297
297
-
 298
298
-
 299
299
-
 300
300
-
 301
301


X-Micro MusePod Manuel utilisateur
- Catégorie
- Lecteurs MP3 / MP4
- Taper
- Manuel utilisateur
- Ce manuel convient également à
dans d''autres langues
- italiano: X-Micro MusePod Manuale utente
- English: X-Micro MusePod User manual
- español: X-Micro MusePod Manual de usuario
- Deutsch: X-Micro MusePod Benutzerhandbuch
- Nederlands: X-Micro MusePod Handleiding
- português: X-Micro MusePod Manual do usuário
Documents connexes
Autres documents
-
Yamaha MCX-2000 Le manuel du propriétaire
-
Yamaha PSR-SX900 Le manuel du propriétaire
-
Difrnce MP1575 Le manuel du propriétaire
-
-
-
Alpine HCE-C300R Le manuel du propriétaire
-
Yamaha PSR-A5000 Le manuel du propriétaire
-
-
Yamaha PSR-SX600 Le manuel du propriétaire
-
Hama 00055102 Le manuel du propriétaire