KitchenAid KBCA06XPBL01 Le manuel du propriétaire
- Catégorie
- Frigos
- Taper
- Le manuel du propriétaire
Ce manuel convient également à

KJtchen kid ®
REFRIGERATOR
For questions about features, operation/performance, parts, accessories or service, call: 1-800-422-1230
In Canada, call for assistance 1-800-461-5681, for installation and service, call: 1-800-807-6777 or visit our website at...
www.kitchenaid.com or www.KitchenAid.ca
P P
REFRIGERATEUR
Au Canada, pour assistance composez le 1-800-481-5881, pour installation ou service composez le 1-800-807-8777 ou visitez notre site web &..
www.KitchenAid.ca
Table of Contents/Table des matieres ............................................................................. 2
2300260

TABLE OF CONTENTS
REFRIGERATOR SAFETY ............................................................. 3
Proper Disposal of Your Old Refrigerator .................................... 3
INSTALLATION INSTRUCTIONS .................................................. 4
Tools and Parts ............................................................................ 4
Location Requirements ................................................................ 4
Electrical Requirements ............................................................... 4
Unpack the Refrigerator ............................................................... 5
Reverse Door Swing (optional) .................................................... 5
Door Closing ................................................................................. 6
Base Grille .................................................................................... 7
REFRIGERATOR USE .................................................................... 7
Normal Sounds ............................................................................ 7
Using the Control ......................................................................... 7
REFRIGERATOR FEATURES ........................................................ 8
Split-level shelf ............................................................................. 8
Lower Shelf ................................................................................... 8
Wire Storage Bin .......................................................................... 8
DOOR FEATURES .......................................................................... 8
Can Rack ...................................................................................... 8
Door Bin........................................................................................ 8
REFRIGERATOR CARE ................................................................. 9
Cleaning ........................................................................................ 9
Changing the Light Bulb .............................................................. 9
Vacation and Moving Care ........................................................... 9
TROUBLESHOOTING .................................................................. 10
ASSISTANCE OR SERVICE ......................................................... 11
In the U.S.A ................................................................................ 11
In Canada ................................................................................... 11
Accessories ................................................................................ 11
WAR RANTY .................................................................................. 12
TABLE DES MATIERES
S¢:CURIT¢: DU RC:FRIGC:RATEUR .............................................. 14
Mise au rebut de votre vieux refrigerateur ................................. 14
INSTRUCTIONS D'INSTALLATION ............................................. 15
Outillage et pieces necessaires ................................................. 15
Emplacement d'installation ........................................................ 15
Specifications electriques .......................................................... 15
Deballage du refrig@ateur .......................................................... 16
Inversion du sens d'ouverture de la porte (option) .................... 16
Fermeture de la porte ................................................................. 17
Grille de la base .......................................................................... 18
UTILISATION DU RI_FRIGI_RATEUR .......................................... 18
Sons normaux ............................................................................ 18
Utilisation de la commande ........................................................ 18
CARACTr::RISTIQUES DU RI_FRIGI_RATEUR ........................... 19
Tablette a deux niveaux ............................................................. 19
Tablette inferieure ....................................................................... 19
Compartiment de rangement metallique ................................... 19
CARACTr::RISTIQUES DE LA PORTE ......................................... 19
Porte-cannettes .......................................................................... 19
Balconnet de porte ..................................................................... 19
ENTRETIEN DU RI_FRIGI_RATEUR ............................................ 20
Nettoyage ................................................................................... 20
Changement de I'ampoule d'eclairage ...................................... 20
Precautions a prendre pour les vacances et avant un
demenagement .......................................................................... 20
DI_PANNAGE ................................................................................. 21
ASSISTANCE OU SERVICE ......................................................... 22
Aux Ctats-Unis ............................................................................ 22
Au Canada .................................................................................. 22
Accessoires ................................................................................ 22
GARANTIE ..................................................................................... 23

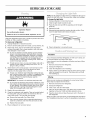
REFRIGERATOR SAFETY
Your safety and the safety of others are very important.
We have provided many important safety messages in this manual and on your appliance. Always read and obey all safety
messages.
This is the safety alert symbol.
This symbol alerts you to potential hazards that can kill or hurt you and others.
All safety messages will follow the safety alert symbol and either the word "DANGER" or "WARNING."
These words mean:
You can be killed or seriously injured if you don't immediately'
follow instructions.
You can be killed or seriously injured if you don't follow
instructions.
All safety messages will tell you what the potential hazard is, tell you how to reduce the chance of injury, and tell you what can
happen if the instructions are not followed.
IMPORTANT SAFETY INSTRUCTIONS
WARNING: To reduce the risk of fire, electric shock, or injury when using your refrigerator, follow these basic precautions:
• Plug into a grounded 3 prong outlet.
• Do not remove ground prong.
• Do not use an adapter.
• Do not use an extension cord.
• Disconnect power before servicing.
• Replace all parts and panels before operating.
• Remove doors from your old refrigerator.
• Use nonflammable cleaner.
• Keep flammable materials and vapors, such as gasoline,
away from refrigerator.
• Use two or more people to move and install refrigerator.
SAVE THESE INSTRUCTIONS
Proper Disposal of Your Old Refrigerator
Suffocation Hazard
Remove doors from your old refrigerator.
Failure to do so can result in death or brain damage.
Before you throw away your old refrigerator or freezer:
• Take off the doors.
• Leave the shelves in place so that children may not easily
climb inside.
IMPORTANT: Child entrapment and suffocation are not problems
of the past. Junked or abandoned refrigerators are still dangerous
- even if they will sit for "just a few days." Ifyou are getting rid of
your old refrigerator, please follow these instructions to help
prevent accidents.

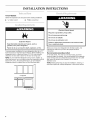
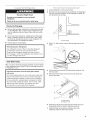
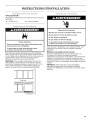
INSTALLATION INSTRUCTIONS
TOOLS NEEDED:
Gatherthe required tools and parts before starting installation.
• 7/04"Allen wrench • Phillips screwdriver
Explosion Hazard
Keep flammable materials and vapors, such as
gasoline, away from refrigerator.
Failure to do so can result in death, explosion, or fire.
To ensure proper ventilation for your refrigerator, allow for a 1/4"
(0.64 cm) space on each side and at the top. When installing your
refrigerator next to a fixed wall, leave 21/2'' (6.35 cm) minimum
clearance on each side to allow for the door to swing open.
NOTE: Do not install the refrigerator near an oven, radiator, or
other heat source, nor in a location where the temperature will fall
below 55°F (13°C). For best performance, do not install the
refrigerator behind a cabinet door or block the base grille.
I I II
1/4" (0.64 cm)
II
II
21/2" (6.35 cm)
Electrical Shock Hazard
Plug into a grounded 3 prong outlet.
Do not remove ground prong.
Do not use an adapter.
Do not use an extension cord.
Failure to follow these instructions can result in death,
fire, or electrical shock.
Before you move your refrigerator into its final location, it is
important to make sure you have the proper electrical
connection.
Recommended grounding method
A 115 Volt, 60 Hz., AC only 15 or 20 amp fused, grounded
electrical supply is required. It is recommended that a separate
circuit serving only your refrigerator be provided. Use an outlet
that cannot be turned off by a switch. Do not use an
extension cord.
NOTE: Before performing any type of installation, cleaning, or
removing a light bulb, unplug refrigerator or disconnect power.

Excessive Weight Hazard
Use two or more people to move and install
refrigerator.
Failure to do so can result in back or other injury.
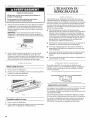
Remove the Packaging
Remove tape and glue residue from surfaces before turning
on the refrigerator. Rub a small amount of liquid dish soap
over the adhesive with your fingers. Wipe with warm water
and dry.
Do not use sharp instruments, rubbing alcohol, flammable
fluids, or abrasive cleaners to remove tape or glue. These
products can damage the surface of your refrigerator. For
more information, see "Refrigerator Safety."
• Properly dispose of packaging.
When Moving Your Refrigerator:
Your refrigerator is heavy. When moving the refrigerator
for cleaning or service, be sure to protect the floor.
Always pull the refrigerator straight out when moving it.
Do not wiggle or "walk" the refrigerator when trying to move
it, as floor damage could occur.
Clean Before Using
After you remove all of the packaging materials, clean the inside
of your refrigerator before using it. See the cleaning instructions
in "Refrigerator Care."
Important information to know about glass shelves
and covers:
Do not clean glass shelves or covers with warm water when
they are cold. Shelves and covers may break if exposed to
sudden temperature changes or impact, such as bumping.
For your protection, tempered glass is designed to shatter
into many small, pebble-size pieces. This is normal. Glass
shelves and covers are heavy. Use special care when
removing them to avoid impact from dropping.
1=
2.
3=
4=
5.
&
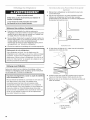
Unplug refrigerator or disconnect power.
Remove three screw plugs (at top and bottom of refrigerator)
from the new hinge locations on the refrigerator cabinet. Do
not discard the screw plugs.
A.Screw plugs
With a 7/e4"Allen wrench, remove the top hinge pin and set
aside.
Tilt the door forward and lift it off the bottom hinge pin. Set
the door aside.
Remove the three hinge screws from the top hinge and
remove the hinge.
A
A. Hinge screws
B. Hinge pin hole
6. Reinsert the hinge pin into the hinge pin hole and turn the
hinge upside down so that the hinge pin points up.
7. Install the hinge on the bottom opposite side of the
refrigerator using the three hinge screws.

8. IMPORTANT:Besuretoproperlyalignthedoorcloser-top
bosseswiththeholesinthehingeplate.
Removethedoorclosersfromtheoldbottomhingeand
installthemonthenewbottomhinge
IMPORTANT:Besuretoproperlyalignthedoorcloser-
bottombosseswiththeholesinthebottomhinge.
A. Door closer (top)
B. Door closer (bottom)
C. Bosses
9. Remove the three screws from the old bottom hinge and
remove the hinge.
10. Turn the old bottom hinge upside down and reinstall on the
top, opposite side of the refrigerator. Remove the hinge pin.
11. Turn the door upside down so the bottom of the door is
facing up. Remove the two screws from the pivot plate and
remove the plate.
12. Flip the plate over and reinstall it on the opposite side of the
door.
S
J
II tjy
/
13. Turn the door over so that the top of the door faces up.
14. Tilt the door forward and place the hole of the pivot plate on
the new bottom hinge pin.
I
I
I
B
A. Pivot plate
B. Boss
15. Align the door with the top hinge and install the hinge pin.
16. Install the six plastic screw plugs in the old hinge holes on the
top and the bottom of the cabinet.
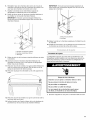
Door Closing
Your refrigerator has four leveling legs. Ifyour refrigerator seems
unsteady or you want the door to close more easily, adjust the
refrigerator's tilt using the instructions below:
Electrical Shock Hazard
Plug into a grounded 3 prong outlet.
Do not remove ground prong.
Do not use an adapter.
Do not use an extension cord.
Failure to follow these instructions can result in death,
fire, or electrical shock.
1. Plug into a grounded 3 prong outlet.
Excessive Weight Hazard
Use two or more people to move and install
refrigerator.
Failure to do so can result in back or other injury.
2. Move the refrigerator into its final location.

3.
Turn the leveling legs to the right to lower the refrigerator or
turn the leveling legs to the left to raise it. It may take several
turns of the leveling legs to adjust the tilt of the refrigerator.
NOTE: Having someone push against the top of the
refrigerator takes some weight off the leveling legs. This
makes it easier to adjust the leveling legs.
J
4.
Open the door and check to make sure that it closes as easily
as you like. If not, tilt the refrigerator slightly more to the rear
by turning both front leveling screws to the right. It may take
several more turns, and you should turn both leveling legs the
same amount.
Remove the Base Grille:
1. Open the refrigerator door.
2. Using a Phillips screwdriver, remove the screws attaching the
base grille to the refrigerator cabinet.
3. Pull the base grille toward you.
A
A, Screws
Replace the Base Grille:
1. Open the refrigerator door.
2. Position the base grille so that the holes are aligned with the
refrigerator and replace the screws.
REFRIGERATOR USE
Your new refrigerator may make sounds that your old one didn't
make. Because the sounds are new to you, you might be
concerned about them. Most of the new sounds are normal. Hard
surfaces, such as the flooring and surrounding structures, can
make the sounds seem louder. The following describes the kinds
of sounds and what may be making them.
• Your refrigerator is designed to run more efficiently to keep
your food items at the desired temperatures and to minimize
energy usage. The high efficiency compressor and fans may
cause your refrigerator to run longer than your old one. You
may also hear a pulsating or high-pitched sound from the
compressor or fans adjusting to optimize performance.
• Rattling noises may come from the flow of refrigerant or items
stored inside the refrigerator.
• As each cycle ends, you may hear a gurgling sound due to
the refrigerant flowing in your refrigerator.
• You may hear water running into the drain pan when the
refrigerator is defrosting.
• You may hear clicking sounds when the refrigerator starts or
stops running.
For your convenience, your refrigerator control is preset at the
factory. When you first install your refrigerator, make sure that the
control is still preset to the mid-setting as shown.
Adjusting Controls
The mid-setting indicated in the previous section should be
correct for normal usage. The control is set correctly when
beverages are as cold as you like.
If you need to adjust the temperature, wait at least 24 hours
between adjustments and then recheck the temperature.
To make the refrigerator colder, adjust the control to the next
higher setting. To make the refrigerator less cold, adjust the
control to the next lower setting.

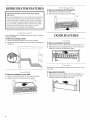
REFRIGERATOR FEATURES
important information to know about glass shelves
and covers:
Do not clean glass shelves or covers with warm water when
they are cold. Shelves and covers may break if exposed to
sudden temperature changes or impact, such as bumping.
For your protection, tempered glass is designed to shatter
into many small, pebble-size pieces. This is normal. Glass
shelves and covers are heavy. Use special care when
removing them to avoid impact from dropping.
To Remove and Replace Wire Storage Bin:
1. Remove the bin by pulling it forward.
2. Replace the bin by sliding it back into place.
"-¢
Your refrigerator has an adjustable split-level shelf for maximum
storage capability.
To Remove and Replace Shelf:
1. Remove the shelf by lifting it up out of the shelf clip.
2. Replace the shelf by aligning it over the clips and pressing it
into place.
DOOR FEATURES
To Remove and Replace Can Rack
1. Remove the can rack by tilting it forward and pulling it out.
2. Replace the rack by placing the rear of the rack under the
support on the door and sliding into place.
To Remove and Replace Lower Shelf:
1. Remove the shelf by lifting it up and pulling it forward.
2. Replace the shelf by lowering it on the guides.
"¢
The door bin can be positioned either on the upper door or the
lower door.
To Reposition the Door Bin:
1. Remove the door bin by tilting it forward and pulling it out.
2. Replace the bin by placing the rear of the bin under the
support on the door and sliding into place.

REFRIGERATOR CARE
Explosion Hazard
Use nonflammable cleaner.
Failure to do so can result in death, explosion, or fire.
Clean the refrigerator about once a month to prevent odors from
building up. Wipe up spills immediately.
To clean your refrigerator:
1. Unplug refrigerator or disconnect power.
2. Remove all removable parts from inside, such as shelves, etc.
3. Hand wash, rinse, and dry removable parts and interior
surfaces thoroughly. Use a clean sponge or soft cloth and a
mild detergent in warm water.
• Do not use abrasive or harsh cleaners such as window
sprays, scouring cleansers, flammable fluids, cleaning
waxes, concentrated detergents, bleaches or cleansers
containing petroleum products on plastic parts, interior
and door liners or gaskets. Do not use paper towels,
scouring pads, or other harsh cleaning tools. These can
scratch or damage materials.
• To help remove odors, you can wash interior walls with a
mixture of warm water and baking soda (2 tbs. to 1 qt.
[26 g to 0.95 L] of water).
4. Wash exterior with a clean sponge or soft cloth and a mild
detergent in warm water. Do not use abrasive or harsh
cleaners. Dry thoroughly with a soft cloth.
• To keep your stainless steel refrigerator looking like new
and to remove minor scuffs or marks, it is suggested that
you use the manufacturer's approved Stainless Steel
Cleaner & Polish. To order the cleaner, see the
"Accessories" section.
IMPORTANT: This cleaner is for stainless steel parts only?
• Do not allow the Stainless Steel Cleaner & Polish to come
into contact with any plastic parts such as the trim pieces
or door gaskets. Ifaccidental contact does occur, clean
plastic part with a sponge and mild detergent in warm
water. Dry thoroughly with a soft cloth.
5. Replace the removable parts.
6. Clean the condenser coils regularly. They are located behind
the base grille. Coils may need to be cleaned as often as
every other month. This may help save energy.
• Remove the base grille. See "Base Grille."
• Use a vacuum cleaner with an extended attachment to
clean the condenser coils when they are dusty or dirty.
• Replace the base grille.
7. Plug in refrigerator or reconnect power.
....... _:.;_ _,-,_ ........._._
NOTE: Not all appliance bulbs will fit your refrigerator. Be sure to
replace the bulb with one of the same size, shape, and wattage.
To change the light bulb:
1. Unplug refrigerator or disconnect power.
2. Slide the light shield towards the tab.
3. Press the tab down and lift the opposite end of the light
shield up.
4. Replace the bulb,
5. Reinstall the light shield by inserting the tab end first. Then
lower the light shield until it clicks into place.
A.Tab
6. Plug in refrigerator or reconnect power.
Vacations
If you choose to leave the refrigerator on while you're away, use
up any perishables and freeze other items.
If you choose to turn the refrigerator off before you leave, follow
these steps.
1. Remove all food from the refrigerator.
2. Unplug the refrigerator.
3. Clean the refrigerator. See "Cleaning."
4. Tape a rubber or wood block to the top of the door to prop it
open far enough for air to get in. This stops odor and mold
from building up.
Moving
When you are moving your refrigerator to a new home, follow
these steps to prepare it for the move.
1. Remove all food from the refrigerator.
2. Unplug the refrigerator.
3. Clean, wipe, and dry it thoroughly.
4. Take out all removable parts, wrap them well, and tape them
together so they don't shift and rattle during the move.
5. Tape the doors shut and tape the power cord to the back of
the refrigerator.
When you get to your new home, put everything back and refer to
the "Installation Instructions" section for preparation instructions.

TROUBLESHOOTING
Trythe solutions suggested here first in order to avoid the cost of an unnecessary service call.
Your refrigerator will not operate
• Is the power supply cord unplugged? Plug into a greunded •
3 prong outlet.
• Has a household fuse blown, or has a circuit breaker
tripped? Replace the fuse or reset the circuit.
• Is the Refrigerator Control turned to the OFF position? •
See "Using the Control."
The lights do not work
• Is the power supply cord unplugged? Plug into a grounded
3 prong outlet.
• Is a light bulb loose in the socket? Unplug refrigerator or
disconnect power. Gently remove the bulb and reinsert. Plug
in refrigerator or reconnect power.
• Has a light bulb burned out? Replace with an appliance
bulb of the same wattage, size, and shape. See "Changing
the Light Bulb." •
There is water in the defrost drain pan
• Is the refrigerator defrosting? The water will evaporate. It is
normal for water to drip into the defrost pan.
• Is it more humid than normal? Expect that the water in the
defrost pan will take longer to evaporate. This is normal when
it is hot or humid.
The motor seems to runtoo much
Is the temperature outside hotter than normal? Expect the
motor to run longer under warm conditions. At normal
outdoor temperatures, expect your motor to run about 40%
to 80% of the time. Under warmer conditions, expect it to run
even more of the time.
Has a large amount of food just been added to the
refrigerator? Adding a large amount of food warms the
refrigerator. It is normal for the motor to run longer in order to
cool the refrigerator back down.
Is the door opened often? Expect the motor to run longer
when this occurs. In order to conserve energy, try to get
everything you need out of the refrigerator at once, keep food
organized so it is easy to find, and close the door as soon as
the food is removed.
Is the control set correctly for the surrounding
conditions? See "Using the Control."
Is the door closed completely? Push the doors firmly shut.
If they will not shut all the way, see "The door will not close
completely" later in this section.
Are the condenser coils dirty? This prevents air transfer and
makes the motor work harder. Clean the condenser coils. See
"Cleaning."
Temperature is too warm
Is the door opened often? Be aware that the refrigerator will
warm when this occurs. In order to keep the refrigerator cool,
try to get everything you need out of the refrigerator at once,
keep food organized so it is easy to find, and close the door
as soon as the food is removed.
Has a large amount of food just been added to the
refrigerator? Adding a large amount of food warms the
refrigerator. It can take several hours for the refrigerator to
return to the normal temperature.
• Is the control set correctly for the surrounding
conditions? See "Using the Control."
• Is the base grille blocked? For best performance, do not
install the refrigerator behind a cabinet door or block the base
grille.
There is interior moisture buildup
Is the door opened often? To avoid humidity buildup, try to
get everything you need out of the refrigerator at once, keep
food organized so it is easy to find, and close the door as
soon as the food is removed. When the door is opened,
humidity from the room air enters the refrigerator. The more
often the door is opened, the faster humidity builds up,
especially when the room itself is very humid.
• Is it humid? It is normal for moisture to build up inside the
refrigerator when the air is humid.
• Is the food packaged correctly? Check that all food is
securely wrapped. Wipe off damp food containers before
placing in the refrigerator.
• Is the control set correctly for the surrounding
conditions? See "Using the Control."
The door is difficult to open
• Is the gasket dirty or sticky? Clean the gasket and the
surface that it touches. Rub a thin coat of paraffin wax on the
gasket following cleaning.
The door will not close completely
• Are food packages blocking the door open? Rearrange
containers so that they fit more tightly and take up less
space.
• Are the shelves out of position? Put the shelves back into
their correct positions. See "Refrigerator Use" for more
information.
• Is the gasket sticking? Clean the gasket and the surface
that it touches. Rub a thin coat of paraffin wax on the gasket
following cleaning.
10

ASSISTANCE OR SERVICE
Before calling for assistance or service, please check
"Troubleshooting." It may save you the cost of a service call. If
you still need help, follow the instructions below.
When calling, please know the purchase date and the complete
model and serial number of your appliance. This information will
help us to better respond to your request.
If you need replacement parts
If you need to order replacement parts, we recommend that you
only use factory specified replacement parts. Factory specified
replacement parts will fit right and work right because they are
made with the same precision used to build every new
KITCH ENAID®appliance.
To locate factory specified replacement parts in your area, call us
or your nearest designated service center.
_ _ _ i¸c
Call the KitchenAid Customer eXperience Center
toll free: 1-800-422-1230.
Our consultants provide assistance with:
• Features and specifications on our full line of appliances.
• Installation information.
• Use and maintenance procedures.
• Accessory and repair parts sales.
• Specialized customer assistance (Spanish speaking, hearing
impaired, limited vision, etc.).
• Referrals to local dealers, repair parts distributors, and
service companies. KitchenAid designated service
technicians are trained to fulfill the product warranty and
provide after-warranty service, anywhere in the United States.
To locate the KitchenAid designated service company in your
area, you can also look in your telephone directory Yellow Pages.
Call the KitchenAid Canada Customer Interaction Center toll free:
1-800-461-5681 Monday to Friday 8:00 a.m. - 6:00 p.m. (EST).
Saturday 8:30 a.m. - 4:30 p.m. (EST).
Our consultants provide assistance with:
• Features and specifications on our full line of appliances.
• Referrals to local dealers.
For service in Canada
Call 1-800-807-6777. KitchenAid Canada designated service
technicians are trained to fulfill the product warranty and provide
after-warranty service, anywhere in Canada.
For further assistance
If you need further assistance, you can write to KitchenAid
Canada with any questions or concerns at:
KitchenAid Canada
Customer Interaction Center
1901 Minnesota Court
Mississauga, Ontario L5N 3A7
Please include a daytime phone number in your correspondence.
To order accessories, call 1-800-442-9991 and ask for the
appropriate part number listed below or contact your authorized
KitchenAid dealer. In Canada, call 1-800-807-6777.
Stainless Steel Cleaner & Polish
Order Part #4396095
Can Rack
Order Part #4396788
For further assistance
If you need further assistance, you can write to KitchenAid with
any questions or concerns at:
KitchenAid Brand Home Appliances
Customer experience Center
553 Benson Road
Benton Harbor, M149022-2692
Please include a daytime phone number in your correspondence.
11

KITCHENAID ®REFRIGERATOR WARILANTY
ONE YEAR LIMITED WARRANTY
For one year from the date of purchase, when this major appliance is operated and maintained according to instructions attached to or
furnished with the product, KitchenAid or KitchenAid Canada (hereafter "KitchenAid') will pay for factory specified parts and repair
labor to correct defects in materials or workmanship. Service must be provided by a KitchenAid designated service company.
SECOND THROUGH FIFTH YEAR LIMITED WARRANTY ON CAVITY LINER AND
SEALED REFRIGERATION SYSTEM PARTS AS LISTED
In the second through fifth years from the date of purchase, when this refrigerator is operated and maintained according to instructions
attached to or furnished with the product, KitchenAid will pay for replacement or repair of the refrigerator/freezer cavity liner (including
labor costs) if the part cracks due to defective materials or workmanship. Also, in the second through fifth years from the date of
purchase, KitchenAid will pay for factory specified parts to correct defects in materials or workmanship in the sealed refrigeration
system. These parts are: compressor, evaporator, condenser, dryer, and connecting tubing. Service must be provided by a KitchenAid
designated service company.
ITEMS KITCHENAID WILL NOT PAY FOR
1. Service calls to correct the installation of your major appliance, to instruct you how to use your major appliance, to replace or repair
house fuses or to correct house wiring or plumbing.
2. Service calls to repair or replace appliance light bulbs, air filters or water filters. Those consumable parts are excluded from warranty
coverage.
3. Repairs when your major appliance is used for other than normal, single-family household use.
4. Damage resulting from accident, alteration, misuse, abuse, fire, flood, acts of God, improper installation, installation not in
accordance with electrical or plumbing codes, or use of products not approved by KitchenAid.
5. Any food loss due to refrigerator or freezer product failures.
6. Replacement parts or repair labor costs for units operated outside the United States or Canada.
7. Pickup and delivery. This major appliance is designed to be repaired in the home.
8. Repairs to parts or systems resulting from unauthorized modifications made to the appliance.
9. Expenses for travel and transportation for product service in remote locations.
10. The removal and reinstallation of your appliance if it is installed in an inaccessible location or is not installed in accordance with
published installation instructions.
DISCLAIMER OF IMPLIED WARRANTIES; LIMITATION OF REMEDIES
CUSTOMER'S SOLE AND EXCLUSIVE REMEDY UNDER THIS LIMITED WARRANTY SHALL BE PRODUCT REPAIR AS PROVIDED
HEREIN. IMPLIED WARRANTIES, INCLUDING WARRANTIES OF MERCHANTABILITY OR FITNESS FOR A PARTICULAR PURPOSE,
ARE LIMITED TO ONE YEAR OR THE SHORTEST PERIOD ALLOWED BY LAW. KITCHENAID SHALL NOT BE LIABLE FOR
INCIDENTAL OR CONSEQUENTIAL DAMAGES. SOME STATES AND PROVINCES DO NOT ALLOW THE EXCLUSION OR LIMITATION
OF INCIDENTAL OR CONSEQUENTIAL DAMAGES, OR LIMITATIONS ON THE DURATION OF IMPLIED WARRANTIES OF
MERCHANTABILITY OR FITNESS, SO THESE EXCLUSIONS OR LIMITATIONS MAY NOT APPLY TO YOU. THIS WARRANTY GIVES
YOU SPECIFIC LEGAL RIGHTS AND YOU MAY ALSO HAVE OTHER RIGHTS, WHICH VARY FROM STATETO STATE OR PROVINCE
TO PROVINCE.
Outside the 50 United States and Canada, this warranty does not apply. Contact your authorized KitchenAid dealer to determine if
another warranty applies.
If you need service, first see the "Troubleshooting" section of the Use & Care Guide. After checking "Troubleshooting," additional help
can be found by checking the "Assistance or Service" section or by calling KitchenAid. In the U.S.A., call 1-800-422-1230. In Canada,
call 1-800-807-6777. 9/05
Keep this book and your sales slip together for future
reference. You must provide proof of purchase or installation
date for in-warranty service.
Write down the following information about your major appliance
to better help you obtain assistance or service if you ever need it.
You will need to know your complete model number and serial
number. You can find this information on the model and serial
number label located on the product.
Dealer name
Address
Phone number
Model number
Serial number
Purchase date
12

13

P P P P
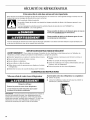
SECURITE DU REFRIGERATEUR
Votre s6curit6 et celle des autres est tres importante.
Nous donnons de nombreux messages de securite importants dans ce manuel et sur votre appareil menager. Assurez-vous de
toujours lire tousles messages de securite et de vous y conformer.
Voici le symbole d'alerte de securit&
Ce symbole d'alerte de securite vous signale les dangers potentiels de deces et de blessures graves & vous
eta d'autres.
Tousles messages de securite suivront le symbole d'alerte de securit6 et le mot "DANGER" eu
"AVERTISSEMENT". Ces roots signifient :
Risque possible de deces ou de blessure grave si vous ne
suivez pas immediatement les instructions.
Risque possible de deces ou de blessure grave si vous
ne suivez pas les instructions.
Tousles messages de securite vous diront quel est le danger potentiel et vous disent comment reduire le risque de blessure et
ce qui peut se produire en cas de non-respect des instructions.
IMPORTANTES INSTRUCTIONS DE SC:CURIT¢:
AVERTISSEMENT : Pour reduire les risques d'incendie, de choc electrique ou des blessures lots de I'utilisation du
refrigerateur, prendre quelques precautions fondamentales, y compris les suivantes :
• Brancher I'appareil sur une prise a 3 alveoles reliee a la terre.
• Ne pas enlever la broche de liaison a la terre.
• Ne pas utiliser un adaptateur.
• Ne pas utiliser un c&ble de rallonge.
• Utiliser deux ou plus de personnes pour deplacer et installer
le refrigerateur.
• Debrancher la source de courant electrique avant I'entretien.
• Replacer pieces et panneaux avant de faire la remise en
marche.
• Utiliser un produit de nettoyage ininflammable.
• Garder les materiaux et les vapeurs inflammables, telle que
I'essence, loin du refrigerateur.
• Enlever les portes de votre vieux refrigerateur.
CONSERVEZ CES INSTRUCTIONS
Mise au rebut de votre vieux r_frig_rateur Avant de jeter votre vieux r6frig6rateur ou cong61ateur :
Enlever les portes.
Laisser les tablettes en place de sorte que les enfants ne
peuvent pas y penetrer facilement.
Risque de suffoquer
Enlever les portes de votre vieux refrigerateur.
Le non-respect de cette instruction peut causer
un deces ou des I_sions cer_brales.
IMPORTANT : L'emprisonnement et I'etouffement des enfants ne
sont pas un probleme du passe. Les refrigerateurs jetes eu
abandonnes sent encore dangereux, m_me s'ils sont laisses
abandennes pendant "quelques jours seulement". Si veus vous
debarrassez de votre vieux refrigerateur, veuillez suivre les
instructions suivantes pour aider a eviter les accidents.
14

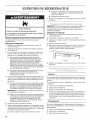
INSTRUCTIONS D'INSTALLATION
OUTILLAGE REQUIS :
Rassembler les outils et pieces necessaires avant de commencer
I'installation.
• Cle Allen de%4" • Tournevis Phillips
Risque d'explosion
Garder les materiaux et les vapeurs inflammables, telle
que ressence, loin du refrigerateuro
Le non-respect de cette instruction peut causer
un deces, une explosion ou un incendie.
Pour obtenir une aeration appropriee pour votre refrigerateur,
laisser un espace de 1/4"(0,64 cm) de chaque c6te et au sommet
Si vous installez votre refrig6rateur pres d'un mur fixe, laisser un
espace minimum de 21/2'' (6,35 cm) de chaque c6te pour
permettre a la porte de s'ouvrir sans obstruction.
REMARQUE : Ne pas installer le refrigerateur pres d'un four,
d'un radiateur ou d'une autre source de chaleur, ni dans un
endroit ou la temperature baissera au-dessous de 55°F (13°C).
Pour le meilleur rendement, ne pas installer le refrig6rateur
derriere une porte d'armoire ni bloquer la grille de la base.
I I 1/4"(0,64 cm) I I
,
Risque de choc _lectrique
Brancher sur une prise a 3 alv_oles reliee a la terre.
Ne pas enlever la broche de liaison a la terre.
Ne pas utiliser un adaptateur.
hie pas utilieer un c_ble de ralionge.
Le non-respect de ces instructions peut causer
un deces, un incendie ou un choc electrique.
Avant de placer le refrigerateur a son emplacement final, il est
important de vous assurer d'avoir la connexion electrique
appropriee.
M6thode recommand6e de mise _ la terre
Une source d'alimentation de 115 volts, 60 Hz, type 15 ou
20 amperes CA seulement, protegee par fusibles et
adequatement mise a la terre est necessaire. II est recommande
d'utiliser un circuit distinct pour alimenter uniquement votre
refrigerateur. Utiliser une prise murale qui ne peut pas _tre mise
hors circuit a I'aide d'un commutateur. Ne pas utiliser un c_ble de
rallonge.
REMARQUE : Avant d'executer tout type d'installation,
nettoyage ou remplacement d'une ampoule d'eclairage,
debrancher le refrigerateur ou deconnecter la source de courant
electrique.
15

Risque du poids excessif
Utiliser deux ou plus de personnes pour d_placer et
installer le refrigerateur.
Le non-respect de cette instruction peut causer
une blessure au dos ou d'autre blessure.
Enl_vement des mat_riaux d'emballage
Enlever le ruban adhesif et la colle des surfaces du
refrigerateur avant de le mettre en marche. Frotter une petite
quantite de savon liquide pour la vaisselle sur I'adhesif avec
les doigts. Rincer a I'eau tiede et essuyer.
• Ne pas utiliser d'instruments coupants, d'alcool afriction, de
liquides inflammables ou de nettoyants abrasifs pour enlever
le ruban adhesif ou la colle. Ces produits peuvent
endommager la surface de votre refrig6rateur. Pour plus de
renseignements, voir "Securite du rdrigerateur".
• 121iminerles materiaux d'emballage de la maniere appropriee.
D_placement de votre refrig_rateur :
Votre refrig6rateur est Iourd. Lots du deplacement du
refrigerateur pour le nettoyage ou le service, veiller & proteger
le plancher. Toujours tirer le refrigerateur tout droit lots du
deplacement. Ne pas incliner le refrigerateur d'un c6te ou de
I'autre nile "faire marcher" en essayant de le deplacer car le
plancher pourrait 6tre endommage.
Nettoyage avant rutilisation
Apres avoir enleve tousles materiaux d'emballage, nettoyer
I'interieur du refrigerateur avant de I'utiliser. Voir les instructions
de nettoyage dans "Entretien du refrigerateur".
Importants renseignements a savoir au sujet des tablettes
et des couvercles en verre :
Ne pas nettoyer les tablettes ou couvercles en verre avec de
I'eau tiede quand ils sent froids. Les tablettes et les
couvercles peuvent se briser s'ils sent exposes & des
changements soudains de temperature ou & un impact tel
que coup brusque. Pour votre protection, le verre trempe est
con£u pour eclater en d'innombrables pieces minuscules.
Ceci est normal. Les tablettes et les couvercles en verre sont
Iourds. Un soin special s'impose Iors de leur deplacement
pour eviter I'impact d'une chute.
1.
2.
3.
Debrancher le refrigerateur ou deconnecter la source de
courant electrique.
Oter les trois bouchons a vis (partie superieure et partie
inferieure du refrigerateur) se trouvant aux nouveaux
emplacements de la charniere sur la caisse du refrigerateur.
Ne pas jeter les bouchons a vis..
A.Bouchons a vis
/_,I'aide d'une cle Allen de 7/64,,retirer I'axe de la charniere
superieure et le mettre de c6te.
4. Incliner la porte vers I'avant et la soulever pour la sortir de
I'axe de la charniere inferieure. Mettre la porte de c6te.
5. Retirer les trois vis de charniere de la charniere superieure et
retirer la charniere.
A
A. Vis de charniere.
B. Trou de I'axe de la
charniere
16

6. Reinstaller I'axe de la charniere darts le trou de I'axe de la
charniere et inverser le sens de la charniere de maniere ace
que I'axe de la charniere soit oriente vers le haut.
7. Installer la charniere sur le c6te inf@ieur oppose du
refrig@ateur en utilisant les trois vis de charniere.
8. Retirer les ferme-porte de I'ancienne charniere inf@ieure et
les installer sur la nouvelle charniere inferieure.
IMPORTANT : S'assurer que les bossages inferieurs du
ferme-porte sont correctement alignes avec les trous de la
charniere inferieure.
I I
I
A. Douilles de plastique sup_rieur
B. Douilles de plastique inf_rieur
C. Bossages
9. Retirer les trois vis de I'ancienne charniere inferieure et retirer
la charniere.
10. Inverser le sens de I'ancienne charniere inferieure et la
reinstaller au sommet, sur le c6te oppose du refrig6rateur.
Retirer I'axe de la charniere.
11. Retoumer la porte de maniere ace que la partie inferieure de
celle-ci se trouve face vers le haut. Oter les deux vis de la
plaque de pivotement et retirer la plaque.
12. Retourner la plaque et la reinstaller sur le c6te oppose de la
porte.
S
J
tjy
/
13. Retourner la porte de maniere a ce que le sommet de celle-ci
se trouve face vers le haut.
14. incliner la porte vers I'avant et placer le trou de la plaque de
pivotement sur le nouvel axe de la charniere inferieure.
IMPORTANT : S'assurer que les bossages sup@ieurs du
ferme-porte sont correctement alignes avec les trous de la
plaque de la charniere.
II
II
II
A. Plaque de pivotement
B. Bossage
15. Aligner la porte sur la charniere sup@ieure et installer I'axe de
la charniere.
16. Installer les bouchons avis en plastique sur les anciens trous
de charniere au sommet et en bas de la caisse.
Fermeture de la porte
Le refrig@ateur dispose de quatre pieds de nivellement. Si le
refrigerateur semble instable ou si vous desirez que la porte se
ferme plus facilement, ajuster I'inclinaison du refrig@ateur en
observant les instructions ci-dessous :
Risque de choc electrique
Brancher sur une prise a 3 alv_oies reliee a la terre.
Ne pas enlever la broche de liaison a la terre.
Ne pae utiliser un adaptateur,
Ne pae utiliser un c&ble de rallonge.
Le non-respect de ces instructions peut causer
un deces, un incendie ou un choc electrique.
1. Brancher I'appareil sur une prise a 3 alveoles reliee a la terre.
17

2. Deplacer le refrigerateur a sa position finale.
Risque du poids exceseif
Utiliser deux ou plus de personnee pour d6placer et
installer le r6frig6rateur.
Le non=respect de cette instruction peut causer
une bleesure au dos ou d'autre blessure.
3.
Tourner les pieds de nivellement vers la droite pour abaisser
le refrigerateur ou tourner les pieds de nivellement vers la
gauche pour le lever. II peut _tre necessaire de tourner les
pieds de nivellement plusieurs fois pour ajuster I'inclinaison
du refrig6rateur.
REMARQUE : Si une autre personne pousse le haut du
refrigerateur, le poids devient moins Iourd sur les pieds de
nivellement, ce qui rend plus facile I'ajustement des pieds de
nivellement.
/
4=
Ouvrir la porte et s'assurer qu'ele ferme comme vous le
desirez. Sinon, incliner le refrigerateur un peu plus vers
I'arriere en tournant les deux vis de nivellement avant vers la
droite. Plusieurs tours peuvent _tre necessaires et il convient
de tourner les deux vis de nivellement de fagon egale.
Retirer la grille de la base :
1. Ouvrir la porte du refrigerateur.
2. ,&,I'aide d'un tournevis Phillips, retirer les vis fixant la grille de
la base & la caisse du refrigerateur.
3. Tirer la grille de la base vers vous.
A
A. Vis
R6installer la grille de la base :
1. Ouvrir la porte du refrigerateur.
2. Placer la grille de la base de maniere ace que les trous soient
alignes avec le refrigerateur et reinstaller les vis.
UTILISATION DU
P P
REFRIGERATEUR
II est possible que le refrigerateur neuf emette des sons que
I'appareil precedent ne produisait pas. Comme ces sons sont
nouveaux, ils peuvent vous inquieter. La plupart de ces nouveaux
sons sont normaux. Les sons peuvent vous sembler plus forts
avec des surfaces dures telles que le plancher et les structures
adjacentes. Les descriptions suivantes indiquent les genres de
sons et leur cause possible.
• Votre refrigerateur est congu pour fonctionner plus
efficacement afin de conserver les aliments aux temperatures
desir6es et pour minimiser la consommation d'energie. Le
compresseur et les ventilateurs tres efficaces peuvent faire
fonctionner votre refrigerateur plus Iongtemps que I'ancien. II
se peut egalement que vous entendiez un bruit saccade ou
aigu provenant du compresseur ou des ventilateurs qui
s'ajustent pour optimiser la performance.
• Des vibrations sonores peuvent provenir de I'ecoulement du
refrigerant ou d'articles places dans le refrigerateur.
• /_,la fin de chaque programme, vous pouvez entendre un
gargouillement attribuable au refrigerant qui se trouve dans
votre refrigerateur.
• Vous pouvez entendre I'ecoulement de I'eau dans le plat de
recuperation d'eau de degivrage Iorsque le refrigerateur
degivre.
• Vous pouvez entendre des declics Iorsque le refrigerateur se
met en marche ou s'arr_te.
[_,(Ifl_, III(.I())
Pour votre commoditi, la commande du rifrigirateur est
prereglee a I'usine. Lors de I'installation initiale du refrigerateur,
s'assurer que la commande est encore prereglee au reglage
moyen tel qu'illustre.
Ajustement des commandes
Les reglages moyens indiques a la section precedente devraient
convenir pour une utilisation normale du refrigerateur.
La commande est reglee correctement Iorsque les boissons sont
la temperature ideale.
S'il est necessaire d'ajuster la temperature, attendre au moins
24 heures entre chaque ajustement puis reverifier la temperature.
Pour rendre le refrigerateur plus froid, ajuster la commande au
r_glage plus eleve suivant. Pour rendre le refrigerateur moins
froid, ajuster lacommande au reglage plus bas suivant.
18

P
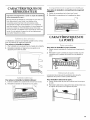
CARA.CTERI.STIQUES DU
REFRIGERATEUR
Importante renseignements a savoir au sujet des tablettes
et des couverclee en verre :
Ne pas nettoyer los tablettes ou couvercles en verre avec de
I'eau tiede quand ils sont froids. Les tablettes et los
couvercles peuvent se briser s'ils sont exposes _ des
changements soudains de temperature ou _ un impact tel
que coup brusque. Pour votre protection, le verre trempe est
con£u pour eclater en d'innombrables pieces minuscules.
Ceci est normal. Los tablettes et los couvercles en verre sont
Iourds. Un soin special s'impose Iors de leur deplacement
pour eviter I'impact d'une chute.
Le refrig@ateur comporte une tablette ajustable a deux niveaux
pour une capacite de rangement maximale,
Pour enlever et r4installer la tablette :
1. Oter la tablette en la soulevant hors de I'agrafe de la tablette.
2. Reinstaller la tablette en I'alignant sur los agrafes et en
appuyant pour la fixer en place.
Pour retirer et r4installer le compartiment de rangement
m4tallique :
1. Enleverle compartiment en letirant vers I'avant.
2. Reinstallerle compartiment en le reglissant enplace.
P
CARACTERISTIQUES DE
LA PORTE
Pour retirer et r4installler le porte-cannettes
1. Enlever le porte-cannettes en I'inclinant vers I'avant pour le
sortir.
2. Reinstaller le porte-cannettes en pla(_ant I'arriere du porte-
cannettes sous le support de la porte et en le glissant en
place.
Pour enlever et r4installer la tablette inf4rieure :
1. Enlever la tablette en la soulevant et en tirant vers I'avant.
2. Reinstaller la tablette en I'abaissant sur les guides.
Le balconnet de porte pout _tre positionne dans la partie
superieure de la porte ou dans la partie inf@ieure.
Pour r4installer le balconnet de porte :
1. Enlever le balconnet de porte en I'inclinant vers I'avant pour
le sortir.
2. Reinstaller le balconnet en pla(_ant I'arriere du balconnet sous
le support de la porte et en le glissant en place.
19

P P
ENTRETIEN DU REFRIGERATEUR
Risque d'exploaion
Utiliser un produit de nettoyage ininflammable.
Le non-respect de cette instruction peut causer un deces,
une explosion ou un incendie.
Nettoyer le refrig6rateur environ une fois par mois pour emp_cher
une accumulation d'odeurs. Essuyer les renversements
imm_diatement
Nettoyage du r6frig6rateur :
1. Debrancher le refrigerateur ou deconnecter la source de
courant electrique.
2. Retirer toutes les pieces amovibles de I'interieur, telles que
les tablettes, etc.
3. Laver a la main, rincer et secher les pieces amovibles et les
surfaces internes a fond. Utiliser une eponge propre ou un
linge doux et un detergent doux dans de I'eau tiede.
• Ne pas utiliser de nettoyants abrasifs tels que les
nettoyants a vitre en atomiseurs, nettoyants & recurer,
liquides inflammables, cires nettoyantes, d_tergents
concentres, eaux de Javel ou nettoyants contenant du
petrole sur les pieces en plastique, les garnitures
interieures et de portes ou les joints de portes. Ne pas
utiliser d'essuie-tout, tampons a recurer ou autres outils
de nettoyage abrasifs. Ces produits risquent d'egratigner
ou d'endommager les materiaux.
• Pour aider a eliminer les odeurs, on peut laver les patois
interieures avec un melange d'eau tiede et de
bicarbonate de soude (2 c. a soupe pour 1 pinte
[26 g pour 0,95 L] d'eau).
4. Laver les surfaces exterieures avec une eponge propre ou un
linge doux et un detergent doux dans de I'eau tiede. Ne pas
utiliser de nettoyants abrasifs. Secher parfaitement avec un
linge doux.
• Pour que votre refrigerateur en acier inoxydable conserve
son aspect neuf et pour enlever les petites egratignures
ou marques, il est sugg_re d'utiliser le nettoyant et poll
pour acier inoxydable approuve par le fabricant. Pour
commander le nettoyant, voir la section "Accessoires".
IMPORTANT : Ce nettoyant dolt _tre utilise sur les pieces en
acier inoxydable uniquement!
5.
6.
• Veiller ace que le nettoyant et poll pour acier inoxydable
n'entre pas en contact avec les pieces de plastique telles
que garnitures ou joints de porte. En cas de contact
accidentel, nettoyer la piece de plastique avec une
eponge et un detergent doux et de I'eau tiede. Secher
parfaitement avec un linge doux.
Remettre en place les parties amovibles.
Nettoyer regulierement les serpentins du condenseur. IIs sont
situes derriere la grille de la base. IIse peut que les serpentins
aient besoin d'etre nettoyes tousles deux mois. Ce nettoyage
peut aider a economiser de I'energie.
• Enlever la grille de la base. Voir "Grille de la base".
7.
• Employer un aspirateur avec un accessoire long pour
nettoyer les serpentins du condenseur Iorsqu'ils sent
sales ou poussiereux.
• Reinstaller la grille de la base.
Brancher le refrigerateur ou reconnecter la source de courant
electrique.
REMARQUE : Toutes les ampoules pour appareils menagers ne
conviendront pas a votre refrigerateur. Veiller a effectuer le
remplacement par une ampoule de grosseur, de forme et de
puissance semblables.
Changement de I'ampoule :
1. Debrancher le refrigerateur ou deconnecter la source de
courant electrique.
2. Faire glisser le protecteur d'ampoule vers I'onglet.
3. Appuyer sur I'onglet et so@ever le c6te oppose du protecteur
d'ampoule.
4. Remettre I'ampoule en place.
5. Reinstaller le protecteur d'ampoule du c6te de I'extremite de
I'onglet du protecteur, puis abaisser le protecteur pour le
mettre en place (un declic se fait entendre).
6.
A. Onglet
Brancher le refrigerateur ou reconnecter la source de courant
electrique.
i_ _:_K_ _ ,_ %6 ¸, ._
Vacances
Si vous laissez votre refrigerateur allume pendant votre absence,
consommer toutes les denrees perissables et congeler les autres
aliments.
Si vous choisissez d'arr_ter le refrigerateur avant de partir, suivre
ces etapes.
1. Enlever tousles aliments du refrigerateur.
2. Debrancher le refrigerateur.
3. Nettoyer le refrigerateur. Voir "Nettoyage".
4. A I'aide d'un ruban adhesif, placer un bloc de caoutchouc ou
de bois dans la partie superieure de la porte de fagon ace
qu'elle soit suffisamment ouverte pour permettre I'entree de
I'air a I'interieur, afin d'eviter I'accumulation d'odeur ou de
moisissure.
D6m6nagement
En cas de demenagement et de deplacement du refrigerateur
dans une nouvelle habitation, suivre ces etapes pour preparer le
demenagement.
1. Enlever tousles aliments du refrigerateur.
2. Debrancher le refrigerateur.
3. Bien nettoyer, essuyer et secher.
2O
La page est en cours de chargement...
La page est en cours de chargement...
La page est en cours de chargement...
La page est en cours de chargement...
-
 1
1
-
 2
2
-
 3
3
-
 4
4
-
 5
5
-
 6
6
-
 7
7
-
 8
8
-
 9
9
-
 10
10
-
 11
11
-
 12
12
-
 13
13
-
 14
14
-
 15
15
-
 16
16
-
 17
17
-
 18
18
-
 19
19
-
 20
20
-
 21
21
-
 22
22
-
 23
23
-
 24
24


KitchenAid KBCA06XPBL01 Le manuel du propriétaire
- Catégorie
- Frigos
- Taper
- Le manuel du propriétaire
- Ce manuel convient également à
dans d''autres langues
Documents connexes
-
KitchenAid KURO24RSBX03 Le manuel du propriétaire
-
-
-
-
KitchenAid KURO24LSBX Manuel utilisateur
-
-
-
-
-