128
TOOLS AND HARDWARE REQUIRED / OUTILS ET QUINCAILLERIE REQUIS / INSTRUMENTAL Y HERRAJE REQUERIDOS
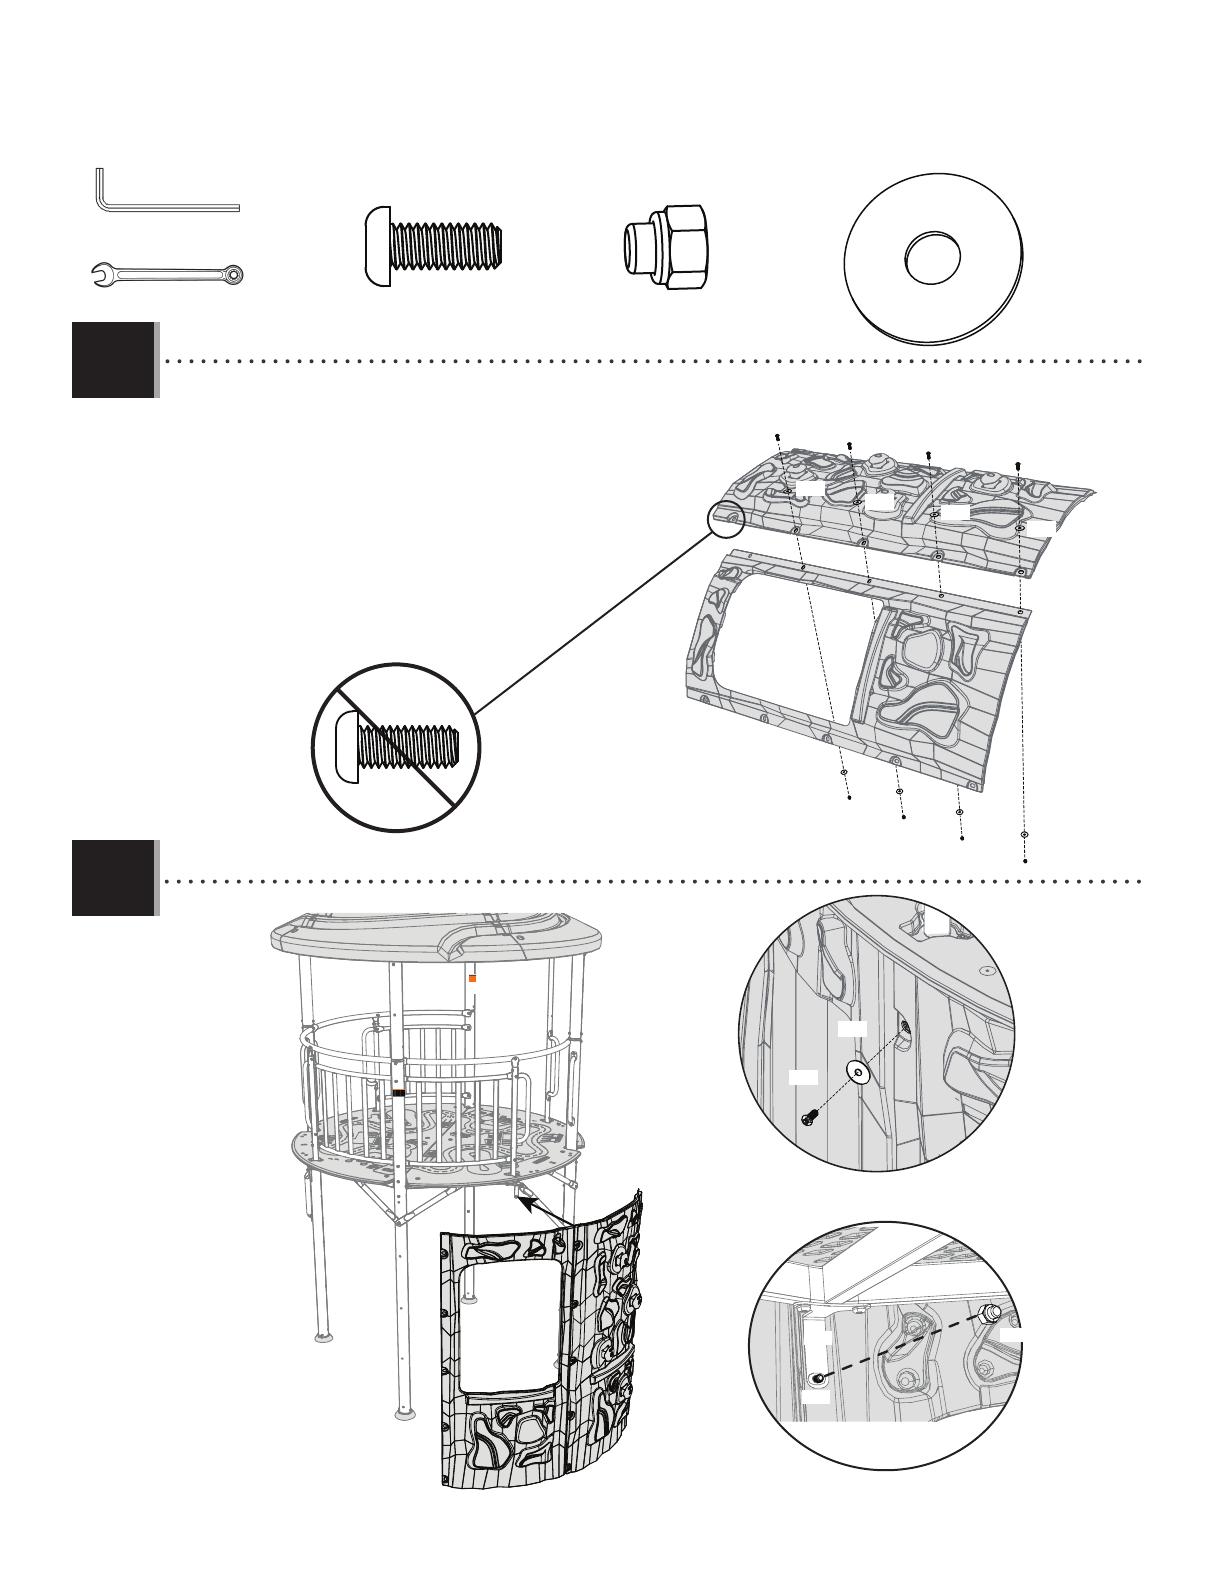
X SECTION 9 (CONTINUED) / SECTION 9 (SUITE) / SECCIÓN 8 (CONTINUACIÓN)
ARN
DZY
DZZ
ARN
ARN
ARN
ENG
ENG
ENG
ENG
ENG
ENG
ENG
ENG
AAN
AAN
AAN
AAN
• Do not insert a bolt in this location until instructed.
• Ne insérez pas un boulon dans cet emplacement
lorsque vous êtes invité à le faire.
• No inserte un perno en esta ubicación hasta que se
le indique.
6
DZS
ARN
ARN
ENG
AAN (x5)
ENG (x9)
ARN (x5)
Interior view / Vue intérieure / Vista interior
Exterior view / Vue extérieure / Vista exterior
9.3
9.4
1/2 in/po (≈13 mm)
(1)
(1)
3/16 in/po (≈5 mm)
DZS
AAN
DO N
PAS
NO
ING
11
6/
O Box 160010 • Freeport Center, Bldg. D-12 • Clearfi eld, UT 84016 • USA • 1-800-225-3865
DED FOR USE
ES 3 TO 12 AND
E ONLY.
n should be
all ages.
f occupants that
e playset is 16
of 1600 pounds
for outdoor
ry or death due
placed over hard
d other items
child’s neck,
trapped by the
strangulation
• CE PRODUIT EST CONÇU POUR L’USAGE
PAR DES ENFANTS ÂGÉS DE 3 À 12 ANS. CE
PRODUIT EST RÉSERVÉ SEULEMENT À UN
USAGE PERSONNEL.
• La supervision d’un adulte devrait être
assurée pour enfants de tous âges.
• Il ne devrait jamais y avoir plus de 16
occupants dans toute l’aire de jeu et le
poids combiné des occupants ne devrait
pas dépasser 726 kg (1600 lb).
• Ce produit est conçu pour usage en
extérieurs seulement.
• Risque de blessures graves à la tête ou de
mort dues à des chutes de l’équipement
mis sur une surface dure.
• Risque de porter les casques et autres
articles qui peuvent enrouler autour du cou
d’un enfant, devenir enchevêtrés ou piégés
par l’équipement, et causer l’étranglement
ou mort.
• ESTE PRODUCTO ES PARA NI
12 AÑOS DE EDAD. ESTE PRO
SÓLO PARA USO RESIDENCIA
• Debe existir supervisión de un
el lugar para niños de todas la
• El mayor número de ocupante
puede usar de manera segura
de juego es seis con un peso n
726 kg (1600 libras).
• Este producto está diseñado s
uso en exteriores.
• Riesgo de una lesión craneal
muerte debido a las caídas de
ubicado en superfi cies duras.
• Riesgo de llevar yelmos y otro
que pueden envolver el cuello
niño, devenir enredados o atr
por el equipo, y causar estran
o muerte.
ARNING / AVERTISSEMENT/ ADVERTENCIA


