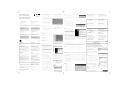
Philips MCW770/22 Quick Installation Guide
- Taper
- Quick Installation Guide

1 Place the set as close as possible to the PC.
Note: In order to ensure a good wireless connection avoid
placing the set close to microwave ovens and large metal
objects.
Placez l’appareil aussi près que possible du PC.
Remarque : Pour assurer une bonne connexion sans fil,
évitez de placer l’appareil près d’un four micro-onde et
de grands objets métalliques.
Coloque el equipo tan cerca como sea posible del PC.
Nota: Para asegurar una óptima conexión inalámbrica
evite colocar el equipo cerca de hornos microondas y de
grandes objetos metálicos.
Stellen Sie das Gerät möglichst nahe am PC auf.
Achtung: Um eine gute Wireless-Verbindung zu
gewährleisten, sollte das Gerät nicht in der Nähe eines
Mikrowellenherdes oder eines großen Metallobjektes
aufgestellt werden.
2 Switch on your PC and insert the installation disc into the
CD-ROM drive of your PC.
Allumez votre PC et insérez le disque d’installation dans le
lecteur de CD-ROM de votre PC.
Encienda su PC e inserte el disco de instalación en la unidad
de CD-ROM de su PC.
Schalten Sie den PC ein und legen Sie die Installations-Disk in
das CD-ROM-Laufwerk Ihres PC.
8
If the message asking for rebooting appears, click on OK to confirm. (Keep the installation disc insert-
ed.)
Vous devez redémarrer votre PC, si le message demandant de redémarrer apparaît, cliquez sur OK pour
confirmer. (Laissez le disque d’installation dans le lecteur.)
Tiene que reiniciar su PC
,si
aparezca el mensaje que pida reiniciar, haga clic en OK para confir-
mar. (Mantenga el disco de instalación insertado.)
Müssen Sie Ihren PC neu starten, wenn die Nachricht erscheint, die Sie zum Neustart auffordert, klicken Sie zur Bestätigung auf OK. (Lassen Sie die
Installations-Disk im Laufwerk.)
9 When the necessary software components are installed, your PC is ready for setup. Plug the wireless USB adapter into a free USB
port of your computer. Click on OK.
Quand les composants logiciels nécessaires sont installés, votre PC est prêt pour la configuration. Connectez l’adaptateur USB sans fil sur un
port USB disponible sur votre ordinateur. Cliquez sur OK.
Cuando los componentes de software necesarios se instalarán, su PC
está listo para configurarlo. Conecte el adaptador de USB inalámbrico a
un puerto USB libre en su ordenador. Haga clic en OK.
Wann Die erforderlichen Software-Komponenten sind installiert, Der PC
ist fertig für den Setup. Stecken Sie den USB-Funkadapter in einen freien
USB-Port auf Ihrem Computer. Klicken Sie auf OK.
10Windows will find the wireless USB adapter and the Windows
New Hardware wizard pops up:
Select the recommended option.Windows will find the correct driv-
er which was just installed before. Click on Next to continue and
start the driver installation.
Note: Windows may display a warning that the driver is not
approved by Microsoft (message differs with Windows ver-
sion). Ignore the message and continue with the installation.
Windows détecte l’adaptateur USB sans fil et l’assistant Ajout de
matériel apparaît :
Sélectionnez l’option recommandée.Windows trouve le pilote
approprié qui vient juste d’être installé. Cliquez sur Next pour con-
tinuer et lancer l’installation du pilote.
Remarque: Il est possible que Windows affiche un avertisse-
ment disant que le pilote n’est pas approuvé par Microsoft
(le message varie selon la version de Windows). Ignorez le message et continuez l’installation.
Windows encontrará el adaptador de USB inalámbrico y aparecerá el asistente de Windows New Hardware:
Seleccione la opción recomendada.Windows encontrará el controlador correcto que ya se había instalado antes. Haga clic en Next para continuar e
iniciar la instalación del controlador.
Nota:
Windows puede mostrar una advertencia de que el controlador no es aprobado por Microsoft (el mensaje difiere según la ver-
sión de Windows). Ignore el mensaje y continúe con la instalación.
IMPORTANT !
This is the recommended way to setup your MC W770 for
wireless PC link operation. With this installation all three com-
ponents needed for the wireless PC link operation will be
installed:
–The wireless USB adapter’s driver software
–The Philips Media Manager software with UPnP server
–The network setup of your MC W770 and your PC
We recommend using this setup for the first installa-
tion of the MC W770.
Do not connect the wireless USB adapter immediately!
You will be asked during the installation process to con-
nect it.
If you have a Firewall installed on your PC, please switch
it off during the installation.
Please close all internet connections and other programs
running on your PC before starting installation.
IMPORTANT!
Ceci est la méthode recommandée pour configurer votre MC
W770 pour le fonctionnement avec PC Link sans fil. Cette
installation installera les trois composants nécessaires pour le
fonctionnement avec PC Link sans fil :
– le logiciel pilote pour l’adaptateur USB sans fil
–logiciel Philips Media Manager sur serveur UPnP.
– la configuration réseau de votre MC W770 et de votre PC
Nous vous recommandons d’utiliser cette méthode
de configuration pour la première installation de
votre MC W770.
Ne connectez pas l’adaptateur USB sans fil tout de suite
! Il vous sera demandé de le connecter pendant le proces-
sus d’installation.Si votre PC est équipé d'un Firewall, dés-
activez-le pendant l'installation.
Fermez toutes les connexions à Internet et les applica-
tions avant l'installation de logiciel.
¡IMPORTANTE !
Este es el modo recomendado de instalar su MC W770 para
una operación de PC link inalámbrico. Con esta instalación se
instalarán los tres componentes necesarios para la operación de
PC link inalámbrico:
– El software del controlador del adaptador del USB inalámbrico
– Software Philips Media Manager con servidor UPnP
– La configuración de red de su MC W770 y de su PC
Recomendamos usar esta configuración para la
primera instalación de MC W770.
¡No conecte el adaptador USB inmediatamente! Se le
pedirá que lo conecte durante el proceso de instalación.
Si tienes instalado un Firewall en tu PC, por favor, desac-
tívalo durante la instalación.
Cierre todas las conexións a Internet y las aplicaciones
antes el proceso de instalación del software.
WICHTIG !
Diese Vorgangsweise wird für die Installation der Wireless-
Verbindung zwischen einem PC und dem MC W770 emp-
fohlen. Damit werden drei Komponenten installiert, die für das
Funktionieren der Wireless-Verbindung erforderlich sind:
–Treibersoftware des USB-Funkadapters
– Philips Media Manager Software mit UpnP-Server
– Netzwerksetup zwischen MC W770 und Ihrem PC
Wir empfehlen diese Vorgangsweise für die
Erstinstallation des MC W770.
USB-Funkadapter nicht sofort anstecken!! Sie werden
während der Installation aufgefordert, diesen
anzuschließen.
Wenn Sie eine Firewall auf Ihrem PC installiert haben,
deaktivieren Sie diese während der Installation.
Schließen Sie alle Internet-Verbindungs und Anwendungen
bevor Sie das software installieren.
Windows findet den USB-Funkadapter, und der Windows-Assistent für die Installation neuer Hardware wird angezeigt:
Wählen Sie die empfohlene Option aus.Windows findet den richtigen Treiber, der soeben installiert wurde. Klicken Sie auf Next,um
fortzufahren und die Treiberinstallation zu starten.
Hinweis: Windows zeigt möglicherweise eine Warnung an, dass der Treiber nicht von Microsoft zugelassen ist (diese
Nachricht ist je nach Windows-Version unterschiedlich). Ignorieren Sie die Nachricht und setzen Sie die Installation fort.
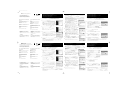
11The installation software checks if the wireless USB adapter is available.Then the network setup is started.
Le logiciel d’installation vérifie si l’adaptateur USB sans fil est disponible. La configuration du réseau démarre ensuite.
El software de instalación comprobará si el adaptador de USB inalámbrico está disponible. Después se iniciará la instalación de red.
Die Installationssoftware prüft, ob der USB-Funkadapter verfügbar ist. Anschließend wird der Netzwerksetup gestartet.
12After the configuration has been checked you have to enter the installation mode on your MC W770. Press PC LINK A on your
MC W770 to select the PC as source. Press PC LINK A for at least 5 seconds until INSTALLING is scrolled on the set.
➜The set searches for a connection to the PC.This can require up to about a minute. When the connection is established, Next is acti-
vated. Click on Next.
Après vérification de la configuration, vous devez entrer en mode installation sur votre MC W770. Appuyez sur PC LINK A sur votre
MC W770 pour sélectionner le PC en tant que source. Appuyez pendant au moins 5 secondes sur PC LINK A jusqu’à ce que
INSTALLING défile sur l’appareil.
➜L’appareil recherche une connexion au PC. Ceci peut nécessiter jusqu’à une minute environ. Lorsque la connexion est établie, Suivant
est activé. Cliquez sur Suivant.
Una vez que la configuración haya sido comprobada tiene que acceder al modo de instalación de su MC W770. Pulse PC LINK A en
su MC W770 para seleccionar el PC como fuente. Pulse PC LINK A durante al menos 5 segundos hasta que INSTALLING se
desplace en el equipo.
➜El equipo buscará una conexión al PC. Esto puede llevar hasta un minuto. Cuando la conexión se haya establecido, Siguiente se acti-
vará. Haga clic en Siguiente.
Nach der Überprüfung der Konfiguration müssen Sie den Installationsmodus auf Ihrem MC W770 eingeben. Drücken Sie PC LINK A
auf Ihrem MC W770, um den PC als Tonquelle auszuwählen. Drücken und halten Sie mindestens 5 Sekunden lang PC LINK A, bis auf
dem Gerät INSTALLING abläuft.
➜Das Gerät sucht nach einer Verbindung zum PC. Das kann bis zu einer Minute lang dauern. Sobald die Verbindung hergestellt ist, wird
Weiter aktiviert. Klicken Sie auf Weiter.
13The network installation is fully automated and ends with the
following window:
Click on Exit and the installation is finished.
L’installation du réseau est complètement automatique et s'achève
avec la fenêtre suivante :
Cliquez sur Exit et l’installation est terminée.
La instalación de la red está totalmente automatizada y termina con
la siguiente ventana:
Haga clic en Salir y la instalación finalizará.
Die Netzwerkinstallation läuft vollautomatisch ab und endet mit dem
folgenden Fenster:
Wenn Sie auf Beenden klicken, ist die Installation abgeschlossen.
4 Important! Do not connect the wireless USB adapter
immediately, until AFTER you have installed the software driver
.You will be asked during the installation process to connect it.
Click on Continue.
Important! Ne pas connecter immédiatement l’adaptateur USB
sans fil, mais seulement si le pilote logiciel correspondant est
installé. Il vous sera demandé de le connecter pendant le
processus d’installation. Cliquez sur Suivant.
¡Importante! No conecte el adaptador de USB inalámbrico
inmediatamente, sino sólo si el controlador de software para él
se instala. Se le pedirá que lo conecte durante el proceso de
instalación. Haga clic en Siguiente.
Wichtig! USB-Funkadapter nicht sofort angesteckt wird, son-
dern erst nachdem die entsprechende Treibersoftware von der
CD-ROM installiert wurde. Sie werden während der
Installation aufgefordert, den USB-Funkadapter anzustecken.
Klicken Sie auf Weiter.
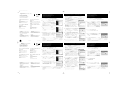
5 The following window appears:
Quick Installation is preselected. Click on Install to start
the installation.
La fenêtre suivante apparaît :
Installation rapide est présélectionné. Cliquez sur Installer
pour lancer l’installation.
La siguiente ventana aparecerá:
Instalación Rápida está preseleccionado. Haga clic en
Instalar para iniciar la instalación.
Das folgende Fenster wird geöffnet:
Schnellinstallation ist die Vorauswahl. Klicken Sie auf
Installieren, um die Installation zu starten.
3 The installation guide will appear automatically. If it does
not, please start the setup_.exe programme from the installa-
tion CD.The installation software starts with the language
selection and the following window appears:
Select your desired language and click on OK.
L’assistant d’installation apparaît automatiquement. Si tel n’est pas le
cas, lancez le programme setup_.exe à partir du CD d’installation.
L’installation du logiciel commence par le choix de la langue et la
fenêtre suivante apparaît :
Sélectionnez la langue de votre choix et cliquez sur OK.
La guía de instalación aparecerá automáticamente. Si no ocurre
así, por favor ejecute el programa setup_.exe desde el CD de
instalación. El software de instalación comenzará con la selec-
ción de la lengua deseada y aparecerá la siguiente ventana:
Seleccione la lengua deseada y haga clic en OK.
Die Installationsanleitung erscheint automatisch. Falls nicht,
starten Sie bitte das Programm setup_.exe auf der
Installations-CD. Die Installationssoftware beginnt mit der
Sprachauswahl und das folgende Fenster wird geöffnet:
Treffen Sie die gewünschte Sprachauswahl und klicken Sie auf
OK.
6 The following window appears:
The driver and utility software of the wireless USB adapter will
be installed first. Click on Next to start the installation and fol-
low the installation steps.
Note: Windows may display a warning that the driver is not
approved by Microsoft (message differs with Windows ver-
sion). Ignore the message and continue with the installation.
La fenêtre suivante apparaît:
Le pilote et le logiciel utilitaire de l’adaptateur USB sans fil sont installés en
premier. Cliquez sur Next pour lancer l’installation et suivez les étapes d’in-
stallation.
Remarques:
Il est possible que Windows affiche un avertissement
disant que le pilote n’est pas approuvé par Microsoft (le message
varie selon la version de Windows). Ignorez le message et continuez
l’installation.
La siguiente ventana aparecerá:
El controlador y el software de utilidades del adaptador de USB inalám-
brico se instalarán primero. Haga clic en Next para iniciar la instalación
y siga los pasos de instalación.
Nota:
Windows puede mostrar una advertencia de que el contro-
lador no es aprobado por Microsoft (el mensaje difiere según la ver-
sión de Windows). Ignore el mensaje y continúe con la instalación.
Das folgende Fenster wird geöffnet:
Treiber- und Nutzsoftware des USB-Funkadapters werden zuerst instal-
liert. Klicken Sie auf Next, um die Installation zu starten und folgen Sie
schrittweise der Anleitung.
Hinweis:
Windows zeigt möglicherweise eine Warnung an, dass
der Trei-ber nicht von Microsoft zu-gelassen ist (diese Nach-richt
ist je nach
Windows-
Version
unter-
schiedlich).
Ignorieren
Sie die
Nachricht
und setzen
Sie die
Installation
fort.
7 The Philips Media Manager software will be installed next.
Click on Next and follow the installation steps.
● After installation the Philips Media Manager will automatically
start up.When opening the Philips Media Manager for the first
time, you will be asked if you want to add a folder and scan for
media (music) files. Open a drive or a folder with music in it.This
folder is now added to the Philips Media Manager and you can
have access to the music files in it from the MC W770.You can
always add more files and folders at a later time (refer to the
chapter ‘Philips Media Manager’)
Le Philips Media Manager est installé. Cliquez sur Suivant et
suivez les étapes d’installation.
● Philips Media Manager démarre automatiquement après avoir été
installé. Lorsque Philips Media Manager est ouvert pour la pre-
mière fois, vous devez préciser si vous souhaitez ajouter un
dossier et rechercher des fichiers de media (musique). Ouvrez un
disque ou un dossier contenant de la musique. Ce dossier est
alors créé dans Philips Media Manager et vous pouvez accéder à
ses fichiers music au Philips Media Manager à partir de MCW770.
Vous avez également la possibilité d'ajouter d'autres fichiers et
dossiers ultérieurement (reportez-vous au chapitre Philips Media
Manager)
El Philips Media Manager software de archivación se instalará a
continuación. Haga clic en Siguiente y siga los pasos de insta-
lación.
● Después de la instalación Philips Media Manager comenzará
automáticamente. Cuando abras Philips Media Manager por
primera vez, te preguntará si deseas añadir una carpeta y
escanear por archivos de media (música). Abre una unidad o car-
peta con música. Esta carpeta será ahora añadida a Philips Media
Manager y podrás acceder a sus archivos de música desde
MCW770. Podrás añadir mas archivos y carpetas en cualquier
otro momento (ver el capítulo Philips Media Manager).
Die Philips Media Manager-Software wird als nächstes. Klicken Sie
auf Weiter und folgen Sie schrittweise der Anleitung.
● Nach der Installation wird Philips Media Manager automatisch
gestartet.Wenn Sie Philips Media Manager zum ersten Mal öff-
nen, werden Sie gefragt, ob ein Ordner erstellt und nach
Mediendateien (Musikdateien) gesucht werden soll. Öffnen Sie
ein Laufwerk oder einen Ordner mit Musikdateien. Dieser
Ordner wird jetzt Philips Media Manager hinzugefügt und Sie
können von MCW770 auf die Musikdateien darin zugreifen. Sie
können jederzeit zu einem späteren Zeitpunkt weitere Ordner
hinzufügen (siehe Kapitel Philips Media Manager ).
Wireless PC Link Quick Installation
PC Link sans fil Installation Rapide
PC Link inalámbrico Instalación Rápida
Wireless PC-Link Schnellinstallation
PC system requirements
– Windows 98SE/ME/2000/XP
–Pentium Class 350MHz processor or higher
– 128MB RAM or higher
– CD–ROM drive
– USB port
– Free hard disk space: 100 MB for the software
Do not connect the wireless USB adapter immediately!
You will be asked during the installation process to con-
nect it.
Configuration système requise du PC
– Windows 98SE/ME/2000/XP
– Processeur Pentium de classe 350 MHz ou supérieure
–128MB RAM ou supérieure
– Lecteur de CD-ROM
–Port USB
– Espace disque dur disponible : 100 Mo pour le logiciel
Ne connectez pas l’adaptateur USB sans fil tout de suite
! Il vous sera demandé de le connecter pendant le proces-
sus d’installation.
Requisitos del sistema del PC
– Windows 98SE/ME/2000/XP
– Procesador Pentium Class 350MHz o superior
– 128MB RAM o superior
– Unidad de CD–ROM
– Puerto USB
– Espacio libre en el disco duro: 100 MB para el software
¡No conecte el adaptador USB inmediatamente! Se le
pedirá que lo conecte durante el proceso de instalación.
PC-Systemvoraussetzungen
– Windows 98SE/ME/2000/XP
–Pentium mit mindestens 350MHz-Prozessor
– 128MB RAM-Prozessor
– CD–ROM-Drive
– USB-Port
– Freier Festplattenspeicher: 100 MB für die Software
USB-Funkadapter nicht sofort anstecken!! Sie werden
während der Installation aufgefordert, diesen
anzuschließen.
MC W770
Firmware upgrade
Occasionally, Philips releases new software (firmware) for your
set. Please visit our website www.philips.com/support for future
possible software upgrade.
Mise à niveau du firmware
De temps en temps, Philips sort de nouveaux logiciels
(firmware) pour votre appareil. Merci de visiter notre site inter-
net www.philips.com/support pour connaître les futures mises à
niveau possibles des logiciels.
Actualización de firmware
Philips lanza ocasionalmente nuevo software (firmware) para su
equipo. Por favor, visite nuestra página web
www.philips.com/support para posibles actualizaciones futuras
de software.
Firmware-Aktualisierung
Philips bringt gelegentlich neue Software (Firmware) für Ihr
Gerät heraus. Besuchen Sie bitte unsere Website
www.philips.com/support, um Ihre Software in Zukunft zu aktu-
alisieren.
Philips Media Manager
Adding music files to the Philips Media Manager (PMM)
Ajout de fichiers sur Philips Media Manager (PMM)
Añadir archivos de música a Philips Media Manager (PMM)
Hinzufügen von Musikdateien zu Philips Media Manager (PMM)
1 Select the media category Music. Click on ‘Add Music’
and then select ‘Add Files or Folders...’
Sélectionnez la Musique de la catégorie media. Cliquez sur
‘Add Music’ (" Ajouter de la musique") puis sélectionnez
‘Add Files or Folders...’ (" Ajouter les fichiers ou dossiers...
")
Selecciona la categoría de media Music. Haz clic en ‘Add
Music’ ('Añadir Musica') y selecciona ‘Add Files or
Folders...’ ('Anadir Archivos o carpetas...')
Wählen Sie die Medienkategorie "Musik". Klicken Sie auf "Add
Music" und wählen Sie dann "Add Files or Folders..."
2 Select a folder or one or more music files and click the
‘Open’button to add the selected folder or files to the Media
Manager window. From now on the music files you added may
be accessed from the MCW770.
Sélectionnez un dossier ou un ou plusieurs fichiers musicaux
puis cliquez sur le bouton ‘Open’ (" Ouvrir") pour les ajouter
à la fenêtre Philips Media Manager. Il est désormais possible
d'accéder au Philips Media Manager fichiers ajoutés à partir de
MCW770.
Selecciona una carpeta o uno o mas archivos de música y haz
clic en el botón ‘Open’ ('Abrir') para añadir la carpeta o
archivos seleccionados a la ventana de Philips Media Manager.
A partir de ahora los archivos de música que has añadido,
podrán accederse desde MCW770.
Wählen Sie eine oder mehrere Musikdateien aus und klicken
Sie auf die Schaltfläche "Open", um den ausgewählten Ordner
bzw. die ausgewählten Dateien dem Philips Media Manager-
Fenster hinzuzufügen. Von nun an können die von Ihnen
hinzugefügten Musikdateien von MCW770 aus aufgerufen wer-
den.
Opening and closing the Philips Media Manager win-
dow
You can close the Media Manager window, but the icon will
remain active in the task bar of Windows.The MC W770 will be
able to access the music files on your computer only if this icon
is visible. Double-clicking the icon opens the Media Manager
window.
Ouverture et fermeture de la fenêtre Philips Media
Manager
Vous pouvez fermer la fenêtre Philips Media Manager, mais
l'icône reste active dans la barre de tâches de Windows. Le
MCW770 peut accéder fichiers musicaux de votre ordinateur
uniquement lorsque l'icône est affichée. En double-cliquant sur
l'icône, vous ouvrez la fenêtre Philips Media Manager.
Abrir y cerrar la ventana de Philips Media Manager
Podrás cerrar la ventana de Philips Media Manager, pero el
icono continuará activo en la barra de tareas de Windows. El
modelo MCW770 podrá acceder a los archivos de música de
tu ordenador, solamente si este icono es visible. El dar dos clics
sobre el icono abrirá la ventana Philips Media Manager.
Öffnen und Schließen des Philips Media Manager-
Fensters
Sie können das Philips Media Manager-Fenster schließen, aber
das -Symbol bleibt in der Windows-Taskleiste aktiv. Der
MCW770 kann auf die Musikdateien Ihres Computers zugreifen,
auch wenn nur dieses -Symbol angezeigt wird. Durch
Doppelklicken auf öffnen Sie das Philips Media Manager-
Fenster.
Custom installation
(For more details, please visit:
www.philips.com/support)
Beside the Quick installation there are also Custom installation menus for
setting up more complex configurations.
– Integration of MC W770 into an existing network
– Add an additional audio system
– Add an additional PC server
Installation personnalisée
(Pour plus d'information merci de visiter notre site inter-
net: www.philips.com/support)
Outre l’Installation rapide, des menus d'Installation personnalisée sont également
disponibles pour paramétrer des configurations plus complexes.
– Intégration du
MC W770 dans un réseau (domestique) existant
– Ajout d’un système audio supplémentaire
– Ajout d’un serveur PC supplémentaire
Instalación personalizada
(Para más información, por favor visite nuestra página
web: www.philips.com/support)
Además de la Instalación rápida hay también menús de Instalación personalizada
para establecer configuraciones más complejas.
–
Integración de
MC W770 en una red existente
– Adición de un sistema de audio adicional
– Adición de un servidor del PC adiciona
Benutzerangepasste Installation
(Weitere Informationen, besuchen Sie bitte unsere
Website: www.philips.com/support)
Neben der Schnell-installation gibt es auch Menüs zur Erstellung komplexerer
Konfigurationen.
–
Integration von
MC W770 in ein ex-istierendes Netzwerk
– Hinzufügen eines zusätzlichen Audiosystems
– Hinzufügen eines zusätzlichen PC-Servers
3141 075 2041.4 PDCC-LC/JW-0502
14If the installation has been finished successfully:
➜PC LINK and COMPLETED are displayed on the MC W770.
Si l’installation se termine avec succès :
➜PC LINK et COMPLETED s’affichent sur le MC W770.
Si la instalación ha sido finalizada con éxito:
➜PC LINK y COMPLETED aparecerán en MC W770.
Nach erfolgreichem Abschluss der Installation:
➜PC LINK und COMPLETED werden auf dem MC W770
angezeigt.
for Windows XP Service Pack 2 users
Please refer to the Appendix or for the latest information,
www.philips/support.com.
Pour les utilisateurs de Windows XP Service Pack 2
reportez-vous aux instructions fournies dans le Supplément
ou www.philips/support.com pour obtenir de plus
amples informations.
Para usuarios de Service Pack 2 de Windows XP
Consulte la Apéndice o www.philips/support.com para
obtener la información más actualizada.
für Benutzer von Windows XP Service Pack 2
Nähere aktuelle Informationen erhalten Sie in den Anhang
oder www.philips/support.com aufgeführt.
MCW770_22 Quick Install (A1).2 1/10/05 11:13 Page 1
La page est en cours de chargement...
La page est en cours de chargement...
-
 1
1
-
 2
2
-
 3
3


Philips MCW770/22 Quick Installation Guide
- Taper
- Quick Installation Guide
dans d''autres langues
- English: Philips MCW770/22
- español: Philips MCW770/22
- Deutsch: Philips MCW770/22
- polski: Philips MCW770/22
- čeština: Philips MCW770/22
- svenska: Philips MCW770/22
