Derby EK-67С Chest Freezer Manuel utilisateur
- Catégorie
- Congélateurs
- Taper
- Manuel utilisateur

Home » GE Appliances » GE APPLIANCES FCM7STWW 7.0 Cu. Ft. Manual Defrost Chest Freezer Instruction
Manual
Contents
1 FCM7STWW 7.0 Cu. Ft. Manual Defrost Chest
Freezer
2 Documents / Resources
2.1 References
3 Related Posts
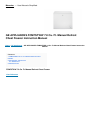
FCM7STWW 7.0 Cu. Ft. Manual Defrost Chest Freezer
View Fullscreen
GE APPLIANCES FCM7STWW 7.0 Cu. Ft. Manual Defrost
Chest Freezer Instruction Manual
Manuals+ — User Manuals Simplified.

CHEST FREEZERS
SAFETY INFORMATION . . . . . . . . .3
USING THE FREEZER . . . . . . . . . . . .5
Defrosting Instructions . . . . . . . . . . . . . . . . .6
CARE AND CLEANING . . . . . . . . . . .7
INSTALLATION . . . . . . . . . . . . . . . . . . .8
TROUBLESHOOTING TIPS. . . . . . .9
Normal Operating Characteristics . . . . . . . 10
LIMITED WARRANTY . . . . . . . . . . . 11
CONSUMER SUPPORT . . . . . . . . . . 12
OWNER’S MANUAL AND INSTALLATION
INSTRUCTIONS
Manual Defrost Models:
FCM5, FCM7
ENGLISH/FRANÇAIS/ ESPAÑOL
Write the model and serial numbers here:
Model # _________________

Serial # _________________
You can find them on a plate on the top-center on the back of the unit.
49-1000422 Rev. 1 05-22 GEA
THANK YOU FOR MAKING GE APPLIANCES A PART OF YOUR HOME.
Whether you grew up with GE Appliances, or this is your first, we’re happy to have you in the family.
We take pride in the craftsmanship, innovation and design that goes into every GE Appliances product, and we
think you will too. Among other things, registration of your appliance ensures that we
can deliver important product information and warranty details when you need them.
Register your GE appliance now online. Helpful websites and phone numbers are available in the Consumer
Support section of this Owner’s Manual. You may also mail in the pre-printed registration
card included in the packing material.
2
49-1000422 Rev. 1
SAFETY INFORMATION
IMPORTANT SAFETY INFORMATION
READ ALL INSTRUCTIONS BEFORE USING THE APPLIANCE
WARNING To reduce the risk of fire, explosion, electric shock, or injury when using your freezer, follow
these basic safety precautions:
7 KLVIUHH]HUPXVWEHSURSHUOLQVWDOOHGDQGORFDWHGLQ 7
RSUHYHQWVXIIRFDWLRQDQGHQWUDSPHQWKD]DUGVWR
accordance with the Installation Instructions before it
children, remove the lid from any freezer before
is used.
disposing of it or discontinuing its use.
8 QSOXJWKHIUHH]HUEHIRUHPDNLQJUHSDLUVRU cleaning. NOTE: Power to the freezer cannot be
disconnected by any setting on the control panel. NOTE: Repairs must be performed by a qualified Service
Professional.
5 HSODFHDOOSDUWVDQGSDQHOVEHIRUHRSHUDWLQJ
7 RDYRLGVHULRXVLQMXURUGHDWKFKLOGUHQVKRXOGQRW stand on, or play in or with the appliance.
& KLOGUHQDQGSHUVRQVZLWKUHGXFHGSKVLFDOVHQVRU or mental capabilities or lack of experience
and knowledge can use this appliance only if they are supervised or have been given instructions on safe use and
understand the hazards involved.
. HHSIODPPDEOHPDWHULDOVDQGYDSRUVDZDIURPWKH freezer.
‘ RQRWVWRUHH[SORVLYHVXEVWDQFHVVXFKDVDHURVRO cans with a flammable propellant in this
appliance.
‘ RQRWXVHDQH[WHQVLRQFRUG

7 KLVDSSOLDQFHLVLQWHQGHGWREHXVHGLQKRXVHKROG and similar applications such as: staff kitchen
areas
LQVKRSVRIILFHVDQGRWKHUZRUNLQJHQYLURQPHQWV
IDUPKRXVHVEFOLHQWVLQKRWHOVPRWHOVEHG
EUHDNIDVWDQGRWKHUUHVLGHQWLDOHQYLURQPHQWV catering and similar non-retail applications.
CAUTION To reduce the risk of injury when using your freezer, follow these basic safety precautions.
‘ RQRWFOHDQIUHH]HUZLWKZDUPZDWHUZKHQLWLV cold. Components may break if exposed to sudden
temperature changes or impact, such as bumping or dropping.
. HHSILQJHUVRXWRIWKH³SLQFKSRLQW´DUHDV clearances between the lid and cabinet are necessarily
small. Be careful closing lid when children are in the area.
‘ RQRWWRXFKWKHFROGVXUIDFHVLQWKHIUHH]HU compartment when hands are damp or wet, skin may
stick to these extremely cold surfaces.
‘ RQRWUHIUHH]HIUR]HQIRRGVZKLFKKDYHWKDZHG completely.
WARNING
EXPLOSION HAZARD Flammable Refrigerant
This appliance contains isobutane refrigerant, also known as R600a, a natural gas with high environmental
compatibility. However, it is also combustible. Adhere to the warnings below to reduce the risk of injury or property
damage
1. When handling, installing and operating the
4. .HHSYHQWLODWLRQRSHQLQJVLQWKHDSSOLDQFH enclosures or in the built-in structure clear of
obstruction.
5. To remove frost,scrape with a plastic or wood VSDWXODRUVFUDSHU’RQRWXVHDQLFHSLFNRUDPHWDO
or sharp-edged instrument as it may puncture the
appliance, care should be taken to avoid damage to
freezer liner and then the flammable refrigerant
the refrigerant tubing.
tubing behind it.
2. Service shall only be performed by authorized
VHUYLFHSHUVRQQHO8VHRQOPDQXIDFWXUHUDXWKRUL]HG service parts.
3. ‘LVSRVHRIDSSOLDQFHLQDFFRUGDQFHZLWK)HGHUDO
DQG/RFDO5HJXODWLRQV)ODPPDEOHUHIULJHUDQWDQG insulation material used require special disposal
6. ‘RQRWXVHHOHFWULFDODSSOLDQFHVLQVLGHWKHIRRG storage compartment of the appliance.
7. ‘RQRWXVHDQHOHFWULFDOGHYLFHWRGHIURVWRXU freezer.
procedures. Contact your local authorities for the
environmentally safe disposal of your appliance.
READ AND SAVE THESE INSTRUCTIONS

49-1000422 Rev. 1
3
SAFETY INFORMATION
IMPORTANT SAFETY INFORMATION
READ ALL INSTRUCTIONS BEFORE USING THE APPLIANCE
WARNING
FIRE OR EXPLOSION HAZARD
.HHSIODPPDEOHPDWHULDOVDQGYDSRUVDZDIURPIUHH]HU)DLOXUHWRGRVRFDQUHVXOWLQILUHH[S
ORVLRQRUGHDWK
CONNECTING ELECTRICITY
WARNING
ELECTRICAL SHOCK HAZARD
Plug into a grounded 3-prong outlet.
‘RQRWUHPRYHWKHJURXQGSURQJ
‘RQRWXVHDQDGDSWHU
‘RQRWXVHDQH[WHQVLRQFRUG
)DLOXUHWRIROORZWKHVHLQVWUXFWLRQVFDQUHVXOWLQGHDWKILUHRUHOHFWULFDOVKRFN
Do not, under any circumstances, cut or remove the third (ground) prong from the power cord. For personal
safety, this appliance must be properly grounded.
The power cord of this appliance is equipped with a 3-prong (grounding) plug which mates with a standard 3-
prong (grounding) wall outlet to minimize the possibility of electric shock hazard from this appliance.
Have the wall outlet and circuit checked by a qualified electrician to make sure the outlet is properly grounded.
Where a standard 2-prong wall outlet is encountered, it is your personal responsibility and obligation to have it
replaced with a properly grounded 3-prong wall outlet.
The freezer should always be plugged into its own individual electrical outlet which has a voltage rating that
matches the rating plate.
A 115 Volt AC, 60 Hz, 15- or 20-amp fused, grounded electrical supply is required. This provides the best
performance and also prevents overloading house wiring circuits which could cause a fire hazard from overheated
wires.
Never unplug your freezer by pulling on the power cord. Always grip plug firmly and pull straight out from the
outlet.
Immediately discontinue use of a damaged supply cord. If the supply cord is damaged, it must be replaced by a
qualified service professional with an authorized service part from the manufacturer.
When moving the freezer away from the wall, be careful not to roll over or damage the power cord.

PROPER DISPOSAL OF YOUR OLD APPLIANCE
WARNING SUFFOCATION AND ENTRAPMENT HAZARD
)DLOXUHWRIROORZWKHVHGLVSRVDOLQVWUXFWLRQVFDQUHVXOW in death or serious injury
IMPORTANT: Child entrapment and suffocation are not problems of the past. Junked or abandoned appliances
DUHVWLOOGDQJHURXVHYHQLIWKHZLOOVLWIRU³MXVWDIHZ GDV
´,IRXDUHJHWWLQJULGRIRXUROGDSSOLDQFH please follow the instructions below to help prevent
accidents.
Before You Throw Away Your Old Freezer: Take off the freezer lid.
Leave the baskets in place so that children may not easily climb inside.
Refrigerant and Foam Disposal:
‘LVSRVHRIDSSOLDQFHLQDFFRUGDQFHZLWK)HGHUDODQG/RFDO5HJXODWLRQV)ODPPDEOHUHIULJH
UDQWDQGLQVXODWLRQ material used require special disposal procedures. Contact your local authorities for
the environmentally safe disposal of your appliance.
READ AND SAVE THESE INSTRUCTIONS
4
49-1000422 Rev. 1
USING THE FREEZER
Using the Freezer
Starting the Freezer
1. Clean the inside of the freezer with a mild solution of baking soda and water (see Care and Cleaning).
2. Connect cord to power outlet.
3. Make sure the temperature control is set at 4.
4. Allow freezer to operate for at least 4 hours before placing food inside.
Temperature Control
)UHH]LQJWHPSHUDWXUHVHOHFWLRQLVPDGHEVHWWLQJWKH control from “Min” to “Max” (coldest) to.
If you want colder or warmer temperatures, adjust the control one step at a time.
Allow several hours after each one-step adjustment for the freezer temperature to stabilize.
7XUQLQJWKHFRQWUROWRWKH2))SRVLWLRQVWRSVWKHFRROLQJ process but does not shut off power
to the freezer.
Power-On Light (on some models)
The Power-On Light indicates that the freezer is properly connected to the electrical power.
The light glows even when the temperature control is turned off.
Key-Ejecting Lock (on some models)
The lock is spring loaded so the key cannot be left in the lock. To lock or unlock, press the key in while turning. If
the key is lost, contact your dealer for a replacement or go to GEApplianceParts.com. Always give the model and
serial number of the freezer when requesting a replacement key.
WARNING
To prevent a child from being entrapped, keep the key out of reach of children and away from the freezer.
49-1000422 Rev. 1

5
USING THE FREEZER: ‘HIURVWLQJ,QVWUXFWLRQV
Defrosting Instructions
In most climates, defrosting will be necessary only about twice a year.
To have your freezer operate most efficiently, do not permit more than 1/2″ (13 mm) of frost to accumulate.
WARNING 5LVNRI¿UHRUH[SORVLRQ Flammable refrigerant used.
To remove frost,scrape with a plastic or wood spatula RUVFUDSHU’RQRWXVHDQLFHSLFNRUDPHWDORU
sharp-edged instrument as it may puncture the freezer liner and then the flammable refrigerant tubing behind it.
‘RQRWXVHDQHOHFWULFDOGHYLFHWRGHIURVWRXU freezer.
For Complete Defrosting
7XUQWKHWHPSHUDWXUHFRQWUROWR2))VHWWLQJDQG unplug the freezer.
2. Remove all food and place it in corrugated boxes,
LQVXODWHGEDJVSLFQLFFRROHUVHWF8VHWRZHOVDQG newspapers for insulation as needed.
3. With the door/lid open, use pans of hot water to speed loosening of frost. Remove large pieces before they
melt.
Chest models have a defrost water drain at the front. Remove the defrost drain cap from the outside and the drain
plug inside the cabinet.
NOTE: Water may drip from the back flange of the lid cover during defrosting. This is normal. Ice builds up in the
lid insulation when the lid is open for adding or removing food, and melts during the defrosting operation.
4. Sponge excess water from the bottom of the freezer as it collects to prevent overflowing.
5. After defrosting, clean the inside of the freezer (see Care and Cleaning).
6. Replace the drain plug inside the cabinet and the cap
RQWKHGHIURVWGUDLQ)ROGRYHUDQGGUWKHJDVNHWRQ the hinge side of the lid.
7. Plug in the freezer. Return the temperature control to its previous position and return food to the freezer.
6
49-1000422 Rev. 1
CARE AND CLEANING
Care And Cleaning
Cleaning Your Freezer
Outside. Protect the paint finish. The finish on the outside of the freezer is a high quality, baked-on paint finish.
With proper care, it will stay new-looking and rust-free for years. Apply a coat of appliance polish wax when the
freezer is new and then at least twice a year. Appliance polish wax also works well to remove tape residue from
freezer surfaces.
Keep the finish clean. Wipe with a clean cloth lightly dampened with appliance polish wax or mild
OLTXLGGLVKZDVKLQJGHWHUJHQW’UDQGSROLVKZLWK
DFOHDQVRIWFORWK’RQRWZLSHWKHIUHH]HUZLWKD
VRLOHGGLVKZDVKLQJFORWKRUZHWWRZHO’RQRWXVH scouring pads, powdered cleaners, bleach, or
cleaners containing bleach.
NOTICE: Care should be taken in moving the freezer away from the wall. All types of floor coverings can be
damaged, particularly cushioned coverings and those with embossed surfaces.
Inside. Clean the inside of your freezer at least once a year. We recommend that the freezer be unplugged before
cleaning. If this is not practical, wring excess moisture out of sponge or cloth when cleaning in the vicinity of

switches, lights or controls.
8VHZDUPZDWHUDQGEDNLQJVRGDVROXWLRQ±DERXWD tablespoon of baking soda to a quart of water.
Rinse WKRURXJKOZLWKZDWHUDQGZLSHGU’RQRWXVH
FOHDQLQJSRZGHUVRURWKHUDEUDVLYHFOHDQHUV’2127 wash removable parts in a dishwasher.
An open box of baking soda in the freezer will absorb stale freezer odors. Change the box every three months.
,Q&DVHRI([WHQGHG3RZHU)DLOXUH
.HHSIUHH]HUOLGFORVHG<RXUIUHH]HUZLOONHHSIRRG frozen for 24 hours provided warm air is not
admitted.
,IIUHH]HULVRXWRIRSHUDWLRQIRUKRXUVRUPRUHDGG dry ice. Leave ice in large pieces. Add more ice as
required.
CAUTION
Handling of dry ice can cause freezing of the hands–gloves or other protection is recommended.
,IGULFHLVQRWDYDLODEOHPRYHIRRGWRDIUR]HQIRRG locker temporarily–until power is restored.
Preparing to Move
‘LVFRQQHFWWKHSRZHUFRUGSOXJIURPWKHZDOORXWOHW Remove foods, defrost and clean the freezer.
Secure all loose items such as baskets by taping them securely in place to prevent damage.
Be sure freezer stays in upright position during actual moving and during transportation. The freezer must be
secured during transportation to prevent movement. Protect outside of freezer with blanket.
Preparing for Vacation
To maintain freezer in operation during vacations, EHVXUHRXUKRXVHSRZHULVQRWWXUQHGRII)RUVXUH
protection of freezer contents, you may want to ask a neighbor to check the power supply and freezer operation
every 48 hours.
)RUH[WHQGHGYDFDWLRQVRUDEVHQFHVRXPDSUHIHUWR move your frozen foods to a storage locker
temporarily. If your freezer is to be left empty, disconnect power cord plug from wall outlet. To prevent formation of
odors, place open box of baking soda in freezer and leave freezer door/lid open.
49-1000422 Rev. 1
7
INSTALLATION
Preparing to Install the Freezer
Read these instructions completely and carefully.
Freezer Location
Your freezer should be conveniently located for day-to-day use in a dry, well-ventilated room.
‘RQRWLQVWDOOWKHIUHH]HULQDORFDWLRQH[SRVHGWRUDLQ water or direct sunlight.
‘RQRWLQVWDOOWKHIUHH]HUZKHUHWKHWHPSHUDWXUHZLOOJR
EHORZ)&RUDERYH)&EHFDXVHLWZLOO not maintain proper temperatures.
Be sure to install your freezer on a floor strong enough to support it when it is fully loaded.
The freezer must be solidly positioned on the floor if it is to function at its best. Your freezer has adjustable leveling

legs that can be turned to be solidly positioned wherever the floor is too uneven. If the place selected for the
freezer is damp or moist, place 2 x 4’s (51 mm x 102 mm) under its entire length to assure adequate support.
Clearances
On all models, allow 3″ (76 mm) on top, back and sides for proper air circulation. Allow sufficient space on top for
lid to open.
Lid Removal
CAUTION LIFTING HAZARD
7KHOLGLVKHDY8VHERWKKDQGVWRVHFXUHWKHOLGEHIRUH lifting.
CAUTION HINGE SPRING UNDER TENSION
If it is necessary to remove the lid, follow these steps:
2. Open the lid to the maximum position. (The hinges are loosest at this position.)
3. Loosen, do not remove, the 4 screws from the lower part of the hinge that are mounted to the cabinet.
1. Remove each upper hinge cover by grasping on the sides and pulling upwards. Remove each lower hinge
cover by grasping on the sides and pulling down.
8SSHU+LQJH Cover
Lower Hinge Cover
Hinge screws to be loosened
Hinge screws to be loosened
4. Raise/lift the lid until the screws align with the larger slotted openings in the bottom of the hinge. Each hinge is
still attached to the lid with 4 screws.
5. To reinstall lid follow steps in reverse. Tighten all hinge screws but avoid over-tightening to prevent stripping.
Reinstall hinge covers.
8
49-1000422 Rev. 1
TROUBLESHOOTING TIPS
Troubleshooting Tips… Before you call for service
Save time and money! Review the charts on the following pages first and you may not need to call for service.
Problem Freezer does not operate or Power-On Light is not on
Freezer starts/stops too frequently
Freezer operates too long
Noisy operation or cabinet vibrates
Freezer temperature too warm Foods defrosting
Freezer temperature too cold Moisture forms on outside of cabinet Interior light does not work (on some models)
Possible Causes
Temperature control set to OFF position.
Freezer is unplugged.

The fuse is blown/circuit breaker is tripped.
Door/lid left open.
Too frequent or too long lid openings.
Temperature control set too cold.
Door/lid left open.
Too frequent or too long lid openings.
Temperature control set too cold.
Inadequate air circulation space around cabinet.
Floor may be weak, causing freezer to vibrate when compressor is on.
Cabinet is not positioned solidly on floor.
Door/lid left open.
Too frequent or too long lid openings.
Temperature control set to OFF position.
Freezer is unplugged.
The fuse is blown/circuit breaker is tripped.
Door/lid left open.
Too frequent or too long lid openings.
Temperature control set too cold.
Not unusual during periods of high humidity.
No power at outlet.
Freezer is unplugged.
Light bulb burned out.
What To Do Move the control to a temperature setting.
Push the plug completely into the outlet. Replace fuse or reset the breaker.
Check to see if package is holding door/lid open. Open the lid less often.
6HH8VLQJWKH)UHH]HU Check to see if package is holding door/lid open. Open the lid less often.
6HH8VLQJWKH)UHH]HU See Preparing to install the freezer
Placing 2 X 4’s (51 mm X 102 mm) under the length of the freezer will help support it and may reduce vibration.
See Preparing to install the freezer. Or use shims for uneven floor. uneven floor. Check to see if package is
holding door/lid open. Open the lid less often.
Move the control to a temperature setting.
Push the plug completely into the outlet. Replace fuse or reset the breaker.
Check to see if package is holding door/lid open. Open the lid less often.
6HH8VLQJWKH)UHH]HU
Wipe surface dry.
Replace fuse or reset the breaker. Push the plug completely into the outlet. Replace bulb.
49-1000422 Rev. 1
9
TROUBLESHOOTING TIPS
Troubleshooting Tips… Before you call for service
Problem
Door/lid won’t fully close by itself
Slow starting time after being off
([FHVVLYHIURVWEXLOGXS
Possible Causes Package holding door/lid open.
Built-in overload protection.
Door/lid left open.
Too frequent or too long lid openings.

Not unusual during periods of high humidity.
What To Do Move package to a different location.
This is normal after being off.
Check to see if package is holding door/lid open. Open the lid less often.
Wipe surface dry.
NOTE:
‘RQRWUHWXUQWKHIUHH]HUWRWKHVWRUHZKHUHRXSXUFKDVHGLW7KHIUHH]HULVHOLJLEOHIRULQK
RPHVHUYLFH )RUZDUUDQWVHUYLFHFRQWDFWXVDWGEAppliances.comRUFDOO*
(&$5(686RU&DQDGD
Normal Operating Characteristics
These things are normal and do not indicate a need for service.
$ZDUPFDELQHWH[WHULRUDVWKHUHIULJHUDWLRQVVWHP transfers heat from the inside to the outside
through the exterior cabinet walls.
7KHVRXQGRIWKHKLJKHIILFLHQFFRPSUHVVRUPRWRU
10
49-1000422 Rev. 1
LIMITED WARRANTY
Freezer Limited Warranty
GEAppliances.com
For US Customers,
DOOZDUUDQWVHUYLFHSURYLGHGERXU)DFWRU6HUYLFH&HQWHUVRUDQDXWKRUL]HG&XVWRPHU&D
UH® technician. To schedule service, on-line, 24 hours a day, visit us at GEAppliances.com, or call
800.GE.CARES
(800.432.2737). Please have serial number and model number available when calling for service. In Canada, call
800.561.3344.
For the Period of:
One Year )URPWKHGDWHRIWKH original purchase
GE Appliances Will Replace
Any part of the freezer which fails due to a defect in materials or workmanship.
‘XULQJWKLVSHULRGRI2QH<HDUIURPWKHGDWHRIRULJLQDOSXUFKDVH*($SSOLDQFHVZLOO
FKRRVHDWLWVRSWLRQWRUHSODFHRUVHUYLFHWKHGHIHFWLYHXQLW’XULQJWKLVOLPLWHGRQHHD
U warranty, should GE Appliances choose to service the unit, GE Appliances will provide any part of the freezer
which fails due to a defect in materials or workmanship and free of
FKDUJHDOOODERUDQGUHODWHGVHUYLFHFRVWVWRUHSODFHWKHGHIHFWLYHSDUW’XULQJWKLVO
LPLWHG one-year warranty, should GE Appliances choose to replace the unit, it may do so by providing you with
a certificate redeemable at a retailer for a replacement product.
What GE Appliances Will Not Cover:
Service trips to your home to teach you how to use the product.
Improper installation, delivery or maintenance. Failure of the product if it is abused, misused, or
used for other than the intended purpose or used commercially. Loss of food due to spoilage. Damage caused
after delivery. Replacement of house fuses or resetting of circuit breakers.
Damage to the product caused by accident, fire, floods or acts of God.

Incidental or consequential damage caused by possible defects with this appliance.
Product not accessible to provide required service. $VVRFLDWHGFRVWVZKHQ*($SSOLDQFHVFKRRVHVWR
issue the consumer a certificate as a form of product replacement.
EXCLUSION OF IMPLIED WARRANTIES
Your sole and exclusive remedy is product repair as provided in this Limited Warranty. Any implied warranties,
including the implied warranties of merchantability or fitness for a particular purpose, are limited to one year or the
shortest period allowed by law.
For US Customers: This limited warranty is extended to the original purchaser and any succeeding owner for
SURGXFWVSXUFKDVHGIRUKRPHXVHZLWKLQWKH86$,IWKHSURGXFWLVORFDWHGLQDQDUHDZKHUHV
HUYLFHED*( Appliances Authorized Servicer is not available, you may be responsible for a trip charge or you
may be required to bring the product to an Authorized GE Appliances Service location for service. In Alaska, the
limited warranty excludes the cost of shipping or service calls to your home. Some states do not allow the
exclusion or limitation of incidental or consequential damages. This limited warranty gives you specific legal rights,
and you may also have other rights which vary from state to state. To know what your legal rights are, consult your
local or state consumer affairs office or your state’s Attorney General.
Warrantor US: GE Appliances, a Haier company Louisville, KY 40225
For Customers in Canada: This limited warranty is extended to the original purchaser and any succeeding owner
for products purchased in Canada for home use within Canada. In-home warrant service will be provided in areas
where it is available and deemed reasonable by Mabe to provide.
Warrantor Canada: MC Commercial, Burlington, Ontario, L7R 5B6
Staple your receipt here. Proof of the original purchase date is needed to obtain service under the warranty.
49-1000422 Rev. 1
11
CONSUMER SUPPORT
Consumer Support
GE Appliances Website
Have a question or need assistance with your appliance? Try the GE Appliances Website 24 hours a day, any day
of the year! You can also shop for more great GE Appliances products and take advantage of all our on-line
support VHUYLFHVGHVLJQHGIRURXUFRQYHQLHQFH,QWKH86GEAppliances.com In Canada:
GEAppliances.ca
Register Your Appliance
Register your new appliance on-line at your convenience! Timely product registration will allow for enhanced
communication and prompt service under the terms of your warranty, should the need arise. You may also mail in
the pre-printed registration card included in the packing material. ,QWKH86GEAppliances.com/register In
Canada: 3URGVXSSRUWPDEHFDFUP3URGXFWV3URGXFW5HJLVWUDWLRQDVS[
Schedule Service
Expert GE Appliances repair service is only one step away from your door. Get on-line and schedule your service
at RXUFRQYHQLHQFHDQGDRIWKHHDU,QWKH86GEAppliances.com/service or call 800.432.2737 during
normal business hours. In Canada: GEAppliances.ca/en/support/service-request or call 800.561.3344
([WHQGHG:DUUDQWLHV
Purchase a GE Appliances extended warranty and learn about special discounts that are available while your
warranty is still in effect. You can purchase it on-line anytime. GE Appliances Services will still be there after your
warranty expires. ,QWKH86*($SSOLDQFHVFRPH[WHQGHGZDUUDQWor call 800.626.2224 during normal
business hours. In Canada: *($SSOLDQFHVFDHQVXSSRUWSXUFKDVHH[WHQGHGZDUUDQW or call
800.290.9029
Parts and Accessories
Individuals qualified to service their own appliances can have parts or accessories sent directly to their homes
9,6$0DVWHU&DUGDQG’LVFRYHUFDUGVDUHDFFHSWHG2UGHURQOLQHWRGDKRXUVHYHUGD
,QWKH86GEApplianceparts.com or by phone at 877.959.8688 during normal business hours. Instructions
contained in this manual cover procedures to be performed by any user. Other servicing

JHQHUDOOVKRXOGEHUHIHUUHGWRTXDOLILHGVHUYLFHSHUVRQQHO&DXWLRQPXVWEHH[HUFLVHGV
LQFHLPSURSHU servicing may cause unsafe operation. Customers in Canada should consult the yellow pages
for the nearest Mabe service center, visit our website at GEAppliances.ca/en/products/parts-filters-accessories or
call 800.661.1616.
Contact Us
If you are not satisfied with the service you receive from GE Appliances, contact us on our Website with all the
details including your phone number, or write to: ,QWKH86*HQHUDO0DQDJHU&XVWRPHU5HODWLRQV_*
($SSOLDQFHV$SSOLDQFH3DUN_/RXLVYLOOH.< GEAppliances.com/contact
,Q&DQDGD’LUHFWRU&RQVXPHU5HODWLRQV0DEH&DQDGD,QF_6XLWH)DFWRU/DQH_0RQFWRQ1%
(&0 GEAppliances.ca/en/contact-us
12
49-1000422 Rev. 1
CONGÉLATEURS HORIZONTAUX
MESURES DE SÉCURITÉ . . . . . . . . .3
UTILISATION DU CONGÉLATEUR . . . . . . . . . . .5
Directives de dégivrage . . . . . . . . . . . . . . . .6
ENTRETIEN ET NETTOYAGE . . . .7
INSTALLATION . . . . . . . . . . . . . . . . . . .8
CONSEILS DE DÉPANNAGE. . . . .9
Caractéristiques normales de fonctionnement. . . . . . . . . . . . . . . . . . . . 10
GARANTIE LIMITÉE . . . . . . . . . . . . . 11
SOUTIEN AU CONSOMMATEUR. . . . . . . . . . . 12
MANUEL D’UTILISATION ET D’INSTALLATION
Dégivrage non automatique : FCM5, FCM7
FRANÇAIS
Inscrivez les numéros de modèle et de série ici : Numéro de modèle : ______ Numéro de série :_________ Ils
sont inscrits sur une plaque qui se trouve sur le dessus central de l’arrière du congélateur.
49-1000422 Rev. 1 05-22 GEA
NOUS VOUS REMERCIONS D’ACCUEILLIR GE APPLIANCES CHEZ VOUS
Que vous ayez grandi avec GE Appliances ou qu’il s’agisse de votre première acquisition, nous sommes heureux
de vous accueillir dans notre famille.
Nous sommes fiers du savoir-faire, de l’innovation et de l’esthétique qui composent chaque appareil GE
Appliances, et nous pensons que vous le serez aussi. Dans cette optique, nous vous rappelons
que l’enregistrement de votre électroménager vous assure la communication de renseignements importants sur le
produit et la garantie lorsque vous en avez besoin.
Enregistrez votre électroménager GE en ligne dès maintenant. Des sites Web et des numéros de téléphone utiles
figurent dans la section Soutien au consommateur de ce manuel d’utilisation. Vous pouvez aussi poster la fiche de
garantie pré-imprimée incluse dans l’emballage.
2
49-1000422 Rev. 1
INFORMATION DE SÉCURITÉ
INSTRUCTIONS IMPORTANTES DE SÉCURITÉ
LIRE TOUTES LES INSTRUCTIONS AVANT D’UTILISER L’APPAREIL

AVERTISSEMENT Pour réduire le risque d’incendie, d’explosion, de choc électrique ou de blessures lorsque
vous
utilisez votre congélateur, veuillez suivre ces consignes de sécurité :
& HFRQJpODWHXUGRLWrWUHFRUUHFWHPHQWLQVWDOOp
FRQIRUPpPHQWDX[&RQVLJQHVG¶,QVWDOODWLRQDYDQWWRXWH utilisation.
3 RXUpYLWHUWRXWULVTXHGHVXIIRFDWLRQRXG¶HQIHUPHPHQW retirez le couvercle d’un congélateur
avant de le mettre au
rebut ou si vous arrêtez de l’utiliser.
‘ pEUDQFKH]OHFRQJpODWHXUDYDQWG¶HIIHFWXHUXQH réparation, de remplacer une ampoule ou de le
nettoyer. Remarque : L’alimentation du congélateur ne peut être déconnectée par aucune des fonctions sur le
panneau de commande. Remarque : Les réparations doivent être effectuées par un professionnel qualifié.
5 HPHWWH]WRXWHVOHVSLqFHVHWSDQQHDX[HQSODFHDYDQW d’utiliser l’appareil.
* DUGH]OHVPDWpULDX[HWYDSHXUVLQIODPPDEOHVORLQGX réfrigérateur.
1 ¶HQWUHSRVH]SDVGDQVFHWpOHFWURPpQDJHUGHV substances explosives telles que des bombes
aérosols qui contiennent un gaz propulseur.
1 ¶XWLOLVH]SDVGHFRUGRQGHUDOORQJH
Afin de prévenir les accidents graves ou la mort, les enfants ne doivent pas se tenir ni jouer dans ou sur
l’électroménager.
/ HVHQIDQWVHWOHVSHUVRQQHVGRQWOHVFDSDFLWpVVRQW réduites sur le plan physique, sensoriel
ou mental, ou qui manquent d’expérience ou de connaissances, peuvent utiliser cet électroménager seulement si
elles sont surveillées ou ont reçues des consignes de sécurité sur son usage et les risques y sont associés.
& HWpOHFWURPpQDJHUHVWFRQoXSRXUXQHXWLOLVDWLRQ domestique et applications similaires : salle
du personnel dans une usine, un bureau ou d’autres lieux de travail; maison de ferme; clients dans un hôtel, un
motel, un gîte touristique et d’autres lieux résidentiels; approvisionnement et applications similaires non reliées au
commerce de
détail.
ATTENTION Pour réduire le risque de blessures lorsque vous utilisez votre congélateur, veuillez suivre les
consignes de
sécurité suivantes :
1 HQHWWRH]SDVOHFRQJpODWHXUDYHFGHO¶HDXWLqGHTXDQG celui-ci est froid. Les composants
peuvent se casser s’ils sont exposés à des changements soudains de température ou si vous les cognez ou les
faites tomber.
e ORLJQH]OHVGRLJWVGHVSDUWLHVGXFRQJpODWHXURO¶RQSHXW facilement se pincer : les espaces
entre le couvercle et la cuve sont toujours étroits. Soyez prudent lorsque vous fermez le couvercle en présence
d’enfants.
1 HWRXFKH]SDVOHVVXUIDFHVIURLGHVGXFRQJpODWHXU lorsque vous avez les mains humides ou
mouillées. La peau risque d’adhérer à ces surfaces extrêmement froides.
1 HUHFRQJHOH]SDVOHVDOLPHQWVVXUJHOpVTXLRQW complètement dégelé.
AVERTISSEMENT
RISQUE D’EXPLOSION Fluide frigorigène inflammable
Cet électroménager contient le réfrigérant isobutane, aussi connu comme R600a, un gaz naturel à compatibilité
élevée avec l’environnement. Il s’agit cependant d’un combustible. Observez les consignes de sécurité ci-
dessous afin de réduire le risque de blessure ou de dommage à la propriété.

3. Mettez le appareil au rebut conformément aux réglementations fédérales et locales. Le fluide frigorigène
inflammable et le matériel isolant utilisés nécessitent des
SURFpGXUHVGHPLVHDXUHEXWVSpFLDOHV&RPPXQLTXH] avec les autorités locales compétentes pour la
mise au rebut de votre appareil sans danger pour l’environnement.
1. Lors de la manipulation, de l’installation et de l’utilisation de cet appareil, prenez soin de ne pas endommager
les tubes de circulation du fluide frigorigène.
2. L’entretien ou la réparation doivent être effectués par un personnel de service autorisé. Utilisez seulement des
pièces de rechange autorisées par le fabricant.
4. N’obstruez pas les évents dans l’enceinte prévue pour l’appareil.
5. N’utilisez pas d’appareils ou autres moyens mécaniques pour accélérer le processus de dégivrage.
6. N’endommagez pas le circuit du fluide frigorigène. 7. N’utilisez aucun appareil électrique pour dégivrer votre
congélateur.
LIRE ET CONSERVER CES INSTRUCTIONS
49-1000422 Rev. 1
3
INFORMATION DE SÉCURITÉ
INSTRUCTIONS IMPORTANTES DE SÉCURITÉ
LIRE TOUTES LES INSTRUCTIONS AVANT D’UTILISER L’APPAREIL
AVERTISSEMENT
RISQUE D’INCENDIE OU D’EXPLOSION
&RQVHUYH]OHVPDWpULDX[HWYDSHXUVLQIODPPDEOHVjO¶pFDUWGHYRWUHDSSDUHLO8QHH[SORVL
RQXQLQFHQGLHYRLUHODPRUWSRXUUDLW en résulter.
BRANCHEMENTS ÉLECTRIQUES
AVERTISSEMENT
RISQUE DE CHOC ÉLECTRIQUE.
Branchez l’appareil dans une prise triple avec terre.
Ne retirez pas la broche de terre.
N’utilisez pas d’adaptateur.
N’utilisez pas de cordon de rallonge.
Le non-respect de ces instructions peut entraîner des risques d’incendies, des chocs électriques ou la mort.
Ne coupez ni retirez en aucun cas la troisième broche (mise à la terre) de la fiche du cordon d’alimentation. Pour

votre sécurité, cet appareil doit être correctement mis à la terre.
Le cordon d’alimentation de cet appareil est muni d’une fiche à 3 broches (mise à la terre) qui se branche dans
une prise murale ordinaire à 3 alvéoles (mise à la terre) pour réduire au minimum les risques de chocs
électriques.
Faites examiner la prise de courant et le circuit par un électricien qualifié pour vous assurer que la prise est
correctement mise à la terre.
Dans le cas d’une prise biphasée, l’installateur a la responsabilité et l’obligation de la remplacer par une prise
triphasée correctement mise à la terre. N’utilisez pas d’adaptateur.
Le congélateur doit toujours être branché dans sa propre prise de courant, dont la tension nominale est identique
à celle indiquée sur la plaque signalétique.
8QHDOLPHQWDWLRQpOHFWULTXHjYROWV&$+]DYHF
XQIXVLEOHGHRXDPSqUHVHWXQHPLVHjODWHUUHHVW
QpFHVVDLUH&HFLSHUPHWG¶REWHQLUXQPHLOOHXUUHQGHPHQWHW évite de surcharger les circuits
électriques du domicile qui risque d’occasionner un incendie en surchauffant.
Ne débranchez jamais le congélateur en tirant sur le cordon d’alimentation. Saisissez fermement la fiche du
cordon et tirez droit pour la retirer de la prise.
&HVVH]LPPpGLDWHPHQWG¶XWLOLVHUXQFRUGRQpOHFWULTXH endommagé. Si le cordon électrique est
endommagé, son remplacement doit être effectué par un technicien en réparation qualifié au moyen d’un cordon
de rechange autorisé par le fabricant.
Lorsque vous déplacez votre congélateur du mur, faites attention de ne pas le faire rouler sur le cordon
d’alimentation afin de ne pas l’endommager.
MISE AU REBUT APPROPRIÉE DE VOTRE ANCIEN CONGÉLATEUR
AVERTISSEMENT RISQUE DE SUFFOQUER OU D’Y ÊTRE EMPRISONNÉ
Le non-respect de ces instructions d’élimination peut entraîner la mort ou des blessures graves.
IMPORTANT: Les enfants pris au piège ou morts d’asphyxie sont toujours d’actualité. Les réfrigérateurs et
congélateurs abandonnés sont toujours aussi dangereux, même si on n’attend que «quelques jours» pour s’en
débarrasser. Si vous ne gardez pas votre ancien réfrigérateur ou congélateur, veuillez suivre les directives ci-
dessous afin de prévenir les
Avant de vous débarrasser de votre ancien réfrigérateur ou congélateur :
Démontez le couvercle du congélateur.
Laissez les clayettes en place afin d’empêcher les enfants de grimper à l’intérieur.
accidents.
Mise au rebut des produits réfrigérants et en mousse
Mettez l’électroménager au rebut conformément à la réglementation fédérale et locale. Le fluide frigorigène
inflammable et le
PDWpULHOLVRODQWXWLOLVpVQpFHVVLWHQWGHVSURFpGXUHVGHPLVHDXUHEXWVSpFLDOHV&RPP
XQLTXH]DYHFOHVDXWRULWpVORFDOHVSRXU connaître la façon de mettre votre électroménager au rebut
qui soit respectueuse de l’environnement.
LIRE ET CONSERVER CES INSTRUCTIONS
4
49-1000422 Rev. 1

UTILISATION DU CONGÉLATEUR
Utilisation du congélateur
Mise en marche du congélateur
1. Nettoyez l’intérieur du congélateur avec une solution de bicarbonate de soude et d’eau (voir la section Entretien
et nettoyage).
2. Branchez le cordon d’alimentation dans une prise de courant.
3. Assurez-vous que la commande de température est réglée sur 4.
4. Laissez fonctionner le congélateur pendant au moins quatre heures avant d’y ranger des aliments.
Commande de température
Le réglage de la température de congélation s’effectue en plaçant la commande à une position variant entre
<<Min>> et <<Max>> (température la plus basse).
Si vous désirez une température plus basse ou plus élevée, réglez la commande d’une position à la fois.
,OIDXGUDDWWHQGUHTXHOTXHVKHXUHVDSUqVFKDTXHUqJOHPHQW de la commande pour que la
température du congélateur se stabilise.
Le fait de régler la commande à OFF (éteint) arrête la congélation mais ne coupe pas l’alimentation électrique du
congélateur.
Voyant marche-arrêt (sur certains modèles)
Le voyant marche-arrêt vous indique que le congélateur est correctement raccordé à l’alimentation électrique.
Le voyant reste allumé même lorsque la commande de température est réglée à OFF (éteint).
Key-Ejecting Lock (on some models)
The lock is spring loaded so the key cannot be left in the
ORFN7RORFNRUXQORFNSUHVVWKHNHLQZKLOHWXUQLQJ,IWKH key is lost, contact your dealer for a
replacement or go to GEApplianceParts.com. Always give the model and serial number of the freezer when
requesting a replacement key.
AVERTISSEMENT
To prevent a child from being entrapped, keep the key out of reach of children and away from the freezer.
49-1000422 Rev. 1
5
UTILISATION DU CONGÉLATEUR: Directives de dégivrage
Directives de dégivrage
Dans la plupart des climats, il faut dégivrer l’appareil seulement deux fois par année.
Pour un fonctionnement efficace de votre congélateur, ne laissez pas s’accumuler plus de 1/2 po (13 mm).
AVERTISSEMENT Risque d’incendie et G¶H[SORVLRQ&RQWLHQWXQÀXLGHIULJRULJqQHLQÀDPPDEOH
eOLPLQH]OHJLYUHHQJUDWWDQWDYHFXQHVSDWXOHHQSODVWLTXHRX en bois ou un racloir. N’utilisez
pas de pic à glace ou d’outil métallique ou à bord tranchant pour éviter de perforer la cuve interne du congélateur
et la tuyauterie du fluide frigorigène inflammable derrière celle-ci.
N’utilisez aucun appareil électrique pour effectuer le dégivrage de votre congélateur.
Dégivrage complet
1. 5pJOH]ODFRPPDQGHGHWHPSpUDWXUHVXU2))pWHLQWHW débranchez le congélateur.

4. eSRQJH]OHVXUSOXVG¶HDXGDQVOHIRQGGXFRQJpODWHXUDX fur et à mesure pour éviter tout
débordement.
2. 5HWLUH]WRXVOHVDOLPHQWVGHO¶DSSDUHLOHWSODFH]OHVGDQV des boîtes en carton ondulé, des
sacs isolants, des glacières, etc. Enveloppez-les dans des couvertures ou des journaux pour les isoler, au besoin.
3. Laissez la porte ou le couvercle ouvert et placez à l’intérieur de l’appareil des casseroles d’eau chaude pour
accélérer le décollement du givre. Enlevez les gros morceaux de givre avant qu’ils fondent.
Modèles coffre possèdent un écoulement pour l’eau de dégivrage à l’avant. 5HWLUH]OHERXFKRQGXWXDX
d’écoulement à partir de l’extérieur et le bouchon de vidange à l’intérieur de la caisse.
REMARQUE : De l’eau peut dégoutter du rebord du
FRXYHUFOHSHQGDQWOHGpJLYUDJH&HSKpQRPqQHHVW normal. De la glace s’accumule dans
l’isolationdu couvercle lorsqu’on ouvre celui-ci pour rajouter ou retirer des aliments, et fond pendant le dégivrage.
5. Après le dégivrage, nettoyez l’intérieur du congélateur (voir la section Entretien et nettoyage).
5pLQVWDOOH]OHERXFKRQG¶pFRXOHPHQWjO¶LQWpULHXUGX congélateur et remettez le capuchon sur
l’écoulement de GpJLYUDJH5HSOLH]HWVpFKH]OHMRLQWTXLVHWURXYHGXF{Wp des charnières du
couvercle.
7. 5HEUDQFKH]OHFRQJpODWHXU5pJOH]ODFRPPDQGHGH température à sa position initiale et remettez les
aliments au congélateur.
49-1000422 Rev. 1
CONSEILS DE DÉPANNAGE
Conseils de dépannage
Nettoyage de votre congélateur
Extérieur. Protégez le fini de l’appareil. La carrosserie du congélateur est recouverte d’une peinture de haute
qualité, cuite au four. Si vous l’entretenez de la façon appropriée, le fini ne rouillera pas et conservera son aspect
neuf pendant des années. Appliquez une couche de cire pour électroménagers lorsque vous recevez votre
appareil et, par la suite, au moins deux fois par année. La cire pour électroménagers se révèle également efficace
pour enlever les résidus de ruban gommé sur les surfaces du congélateur.
Gardez le fini propre. Essuyez-le avec un linge propre légèrement humecté de cire pour électroménagers ou de
détergent liquide doux pour la vaisselle. Essuyez et polissez avec un linge doux et propre. N’essuyez pas le
congélateur avec un linge à vaisselle sale ou une serviette humide. N’utilisez pas de tampons à récurer, de
produits nettoyants en poudre, de javellisants ou de produits nettoyants contenant du javellisant.
REMARQUE : Faites attention lorsque vous éloignez le congélateur du mur, car vous risquez d’endommager le
revêtement de sol, plus particulièrement ceux qui sont coussinés ou dont la surface est gaufrée.
Intérieur. Nettoyez l’intérieur de votre congélateur au moins une fois par année. Nous vous recommandons de
débrancher l’appareil avant le nettoyage. Si cela est trop difficile, tordez bien votre linge ou votre éponge pour
enlever l’excès d’eau lorsque vous nettoyez autour des interrupteurs, des lampes et des commandes.
Nettoyez à l’aide d’une solution d’eau chaude et de bicarbonate de soude environ 1 cuillère à soupe (15 ml)
GHELFDUERQDWHSDUSLQWHOLWUHG¶HDX5LQFH]jIRQGDYHF de l’eau et essuyez. N’utilisez pas de
poudres à récurer ni de produits nettoyants abrasifs. NE lavez PAS les parties amovibles dans le lave-vaisselle.
Laissez une boîte ouverte de bicarbonate de soude dans le
FRQJpODWHXUSRXUDEVRUEHUOHVRGHXUV5HPSODFH]ODERvWH tous les trois mois.
Lors d’une panne de courant prolongée
*DUGH]OHFRXYHUFOHGXFRQJpODWHXUIHUPp9RWUHFRQJpODWHXU peut garder les aliments congelés
pendant 24 heures lorsque le couvercle n’est pas ouvert.
6LOHFRQJpODWHXUQHIRQFWLRQQHSDVSHQGDQWSOXVGH heures, ajoutez de la glace sèche. Placez de
gros morceaux de glace dans l’appareil. Ajoutez-en davantage au besoin.

ATTENTION
La manipulation de glace sèche peut causer des gelures aux mainsil est recommandé de porter des gants ou
autre équipement de protection.
6LYRXVQHGLVSRVH]SDVGHJODFHVqFKHHQOHYH]OHV aliments et placez-les temporairement dans une
armoire pour produits congelés jusqu’à ce que le courant soit rétabli.
Déménagement
Débranchez le cordon d’alimentation de la prise murale.
5HWLUH]WRXVOHVDOLPHQWVIDLWHVGpJLYUHUSXLVQHWWRH]OH congélateur.
Fixez toutes les pièces mobiles, commela grille et les clayettes, en les immobilisant à l’aide de ruban gommé afin
d’éviter de les endommager.
Assurez-vous que le congélateur demeure debout pendant le déménagement et dans le camion. L’appareil doit
être immobilisé dans le camion. Protégez l’appareil à l’aide d’une couverture.
Lorsque vous partez en vacances
Pour assurer le bon fonctionnement de votre congélateur pendant vos vacances, assurez-vous que l’alimentation
secteur de votre résidence n’est pas coupée. Pour assurer la protection des denrées dans votre congélateur, vous
pouvez demander à un voisin de vérifier toutes les 48 heures l’alimentation électrique et le fonctionnement de
votre congélateur.
Lorsque vous vous absentez pendant une période prolongée, il peut être préférable de ranger temporairement
vos aliments congelés dans une armoire de rangement pour produits congelés. Si vous laissez votre congélateur
vide, débranchez le cordon d’alimentation de la prise de courant. Pour prévenir la formation d’odeurs, placez une
boîte ouverte de bicarbonate de soude dans le congélateur et laissez la porte ou le couvercle de l’appareil ouvert.
Lorsque le congélateur ne fonctionne pas, il peut être laissé dans une pièce non chauffée sans que l’appareil ou
son mécanisme ne subissent de dommages.
49-1000422 Rev. 1
7
INSTALLATION
Préparatifs pour l’installation
Veuillez lire toutes les directives attentivement.
Emplacement du congélateur
Votre congélateur doit être installé à un endroit pratique, en
YXHG¶XQHXWLOLVDWLRQTXRWLGLHQQHGDQVXQHSLqFHELHQDpUpHR l’air est sec.
1¶LQVWDOOH]SDVYRWUHFRQJpODWHXUGDQVO¶HQGURLWROD
WHPSpUDWXUHHVWDXGHVVRXVGH)RXDQGHVVXVGH) parce qu’il ne maintiendra pas les températures
appropriées.
Assurez-vous que le plancher sur lequel sera installé votre congélateur est suffisamment solide pour le supporter
lorsqu’il est plein.
N’installez pas le congélateur dans un endroit exposé à l’eau de pluie ou aux rayons directs du soleil.
Pour qu’il puisse offrir un rendement optimum, le congélateur doit reposer solidement sur le sol. Vous pouvez
installer des cales lorsque le sol est inégal. Si l’endroit choisi pour l’installation du congélateur est humide ou
mouillé, installez GHVPRUFHDX[GHERLVGHSR[SRPP;PP sous l’appareil, sur toute la longueur, pour assurer un
support adéquat.
Dégagements

6XUWRXVOHVPRGqOHVSUpYRH]XQGpJDJHPHQWGHSR mm) de chaque côté, à l’arrière et au-dessus de
l’appareil afin d’assurer une circulation d’air adéquate. Laissez suffisamment d’espace au-dessus du couvercle
pour permettre son ouverture.
Démontage du couvercle
ATTENTION RISQUE ASSOCIÉ À UN POIDS LOURD
Le couvercle est lourd. Utilisez les deux mains pour bien agripper le couvercle avant de le soulever.
2. Ouvrez le couvercle au maximum. (Les charnières sont moins serrées dans cette position.)
3. Desserrez, sans les retirer, les 4 vis de la partie inférieur de la charnière qui sont vissées dans la carrosserie.
ATTENTION RESSORT DE CHARNIÈRE SOUS
TENSION S’il est nécessaire de retirer le couvercle, suivez les étapes suivantes :
1. Enlevez chaque couvercle de charnière supérieure en agrippant par les côtés et tirant vers le haut. Enlevez
chaque couvercle de charnière inférieure en agrippant par les côtés et tirant vers le bas.
&RXYHUFOH de charnière supérieure
Vis de charnière à desserrer
Vis de charnière à desserrer
&RXYHUFOH de charnière
inférieure
4. Levez le couvercle jusqu’à ce que les vis s’alignent sur les orifices allongés les plus grands dans le bas de la
charnière. &KDTXHFKDUQLqUHHVWWRXMRXUVDWWDFKpHDXFRXYHUFOHSDU vis.
5. Pour reposer le couvercle, suivez les étapes dans l’ordre inverse. Serrez toutes les vis de charnière mais évitez
de WURSVHUUHUSRXUQHSDVIDXVVHUOHILOHWDJH5HSRVH]OHV couvercles de charnière.
8
49-1000422 Rev. 1
CONSEILS DE DÉPANNAGE
Conseils de dépannage… Avant de faire un appel de service
eFRQRPLVH]WHPSVHWDUJHQW&RQVXOWH]G¶DERUGOHVWDEOHDX[GHVSDJHVVXLYDQWHVHWYRXV
SRXUULH]YRXVpYLWHUXQDSSHOGHVHUYLFH
Problème
Causes possibles
Correctifs
Le congélateur ne fonctionne pas ou le voyant march-arrêt n’est pas allumé
Commande de température réglée à OFF (éteint). Le congélateur n’est pas branché. Le fusible est grillé/le
disjoncteur est déclenché.
La page est en cours de chargement...
La page est en cours de chargement...
La page est en cours de chargement...
La page est en cours de chargement...
La page est en cours de chargement...
La page est en cours de chargement...
La page est en cours de chargement...
La page est en cours de chargement...
La page est en cours de chargement...
La page est en cours de chargement...
La page est en cours de chargement...
La page est en cours de chargement...
La page est en cours de chargement...
La page est en cours de chargement...
La page est en cours de chargement...
La page est en cours de chargement...
La page est en cours de chargement...
-
 1
1
-
 2
2
-
 3
3
-
 4
4
-
 5
5
-
 6
6
-
 7
7
-
 8
8
-
 9
9
-
 10
10
-
 11
11
-
 12
12
-
 13
13
-
 14
14
-
 15
15
-
 16
16
-
 17
17
-
 18
18
-
 19
19
-
 20
20
-
 21
21
-
 22
22
-
 23
23
-
 24
24
-
 25
25
-
 26
26
-
 27
27
-
 28
28
-
 29
29
-
 30
30
-
 31
31
-
 32
32
-
 33
33
-
 34
34
-
 35
35
-
 36
36
-
 37
37


Derby EK-67С Chest Freezer Manuel utilisateur
- Catégorie
- Congélateurs
- Taper
- Manuel utilisateur
dans d''autres langues
Autres documents
-
GE FCM11PHWW Le manuel du propriétaire
-
Hotpoint HCM9STWW Le manuel du propriétaire
-
GE FCM5 Le manuel du propriétaire
-
Haier FCM5 Manuel utilisateur
-
-
GE FCM9 Manuel utilisateur
-
GE FCM22DLWW Le manuel du propriétaire
-
Haier FCM5 Manuel utilisateur
-
Haier FUM5SARWH Manuel utilisateur
-