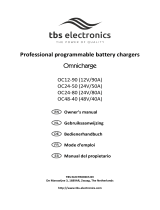
tbs electronics OCS 150-60 Le manuel du propriétaire

Taper
Le manuel du propriétaire
MPPT Solar Charge Controller
Omnicharge Solar
OCS 150-60 (150V/60A)
OCS 250-70 (250V/70A)
Owner’s manual
Gebruikershandleiding
Bedienungsanleitung
Mode d’emploi
Manual de usuario
TBS ELECTRONICS BV
De Marowijne 3, 1689AR, Zwaag, The Netherlands
tbs-electronics.com
2
3
Notice of Copyright
Omnicharge Solar 60-70A MPPT Solar Charge Controller user manual © 2023 TBS Electronics BV. All
rights reserved. No part of this document may be reproduced in any form or disclosed to third
parties without the express written permission of TBS Electronics BV, De Marowijne 3, 1689AR,
Zwaag, The Netherlands. TBS Electronics BV reserves the right to revise this document and to
periodically make changes to the content hereof without obligation or organization of such revisions
or changes, unless required to do so by prior arrangement.
Exclusions for documentation and product usage
UNLESS SPECIFICALLY AGREED TO IN WRITING, TBS ELECTRONICS BV (“TBS”) :
1. MAKES NO WARRANTY AS TO THE ACCURACY, SUFFICIENCY OR SUITABILITY OF ANY
TECHNICAL OR OTHER INFORMATION PROVIDED IN ITS MANUALS OR OTHER
DOCUMENTATION
2. ASSUMES NO RESPONSIBILITY OR LIABILITY FOR LOSSES, DAMAGES, COSTS OR EXPENSES,
WHETHER SPECIAL, DIRECT, INDIRECT, CONSEQUENTIAL OR INCIDENTAL, WHICH MIGHT
ARISE OUT OF THE USE OF SUCH INFORMATION. THE USE OF ANY SUCH INFORMATION
WILL BE ENTIRELY AT THE USER’S RISK
3. REMINDS YOU THAT IF THIS MANUAL IS IN ANY LANGUAGE OTHER THAN ENGLISH OR
DUTCH, ALTHOUGH STEPS HAVE BEEN TAKEN TO MAINTAIN THE ACCURACY OF THE
TRANSLATION, THE ACCURACY CANNOT BE GUARANTEED.
4. MAKES NO WARRANTY, EITHER EXPRESSED OR IMPLIED, INCLUDING BUT NOT LIMITED TO ANY
IMPLIED WARRANTIES OF MERCHANTABILITY OR FITNESS FOR A PARTICULAR PURPOSE,
REGARDING THESE TBS PRODUCTS AND MAKES SUCH TBS PRODUCTS AVAILABLE SOLELY ON AN
“AS IS” BASIS.
5. SHALL IN NO EVENT BE LIABLE TO ANYONE FOR SPECIAL, COLLATERAL, INCIDENTAL, OR
CONSEQUENTIAL DAMAGES IN CONNECTION WITH OR ARISING OUT OF PURCHASE OR
USE OF THESE TBS PRODUCTS. THE SOLE AND EXCLUSIVE LIABILITY TO TBS, REGARDLESS
OF THE FORM OF ACTION, SHALL NOT EXCEED THE PURCHASE PRICE OF THE TBS
PRODUCTS DESCRIBED HERE IN.
Document name, date and part number
OCS-60-70 User Manual Rev1endfs”, August 2023, xxxxxx
4
English
Page 5
Nederlands
Pagina 30
Deutsch
Seite 54
Francais
Page 81
Español
Página 107
5
TABLE OF CONTENTS
TABLE OF CONTENTS.............................................................................................................................. 5
1. SAFETY PRECAUTIONS ........................................................................................................................ 6
2. TECHNOLOGY ..................................................................................................................................... 7
2.1 Product features ...................................................................................................................... 7
2.2 MPPT charging ......................................................................................................................... 7
2.3 Battery charging explained ..................................................................................................... 9
2.4 Temperature compensation ................................................................................................. 10
3. OMNICHARGE SOLAR SETUP............................................................................................................ 11
3.1 Using the Dashboard Mobile app.......................................................................................... 11
3.2 Omnicharge Solar charger setup using the Dashboard Mobile app ..................................... 15
3.2.1 Creating a lithium charge program with a float stage ....................................................... 16
3.3 Omnicharge Solar charger setup using the info/control display .......................................... 17
3.3.1 Setting up a user- or custom defined battery or charge program .................................... 19
3.4 Overview of factory default charge program parameters .................................................... 21
4. TROUBLESHOOTING GUIDELINE ...................................................................................................... 22
4.1 Troubleshooting table ........................................................................................................... 22
4.2 Alarm codes ........................................................................................................................... 25
5. TECHNICAL SPECIFICATIONS ............................................................................................................ 26
5.1 Dimension drawings .............................................................................................................. 27
6. WARRANTY CONDITIONS ................................................................................................................. 28
7. DECLARATION OF CONFORMITY ...................................................................................................... 29
6
1. SAFETY PRECAUTIONS
Thank you for purchasing a TBS Electronics (TBS) Omnicharge Solar MPPT Solar Charge Controller
(hereinafter referred to as 'product' or ‘solar charger’). Please read this user manual for information
about operating the product correctly and safely.
!
CAUTION
This user manual is an addition to the installation manual of this product. Please make sure
that the installation manual has always been read first, before proceeding with the user
manual. The installation manual is included with the charger or can be downloaded from
our website at tbs-electronics.nl/downloads.
Keep this user manual and all other included documentation close to the product for future
reference. For the most recent manual revision, please check the downloads section of our website.
7
2. TECHNOLOGY
2.1 Product features
Omnicharge Solar battery chargers are true next generation products and contain the latest highly
efficient switch mode power supply technology, as well as a smart digital control system. Please see
below a summary of the most important Omnicharge Solar features:
Fast Maximum Power Point Tracking (MPPT) ensures that you always get the maximum
amount of power transferred from the PV panels to your battery. Even under the most
difficult circumstances. The MPPT efficiency of an Omnicharge Solar charger can reach up to
99%.
Highly efficient switch power supply technology ensures a low waste of power and allows for
a fan-less design
Clear detachable information display for real time status and parameter monitoring
Smart selectable charge programs for AGM, Gel, Flooded, Lithium and User defined battery
types
Automatic battery voltage detection
Battery temperature sensor input
Programmable battery under- and overvoltage alarm relay
Battery temperature sensor included
Historical data storage up to 300 days
Full protection against battery reverse polarity, PV reverse polarity, short circuits, battery
open circuit and solar charger over temperature
Monitoring and configuration via Dashboard Mobile app (iOS and Android)
2.2 MPPT charging
There are essentially two types of charging technologies for solar chargers. These are PWM and
MPPT technology. PWM is the most basic one and can be seen as just an automatic switch that
connects the PV array directly to the battery as long as charging is needed. This results in a PV
voltage that is pulled down to the same level as the battery voltage. And since this voltage level is
typically lower than the maximum power point voltage (Vmp) of the PV array, the resulting effective
power to charge the battery bank is not optimal.
A solar charger with MPPT technology is more advanced and it is based on a smart high efficiency DC
to DC converter that will continuously find the maximum amount of power that is available from the
PV array. This is accomplished by varying the input voltage of the charger by controlling the amount
of power consumed from the PV array. The main goal is to find the highest result out of the
multiplication of battery voltage and charging current (P = V * I). This highest result is called the
Maximum Power Point. The image below shows a typical I-V graph of a PV panel. Added in red is a
scaled graph representing the generated power (multiplication of I and V) of the same PV panel,
including the maximum power point Pmax:
8
The blue area in the above graph (ΔP) represents the typical operating area of a traditional PWM
type solar charge controller. As you can see, Pmax (MPPT) is higher than ΔP (PWM).
The fast and efficient MPPT technology onboard of the Omnicharge Solar products makes sure that
the maximum power point is tracked continuously. This is to make sure that it always operates at the
maximum power point of the PV array, that may vary continuously against irradiation levels from the
sun, partial shading (causing more than one Pmax point) and last but not least PV array temperature.
In general, a well designed MPPT solar charge controller will typically get 15 25% more power from
your PV array compared to traditional PWM type solar chargers.
9
2.3 Battery charging explained
Most standard selectable Omnicharge Solar charge programs perform a 3-stage IUoUo charging
process comprising of a “Bulk/MPPT” , an “Absorption/Boost”, and a “Float” stage. All of course for
as long as there is sufficient sunlight. The image below visualizes the 3-stage charging process:
In the Bulk/MPPT stage the charger delivers full available output current and typically returns
approximately 80% of charge back into the battery, once the charge voltage is reached. During this
stage the charger runs in MPPT mode, transferring maximum PV power into the battery.
When the Charge voltage has been reached, the Absorption/Boost stage will be entered. In this
stage the voltage will be held constant and the current will decline automatically as function of the
battery’s state of charge. Typically, this stage will return the final 20% of charge to battery. When the
absorption time-out of 2 hours (= factory default) has been reached the float stage will be entered.
For lithium batteries the charger will remain in the absorption stage as long as there is sufficient
solar power available.
Once every 30 days and only if a Flooded (open lead acid type) battery is selected, the Omnicharge
Solar charger will automatically perform a mild equalization charge, setting the Absorption/Boost
voltage 0.4V @ 12V or 0.8V @ 24V higher than the normal voltage level for a maximum of 2 hours.
This process will help minimize the acid stratification and sulfation that typically occurs in all flooded
batteries. When you do not wish to have this automatic mild equalize charge performed on your
Flooded batteries or wish to alter the equalization voltage level, please create a user defined /
10
custom charge program (see chapter 3.2) and select it to become the standard charge program. By
default mild equalization is never performed on AGM, GEL or Lithium batteries.
!
CAUTION
During a mild equalize charge, the applied voltage to the battery is higher than the standard
charge voltage. Please check if the battery and the connected battery loads can handle this
voltage safely.
After the Absorption/Boost stage has been finished and when an AGM, GEL or Flooded battery
selected, the charger will jump to the Float stage. In this stage the battery voltage will be held
constant at a safe level for the battery. This will maintain the battery in optimal condition for as long
as there is sufficient sunlight. Connected battery loads will be directly powered by the charger up to
the charger’s maximum output current level. When even more current is drawn, the battery must
supply this which results in a declining battery voltage. At a certain battery voltage level (Restart
voltage), the charger jumps back to the Bulk/MPPT stage and will execute a complete charge process
again.
By default, the Float stage is not enabled when a Lithium battery is selected. When you do need to
Float charge your Lithium battery, please create a user defined / custom charge program (see
chapter 3.2) and select it to become the standard charge program.
2.4 Temperature compensation
When the battery temperature sensor is connected to the Omnicharge Solar charger and an AGM,
GEL or Flooded battery is selected, it will automatically provide charge voltage compensation against
temperature. The charge voltage is compensated by -3mV/°C/cell with +25°C as a ‘no compensation’
starting point. So for a 12V battery (6 cells) the charge voltage will increase by +18mV/°C below 25°C
and decrease by -18mV/°C above 25°C. For a 24V battery (12 cells) this is respectively +36mV/°C and
-36mV/°C.
When no battery temperature sensor is connected to the charger, the charge voltages will remain
unchanged at the default set 25°C values, independent of ambient temperature.
When a Lithium battery is installed and a temperature sensor is connected to the charger, there is no
charge voltage compensation as this is typically not allowed for this type of battery.
11
3. OMNICHARGE SOLAR SETUP
All information on how to commission the Omnicharge Solar charger, how to interpret the LED
indicators on the device and how to select the battery type using the setup button on the device
itself, is explained in chapter 3 of the installation manual. This manual is included with the charger or
can be downloaded from our website at tbs-electronics.nl/downloads. For a more advanced setup
and insight in real time parameter data, you can either use the front panel information display or the
TBS Dashboard Mobile app. For setting up the solar charger, we strongly advice to use the app for a
clearer overview and more options.
3.1 Using the Dashboard Mobile app
The easiest way to setup your Omnicharge Solar charger is to use the TBS Electronics Dashboard
Mobile app. You can find this app in the Apple App Store and Google Play. Besides setting up the
charger, this app will also provide you with real time information about the chargers operation and
access to historic data like solar energy yield and maximum power per day. The global operation of
the Dashboard Mobile app is explained below using the iOS version. The Android version will
however be very similar with only some differences in the system messages when making a
Bluetooth connection. For Android, do make sure that you also allow Location Permission and select
‘Precise’ and ‘While using the app’ after that. (TBS Dashboard does not locally or externally store any
personal, usage or location data)
Once the app is installed and launched you
will see the screen as shown on the right.
Please press ‘Allow’ to confirm acceptance
of this notifications request.
After that, please press the ‘Add Device’
button at the bottom of the screen.
12
When the app is used for the first time and
right after the ‘Add Device’ button is
pressed, it will ask for permission to use
Bluetooth on your device.
Please press ‘OK’ to proceed so that the app
can scan for TBS devices in the
neighborhood.
NOTE: Bluetooth in general has a limited
range. In open spaces (line of sight) the
maximum distance between charger and
mobile device can be up to 20 meters.
However, in practical circumstances like
inside houses, vehicles or boats, several
objects such as walls or other equipment
can limit this range down to only a few
meters. On top of this, it also depends on
the Bluetooth hardware inside your mobile
device.
After the app has found a TBS Bluetooth
device, please press on it to establish a
connection.
13
Now the device is shown in the Device List.
The green bar on the left side of the tile
indicates that it is successfully connected.
There are three other color states available,
being:
Orange Device busy connecting
Red Connection error
Dark grey (Off) No connection
This device tile will always remain in the
Device List for future use, even when it is
disconnected. So next time you launch the
app, you only have to press the device tile
and it connects automatically. You can
remove it by swiping the tile to the left and
press Delete.
When you press the device tile the app will
jump the device’s main screen.
In main screen of the device you can
observe all available real time data of the
solar panels, the battery and the charging
status. Once the sun icon is shown inside
the solar power gauge, the charger is active.
When the moon and stars icon is shown,
the charger is inactive due to a lack of solar
light.
To select a different TBS device (if
available), you can press the arrow button
on the upper left side of the screen to jump
back to the device list screen.
In the upper right corner of this screen
there are two buttons for respectively
entering the history graph screen or the
settings screen.
14
The history graph screen shows you the
solar energy yield of the current day and
previous days. Additionally it also indicates
the minimum and maximum battery
voltages, maximum charge current and
charge power and total Amphours charged
of each day. You can swipe left to show
more days or rotate your device to enter
landscape view.
Please note that since the Omnicharge Solar
is not equipped with a real time clock, it
determines a day length based on solar
light input. So the best indications are
always given once the current day has
completely passed.
In the settings screen you have four
options.
The Status button will direct you to a status
overview screen showing device name,
firmware version, historic data etc.
The Setup button will direct you to the
Setup screen.
The Reset button allows you to either
perform a full factory reset, or to only clear
all history data.
And finally the About this App button,
which directs you to a screen with app
information, legal stuff and a link to our
website.
15
3.2 Omnicharge Solar charger setup using the Dashboard Mobile app
!
CAUTION
Invalid battery type or other parameter settings can cause serious damage to your
batteries and/or connected battery loads. Always consult your battery’s documentation
for the correct charge voltage settings.
As explained earlier, when you wish to setup the charger in a clearer way or wish to create a charge
program with different voltages or other parameters, the Dashboard Mobile app is the way to go.
If from the settings screen
you have pressed the
Setup button, the first
screen on the right will
appear. In this screen you
can select the desired
battery type by pressing
the upper button.
When you have selected
battery type Flooded,
AGM, Gel, Lithium 12V,
24V, 36V or 48V and then
press the back button, all
corresponding settings
can be reviewed but not
edited. This is because
these are the factory
default battery types /
charge programs. Except
for the Charge Current
and the Battery Min/Max
Temperatures for
charging. These can
always be modified.
For most applications the standard charge programs will be sufficient.
When the desired battery type has been selected, please press the back button and the
app will ask you to save this setting or not. Press ‘Save’ and the charger will be updated.
16
If any of the standard selectable battery
types does not fulfil your requirements, there
is a possibility to create your own battery
type or charge program.
For this you need to select battery type
Custom Lead if you have a lead based battery
installed, or Custom Lithium if you have a
lithium based battery installed.
Once selected you will see that all available
parameters can now be edited. In the app
each parameter is explained with text below
the button. Please note that only for lead
based batteries you can set the Nominal
Battery Voltage to Auto. For Lithium based
batteries, you must select a nominal voltage
manually.
You will also notice that when Custom
Lithium is selected, there are a lot less
parameters to edit since a float stage and
equalization are not possible for Lithium, as
well as temperature compensation of the
charge voltage. When you do wish to have a
float stage for your lithium battery, please
see chapter 3.2.1.
When the desired custom battery type has
been edited, please press the back button
and the app will ask you to save these
settings or not. Press ‘Save’ and the charger
will be updated.
3.2.1 Creating a lithium charge program with a float stage
As explained above, as standard an Omnicharge Solar charger does not offer a float stage for lithium
batteries. If desired however, there is a way to still create a charge program with float for a lithium
battery. This can only be done by the Dashboard app and not using the front panel display.
For this please select the Custom Lead battery type in the setup screen and use the following
parameter settings:
Charge Current → Enter the desired maximum charge current
Battery Type → Custom Lead
Max. Battery Temperature → Enter the desired maximum allowed battery temperature
Min. Battery Temperature → Enter the desired minimum allowed battery temperature
17
Nominal Battery Voltage → select a voltage manually, do not choose Auto
Charge Voltage → Enter the desired charge voltage
Absorption Time → Enter the desired absorption time
Float Voltage → Enter the desired float voltage
Restart Voltage → Enter the desired restart voltage
Auto Equalize Charge → Off
Equalize Voltage → Enter the same value as Charge Voltage
Equalize Duration → 10min (do not set to 0min.!)
Temperature Compensation → Not Compensated
Undervoltage Alarm On Value → Enter the desired voltage
Undervoltage Alarm Relay → Enter the desired voltage
Undervoltage Alarm Off Value → Enter the desired voltage
Undervoltage Alarm Delay Time → Enter the desired time
The parameters indicated in red are very important. Please use exactly these values for correct
functionality.
3.3 Omnicharge Solar charger setup using the info/control display
As mentioned earlier in this document, it is advised to do all setup tasks using the Dashboard Mobile
app. There is however a possibility to do a basic setup using the info/control display of the solar
charger as well.
We will first explain the display in more detail using the image below.
In normal operating mode, you can use the SELECT button to cyclically browse through the following
screens:
Main overview (start screen)
Solar panel voltage
Battery voltage
18
Battery state of charge
Charge current
Charge power
Charged Amphours
Solar charger operating temperature
Error code
A basic setup covers only the selection of battery type and system voltage. This can be accomplished
as follows. At first the ENTER key has to be pressed for 2 seconds until the battery type indicator
starts flashing. Then short press the ENTER key a number of times until the desired battery type
flashes. Please see the images below:
The following battery types are available:
USE = User defined / Custom battery type
FLD = Flooded or open lead acid
GEL = Gel type lead acid
SLD = Sealed type lead acid or AGM
LI = Lithium type battery (LiFePo4)
Once the desired battery type has been selected and you are sure that the battery- or system
voltage is set correctly too, you can long press ENTER for 2 seconds again to save the setting and
jump back to the normal operating mode. When you need to setup the battery- or system voltage as
well while still operating in the setup mode, please press the SELECT key to switch over to the
voltage selection mode as indicated below:
The current voltage select starts flashing. Please press the ENTER key a number of times until the
desired battery- or system voltage is flashing. You can choose between 12V, 24V, 36V, 48V and
Automatic voltage detection (display shows all available voltages flashing at the same time). Please
note that Automatic detection is not available for Lithium based batteries. When the desired system
voltage is selected, you can long press the ENTER key for 2 seconds again to save the setting and
jump back to the normal operating mode.
The solar charger is now setup correctly for most common systems.
19
3.3.1 Setting up a user- or custom defined battery or charge program
When you wish to use different charge parameter settings than available as standard, you can select
the ‘USE‘ battery type and revise a number of voltages. It remains however strongly recommended
to use the Dashboard Mobile app to perform this action. Please see below the procedure to setup a
user defined battery or custom charge program. First the ENTER key has to be pressed for 2 seconds
until the currently set battery type starts flashing:
After the ENTER key has been pressed a number of times to select the USE battery type, press the
SELECT key to jump to the system voltage selection and make sure the correct system voltage is
selected as in the example below:
In this example a 24V system voltage is selected. When the SELECT key is pressed the first voltage
parameter (Equalize charge voltage) is shown, see below:
!
CAUTION
When setting up charge voltages using the display, the value range is 9.0 17.0V. For a 12V
battery system this is fine. But when making settings for 24V, 36V and 48V battery systems,
you need to divide your target voltage values by respectively 2, 3 or 4 to stay in the 9.0
17.0V range. The solar charger will make sure that the voltage settings are multiplied by the
correct factor again to guarantee correct voltages during charging.
The voltage can be edited by short pressing the ENTER key each time to increase the value by 0.1V.
When 17.0V is reached, the voltage value will jump back to 9.0V and can be increased again. If you
wish to turn off periodic equalize charging, just make sure that this voltage has the same value as the
Absorption/Boost charge voltage. In the above example 14.6V is set, while a 24V battery system
20
voltage was selected earlier. This means that the actual Equalize voltage value will be 2x 14.6V =
29.2V
When the SELECT key is pressed after the Equalize charge voltage is set, the next voltage parameter
(Absorption/Boost charge voltage) is shown, see below:
This voltage can be edited by short pressing the ENTER key each time to increase the value by 0.1V.
When 17.0V is reached, the voltage value will jump back to 9.0V and can be increased again.
When the SELECT key is pressed after the Absorption/Boost charge voltage is set, the next voltage
parameter (Float charge voltage) is shown, see below:
This voltage can be edited by short pressing the ENTER key each time to increase the value by 0.1V.
When 17.0V is reached, the voltage value will jump back to 9.0V and can be increased again.
When the SELECT key is pressed after the Float charge voltage is set, the next voltage parameter
(Undervoltage alarm off value) is shown, see below:
This parameter represents the voltage value at which the activated alarm relay will de-activate again,
besides clearing the undervoltage alarm message. It can be edited by short pressing the ENTER key
each time to increase the value by 0.1V. This value must always be higher than the Undervoltage
alarm relay trigger voltage.
When the SELECT key is pressed after the Undervoltage alarm off value is set, the next and final
voltage parameter (Undervoltage alarm relay trigger value) is shown, see below:
  • Page 1 1
  • Page 2 2
  • Page 3 3
  • Page 4 4
  • Page 5 5
  • Page 6 6
  • Page 7 7
  • Page 8 8
  • Page 9 9
  • Page 10 10
  • Page 11 11
  • Page 12 12
  • Page 13 13
  • Page 14 14
  • Page 15 15
  • Page 16 16
  • Page 17 17
  • Page 18 18
  • Page 19 19
  • Page 20 20
  • Page 21 21
  • Page 22 22
  • Page 23 23
  • Page 24 24
  • Page 25 25
  • Page 26 26
  • Page 27 27
  • Page 28 28
  • Page 29 29
  • Page 30 30
  • Page 31 31
  • Page 32 32
  • Page 33 33
  • Page 34 34
  • Page 35 35
  • Page 36 36
  • Page 37 37
  • Page 38 38
  • Page 39 39
  • Page 40 40
  • Page 41 41
  • Page 42 42
  • Page 43 43
  • Page 44 44
  • Page 45 45
  • Page 46 46
  • Page 47 47
  • Page 48 48
  • Page 49 49
  • Page 50 50
  • Page 51 51
  • Page 52 52
  • Page 53 53
  • Page 54 54
  • Page 55 55
  • Page 56 56
  • Page 57 57
  • Page 58 58
  • Page 59 59
  • Page 60 60
  • Page 61 61
  • Page 62 62
  • Page 63 63
  • Page 64 64
  • Page 65 65
  • Page 66 66
  • Page 67 67
  • Page 68 68
  • Page 69 69
  • Page 70 70
  • Page 71 71
  • Page 72 72
  • Page 73 73
  • Page 74 74
  • Page 75 75
  • Page 76 76
  • Page 77 77
  • Page 78 78
  • Page 79 79
  • Page 80 80
  • Page 81 81
  • Page 82 82
  • Page 83 83
  • Page 84 84
  • Page 85 85
  • Page 86 86
  • Page 87 87
  • Page 88 88
  • Page 89 89
  • Page 90 90
  • Page 91 91
  • Page 92 92
  • Page 93 93
  • Page 94 94
  • Page 95 95
  • Page 96 96
  • Page 97 97
  • Page 98 98
  • Page 99 99
  • Page 100 100
  • Page 101 101
  • Page 102 102
  • Page 103 103
  • Page 104 104
  • Page 105 105
  • Page 106 106
  • Page 107 107
  • Page 108 108
  • Page 109 109
  • Page 110 110
  • Page 111 111
  • Page 112 112
  • Page 113 113
  • Page 114 114
  • Page 115 115
  • Page 116 116
  • Page 117 117
  • Page 118 118
  • Page 119 119
  • Page 120 120
  • Page 121 121
  • Page 122 122
  • Page 123 123
  • Page 124 124
  • Page 125 125
  • Page 126 126
  • Page 127 127
  • Page 128 128
  • Page 129 129
  • Page 130 130
  • Page 131 131
  • Page 132 132

tbs electronics OCS 150-60 Le manuel du propriétaire

Taper
Le manuel du propriétaire