Shop Vac SE16-SQ550 Manuel utilisateur
- Catégorie
- Aspirateurs
- Taper
- Manuel utilisateur

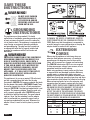
OWNER’S MANUAL
THE WORKSHOP
ASSISTANT
WET/DRY VAC
87555-80
*Working capacity may vary based on use.
14
53
FOR YOUR SAFETY, READ ALL
INSTRUCTIONS CAREFULLY
BEFORE USE. SAVE THIS
MANUAL FOR
FUTURE REFERENCE.
LITER
*
U.S. GALLON
*
SERIES SE
HOUSEHOLD AND
WORKSHOP USE

TO BEGIN
TABLE OF CONTENTS:
Catalog / Model Numbers . . . . . . . . . . . . . . . . . . . . . . . . . . . . . . . . . . . . . . . . . . . . . . . . . . . . . . . . . . . . . . . . . . . . . . . .
Carton Contents . . . . . . . . . . . . . . . . . . . . . . . . . . . . . . . . . . . . . . . . . . . . . . . . . . . . . . . . . . . . . . . . . . . . . . . . . . . . . . . . .
Tools Required . . . . . . . . . . . . . . . . . . . . . . . . . . . . . . . . . . . . . . . . . . . . . . . . . . . . . . . . . . . . . . . . . . . . . . . . . . . . . . . . . .
Safety Warnings & Instructions . . . . . . . . . . . . . . . . . . . . . . . . . . . . . . . . . . . . . . . . . . . . . . . . . . . . . . . . . . . . . . . . . . .
Unpacking . . . . . . . . . . . . . . . . . . . . . . . . . . . . . . . . . . . . . . . . . . . . . . . . . . . . . . . . . . . . . . . . . . . . . . . . . . . . . . . . . . . . . .
Assembly . . . . . . . . . . . . . . . . . . . . . . . . . . . . . . . . . . . . . . . . . . . . . . . . . . . . . . . . . . . . . . . . . . . . . . . . . . . . . . . . . . . . . . .
General Set Up . . . . . . . . . . . . . . . . . . . . . . . . . . . . . . . . . . . . . . . . . . . . . . . . . . . . . . . . . . . . . . . . . . . . . . . . . . . . . . . . . .
Filter Installation and Cleaning . . . . . . . . . . . . . . . . . . . . . . . . . . . . . . . . . . . . . . . . . . . . . . . . . . . . . . . . . . . . . . . . . . . . . .
Dry Pick Up Operation . . . . . . . . . . . . . . . . . . . . . . . . . . . . . . . . . . . . . . . . . . . . . . . . . . . . . . . . . . . . . . . . . . . . . . . . . .
Wet Pick Up Operation . . . . . . . . . . . . . . . . . . . . . . . . . . . . . . . . . . . . . . . . . . . . . . . . . . . . . . . . . . . . . . . . . . . . . . . . . . . .
Blower feature . . . . . . . . . . . . . . . . . . . . . . . . . . . . . . . . . . . . . . . . . . . . . . . . . . . . . . . . . . . . . . . . . . . . . . . . . . . . . . . . . .
Emptying Liquid Waste from Tank . . . . . . . . . . . . . . . . . . . . . . . . . . . . . . . . . . . . . . . . . . . . . . . . . . . . . . . . . . . . . . . . . . .
Automatic Suction Shut Off . . . . . . . . . . . . . . . . . . . . . . . . . . . . . . . . . . . . . . . . . . . . . . . . . . . . . . . . . . . . . . . . . . . . . . . .
Lubrication . . . . . . . . . . . . . . . . . . . . . . . . . . . . . . . . . . . . . . . . . . . . . . . . . . . . . . . . . . . . . . . . . . . . . . . . . . . . . . . . . . . . .
Storage . . . . . . . . . . . . . . . . . . . . . . . . . . . . . . . . . . . . . . . . . . . . . . . . . . . . . . . . . . . . . . . . . . . . . . . . . . . . . . . . . . . . . . . .
Troubleshooting . . . . . . . . . . . . . . . . . . . . . . . . . . . . . . . . . . . . . . . . . . . . . . . . . . . . . . . . . . . . . . . . . . . . . . . . . . . . . . . . .
Warranty Information . . . . . . . . . . . . . . . . . . . . . . . . . . . . . . . . . . . . . . . . . . . . . . . . . . . . . . . . . . . . . . . . . . . . . . . . . . . .
Filter Replacement . . . . . . . . . . . . . . . . . . . . . . . . . . . . . . . . . . . . . . . . . . . . . . . . . . . . . . . . . . . . . . . . . . . . . . . . . . . . . .
Contact Us . . . . . . . . . . . . . . . . . . . . . . . . . . . . . . . . . . . . . . . . . . . . . . . . . . . . . . . . . . . . . . . . . . . . . . . . . . . . . . . . . . . . .
CATALOG / MODEL NUMBERS
Catalog No. 9751411 Model No. SE16-SQ550
Date of Purchase:
For your records, please record your Date of Purchase and store this owner’s manual
in a safe location for future reference.
1
2
2
3, 4
5
5
6
6
6, 7
8
8
8
9
9
9
9
10
10
10
PAGE
PAGE 1

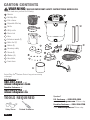
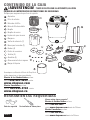
CARTON CONTENTS
WARNING: REVIEW IMPORTANT SAFETY INSTRUCTIONS BEFORE USE.
TOOLS REQUIRED
PAGE 2
Vacuum
Cartridge filter
Filter retainer
Disposable filter bag
Nozzle
Utility nozzle
Crevice tool
Hose
Extensions wands (2)
Caster feet (2)
Casters (4)
Accessory caddy
Screws (4)
Washers (4)
Hose holder
Foam sleeve
Contact Shop-Vac
®
Customer Service if any parts are missing
or damaged.
U.S. Customers call
888-822-4644 or visit
www.shopvac.com
Canadian Customers call
905-335-9730 or visit
www.shopvac.ca
Questions?
U.S. Customers call 888-822-4644
or visit www.shopvac.com 24 hours a day.
Canadian Customers call 905-335-9730
or visit www.shopvac.ca 24 hours a day.
1
1
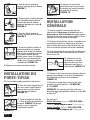
Safety Glasses Flathead Screwdriver
Check to make sure you have the following:

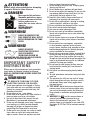
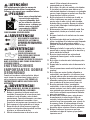
Never operate this unit when
flammable materials or vapors
are present because electrical
devices produce arcs or
sparks that can cause a fire or
explosion.
NEVER OPERATE
UNATTENDED!
PAGE 3
IMPORTANT SAFETY
INSTRUCTIONS
Read all safety rules carefully before attempting
to operate. Retain for future reference.
ALWAYS DISCONNECT THE
PLUG FROM THE WALL OUTLET
BEFORE REMOVING THE TANK
COVER.
ALWAYS WEAR EYE
PROTECTION TO PREVENT
ROCKS OR DEBRIS
FROM BEING BLOWN OR
RICOCHETING INTO THE EYES OR FACE WHICH
CAN RESULT IN SERIOUS INJURY.
When using an electrical appliance, basic precautions
should always be followed, including the following:
READ ALL INSTRUCTIONS BEFORE USING THIS
APPLIANCE.
TO REDUCE THE RISK OF FIRE,
ELECTRIC SHOCK OR INJURY:
1. Do not leave appliance when plugged in. Unplug
from outlet when not in use and before servicing.
Connect to a properly grounded outlet only. See
Grounding Instructions.
2. Do not expose to rain – store indoors.
3. Do not allow to be used as a toy. Close attention is
necessary when used by or near children.
4. Use only as described in this manual. Use only
Manufacturer’s recommended attachments.
5. Do not use with damaged cord or plug. If appliance
is not working as it should, has been dropped,
damaged, left outdoors or dropped into water,
contact Shop-Vac Corporation for assistance.
6. Do Not: pull or carry by cord, use cord as a handle,
close a door on cord or pull cord around sharp
edges or corners. Do not run appliance over cord.
ATTENTION!
DANGER!
WARNING!
WARNING!
WARNING!
Keep cord away from heated surfaces.
7. Do not unplug by pulling on cord. To unplug, grasp
the plug; not the cord.
8. Do not handle plug or appliance with wet hands.
9. Do not put any object into openings. Do not use with
any openings blocked; keep free of dust, lint, hair
and anything that may reduce air flow.
10. Keep hair, loose clothing, fingers and all parts of
body away from openings and moving parts.
11. Do not pick up anything that is burning or smoking,
such as cigarettes, matches or hot ashes.
12. Do not use without dust bag and/or filters in place.
13. Turn off all controls before unplugging.
14. Use extra care when cleaning on stairs.
15. Do not use to pick up flammable or combustible
liquids such as gasoline or use in areas where they
may be present.
16. Do not use your cleaner as a sprayer of flammable
liquids such as oil base paints, lacquers, household
cleaners, etc.
17. Do not vacuum toxic, carcinogenic, combustible
or other hazardous materials such as asbestos,
arsenic, barium, beryllium, lead, pesticides or other
health endangering materials. Specially designed
units are available for these purposes.
18. Do not pick up soot, cement, plaster or drywall dust
without cartridge filter and collection filter bag in
place. These are very fine particles that may pass
through the foam and affect the performance of the
motor or be exhausted back into the air. Additional
collection filter bags are available.
19. Do not leave the cord lying on the floor once you
have finished the cleaning job. It can become a
tripping hazard.
20. Use special care when emptying heavily loaded
tanks.
21. To avoid spontaneous combustion, empty tank after
each use.
22. The operation of a utility vac can result in foreign
objects being blown into eyes, which can result in
eye damage. Always wear safety goggles when
operating vacuum.
23. STAY ALERT. Watch what you are doing and use
common sense. Do not use vacuum cleaner when
you are tired, distracted or under the influence of
drugs, alcohol or medication causing diminished
control.
24. WARNING! Do NOT use this vacuum cleaner to
vacuum lead paint debris because this may
disperse fine lead particles into the air. This
vacuum cleaner is not intended for use under EPA
Regulation 40 CFR Part 745 for lead paint material
cleanup.

PAGE 4
DO NOT LEAVE VACUUM
UNATTENDED WHEN IT
IS PLUGGED IN AND/OR
OPERATING. UNPLUG UNIT
WHEN NOT IN USE.
This appliance must be grounded. If it should
malfunction or breakdown, grounding provides a path
of least resistance for electric current to reduce the
risk of electric shock. This appliance is equipped with
a cord having an equipment-grounding conductor
and grounding plug. The plug must be inserted into
an appropriate outlet that is properly installed and
grounded in accordance with all local codes and
ordinances.
IMPROPER CONNECTION OF THE EQUIPMENT-
GROUNDING CONDUCTOR CAN RESULT IN A
RISK OF ELECTRIC SHOCK. CHECK WITH A
QUALIFIED ELECTRICIAN OR SERVICE PERSON
IF YOU ARE IN DOUBT AS TO WHETHER THE
OUTLET IS PROPERLY GROUNDED. DO NOT
MODIFY THE PLUG PROVIDED WITH THE
APPLIANCE – IF IT WILL NOT FIT THE OUTLET,
HAVE A PROPER OUTLET INSTALLED BY A
QUALIFIED ELECTRICIAN.
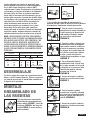
This appliance is for use on a nominal 120-volt circuit,
and has a grounded plug that looks like the plug
illustrated in SKETCH A. A temporary adapter that looks
like the adapter illustrated in SKETCHES B and C may
be used to connect this plug to a 2-pole receptacle as
shown in SKETCH B if a properly grounded outlet is not
available. The temporary adapter should be used only
until a properly grounded outlet (SKETCH A) can be
installed by a qualified electrician. The green colored
rigid ear, lug or the like extending from the adapter
must be connected to a permanent ground such as
a properly grounded outlet box cover. Whenever the
adapter is used, it must be held in place by a metal
screw.
WARNING!
WARNING!
GROUNDING
INSTRUCTIONS
IN CANADA, THE USE OF A TEMPORARY ADAPTOR
IS NOT PERMITTED BY THE CANADIAN ELECTRICAL
CODE. Make sure that the appliance is connected to
an outlet having the same configuration as the plug. No
adapter should be used with this appliance.
When using the appliance at a distance where an
extension cord becomes necessary, a 3-conductor
grounding cord of adequate size must be used for
safety, and to prevent loss of power and overheating.
Use TABLE A to determine A.W.G. wire size required.
To determine ampere rating of your vacuum, refer to
nameplate located on motor housing.
Before using appliance, inspect power cord for loose
or exposed wires and damaged insulation. Make any
needed repairs or replacements before using your
appliance. Use only three-wire outdoor extension cords,
which have three-prong grounding-type plugs and three-
pole receptacles which accept the extension cord’s plug.
When vacuuming liquids, be sure the extension cord
connection does not come in contact with the liquid.
NOTE: STATIC SHOCKS ARE COMMON IN DRY AREAS
OR WHEN THE RELATIVE HUMIDITY OF THE AIR IS
LOW. THIS IS ONLY TEMPORARY AND DOES NOT
AFFECT THE USE OF THE APPLIANCE. TO REDUCE
THE FREQUENCY OF STATIC SHOCKS IN YOUR HOME,
THE BEST REMEDY IS TO ADD MOISTURE TO THE AIR
WITH A CONSOLE OR INSTALLED HUMIDIFIER.
SKETCH A
SKETCH B SKETCH C
EXTENSION
CORDS
Volts
Total length of cord in feet
120V
Ampere Rating
More Not More
Than Than
0 - 6
6 - 10
10 - 12
12 - 16
25 50 100
150
AWG
18
18
16
14
16
16
16
12
16
14
14
14
12
12
Not recommended
TABLE A
SAVE THESE
INSTRUCTIONS

Pull lid latches in an outward motion and remove tank
cover. Remove any accessories and literature that may
have been packed in the vacuum tank.
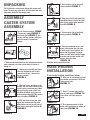
UNPACKING
ASSEMBLY
FIGURE 1
FIGURE 2
You will find four casters FIGURE
1, accessory caddy FIGURE 2,
two caster feet FIGURE 3, four
screws and four washers with your
wet/dry vacuum. Assemble as
follows:
CASTER SYSTEM
ASSEMBLY
1. With cord disconnected from the receptacle and tank
cover removed, turn tank upside-down so bottom is
facing up.
FIGURE 4
2. Take accessory caddy and place
into slots located on rear of tank
(opposite of drain). Secure with
screws provided.
FIGURE 4.
PAGE 5
FIGURE 3
FIGURE 5
3. Take two casters and place a flat
washer over the stem of each caster.
Install casters into accessory caddy
by inserting the caster stems into
the holes provided. Apply pressure
and twisting motion until the casters
snap into place. FIGURE 5.
FIGURE 6
A
4. With tank drain facing you, take
caster foot marked with the letter
A and place into slot on left side of
tank, also marked with the letter A.
FIGURE 6.
A
B
5. Secure caster foot to tank with
screw provided. FIGURE 7.
FIGURE 7
FIGURE 8
B
6. Take caster foot marked with the
letter B and place into slot on right
side of tank, also marked with the
letter B. FIGURE 8.
7. Secure caster foot to tank with
screw provided. FIGURE 9.
FIGURE 9
8. Take the remaining casters and
place a flat washer over the stem
of each caster. Insert casters into
caster feet by placing the caster
stems into the holes provided. Apply
pressure and twisting motion until
casters snap into place.
FIGURE 10.
FIGURE 10
9. Return tank to upright position.
A
FIGURE 11
FIGURE 12
FIGURE 13
10. With rear of unit facing you, take
hose holder and position it with tabs
facing rear of unit.
FIGURE 11.
11. Place “J” shaped tabs into the
slots on cord wraps. FIGURE 12.
Press down until tabs snap into
place.
12. Press down on center of hose
holder until tab latches on bottom of
tank cover. FIGURE 13.
HOSE HOLDER
INSTALLATION
If not already installed, assemble as follows:

FILTER
INSTALLATION
AND CLEANING
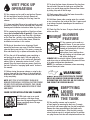
DRY PICK UP
OPERATION
13. Before replacing tank cover, refer to Dry Pick
Up or Wet Pick Up Operation in user manual
to ensure you have the proper filters installed for your
cleaning operation.
14. Replace tank cover, and apply pressure with thumb
to each latch until it snaps tightly into place. Make
certain all lid latches are clamped securely.
15. Insert machine hose end with locking-nut into inlet
of tank. Turn locking nut to tighten. Do not over-tighten.
16. Attach the extension wands
to the accessory end of the
hose. Twist slightly to tighten
the connection. FIGURE 14.
17. Attach one of the cleaning accessories (depending
on your cleaning requirements) on the extension wands.
Twist slightly to tighten the connection. FIGURE 14.
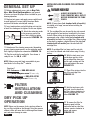
GENERAL SET UP
FIGURE 14
NOTE: If foam sleeve (not standard with all models)
is installed on lid cage, remove before installing the
cartridge filter.
19. The cartridge filter can be used for dry pick up and
small quantities of wet pick up. Installation is the same
for both. When picking up large quantities of water we
recommend using a foam sleeve (not standard with
all models) instead of the cartridge filter. When picking
up fine dust or powders a high efficiency filter bag (not
standard with all models) must be used with the
cartridge filter.
NOTE: If cartridge filter has been used for wet pick
up, it must be cleaned and dried before using it for dry
pick up.
20. With the tank cover in an
upside down position, slide
the cartridge filter down over
the lid cage, pushing until the
filter seals against the cover.
FIGURE 15.
21. Place filter retainer into the
top of the cartridge filter.
FIGURE 16.
22. Hold the tank cover with
one hand, turn the handle on
the filter retainer clockwise to
tighten, locking the filter into
place. FIGURE 17.
23. To remove the filter for
cleaning, again hold the
tank cover and turn the filter
retainer counter-clockwise to
loosen and remove.
FIGURE 18.
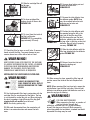
PAGE 6
ALWAYS DISCONNECT THE
PLUG FROM THE WALL OUTLET
BEFORE REMOVING THE TANK
COVER.
WARNING!
Questions?
U.S. Customers call 888-822-4644
or visit www.shopvac.com 24 hours a day.
Canadian Customers call 905-335-9730
or visit www.shopvac.ca 24 hours a day.
NOTE: Never use the vacuum for dry pick up without a
dry use filter installed on the lid cage. Using the vacuum
without a filter will cause dust to discharge from blower
port and cause damage to motor.
FIGURE 15
FIGURE 16
FIGURE 17
FIGURE 18
18. Plug the cord into the wall outlet. Your cleaner is
ready for use. I = ON, O = OFF
NOTE: Many more useful tools are available at your
local dealer or the Shop-Vac
®
website.
INSTALLING AND CLEANING THE CARTRIDGE
FILTER:

24. Slide the cartridge filter off
the lid cage.
FIGURE 19.
25. To clean cartridge filter
shake or brush off excess dirt.
FIGURE 20.
26. Or rinse (from the inside of
the filter) with water.
FIGURE 21. Dry completely
(approximately 24 hours).
27. Check the filter for tears or small holes. If none are
found, reinstall the filter. To prevent damage to your
vacuum, do not use a filter with a hole or a tear.
KEEP FILTERS CLEAN. EFFICIENCY OF THE VACUUM
IS LARGELY DEPENDENT ON THE FILTER. A CLOGGED
FILTER CAN CAUSE OVERHEATING AND POSSIBLY
DAMAGE THE CLEANER. CHECK THE FILTER
PERIODICALLY AND REPLACE AS REQUIRED.
INSTALLING THE DISPOSABLE FILTER BAG:
28. Use the disposable filter bag in conjunction with the
cartridge filter for easy disposal of the debris. The bag
is not required for normal dry pick up. When picking up
fine dust or powders a high efficiency filter bag (not
standard with all models) must be used.
NOTE: Use for dry pick up only.
29. With cord disconnected from the receptacle, pull
latches in an outward motion and remove the tank
cover.
PAGE 7
30. Unscrew hose locking-nut and
remove hose from inlet.
FIGURE 22.
31. Remove the inlet defector from
the deflector guide. NOTE: Hose
must be removed before the inlet
deflector can be taken out.
FIGURE 23.
32. Position the inlet deflector with
the opening facing the left or the
right side of the filter bag. Slide
the filter bag collar over the inlet
deflector, matching the notches of
the bag collar to the tabs on the inlet
deflector. Bag will only fit properly
one way. FIGURE 24.
33. Slide the inlet deflector with the
filter bag attached into the deflector
guide. FIGURE 25.
34. Reinsert hose into inlet and
tighten the locking-nut.
FIGURE 26.
35. When secured in place, expand the filter bag and
position around the inside of the tank. Replace tank
cover.
NOTE: When removing filter bag from tank, remove the
inlet deflector from the filter bag collar. Reinstall inlet
deflector into deflector guide. Inlet deflector must be in
place for any type of cleaning.
FOR FINE DUST POWDERS
When vacuuming fine dust, or powders of
any kind (plaster, drywall dust,
cold ashes, concrete dust, etc.) a high efficiency
drywall filter bag must be used. When vacuuming
normal household dust and debris, standard household
disposable filter bags may be used.
WARNING!
ALWAYS DISCONNECT THE
PLUG FROM THE WALL OUTLET
BEFORE REMOVING THE TANK
COVER.
WARNING!
FIGURE 22
FIGURE 23
FIGURE 24
WARNING!
FIGURE 19
FIGURE 20
FIGURE 21
FIGURE 25
FIGURE 26

PAGE 8
36. Your vacuum can be used for wet pick up. Remove
ALL dirt and debris found in the tank. Remove all
dry use only filters, including the filter bag, from the
vacuum.
37. A clean cartridge filter may be used to pick up small
quantities of liquid. To use the cartridge filter; follow the
cleaning and installation instructions under dry pick up.
38. For vacuuming large quantities of liquid use a foam
sleeve (not standard with all models). A foam sleeve
may be purchased at your local Shop-Vac
®
distributor,
on the Shop-Vac
®
website, or by contacting Shop-Vac
®
customer service. To use the foam sleeve; follow the
installation instructions in this section.
39. Misting in the exhaust air or dripping of liquid
around the tank cover may occur if the filter becomes
saturated during wet pick up. If this occurs, remove the
filter and allow to dry, or replace with another dry filter.
40. Turn the unit off immediately upon completing a
wet pick up job or when tank is full and ready to be
emptied. When the tank is full, suction will drastically
reduce. Refer to “automatic suction shut off” in this
manual. Raise the hose to drain any excess liquid into
the tank. Follow the “emptying liquid waste” section in
this manual.
41. Before storing the vacuum cleaner or using for dry
pick up, clean and dry the interior of the tank and the
underside of the tank cover. Clean and allow the filters
to dry completely.
NOTE: WET PICK UP ACCESSORIES SHOULD BE
WASHED PERIODICALLY; ESPECIALLY AFTER PICKING
UP WET, STICKY KITCHEN ACCIDENTS. THIS CAN BE
ACCOMPLISHED WITH A WARM SOLUTION OF SOAP
AND WATER.
FOAM SLEEVE INSTALLATION AND CLEANING:
42. With tank cover in an upside
down position, slide foam sleeve
down over lid cage pulling until foam
sleeve completely covers lid cage.
FIGURE 27.
WET PICK UP
OPERATION
43. To clean the foam sleeve, disconnect the plug from
the wall outlet. Remove the tank cover and place the
cover in an upside-down position. Remove foam sleeve
by sliding it up and off the lid cage.
44. Shake excess debris off of the foam sleeve with a
rapid up and down movement.
45. Hold foam sleeve under running water for a minute
or two, rinsing from the inside of the filter. A water wash
is not always required, depending on the condition of
the foam sleeve.
46. Check the filter for tears. If any are found, replace
with a new filter.
47. Your vacuum can be used as a
powerful blower. To use your unit as
a blower, unscrew blower port cover
located on the backside of the tank
cover. Clear hose of any
obstructions. Insert machine hose
end with locking nut into blower port
and tighten locking-nut.
FIGURE 28. Do not over-tighten. Caution should be
used when using as a blower due to the powerful force
of air when using certain attachments.
NOTE: For maximum performance, when vacuuming,
remove blower port cover.
ALWAYS WEAR EYE PROTECTION TO PREVENT
ROCKS OR DEBRIS FROM BEING BLOWN OR
RICOCHETING INTO THE EYES OR FACE WHICH
CAN RESULT IN SERIOUS INJURY.
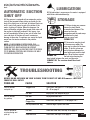
48. Your wet/dry vacuum can be emptied
of liquid waste by removing the drain cap. To empty,
turn unit off and remove plug from the wall receptacle.
Remove the drain cap and deposit the liquid waste
contents in a suitable drain. After the tank is empty,
return the drain cap to its original position. To continue
use, plug the cord into the wall receptacle and turn the
BLOWER
FEATURE
EMPTYING
LIQUID
WASTE FROM
THE TANK
FIGURE 28
WARNING!
FIGURE 27

unit on. Use side carry handles for lifting vac when
draining tank into drains that are located above floor
level.
49. The vacuum is equipped with an automatic suction
shut-off that operates when picking up liquids. As the
level of the liquid rises in the tank, an internal float rises
until it seats itself against a seal at the intake of the
motor, shutting off suction. When this happens, the
motor will develop a higher than normal pitch noise and
the suction is drastically reduced. If this occurs, turn
unit off immediately. Failure to turn unit off after float
rises and shuts off suction will result in extensive
damage to the motor. To continue use, empty the liquid
waste from the tank as outlined in the previous
section.
NOTE: IF ACCIDENTALLY TIPPED OVER, THE
VACUUM COULD LOSE SUCTION. IF THIS OCCURS,
TURN UNIT OFF AND PLACE VAC IN UPRIGHT
POSITION. THIS WILL ALLOW THE FLOAT TO RETURN
TO ITS NORMAL POSITION, AND YOU WILL BE ABLE
TO CONTINUE OPERATION.
PAGE 9
AUTOMATIC SUCTION
SHUT OFF
LUBRICATION
STORAGE
TROUBLESHOOTING
FIGURE 29
PROBLEM CAUSE SOLUTION
Loss of suction
wet pick up
Loss of suction
dry pick up
Loss of suction or
misting during wet
pick up
Clogged filter
Clogged filter
Full tank
Full tank
Saturated filter
Clean filter, see steps 23 - 27 on pages 6 & 7, and steps
43 - 46 on page 8.
Clean filter, see steps 23 - 27 on pages 6 & 7.
Drain and clean tank, see step 48 on page 8
Clean filter, see steps 39 on page 8
Empty and clean tank
50. No lubrication is necessary as the motor is equipped
with lifetime lubricated bearings.
51. Before storing your vacuum
cleaner the tank should
be emptied and cleaned. The
power cord can be
wrapped around the cord wraps
provided on the tank
cover on rear of unit.
FIGURE 29.
52. Accessories may be stored
in the accessory caddy. The
hose may be stored in the hose
holder. To do this, place one
end of the hose between the
hose holder posts and the tank
cover. Wrap the hose around
the tank cover keeping the
hose tucked between the posts and the cover.
FIGURE 30. The vacuum should be stored
indoors.
BEFORE DOING ANY WORK ON YOUR VACUUM, TURN THE UNIT OFF AND DISCONNECT THE PLUG
FROM THE WALL OUTLET.
Full tank
Empty tank, see step 48 on pg 8.
FIGURE 30
Full disposable filter bag Remove bag or replace with new.

PAGE 10
Your Shop-Vac
®
vacuum cleaner is warranted for
normal household use, in accordance with the User
Manual, against original defects in material and
workmanship for a period of five years from date of
purchase. Should this product be used for commercial
or rental use, a 90 day limited warranty will apply.
Shop-Vac Corporation warrants placing this vacuum
cleaner in correct operating condition, by repair or
parts replacement, during the warranty period, without
charge. This warranty does not cover accessories. Use
of non-recommended filters and/or accessories may
void the manufacturer’s warranty. Shop-Vac
®
assumes
no responsibility for damage or faulty performance
caused by misuse, careless handling, and where repairs
or modifications have been made. Do not attempt to
service your vacuum beyond that described in the
User Manual. Proof of purchase date is required. The
warranty gives you specific legal rights, and you may
have other rights which vary from state to state or
province to province. This warranty is void outside of the
United States and Canada.
Customers in the United States: for product service
contact Shop-Vac Corporation, Customer
Service, at (570) 326-3557 or go to www.shopvac.com/
support. Visit www.shopvac.com for your vacuum’s parts
list schematic.
Customers in Canada: for product service return
the complete unit, (transportation prepaid), to the
Authorized Shop-Vac
®
Service Centre nearest you.
Visit www.shopvac.ca for a complete list of authorized
service centres in your area.
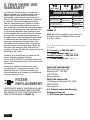
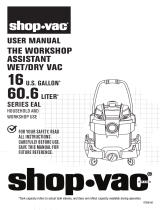
LOCATED ON THE REAR OF YOUR VACUUM, YOU WILL
FIND A FILTER REPLACEMENT CHART. THIS CHART
WILL INDICATE BY “TYPE” WHICH FILTERS WILL FIT
YOUR VACUUM CORRECTLY. FIGURE 31.
5 YEAR HOME USE
WARRANTY
FILTER
REPLACEMENT
Contact Shop-Vac
®
Customer Service if any parts are missing
or damaged.
U.S. Customers call 888-822-4644
or visit www.shopvac.com 24 hours a day.
Canadian Customers call 905-335-9730
or visit www.shopvac.ca 24 hours a day.
REPLACEMENT FILTERS
FILTRES DE RECHANGE
FILTROS DE REEMPLAZO
www.shopvac.com 1-888-822-4644
14
U.S. GAL
53
L
5.5
PEAK
DE POINTE
PICO
HP
Foam sleeve/Manchon en mousse/
Manguito de espuma
90585/064911
Disposable filter bag/
Sac filtrant collecteur/
Bolsa filtro desechable
90662/N/A
90672/012322
Cartridge filter/
Filtre cartouche/
Filtro de cartucho
90304/009704
90340/216218
90350/215733
90333/189966
U
W
X
R
V
F
I
FIGURE 31
SHOP-VAC CORPORATION
2323 Reach Road, P.O. Box 3307,
Williamsport, PA 17701-0307
(570) 326-3557
www.shopvac.com
SHOP-VAC Canada Ltd.
1770 Appleby Line, Burlington, ON L7L 5P8
(905) 335-9730
www.shopvac.ca
U.S. Patents Issued and Pending.
All Rights Reserved.
© 2017 Shop-Vac Corporation.
NOTE: Not all filters available for your vacuum are
listed on this chart. For Additional filters visit the
Shop-Vac
®
website.

PAGE 11

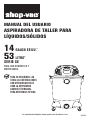
MANUEL D’UTILISATION
L’ASPIRATEUR ASSISTANT
POUR L’ATELIER POUR
DÉCHETS SECS/HUMIDES
87555-80
*La capacité de la cuve en service peut varier selon l’usage.
14
53
POUR VOTRE SÉCURITÉ, LIRE
TOUTES LES INSTRUCTIONS
AVANT L’UTILISATION.
CONSERVER CE MANUEL À
DES FINS DE CONSULTATIONS
ULTÉRIEURES.
LITRE
*
GALLON U.S.
*
SÉRIE SE
MODÈLE DOMESTIQUE ET
D’ATELIER

POUR COMMENCER
TABLE DES MATIÈRES:
Numéros de catalogue/modèle . . . . . . . . . . . . . . . . . . . . . . . . . . . . . . . . . . . . . . . . . . . . . . . . . . . . . . . . . . . . . . . . . . . . . .
Contenu de la boîte . . . . . . . . . . . . . . . . . . . . . . . . . . . . . . . . . . . . . . . . . . . . . . . . . . . . . . . . . . . . . . . . . . . . . . . . . . . . . . .
Outils nécessaires . . . . . . . . . . . . . . . . . . . . . . . . . . . . . . . . . . . . . . . . . . . . . . . . . . . . . . . . . . . . . . . . . . . . . . . . . . . . . . . .
Avertissements et consignes de sécurité . . . . . . . . . . . . . . . . . . . . . . . . . . . . . . . . . . . . . . . . . . . . . . . . . . . . . . . . . .
Déballage . . . . . . . . . . . . . . . . . . . . . . . . . . . . . . . . . . . . . . . . . . . . . . . . . . . . . . . . . . . . . . . . . . . . . . . . . . . . . . . . . . . . . .
Assemblage . . . . . . . . . . . . . . . . . . . . . . . . . . . . . . . . . . . . . . . . . . . . . . . . . . . . . . . . . . . . . . . . . . . . . . . . . . . . . . . . . . .
Installation générale . . . . . . . . . . . . . . . . . . . . . . . . . . . . . . . . . . . . . . . . . . . . . . . . . . . . . . . . . . . . . . . . . . . . . . . . . . . . . .
Installations et nettoyage du filtre . . . . . . . . . . . . . . . . . . . . . . . . . . . . . . . . . . . . . . . . . . . . . . . . . . . . . . . . . . . . . . . . . . .
Ramassage de déchets secs . . . . . . . . . . . . . . . . . . . . . . . . . . . . . . . . . . . . . . . . . . . . . . . . . . . . . . . . . . . . . . . . . . . . . .
Ramassage de déchets humides . . . . . . . . . . . . . . . . . . . . . . . . . . . . . . . . . . . . . . . . . . . . . . . . . . . . . . . . . . . . . . . . . .
Caractéristique de la souffleuse . . . . . . . . . . . . . . . . . . . . . . . . . . . . . . . . . . . . . . . . . . . . . . . . . . . . . . . . . . . . . . . . . . . . .
Vidange des déchets liquides . . . . . . . . . . . . . . . . . . . . . . . . . . . . . . . . . . . . . . . . . . . . . . . . . . . . . . . . . . . . . . . . . . . . . . .
Arrêt automatique de l’aspiration . . . . . . . . . . . . . . . . . . . . . . . . . . . . . . . . . . . . . . . . . . . . . . . . . . . . . . . . . . . . . . . . . . . .
Lubrification . . . . . . . . . . . . . . . . . . . . . . . . . . . . . . . . . . . . . . . . . . . . . . . . . . . . . . . . . . . . . . . . . . . . . . . . . . . . . . . . . . . .
Rangement. . . . . . . . . . . . . . . . . . . . . . . . . . . . . . . . . . . . . . . . . . . . . . . . . . . . . . . . . . . . . . . . . . . . . . . . . . . . . . . . . . . . .
Diagnostic de pannes . . . . . . . . . . . . . . . . . . . . . . . . . . . . . . . . . . . . . . . . . . . . . . . . . . . . . . . . . . . . . . . . . . . . . . . . . . . .
Renseignements sur la garantie . . . . . . . . . . . . . . . . . . . . . . . . . . . . . . . . . . . . . . . . . . . . . . . . . . . . . . . . . . . . . . . . . . . .
Remplacement du filtre . . . . . . . . . . . . . . . . . . . . . . . . . . . . . . . . . . . . . . . . . . . . . . . . . . . . . . . . . . . . . . . . . . . . . . . . . .
Contactez-nous . . . . . . . . . . . . . . . . . . . . . . . . . . . . . . . . . . . . . . . . . . . . . . . . . . . . . . . . . . . . . . . . . . . . . . . . . . . . . . . . .
NUMÉROS DE CATALOGUE / MODÈLE
No de catalogue. 9751411 No de modèle. SE16-SQ550
Date d’achat:
Pour vos dossiers, veuillez consigner votre date d’achat et, à des fins de référence ultérieure,
rangez le manuel du propriétaire dans un endroit sûr.
1
2
2
3, 4, 5
5
5, 6
6
7
7, 8
8, 9
9
9
10
10
10
10
11
11
11
PAGE
PAGE F1

1
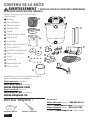
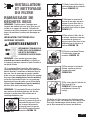
CONTENU DE LA BOÎTE
AVERTISSEMENT : PRIÈRE DE REVOIR LES DIRECTIVES IMPORTANTES
DE SÉCURITÉ AVANT D’UTILISER L’APPAREIL.
OUTILS REQUIS :
Communiquez avec le service à la clientèle de Shop-Vac
MD
si
des pièces manquent ou sont endommagées.
Clients américains, composez le
888-822-4644 ou consultez le
www.shopvac.com
Clients canadiens, composez le
905-335-9730 ou consultez le
www.shopvac.ca
Des questions?
Clients Américains composez le 888-822-4644 ou
consultez le www.shopvac.com 24 heures par jour.
Clients Canadiens composez le 905-335-9730
ou consultez le www.shopvac.ca 24 heures par jour.
Lunette de sécurité Tournevis à tête plate
Vérifiez si vous avez en main tous les éléments
illustrés suivants :
Aspirateur
Filtre à Cartouche
Disque de retenue
Sac filtre jetable
Embout
Embout à usages multiples
Embout de plat
Tuyau flexible
Tubes rigides de rallonge (2)
Porte-roulettes (2)
Roulettes de manutention (4)
Chariot-panier accessoire
Vis (4)
Rondelles (4)
Rangement du tuyau
Filtre en mousse
PAGE 11
PAGE F2
1

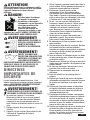
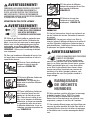
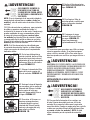
Ne faites jamais fonctionner
cet appareil en présence
de matières ou de vapeurs
inflammables car les dispositifs
électriques produisent des
arcs électriques ou des
étincelles qui risquent de
provoquer un incendie ou une
explosion. NE LAISSEZ JAMAIS L’APPAREIL EN
FONCTIONNEMENT SANS SURVEILLANCE!
DIRECTIVES
IMPORTANTES DE
SÉCURITÉ
Lisez attentivement tous les règlements relatifs
à la sécurité avant d’essayer de faire fonctionner
l’appareil. Conservez-les pour référence
ultérieure.
DÉBRANCHEZ TOUJOURS LA
FICHE DE LA PRISE MURALE
AVANT DE RETIRER LE
COUVERCLE DU RÉSERVOIR.
PORTEZ TOUJOURS UNE
PROTECTION OCULAIRE POUR
EMPÊCHER LES PIERRES OU
LES DÉBRIS D’ATTEINDRE,
PAR PROJECTION DIRECTE OU RICOCHET, LES
YEUX OU LE VISAGE, CE QUI RISQUE DE SE
SOLDER PAR DES BLESSURES GRAVES.
Lors de l’utilisation d’un appareil électrique, il faut
toujours respecter des précautions de base notamment
celle-ci : LISEZ TOUTES LES DIRECTIVES AVANT
L’UTILISATION DE CET APPAREIL.
ATTENTION!
DANGER!
AVERTISSEMENT!
AVERTISSEMENT!
AVERTISSEMENT!
1. Ne quittez pas l’appareil s’il est branché.
Débranchez la fiche de la prise lorsque l’appareil
n’est pas utilisé et avant tout entretien. Branchez
uniquement à une prise correctement mise à la
terre. Consultez les directives relatives à la mise à la
terre.
2. Protégez l’appareil de la pluie; rangez-le à
l’intérieur.
3. L’appareil n’est pas un jouet. Soyez attentif lors de
l’utilisation de l’appareil par des enfants
ou près de ceux-ci.
4. Utilisez l’appareil uniquement comme décrit dans le
présent manuel. Utilisez également uniquement les
accessoires recommandés par le fabricant.
5. N’utilisez pas l’appareil avec un cordon
d’alimentation ou une fiche endommagé(e).
Communiquez avec le Service d’assistance de
Shop-Vac
MD
si l’appareil ne fonctionne pas comme
prévu, a subi un choc, est endommagé, a été oublié
à l’extérieur ou s’il a été immergé dans l’eau.
6. Ne pas : tirer sur le cordon d’alimentation ou
transporter l’appareil par celui-ci, l’utiliser comme
poignée, fermer une porte sur le cordon ni le
contraindre sur des bords tranchants ou des
coins. Ne passez pas l’appareil sur le cordon
d’alimentation. Tenez le cordon d’alimentation à
l’écart des surfaces chauffées.
7. Ne tirez pas sur le cordon d’alimentation pour
débrancher l’appareil. Pour ce faire, saisissez la
fiche et non le cordon d’alimentation.
8. Ne manipulez pas la fiche ou l’appareil avec des
mains mouillées.
9. N’insérez aucun objet dans les ouvertures. N’utilisez
pas l’appareil avec des ouvertures bloquées,
maintenez-les exemptes de poussières, de peluches,
de cheveux ou de tous éléments qui pourraient
réduire l’admission d’air.
10. Tenez les cheveux, les vêtements amples, les doigts
et toutes parties du corps à l’écart des ouvertures
et des pièces mobiles.
11. N’aspirez aucun élément qui brûle ou qui émet de la
fumée comme des cigarettes, des allumettes ou des
cendres chaudes.
12. Ne faites pas fonctionner l’appareil sans le sac à
poussière et/ou les filtres en position.
13. Éteignez toutes les commandes avant de le
débrancher.
14. Soyez très attentif lors du nettoyage dans les
escaliers.
15. N’utilisez pas l’appareil pour aspirer des liquides
inflammables ou combustibles comme de l’essence.
Ne le faites pas fonctionner en présence de tels
liquides.
16. N’utilisez pas l’aspirateur comme un vaporisateur
de liquides inflammables comme des peintures à
base d’huile, des vernis-laques, des produits de
nettoyage domestiques, etc.
17. N’aspirez pas de matières toxiques, cancérogènes,
combustibles ou dangereuses comme de l’amiante,
de l’arsenic, du baryum, du béryllium, du plomb,
des pesticides ou d’autres matières pouvant porter
atteinte à la santé. Des modèles sont spécialement
conçus et offerts pour ces travaux.
18. N’aspirez pas de particules de suie ou de poussières
de ciment, de plâtre ou de cloison sèche sans le
filtre à cartouche et le sac-filtre à poussière en
position. Ces particules sont très fines et risquent
de passer à travers la mousse et
POUR RÉDUIRE LE RISQUE D’INCENDIE, DE
DÉCHARGE ÉLECTRIQUE OU DE BLESSURES :
PAGE F3

AVERTISSEMENT!
AVERTISSEMENT!
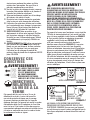
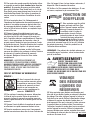
BROCHE DE MISE
À LA TERRE
BOÎTE A PRISES MISE À LA TERRE
PRISE MISE
À LA TERRE
CROQUIS A
ADAPTATEUR
VIS
MÉTALLIQUE
BOÎTE À PRISES
MISE À LA TERRE
ADAPTATEUR
ONGLET
POUR VIS
DE MISE À TERRE
CROQUIS B CROQUIS C
CONSERVEZ CES
DIRECTIVES
ainsi nuire au rendement du moteur ou d’être
rejetées dans l’atmosphère. Des sacs-filtres à
poussière supplémentaires sont offerts.
19. Une fois le service de nettoyage terminé, ramassez
le cordon d’alimentation déployé sur le plancher. Il
risque de faire trébucher un passant.
20. Soyez particulièrement prudent lors de la vidange
de réservoirs très pleins et lourds.
21. Pour éviter tout risque de combustion spontanée,
videz le réservoir après chacune des utilisations.
22. L’utilisation d’un aspirateur utilitaire peut se solder
par la projection de corps étrangers qui pourraient
blesser les yeux. Portez toujours des lunettes de
sécurité lors de l’utilisation de l’aspirateur.
23. SOYEZ VIGILANT. Notez vos actions et vos
déplacements et utilisez votre jugement. N’utilisez
pas l’aspirateur ménager si vous êtes fatigué(e),
distrait(e) ou sous l’influence de drogues, d’alcool
ou de médicaments qui risque(nt) d’affaiblir vos
facultés.
24. AVERTISSEMENT! Ne PAS utiliser cet aspirateur
pour ramasser des débris de peinture à base de
plomb, car ceci peut disperser de fines particules
dans l’air. Cet aspirateur n’est pas conçu pour
l’utilisation lors du nettoyage de matériel de
peinture à base de plomb sous le règlement 40 CFR
pièce 745 d’EPA.
NE LAISSEZ PAS L’ASPIRAT
EUR SANS SURVEILLANCE
S’IL EST BRANCHÉ OU
EN FONCTIONNEMENT.
DÉBRANCHEZ L’APPAREIL
LORSQU’IL N’EST PAS UTILISÉ.
DIRECTIVES
RELATIVES À
LA MI SE À LA
TERRE
Cet appareil doit être mis à la terre. En cas de
défectuosité ou de bris, la mise à la terre offre
une voie de moindre résistance pour le passage
du courant électrique et réduit ainsi le risque de
décharge électrique. Cet appareil est muni d’un cordon
d’alimentation doté d’un fil conducteur et d’une fiche
mise à la terre. Il faut insérer la fiche dans une prise
correspondante adéquate correctement installée et mise
à la terre en conformité avec tous les codes et toutes
les ordonnances locales en vigueur.
UNE CONNEXION INCORRECTE DU
CONDUCTEUR DE TERRE DU MATÉRIEL PEUT
CRÉER UN RISQUE DE DÉCHARGE ÉLECTRIQUE.
VÉRIFIEZ AUPRÈS D’UN ÉLECTRICIEN
PROFESSIONNEL OU DE PERSONNEL
QUALIFIÉ EN ENTRETIEN ET RÉPARATION SI
VOUS AVEZ DES DOUTES RELATIFS À LA BONNE
MISE À LA TERRE DE LA PRISE. NE MODIFIEZ
PAS LA FICHE FOURNIE AVEC L’APPAREIL.
SI ELLE N’EST PAS COMPATIBLE AVEC LA
PRISE, FAITES CHANGER LA PRISE PAR UN
ÉLECTRICIEN PROFESSIONNEL.
Cet appareil est conçu pour fonctionner sur un circuit de
120 volts de tension nominale et il est muni d’une fiche
mise à la terre semblable à celle illustrée au CROQUIS
A. Il est possible d’utiliser un adaptateur temporaire
semblable à celui illustré aux CROQUIS B
et C pour raccorder cette prise à un réceptacle
bipolaire comme illustré au CROQUIS B, si une prise
correctement mise à la terre n’est pas disponible.
Utilisez cet adaptateur temporaire jusqu’à l’installation
d’une prise correctement mise à la terre (CROQUIS
A) par un électricien professionnel. L’oreille ou la cosse
rigide (ou un élément semblable) de couleur verte qui
fait saillie de l’adaptateur doit être raccordée à une mise
à la terre permanente comme le couvercle d’une boîte
à prises correctement mise à la terre. À chacune des
utilisations de l’adaptateur, il faut le fixer en place avec
une vis métallique.
AU CANADA, L’UTILISATION D’UN ADAPTATEUR
PROVISOIRE N’EST PAS AUTORISÉE PAR LE CODE
ÉLECTRIQUE CANADIEN.
Assurez-vous que l’appareil
est relié à une prise ayant la même configuration que la
fiche. Aucun adaptateur ne devrait être utilisé avec cet
appareil.
PAGE F4

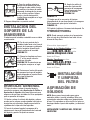
Tirez les verrous du couvercle dans un mouvement
extérieur et retirez le couvercle du réservoir. Retirez
tous les accessoires et les documents qui ont pu être
envoyés dans le réservoir de l’aspirateur.
DÉBALLAGE
ASSEMBLAGE
FIGURE 1
FIGURE 2
Avec votre aspirateur de déchets
secs/humides, vous trouverez
quatre roulettes FIGURE 1, un
porte-accessoires FIGURE 2,
deux pattes à roulettes
FIGURE 3, quatre vis et quatre
rondelles. Assemblez comme suit:
ASSEMBLAGE
DU SYSTÈME DE
ROULETTES
1. Alors que le cordon est débranché de la prise et que
le couvercle du réservoir est enlevé, retournez réservoir
de sorte que le bas fait face vers le haut.
FIGURE 4
FIGURE 6
2. Prenez le porte-accessoires et
insérez-le dans les fentes situées
à l’arrière du réservoir (en face du
drain). Fixez-le avec les vis fournies.
FIGURE 4.
PAGE F5
FIGURE 3
3. Prenez deux roulettes et placez
une rondelle sur la tige de chacune
d’elle. Insérez les roulettes dans le
porte-accessoires en glissant les
tiges des roulettes dans les orifices
prévus à cette fin. Appliquez une
pression et un mouvement de
torsion jusqu’à ce que les roulettes
s’enclenchent. FIGURE 5.
4. Tandis que le drain vous fait face,
prenez la patte à roulette marquée
de la lettre A et placez-la dans la
fente du côté gauche du réservoir
également marquée par la lettre A.
FIGURE 6.
A
FIGURE 5
RALLONGES
Tension
Longueur totale de la
rallonge, en pieds
120V
Intensité nominal
e
0 - 6
6 - 10
10 - 12
12 - 16
25 50 100
150
AWG
(cabre américain normalisé de fils)
18
18
16
14
16
16
16
12
16
14
14
14
12
12
Non recommandé
Plus
de
Pas
Plus de
Lorsque vous passez l’aspirateur à une distance qui
nécessite l’utilisation d’une rallonge, vous devez utiliser
un cordon de mise à la terre à 3 conducteurs de calibre
adéquat pour assurer la sécurité et empêcher la perte
de puissance et la surchauffe de l’appareil. Utilisez le
Tableau A pour déterminer le calibre de fil AWG requis.
Pour déterminer l’intensité nominale de votre appareil,
reportez-vous à la plaque située sur le capot du moteur.
Avant d’utiliser l’appareil, inspectez le cordon
d’alimentation pour déceler les fils desserrés ou exposés
et les dommages d’isolation éventuels. Procédez à toutes
les réparations et à tous les remplacements nécessaires
avant d’utiliser votre appareil. Utilisez uniquement les
rallonges pour l’extérieur, à trois fils, munies de fiches
de mise à la terre à trois broches et les prises de
courant trois pôles qui acceptent la fiche de la rallonge.
Lorsque vous utilisez votre aspirateur pour ramasser des
liquides, assurez-vous que le branchement de la rallonge
ne contacte pas le liquide.
REMARQUE : LES DÉCHARGES STATIQUES SONT
COURANTES DANS LES ENDROITS SECS OU
LORSQUE L’HUMIDITÉ RELATIVE DE L’AIR EST
FAIBLE. IL S’AGIT DE CONDITIONS TEMPORAIRES
QUI N’AFFECTENT PAS L’UTILISATION DE L’APPAREIL.
LA MEILLEURE SOLUTION POUR RÉDUIRE LA
FRÉQUENCE DES DÉCHARGES STATIQUES DANS
VOTRE MAISON CONSISTE À HUMIDIFIER L’AIR À
L’AIDE D’UN HUMIDIFICATEUR À POSER OU FIXE.
TABLEAU A

FIGURE 12
FIGURE 13
11. Placez les onglets en forme de
«J» dans les fentes du rembobineur
de cordon. FIGURE 12. Appuyez
jusqu’à ce que les languettes
s’enclenchent en place.
12. Appuyez sur le centre du
porte-tuyau jusqu’à ce que l’onglet
se verrouille sur la partie inférieure
du couvercle du réservoir.
FIGURE 13.
13. Avant de remettre le couvercle du réservoir,
reportez-vous à Ramassage de déchets secs ou à
Ramassage de déchets humides du présent manuel
d’utilisateur pour vous assurer d’avoir installé les filtres
adéquats pour votre opération de nettoyage.
14. Remettez le couvercle du réservoir, et appliquez une
pression avec le pouce sur chaque verrou jusqu’à ce
qu’ils se fixent fermement en place. Assurez-vous que
tous les verrous du couvercle sont serrées solidement.
15. Insérez l’extrémité du long tuyau de la machine avec
l’écrou de blocage dans l’orifice du réservoir et serrez.
Ne serrez pas trop.
16. Attachez les bras de
prolongation à l’extrémité
accessoire du tuyau. Visez
légèrement pour serrer le
raccordement. FIGURE 14.
17. Attachez un des accessoires de nettoyage (selon vos
exigences de nettoyage) sur les bras de prolongation.
Visez légèrement pour serrer le raccordement.
FIGURE 14.
INSTALLATION
GÉNÉRALE
FIGURE 14
18. Branchez le cordon dans la prise murale. Votre
aspirateur est prêt à l’emploi. I = EN MARCHE,
O = À L’ARRÊT
REMARQUE : De nombreux outils plus utiles sont
disponibles chez votre revendeur local ou sur le site Web
de Shop-Vac
MD
.
Des questions?
Clients Amércains composez le 888-822-4644 ou
consultez le www.shopvac.com 24 heures par jour.
Clients Canadian composez le 905-335-9730
ou consultez le www.shopvac.ca 24 heures par jour.
PAGE F6
A
A
B
5. Fixez la patte de roulette au
réservoir au moyen de la vis fournie.
FIGURE 7.
FIGURE 7
FIGURE 8
B
6. Prenez la patte à roulette marquée
de la lettre B et placez-la dans la
fente du côté droit du réservoir
également marquée par la lettre B.
FIGURE 8.
7. Fixez la patte de roulette au
réservoir au moyen de la vis fournie.
FIGURE 9.
FIGURE 9
8. Prenez les roulettes restantes et
placez une rondelle sur la tige de
chacune d’elle. Insérez les roulettes
dans la patte de roulette en glissant
les tiges des roulettes dans les
orifices prévus à cette fin. Appliquez
une pression et un mouvement de
torsion jusqu’à ce que les roulettes
s’enclenchent. FIGURE 10.
9. Retournez le réservoir en position verticale.
FIGURE 11
10. Avec l’arrière de l’appareil tourné
vers vous, prenez le porte-tuyau et
placez-le avec les onglets faisant
face à l’arrière de l’appareil.
FIGURE 11.
INSTALLATION DU
PORTE-TUYAU
S’il n’est pas déjà installé, assemblez-le comme suit:
FIGURE 10

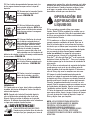
INSTALLATION
ET NETTOYAGE
DU FILTRE
RAMASSAGE DE
DÉCHETS SECS
19. La cartouche filtrante peut être utilisée pour le
ramassage de déchets secs et de petites quantités de
déchets humides. L’installation est identique dans les
deux cas. Lors du ramassage de grandes quantités
d’eau, nous vous recommandons d’utiliser un manchon
de mousse (non standard avec tous les modèles)
au lieu de la cartouche filtrante. Lors du ramassage
de poussière fine ou de poudre, un sac filtrant haute
efficacité (non standard avec tous les modèles)
doit être utilisé avec la cartouche filtrante.
20. Alors que le couvercle du
réservoir est renversé, glissez la
cartouche filtrante vers le bas,
sur le support de couvercle,
et poussez jusqu’à ce que les
joints du filtre reposent contre
couvercle. FIGURE 15.
21. Placez le porte-filtre dans la
partie supérieure de la cartouche
filtrante. FIGURE 16.
22. Maintenez le couvercle du
réservoir d’une main, tournez la
poignée du porte-filtre dans le
sens horaire pour la serrer, en
verrouillant ainsi le filtre en place.
FIGURE 17.
23. Pour enlever le filtre afin de
le nettoyer, maintenez à nouveau
le couvercle du réservoir et
tournez le porte-filtre dans le sens
antihoraire pour le desserrer et
l’enlever. FIGURE 18.
24. Glissez la cartouche filtrante
à l’extérieur du support de
couvercle. FIGURE 19.
25. Pour nettoyer la cartouche
filtrante, secouez ou brossez
l’excédent de saleté.
FIGURE 20.
26. Ou rincez (depuis l’intérieur du
filtre) avec de l’eau.
FIGURE 21. Laissez sécher
complètement (environ 24
heures).
PAGE F7
DÉBRANCHEZ TOUJOURS LA
FICHE DE LA PRISE MURALE
AVA NT DE RETIRER LE
COUVERCLE DU RÉSERVOIR.
AVERTISSEMENT!
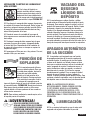
REMARQUE : N’utilisez jamais l’aspirateur pour
ramasser des déchets secs sans qu’un filtre sec soit
installé sur le support de couvercle. L’utilisation de
l’aspirateur sans filtre provoquera le rejet de poussière
du port du ventilateur et causera des dommages au
moteur.
REMARQUE : Si un manchon en mousse (non
standard avec tous les modèles) est installé sur
le support du couvercle, enlevez-le avant d’installer la
cartouche filtrante.
REMARQUE : Si la cartouche filtrante a été utilisée
pour ramasser des déchets humides, elle doit être
nettoyée et séchée avant d’être utilisée pour le
ramassage de déchets secs.
INSTALLATION ET NETTOYAGE DE LA
CARTOUCHE FILTRANTE:
FIGURE 15
FIGURE 16
FIGURE 17
FIGURE 18
FIGURE 19
FIGURE 20
FIGURE 21
27. Vérifiez si le filtre comporte des déchirures ou de
petits trous. Si vous n’en trouvez pas, réinstallez le filtre.
Pour éviter d’endommager votre aspirateur, n’utilisez
pas de filtre comportant un trou ou une déchirure.
La page est en cours de chargement...
La page est en cours de chargement...
La page est en cours de chargement...
La page est en cours de chargement...
La page est en cours de chargement...
La page est en cours de chargement...
La page est en cours de chargement...
La page est en cours de chargement...
La page est en cours de chargement...
La page est en cours de chargement...
La page est en cours de chargement...
La page est en cours de chargement...
La page est en cours de chargement...
La page est en cours de chargement...
La page est en cours de chargement...
La page est en cours de chargement...
-
 1
1
-
 2
2
-
 3
3
-
 4
4
-
 5
5
-
 6
6
-
 7
7
-
 8
8
-
 9
9
-
 10
10
-
 11
11
-
 12
12
-
 13
13
-
 14
14
-
 15
15
-
 16
16
-
 17
17
-
 18
18
-
 19
19
-
 20
20
-
 21
21
-
 22
22
-
 23
23
-
 24
24
-
 25
25
-
 26
26
-
 27
27
-
 28
28
-
 29
29
-
 30
30
-
 31
31
-
 32
32
-
 33
33
-
 34
34
-
 35
35
-
 36
36


Shop Vac SE16-SQ550 Manuel utilisateur
- Catégorie
- Aspirateurs
- Taper
- Manuel utilisateur
dans d''autres langues
- English: Shop Vac SE16-SQ550 User manual
- español: Shop Vac SE16-SQ550 Manual de usuario
Documents connexes
-
 Shop Vac EA14-SQ550 Manuel utilisateur
-
Shop Vac H87S600Cr Manuel utilisateur
-
 Shop Vac EAL16-SQ650 Manuel utilisateur
-
 Shop Vac SL14-350A Manuel utilisateur
-
 Shop Vac L250 Manuel utilisateur
-
Shop Vac LB650C Manuel utilisateur
-
-
 Shop Vac SL14-600C Manuel utilisateur
-
 Shop Vac 8891411 Manuel utilisateur
-
 Shop Vac ESLSQ550 Manuel utilisateur


