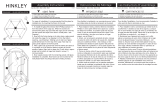
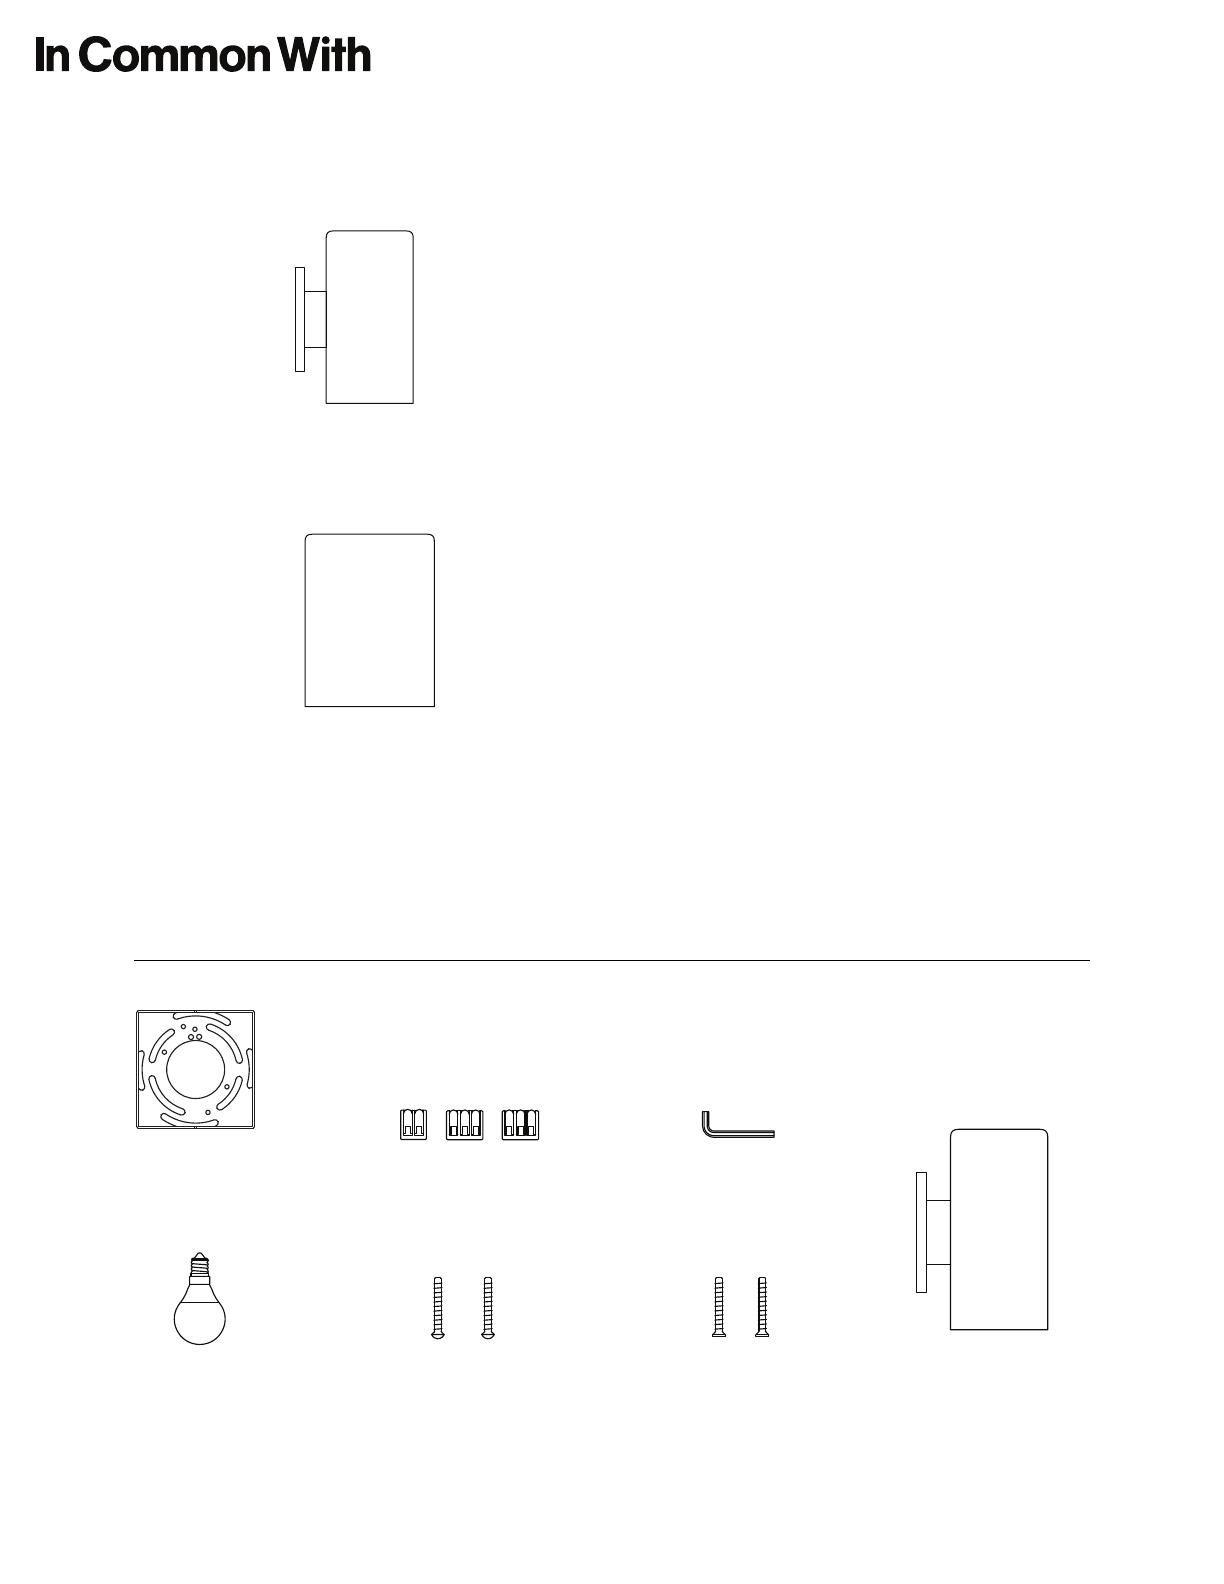
In Common With Luca Manuel utilisateur

Catégorie
Accessoires de moto
Taper
Manuel utilisateur
Part G
Luca Fixture
Part B
Wago Clips (x3)
Part A
Backplate
Part E
Mounting Screws (x2)
Part C
Hex Key
Part F
Canopy Set Screws (x2)
Part D
Bulb (x2)
Luca Wall Mount
Assembly Guide incommonwith.com1 of 3
Contents
How to Install Your New Light
Please check that you received all of the components pictured in
this guide. Reach out to us if anything is missing. It’s very rare, but it
happens. Don’t forget to turn o the electrical power source.
Tools you will need that aren’t included: standard wire stripper,
Phillips head screwdriver.
CAUTION
Electrical shock risk. Turn o electrical power at the main fuse box
or circuit panel before beginning installation, servicing the light,
or installing accessories. We recommend working with a qualified
electrician familiar with the type of work you’d like done.
ATTENTION
Risque de choc électrique. Coupez lalimentation électrique au
niveau de la boîte à fusibles principale ou du panneau de circuits
avant de commencer l’installation, lentretien de la lumière ou
l’installation daccessoires. Nous vous recommandons de travailler
avec un électricien qualifié familier avec le type de travail que vous
souhaitez eectuer.
Luca Wall Mount
Assembly Guide incommonwith.com2 of 3
Step 2: Mount the backplate (A) to the junction box using a phillips head
screwdriver to tighten the mounting screws (E).
!
Step 1: Turn o electrical power at the main fuse box or circuit panel
before beginning installation.
Step 3: Use the wago clips (B) to connect the fixture’s wires to the
corresponding wires from the junction box in the wall or ceiling. White
is neutral; Black is live; Green/ Yellow is ground. One ground wire will be
attached to the backplate (A), the other ground wire should come from the
junction box. If needed use a wire stripper to remove 3/8” of the insulation
from each wire before inserting them into the corresponding wago clip.
Step 4: Align the holes of the backplate with the holes of the canopy
cover attached to the fixture (G) and secure the set screws (F) by
tightening using the included L-shaped hex key (C).
A
E
A
B
G
F
C
Luca Wall Mount
Step 5: Gently screw in the included lightbulb (D) into the sockets of the
fixture (G).
Assembly Guide incommonwith.com3 of 3
G
D
  • Page 1 1
  • Page 2 2
  • Page 3 3

In Common With Luca Manuel utilisateur

Catégorie
Accessoires de moto
Taper
Manuel utilisateur

dans d''autres langues