La page est en cours de chargement...

FRANÇAIS
4. Configuration
Appuyez 10 secondes sur la touche MODE pour entrer dans
le mode configuration.
4.1 Sélection de l’affichage (cf. tableau 4.1)
Vous pouvez choisir l’affichage permanent de la température
ambiante ou de la température de consigne.
Pour modifier la sélection en cours, appuyez sur la touche +,
puis appuyez sur la touche MODE pour valider et passer au
réglage suivant.
4.2 Correction de la mesure de la température
ambiante (cf. tableau 4.2)
Vous pouvez modifier la mesure de la température jusqu’à +
ou - 5°C :
Appuyez sur les touches + ou - pour modifier par pas de
0,5°C, puis appuyez sur la touche MODE pour valider et pas-
ser au réglage suivant.
4.3 Verrouillage du clavier (cf. tableau 4.3)
Vous pouvez verrouiller le clavier (dans ce cas vous ne pour-
rez modifier ni la consigne ni le mode) ou le déverrouiller.
Pour modifier la sélection en cours, appuyez sur la touche +,
puis appuyez sur la touche MODE pour valider et passer au
réglage suivant.
Pour déverrouiller le clavier, entrez à nouveau dans le mode
configuration (appui 10 secondes sur la touche MODE).
4.4 Configuration de l’installation (cf. tableau 4.4)
Lorsqu’un autre émetteur est associé, vous devez configurer
le type d’installation sur votre thermostat.
Par défaut, il est configuré en thermostat simple.
Pour sélectionner le type d’installation, appuyez sur la touche
+ puis appuyez sur la touche MODE pour valider et sortir du
mode configuration.
ESPAÑOL
4. Configuración
Pulse 10 segundos la tecla MODE para entrar en modo
configuración.
Una vez en configuración cada pulsación breve sobre MODE
pasa al menú siguiente.
4.1 Selección de la visualización (tabla 4.1)
Puede elegir la visualización permanente de la temperatura
de ambiente o de la temperatura de consigna.
Para modificar la selección en curso, pulse la tecla + y pulse
la tecla MODE para validar y pasar al menú siguiente.
4.2 Corrección de la medida de temperatura de
ambiente (tabla 4.2)
Puede modificar la medida de temperatura en + o - 5°C :
Pulse las teclas + o - para modificar por pasos de 0,5°C, y
pulse la tecla MODE para validar y pasar al menú siguiente.
4.3 Bloqueo del teclado (tabla 4.3)
Puede bloquear el teclado, en este caso no se podrá modifi-
car la selección establecida.
Para bloquear el teclado, pulse la tecla +, pulse la tecla
MODE para validar y pasar al menú siguiente.
Para desbloquear el teclado, repetir la operación 4.3.
4.4 Configuración de la instalación (cf. tabla 4.4)
Cuando un emisor está asociado, debe configurar el tipo de
instalación en el termostato.
Por defecto, está configurado en termostato simple.
Para seleccionar otro tipo de instalación, pulse la tecla + y
pulse la tecla MODE para validar y salir del modo configuración.
En caso de una instalación con un programador+emisores
seleccionar 02
(cf. tabla 4.4)
. La asociación de los emisores se
hará previamente en el receptor del programador (ver manual
co-rrespondiente).
DEUTSCH
4. Konfiguration
Drücken Sie 10 Sek. lang die MODE-Taste, um auf
Konfiguration umzuschalten.
4.1 Auswahl der Anzeige (siehe 4.1)
Sie haben die Auswahl zwischen der ständigen Anzeige der
Raumtemperatur oder der Solltemperatur.
Wenn Sie die aktuelle Auswahl ändern möchten, drücken Sie
die + Taste und anschließend zur Bestätigung und zum
Aufrufen der nächsten Einstellung die MODE-Taste.
4.2 Korrektur der Raumtemperaturmessung (s.Tab. 4.2)
So ändern Sie die Temperaturmessung um bis zu + oder - 5°C:
Drücken Sie die Taste + oder - für eine Änderung in 0,5 °C-
Schritten und anschließend zur Bestätigung und zum
Aufrufen der nächsten Einstellung die MODE-Taste.
4.3 Sperren der Tastatur (s.Tab. 4.3)
Die Tastatur lässt sich auf Wunsch sperren. Bei gesperrter
Tastatur kann weder die Solltemperatur noch die Betriebsart
geändert werden.
Wenn Sie die aktuelle Auswahl ändern möchten, drücken Sie
die + Taste und anschließend zur Bestätigung und zum
Aufrufen der nächsten Einstellung die MODE-Taste.
Zur Freigabe der Tastatur rufen Sie erneut den
Konfigurationsmodus auf (10 Sek. lang die MODE-Taste
drücken).
4.4 Konfigurieren der Anlage (s.Tab. 4.4)
Bei Zuordnung eines weiteren Senders muss der Anlagentyp
am Thermostat konfiguriert werden.
Die Standardeinstellung lautet nur Thermostat.
Drücken Sie zur Auswahl des Anlagentyps die + Taste und
anschließend zur Bestätigung und zum Verlassen des
Konfigurationsmodus die MODE-Taste.
ENGLISH
4. Configuration
Press and hold the MODE button for 10 seconds to enter
configuration mode.
4.1 Selecting the display (see table 4.1)
You can select the permanent display of the room temperatu-
re or the set-point temperature.
To change the current selection, press the + button,
then press the MODE button to confirm and move on to the
next setting.
4.2 Correcting the room temperature measurement
(see table 4.2)
You can change the temperature measurement by up to + or -
5°C:
Press the + or - buttons to change by steps of 0.5°C, then
press the MODE button to confirm and move on to the next
setting.
4.3 Locking the keypad (see table 4.3)
You can lock the keypad, in which case you cannot change
the set-point or the mode.
To change the current selection, press the + button,
then press the MODE button to confirm and move on to the
next setting.
You can unlock the keypad by entering the configuration
mode again (pressing the MODE button for 10 seconds).
4.4 Configuring the installation (see table 4.4)
When another transmitter is associated, you must configure
the type of installation on your thermostat.
It is configured as a simple thermostat by default.
To select the installation type, press the + button then press
the MODE button to confirm and exit the configuration mode.
Caractéristiques - Características - Daten - Characteristics
Alimentation - Alimentación 2 piles
Alcalines
Versorgungsspannung - Power supply 1,5 V,LR03
Classe d’isolement - Clase de aislamiento
classe II
Schutzklasse - Insulation class
Régulation PI (Proportionnelle intégrale) - Regulación PI (Proporcional
integral) - Proportional-Integral (PI)-Regler -
Proportional integral regulation
Température de stockage - Temperatura de almacenaje
Lagertemperatur - Storage temperature -10°C ➔ +70°C
Température de fonctionnement - Temperatura de funcionamiento
Betriebstemperatur - Operating temperature 0°C ➔ 40°C
Dimensions - Dimensiones
80 x 80 x 23 mm
Abmessungen - Dimensions
Indice de protection - Índice de proteccíon
IP30
Schutzart - Protection index
Classement au feu - Clasificación al fuego Vo
Brandklasse - Fire rating
Pollution - Polucíon - Verschmutzung - Pollution Normal - Normale
Fréquence d’émission - Frecuencia de emisión 868 MHz
Sendefrequenz - Transmission frequency (Norm EN 300 220)
• Portée radio de 100 à 300 mètres en champ libre variable en fonction
des équipements associés (portée pouvant être altérée en fonction
des conditions d'installation et de l'environnement électromagnétique)
• Alcance radio de 100 a 300 metros en campo libre según los equi-
pos asociados (el alcance puede verse alterado en función de las
condiciones de la instalación y del entorno electromagnético)
• Funkreichweite von 100 bis 300 Metern im Freien (die Reichweite
kann je nach Installationsort und elektromagnetischen
Feldbedingungen variieren)
• Radio range 100 to 300 meters outside depending on the
associated equipment (the range can be altered depending on the
installation conditions and the electromagnetic environment)
Product compliant with directive R&TTE 1999/5/CE
4.1
4.2
4.3
4.4
Température ambiante OU
Temperatura de ambiente O
Raumtemperatur ODER
Room temperature OR
Réglage de la mesure de température de + ou - 5˚C
Ajuste de la medida de la temperatura de + o - 5˚C
Verstellung der Temperaturmessung um + oder - 5˚C
Temperature measurement adjustment of + or - 5˚C
Température de consigne (affichage par défaut)
Temperatura de consigna (visualización por defecto)
Solltemperatur (Standardanzeige)
Set-point temperature (default display)
Clavier verrouillé OU
Teclado bloqueado O
Tastatur gesperrt ODER
Keypad locked OR
Thermostat + Récepteur(s) OU
Termostato simple (1 o varios receptores) O
Thermostat + Empfänger ODER
Thermostat + receiver(s) OR
Thermostat + Récepteur(s) + programmateur OU
Termostato simple + programador O
Thermostat + Empfänger + Programmiergerät ODER
Thermostat + receiver(s) + programmer OR
Thermostat + Récepteur(s) + télécommande et/ou transmetteur domotique
Termostato simple + emisores (telemandos y/o transmisor telefónico domótico)
Thermostat + Empfänger + Fernbedienung und/oder haustechnischer Sender
Thermostat + receiver(s) + remote control and/or domotics transmitter
Clavier déverrouillé
Teclado desbloqueado
Tastatur freigegeben
Keypad unlocked
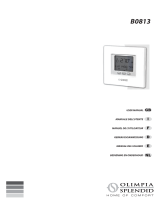
Radio Diana D10
Thermostat radio pour commande de chauffage
Termostato digital radio para calefacción
Funkthermostat zur Heizungssteuerung
Radio thermostat for heating control
France : DELTA DORE TALCO - Bonnemain - 35270 COMBOURG
España : Información :Tlf. : 93 699 65 53 / Fax.: 93 588 19 66 - Web : www.deltadore.es - E-mail : [email protected]
DELTA DORE ELECTRÓNICA, S.A - C/ AntoniBorja, 13 - Semi-sótano, local 1 y 2 - 08191 Rubí (Barcelona)
Deutschland : DELTA DORE Schlüter GmbH - Fichtenstraße 38 a - D - 76829 Landau - Telefon: 0049 7276 96690
-+
MODE
2701262 rev2

FRANÇAIS
1. Association
Pour associer le thermostat à un récepteur, procédez de la
façon suivante :
- sur le récepteur, appuyez sur la touche d’association jus-
qu’à ce que le voyant clignote (voir notice du récepteur),
- sur le thermostat en mode arrêt, appuyez sur la touche +
pendant 3 secondes,
le thermostat affiche CnF (1),
- appuyez de nouveau brièvement sur la touche +,
- sur le récepteur, vérifiez que le voyant ne clignote plus.
Le thermostat est associé au récepteur.
2. Utilisation
La touche MODE permet de sélectionner les différents
modes de fonctionnement du thermostat ((2)Confort
*
,
(3) Economie
*
, (4) Hors-gel , (5) AUTO, (6) Arrêt ).
Pendant les modes Confort , Economie ou Hors-gel ,
le thermostat affiche la température de consigne en cours
(pour modifier l’affichage, voir § 4.1).
Un appui bref sur les touches + ou - permet de connaître la
température ambiante, un second appui sur les touches + ou
- permet de modifier la consigne en cours par pas de 0,5°C.
L’affichage du picto indique que le thermostat est en
demande de chauffe.
*Dans le cas d’une installation avec un programmateur, la
sélection des modes Confort et Economie correspond
au réglage des consignes uniquement.
Mode Auto
Le thermostat n’affiche que la température ambiante, ce
mode permet aux autres émetteurs associés (télécomman-
des, programmateurs,...) de commander le chauffage, il n’est
accessible que s’il a été configuré (voir 4.4 configuration de
l’installation).
Dans une installation avec un programmateur, un appui sur
les touches + ou - du thermostat, permet de faire une déro-
gation réglable de 5°C à 30°C et d’une durée de 2 heures.
3. Remplacement des piles
Dès que le témoin d'usure des piles s'allume,
vous disposez d’un mois environ pour changer les piles.
Ne laissez pas les piles usées séjourner dans l'appareil
(la garantie ne couvre pas les dégradations dues à des piles
défectueuses).
ESPAÑOL
1. Asociación
Para asociar el termostato al receptor (se pueden asociar varios
receptores), siga los pasos siguientes :
- en el receptor, pulse la tecla asociación hasta que el testigo
luminoso parpadee (ver manual del receptor),
- en el termostato, en modo paro, pulse la tecla + durante 3
segundos,
el termostato indica CnF (1),
- pulse de nuevo brevemente la tecla +,
- en el receptor, verifique que el testigo ha dejado de parpadear.
El termostato está asociado al receptor.
Se pueden asociar varios emisores tipo programadores, teleman-
dos, transmisor telefónico... (ver el manual del aparato a asociar).
En este caso, es necesario configurar el tipo de instalación. (ver
§ 4.4 configuración de la instalación).
2. Utilización
El aparato se suministra preconfigurado con las temperaturas de
consigna de cada modo de funcionamiento indicadas
en los
esquemas ((2)Confort , (3) Economía , (4) Antihielo , (6)
Paro ) y con la visualización de
la temperatura de consigna,
excepto en (5) Auto que indicará siempre la temperatuta de
ambiente.
Utilización en termostato simple
Para seleccionar un modo, pulse sucesivamente la tecla MODE.
Para modificar la temperatura de consigna de un modo, manten-
ga pulsadas las teclas + o -. Modificación por pasos de 0,5ºC.
Para visualizar la temperatura de ambiente (o de consigna según
configuración) pulse brevemente las teclas + o -.
Para modificar la visualización de la pantalla entre en modo confi-
guración ver § 4.1.
La visualización del picto indica que el termostato está acti-
vando la calefacción.
Utilización con emisores asociados
Sitúe el termostato en modo Auto.
Este modo permite a los emisores asociados (telemandos, pro-
gramadores,...) actuar sobre la calefacción.
En el caso de una instalación con programación centralizada
La selección de los modos Confort y Economía en el ter-
mostato no actúa en la instalación.
En modo Auto, directamente en el termostato se puede hacer una
derogación ajustable de 5°C a 30°C de una duración de 2 horas,
mediante una pulsación en las teclas + o - del termostato.
Si la derogación se realiza a través de un emisor, esta durará
hasta el próximo cambio de programación.
3. Cambio de las pilas
Cuando el testigo de pilas usadas se enciende, tiene aproxima-
damente 1 mes para sustituirlas.
No deje las pilas usadas en el aparato (la garantía no cubre las
degradaciones debidas a pilas defectuosas).
DEUTSCH
1. Zuordnung
So weisen Sie den Thermostat einem Empfänger zu:
- Drücken Sie so lange auf die Zuordnungstaste des
Empfängers, bis die Kontrollampe blinkt (siehe
Bedienungsanleitung des Empfängers).
- Drücken Sie bei Betriebsart Aus 3 Sek. lang die + Taste am
Thermostat. Am Thermostat wird CnF (1) angezeigt.
- Drücken Sie erneut kurz die + Taste.
- Vergewissern Sie sich, dass die Kontrollampe am
Empfänger nicht mehr blinkt.
Der Thermostat ist dem Empfänger zugeordnet.
2. Einsatz
Mit der MODE-Taste können Sie zwischen den Betriebsarten
des Thermostats wählen ((2) Komfort *, (3) Sparbetrieb *,
(4) Frostschutz , (5) AUTOMATIK, (6) Aus ).
Bei Komfort , Spar und Frostschutzbetrieb zeigt der
Thermostat jeweils die aktuelle Solltemperatur an (Umstellen
der Anzeige siehe 4.1).
Bei kurzem Tastendruck auf + oder - wird die
Raumtemperatur angezeigt, mit jedem weiteren Tastendruck
auf + oder - wird die aktuelle Solltemperatur in 0,5 °C-
Schritten geändert.
Das Symbol auf der Anzeige weist auf eine
Wärmeanforderung des Thermostats hin.
*Bei einer Anlage mit Programmiergerät wird bei Anwahl des
Komfort und des Sparbetriebs ausschließlich die
Solltemperatur eingestellt.
Automatik
Im Automatikbetrieb zeigt der Thermostat nur die
Raumtemperatur an, die Heizungssteuerung erfolgt über die
anderen zugeordneten Sender (Fernbedienungen,
Programmiergeräte o. ä.). Der Automatikbetrieb steht nur bei
entsprechender Konfiguration zur Verfügung (siehe 4.4
Konfigurieren der Anlage).
Bei einer Anlage mit Programmiergerät kann durch
Tastendruck auf + oder - am Thermostat eine von 5 bis
30°C variierbare Übersteuerung für 2 Stunden eingestellt
werden.
3. Batterien ersetzen
Wenn die Batterieanzeige leuchtet, haben Sie bis zum
Batteriewechsel noch etwa einen Monat Zeit.
Lassen Sie keine leeren Batterien im Gerät.
Durch defekte Batterien verursachte Schäden sind von der
Garantie ausgeschlossen.
ENGLISH
1. Association
Follow the steps below to associate the thermostat with a
receiver:
- on the receiver, press the configuration button until the LED
flashes (see the receiver guide),
- on the thermostat in shutdown mode, press the + button for
3 seconds.The thermostat displays CnF (1)
- briefly press the + button again,
- check that the LED is no longer flashing on the receiver.
The thermostat is associated with the receiver.
2. Use
The MODE button is used to select the different operating
modes of the thermostat ((2)Comfort *, (3) Economy *,
(4) Frost protection , (5) AUTO, (6) Shutdown ).
During the Comfort , Economy or Frost protection
modes, the thermostat displays the current set-point tempe-
rature (to change the display, see § 4.1).
Briefly pressing the + or - buttons will give you the room tem-
perature, and pressing the + or - buttons a second time ena-
bles the set-point temperature to be changed by steps of
0.5°C.
If the pictogram is displayed, this means that the
thermostat is in heating demand mode.
*For an installation with a programmer, selecting the Comfort
and Economy modes corresponds to adjusting the set-
point settings only.
Auto Mode
The thermostat only displays the room temperature, this
mode enables the other associated transmitters (remote
controls, programmers, etc.) to control the heating. It is only
accessible if it has been configured (see 4.4 configuring the
installation).
In an installation with a programmer, pressing the + or - but-
tons of the thermostat will obtain an adjustable override of
5°C to 30°C and a duration of 2 hours.
3. Replacing batteries
As soon as the battery level indicator is lit,
you have approximately one month to change the batteries.
Never leave used batteries in the unit
(the warranty does not cover damage due to faulty batteries).
12
-
+
MO
DE
4
3
+
+
1,50 m
Mini 20 cm
Installation / instalaciòn / Installations / Installation
Confort, Confort,
Komfort, Comfort
Economie, Economía,
Sparbetrieb, Economy
réglable de 5 à 30˚C
ajustable de 5 a 30˚C
einstellbar von 5 bis 30˚C
adjustable from 5 to 30˚C
réglable de 5 à 30˚C
ajustable de 5 a 30˚C
einstellbar von 5 bis 30˚C
adjustable from 5 to 30˚C
Hors-gel, Antihielo,
Frostschutz, Frost Protection
Automatique, Automático,
Automatik, Automatic
Arrêt, Paro,
Aus, Shutdown
réglable de 5 à 15˚C
ajustable de 5 a 15˚C
einstellbar von 5 bis 15˚C
adjustable from 5 to 15˚C
(1)
(2)
(3)
(4)
(5)
(6)
/