Roland SYSTEM-1 Le manuel du propriétaire
- Catégorie
- Pianos numériques
- Taper
- Le manuel du propriétaire

English
Owner’s Manual
About Plug-In/Plug-Out
When you turn on the [SYSTEM-1] button, this unit operates as a
SYSTEM-1 synthesizer. When you turn on the [PLUG-OUT] button, this
unit operates as a “plug-out” synthesizer.
What is “plug-out”?
• A separately sold plug-out compatible software synthesizer can be
downloaded to this unit, allowing you to play this unit by itself.
• The plug-out compatible software synthesizer can also be used as a plug-in synthesizer on your computer.
• For details on dedicated plug-out software synthesizers and how to obtain them, and
on the operating requirements, refer to the Roland website.
& http://roland.cm/system1
Synchronizing/Recording with Other Devices
The SYSTEM-1 can receive MIDI Clock (F8) data to synchronize its tempo.
Synchronizing with a TR-8
You can synchronize the SYSTEM-1 with a TR-8 by using a commercially
available MIDI cable to make connections.
Synchronizing/recording with your computer DAW via
USB
If you use a commercially available USB 2.0 cable to connect the
SYSTEM-1 to your computer, you can synchronize the SYSTEM-1 with your
DAW via USB MIDI, or record the sound of the SYSTEM-1 onto tracks of
your DAW via USB audio.
TR-8 (master) SYSTEM-1
(slave)
MIDI OUT MIDI IN
Various Settings
Restoring the Factory Settings ( Factory Reset)
Here’s how to return the SYSTEM-1 to its factory-set state.
1. While holding down the [MANUAL] button, turn on the power.
The [ARPEGGIO] button blinks.
If you decide to cancel the factory reset, turn o the power.
2. Press the [ARPEGGIO] button to execute the factory reset.
3. When all buttons lit, turn the SYSTEM-1’s power o , then on again.
MIDI and Other Settings
1. While holding down the [SYSTEM-1] button, turn on the power.
The [ARPEGGIO] button blinks.
If you decide not to make settings, turn o the power.
2. Use the [1]–[3] buttons and the SCATTER [TYPE] dial to change the settings.
Parameter Controller Explanation
MIDI
channel
[TYPE] dial
Unlit (OFF)
Speci es the MIDI transmit/receive channel. The SCATTER LEDs
(1–10) indicate the channel. (default: 1)
• All unlit (OFF) when turned to the far left
• All lit (OMNI) when turned to the far right
• For 11–16, LEDs 10 and 1–6 are lit simultaneously.
1–16
All lit (OMNI)
MIDI messages of all channels are received.
The MIDI transmit channel will be 1.
MIDI Clock
Source
[1] button
Lit (AUTO)
If MIDI clock is being input to the MIDI IN connector or the USB port,
the SYSTEM-1’s tempo will automatically synchronize to MIDI clock.
(default)
* If MIDI clock is being simultaneously input from the MIDI IN
connector and from the USB port, the USB port takes priority.
Unlit
(INTERNAL)
The SYSTEM-1 operates at the tempo speci ed on the unit itself.
Choose the “INTERNAL” setting if you don’t want to synchronize to
an external device.
MIDI Thru [2] button
Lit (ON)
Speci es whether data received from the MIDI IN connector will be
retransmitted from the MIDI OUT connector (ON: default) or will not
be retransmitted (OFF).
Unlit (OFF)
BOOST
mode
[3] button
Lit (ON)
Boosts the output level of the OUT jacks.
Unlit (OFF)
LED DEMO
Hold down [MOD] and
turn the [TYPE] dial
Speci es the time (minute) until the LED DEMO is shown. If this is
unlit, the LED DEMO is not shown.
3. Press the [ARPEGGIO] button to save the settings.
The settings are saved, and the SYSTEM-1 restarts.
Main Speci cations Roland SYSTEM-1: PLUG-OUT SYNTHESIZER
Maximum Polyphony 4 voices (SYSTEM-1 Mode)
Power Supply AC adaptor
Current Draw 850 mA
Dimensions 472 (W) x 283 (D) x 70 (H) mm 18-5/8 (W) x 11-3/16 (D) x 2-13/16 (H) inches
Weight 2.4 kg (excluding AC adaptor) 5 lbs 5 oz
Accessories AC adaptor, Owner’s Manual, Lea et “USING THE UNIT SAFELY”
Options (sold
separately)
Pedal switch: DP Series, Footswitch: BOSS FS-5U,
Expression pedal: EV-5
* In the interest of product improvement, the speci cations and/or appearance of this unit are subject to
change without prior notice.
Before using this unit, carefully read the lea et “USING THE UNIT SAFELY.” The lea et provides important information concerning the
proper operation of the unit. Additionally, in order to feel assured that you have gained a good grasp of every feature of your new
unit, read Owner’s Manual in its entirety. This manual should be saved and kept on hand as a convenient reference.
Copyright © 2014 ROLAND CORPORATION
All rights reserved. No part of this publication may be reproduced in any form without the written permission of ROLAND
CORPORATION.
4
MIXER
Here you can adjust the volume of OSC 1, OSC 2, the sub-oscillator (an oscillator that produces a sound one or
two octaves lower), and noise.
Controller Explanation
[OSC 1] knob Adjusts the volume of the OSC 1.
[OSC 2] knob Adjusts the volume of the OSC 2.
[SUB OSC] knob Adjusts the volume of the sub oscillator.
[OSC TYPE] button
Selects the type of the sub oscillator.
Lit: Sound one octave below, Unlit: Sound two octaves below
[NOISE] knob Adjusts the volume of the noise.
[NOISE TYPE]
button
Selects the type of the noise.
Lit: white noise, Unlit: pink noise
5
PITCH
Here you can create time-varying change (envelope) for pitch.
Controller Explanation
[ENV] knob
If this knob is turned toward the right, the pitch initially becomes higher and then returns
to the pitch of the key you pressed.
If this knob is turned toward the left, the pitch initially becomes lower and then returns to
the pitch of the key you pressed.
[A] slider
These sliders operate similarly to the [A][D] sliders of the
7
AMP section (they a ect the
pitch rather than the volume).
[D] slider
6
FILTER
These settings determine the brightness and thickness of the sound. Here you can also specify the time-varying
change (envelope) for the lter.
Controller Explanation
[LPF CUTOFF] knob
Speci es the cuto frequency of the low-pass lter. Frequency components above the
cuto frequency are cut, making the sound mellower.
[LPF TYPE] button
Selects the slope (steepness) of the low-pass
lter.
Lit: -12 dB, Unlit: -24 dB
[HPF CUTOFF]
knob
Speci es the cuto frequency of the high-pass lter. Frequency components below the
cuto frequency are cut.
[RESO] knob
Resonance boosts the sound in the region of the lter’s cuto frequency.
Higher settings produce stronger emphasis, creating a distinctively “synthesizer-like”
sound.
[ENV] knob
This knob speci es the depth and direction of the cuto frequency change produced by
the [A], [D], [S], and [R] sliders.
If the knob is turned toward the right, the cuto frequency moves in the upward direction.
If the knob is turned toward the left, the cuto frequency moves in the downward
direction.
[KEY] knob
Allows the lter cuto frequency to vary according to the key that you play.
If the knob is turned toward the right, the cuto frequency becomes higher as you play
higher notes.
If the knob is turned toward the left, the cuto frequency becomes lower as you play
lower notes.
[A] slider
These sliders operate similarly to the [A][D][S][R] sliders of the
7
AMP section (they a ect
the cuto frequency rather than the volume).
[D] slider
[S] slider
[R] slider
7
AMP
Here you can create time-varying change (envelope) for the volume.
Controller Explanation
[TONE] knob Adjusts the brightness of the sound.
[CRUSHER] knob Modi es the tonal character by distorting the waveform.
[A] slider
(Attack time)
Speci es the time from the moment you press the key
until the maximum volume is reached.
[D] slider
(Decay time)
Speci es the time from when the maximum volume is
reached, until it decays to the sustain level.
[S] slider
(Sustain level)
Speci es the volume level that will be maintained
from when the attack and decay times have elapsed
until you release the key.
[R] slider
(Release time)
Speci es the time from when you release the key until
the volume reaches its minimum value.
8
EFFECTS
Here you can adjust the amount of reverb and delay.
Controller Explanation
[REVERB] knob Adds reverberation.
[DELAY] knob Adjusts the volume of delay sound.
[TIME] knob Adjusts the delay time (the time by which the sound is delayed).
9
PITCH BEND/SCATTER
“Pitch bend” modi es the pitch.
What is Scatter?
This is a function that applies various changes to the arpeggio performance, creating musical grooves.
Controller Explanation
[ARPEGGIO] button
Causes an arpeggio to be produced when you simply hold down a chord on the
keyboard. (This function is called the “arpeggiator.”)
[ARP TYPE] knob Selects the arpeggio variation.
[ARP STEP] knob Speci es the note value for each step of the arpeggiator.
[PITCH BEND/
SCATTER] jog
shuttle
The jog shuttle normally operates as pitch bend.
If the [ARPEGGIO] button is turned on, the jog shuttle adjusts the scatter depth.
* Scatter is on while you operate the jog shuttle. When you return the jog shuttle to the
center, scatter turns o .
[TYPE] dial Selects the scatter type (1–10).
[KEY HOLD] button You can make notes continue sounding even after you take your hand o the keyboard.
Panel Descriptions
2 3 4 5 6 7 81
9 10
1
Common section
Here you can make the following settings for the SYSTEM-1.
Controller Explanation
[VOLUME] knob Adjusts the volume.
[PORTAMENTO]
knob
Creates a smooth change in pitch between one key and the next key played. The knob
adjusts the time required for the pitch change.
[LEGATO] button
Applies portamento only when you play legato (i.e., when you press the next key before
releasing the previous key).
[TEMPO] knob Sets the tempo of the arpeggiator (scatter). The LED blinks at the tempo you speci ed.
[TEMPO SYNC]
button
Synchronizes the RATE of the
2
LFO section and the delay time (TIME) of the
8
EFFECTS
section to the tempo.
[LFO KEY TRIG]
button
Speci es whether the LFO cycle will be synchronized to begin when the key is pressed
(ON) or not (OFF).
[MONO] button
If this is on (lit), the synth will play monophonically (single notes).
If this is blinking, the synth will play all sounds in unison (UNISON mode).
MODEL
[SYSTEM-1]/
[PLUG-OUT]
button
If the [SYSTEM-1] button is on, this unit will operate as a SYSTEM-1 synthesizer. If the
[PLUG-OUT] button is on, this unit will operate in “plug-out” mode.
&Refer to “About Plug-In/Plug-Out”
[MANUAL] button Causes sound to be produced according to the current settings of the knobs and sliders.
Memory[1]–[8]
button
Use these buttons to store/recall eight sets of panel settings (knobs/sliders).
To store panel settings in a memory button
Long-press a memory [1]–[8] button.
To recall settings (a sound) from a memory button
Press a memory [1]–[8] button.
2
LFO
Here you can create cyclic change (modulation) in the sound by applying vibrato (pitch modulation) or tremolo
(volume modulation).
Controller Explanation
Wave knob
Selects the LFO waveform.
R (Sine wave), S (Triangle wave), T (Sawtooth wave), U (Square wave), W (Sample
and Hold), RND (Random wave)
[FADE TIME] knob
Speci es the time from when the tone sounds until the LFO
reaches its maximum amplitude.
[RATE] knob Determines the speed of the LFO.
[PITCH] knob Allows the LFO to modulate the pitch, producing a vibrato e ect.
[FILTER] knob Allows the LFO to modulate the FILTER CUTOFF (cuto frequency),
[AMP] knob Allows the LFO to modulate the AMP LEVEL (volume), producing a tremolo e ect.
3
OSC 1/OSC 2
Here you can select the waveform that determines the character of the sound, and specify its pitch.
The SYSTEM-1 has two oscillators (OSC 1 and OSC 2).
Controller Explanation
Wave knob
Selects the waveform that is the basis of the sound.
T (Sawtooth wave), U (Square wave), S (Triangle wave),
(Sawtooth wave 2),
(Square wave 2), (Triangle wave 2)
[COLOR] knob The result depends on the waveform.
[MOD] knob
Selects the source that modulates the [COLOR] knob.
MAN
The sound is determined by the position of the [COLOR] knob. It will not vary over
time.
LFO
The sound varies over time at the rate speci ed in the
2
LFO section.
P. ENV
The sound changes over time according to the envelope of the
5
PITCH section.
F. ENV
The sound changes over time according to the envelope of the
6
FILTER section.
A. ENV
The sound changes over time according to the envelope of the
7
AMP section.
S. OSC The sound changes over time according to the frequency of the sub-oscillator.
Octave (feet) knob Speci es the octave of the oscillator.
[CROSS MOD]
knob
Modi es the OSC 1 frequency according to the OSC 2 waveform. Turning the knob toward
the right makes OSC 1 become a more complex sound, allowing you to create metallic
sounds or sound e ects.
[TUNE] knob
Adjusts the pitch of the oscillator.
Coarse Tune
Adjusts the pitch in semitone steps.
By holding down the [RING][SYNC] buttons simultaneously and turning the SCATTER
[TYPE] dial, you can adjust the Coarse Tune.
The SCATTER LEDs (1–10) indicate the amount of Coarse Tune (OFF (unlit), -11–+11). (LEDs
10 and 1 light simultaneously to indicate 11.)
[RING] button
This is a ring modulator. It generates a complex waveform
by multiplying OSC 1 and OSC 2.
[SYNC] button
This is oscillator sync. It generates a complex waveform
by forcibly resetting OSC 2 to the beginning of its cycle in
synchronization with the OSC 1 frequency.
Controller Explanation
OCTAVE [DOWN]
[UP] button
Octave shift
You can shift the keyboard’s pitch range in steps of one octave. The button is lit for the
one octave setting; the button is blinking for the 2–3 octave setting. If you press the
[DOWN] [UP] buttons simultaneously, the keyboard will return to its normal pitch range.
Key transpose
By holding down the [DOWN][UP] buttons simultaneously and turning the SCATTER
[TYPE] dial, you can transpose the keyboard in semitone steps (only upward).
• The SCATTER LEDs (1–10) indicate the amount of transposition (1–11). (LEDs 10 and 1
light simultaneously to indicate 11.)
• All unlit (OFF) when turned to the far left
[MOD] button
Vibrato (modulation) is applied to the sound while you hold down the [MOD] button. By
holding down the [MOD] button and operating the
2
LFO section, you can adjust the
MOD depth.
10
Keyboard
This is a standard-size keyboard.
It is not touch-sensitive (the velocity is xed).
Connecting Your Equipment
* To prevent malfunction and equipment failure, always turn down the volume, and turn o all the units
before making any connections.
A B C E F GD
H
A
DC IN jack
Connect the included AC adaptor here. Use only the included AC adaptor.
* To prevent the inadvertent disruption of power to your unit (should the plug be pulled
out accidentally), and to avoid applying undue stress to the DC IN jack, anchor the power
cord using the cord hook, as shown in the illustration.
B
USB ( ) port
Use a commercially available USB 2.0 cable to connect this port to your computer. It can be used to transfer
USB MIDI and USB audio data. You must install the USB driver before connecting the SYSTEM-1 to your
computer. Download the USB driver from the Roland website. For details, refer to Readme.htm which is
included in the download.
& http://www.roland.com/support/
C
MIDI connectors
For connecting MIDI device.
D
Security slot (
)
& http://www.kensington.com/
E
PEDAL jacks
If you connect a pedal switch (DP series, BOSS FS-5U; sold separately) to the HOLD jack, the notes will be
sustained as long as you continue holding down the pedal even after you take your hands o the keyboard.
If you connect an expression pedal (EV-5; sold separately) to the CONTROL jack, you’ll be able to use the
expression pedal to control the volume and add expression to your performance.
* Use only the speci ed expression pedal (EV-5; sold separately). By connecting any other expression pedals,
you risk causing malfunction and/or damage to the unit.
F
OUT jacks
Connect these jacks to your amp or monitor speakers. If your system is monaural, use only the L/MONO jack.
G
PHONES jack
Connect headphones (sold separately) here.
Turning the Power On/O
H
[POWER] switch
This turns the power on/o .
* After you’ve made connections correctly, be sure to turn on the power in the order of the SYSTEM-1 rst,
and then the connected system. Powering-on in the incorrect order may cause malfunctions or damage.
When turning the power o , power-o the connected system rst, and then the SYSTEM-1.
* This unit is equipped with a protection circuit. A brief interval (a few seconds) after turning the unit on is
required before it will operate normally.
* Before turning the unit on/o , always be sure to turn the volume down. Even with the volume turned down,
you might hear some sound when switching the unit on/o . However, this is normal and does not indicate
a malfunction.
Deutsch
Bedienungsanleitung
Das Plug-In/Plug-Out-System
Wenn Sie den [SYSTEM-1]-Taster drücken, arbeitet das Instrument
als SYSTEM-1 Synthesizer. Wenn Sie den [PLUG-OUT]-Taster drücken,
arbeitet das Instrument als “Plug-Out”-Synthesizer.
Was ist “Plug-Out”?
• Ein separat erhältlicher Plug-out-kompatibler Software-Synthesizer
kann per Download in das SYSTEM-1 geladen werden und mit dem SYSTEM-1 gespielt werden.
• Der Plug-out-kompatible Software-Synthesizer kann auch als Plug-in-Synthesizer in einem Rechner
verwendet werden.
• Weitere Informationen zu Plug-out Software-Synthesizern, deren Verfügbarkeit und
Anforderungen an das Betriebssystem eines Rechners nden Sie auf folgender Roland-
Internetseite:
& http://roland.cm/system1
Synchronisation und Aufnahme mit anderen Geräten
Das SYSTEM-1 kann über empfangene MIDI Clock-Daten (F8) zum Tempo eines externen MIDI-Gerätes
synchronisiert werden.
Synchronisieren mit einer TR-8
Sie können das SYSTEM-1 über MIDI mit einer TR-8 synchronisieren.
Synchronisieren zu bzw. Aufnahme mit einer DAW-
Software über USB
Sie können das SYSTEM-1 mithilfe eines USB 2.0-kompatiblen USB-Kabels
mit einer auf einem Rechner installierten DAW-Software über USB MIDI
synchronisieren bzw. die Sounds des SYSTEM-1 über die USB Audio-
Verbindung als Audiospuren innerhalb der DAW-Software aufzeichnen.
TR-8 (Master) SYSTEM-1
(Slave)
MIDI OUT MIDI IN
Verschiedene Einstellungen
Abrufen der Werksvoreinstellungen ( Factory Reset)
Sie können die Einstellungen des SYSTEM-1 wie folgt auf die Werksvoreinstellungen zurück setzen.
1. Halten Sie den [MANUAL]-Taster gedrückt, und schalten Sie das Instrument ein.
Der [ARPEGGIO]-Taster blinkt.
Wenn Sie den Vorgang abbrechen möchten, schalten Sie das Instrument wieder aus.
2. Drücken Sie den [ARPEGGIO]-Taster, um den Vorgang auszuführen.
3. Wenn alle Taster-Anzeigen leuchten, schalten Sie das SYSTEM-1 aus und nach kurzer Zeit wieder ein.
MIDI und weitere Einstellungen
1. Halten Sie den [SYSTEM-1]-Taster gedrückt, und schalten Sie das Instrument ein.
Der [ARPEGGIO]-Taster blinkt.
Wenn Sie den Vorgang abbrechen möchten, schalten Sie das Instrument wieder aus.
2. Verändern Sie die Einstellungen mithilfe der [1]–[3]-Taster und des SCATTER [TYPE]-Reglers.
Parameter Controller Beschreibung
MIDI-
Kanal
[TYPE]-
Regler
erloschen
(OFF)
Bestimmt den MIDI-Sende- und Empfangskanal. Die SCATTER-LEDs
(1–10) bezeichnen den aktuell gewählten Kanal (Voreinstellung: 1).
• Alle erloschen: Der Regler ist ganz nach links gedreht.
• Alle leuchten (OMNI): Der Regler ist ganz nach rechts gedreht.
• Für die Kanäle 11–16 leuchten die LEDs 10 sowie “1” – “6”
gleichzeitig.
1–16
Alle LEDs
leuchten
(OMNI)
Es werden MIDI-Meldungen auf allen 16 Kanälen empfangen.
Der MIDI-Sendekanal ist auf “1” eingestellt.
MIDI Clock
Source
[1]-Taster
leuchtet
(AUTO)
Wenn über den MIDI IN- bzw. USB-Anschluss MIDI Clock-Daten
empfangen werden, wird das Tempo des SYSTEM-1 automatisch zur
externen MIDI Clock synchronisiert (Voreinstellung).
* Wenn über beide Anschlüsse (MIDI IN und USB) MIDI Clock-
Daten empfangen werden, erhält der USB-Anschluss Priorität.
aus
(INTERNAL)
Das SYSTEM-1 verwendet sein internes Tempo. Eine Synchronisation
zu externen MIDI-Geräten ist in diesem Fall nicht möglich.
MIDI Thru [2]-Taster
leuchtet (ON)
Bestimmt, ob die über den MIDI IN-Anschluss empfangenen Daten
unverändert über den MIDI OUT-Anschluss weiter geleitet werden
(ON: Voreinstellung) oder nicht (OFF).
aus (OFF)
BOOST
Mode
[3]-Taster
leuchtet (ON)
Bei ON: Verstärkt den Pegel des über die OUT-Buchsen
ausgegebenen Signals.
aus (OFF)
LED DEMO
Halten Sie den [MOD]-
Taster gedrückt, und
drehen Sie den [TYPE]-
Regler.
Bestimmt die Zeit (in Minuten), bis die LED DEMO angezeigt wird.
Wenn die Anzeige erloschen ist, wird keine LED DEMO gezeigt.
3. Drücken Sie den [ARPEGGIO]-Taster, um die Einstellungen zu sichern.
Nach Abschluss des Speichervorgangs wird das SYSTEM-1 neu gestartet.
Technische Daten Roland SYSTEM-1: PLUG-OUT SYNTHESIZER
Maximale Polyphonie 4 Stimmen (SYSTEM-1 Mode)
Stromversorgung AC-Adapter
Stromverbrauch 850 mA
Abmessungen 472 (W) x 283 (D) x 70 (H) mm
Gewicht ca. 2.4 kg (ohne AC-Adapter)
Beigefügtes Zubehör AC-Adapter, Bedienungsanleitung, Infoblatt “USING THE UNIT SAFELY”
Zusätzliches Zubehör Fußpedale: DP-Serie, Fußtaster BOSS FS-5U, Expression-Pedal: EV-5
* Änderungen der technischen Daten und des Designs bleiben vorbehalten und bedürfen keiner besonderen
Ankündigung. Für Druckfehler wird keine Haftung übernommen.
Lesen Sie zuerst die Hinweise im Informationsblatt “USING THE UNIT SAFELY”. Hier nden Sie wichtige Sicherheits-Informationen für
den Betrieb des Gerätes. Lesen Sie dann diese Anleitung ganz durch, um sich mit allen Funktionen des Gerätes vertraut zu machen.
Bewahren Sie die Anleitung zu Referenzzwecken auf.
Copyright © 2014 ROLAND CORPORATION
Alle Rechte vorbehalten, Vervielfältigung, als Druck oder Datei, als Ganzes oder in Teilen, bedarf eine schriftlichen Genehmigung
der ROLAND CORPORATION.
4
MIXER
Hier können Sie die Lautstärken von OSC 1, OSC 2, dem Sub-Oszillator (ein Sound mit 1 oder 2 Oktaven tiefer)
einstellen und einen Rausche ekt (noise) hinzufügen.
Controller Beschreibung
[OSC 1]-Regler Bestimmt die Lautstärke des OSC 1.
[OSC 2]-Regler Bestimmt die Lautstärke des OSC 2.
[SUB OSC]-Regler Bestimmt die Lautstärke des Sub-Oszillators.
[OSC TYPE]-Taster
Bestimmt den Typ des Sub-Oszillators.
Leuchtet: Sound eine Oktave tiefer, erloschen: Sound zwei Oktaven tiefer
[NOISE]-Regler Bestimmt die Lautstärke des Rausch-E ektes.
[NOISE TYPE]-
Taster
Bestimmt den Typ des Rausch-E ektes.
Leuchtet: weißes Rauschen, erloschen: rosa Rauschen
5
PITCH
Hier können Sie die Hüllkurve für die Änderung der Tonhöhe einstellen.
Controller Beschreibung
[ENV]-Regler
Wenn der Regler nach rechts gedreht ist, ist die Tonhöhe am Anfang höher als normal und
wird dann auf die Tonhöhe der gespielten Note erniedrigt.
Wenn der Regler nach links gedreht ist, ist die Tonhöhe am Anfang tiefer als normal wird
dann auf die Tonhöhe der gespielten Note erhöht.
[A]-Regler
Diese Regler entsprechen in ihrer Funktionsweise den [A][D]-Reglern der
7
AMP-Sektion,
bein ussen aber die Tonhöhe (und nicht die Lautstärke).
[D]-Regler
6
FILTER
Hier können Sie die Filter-Frequenz, die Resonanz sowie die Hüllkurve für die Änderung der Filter-Frequenz
einstellen.
Controller Beschreibung
[LPF CUTOFF]-
Regler
Bestimmt die Cuto -Frequenz des Low-Pass Filters. Die Frequenzen oberhalb der
eingestellten Frequenz werden ge ltert, und der Sound klingt entsprechend gedämpft.
[LPF TYPE]-Taster
Bestimmt die Flankensteilheit des Low-Pass
Filters.
leuchtet: -12 dB, erloschen: -24 dB
[HPF CUTOFF]-
Regler
Bestimmt die Cuto -Frequenz des High-Pass Filters. Die Frequenzen unterhalb der
eingestellten Frequenz werden ge ltert, und der Sound klingt entsprechend mit weniger
Mitten und Bässen.
[RESO]-Regler
Bestimmt den Grad der Überbetonung der Frequenzen im direkten Umfeld der Cuto -
Frequenz. Je höher der Wert, desto stärker ist der Resonanz-E ekt.
[ENV]-Regler
Bestimmt die Stärke und Richtung der Änderung der Cuto -Frequenz auf Grundlage der
Einstellungen der [A] [D] [S] [R]-Regler.
Wenn der Regler nach rechts gedreht ist, wird die Cuto -Frequenz nach oben gelenkt.
Wenn der Regler nach links gedreht ist, wird die Cuto -Frequenz nach unten gelenkt.
[KEY]-Regler
Bestimmt die Einstellung der Filter-Frequenz abhängig von der gespielten Note.
Wenn der Regler nach rechts gedreht ist, erklingen höher gespielte Note entsprechend
brillanter.
Wenn der Regler nach links gedreht ist, erklingen tiefer gespielte Note entsprechend
gedämpfter.
[A]-Regler
Diese Regler entsprechen in ihrer Funktionsweise den [A][D][S][R]-Reglern der
7
AMP-
Sektion, bein ussen aber die Cuto -Frequenz (und nicht die Lautstärke).
[D]-Regler
[S]-Regler
[R]-Regler
7
AMP
Hier können Sie u.a. die Hüllkurve für die Änderung der Lautstärke einstellen.
Controller Beschreibung
[TONE]-Regler Bestimmt die Helligkeit des Sounds.
[CRUSHER]-Regler Verändert den Klangcharakter durch Verzerren der Wellenform.
[A]-Regler
(Attack-Zeit)
Bestimmt die Zeit von “der Sound wird gespielt” bis
“die maximale Lautstärke ist erreicht”.
[D]-Regler
(Decay-Zeit)
Bestimmt die Zeit von “maximalem Lautstärkepegel”
bis “der Sustainpegel ist erreicht”.
[S]-Regler
(Sustainpegel)
Bestimmt den konstanten Lautstärkepegel nach
Durchlaufen der Attack- und Decay-Phasen.
[R]-Regler
(Release-Zeit)
Bestimmt die Zeit von “Loslassen der Taste” bis “die
Lautstärke ist auf Minimum abgesunken”.
8
EFFECTS
Hier können Sie Einstellungen für das Reverb und Delay vornehmen.
Controller Beschreibung
[REVERB]-Regler Bestimmt die Lautstärke des Hall-E ektes.
[DELAY]-Regler Bestimmt die Lautstärke des Delay-E ektes.
[TIME]-Regler Bestimmt die Delayzeit (zeitlicher Abstand der wiederholten Echosignale).
9
PITCH BEND/SCATTER
Mit “Pitch Bend” wird die Tonhöhe verändert.
Was ist Scatter?
Die Scatter-Funktion beein usst die Rhythmik des Arpeggio-Musters und erstellt daraus neue Grooves.
Controller Beschreibung
[ARPEGGIO]-Taster
Ermöglicht das Erzeugen eines Arpeggio-Musters durch Spielen eines Akkordes auf der
Tastatur.
[ARP TYPE]-Regler Bestimmt die Variation für das Arpeggio.
[ARP STEP]-Regler Bestimmt den Notenwert für die einzelnen Schritte des Arpeggio-Musters.
[PITCH BEND/
SCATTER] Jog
Shuttle
Der Jog Shuttle arbeitet normalerweise als Pitch Bend Controller.
Wenn die [ARPEGGIO]-Taste eingeschaltet ist, wird mit dem Jog Shuttle die Stärke des
Scatter-E ektes eingestellt.
* Die Scatter-Funktion ist solange aktiv, wie das Jog Shuttle nach links bzw. rechts
ausgelenkt wird. Wenn sich der Jog Shuttle in der Mittel-Position be ndet, wird der
Scatter-E ekt wieder ausgeschaltet.
[TYPE]-Regler Bestimmt den Scatter-Typ (1–10).
[KEY HOLD]-Taster Ermöglicht das Halten der gespielten Noten auch nach Loslassen der Tasten.
Die Bedienober äche
2 3 4 5 6 7 81
9 10
1
Allgemeine Einstellungen
In diesem Bereich können Sie die nachfolgend aufgeführten Einstellungen für das SYSTEM-1 vornehmen.
Controller Beschreibung
[VOLUME]-Regler Bestimmt die Gesamtlautstärke.
[PORTAMENTO]-
Regler
Bestimmt die Zeit für die stufenlose Tonhöhenänderung zwischen zwei gespielten Noten
(Portamento-E ekt).
[LEGATO]-Taster Das Portamento wird nur dann ausgeführt, wenn Sie legato (gebundene Noten) spielen.
[TEMPO]-Regler
Bestimmt das Tempo des Arpeggiators (Scatter-E ekt). Die LED blinkt im aktuell
eingestellten Tempo.
[TEMPO SYNC]-
Taster
Synchronisiert die RATE der
2
LFO-Sektion und die Delayzeit (TIME) der
8
EFFECTS-
Sektion zum aktuell eingestellten Tempo.
[LFO SYNC]-Taster
Bestimmt, ob der LFO-Zyklus bei Spielen einer Note ab Beginn gestartet wird (ON) oder
nicht (OFF).
[MONO]-Taster
Wenn die Anzeige leuchtet, wird der Sound einstimmig (monophon) gespielt.
Wenn die Anzeige blinkt, werden alle Stimmen unisono gespielt (UNISON Mode).
MODEL
[SYSTEM-1]/
[PLUG-OUT]-Taster
Wenn der [SYSTEM-1]-Taster gedrückt wurde, arbeitet das Instrument als SYSTEM-1
Synthesizer. Wenn der [PLUG-OUT]-Taster gedrückt wurde, arbeitet das Instrument im
“Plug-out”-Modus.
&Siehe “Das Plug-In/Plug-Out-System”
[MANUAL]-Taster
Ruft die aktuellen Einstellungen der Bedienregler ab und stellt den Sound entsprechend
ein.
Memory
[1]–[8]-Taster
Diese Taster ermöglichen das Speichern bzw. Abrufen von bis zu 8 Einstellungs-Sets für die
Bedienregler.
Sichern der aktuellen Einstellungen auf einen der Speicher-Taster
Halten Sie den gewünschten [1]–[8]-Taster länger gedrückt.
Abrufen der Einstellungen eines der Speicher-Taster
Drücken Sie den gewünschten [1]–[8]-Taster.
2
LFO
Der LFO erzeugt eine zyklische Modulation für Tonhöhe (Vibrato), Filter-Frequenz (Cuto ) und Lautstärke
(Tremolo).
Controller Beschreibung
Wave-Regler
Bestimmt die LFO-Wellenform.
R (Sinus), S (Dreieck), T (Sägezahn), U (Rechteck), W (Sample and Hold),
RND (Random=zufällig erzeugte Wellenform)
[FADE TIME]-
Regler
Bestimmt die Zeit von “Der Sound wird gespielt” bis “Der LFO
hat seine maximale Amplitude erreicht”.
[RATE]-Regler Bestimmt die Modulations-Geschwindigkeit des LFO.
[PITCH]-Regler Bestimmt die Stärke der Tonhöhen-Modulation (PITCH -> Vibrato).
[FILTER]-Regler Bestimmt die Stärke der Filter-Modulation (FILTER CUTOFF).
[AMP]-Regler Bestimmt die Stärke der Lautstärke-Modulation (AMP LEVEL -> Tremolo).
3
OSC 1/OSC 2
In diesem Bereich können Sie die Wellenform auswählen, die den grundsätzlichen Klangcharakter des Sounds
bestimmt, und die Tonhöhe einstellen.
Das SYSTEM-1 besitzt zwei Oszillatoren: OSC 1 und OSC 2.
Controller Beschreibung
Wave-Regler
Bestimmt die Wellenform, welche den grundsätzlichen Klangcharakter bestimmt.
T (Sägezahn), U (Rechteck), S (Dreieck),
(Sägezahn 2), (Rechteck 2),
(Dreieck 2)
[COLOR]-Regler Bestimmt die Klangfarbe. Das Ergebnis ist abhängig von der ausgewählten Wellenform.
[MOD]-Regler
Bestimmt die Modulationsquelle für den [COLOR]-Regler.
MAN
Der Sound wird durch die Stellung des [COLOR]-Reglers bestimmt und nicht über
eine Zeitstrecke verändert.
LFO
Der Sound wird abhängig von der RATE der
2
LFO-Sektion verändert.
P. ENV
Der Sound wird abhängig von der Hüllkurve der
5
PITCH-Sektion verändert.
F. ENV
Der Sound wird abhängig von der Hüllkurve der
6
FILTER-Sektion verändert.
A. ENV
Der Sound wird abhängig von der Hüllkurve der
7
AMP-Sektion verändert.
S. OSC Der Sound wird abhängig von der Frequenz des Sub-Oszillators verändert.
Octave-Regler Bestimmt die Oktavlage des Oszillators.
[CROSS MOD]-
Regler
Verändert die OSC 1-Frequenz abhängig von der ausgewählten OSC 2-Wellenform. Drehen
des Reglers nach rechts macht den OSC 1-Sound komplexer, um z.B. metallisch klingende
Sounds oder Sounde ekte zu erzielen.
[TUNE]-Regler
Bestimmt die Tonhöhe des Oszillators.
Coarse Tune
Verändert die Tonhöhe in Halbtonschritten.
Halten Sie die Taster [RING] und [SYNC] gleichzeitig gedrückt, und verändern Sie mit dem
SCATTER [TYPE]-Regler die Tonhöhe.
Die SCATTER-LEDs (1–10) bezeichnen die Anzahl der Halbtöne (OFF=erloschen, -11–+11).
(Die gleichzeitig leuchtenden LEDs 10 und 1 entsprechen dem Wert “11”.)
[RING]-Taster
Erzeugt einen Ring Modulator-E ekt. Durch Multiplizieren
von OSC 1 und OSC 2 wird eine komplexe Wellenform
erzeugt.
[SYNC]-Taster
Erzeugt einen Oscillator Sync-E ekt. Durch aktives
Zurücksetzen des OSC 2 an den Beginn seines Zyklus
synchron zur OSC 1-Frequenz wird eine komplexe
Wellenform erzeugt.
Controller Beschreibung
OCTAVE [DOWN]
[UP]-Taster
Octave Shift
Sie können die auf der Tastatur gespielte Tonhöhe in Oktavschritten abwärts bzw.
aufwärts versetzen. Wenn die Taster-Anzeige leuchtet, ist die Tastatur um eine Oktave
versetzt. Wenn die Taster-Anzeige blinkt, ist die Tastatur um 2–3 Oktaven versetzt. Wenn
Sie beide [DOWN] [UP]-Taster gleichzeitig drücken, wird wieder die normale Oktavlage
aktiviert.
Key Transpose
Wenn Sie beide [DOWN] [UP]-Taster gleichzeitig gedrückt halten, können Sie die Tonhöhe
der Tastatur durch Drehen des SCATTER [TYPE]-Rads in Halbtonschritten versetzen (nur
aufwärts).
• Die SCATTER-LEDs (1–10) bezeichnen den Transponierwert (1–11). Wenn die LEDs 10
und 1 gleichzeitig leuchten, ist der Wert “11” ausgewählt.
• Wenn das SCATTER [TYPE]-Rad ganz nach links gedreht wird, sind alle LEDs erloschen,
und die Transponierung ist dann ausgeschaltet.
[MOD]-Taster
Bei Gedrückt halten des [MOD]-Tasters wird ein Modulations-E ekt (Vibrato) erzeugt. Bei
Gedrückt halten des [MOD]-Tasters und Bewegen einer der Regler der
2
LFO-Sektion
kann die Modulationsstärke (MOD Depth) eingestellt werden.
10
Keyboard
Diese Standard-Tastatur ist nicht anschlagdynamisch.
Anschließen an externes Equipment
* Um Fehlfunktionen bzw. eventuellen Beschädigungen vorzubeugen, regeln Sie immer die Lautstärke auf
Minimum und lassen Sie alle Geräte ausgeschaltet, wenn Sie Kabelverbindungen vornehmen.
A B C E F GD
H
A
DC IN-Buchse
Hier wird der beigefügte Netzadapter angeschlossen. Verwenden Sie mit diesem Gerät nur
den beigefügten AC-Adapter.
* Führen Sie das Netzkabel des AC-Adapters um die Kabelsicherung an der Rückseite
des Gerätes. Dadurch verhindern Sie eine Unterbrechung der Stromversorgung durch
versehentliches Abziehen des Netzsteckers.
B
USB ( )-Anschluss
Verwenden Sie ein USB 2.0-kompatibles USB-Kabel für die Verbindung zu einem Rechner. Sie können dann über
die USB-Verbindung MIDI- bzw. Audiodaten übertragen. Sie müssen auf dem verwendeten Rechner den
USB-Treiber installieren, bevor Sie das SYSTEM-1 an den Rechner anschließen. Den USB-Treiber können Sie
von der nachfolgend aufgeführten Internetseite herunter laden. Details nden Sie im Dokument Readme.htm,
welches sich innerhalb der Download-Datei be ndet.
& http://www.roland.com/support/
C
MIDI-Anschlüsse
Zum Anschluss externer MIDI-Instrumente.
D
Anschluss für eine Sicherheitskette (
)
& http://www.kensington.com/
E
PEDAL-Buchsen
Sie können an die HOLD-Buchse einen Fußtaster (DP-Serie, BOSS FS-5U; zusätzliches Zubehör) anschließen. Bei
Drücken des Fußtasters werden die gespielten Noten gehalten, auch wenn Sie die Tasten loslassen.
Sie können an die CONTROL-Buchse ein Expression-Pedal (EV-5; zusätzliches Zubehör) anschließen und damit
die Lautstärke in Echtzeit verändern.
* Verwenden Sie nur das empfohlene Expression-Pedal (EV-5; zusätzliches Zubehör). Bei Benutzung anderer
Expression-Pedale besteht das Risiko von Fehlfunktionen oder sogar Beschädigungen am Gerät.
F
OUT-Buchsen
Zum Anschluss an ein Verstärker- bzw. Lautsprechersystem.
Verkabeln Sie für den Mono-Betrieb nur die L/MONO-Buchse.
G
PHONES-Buchse
Zum Anschluss eines Stereokopfhörers (zusätzliches Zubehör).
Ein- und Ausschalten
H
[POWER]-Schalter
Schaltet das Gerät ein bzw. aus.
* Stellen Sie sicher, dass beim Einschalten zuerst das SYSTEM-1 und danach das Verstärkersystem
eingeschaltet wird und beim Ausschalten zuerst das Verstärkersystem und danach das SYSTEM-1
ausgeschaltet wird. Eine falsche Ein- bzw. Ausschalt-Reihenfolge kann Fehlfunktionen bzw.
Beschädigungen zur Folge haben.
* Dieses Gerät besitzt einen internen Schutzschaltkreis, der nach Einschalten überbrückt wird, daher dauert es
einen kurzen Moment, bis das Gerät einsatzbereit ist.
* Bevor Sie das Gerät ein- bzw. ausschalten, regeln Sie immer die Lautstärke auf Minimum. Auch bei
minimaler Lautstärke ist beim Ein- bzw. Ausschalten noch ein leises Geräusch hörbar, dieses ist aber normal
und keine Fehlfunktion.
&
&
R S T U
W
T U S
O
&
N
&
Français
Mode d’emploi
À propos de Plug-In/Plug-Out
Lorsque vous activez le bouton [SYSTEM-1], cet appareil fonctionne
comme un synthétiseur SYSTEM-1. Lorsque vous activez le bouton
[PLUG-OUT], cet appareil fonctionne comme un synthétiseur «plug-out».
Qu’est-ce que le «plug-out» ?
• Un synthétiseur logiciel compatible avec le plug-out et vendu
séparément peut être téléchargé sur cet appareil, ce qui vous permet de jouer cet appareil par lui-même.
• Le synthétiseur logiciel compatible avec le plug-out peut également être utilisé comme synthétiseur plug-in
sur votre ordinateur.
• Pour des informations détaillées sur les synthétiseurs logiciels plug-out dédiés et le
moyen de les obtenir, et pour connaître la con guration requise, consultez le site Web
de Roland.
& http://roland.cm/system1
Synchronisation/enregistrement avec d’autres appareils
Le SYSTEM-1 peut recevoir des données de l’horloge MIDI (F8) pour synchroniser son tempo.
Synchronisation avec un TR-8
Vous pouvez synchroniser la SYSTEM-1 avec un TR-8 en utilisant un câble
MIDI disponible dans le commerce pour e ectuer les branchements.
Synchronisation/enregistrement avec le DAW de votre
ordinateur via USB
Si vous utilisez un câble USB 2.0 disponible dans le commerce pour
connecter le SYSTEM-1 à votre ordinateur, vous pouvez synchroniser
le SYSTEM-1 avec votre DAW via USB MIDI ou enregistrer le son du
SYSTEM-1 sur les pistes de votre DAW via audio USB.
TR-8 (maître) SYSTEM-1
(esclave)
MIDI OUT MIDI IN
Réglages divers
Rétablissement des paramètres d’usine ( Factory Reset)
Cette section explique comment rétablir les paramètres d’usine du SYSTEM-1.
1. Tout en maintenant enfoncé le bouton [MANUAL], mettez l’appareil sous tension.
Le bouton [ARPEGGIO] clignote.
Si vous décidez d’annuler le rétablissement des paramètres d’usine, mettez l’appareil hors tension.
2. Appuyez sur le bouton [ARPEGGIO] pour exécuter le rétablissement des paramètres d’usine.
3. Lorsque tous les boutons sont allumés, mettez le SYSTEM-1 hors tension, puis à nouveau sous tension.
MIDI et autres réglages
1. Tout en maintenant enfoncé le bouton [SYSTEM-1], mettez l’appareil sous tension.
Le bouton [ARPEGGIO] clignote.
Si vous décidez de ne pas e ectuer de réglages, mettez l’appareil hors tension.
2. Utilisez les boutons [1]–[3] et la molette SCATTER [TYPE] pour modi er les réglages.
Paramètre Contrôleur Explication
Canal MIDI
Molette
[TYPE]
Éteint (OFF)
Permet de spéci er le canal de transmission/réception MIDI. Les LED
SCATTER (1–10) indiquent le canal. (par défaut: 1)
• Ils sont tous éteints (OFF) en cas de rotation vers l’extrémité
gauche.
• Ils sont tous allumés (OMNI) en cas de rotation vers l’extrémité
droite
• Pour 11–16, les LED 10 et 1–6 sont allumées simultanément.
1–16
Tous allumés
(OMNI)
Les messages MIDI de tous les canaux sont reçus.
Le canal de transmission MIDI sera le 1.
Source de
l’horloge
MIDI
Bouton [1]
Allumé
(AUTO)
Si l’horloge MIDI est entrée via le connecteur MIDI IN ou le port USB,
le SYSTEM-1 synchronise son tempo sur l’horloge MIDI. (par défaut)
* Si l’horloge MIDI est simultanément entrée depuis le connecteur
MIDI IN et depuis le port USB, le port USB est prioritaire.
Éteint
(INTERNAL)
Le SYSTEM-1 fonctionne au tempo spéci é sur l’appareil lui-même.
Choisissez le réglage «INTERNAL» si vous ne souhaitez pas
synchroniser sur un périphérique externe.
MIDI Thru Bouton [2]
Allumé (ON)
Spéci e si les données reçues du connecteur MIDI IN seront
retransmises depuis le connecteur MIDI OUT (ON : par défaut) ou ne
seront pas retransmises (OFF).
Éteint (OFF)
Mode
BOOST
Bouton [3]
Allumé (ON)
Ampli e le niveau de sortie des prises OUT.
Éteint (OFF)
LED DEMO
Maintenez [MOD]
enfoncé et tournez la
molette [TYPE]
Spéci e la durée (en minutes) jusqu’à ce que le LED DEMO s’a che.
Si ceci n’est pas allumé, le LED DEMO ne s’a che pas.
3. Appuyez sur le bouton [ARPEGGIO] pour enregistrer les réglages.
Les réglages sont enregistrés et le SYSTEM-1 redémarre.
Principales caractéristiques techniques du Roland SYSTEM-1: PLUG-OUT SYNTHESIZER
Polyphonie maximum 4 voix (SYSTEM-1 Mode)
Alimentation électrique Adaptateur secteur
Consommation 850 mA
Dimensions 472 (L) x 283 (P) x 70 (H) mm
Poids 2.4 kg (à l’exclusion de l’adaptateur secteur)
Accessoires Adaptateur secteur, mode d’emploi, dépliant «CONSIGNES DE SÉCURITÉ»
Options (vendues
séparément)
Commutateur à pédale : série DP, commutateur au pied : BOSS FS-5U,
Pédale d’expression : EV-5
* En vue d’améliorer l’appareil, ses caractéristiques techniques et/ou son aspect peuvent être modi és sans
avis préalable.
Avant d’utiliser cet appareil, veuillez lire attentivement le dépliant intitulé «CONSIGNES DE SÉCURITÉ». Ce dépliant fournit des
informations importantes relatives au bon fonctionnement de l’appareil. En outre, pour être sûr de bien maîtriser chacune des
fonctionnalités de votre nouvel appareil, il est nécessaire de lire le mode d’emploi dans son intégralité. Conservez ce manuel à
portée de main pour pouvoir vous y référer facilement.
Copyright © 2014 ROLAND CORPORATION
Tous droits réservés. La reproduction, totale ou partielle, de cette publication est interdite sous quelque forme que ce soit sans
l’autorisation écrite de ROLAND CORPORATION.
4
MIXER
Permet de régler le volume d’OSC 1, d’OSC 2, du sous-oscillateur (un oscillateur qui produit un son une ou deux
octaves plus bas) et du bruit.
Contrôleur Explication
Bouton [OSC 1] Permet de régler le volume d’OSC 1.
Bouton [OSC 2] Permet de régler le volume d’OSC 2.
Bouton [SUB OSC] Permet de régler le volume du sous-oscillateur.
Bouton [OSC TYPE]
Permet de sélectionner le type de sous-oscillateur.
Allumé : Son une octave plus bas, Éteint : Son deux octaves plus bas
Bouton [NOISE] Permet de régler le volume du bruit.
Bouton [NOISE
TYPE]
Permet de régler le type de bruit.
Allumé : bruit blanc, Éteint : bruit rose
5
PITCH
Permet de créer un changement variable dans la durée (enveloppe) pour la note.
Contrôleur Explication
Bouton [ENV]
Si vous tournez ce bouton vers la droite, la note devient initialement plus haute, puis
revient à la note de la touche sur laquelle vous avez appuyé.
Si vous tournez ce bouton vers la gauche, la note devient initialement plus basse, puis
revient à la note de la touche sur laquelle vous avez appuyé.
Curseur [A]
Ces curseurs fonctionnent comme les curseurs [A][D] de la section
7
AMP (ils a ectent la
hauteur de note plutôt que le volume).
Curseur [D]
6
FILTER
Ces réglages permettent de déterminer l’éclat et l’épaisseur du son. Vous pouvez également spéci er ici le
changement variable dans la durée (enveloppe) pour le ltre.
Contrôleur Explication
Bouton [LPF
CUTOFF]
Permet de spéci er la fréquence de coupure du ltre passe-bas. Les composants de
fréquence au-dessus de la fréquence de coupure sont coupés, ce qui adoucit le son.
Bouton [LPF TYPE]
Permet de sélectionner la pente du ltre
passe-bas.
Allumé : -12 dB, Éteint : -24 dB
Bouton [HPF
CUTOFF]
Permet de spéci er la fréquence de coupure du ltre coupe-haut. Les composants de
fréquence en dessous de la fréquence de coupure sont coupés.
Bouton [RESO]
La résonance dynamise le son dans la zone de la fréquence de coupure du ltre.
Des réglages plus élevés accentuent l’emphase, créant un son de synthétiseur
caractéristique.
Bouton [ENV]
Ce bouton permet de spéci er la profondeur et la direction du changement de fréquence
de coupure produit par les curseurs [A], [D], [S] et [R].
Si vous tournez le bouton vers la droite, la fréquence de coupure se déplace vers le haut.
Si vous tournez le bouton vers la gauche, la fréquence de coupure se déplace vers le bas.
Bouton [KEY]
Permet à la fréquence de coupure du ltre de varier selon la touche que vous jouez.
Si vous tournez le bouton vers la droite, la fréquence de coupure devient plus élevée
lorsque vous jouez des notes plus aiguës.
Si vous tournez le bouton vers la gauche, la fréquence de coupure devient plus basse
lorsque vous jouez des notes plus graves.
Curseur [A]
Ces curseurs fonctionnent comme les curseurs [A][D][S][R] de la section
7
AMP (ils
a ectent la fréquence de coupure plutôt que le volume).
Curseur [D]
Curseur [S]
Curseur [R]
7
AMP
Permet de créer un changement variable dans la durée (enveloppe) pour le volume.
Contrôleur Explication
Bouton [TONE] Permet de régler l’éclat du son.
Bouton [CRUSHER] Permet de modi er le caractère tonal en déformant la forme d’onde.
Curseur [A]
(Temps d’attaque)
Permet de spéci er la durée depuis le moment où
vous appuyez sur la touche jusqu’au moment où vous
atteignez le volume maximum.
Curseur [D]
(Durée de déclin)
Permet de spéci er la durée depuis le moment
où le volume maximum est atteint jusqu’à son
a aiblissement vers le niveau de maintien.
Curseur [S]
(Niveau de
maintien)
Permet de spéci er le niveau de volume qui sera
maintenu depuis le moment où l’attaque et le déclin
se sont écoulés jusqu’au relâchement de la touche.
Curseur [R]
(Durée de
relâchement)
Permet de spéci er la durée depuis le moment où
vous relâchez la touche jusqu’au moment où le
volume atteint sa valeur minimale.
8
EFFETS
Permet de régler la quantité de réverbération et de retard.
Contrôleur Explication
Bouton [REVERB] Ajoute un e et de réverbération.
Bouton [DELAY] Permet de régler le volume du son avec e et delay.
Bouton [TIME] Permet de régler la durée de l’e et delay (le retard dans la production de son).
9
PITCH BEND/SCATTER
L’option «Pitch bend» permet de modi er la note.
Qu’est-ce que l’e et «Scatter» ?
Cette fonction applique diverses modi cations au jeu d’arpèges, créant des grooves musicaux.
Contrôleur Explication
Bouton
[ARPEGGIO]
Permet de générer un arpège lorsque vous maintenez simplement enfoncé un accord sur
le clavier. (Cette fonction est appelée «arpégiateur».)
Bouton [ARP TYPE] Permet de sélectionner la variation d’arpège.
Bouton [ARP STEP] Permet de spéci er la valeur de note pour chaque pas de l’arpégiateur.
Commande jog/
shuttle [PITCH
BEND/SCATTER]
La commande jog/shuttle fonctionne généralement comme «pitch bend» (glissando).
Si l’e et Scatter est activé pour la bouton [ARPEGGIO], la commande jog/shuttle permet
de régler la profondeur de l’e et Scatter.
* L’e et Scatter est activé lorsque vous utilisez la commande jog/shuttle. Lorsque vous
ramenez la commande jog/shuttle au centre, l’e et Scatter est désactivé.
Molette [TYPE] Permet de sélectionner le type d’e et Scatter (1–10).
Bouton [KEY
HOLD]
Vous pouvez créer un son continu de notes même après avoir retiré les mains du clavier.
Description des panneaux
2 3 4 5 6 7 81
9 10
1
Section commune
Cette section décrit comment e ectuer les réglages suivants pour le SYSTEM-1.
Contrôleur Explication
Bouton [VOLUME] Permet de régler le volume.
Bouton
[PORTAMENTO]
Crée un changement de note en douceur entre une touche et la touche jouée suivante. Le
bouton permet de régler la durée nécessaire pour le changement de note.
Bouton [LEGATO]
Applique l’e et Portamento uniquement lorsque vous jouez legato (c’est-à-dire lorsque
vous appuyez sur la touche suivante avant de relâcher la touche précédente).
Bouton [TEMPO]
Permet de régler le tempo de l’arpégiateur (e et Scatter). Le voyant LED clignote au tempo
que vous avez spéci é.
Bouton [TEMPO
SYNC]
Synchronise le paramètre RATE de la section
2
LFO et la durée de retard (TIME) de la
section
8
EFFETS avec le tempo.
Bouton [LFO KEY
TRIG]
Spéci e si le cycle LFO sera synchronisé de manière à commencer lorsque vous appuyez
sur la touche (ON) ou non (OFF).
Bouton [MONO]
Si ce bouton est activé (allumé), le synthétiseur joue de manière monophonique (notes
uniques).
S’il clignote, le synthétiseur joue tous les sons à l’unisson (mode UNISON).
Bouton MODEL
[SYSTEM-1]/
[PLUG-OUT]
Si le bouton [SYSTEM-1] est activé, cet appareil fonctionne comme synthétiseur SYSTEM-1.
Si le bouton [PLUG-OUT] est activé, l’appareil fonctionne en mode «plug-out».
&Reportez-vous à la section «À propos de Plug-In/Plug-Out»
Bouton [MANUAL] Permet l’émission du son conformément aux réglages actuels des boutons et des curseurs.
Bouton Memory
[1]–[8]
Utilisez ces boutons pour mémoriser/rappeler huit ensembles de réglages de panneau
(boutons/curseurs).
Pour mémoriser les réglages du panneau sur un bouton Memory
E ectuez une pression prolongée sur un bouton Memory [1]–[8].
Pour rappeler les réglages (un son) depuis un bouton Memory
Appuyez sur un bouton Memory [1]–[8].
2
LFO
Vous pouvez créer ici un changement cyclique (modulation) dans le son en appliquant un vibrato (modulation
de note) ou un trémolo (modulation de volume).
Contrôleur Explication
Bouton Wave
Permet de sélectionner la forme d’onde de LFO.
R (onde sinusoïdale), S (onde triangulaire), T (onde en dents de scie), U (onde
carrée), W (Sample and Hold), RND (onde aléatoire)
Bouton [FADE
TIME]
Permet de spéci er la durée depuis l’émission du son jusqu’à
ce que LFO atteigne son amplitude maximale.
Bouton [RATE] Permet de déterminer la vitesse de LFO.
Bouton [PITCH] Permet à LFO de moduler la note, en produisant un e et de vibrato.
Bouton [FILTER] Permet à LFO de moduler le réglage FILTER CUTOFF (fréquence de coupure).
Bouton [AMP] Permet à LFO de moduler le réglage AMP LEVEL (volume), en produisant un e et de trémolo.
3
OSC 1/OSC 2
Permet de sélectionner la forme d’onde qui détermine le caractère du son et de spéci er sa hauteur de note.
Le SYSTEM-1 est doté de deux oscillateurs (OSC 1 et OSC 2).
Contrôleur Explication
Bouton Wave
Permet de sélectionner la forme d’onde qui forme la base du son.
T (onde en dents de scie), U (onde carrée), S (onde triangulaire),
(onde en dents
de scie 2), (onde carrée 2), (onde triangulaire 2)
Bouton [COLOR] Le résultat dépend de la forme d’onde.
Bouton [MOD]
Permet de sélectionner la source qui module le bouton [COLOR].
MAN
Le son est déterminé par la position du bouton [COLOR]. Il ne variera pas dans la
durée.
LFO
Le son varie dans la durée à la fréquence spéci ée dans la section
2
LFO.
P. ENV
Le son change dans la durée en fonction de l’enveloppe de la section
5
PITCH.
F. ENV
Le son change dans la durée en fonction de l’enveloppe de la section
6
FILTER.
A. ENV
Le son change dans la durée en fonction de l’enveloppe de la section
7
AMP.
S. OSC Le son change dans la durée en fonction de la fréquence du sous-oscillateur.
Bouton d’octave
(au pied)
Permet de spéci er l’octave de l’oscillateur.
Bouton [CROSS
MOD]
Modi e la fréquence OSC 1 en fonction de la forme d’onde OSC 2. Si vous tournez le
bouton vers la droite, OSC 1 devient un son plus complexe, ce qui vous permet de créer
des sons métalliques ou des e ets sonores.
Bouton [TUNE]
Permet d’ajuster la hauteur de note de l’oscillateur.
Coarse Tune (accord approximatif)
Ajuste la note par pas de demi-tons.
En maintenant enfoncés les boutons [RING][SYNC] simultanément et en tournant la molette
SCATTER [TYPE], vous pouvez régler le paramètre Coarse Tune.
Les LED SCATTER (1–10) indiquent la quantité de Coarse Tune (OFF (éteint), -11–+11). (Les
LED 10 et 1 s’allument simultanément pour indiquer 11.)
Bouton [RING]
Oscillateur en anneau. Génère une forme d’onde
complexe en multipliant OSC 1 et OSC 2.
Bouton [SYNC]
Synchronisation d’oscillateur. Génère une forme d’onde
complexe en réinitialisant de force OSC 2 au début de son
cycle en synchronisation avec la fréquence OSC 1.
Contrôleur Explication
Bouton OCTAVE
[DOWN] [UP]
Déplacement d’octave
Vous pouvez déplacer la tessiture du clavier par pas d’une octave. Le bouton est allumé
pour le réglage d’une octave ; il clignote pour le réglage de 2–3 octaves. Si vous appuyez
sur les boutons [DOWN] [UP] simultanément, le clavier revient à sa tessiture habituelle.
Transposition de touches
En maintenant enfoncé les boutons [DOWN][UP] simultanément et en tournant la
molette SCATTER [TYPE], vous pouvez transposer le clavier par pas de demi-tons
(uniquement vers le haut).
• Les LED SCATTER (1–10) indiquent la quantité de transposition (1–11). (Les LED 10 et 1
s’allument simultanément pour indiquer 11.)
• Ils sont tous éteints (OFF) en cas de rotation vers l’extrémité gauche.
Bouton [MOD]
Un vibrato (modulation) est appliqué au son lorsque vous maintenez enfoncé le bouton
[MOD]. En maintenant enfoncé le bouton [MOD] et en utilisant la section
2
LFO, vous
pouvez régler la profondeur de MOD.
10
Clavier
Clavier de taille normale,
non sensible au toucher (vélocité xe).
Branchement de votre équipement
* Pour éviter tout dysfonctionnement ou une panne de l’appareil, veillez à toujours baisser le volume et à
éteindre tous les appareils avant de procéder à des branchements.
A B C E F GD
H
A
Prise DC IN
Connectez l’adaptateur secteur fourni à cette prise. Utilisez exclusivement l’adaptateur
secteur fourni.
* Pour éviter de couper l’alimentation de votre appareil par inadvertance (en cas de
débranchement accidentel de la che) et d’appliquer une pression excessive sur la
prise DC IN, xez le cordon d’alimentation à l’aide du serre-câble, comme montré sur
l’illustration.
B
Port USB ( )
Utilisez un câble USB 2.0 disponible dans le commerce pour connecter ce port à votre ordinateur. Il peut être
utilisé pour transférer des données MIDI et des données audio via USB. Vous devez installer le pilote USB
avant de connecter le SYSTEM-1 à votre ordinateur. Téléchargez le pilote USB sur le site Web de Roland. Pour
plus de détails, reportez-vous au chier Readme.htm inclus dans le téléchargement.
& http://www.roland.com/support/
C
Connecteurs MIDI
Pour connecter un périphérique MIDI.
D
Emplacement de sécurité (
)
& http://www.kensington.com/
E
Prises PEDAL
Si vous branchez un commutateur à pédale (série DP, BOSS FS-5U ; vendu séparément) sur la prise HOLD, les
notes sont maintenues aussi longtemps que vous continuez de maintenir la pédale enfoncée, même après que
vous avez retiré les mains du clavier.
Si vous branchez une pédale d’expression (EV-5 ; vendue séparément) à la prise CONTROL, vous pourrez utiliser
la pédale d’expression pour contrôler le volume et ajouter de l’expression à votre jeu.
* Utilisez uniquement la pédale d’expression spéci ée (EV-5 ; vendue séparément). Si vous connectez
une autre pédale d’expression, vous risquez de provoquer un dysfonctionnement de l’appareil ou de
l’endommager.
F
Prises OUT
Raccordez les enceintes de votre ampli cateur ou de votre moniteur à ces prises. Si vous utilisez un système
monaural, utilisez uniquement la prise L/MONO.
G
Prise PHONES
Branchez le casque (vendu séparément) à cette prise.
Mise sous tension et hors tension
H
Commutateur [POWER]
Permet de mettre l’appareil sous tension/hors tension.
* Après avoir e ectué les branchements correctement, veillez à mettre sous tension dans l’ordre suivant :
en premier le SYSTEM-1, et ensuite le système connecté. Si vous mettez l’équipement sous tension sans
respecter cet ordre, il peut se produire des dysfonctionnements ou des dommages. Lors de la mise hors
tension, éteignez d’abord le système connecté en premier, et ensuite le SYSTEM-1.
* Cet appareil est équipé d’un circuit de protection. Il faut un bref intervalle (quelques secondes) après la mise
sous tension de l’appareil pour qu’il fonctionne normalement.
* Avant d’allumer ou d’éteindre l’appareil, veillez à toujours baisser le volume. Même si le volume est au
minimum, il se peut que vous entendiez un son lors de la mise sous tension/hors tension. Ce phénomène
est toutefois normal et ne signale pas un dysfonctionnement.
* 5 1 0 0 0 3 7 1 6 0 - 0 2 *

Italiano
Manuale dell'utente
Informazioni su Plug-In/Plug-Out
Premendo il pulsante [SYSTEM-1], l'unità opera come sintetizzatore
SYSTEM-1. Premendo il pulsante [PLUG-OUT], l'unità opera come
sintetizzatore "plug-out".
Cos'è il "plug-out"?
• Scaricando un sintetizzatore software plug-out compatibile,
acquistabile separatamente, è possibile far funzionare lo strumento come unità a sé stante.
• Tale software può inoltre essere utilizzato come sintetizzatore plug-in per il proprio computer.
• Per i dettagli sui sintetizzatori software plug-out compatibili e su come ottenerli, e
informazioni relative ai requisiti per il funzionamento, fare riferimento al sito interno di
Roland.
& http://roland.cm/system1
Sincronizzazione e registrazione con altri dispositivi
L'unità SYSTEM-1 può ricevere messaggi di MIDI Clock (F8) per la sincronizzare il tempo.
Sincronizzazione con l'unità TR-8
L'unità SYSTEM-1 può essere sincronizzata all'unità TR-8 utilizzando un
cavo MIDI generico.
Sincronizzazione/registrazione sulla DAW del computer
via USB
Utilizzando un cavo USB 2.0 generico per collegare l'unità SYSTEM-1 a un
computer, è possibile sincronizzarla via MIDI o USB, così come registrarne
i suoni sulle tracce della DAW tramite il collegamento USB audio.
TR-8 (master) SYSTEM-1
(slave)
MIDI OUT MIDI IN
Impostazioni varie
Ripristino delle impostazioni di fabbrica ( Factory Reset)
La seguente procedura descrive come ripristinare per l'unità SYSTEM-1 i valori di fabbrica.
1. Tenere premuto il pulsante [MANUAL] e accendere l'unità.
Il pulsante [ARPEGGIO] lampeggia.
Se si decide di annullare l'operazione, spegnere l'unità.
2. Premere il pulsante [ARPEGGIO] per e ettuare il ripristino delle impostazioni di fabbrica.
3. Quando tutti i pulsanti sono accesi, spegnere e riaccendere l'unità SYSTEM-1.
MIDI e altre impostazioni
1. Tenere premuto il pulsante [SYSTEM-1] e accendere l'unità.
Il pulsante [ARPEGGIO] lampeggia.
Se si decide di annullare l'operazione, spegnere l'unità.
2. Utilizzare i pulsanti [1]–[3] e la manopola SCATTER [TYPE] per cambiare le impostazioni.
Parametro Controller Spiegazione
Canale
MIDI
Manopola
[TYPE]
Spento (OFF)
Speci ca il canale di trasmissione/ricezione MIDI. I LED SCATTER
(1–10) indicano il canale. (valore prede nito: 1)
• Tutti i LED spenti (OFF) con il controllo completamente a sinistra
• Tutti i LED accesi (OMNI) con il controllo completamente a destra
• Per i canali 11–16, i LED 10 e 1–6 sono accesi simultaneamente.
1–16
Tutti accesi
(OMNI)
L'unità riceve i messaggi MIDI di tutti i canali.
L'unità trasmette sul canale MIDI 1.
Clock MIDI
sorgente
Pulsante
[1]
Acceso
(AUTO)
Se il clock MIDI viene ricevuto attraverso il connettore MIDI IN o la
porta USB, l'unità SYSTEM-1 sincronizza il tempo interno con il clock
MIDI. (prede nito)
* Se il clock MIDI viene ricevuto simultaneamente attraverso il
connettore MIDI IN e la porta USB, quest'ultima ha la priorità.
Spento
(INTERNAL)
L'unità SYSTEM-1 funziona con il tempo interno. Scegliere
l'impostazione "INTERNAL" se non si desidera sincronizzare l'unità
con un dispositivo esterno.
MIDI Thru
Pulsante
[2]
Acceso (ON)
Speci ca se i messaggi ricevuti attraverso il connettore MIDI IN
debbano essere ritrasmessi o meno dal connettore MIDI OUT (ON:
messaggi trasmessi, impostazione prede nita; OFF: messaggi non
trasmessi ).
Spento (OFF)
Modalità
BOOST
Pulsante
[3]
Acceso (ON)
Incrementa il livello di uscita per i jack OUT.
Spento (OFF)
LED DEMO
Tenere premuto il
pulsante [MOD] e ruotare
la manopola [TYPE]
Speci ca il tempo (minuti) no a che non appare il LED DEMO. Se è
spento, il LED DEMO non appare.
3. Premere il pulsante [ARPEGGIO] per e ettuare il salvataggio delle impostazioni.
Le impostazioni vengono così salvate e l'unità SYSTEM-1 si riavvia.
Speci che principali Roland SYSTEM-1: PLUG-OUT SYNTHESIZER
Polifonia massima 4 voci (SYSTEM-1 Mode)
Alimentazione Adattatore CA
Assorbimento di corrente 850 mA
Dimensioni 472 (L) x 283 (P) x 70 (A) mm
Peso 2.4 kg (escluso adattatore CA)
Accessori Adattatore CA, manuale dell'utente, volantino "UTILIZZO SICURO DELL'UNITÀ"
Accessori opzionali
(acquistabili separatamente)
Pedale: Serie DP, Interruttore a pedale: BOSS FS-5U,
Pedale di espressione: EV-5
* Allo scopo di migliorare il prodotto, le speci che e/o l'aspetto di questa unità sono soggetti a modi che
senza preavviso.
Prima dell'utilizzo, leggere attentamente la sezione intitolata "UTILIZZO SICURO DELL'UNITÀ". In questa sezione vengono fornite
informazioni importanti sul corretto impiego dell'unità. Si consiglia di leggere per intero il Manuale dell'utente per assicurarsi di
aver compreso appieno tutte le funzioni o erte dalla nuova unità. È consigliabile conservare il manuale e tenerlo a portata di mano
per usarlo come riferimento.
Copyright © 2014 ROLAND CORPORATION
Tutti i diritti riservati. Nessuna parte di questo documento può essere in alcun modo riprodotta senza autorizzazione scritta di
ROLAND CORPORATION.
4
MIXER
In questa sezione è possibile regolare il volume di OSC 1, OSC 2, del sub oscillatore (ossia dell'oscillatore che
produce un suono una o due ottave più in basso) e del rumore.
Controller Spiegazione
Manopola [OSC 1] Regola il volume di OSC 1.
Manopola [OSC 2] Regola il volume di OSC 2.
Manopola [SUB
OSC]
Regola il volume del sub oscillatore.
Pulsante [OSC
TYPE]
Seleziona il tipo di sub oscillatore.
Acceso: il suono è di un'ottava inferiore; Spento: il suono è di due ottave inferiore
Manopola [NOISE] Regola il volume del rumore.
Pulsante [NOISE
TYPE]
Seleziona il tipo di rumore.
Acceso: rumore bianco; Spento: rumore rosa
5
PITCH
In questa sezione è possibile creare variazioni temporali (inviluppi) per l'intonazione dei suoni.
Controller Spiegazione
Manopola [ENV]
Se ruotata verso destra, l'intonazione inizialmente aumenta per poi tornare all'altezza
della nota suonata.
Se ruotata verso sinistra, l'intonazione inizialmente cala per poi tornare all'altezza della
nota suonata.
Cursore [A]
Questi cursori operano in modo simile ai cursori [A][D] della sezione
7
AMP (agiscono
sull'intonazione piuttosto che sul volume).
Cursore [D]
6
FILTER
Queste impostazioni determinano la brillantezza o lo spessore del suono. Inoltre, è possibile speci care le
variazioni temporali (inviluppo) per il ltro.
Controller Spiegazione
Manopola [LPF
CUTOFF]
Speci ca la frequenza di taglio per il ltro passa bassi. Il ltro taglia le frequenze al di sopra
della soglia stabilita, in modo da rendere il suono più morbido.
Pulsante [LPF
TYPE]
Seleziona la curva (ripidità) del ltro passa
bassi.
Acceso: -12 dB, Spento: -24 dB
Manopola [HPF
CUTOFF]
Speci ca la frequenza di taglio per il ltro passa alti. Il ltro taglia le frequenze al di sotto
della soglia stabilita.
Manopola [RESO]
La risonanza permette di incrementare il suono intorno alla frequenza di taglio del ltro.
L'e etto è proporzionale al valore del parametro, in modo da creare il tipico suono
"sintetizzato".
Manopola [ENV]
Speci ca l'intensità e la direzione delle variazioni per la frequenza di taglio prodotte dai
cursori [A], [D], [S] e [R].
Ruotando la manopola verso destra, la frequenza di taglio si sposta verso il registro acuto.
Ruotandola verso sinistra, la frequenza di taglio si sposta verso il registro grave.
Manopola [KEY]
Permette alla frequenza di taglio del ltro di variare in base alla nota premuta.
Ruotando la manopola verso destra, la frequenza di taglio aumenta in modo
proporzionale all'altezza delle note suonate.
Ruotandola verso sinistra, la frequenza di taglio diminuisce in modo proporzionale
all'altezza delle note suonate.
Cursore [A]
Questi cursori operano in modo simile ai cursori [A][D][S][R] della sezione
7
AMP
(agiscono sulla frequenza di taglio piuttosto che sul volume).
Cursore [D]
Cursore [S]
Cursore [R]
7
AMP
In questa sezione è possibile creare variazioni temporali (inviluppi) per il volume.
Controller Spiegazione
Manopola [TONE] Regola la brillantezza del suono.
Manopola
[CRUSHER]
Modi ca il carattere timbrico mediante la distorsione della forma d'onda.
Cursore [A]
(Tempo di attacco)
Speci ca il tempo che impiega la nota premuta a
raggiungere il volume massimo.
Cursore [D]
(Tempo di
decadimento)
Speci ca il tempo che impiega il suono a passare dal
volume massimo no al livello di sostegno.
Cursore [S]
(Livello di
sostegno)
Speci ca il livello di volume da mantenere per il suono
dopo le fasi di attacco e decadimento no a quando si
rilascia la nota premuta.
Cursore [R]
(Tempo di rilascio)
Speci ca il tempo che impiega il suono a raggiungere
il livello minimo una volta che è stata rilasciata la nota
premuta.
8
EFFECTS
In questa sezione è possibile regolare la quantità di riverbero e delay.
Controller Spiegazione
Manopola
[REVERB]
Aggiunge il riverbero.
Manopola [DELAY] Regola il livello del suono ritardato.
Manopola [TIME] Regola il tempo di delay (l'intervallo di ritardo).
9
PITCH BEND/SCATTER
Il "Pitch bend" permette di modi care l'intonazione.
Cos'è lo Scatter?
È una funzione che applica diverse variazioni alle note arpeggiate, in modo da generare groove musicali.
Controller Spiegazione
Pulsante
[ARPEGGIO]
Permette di creare un arpeggio, semplicemente tenendo premuto un accordo sulla
tastiera. (Funzione nota come "arpeggiatore").
Manopola [ARP
TYPE]
Seleziona la variazione per l'arpeggio.
Manopola [ARP
STEP]
Speci ca il valore di nota per ciascun step dell'arpeggio.
Controllo
scorrimento [PITCH
BEND/SCATTER]
Il controllo di scorrimento opera in genere come pitch bend.
Se per la pulsante [ARPEGGIO] si attiva lo scatter, il controllo di scorrimento regola
l'intensità di scatter.
* Lo scatter rimane attivo n tanto che si utilizza il controllo di scorrimento, e si disattiva
quando il controllo ritorna al centro.
Manopola [TYPE] Seleziona il tipo di scatter (1–10).
Pulsante [KEY
HOLD]
Permette di lasciar risonare le note anche dopo aver rilasciato le note sulla tastiera.
Descrizione del pannello
2 3 4 5 6 7 81
9 10
1
Sezione comune
Controlli dedicati alle seguenti impostazioni per l'unità SYSTEM-1.
Controller Spiegazione
Manopola [VOLUME]
Regola il volume.
Manopola
[PORTAMENTO]
Consente di creare un graduale cambio dell'intonazione tra due note suonate. La
manopola regola il tempo che impiega la nota a cambiare intonazione.
Pulsante [LEGATO]
Applica il portamento solo quando si suona in legato (es.: quando si preme una nota non
avendo ancora rilasciato la precedente).
Manopola [TEMPO] Imposta il tempo dell'arpeggiatore (scatter). Il LED lampeggia in base al tempo speci cato.
Pulsante [TEMPO
SYNC]
Sincronizza il parametro RATE della sezione
2
LFO e il tempo di delay (TIME) della
sezione
8
EFFECTS al tempo.
Pulsante [LFO KEY
TRIG]
Speci ca se l'inizio del ciclo dell'LFO debba essere (ON) o meno (OFF) sincronizzato alla
pressione della nota.
Pulsante [MONO]
Se attivato (acceso), permette di riprodurre i suoni in monofonia (note singole).
Se lampeggiante, il sintetizzatore riprodurrà tutti i suoni all'unisono (modalità UNISON).
Pulsante MODEL
[SYSTEM-1]/[PLUG-
OUT]
Se il pulsante [SYSTEM-1] è attivato, l'unità opera come sintetizzatore SYSTEM-1. Se il
pulsante [PLUG-OUT] è attivato, l'unità opera in modalità "plug-out".
&Fare riferimento a "Informazioni su Plug-In/Plug-Out"
Pulsante [MANUAL] Permette di riprodurre i suoni in base alle correnti impostazioni di manopole e cursori.
Pulsanti di memoria
[1]–[8]
Permettono di salvare/richiamare otto set di impostazioni per il pannello di controllo
(manopole e cursori).
Salvataggio delle impostazioni del pannello di controllo in un pulsante di memoria
Tenere premuto a lungo uno dei pulsanti di memoria [1]–[8].
Ripristino di una delle impostazioni salvate su un pulsante di memoria
Premere uno dei pulsanti di memoria [1]–[8].
2
LFO
Questa sezione permette di creare variazioni cicliche (modulazioni) del suono, applicando un vibrato
(modulazione dell'intonazione) o un tremolo (modulazioni del volume).
Controller Spiegazione
Manopola Wave
Seleziona la forma d'onda per l'LFO.
R (onda sinusoidale), S (onda triangolare), T (onda a dente di sega), U (onda
quadra), W (e etto "Sample and Hold"), RND (onda casuale)
Manopola [FADE
TIME]
Speci ca il tempo che impiega l'LFO a raggiungere la
massima amplitudine da quando il suono viene emesso.
Manopola [RATE] Determina la velocità dell'LFO.
Manopola [PITCH] Consente all'LFO di modulare l'intonazione per produrre l'e etto di vibrato.
Manopola [FILTER] Consente all'LFO di modulare il parametro FILTER CUTOFF (frequenza di taglio).
Manopola [AMP]
Consente all'LFO di modulare il parametro AMP LEVEL (volume), per produrre l'e etto di
tremolo.
3
OSC 1/OSC 2
In questa sezione è possibile selezionare la forma d'onda che determina il carattere del suono e di speci carne
l'intonazione.
L'unità SYSTEM-1 dispone di due oscillatori (OSC 1 e OSC 2).
Controller Spiegazione
Manopola Wave
Seleziona la forma d'onda alla base del suono.
T (onda a dente di sega), U (onda quadra), S (onda triangolare),
(onda a dente di
sega 2),
(onda quadra 2), (onda triangolare 2)
Manopola [COLOR] L'e etto di questa manopola dipende dal tipo di onda selezionata.
Manopola [MOD]
Seleziona la sorgente che modula la manopola [COLOR].
MAN Il suono è determinato dalla posizione della manopola [COLOR]. Non varia nel tempo.
LFO
Il suono varia nel tempo in base alla velocità speci cata nella sezione
2
LFO.
P. ENV
Il suono cambia nel tempo in base all'inviluppo della sezione
5
PITCH.
F. ENV
Il suono cambia nel tempo in base all'inviluppo della sezione
6
FILTER.
A. ENV
Il suono cambia nel tempo in base all'inviluppo della sezione
7
AMP.
S. OSC Il suono cambia nel tempo in base alla frequenza del sub oscillatore.
Manopola Ottava
(piedi)
Speci ca l'ottava dell'oscillatore.
Manopola [CROSS
MOD]
Modi ca la frequenza di OSC 1 in base alla forma d'onda selezionata per OSC 2. Ruotando
la manopola verso destra, il suono di OSC 1 diviene man mano più complesso, e ciò
permette di generare timbri metallici o e etti sonori.
Manopola [TUNE]
Regola l'intonazione (altezza) dell'oscillatore.
Intonazione di massima
Regola il tono in step di semitoni.
Tenendo premuti entrambi i pulsanti [RING][SYNC] e ruotando la manopola SCATTER
[TYPE], è possibile regolare l'intonazione di massima.
I LED SCATTER (1–10) indicano l'intonazione di massima impostata (OFF (spento), -11–+11).
(I LED 10 e 1 accesi simultaneamente indicano il valore 11).
Pulsante [RING]
Modulatore ad anello. Permette di generare una complessa
forma d'onda moltiplicando tra loro OSC 1 e OSC 2.
Pulsante [SYNC]
Sincronia dell'oscillatore. Genera una forma d'onda
complessa forzando il reset di OSC 2 all'inizio del proprio
ciclo in sincronia con la frequenza di OSC 1.
Controller Spiegazione
Pulsante OCTAVE
[DOWN] [UP]
Spostamento di ottava
È possibile spostare l'intervallo di intonazione della tastiera in step di un'ottava. Il
pulsante rimane acceso per l'impostazione a un'ottava, e lampeggia per l'impostazione
2–3 ottave. Premendo simultaneamente i pulsanti [DOWN] [UP], la tastiera tornerà
all'intervallo di intonazione normale.
Trasposizione di chiave
Tenendo premuti entrambi i pulsanti [DOWN][UP] e ruotando la manopola SCATTER
[TYPE], è possibile trasporre la tastiera in step di semitoni (solo verso il registro acuto).
• I LED SCATTER (1–10) indicano la quantità di trasposizione (1–11). (I LED 10 e 1 accesi
simultaneamente indicano il valore 11).
• Tutti i LED spenti (OFF) con il controllo completamente a sinistra.
Pulsante [MOD]
Tenendo premuto il pulsante [MOD], è possibile applicare l'e etto di vibrato. Tenendo
premuto il pulsante [MOD] e utilizzando la sezione
2
LFO, è possibile regolare l'intensità
di MOD.
10
Tastiera
Tastiera di tipo standard,
non sensibile al tocco (ossia a velocità ssa).
Collegamento dell'unità
* Per evitare guasti e/o danni ai dispositivi, abbassare sempre il volume e spegnere tutte le unità prima di
e ettuare qualsiasi collegamento.
A B C E F GD
H
A
Jack DC IN
Collegare qui l'adattatore CA in dotazione. Utilizzare esclusivamente l'adattatore CA in
dotazione.
* Per prevenire l'interruzione accidentale di erogazione della corrente (es.: scollegamento
del connettore elettrico), e per evitare danni al jack DC IN, ancorare il cavo di
alimentazione al gancio, così come mostrato nell'illustrazione a lato.
B
Porta USB ( )
Utilizzare un cavo USB 2.0 standard per collegare questa porta al computer. Il collegamento USB permette di
trasferire sia eventi MIDI sia audio. Prima di collegare l'unità SYSTEM-1 al computer, installare su questo
il driver USB. Scaricare il driver USB speci co per l'unità dal sito internet di Roland. Per maggiori dettagli,
consultare il le Readme.htm incluso nel download.
& http://www.roland.com/support/
C
Connettori MIDI
Collegare qui i dispositivi MIDI.
D
Fessure di sicurezza (
)
& http://www.kensington.com/
E
Jack PEDAL
Collegando un pedale o un interruttore (serie DP, BOSS FS-5U; acquistabili separatamente) al jack HOLD, è
possibile sostenere le note n tanto che si mantiene premuto il pedale, anche dopo aver rilasciato le note
premute sulla tastiera.
Collegando un pedale di espressione (EV-5; acquistabile separatamente) al jack CONTROL, è possibile
controllare il volume e gestire l'espressività della propria esecuzione strumentale.
* Utilizzare solo il pedale di espressione suggerito (EV-5; acquistabile separatamente). Il collegamento di
qualsiasi altro pedale di espressione può causare guasti e/o danni all'unità.
F
Jack OUT
Collegare queste uscite agli altoparlanti dell'ampli catore o del monitor. Se il sistema in uso è mono, utilizzare
solo il jack L/MONO.
G
Jack PHONES
Per il collegamento di un paio di cu e (acquistabili separatamente).
Accensione/spegnimento
H
Interruttore [POWER]
Accende e spegne l'unità.
* Dopo aver e ettuato tutti i collegamenti, assicurarsi di accendere prima l'unità SYSTEM-1, e poi tutto il
resto dell'equipaggiamento. La mancata osservanza di questo ordine potrebbe causare malfunzionamenti
o guasti. Per lo spegnimento, spegnere prima il sistema esterno collegato, e successivamente l'unità
SYSTEM-1.
* Questa unità è dotata di un circuito di protezione. Deve passare un breve intervallo (pochi secondi) dopo
l'accensione dell'unità prima che questa possa funzionare normalmente.
* Prima di accendere o spegnere l'unità, assicurarsi sempre che il volume sia abbassato del tutto. Anche con il
volume completamente abbassato, si potrebbe percepire un suono quando si accende o spegne l'unità. Ciò
è normale e non indica un guasto.
Português
Manual do Proprietário
Sobre plug-in/plug-out
Quando você ativa o botão [SYSTEM-1], esta unidade opera como um
sintetizador SYSTEM-1. Quando você ativa o botão [PLUG-OUT], esta
unidade opera como um sintetizador “plug-out”.
O que é “plug-out”?
• Um sintetizador virtual plug-out compatível (vendido separadamente)
pode ser baixado para esta unidade, permitindo que você toque a unidade de forma independente.
• O sintetizador virtual plug-out compatível também pode ser usado como sintetizador plug-in no seu
computador.
• Para obter mais detalhes sobre sintetizadores virtuais plug-out dedicados, como obtê-
los e sobre os requisitos operacionais, visite o site da Roland.
& http://roland.cm/system1
Sincronizar/Gravar com outros dispositivos
O SYSTEM-1 pode receber dados de MIDI Clock (F8) para sincronizar seu andamento.
Sincronizar com um TR-8
Você pode sincronizar o SYSTEM-1 com um TR-8 usando um cabo MIDI
disponível comercialmente para fazer as conexões.
Sincronizar/gravar com uma DAW em computador via USB
Se você usar um cabo USB 2.0 disponível comercialmente para conectar
o SYSTEM-1 ao computador, poderá sincronizar o SYSTEM-1 com sua
estação de trabalho de áudio digital (DAW) via MIDI USB ou gravar o som
do SYSTEM-1 em faixas da sua DAW via áudio USB.
TR-8 (principal) SYSTEM-1
(secundário)
MIDI OUT MIDI IN
Ajustes diversos
Restaurar os ajustes de fábrica ( restauração aos padrões de fábrica)
Veja como retornar o SYSTEM-1 às con gurações originais de fábrica.
1. Mantendo o botão [MANUAL] pressionado, ligue a energia.
O botão [ARPEGGIO] começa a piscar.
Se decidir cancelar a restauração aos padrões de fábrica, desligue a energia.
2. Pressione o botão [ARPEGGIO] para executar a função de restauração aos padrões de fábrica.
3. Quando todos os botões se acenderem, desligue a energia do SYSTEM-1 e depois ligue novamente.
MIDI e outras con gurações
1. Mantendo o botão [SYSTEM-1] pressionado, ligue a energia.
O botão [ARPEGGIO] começa a piscar.
Se decidir não fazer ajustes, desligue a energia.
2. Use os botões [1]–[3] e o seletor SCATTER [TYPE] para alterar as con gurações.
Parâmetro Controlador Explicação
Canal MIDI
Seletor
[TYPE]
Apagado
(OFF)
Especi ca o canal de transmissão/recepção MIDI. Os LEDs do
SCATTER (1–10) indicam o canal. (padrão: 1)
• Todos apagam (OFF) quando girado todo para a esquerda
• Todos acesos (OMNI) quando girado todo para a direita
• Para o intervalo 11–16, os LEDs 10 e 1–6 se acendem
simultaneamente.
1–16
Todos acesos
(OMNI)
São recebidas as mensagens MIDI de todos os canais.
O canal de transmissão MIDI será o 1.
Fonte
de MIDI
Clock
Botão [1]
Aceso
(AUTO)
Se o MIDI Clock estiver sendo enviado para o conector MIDI IN ou
para a porta USB, o andamento do SYSTEM-1 será sincronizado
automaticamente com o MIDI Clock. (padrão)
* Se o MIDI Clock estiver sendo enviado simultaneamente do
conector MIDI IN e da porta USB, a porta USB terá prioridade.
Apagado
(INTERNAL)
O SYSTEM-1 opera no andamento especi cado na própria unidade.
Escolha a con guração “INTERNAL” se você não quiser sincronizar
com um dispositivo externo.
MIDI Thru Botão [2]
Aceso (ON)
Especi ca se os dados recebidos do conector MIDI IN serão
retransmitidos a partir do conector MIDI OUT (ON: padrão) ou se
não serão retransmitidos (OFF).
Apagado
(OFF)
Modo
BOOST
Botão [3]
Aceso (ON)
Reforça o nível de saída dos conectores OUT.
Apagado
(OFF)
LED DEMO
Mantenha [MOD]
pressionado e gire o
seletor [TYPE]
Especi ca o tempo (minutos) até o LED DEMO ser exibido. Se estiver
apagado, o LED DEMO não será exibido.
3. Pressione o botão [ARPEGGIO] para salvar as con gurações.
As con gurações são salvas e o SYSTEM-1 é reiniciado.
Especi cações principais Roland SYSTEM-1: PLUG-OUT SYNTHESIZER
Polifonia máxima 4 vozes (SYSTEM-1 Mode)
Fonte de alimentação Adaptador AC
Uso de corrente 850 mA
Dimensões 472 (L) x 283 (P) x 70 (A) mm
Peso 2.4 kg (sem o adaptador AC)
Acessórios Adaptador AC, Manual do Proprietário, folheto “USO SEGURO DA UNIDADE”
Opcionais (vendidos
separadamente)
Chave de pedal: Série DP, pedal: BOSS FS-5U,
Pedal de expressão: EV-5
* Com a nalidade de aprimorar o produto, as especi cações e/ou a aparência desta unidade estão sujeitas a
mudanças sem aviso prévio.
Antes de usar esta unidade, leia cuidadosamente o folheto “USO SEGURO DA UNIDADE”. Esse folheto fornece informações
importantes sobre a operação correta da unidade. Além disso, para ter uma boa compreensão de todos os recursos da sua nova
unidade, leia todo o Manual do Proprietário. Esse manual deverá ser guardado em local de fácil acesso para consultas futuras.
Copyright © 2014 ROLAND CORPORATION
Todos os direitos reservados. Nenhuma parte desta publicação poderá ser reproduzida de nenhuma forma sem permissão por
escrito da ROLAND CORPORATION.
4
MIXER
Aqui, você pode ajustar o volume de OSC 1, OSC 2, do suboscilador (um oscilador que produz um som uma ou
duas oitavas mais baixas) e de ruído.
Controlador Explicação
Botão [OSC 1] Ajusta o volume do oscilador OSC 1.
Botão [OSC 2] Ajusta o volume do oscilador OSC 2.
Botão [SUB OSC] Ajusta o volume do suboscilador.
Botão [OSC TYPE]
Seleciona o tipo de suboscilador.
Aceso: Som uma oitava abaixo; Apagado: Som duas oitavas abaixo
Botão [NOISE] Ajusta o volume do ruído.
Botão [NOISE TYPE]
Seleciona o tipo de ruído.
Aceso: ruído branco; Apagado: ruído rosa
5
PITCH
Aqui, você pode criar uma alteração de variação no tempo (envelope) para a a nação.
Controlador Explicação
Botão [ENV]
Se esse botão estiver voltado para a direita, a a nação se torna inicialmente mais
aguda e depois retorna à a nação da tecla pressionada.
Se esse botão estiver voltado para a esquerda, a a nação se torna inicialmente mais
grave e depois retorna à a nação da tecla pressionada.
Controle deslizante [A]
Esses controles deslizantes operam de modo semelhante aos controles [A][D] da seção
7
AMP (afetam a a nação em vez do volume).
Controle deslizante [D]
6
FILTER
Estas con gurações determinam o brilho e a densidade do som. Aqui, você também pode especi car a
alteração de variação no tempo (envelope) para o ltro.
Controlador Explicação
Botão [LPF CUTOFF]
Especi ca a frequência de corte do ltro passa-baixas. Os componentes de frequência
acima da frequência de corte são eliminados, tornando o som mais suave.
Botão [LPF TYPE]
Seleciona a inclinação (declividade) do ltro
passa-baixas.
Aceso: -12 dB; Apagado: -24 dB
Botão [HPF CUTOFF]
Especi ca a frequência de corte do ltro passa-altas. Os componentes de frequência
abaixo da frequência de corte são eliminados.
Botão [RESO]
A ressonância reforça o som na região da frequência de corte do ltro.
Ajustes mais altos produzem ênfases maiores, criando um som mais característico de
sintetizadores.
Botão [ENV]
Esse botão especi ca a profundidade e direção da alteração de frequência de corte
produzida pelos controles deslizantes [A], [D], [S] e [R].
Girando esse botão para a direita, a frequência de corte será deslocada para cima.
Girando esse botão para a esquerda, a frequência de corte será deslocada para baixo.
Botão [KEY]
Permite a variação da frequência de corte do ltro de acordo com a tecla tocada.
Girando esse botão para a direita, a frequência de corte ca mais alta conforme você
toca notas mais altas.
Girando esse botão para a esquerda, a frequência de corte ca mais baixa conforme
você toca notas mais baixas.
Controle deslizante [A]
Esses controles deslizantes operam de modo similar aos controles [A][D][S][R] da seção
7
AMP (afetam a frequência de corte, em vez do volume).
Controle deslizante [D]
Controle deslizante [S]
Controle deslizante [R]
7
AMP
Aqui, você pode criar alterações de variação no tempo (envelope) para o volume.
Controlador Explicação
Botão [TONE] Ajusta o brilho do som.
Botão [CRUSHER] Modi ca a característica do timbre distorcendo a forma de onda.
Controle deslizante [A]
(Tempo de ataque)
Especi ca o tempo do momento que você
pressiona a tecla até o volume máximo ser
atingido.
Controle deslizante [D]
(Tempo de declínio)
Especi ca o tempo do momento em que o volume
máximo é atingido até que chegue ao nível de
sustentação.
Controle deslizante [S]
(Nível de sustentação)
Especi ca o nível de volume que será mantido
desde o término dos tempos de ataque e declínio
até que a tecla seja liberada.
Controle deslizante [R]
(Tempo de liberação)
Especi ca o tempo desde a liberação da tecla até
que o volume atinja o nível seu valor mínimo.
8
EFFECTS
Aqui, você pode ajustar a quantidade de reverb e delay.
Controlador Explicação
Botão [REVERB] Adiciona reverberação.
Botão [DELAY] Ajusta o volume do som do delay.
Botão [TIME] Ajusta o tempo do delay (o tempo de atraso para a reprodução do som).
9
PITCH BEND/SCATTER
O “Pitch bend” modi ca a a nação.
O que signi ca Scatter (Dispersão)?
É uma função que aplica várias alterações ao arpejo, criando ritmos musicais.
Controlador Explicação
Botão [ARPEGGIO]
Produz um arpejo enquanto você mantém um acorde pressionado no teclado. (Esta
função é chamada de “arpejador”.)
Botão [ARP TYPE] Seleciona a variação do arpejo.
Botão [ARP STEP] Especi ca o valor da nota para cada etapa do arpejador.
Seletor rotativo [PITCH
BEND/SCATTER]
O seletor rotativo normalmente opera como o pitch bend.
Se a dispersão estiver ativada no botão [ARPEGGIO], o seletor rotativo ajusta a
profundidade da dispersão.
* A dispersão ca ativada enquanto você opera o seletor rotativo. Quando você
recoloca o seletor rotativo no centro, a dispersão é desativada.
Seletor [TYPE] Seleciona o tipo de dispersão (1–10).
Botão [KEY HOLD]
Você pode fazer com que as notas continuem soando mesmo depois de retirar a mão
do teclado.
Descrições do painel
2 3 4 5 6 7 81
9 10
1
Seção comum
Aqui você pode fazer as seguintes con gurações no SYSTEM-1.
Controlador Explicação
Botão [VOLUME] Ajusta o volume.
Botão
[PORTAMENTO]
Cria uma alteração suave na a nação entre uma tecla e a próxima tecla tocada. O botão
ajusta o tempo necessário à mudança de a nação.
Botão [LEGATO]
Aplica portamento apenas quando você toca legato (ou seja, quando você pressiona a
tecla seguinte antes de liberar a anterior).
Botão [TEMPO] De ne o andamento do arpejador (dispersão). O LED pisca no andamento especi cado.
Botão [TEMPO
SYNC]
Sincroniza o RATE da seção
2
LFO e o tempo do delay (TIME) da seção
8
EFFECTS com
o andamento.
Botão [LFO KEY
TRIG]
Especi ca se o ciclo LFO será sincronizado para começar quando a tecla estiver
pressionada (ON) ou não (OFF).
Botão [MONO]
Se estiver ativado (aceso), o sintetizador tocará em modo monofônico (notas isoladas).
Se estiver piscando, o sintetizador tocará todos os sons em uníssono (modo UNISON).
Botão MODEL
[SYSTEM-1]/
[PLUG-OUT]
Se o botão [SYSTEM-1] estiver ativado, esta unidade irá operar como um sintetizador
SYSTEM-1. Se o botão [PLUG-OUT] estiver ativado, esta unidade irá operar no modo
“plug-out”.
&Consulte “Sobre plug-in/plug-out”
Botão [MANUAL]
Faz com que os sons sejam produzidos de acordo com as con gurações atuais dos botões
e controles deslizantes.
Botão de memória
[1]–[8]
Use esses botões para armazenar/recuperar oito conjuntos de con gurações do painel
(botões/controles deslizantes).
Para armazenar con gurações do painel em um botão de memória
Pressione por alguns segundos um botão de memória de [1]–[8].
Para recuperar con gurações (um som) de um botão de memória
Pressione um botão de memória de [1]–[8].
2
LFO
Aqui, você pode criar uma alteração cíclica (modulação) no som aplicando um vibrato (modulação de a nação)
ou tremolo (modulação de volume).
Controlador Explicação
Botão de onda
Seleciona a forma de onda do oscilador de baixa frequência (LFO).
R (onda senoidal), S (onda triangular), T (onda dente de serra), U (onda quadrada),
W (amostragem e retenção), RND (onda aleatória)
Botão [FADE TIME]
Especi ca o tempo desde quando o tom é emitido até que o
LFO atinja sua amplitude máxima.
Botão [RATE] Determina a velocidade do LFO.
Botão [PITCH] Permite que o LFO module a a nação, produzindo um efeito de vibrato.
Botão [FILTER] Permite que o LFO module a FILTER CUTOFF (frequência de corte).
Botão [AMP] Permite que o LFO module o AMP LEVEL (volume), produzindo um efeito de tremolo.
3
OSC 1/OSC 2
Aqui, você pode selecionar a forma de onda que determina a característica do som e especi car sua a nação.
O SYSTEM-1 possui dois osciladores (OSC 1 e OSC 2).
Controlador Explicação
Botão de onda
Seleciona a forma de onda que é a base do som.
T (onda dente de serra), U (onda quadrada), S (onda triangular),
(onda dente de
serra 2), (onda quadrada 2), (onda triangular 2)
Botão [COLOR] O resultado depende da forma de onda.
Botão [MOD]
Seleciona a fonte que modula o botão [COLOR].
MAN O som é determinado pela posição do botão [COLOR]. Ele não varia com o tempo.
LFO
O som varia com o tempo na frequência especi cada na seção
2
LFO.
P. ENV
O som varia com o tempo de acordo com o envelope da seção
5
PITCH.
F. ENV
O som varia com o tempo de acordo com o envelope da seção
6
FILTER.
A. ENV
O som varia com o tempo de acordo com o envelope da seção
7
AMP.
S. OSC O som varia com o tempo de acordo com a frequência do suboscilador.
Botão de oitava
(base)
Especi ca a oitava do oscilador.
Botão [CROSS
MOD]
Modi ca a frequência de OSC 1 de acordo com a forma de onda de OSC 2. Gire o botão
para a direita para tornar o som de OSC 1 mais complexo, o que permite criar sons
metálicos ou efeitos sonoros.
Botão [TUNE]
Ajusta a a nação do oscilador.
Coarse Tune (A nação inicial)
Ajusta a a nação em intervalos de semitons.
Mantendo os botões [RING][SYNC] pressionados simultaneamente e girando o seletor
SCATTER [TYPE], você pode ajustar o Coarse Tune.
Os LEDs de SCATTER (1–10) indicam a quantidade de Coarse Tune (OFF (apagado),
-11–+11). (Os LEDs 10 e 1 acendem simultaneamente para indicar 11.)
Botão [RING]
Este é um modulador em anel. Ele gera uma forma de
onda complexa multiplicando OSC 1 e OSC 2.
Botão [SYNC]
Este é o sincronizador do oscilador. Ele gera uma forma
de onda complexa forçando a rede nição de OSC 2 para
o início de seu ciclo, sincronizado com a frequência de
OSC 1.
Controlador Explicação
Botão OCTAVE
[DOWN] [UP]
Mudança de oitavas
Você pode mudar a faixa de a nação do teclado em etapas de uma oitava. O botão
ca aceso para con guração de uma oitava, e ca piscando para a con guração de
2–3 oitavas. Se você pressionar os botões [DOWN] [UP] simultaneamente, o teclado
voltará à sua faixa de a nação normal.
Transposição de teclas
Ao manter os botões [DOWN][UP] pressionados simultaneamente e girar o seletor
SCATTER [TYPE], você pode transpor o teclado em semitons (somente em escala
ascendente).
• Os LEDs de SCATTER (1–10) indicam a quantidade de transposição (1–11). (Os
LEDs 10 e 1 acendem simultaneamente para indicar 11.)
• Todos apagam (OFF) quando girado todo para a esquerda
Botão [MOD]
O vibrato (modulação) é aplicado ao som enquanto você mantém pressionado o
botão [MOD]. Mantendo o botão [MOD] pressionado e operando a seção
2
LFO,
você poderá ajustar a profundidade de MOD.
10
Teclado
É um teclado de tamanho padrão.
Não é sensitivo (possui velocidade xa).
Conexão do equipamento
* Para evitar mau funcionamento e falhas no equipamento, sempre abaixe o volume e desligue todas as
unidades antes de fazer qualquer conexão.
A B C E F GD
H
A
Conector DC IN
Conecte aqui o adaptador AC incluso. Use apenas o adaptador AC incluso.
* Para evitar a interrupção acidental da alimentação da unidade (caso o plugue seja puxado
acidentalmente) e para evitar aplicar uma tensão indevida ao conector DC IN, xe o cabo
de força usando o gancho do cabo, conforme mostrado na ilustração.
B
Porta USB ( )
Use um cabo USB 2.0 disponível comercialmente para conectar essa porta ao computador. Ele pode ser usado
para transferir dados de áudio USB e MIDI USB. É necessário instalar o driver USB antes de conectar o
SYSTEM-1 ao computador. Faça o download do driver USB no site da Roland. Para obter detalhes, consulte o
arquivo Readme.htm incluído no download.
& http://www.roland.com/support/
C
Conectores MIDI
Para conectar um dispositivo MIDI.
D
Slot de segurança (
)
& http://www.kensington.com/
E
Conectores de PEDAL
Conectando um pedal (série DP, BOSS FS-5U, vendidos separadamente) ao conector HOLD, as notas serão
sustentadas enquanto o pedal for mantido pressionado, mesmo depois que você tirar as mãos do teclado.
Se você conectar um pedal de expressão (EV-5, vendido separadamente) ao conector CONTROL, será possível
usar o pedal de expressão para controlar o volume e adicionar expressividade à sua execução.
* Use apenas o pedal de expressão especi cado (EV-5, vendido separadamente). Se conectar outros pedais de
expressão, você poderá provocar mau funcionamento ou dani car a unidade.
F
Conectores OUT
Conecte esses conectores ao ampli cador ou às caixas de retorno. Se o sistema for mono, use somente o
conector L/MONO.
G
Conector PHONES
Conecte fones de ouvido (vendidos separadamente) aqui.
Como ligar e desligar a energia
H
Chave [POWER]
Liga/desliga o equipamento.
* Após fazer as conexões corretas, certi que-se de ligar a energia na seguinte ordem: primeiro o
SYSTEM-1 e depois o sistema conectado. Ligar a energia dos equipamentos na ordem incorreta pode
provocar mau funcionamento ou danos. Ao desligar a energia, desligue o sistema conectado primeiro e
depois o SYSTEM-1.
* Esta unidade está equipada com um circuito de proteção. É necessário um breve intervalo (alguns
segundos) após ligar a unidade para que ela possa operar normalmente.
* Antes de ligar/desligar a unidade, lembre-se sempre de abaixar o volume. Mesmo com o volume abaixado,
você poderá ouvir algum som ao ligar/desligar a unidade. Entretanto, isso é normal e não indica mau
funcionamento.
Español
Manual del usuario
Acerca del modo conectado/desconectado
Al activar el botón [SYSTEM-1], la unidad funciona como sintetizador
SYSTEM-1. Si activa el botón [PLUG-OUT], la unidad funciona como
sintetizador “desconectado”.
¿Qué signi ca “desconectado”?
• Es posible descargar para la unidad un sintetizador de software
compatible desconectado, que permite tocar esta unidad de forma independiente.
• El software compatible desconectado también puede utilizarse como sintetizador conectado en su
ordenador.
• Para más información sobre los sintetizadores de software desconectados exclusivos
y cómo obtenerlos, así como los requisitos de funcionamiento, visite el sitio web de
Roland.
& http://roland.cm/system1
Sincronización/grabación con otros dispositivos
La SYSTEM-1 puede recibir datos del reloj MIDI (F8) para sincronizar su tempo.
Sincronización con TR-8
Puede sincronizar el SYSTEM-1 con una caja de ritmos TR-8
conectándolo por medio de un cable MIDI común.
Sincronización/grabación con el software DAW de su
ordenador mediante USB
Si conecta el SYSTEM-1 a su ordenador mediante un cable USB 2.0 común,
podrá sincronizar el SYSTEM-1 con el software DAW mediante USB MIDI o
grabar el sonido del SYSTEM-1 en las pistas de su software DAW mediante
audio USB.
TR-8 (maestro) SYSTEM-1
(esclavo)
MIDI OUT MIDI IN
Ajustes diversos
Restauración de los ajustes de fábrica ( restablecimiento de fábrica)
Siga estos pasos para restablecer el SYSTEM-1 a su estado de con guración de fábrica.
1. Mientras mantiene presionado el botón [MANUAL], encienda el equipo.
El botón [ARPEGGIO] parpadea.
Si decide cancelar el restablecimiento de fábrica, apague el equipo.
2. Pulse el botón [ARPEGGIO] para ejecutar el restablecimiento de fábrica.
3. Cuando todos los botones se iluminen, apague el SYSTEM-1 y vuelva a encenderlo.
MIDI y otros ajustes
1. Encienda la unidad mientras mantiene presionado el botón [SYSTEM-1].
El botón [ARPEGGIO] parpadea.
Si decide no establecer los ajustes, apague el equipo.
2. Use los botones [1]–[3] y el mando SCATTER [TYPE] para cambiar los ajustes.
Parámetro Controlador Explicación
Canal MIDI
Mando
[TYPE]
No iluminado
(OFF)
Especi ca el canal de transmisión/recepción MIDI. Los LED
SCATTER (1–10) indican el canal. (valor predeterminado: 1)
• Si se gira completamente a la izquierda se apagan todos
(OFF).
• Si se gira completamente a la derecha se encienden todos
(OMNI).
• Para 11–16, los LED 10 y 1–6 se iluminan simultáneamente.
1–16
Todos iluminados
(OMNI)
Se reciben mensajes MIDI de todos los canales.
El canal de transmisión MIDI será el 1.
Fuente del
reloj MIDI
Botón [1]
Iluminado (AUTO)
Si el reloj MIDI está entrando por el conector MIDI IN o el puerto
USB, el tempo del SYSTEM-1 se sincronizará automáticamente
con el reloj MIDI. (valor predeterminado)
* Si el reloj MIDI entra simultáneamente desde el conector MIDI
IN y el puerto USB, el puerto USB tendrá prioridad.
Apagado
(INTERNAL)
El SYSTEM-1 funciona al tempo especi cado en la propia
unidad. Elija el ajuste “INTERNAL” si no desea sincronizar con un
dispositivo externo.
MIDI Thru Botón [2]
Iluminado (ON)
Especi ca si los datos recibidos desde el conector MIDI IN
se retransmitirán desde el conector MIDI OUT (ON: valor
predeterminado) no se retransmitirán (OFF).
No iluminado
(OFF)
Modo
BOOST
Botón [3]
Iluminado (ON)
Potencia el nivel de salida de los conectores OUT.
No iluminado
(OFF)
LED DEMO
Mantenga presionado
[MOD] y gire el mando
[TYPE].
Especi ca el tiempo (minuto) hasta que se muestra el LED
DEMO. Si se apaga, deja de mostrarse el LED DEMO.
3. Pulse el botón [ARPEGGIO] para guardar los ajustes.
Los ajustes se guardan y el SYSTEM-1 se reinicia.
Especi caciones principales Roland SYSTEM-1: PLUG-OUT SYNTHESIZER
Polifonía máxima 4 voces (SYSTEM-1 Mode)
Fuente de alimentación Adaptador de CA
Consumo eléctrico 850 mA
Dimensiones 472 (ancho) x 283 (fondo) x 70 (alto) mm
Peso 2.4 kg (sin adaptador de CA)
Accesorios Adaptador de CA, manual del usuario, folleto “UTILIZACIÓN SEGURA DE LA UNIDAD”
Opciones (se venden
por separado)
Interruptor del pedal: serie DP, conmutador de pedal: BOSS FS-5U,
pedal de expresión: EV-5
* Con el n de mejorar el producto, las especi caciones y/o el aspecto de la unidad pueden modi carse sin
previo aviso.
Antes de utilizar esta unidad, lea atentamente el folleto “UTILIZACIÓN SEGURA DE LA UNIDAD”. En este folleto encontrará
información importante acerca de la utilización correcta de la unidad. También es aconsejable leer íntegramente el manual de
instrucciones para familiarizarse y conocer bien todas las funciones del equipo nuevo. Asimismo, se recomienda guardar el manual
en un lugar accesible para consultas futuras.
Copyright © 2014 ROLAND CORPORATION
Todos los derechos reservados. Se prohíbe la reproducción total o parcial y en cualquier formato de la presente publicación sin la
previa autorización por escrito de ROLAND CORPORATION.
4
MIXER
Aquí puede ajustar el volumen de OSC 1, OSC 2, el suboscilador (un oscilador que produce un sonido una o dos
octavas por debajo) y el ruido.
Controlador Explicación
Mando [OSC 1] Ajusta el volumen de OSC 1.
Mando [OSC 2] Ajusta el volumen de OSC 2.
Mando [SUB OSC] Ajusta el volumen del suboscilador.
Botón [OSC TYPE]
Selecciona el tipo de suboscilador.
Iluminado: suena una octava por debajo. No iluminado: suena dos octavas por debajo.
Mando [NOISE] Ajusta el volumen del ruido.
Botón [NOISE TYPE]
Selecciona el tipo de ruido.
Iluminado: ruido blanco. No iluminado: ruido rosa.
5
PITCH
Aquí puede crear un cambio en función del tiempo (envolvente) para el tono.
Controlador Explicación
Mando [ENV]
Si se gira a la derecha, el tono inicialmente sube y, a continuación, regresa al tono de la
tecla pulsada.
Si se gira a la izquierda, el tono baja y, a continuación, regresa al tono de la tecla
pulsada.
Control deslizante [A]
Estos controles deslizantes funcionan de forma parecida a los controles deslizantes [A]
[D] de la sección
7
AMP (afectan al tono en lugar de al volumen).
Control deslizante [D]
6
FILTER
Estos ajustes determinan el brillo y la densidad del sonido. También puede especi car el cambio en función del
tiempo (envolvente) del ltro.
Controlador Explicación
Mando [LPF CUTOFF]
Especi ca la frecuencia de corte del ltro de paso bajo. Los componentes de frecuencia
por encima de la frecuencia de corte se eliminan, por lo que el sonido resulta más
suave.
Botón [LPF TYPE]
Selecciona la pendiente (más o menos
pronunciada) del ltro de paso bajo.
Iluminado: -12 dB. No iluminado: -24 dB.
Mando [HPF CUTOFF]
Especi ca la frecuencia de corte del ltro de paso alto. Los componentes de frecuencia
por debajo de la frecuencia de corte se eliminan.
Mando [RESO]
La resonancia potencia el sonido en la región de la frecuencia de corte del ltro.
Unos ajustes más altos producen un mayor énfasis, creando sonido distintivo de
“sintetizador”.
Mando [ENV]
Este mando especi ca la profundidad y la dirección del cambio en la frecuencia de
corte producido por los controles deslizantes [A], [D], [S] y [R].
Si el mando se gira a la derecha, la frecuencia de corte se mueve hacia arriba.
Si el mando se gira a la izquierda, la frecuencia de corte se mueve hacia abajo.
Mando [KEY]
Permite variar la frecuencia de corte del ltro según la tecla pulsada.
Si el mando se gira a la derecha, la frecuencia de corte asciende a medida que se tocan
notas más agudas.
Si el mando se gira a la izquierda, la frecuencia de corte desciende a medida que se
tocan notas más graves.
Control deslizante [A]
Estos controles deslizantes funcionan de forma parecida a los controles deslizantes [A]
[D][S][R] de la sección
7
AMP (afectan a la frecuencia de corte en lugar de al volumen).
Control deslizante [D]
Control deslizante [S]
Control deslizante [R]
7
AMP
Aquí puede crear un cambio en función del tiempo (envolvente) para el volumen.
Controlador Explicación
Mando [TONE] Ajusta el brillo del sonido.
Mando [CRUSHER] Modi ca el carácter tonal distorsionando la forma de onda.
Control deslizante [A]
(tiempo de ataque)
Especi ca el tiempo desde que se pulsa la tecla
hasta que se alcanza el volumen máximo.
Control deslizante [D]
(tiempo de
disminución)
Especi ca el tiempo desde que se alcanza el
volumen máximo hasta que disminuye al nivel de
sostenido.
Control deslizante [S]
(nivel de sostenido)
Especi ca el nivel de volumen que se sostendrá
desde que terminan los tiempos de ataque y
disminución hasta que se suelta la tecla.
Control deslizante [R]
(tiempo de
restablecimiento)
Especi ca el tiempo desde que se suelta la tecla
hasta que el volumen alcanza su valor mínimo.
8
EFFECTS
Aquí puede ajustar la cantidad de reverberación y retardo.
Controlador Explicación
Mando [REVERB] Añade reverberación.
Mando [DELAY] Ajusta el volumen del sonido de retardo.
Mando [TIME] Ajusta el tiempo de retardo (el tiempo que se retrasa el sonido).
9
PITCH BEND/SCATTER
“Pitch bend” modi ca el tono.
¿Qué es Scatter?
Esta función aplica varios cambios a un arpegio, creando sensaciones musicales.
Controlador Explicación
Botón [ARPEGGIO]
Hace que se produzca un arpegio con solo pulsar un acorde en el teclado. (Esta
función se conoce como “arpegiador”).
Mando [ARP TYPE] Selecciona la variación del arpegio.
Mando [ARP STEP] Especi ca el valor de la nota por cada paso del arpegiador.
Mando giratorio
[PITCH BEND/
SCATTER]
Este mando giratorio normalmente funciona para la in exión de tono.
Si se activa Scatter con el botón [ARPEGGIO], el mando giratorio ajusta la profundidad
de la dispersión.
* Scatter permanece activado mientras ser acciona el mando giratorio. Al volver a
colocar el mando giratorio en la posición central, Scatter se desactiva.
Mando [TYPE] Selecciona el tipo de dispersión (1–10).
Botón [KEY HOLD]
Puede hacer que las notas continúen sonando aun después de retirar la mano del
teclado.
Descripción del panel
2 3 4 5 6 7 81
9 10
1
Sección común
Aquí puede realizar los siguientes ajustes para el SYSTEM-1.
Controlador Explicación
Mando [VOLUME] Ajusta el volumen.
Mando
[PORTAMENTO]
Crea un cambio paulatino del tono entre una tecla pulsada y la siguiente. El mando ajusta
el tiempo necesario para que cambie el tono.
Botón [LEGATO]
Aplica un portamento únicamente al tocar legato (es decir, al pulsar la siguiente tecla antes
de haber soltado la tecla anterior).
Mando [TEMPO] Ajusta el tempo del arpegiador (dispersión). El LED parpadea al tempo especi cado.
Botón [TEMPO
SYNC]
Sincroniza el valor RATE de la sección
2
LFO y el tiempo de retardo (TIME) de la sección
8
EFFECTS según el tempo.
Botón [LFO KEY
TRIG]
Especi ca si el ciclo LFO se sincronizará para comenzar cuando se pulsa la tecla (ON) o no
(OFF).
Botón [MONO]
Si está encendido (iluminado), el sintetizador sonará en monofonía (notas sueltas).
Si parpadea, el sintetizador reproducirá todos los sonidos al unísono (modo UNISON).
Botón MODEL
[SYSTEM-1]/
[PLUG-OUT]
Si el botón [SYSTEM-1] está activado, la unidad funcionará como un sintetizador SYSTEM-1.
Si el botón [PLUG-OUT] está activado, la unidad funcionará en modo “desconectado”.
&Consulte “Acerca del modo conectado/desconectado”
Botón [MANUAL]
Hace que el sonido se produzca según los ajustes actuales de los mandos y controles
deslizantes.
Botones de
memoria [1]–[8]
Use estos botones para almacenar/recuperar ocho grupos de ajustes del panel (mandos/
controles deslizantes).
Para guardar los ajustes del panel en un botón de memoria
Mantenga presionado uno de los botones de memoria [1]–[8].
Para recuperar los ajustes (sonido) de un botón de memoria
Pulse uno de los botones de memoria [1]–[8].
2
LFO
Aquí puede crear un cambio cíclico (modulación) en el sonido aplicando vibrato (modulación del tono) o
tremolo (modulación del volumen).
Controlador Explicación
Mando de onda
Selecciona el tipo de onda del LFO.
R (onda sinusoide), S (onda triangular), T (onda de sierra), U (onda cuadrada), W
(muestreo y retención), RND (onda aleatoria)
Mando [FADE
TIME]
Especi ca el tiempo desde que se emite el sonido hasta que
el LFO alcanza su amplitud máxima.
Mando [RATE] Determina la velocidad del LFO.
Mando [PITCH] Permite al LFO modular el tono, produciendo un efecto de vibrato.
Mando [FILTER] Permite al LFO modular FILTER CUTOFF (frecuencia de corte).
Mando [AMP] Permite al LFO modular AMP LEVEL (volumen), produciendo un efecto de tremolo.
3
OSC 1/OSC 2
Aquí puede seleccionar la forma de onda que determina el carácter del sonido y especi car su tono.
El SYSTEM-1 cuenta con dos osciladores (OSC 1 y OSC 2).
Controlador Explicación
Mando de onda
Selecciona la forma de onda base para el sonido.
T (onda de sierra), U (onda cuadrada), S (onda triangular),
(onda de sierra 2),
(onda cuadrada 2), (onda triangular 2)
Mando [COLOR] El resultado depende de la forma de onda.
Mando [MOD]
Selecciona la fuente que modula el mando [COLOR].
MAN
El sonido está determinado por la posición del mando [COLOR]. No variará con el
tiempo.
LFO
El sonido varía con el tiempo a la velocidad especi cada en la sección
2
LFO.
P. ENV
El sonido varía con el tiempo según la envolvente de la sección
5
PITCH.
F. ENV
El sonido varía con el tiempo según la envolvente de la sección
6
FILTER.
A. ENV
El sonido varía con el tiempo según la envolvente de la sección
7
AMP.
S. OSC El sonido varía con el tiempo según la frecuencia del suboscilador.
Mando (pie) de
octava
Especi ca la octava del oscilador.
Mando [CROSS
MOD]
Modi ca la frecuencia de OSC 1 según la forma de onda de OSC 2. Si gira el mando a la
derecha, OSC 1 pasará a ser un sonido más complejo, lo que le permitirá crear sonidos
metálicos o efectos de sonido.
Mando [TUNE]
Ajusta el tono del oscilador.
A nación aproximada
Ajusta el tono en pasos de semitono.
Si mantienen presionados los botones [RING][SYNC] simultáneamente y gira el mando
SCATTER [TYPE], puede ajustar la a nación aproximada.
Los LED SCATTER (1–10) indican el grado de a nación aproximada (OFF (no iluminado),
-11–+11). (Los LED 10 y 1 se iluminan simultáneamente para indicar 11).
Botón [RING]
Modulador de anillo. Genera una forma de onda compleja
multiplicando OSC 1 y OSC 2.
Botón [SYNC]
Sincronización del oscilador. Genera una forma de onda
compleja forzando el restablecimiento de OSC 2 al
comienzo de su ciclo en sincronización con la frecuencia
de OSC 1.
Controlador Explicación
Botón OCTAVE
[DOWN] [UP]
Cambio de octava
Puede cambiar el rango tonal del teclado en pasos de una octava. El botón se ilumina
para el ajuste de una octava y parpadea para el ajuste de 2–3 octavas. Si pulsa los
botones [DOWN] [UP] simultáneamente, el teclado regresará a su rango tonal normal.
Transposición de tono
Si mantiene presionados los botones [DOWN][UP] simultáneamente y gira el mando
SCATTER [TYPE], puede transponer el teclado en pasos de semitono (solo en sentido
ascendente).
• Los LED SCATTER (1–10) indican el grado de transposición (1–11). (Los LED 10 y 1
se iluminan simultáneamente para indicar 11).
• Si se gira completamente a la izquierda se apagan todos (OFF).
Botón [MOD]
Si se mantiene presionado el botón [MOD] se aplica un vibrato (modulación) al sonido.
Si mantiene presionado el botón [MOD] y maneja la sección
2
LFO, puede ajustar la
profundidad de MOD.
10
Teclado
Se trata de un teclado de tamaño estándar.
No es sensible a la presión (la velocidad es ja).
Conexión del equipo
* Para evitar que el equipo funcione de manera de ciente o sufra algún daño, baje siempre el volumen y
apague todas las unidades antes de proceder a realizar cualquier conexión.
A B C E F GD
H
A
Conector DC IN
Conecte aquí el adaptador de CA incluido. Utilice únicamente el adaptador de CA incluido.
* Para evitar la interrupción inesperada de la alimentación que llega a la unidad (si el
conector se desconecta accidentalmente) y para evitar que el conector DC IN sufra más
de lo necesario, ancle el cable de alimentación con el gancho suministrado tal y como se
muestra en la ilustración.
B
Puerto USB ( )
Utilice un cable USB 2.0 común para conectar este puerto a su ordenador. Puede utilizarse para transferir datos
de audio USB y MIDI USB. Antes de conectar el SYSTEM-1 a su ordenador, debe instalar el controlador USB.
Descargue el controlador USB desde el sitio web de Roland. Para más información, consulte el archivo Readme.
htm incluido en la descarga.
& http://www.roland.com/support/
C
Conectores MIDI
Sirven para conectar dispositivos MIDI.
D
Ranura de seguridad (
)
& http://www.kensington.com/
E
Conectores PEDAL
Si conecta un interruptor del pedal (serie DP, BOSS FS-5U; se venden por separado) al conector HOLD, las notas
se sostendrán mientras mantenga pisado el pedal aunque retire las manos del teclado.
Si conecta un pedal de expresión (EV-5; se vende por separado) al conector CONTROL, podrá utilizar el pedal de
expresión para controlar el volumen y añadir expresión a su interpretación.
* Use únicamente el pedal de expresión especi cado (EV-5; se vende por separado). Si conecta otros pedales
de expresión podría provocar fallos de funcionamiento y daños en la unidad.
F
Conectores OUT
Conecte aquí un ampli cador o altavoces monitores. Si su sistema es monaural, utilice únicamente el conector
L/MONO.
G
Conector PHONES
Conecte aquí unos auriculares (se venden por separado).
Encendido y apagado
H
Conmutador [POWER]
Apaga y enciende la unidad.
* Una vez realizadas las conexiones correctamente, asegúrese de encender primero el SYSTEM-1 y, a
continuación, el sistema conectado. Si no enciende los equipos en el orden adecuado, podrían producirse
de ciencias en el funcionamiento o daños. Para apagar la unidad, apague primero el sistema conectado y,
a continuación, el SYSTEM-1.
* Esta unidad está equipada con un circuito de protección. Es necesario un breve intervalo de tiempo (unos
cuantos segundos) después del encendido para que funcione con normalidad.
* Antes de encender o apagar la unidad, asegúrese siempre de bajar el volumen. Incluso con el volumen
bajado, podría oírse algún sonido al encender o apagar la unidad. No obstante, esto es normal y no indica la
existencia de de ciencias de funcionamiento.
Nederlands
Gebruikershandleiding
Over Plug-In/Plug-Out
Als u de [SYSTEM-1]-knop gebruikt, fungeert dit systeem als een
SYSTEM-1 synthesizer. Als u de [PLUG-OUT]-knop gebruikt, fungeert dit
systeem als een “plug-out” synthesizer.
Wat is “plug-out”?
• U kunt een apart leverbare plug-out compatibele software-
synthesizer naar deze eenheid downloaden zodat u de eenheid zelfstandig kunt gebruiken.
• De plug-out compatibele software-synthesizer kan ook worden gebruikt als een plug-in synthesizer op uw
computer.
• Meer informatie over speciale plug-out software-synthesizers en hoe u ze kunt
verkrijgen, evenals de systeemeisen, vindt u op de website van Roland.
& http://roland.cm/system1
Synchroniseren/opnemen met andere apparaten
De SYSTEM-1 kan MIDI-kloksignalen (F8) ontvangen om zijn tempo te synchroniseren.
Synchroniseren met een TR-8
U kunt de SYSTEM-1 synchroniseren met een TR-8 door een in de handel
verkrijgbare MIDI-kabel te gebruiken voor uw aansluitingen.
Synchroniseren/opnemen met de DAW (digital audio
workstation) op uw computer via USB
Door gebruik te maken van een in de handel verkrijgbare USB 2.0-kabel
om de SYSTEM-1 aan te sluiten op uw computer, kunt u de SYSTEM-1
synchroniseren met uw DAW via USB MIDI, of het geluid van de SYSTEM-1
opnemen op de tracks van uw DAW via USB audio.
TR-8 (master) SYSTEM-1
(slave)
MIDI OUT MIDI IN
Overige instellingen
De fabrieksinstellingen herstellen ( Factory Reset)
Hier leest u hoe u de SYSTEM-1 kunt herstellen naar de fabrieksinstellingen.
1. Schakel de stroom in terwijl u de [MANUAL]-knop ingedrukt houdt.
De [ARPEGGIO]-knop knippert.
Schakel de stroom uit wanneer u beslist de herstelling van de fabrieksinstellingen te annuleren.
2. Druk op de [ARPEGGIO]-knop om de fabrieksinstellingen terug te zetten.
3. Schakel de stroom van de SYSTEM-1 uit als alle knoppen oplichten en schakel de stroom vervolgens
weer in.
MIDI en andere instellingen
1. Schakel de stroom in terwijl u de [SYSTEM-1]-knop ingedrukt houdt.
De [ARPEGGIO]-knop knippert.
Schakel de stroom uit wanneer u beslist geen instellingen te wijzigen.
2. Gebruik de knoppen [1]-[3] en de SCATTER [TYPE]-keuzeknop om de instellingen te wijzigen.
Parameter Controller Uitleg
MIDI-
kanaal
[TYPE]-
keuzeknop
Gedoofd (OFF)
Speci ceert het kanaal voor verzenden/ontvangen van MIDI. De
SCATTER LED's (1–10) geven het kanaal aan. (standaard: 1)
• Alles gedoofd (OFF) indien geheel naar links gedraaid.
• Alles opgelicht (OMNI) indien geheel naar rechts gedraaid.
• Voor 11–16 lichten de ledlampjes 10 en 1–6 tegelijk op.
1–16
Alles opgelicht
(OMNI)
MIDI-berichten van alle kanalen worden ontvangen.
Het MIDI-verzendkanaal is 1.
MIDI-
klokbron
Knop [1]
Verlicht (AUTO)
Wanneer een MIDI-kloksignaal wordt ingevoerd via de MIDI
IN-connector of de USB-poort, zal het tempo van de SYSTEM-1
automatisch synchroniseren met de MIDI-klok. (standaard)
* Wanneer simultaan een MIDI-kloksignaal wordt ingevoerd via
de MIDI IN-connector en de USB-poort, krijgt de USB-poort
voorrang.
Gedoofd
(INTERNAL)
De SYSTEM-1 werkt met het tempo aangegeven op het apparaat
zelf. Kies de instelling “INTERNAL” wanneer u niet wenst te
synchroniseren met een extern toestel.
MIDI Thru Knop [2]
Verlicht (ON)
Speci eert of data ontvangen via de MIDI IN-connector terug
wordt uitgezonden via de MIDI OUT-connector (ON: standaard)
of niet (OFF).
Gedoofd (OFF)
BOOST-
modus
Knop [3]
Verlicht (ON)
Versterkt het uitgangsniveau van de OUT-aansluitingen.
Gedoofd (OFF)
LED DEMO
Houd [MOD] ingedrukt
en draai aan de [TYPE]-
keuzeknop
Speci ceert de tijd (minuten) tot de LED DEMO wordt
weergegeven. Wanneer dit gedoofd is, wordt de LED DEMO niet
weergegeven.
3. Druk op de [ARPEGGIO]-knop om de instellingen op te slaan.
De instellingen worden opgeslagen en de SYSTEM-1 herstart.
Belangrijkste speci caties Roland SYSTEM-1: PLUG-OUT SYNTHESIZER
Maximale polifonie 4 stemmen (SYSTEM-1 Mode)
Stroomtoevoer Netstroomadapter
Stroomverbruik 850 mA
Afmetingen 472 (B) x 283 (D) x 70 (H) mm
Gewicht 2.4 kg (exclusief netstroomadapter)
Accessoires Netstroomadapter, gebruikershandleiding, infoblad “HET APPARAAT VEILIG GEBRUIKEN”
Opties (apart
leverbaar)
Pedaalschakelaar: DP-reeks, voetschakelaar: BOSS FS-5U,
Expressiepedaal: EV-5
* Met het oog op productverbetering kunnen de speci caties en/of het voorkomen van dit apparaat worden
gewijzigd zonder voorafgaande kennisgeving.
Lees het infoblad “HET APPARAAT VEILIG GEBRUIKEN” zorgvuldig alvorens het apparaat te gebruiken. Het infoblad bevat belangrijke
informatie over de juiste bediening van het apparaat. Om er bovendien zeker van te zijn dat u elke functie van uw nieuwe apparaat
goed begrijpt, leest u best de hele gebruikershandleiding. Deze handleiding moet als referentie worden bewaard en voorhanden zijn.
Copyright © 2014 ROLAND CORPORATION
Alle rechten voorbehouden. Niets uit deze uitgave mag op enige manier worden gereproduceerd zonder schriftelijke toestemming
van ROLAND CORPORATION.
4
MIXER
Hier kunt u het volume aanpassen van OSC 1, OSC 2, de suboscillator (een oscillator die een geluid produceert
dat een of twee octaven lager ligt) en ruis.
Controller Uitleg
[OSC 1]-regelaar Stelt het volume van OSC 1 in.
[OSC 2]-knop Stelt het volume van OSC 2 in.
[SUB OSC]-regelaar Stelt het volume van de suboscillator in.
[OSC TYPE]-knop
Selecteert het type suboscillator.
Verlicht: klinkt een octaaf lager, Niet verlicht: klinkt twee octaven lager
[NOISE]-regelaar Stelt het volume van de ruis in.
[NOISE TYPE]-knop
Selecteert het type ruis.
Verlicht: witte ruis, Niet verlicht: roze ruis
5
PITCH
Hier kunt u in tijd variërende veranderingen (enveloppe) voor de toonhoogte instellen.
Controller Uitleg
[ENV]-regelaar
Als deze regelaar rechtsom wordt gedraaid, wordt de toonhoogte eerst hoger en keert
dan terug naar de toonhoogte van de ingedrukte toets.
Als deze regelaar linksom wordt gedraaid, wordt de toonhoogte eerst lager en keert dan
terug naar de toonhoogte van de ingedrukte toets.
[A]-schuif
Deze schuiven werken op dezelfde manier als de schuiven [A][D] van de sectie
7
AMP (ze
beïnvloeden de toonhoogte, niet het volume).
[D]-schuif
6
FILTER
Deze instellingen bepalen de helderheid en vetheid van het geluid. Hier kunt u ook de tijdvariatie (enveloppe)
voor de lter instellen.
Controller Uitleg
[LPF CUTOFF]-
regelaar
Stelt de afsnijfrequentie van de laagdoorlaat lter in. Frequentiecomponenten boven de
afsnijfrequentie worden afgesneden, zodat het geluid voller wordt.
[LPF TYPE]-knop
Selecteert de helling (steilheid) van de
laagdoorlaat lter.
Verlicht: -12 dB, Niet verlicht: -24 dB
[HPF CUTOFF]-
regelaar
Stelt de afsnijfrequentie van de hoogdoorlaat lter in. Frequentiecomponenten onder de
afsnijfrequentie worden afgesneden.
[RESO]-regelaar
Resonantie versterkt het geluid in het gebied van de afsnijfrequentie van de lter.
Hogere instellingen zorgen voor een krachtigere nadruk, wat een duidelijk “synthesizer-
achtig” geluid oplevert.
[ENV]-knop
Deze regelaar stelt de diepte en richting van de verandering van de afsnijfrequentie in die
veroorzaakt wordt met de schuiven [A], [D], [S] en [R].
Als de regelaar rechtsom gedraaid wordt, wordt de afsnijfrequentie omhoog verplaatst.
Als de regelaar linksom gedraaid wordt, wordt de afsnijfrequentie omlaag verplaatst.
[KEY]-regelaar
Laat de afsnijfrequentie van de lter veranderen afhankelijk van de ingedrukte toets.
Als de regelaar rechtsom gedraaid wordt, wordt de afsnijfrequentie hoger naarmate u
hogere toetsen indrukt.
Als de regelaar linksom gedraaid wordt, wordt de afsnijfrequentie lager naarmate u lagere
toetsen indrukt.
[A]-schuif
Deze schuiven werken op dezelfde manier als de schuiven [A][D][S][R] van de sectie
7
AMP (ze beïnvloeden de afsnijfrequentie, niet het volume).
[D]-schuif
[S]-schuif
[R]-schuif
7
AMP
Hier kunt u in tijd variërende veranderingen (enveloppe) voor het volume instellen.
Controller Uitleg
[TONE]-regelaar Past de helderheid van het geluid aan.
[CRUSHER]-
regelaar
Past het tonale karakter aan door de golfvorm te vervormen.
[A]-schuif
(Aanslagtijd)
Stelt de tijd in vanaf het moment waarop u een toets
indrukt totdat het maximale volume is bereikt.
[D]-schuif
(Vervaltijd)
Stelt de tijd in vanaf het bereiken van het maximale
volume tot dit is teruggelopen tot het sustain-niveau.
[S]-schuif
(Sustain-niveau)
Stelt het volume in dat wordt aangehouden nadat
de aanslag- en vervaltijden zijn verlopen totdat u de
toets loslaat.
[R]-schuif
(Release-tijd)
Stelt het e ect in vanaf het moment waarop u de
toets loslaat tot het volume de minimumwaarde heeft
bereikt.
8
EFFECTEN
Hier kunt u de hoeveelheid galm en vertraging instellen.
Controller Uitleg
[REVERB]-regelaar Voegt galm toe.
[DELAY]-regelaar Past het volume van het vertragingsgeluid aan.
[TIME]-regelaar Past de vertragingstijd aan (de tijd dat het geluid vertraagd wordt).
9
PITCH BEND/SCATTER
“Pitch bend” past de toonhoogte aan.
Wat is Scatter?
Dit is een functie die verschillende wijzigingen toepast op arpeggio's, waardoor muzikale loopjes ontstaan.
Controller Uitleg
[ARPEGGIO]-knop
Laat een arpeggio ontstaan als u een akkoord op het keyboard indrukt. (Deze functie
heet de “arpeggiator”).
[ARP TYPE]-
regelaar
Selecteert het arpeggio-verschil.
[ARP STEP]-
regelaar
Stelt de notenwaarde in voor elke stap van de arpeggiator.
[PITCH BEND/
SCATTER] jog-knop
De jog-knop fungeert normaal als pitch bend.
Als scatter is ingeschakeld voor de [ARPEGGIO]-knop, past de jog-knop de scatter-diepte
aan.
* Scatter is ingeschakeld bij het gebruik van de jog-knop. Als u de jog-knop terugzet in
de neutrale stand, wordt scatter uitgeschakeld.
[TYPE]-keuzeknop Selecteert het soort scatter (1–10).
[KEY HOLD]-knop U kunt noten laten doorklinken ook nadat u de toetsen hebt losgelaten.
Paneelbeschrijvingen
2 3 4 5 6 7 81
9 10
1
Algemeen
Hier kunt u de volgende zaken instellen voor de SYSTEM-1.
Controller Uitleg
[VOLUME]-
regelaar
Wijzigt het volume.
[PORTAMENTO]-
regelaar
Zorgt voor een vloeiende overgang in toonhoogte tussen een toets en de volgende
gespeelde toets. De regelaar stelt de tijd in die nodig is voor de verandering in toonhoogte.
[LEGATO]-knop
Past portamento alleen toe wanneer u legato speelt (d.w.z. wanneer u de volgende toets
indrukt voordat u de vorige loslaat).
[TEMPO]-regelaar Stelt het tempo voor arpeggio in (scatter). De led knippert volgens het ingestelde tempo.
[TEMPO SYNC]-
knop
Synchroniseert de RATE van de
2
LFO-sectie en de delaytijd (TIME) van de
8
EFFECTS-
sectie met het tempo.
[LFO KEY TRIG]-
knop
Speci ceert of de LFO-cyclus gesynchroniseerd wordt om te beginnen wanneer de toets
wordt ingedrukt (ON) of niet (OFF).
[MONO]-knop
Wanneer die is geactiveerd (verlicht), speelt de synthesizer monofoon (afzonderlijke noten).
Wanneer die knippert, speelt de synthesizer alle geluiden in unisono (UNISON-modus).
MODEL
[SYSTEM-1]/
[PLUG-OUT]-knop
Als de [SYSTEM-1]-knop actief is, fungeert deze eenheid als een SYSTEM-1-synthesizer. Als
de [PLUG-OUT]-knop actief is, fungeert deze eenheid in de modus “plug-out”.
&Zie “Over Plug-In/Plug-Out”
[MANUAL]-knop Produceert geluid volgens de huidige instellingen van de regelaars en schuiven.
Geheugen[1]–[8]
knop
Gebruik deze knoppen om acht reeksen paneelinstellingen (regelaars/schuiven) op te slaan
of op te roepen.
Paneelinstellingen opslaan onder een geheugenknop
Houd een geheugen[1]–[8] knop ingedrukt.
Instellingen (een geluid) ophalen met een geheugenknop
Druk op een geheugen[1]–[8] knop.
2
LFO
Hier kunt u de cyclische verandering (modulatie) in het geluid maken door vibrato (toonhoogtemodulaties) of
tremolo (volumemodulaties) toe te passen.
Controller Uitleg
Golfregelaar
Selecteert de LFO-golfvorm.
R (Sinusgolf), S (Driehoeksgolf), T (Zaagtandgolf), U (Vierkantsgolf),
W (Monsteren en vasthouden), RND (Willekeurige golf)
[FADE TIME]-
regelaar
Geeft de tijd op vanaf het klinken van een toon tot de LFO zijn
maximale amplitude bereikt.
[RATE]-regelaar Bepaalt de snelheid van de LFO.
[PITCH]-regelaar Laat de LFO de toonhoogte bepalen, wat een vibrato-e ect oplevert.
[FILTER]-regelaar Laat de LFO de FILTER CUTOFF (afsnijfrequentie) moduleren.
[AMP]-regelaar Laat de LFO het AMP LEVEL (volume) bepalen, wat een vibrato-e ect oplevert.
3
OSC 1/OSC 2
Hier kunt u de golfvorm selecteren die het karakter van het geluid bepaalt, en de toonhoogte instellen.
De SYSTEM-1 heeft twee oscillatoren (OSC 1 en OSC 2).
Controller Uitleg
Golfknop
Selecteert de golfvorm die de basis van het geluid vormt.
T (Zaagtandgolf), U (Vierkantsgolf), S (Driehoeksgolf),
(Zaagtandgolf 2),
(Vierkantsgolf 2), (Driehoeksgolf 2)
[COLOR]-
regelaar
Het resultaat is afhankelijk van de golfvorm.
[MOD]-
regelaar
Selecteert de bron die de [COLOR]-regelaar moduleert.
MAN
Het geluid wordt bepaald door de stand van de [COLOR]-regelaar. Het verschilt niet
na verloop van tijd.
LFO
Het geluid verschilt na verloop van tijd met het tempo opgegeven in de sectie
2
LFO.
P. ENV
Het geluid verschilt na verloop van tijd volgens de enveloppe van de sectie
5
PITCH.
F. ENV
Het geluid verschilt na verloop van tijd volgens de enveloppe van de sectie
6
FILTER.
A. ENV
Het geluid verschilt na verloop van tijd volgens de enveloppe van de sectie
7
AMP.
S. OSC Het geluid verschilt na verloop van tijd volgens de frequentie van de sub-oscillator.
Octaaf (voet)
regelaar
Speci ceert het octaaf van de oscillator.
[CROSS MOD]-
regelaar
Past de OSC 1-frequentie aan volgens de OSC 2-golfvorm. Door de regelaar rechtsom
te draaien wordt de OSC 1 een complexer geluid, zodat u metaalachtige geluiden of
geluidse ecten kunt maken.
[TUNE]-
regelaar
Speci ceert de toonhoogte van de oscillator.
Grove stemming
Past de toonhoogte aan in stappen van een halve toon.
Door de knoppen [RING][SYNC] tegelijk ingedrukt te houden en de SCATTER [TYPE]-
keuzeknop te verdraaien, kunt u de grove stemming (Coarse Tune) aanpassen.
De SCATTER LED's (1–10) geven de mate van grove stemming (OFF (niet verlicht), -11–+11)
aan. (Leds 10 en 1 lichten samen op om 11 aan te geven).
[RING]-knop
Dit is een ringmodulator. Die genereert een complexe
golfvorm door OSC 1 en OSC 2 te vermenigvuldigen.
[SYNC]-knop
Dit is oscillator sync. Die genereert een complexe golfvorm
door OSC 2 geforceerd te resetten tot het begin van de cyclus,
synchroon met de OSC 1-frequentie.
Controller Uitleg
OCTAVE [DOWN]
[UP]-knop
Octaafverschuiving
U kunt het toonhoogtebereik van het keyboard in stappen van een octaaf aanpassen.
De knop is verlicht bij de instelling één octaaf; de knop knippert bij de instelling 2–3
octaven. Als u de knoppen [DOWN] [UP] tegelijk indrukt, wordt de normale toonhoogte
van het keyboard hersteld.
Toetstranspositie
Door de knoppen [DOWN][UP] tegelijk ingedrukt te houden en de SCATTER [TYPE]-
keuzeknop te verdraaien, kunt u het keyboard transponeren in stappen van een halve
toon (alleen omhoog).
• De SCATTER LED's (1–10) geven de mate van transpositie (1–11) aan. (Ledlampjes 10
en 1 lichten gelijkertijd op om 11 aan te geven).
• Alles gedoofd (OFF) indien geheel naar links gedraaid.
[MOD]-knop
Vibrato (modulatie) wordt op het geluid toegepast bij indrukken van de [MOD]-knop.
Door de [MOD]-knop ingedrukt te houden en de sectie
2
LFO te bedienen, kunt u de
MOD-diepte instellen.
10
Klavier
Dit is een klavier met standaardmaten.
Hij is niet aanslaggevoelig (de snelheid is vast).
Uw apparatuur aansluiten
* Zet het volume altijd op nul en schakel alle apparaten uit voordat u aansluitingen maakt om defecten of
storingen aan de apparatuur te voorkomen.
A B C E F GD
H
A
DC IN-aansluiting
Sluit de meegeleverde netstroomadapter hier aan. Gebruik alleen de meegeleverde
netstroomadapter.
* Om onbedoelde onderbrekingen van de stroomtoevoer naar de eenheid te voorkomen
(mocht de stekker per ongeluk worden losgetrokken) en om ongewenste spanningen
op de DC IN-aansluiting te vermijden, moet u het voedingssnoer vastzetten met de
snoerhaak als afgebeeld.
B
USB ( )-poort
Gebruik een in de handel verkrijgbare USB 2.0-kabel om deze poort met uw computer te verbinden. Die kan
worden gebruikt voor de transfer van USB MIDI- en USB-audiogegevens. U moet de USB-driver installeren
alvorens de SYSTEM-1 op uw computer aan te sluiten. Download de USB-driver van de Roland-website.
Raadpleeg het bestand Readme.htm dat is inbegrepen in de download voor meer informatie.
& http://www.roland.com/support/
C
MIDI-connectoren
Voor het aansluiten van MIDI-apparatuur.
D
Beveiligingsslot (
)
& http://www.kensington.com/
E
PEDAL-aansluitingen
Als u een pedaalschakelaar aansluit (DP-reeks, BOSS FS-5U, apart leverbaar) op de HOLD-aansluiting, worden de
noten aangehouden zolang u het pedaal blijft indrukken ook nadat u het klavier hebt losgelaten.
Als u een expressiepedaal (EV-5, apart leverbaar) op de CONTROL-aansluiting aansluit, kunt u het
expressiepedaal gebruiken om het volume te beheren en om uw uitvoering expressiever te maken.
* Gebruik uitsluitend het opgegeven expressiepedaal (EV-5, apart leverbaar). Door andere expressiepedalen
aan te sluiten, kunt u storingen en/of schade aan de eenheid veroorzaken.
F
OUT-aansluitingen
Sluit deze aansluitingen aan op uw versterker of monitoren. Wanneer u een mono-systeem hebt, gebruik dan
alleen de L/MONO-aansluiting.
G
PHONES-aansluiting
Sluit hier uw hoofdtelefoon (apart verkrijgbaar) aan.
De stroom in- en uitschakelen
H
[POWER]-schakelaar
Dit schakelt het apparaat in en uit.
* Nadat u alles hebt aangesloten, schakelt u de stroom in deze volgorde in: eerst de SYSTEM-1 en
vervolgens het aangesloten systeem. Inschakelen in de verkeerde volgorde kan defecten of schade
veroorzaken. Zorg er bij het uitschakelen van de stroom voor het aangesloten systeem eerst uit te
schakelen en dan pas de SYSTEM-1.
* Dit apparaat is uitgerust met een beveiligingscircuit. Het duurt even (een paar seconden) voordat het
apparaat normaal functioneert nadat het is ingeschakeld.
* Zet het volume altijd op nul voordat u het apparaat in- of uitschakelt. Zelfs als het volume volledig op nul
staat, kunt u nog geluid horen wanneer het apparaat wordt in- of uitgeschakeld. Dit is normaal en wijst niet
op een defect.
-
 1
1
-
 2
2


Roland SYSTEM-1 Le manuel du propriétaire
- Catégorie
- Pianos numériques
- Taper
- Le manuel du propriétaire
dans d''autres langues
- italiano: Roland SYSTEM-1 Manuale del proprietario
- español: Roland SYSTEM-1 El manual del propietario
- Deutsch: Roland SYSTEM-1 Bedienungsanleitung
- Nederlands: Roland SYSTEM-1 de handleiding
- português: Roland SYSTEM-1 Manual do proprietário
- 日本語: Roland SYSTEM-1 取扱説明書
Documents connexes
Autres documents
-
Novation UltraNova Mode d'emploi
-
Steinberg VST Instruments Studio Case II Mode d'emploi
-
CME MIDI Thru5 WC Mode d'emploi
-
Korg volca nubass Le manuel du propriétaire
-
-
Behringer Crave Guide de démarrage rapide
-
-
-
Behringer POLY D Guide de démarrage rapide
-
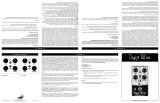 Earthquaker Devices Night Wire Mode d'emploi
