GE Monogram ZIFP360NXARH Manuel utilisateur

Catégorie
Frigos
Taper
Manuel utilisateur
Owner's
Manual
36" Built-In
All-Refrigerators and
All-Freezers
22402602P001
149-6o_621
07-08 JR
monogram.com
Consumer Information
36" All-Refrigerator and All-Freezer Units
Contents Consumer Services
Important PhoneNumbers ..................... 27
Model and Serial Numbers ....................... 3
Problem Solver ............................. 21,22
Product Registration ............................. 3
Safety Instructions ........................... /4-7
State of California
Water Treatment DeviceCertificate ............ 26
Warranty .............................. BackCover
Care and Cleaning
Cleaning-Outside and Inside .................. 13
Light Bulb Replacement ....................... 1/4
Vacation ....................................... 1/4
Operating Instructions
Anti-Tip Bracket Installation ................ 16-20
Automatic Icemaker ............................. 9
Sabbath Node Product ......................... 12
Shelves ..................................... 11,12
Storage Drawers ........................... 10,11
Temperature Controls ........................... 8
Water FilterAccessory ......................... 10
Wine Rack ..................................... 12
Preparation
Anti-Tip Bracket ................................ 15
Clearances ..................................... 15
Location ....................................... 15
Before
using
gout
refrigerator/
freezer
Readthis manual carefully. It is intended
to help you operate and maintain your new
refrigerator/freezer properly.
Keep it handy for answers to your questions.
If you don't understand something or
need more help, there isa list of toll-free
consumer service numbers included in
the back section of this manual.
OR
Visit our Website at: monogram.cam
Consumer Information
36" All-Refrigerator and All-Freezer Units
Write
down the
model &
serial
numbers
You'll see them on a label inside the
refrigerator/freezer under the storage drawers.
These numbers are also on the Consumer
Product Ownership Registration Card included
with this manual.
Beforesending in this card, please write these
numbers here:
Hodel Number
Serial Number
Usethese numbers in any correspondence or
service callsconcerning gour refrigerator/freezer.
If gou
received a
damaged
refrigerator/
freezer
The warranty does not cover damage caused
after deliverg.
Immediately contact the dealer (or builder) that
sold gou the refrigerator/freezer.
Save time
& moneg
Before gou request service, check the Problem
Solver in the back of this manual.
It lists causes of minor operating problems that
gou can correct yourself.
If gou
need
service
To obtain service, seethe Consumer Services
page in the back of this manual.
We're proud of our service and want gou to be
pleased. If for some reason gou are not happg
with the service gou receive, here are steps to
follow for further help.
For customers in the USA:
FIRST,contact the people who serviced gour
appliance. Explain whg gou are not pleased.
In most cases, this will solve the problem.
NEXT,if gou are still not pleased, write all
the details-including gour phone number-to:
Manager, Customer Relations
GEAppliances
Appliance Park
Louisville, KY/40225
For customers in Canada:
FIRST,contact the people who serviced gour
appliance. Explain whg gou are not pleased.
In most cases, this will solve the problem.
NEXT,if gou are still not pleased, write all
the details-including gour phone number to:
Manager, Consumer Relations
Mabe Canada Inc,
i Factorg Lane,Suite 310
Moncton, N.B.EIC 9P13
IMPORTANTSAFETYINSTRUCTIONS
READ AND SAVE THESE INSTRUCTIONS
WARN JNG-when usingthis
appliance, always exercise basic safety
precautions, including the following:
Use this appliance only for its intended
purpose as described in this Owner's Manual.
This refrigerator/freezer must be properly
installed in accordance with the Installation
Instructions before it is used.
Do not allow children to climb, stand or hang
on the shelves in the refrigerator/freezer.
They could damage the refrigerator/freezer
and seriously injure themselves.
Do not touch the cold surfaces in the freezer
compartment when hands are damp or wet.
Skin may adhere to these extremely cold
surfaces.
Do not store or use gasoline or other
flammable vapors and liquids in the vicinity
of this or any other appliance.
Your freezer has an automatic
icemaker--avoid contact with the moving
parts of the ejector mechanism, or with
the heating element located on the bottom
of the icemaker. Donot place fingers or hands
on the automatic icemaking mechanism while
the freezer is plugged in.
Unplug your refrigerator/freezer
before cleaning and making repairs.
NOTE:We strongly recommend that
any servicing be performed by a qualified
individual.
Before replacing a burned-out light bulb,
the refrigerator/freezer should be unplugged in
order to avoid contact with a livewire filament.
(Aburned-out light bulb may break when being
replaced.) NOTE:Turning control to OFFdoes
not remove power to the light circuit.
Do not refreeze frozen foods which have
thawed completely.
DANGER: RISK OF CHILD ENTRAPMENT
Child entrapment and suffocation are not
problems of the past. Junked or abandoned
refrigerator/freezers are still dangerous...even
if they will sit for "just a few days." If you are
getting rid of your old refrigerator/freezer,
please follow the instructions below to help
prevent accidents.
Before You Throw Away Your Old
Refrigerator/Freezer or Freezer:
Take off the doors.
Leave the shelves in place so that children may
not easily climb inside.
REFRIGERANTS
All refrigeration products contain refrigerants,
which under federal law must be removed prior
to product disposal. If you are getting rid of an old
refrigeration product, check with the company
handling the disposal about what to do.
a
IMPORTANTSAFETYINSTRUCTIONS
LIREETCONSERVERCESINSTRUCTIONS
AVERTISSEMENT :
Lorsquevous utilisezle r_frig_roteur/cong_loteur,
observez toujours certoines pr@coutionsde bose,
notomment :
N'utilisez I'appareil que pour son usage
pr@vu, comme d@crit dons le pr@sent monuel
de I'utilisoteur.
Installez le r_frig_rateur/cong_lateur
conform_ment aux directives d'installation
avant de I'utiliser.
Ne laissez pas les enfants grimper, s'asseoir,
se tenir debout ni se pendre aux clagettes
du r_frig_rateur/cong_lateur. IIspourroient
endommoger le r_frig_roteur et se blesser
grovement.
Une fois le cong_lateur en marche,
ne touchez pas les surfaces froides
du cong_lateur, surtout si vous avez
les mains humides ou mouill_es :lo peou
risque d'odh_rer 6 ces surfoces tr_s froides.
N'entreposez et n'utilisez pas d'essence
ou autres vapeurs et liquides inflammables
6 proximit_ de cet appareil ou de tout autre
appareil _lectrom_nager.
Le cong_lateur dot_ d'une machine
6 glaqons automatique--6vitez le contoct
ovec lespi_ces mobiles du m_conisme _jecteur
ou ovec I'_l_ment chouffont situ_ 6 Io portie
inf_rieure de Io mochine 6 gloqons. Ne posez
pos lesdoigts ou les moins sur le m_conisme
de Io mochine 5 gloqons pendont que
le cong_loteur est bronch_.
D_branchez votre r_frig_rateur/cong_lateur
avant de le nettoger et de le r_parer.
REMARQUE: Nous vous recommondons
vivement de confier toute r_porotion
6 un technicien quolifi_.
Avant de remplacer une ampoule grill_e,
le r_frig_roteur/cong_loteur doit _tre d_branch_
ofin d'@iter tout contoct ovec un fil sous tension.
(Uneompoule grill_e peut se briser pendont
I'op_rotion). REMARQUE: Lorsquevous plocez
Io commonde sur <<0>>(_teint),I'olimentotion
_lectrique de I'ompoule n'est pos couple.
Ne faites PASrecongeler des aliments
surgel_s qui ont compl_tement d_gel_.
DANGER
: RISQUESPOUR LESENFANTS
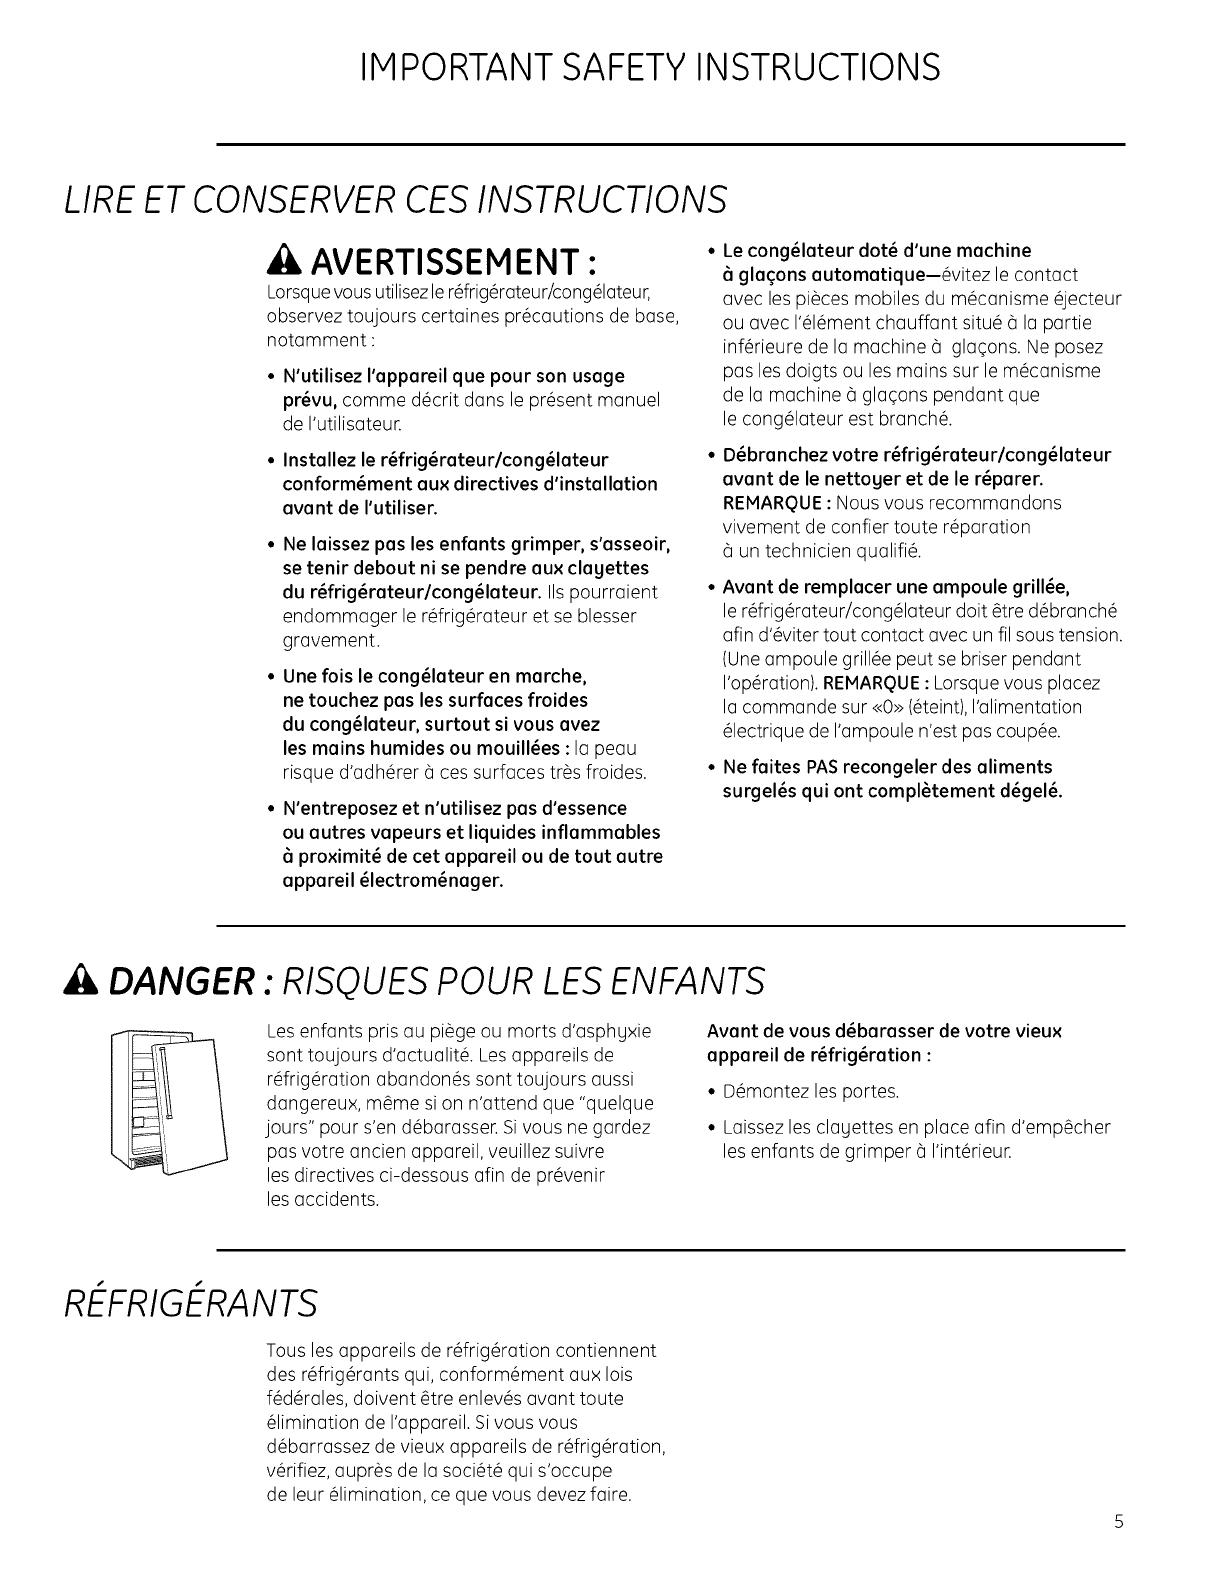
Les enfonts pris ou pi6ge ou morts d'osphyxie
sont toujours d'octuolit_. Lesopporeils de
r6frig6rotion obondon6s sont toujours oussi
dongereux, m6me si on n'ottend que "quelque
jours" pour s'en d6borosser. Si vous ne gordez
pos votre oncien opporeil, veuillez suivre
les directives ci-dessous ofin de pr6venir
les occidents.
Avant de vous d_barasser de votre vieux
appareil de r_frig_ration :
D_montez les portes.
Loissez les cloyettes en ploce ofin d'emp6cher
les enfonts de grimper 6 I'int_rieur.
REFRIGERANTS
Tous les opporeils de r6frig6rotion contiennent
des r6frig6ronts qui, conform6ment oux lois
f6d6roles, doivent 6tre enlev6s ovont toute
61iminotion de I'opporeil. Sivous vous
d6borrossez de vieux opporeils de r6frig6rotion,
v6rifiez, oupr6s de Io soci6t_ qui s'occupe
de leur 61iminotion, ce que vous devez foire.
IMPORTANTSAFETYINSTRUCTIONS
HOW TO CONNECT ELECTRICITY
Do not, under any circumstances,
cut or remove the third (ground) prong
from the power cord. For personal safety,
this appliance must be properly grounded.
The power cord of this appliance isequipped
with a 3-prong (grounding) plug which mates
with a standard 3-prong (grounding) wall outlet
to minimize the possibility of electric shock
hazard from this appliance.
Have the wall outlet and circuit checked by
a qualified electrician to make sure the outlet
is properly grounded.
Where a standard 2-prong wall outlet is
encountered, it is your personal responsibility
and obligation to have it replaced with a properly
grounded 3-prong wall outlet.
The refrigerator/freezer should always
be plugged into its own individual electrical
outlet which has a voltage rating that matches
the rating plate.
DO NOT USEAN ADAPTER PLUGTO CONNECT
THE REFRIGERATOR/FREEZERTO A 2-PRONG
OUTLET.
DO NOT USE AN EXTENSION CORD WITH
THIS APPLIANCE.
This provides the best performance and also
prevents overloading house wiring circuits, which
could cause a fire hazard from overheated wires.
Never unplug your refrigerator/freezer by pulling
on the power cord. Always grip plug firmly and
pull straight out from the outlet.
Repairor replace immediately all power
cords that have become frayed or otherwise
damaged. Do not usea cord that shows cracks
or abrasion damage along its length or at
either end.
When moving the refrigerator/freezer away
from the wall, be careful not to roll over or
damage the power cord.
SAVETHESE
INSTRUCTIONS
6
IMPORTANTSAFETYINSTRUCTIONS
RACCORDEMENT ELECTRIQUE
Ne coupez ni retirez en aucun cas Io troisi_me
broche (mise 6 Io terre} de Io fiche du cordon
d'olimentotion. Pour votre s_curit_, cet
opporeil doit _tre correctement mis 6 Io terre.
Le cordon d'alimentation decet appareil
est muni d'une fiche a 3 broches (mise a la terre)
qui se branche dans une prise mural ordinaire
5 alv6oles (mise a la terre) pour r6duire
au minimum les risques du chocs 61ectriques.
Faites examiner la prise de courant et le circuit
par un 61ectricienqualifi6 pour vous assurer
que la prise est correctement mise 8 la terre.
Si la prise murale est du tgpe standard
2 alv6oles, il vous incombe de la faire remplacer
par une prise 8 5 alv6oles correctement mise
la terre.
Le r@frig@rateur/cong@lateurdoit toujours @tre
branch@dans sa propre prisede courant, dont
la tension nominale est identique 8 celle indiqu6e
sur la plaque signal@tique.
N'UTILISEZ PAS UNE FICHE
D'ADAPTATION POUR RACCORDER
LE RI_FRIGI_RATEUR/CON GI_LATEUR
DANS UNE PRISE MURALE A 2 ALVI_OLES.
N'UTILISEZ PAS DE CORDONS PROLONGATEURS
AVEC CET APPAREIL.
Cette precaution est recommand@e pour garantir
un rendement optimum et @iter une surcharge
des circuits 61ectriquesde la r@sidence,
ce qui pourrait crier un risque d'incendie
par surschauffe des ills.
Ned@branchezjamais I'appareil en tirant
le cordon d'alimentation. Saisissezfermement
la fiche du cordon et tirez droit pour la retirer
de la prise.
R6parez ou remplacez imm6diatement tout
cordon effiloch6 ou endommag& N'utilisez pas
un cordon fendill6 ou pr6sentant des signes
d'usure.
Lorsque vous d6placez I'appareil du mur, faites
attention de ne pas la faire rouler sur le cordon
d'alimentation afin de ne pas I'endommager.
CONSERVEZ
CESDIRECTIVES
Temperature Controls
36" All-Refrigerator and All-Freezer Units
All-Freezer Controls
TEMPERAT @
°CO O°F
@@
® ®
HOLD 3 SEC
PresetSettings:
Allow 24hoursto reachthesepresettemperatures.
All-Refrigerator Controls
TEMPERAT @
°CO O°F
@
®
PresetSettings:
Allow 24hoursto reachthesepresettemperatures.
Temperature
controls
The temperature displag shows the actual
temperature of the freezer or fresh food unit.
The actual temperature will varg from the set
temperature based on factors such as door
opening, amount of food, defrost cgcling
and room temperature.
NOTE:Frequent door openings or door left open
for periods of time mag increase the internal
temperature of the freezer and fresh food
compartments temporarilg.
To turn off the cooling sgstem in either
the freezer or fresh food unit, press
the plus 1+)pad until the display shows OFF.
To turn the cooling sgstem on, press
the minus (-) pad. The preset temperature of 0°F
for the freezer or 37°Ffor the fresh food unit
will appear in the display.
To checkthe current temperature setting for
the fresh food or freezer unit, pressthe plus (+)
or minus (-) pad once. After 5 seconds, the
display will return to the actual temperature.
To change the temperature settings, press
the plus (+)or minus (-) pad for each increment
to the desired temperature set point. Allow
24 hours for the unit to reach the temperature
you have set.
Fresh Food
Freezer
Temperature Ranges
Low Hig h
34°F 45°F
1oc 7oc
-6°F +6°F
-21°C -14°C
NOTE: Setting the controls to OFF stops cooling,
but does not shut off electrical power to the unit.
Changing
displag
temperatures
from °F to °C
To change the temperature display
between Fahrenheit and Celsius, press
Tamp Display °C/°F.
Ooor
alarm
To turn the Door Alarm feature on, press
DOOR ALARM once. The ACTIVE light will
come on. To turn it off, press it again.
When the DOOR ALARM
is active, the alarm will flash
and beep if you keep the door
open for more than 2 minutes, e
Automatic Icemaker (freezermodels)
36" All-Refrigerotor and All-Freezer Units
Automatic
icemaker
(freezer models)
A newlg-instelled refrigeretor meg teke
12-24 hours to begin making ice.
The icemaker will produce seven cubes per
cycle-approximately 15 cycles in a 24-hour
period, depending on freezer compartment
temperature, room temperature, number of
door openings and other use conditions.
If the refrigerator is operated before the water
connection ismade to the icemaker, set the
power switch to OFF.
When the refrigerator has been connected
to the water supply, set the power switch to ON.
Throw away the first full bucket of ice.
Be sure nothing interferes with the sweep
of the feeler arm.
When the bin fills to the level of the feeler arm,
the icemaker will stop producing ice.
It is normal for several cubes to be joined
together.
If ice is not used frequently, old ice cubes
will become cloudy, taste stale and shrink.
Icemaker
Switch Feeler Arm
After the icemaker has been turned on again,
there will be a delay of about/45 minutes before
the icemaker resumes operations.
NOTE:In homes with lower-than-average
water pressure, you may hear the icemaker
water valve cycle on several times when
making one batch of ice.
NOTE:Icemaker works best between
/40and 120 PSIhome water pressure.
Accessing
the icemaker
and ice
storage bin
(freezer models)
The icemaker is located behind the first drawer
on the right of the freezer. The ice bin
is the second drawer.
On/Off switch
To remove the ice bin:
Open the access door to reach the icemaker. Set
the icemaker power switch to the OFFposition.
With the access door closed, support the storage
bin at the bottom while slightly lifting. Pull bin
straight out. See Drawer Removal section.
To replace the ice bin: Slide the bin back until
the tab on the bin locks into the slot on the shelf.
After replacing the ice bin, open the access door
to reach the icemaker. Setthe icemaker power
switch to the ON position.
Ice bin
Icemaker
Water Filter/Storage Drawers
36" All-Refrigerotor and All-Freezer Units
Water filter
cartridge
(freezer models)
The water filter cartridge islocated in the top
machine compartment of the freezer.
To Replace the Filter:
The filter cartridge isdesigned /fRESETX_
to filter 300 gallons of water
(lasting approximatelg 12 months).
®
There isa replacement indicator light HOLD3SEe
for the water filter cartridge onthe temperature
control panel.This light willturn gellowto tell gou
that gou need to replacethe filter soon.Thefilter
cartridge should be replaced when the replacement
indicator light turns red or ifthe flow of water to the
dispenser or icemaker decreases.
Installing the Filter Cartridge:
1. Removethe old cartridge bg slowlg turning
itto the left. Asmall amount of water mag
drip down. Do not pull down on the cartridge.
2. Fillthe new cartridge with water from the tap to
allow for better flow immediatelg after installation.
3. Lineup the arrow on the cartridge with the center
of the holder.Do not push it up into the holder.
°
Slowlgturn itto the right Cartridge
untilthe cartridge stops. Holder I IItwill rotate about
1/4turn. DONOT Filter t I
OVERTIGHTEN. Cortridge
Slowlg turn it to the right. ,dm_
Do not overtighten.
ToResetthe Filter Status Light:
Pressand hold the RESETpad for 3 seconds.
Filter BgpassPlug:
Youmust usethefilter bgpassplug:
a) ifyou havea household
reverseosmosiswater sgstem
and/or another form of home
water filtration sgstem
b) ifa replacement filter isnot
available.
_ Filter
Bgpass
Plug
Theicemakerand dispenserwill not operate without
the filter or filter bgpass plug installed.
Replacement filters:
Toorder additional filter cartridgesinthe United
States, visit our Website at monogram.com, or
call GEParts and Accessories, 800.626.2002.
IMPORTANTNOTE:Remove the water filter to
immediatelg stop ang water leak from the
Icemaker/Dispenser sgstem. The water filter
cartridge holder (bracket) acts as a cut-off valve
when the filter is removed and will prevent
further leaking.
Call 1.800,844,1845 to schedule a service call
to repair the leak.
Refrigerator--
Sealed snack
pans
The sealed snack pans retain high humiditg
for the convenient storage of lunch meats and
cheese, hors d'oeuvres, spreads and snacks.
To remove a snack pan, pull the pan out and
lift the front of the pan up until it snaps out
of the wire holder.
To remove the upper drawers when
the door cannot be opened fullg, the shelf above
the drawers must be removed. Push the shelf
back, then lift up. Tilt the cover and take it out.
To replace a snack pan, place the back
of the pan in the wire holder. Lower the front
of the pan, then push down until the front
of the pan snaps into the wire holder.
I
10
Shelves
36" All-Refrigerator and All-Freezer Units
Refrigerator--
Storage
drawers
The upper drawers have individual, adjustable
humidity controls that let you control the amount
of cold air entering the drawers.
Slide the control all the wall to the High setting
and the drawer provides higher humidity levels
recommended for most leafy vegetables.
Slide the control all the wall to the Low setting
and the drawer provides lower humidity levels
recommended for most fruits.
Excesswater that may accumulate
in the bottom of the drawers should
be emptied and the drawers wiped dry.
\
Drawer
removal
Drawers in the refrigerator/freezer will
stop before coming all the wag out, to help
prevent contents from spilling onto floor.
To remove a drawer, pull the drawer out and lift
the front of the drawer up and out of the wire
holder. Lift the back of the drawer up and out.
To replace a drawer, place the back
of the drawer in the wire holder, making
sure the extensions of the side of the drawer fit
into the back of the wire holder. Lower the front
of the drawer into the wire holder. Pressfirmlg
on the top of the drawer.
II
Adjustable
shelves
Tempered glass shelves in the refrigerator and
wire shelves in the freezer enable gou to make
efficient shelf arrangements to fit gour familg's
food storage needs.
To remove shelves: Tilt shelf up at front,
then lift it up and out of tracks on rear wall
of refrigerator/freezer.
Handle glass shelves carefullg. Rough handling
of tempered glass can cause it to shatter.
To replace shelves: Select desired shelf height.
With shelf front raised slightlg, engage top lugs in
tracks at rear of cabinet. Then lower front of shelf
until it locks into position.
11
Shelves/SabbathMode
36" All-Refrigerator and All-Freezer Units
Removable
wine rack
(on all
refrigerator
models)
The wine rack isdesigned to hold a bottle
on its side and will fit on any shelf.
To relocate the wine rack: Pull the wine rack
straight out, position its lip over the right edge
of the shelf you want to suspend it from and push
it all the way in.
Door
shelves
Some doorshelvesareadjustableand can
be moved up and down tomeet yourstorage
needs,The deeperdoorshelvesmustbe placed
atthebottomofthedoor,
To remove: Lift the shelf up and slide it
towards you.
II
ZSA B1
Sabbath
Mode
Product Kit
(available at
extra cost)
12
The Sabbath Mode Product Kitwas designed
for use on the Jewish Sabbath and Holidays.
The Sabbath Mode feature makes it possible
for observant Jews to refrigerate and freeze
food during the duration of the holiday.
The Sabbath Mode feature can be set to override
typical reactions to actions in your refrigerator.
While in the Sabbath Mode, your refrigerator will
still operate normally. However, the refrigerator
will not respond to your actions.
While in the Sabbath Mode, you may notice
the fan running when the door is opened;
however, this isnot a result of your actions.
The fan will operate at random times.
The defrost heater will continue to defrost
the refrigerator and freezer and will be activated
on a timer. The defrost heater will not defrost
as a result of door openings or any consumer
actions.
ON/OFF--To activate, raise the top grille
panel and set the Sabbath Mode switch to
the ON position. A green LEDlight will be visible
below the Sabbath Mode Kit switch. The light
will be visible when the grille isclosed between
the grille door and compartment doors.
DISPLAYS,ALARMSand LIGHTS--The main
temperature control displays will be deactivated;
therefore they will not be lit, sound a tone or
operate when touched. Door alarms and lights
will be disabled.
ICEMAKER--Theicemaker will continue
to operate. The icemaker can be disabled by
setting the icemaker power switch to the OFF
position (seeAutomatic Icemoker).To obtain ice,
open the freezer door and remove the cubed ice
from the ice bin.
This Sabbath Mode Product Kit can be purchased
from your local appliance dealer.TheZSAB1Kit
isdesigned for usewith all Monogram Built-In
Refrigerators manufactured after 2008.
Tolocate your nearest dealer,visit our web site
monogram.cam or call1.800.626.2000.InCanada,
call 1.800.561.3344.Order Kit# ZSABI.
NOTE:The Sabbath Mode Product Kit must
be installed by a qualified service technician.
NOTE:If installing the refrigerator and freezer as
a pair, 2 Sabbath Mode Kits must be ordered.
Careand Cleaning
36" All-Refrigerator and All-Freezer Units
Cleaning
outside
Door handles and trim-Clean with a cloth
dampened with soapgwater. Drgwith a soft cloth.
Keepthe outside clean. Wipe with a clean
cloth lightlu dampened with mildliquid dish
detergent. Drywith a clean, softcloth.
Do notwipe the refrigerator/freezer with a soiled
dishcloth or wet towel.Thesemag leavea residue
that can damage the finish.Donot usescouring
pads, powdered cleaners,bleach or cleaners
containing bleach because these products
can scratch and damage the finish.
Stainless steeI--Regularlu cleanand polish
the StainlessSteelDoor Panelsand Handles
(onsome models)with a commercially available
stainlesssteel cleanersuch as StainlessSteelMagiC"
to preserve and protect thefine finish.StainlessSteel
Magic isavailablethrough GEPartsand Accessories,
800.626.2002,or ge.com.Order part number
WXIOX15.
Donot useappliancewax or polishon the stainless
steel.
Cleaning
inside
I_ o helpprevent odors, leave
an open boxof bakingsoda
in the refrigerator/freezer.
Turn off power at the circuit
breaker or fuse box before
cleaning. Ifthis isnot practical,
wring excessmoisture out of
sponge or cloth when cleaning around switches,
lights or controls.
Usewarm water and bakingsoda solution-
about a tablespoon (15 ml)of bakingsoda
to a quart (1liter)of water.Thisboth cleans
and neutralizesodors.Thoroughlu rinse
and wipe dru.
Other parts of the refrigerator/freezer- including
door gaskets,meat and vegetable drawers, ice
storage bin and all plastic parts-can be cleaned
the same way. After cleaning the door gaskets,
applu a thin lauer of petroleumjellu to the door
gaskets at the hinge side.This helpskeepthe
gasketsfrom sticking and bending out of shape.
Avoid cleaning cold glass shelves with hot water
because the extreme temperature difference
may cause them to break. Handle glass shelves
carefully. Rough handling of tempered glass can
cause it to shatter.
Do not wash any plastic refrigerator/freezer parts
in the dishwasher.
13
Careand Cleaning
36" All-Refrigerator and All-Freezer Units
Preparing
for vacation
For long vacations or absences, remove food
from the refrigerator/freezer. Setthe control to
OFF,and clean the interior with a baking soda
solution of one tablespoon (15 ml) of baking
soda to one quart (1 liter)of water. Leave
the door open.
For shorter vacations, remove perishable foods
and leave the control at the regular setting.
However, if the room temperature isexpected
to drop below 60°F (16°C),follow the same
instructions asfor extended vacations.
Move icemaker power switch to the OFFposition
and shut off the water supplg to the freezer.
Using the
master
light switch
Thisfeature turns off the lights insidethe unit.The
switch islocated behindthe top accesspanel. Liftup
the panel to accessthe switch.Turningoffthe
master switch doesnot turn off all power tothe unit.
Master Light
Switch
All-Refrigerator
\
Master Light
Switch
All-Freezer
Light bulb
replacement
For upper and lower light bulb replacement,
call for service.
la
Preparation
36" All-Refrigerator and All-Freezer Units
Refrigerator/
freezer
location
Do not instell the refrigeretor/freezer where
temperetures will be below 60°F(16°C}because
it will not run often enough to maintain proper
temperatures, and the refrigerator will develop
high internal humidity.
For proper instelletion, the refrigeretor/
freezer must be pieced on e level surface
of herd meteriel the seme height es the rest
of the flooring. This surface should be
strong enough to support e fullg Ioeded
refrigeretor/freezer, or epproximetelg
1,200 Ibs.eech. See the Instelletion
Instructions for complete directions.
Clearances
If the refrigerator/freezer isto be installed in
a corner, a 4"clearance is required on the hinge
side for a 90°door opening and access to fresh
food drawers. A 15"clearance is required on
the hinge sideto remove pans.A 25" clearance
is required on the hinge sidefor a full 130°
door swing.
Noother clearances attop, sides or back
are required. See the Installation Instructions
for complete directions.
Anti-tip
bracket
The unit is top-heavg and must be secured
to prevent the possibilitg of tipping forward.
An anti-tip bracket must be installed to secure
this unit to the wall. The following pages show
the installation of this bracket.
15
Anti-Tip Bracket Installation
36" All-Refrigerator and All-Freezer Units
Anti-tip
bracket
installation
The kit supplied with the unit contains 2 lag
bolts and 4 toggles with bolts. The wall bracket
will be attached to the wall in 4 places.
Heasure the opening where the unit isto be
installed. Hark the center with a vertical line.
Measure up 81 1/2" from the floor. Mark this
point on the wall.
Using a level, draw a horizontal lineon the wall
at this height.
Locate at least 2 studs on the back wall.
Mark these points on the horizontal line.
Place the bottom of the wall bracket with tabs
on the horizontal line.Align the center notch
on the bracket with the center line on the wall.
The anti-tip wall bracket has a series of holes.
Select 2 holes that match with the located
studs. Make sure the holes selected ore
on the center of the studs. Mark the wall
at these points.
Mark on additional hole at each end
of the bracket. If one of the studs iscloser
to the end of the bracket, mark on additional
hole towards the center of the bracket.
Drill 1/2" holes into the wall board
at the locations marked for the toggles
to be mounted (not the stud markings).
Drill 3/16" holes into wooden studs where
marked. If steel stud construction, drill 1/2"
holes into the studs where marked. You will
use 2 toggles with the metal studs.
, _===:
......
%
\
8tq/2"
ToFloor
Center Wall Bracket
/
: [ ]
.--
i ---- -
i _--- ,
j.-
',_..... . _---I----I-- "......
i j o-
TwoAdditional
HoleLocationsat
EndsofBrackets
Wall Studs
/
LineOnWall
/
/
/
LineonWall
,4
/ i
/
/
/
/
,/
Center
16
Anti-Tip Brucket Installation
36" All-Refrigerator and All-Freezer Units
Anti-tip
bracket
installation
(cont.)
Install Wall Toggles:
The wall toggles and bolts con be ordered
as Service Kit#WR49X10193. WoII toggles
ore installed in the drywall and metal studs
for stobilitu. Install the wall toggles as follows:
Drill 1/2" holes at the wall markings mode
in the holes otthe ends of the wall bracket.
Hold the metal channel flat against the plastic
strops and slide the channel through the hole.
Gently pull back at the ends of the plastic
strops to make the channel rest flush behind
the wall.
Hold the ends of the strops in one hand
and slide the plastic cop along the strops until
the flange of the cop isflush with the wall.
Place your thumb between the plastic strops
and bend up and down to snopthe strops off
at the wall.
Instell Screws end Bolts:
Hove someone hold the wall bracket centered
in place with each of the holes aligned with
the correct opening in the bracket and level
with the horizontal line.
Insert the log screws through the bracket
and into the stud. Tighten with o wrench.
Insert the bolts into the toggle by hand until
snug. Tighten with o wrench.
PlasticStraps
Metal Channel
Cap
Wood Stud
/
Anti-TipWall Bracket
Drywall or
SteelStud
\,
Belt
Anti-Tip Wall Bracket
17
Anti-Tip Bracket Installation
36" All-Refrigerator and All-Freezer Units
Anti-tip
bracket
installation
(cont.)
Remove Grilles for Access to Power Cord
and Anti-tip Locking Hooks
Fresh Food Unit
Open theaccessdoor.
Usinga 1/4"hexdriver,removethe2 screws
atthebottomofthegrille.
Pull the bottom of the grille forward, down
and out to remove.
Freezer Unit
Open the access door.
Using a 1/4" hex driver, remove the 2 screws
at the bottom of the grille on the right.
Pull the bottom of the grille forward, down
and out to remove.
Using a 1/4" hex driver, remove the screw
on the left side of the grille.
The grille is aluminum and will bend easilu.
Gentlu pull forward on the left side of the grille
to open for access.This grille will not be
completely removed.
Power Cord
Locate the power cord inside the left cavity.
If it has not been adjusted so the plug iseasilu
accessible, do so now.
Move Unit into Final Position
Hove refrigerator toward its final installed
location. Align the tabs on the wall bracket
with the openings in the back of the unit.
The unit has "L"bolts in the upper left and right
corners inside of the access compartment.
These bolts will interlock with the wall bracket
and secure the unit using the washers and hair
pin cotters in the hardware kit once the unit has
been leveled and is in the final position.
\
\
.j.jjjjJJ _1_*
.J
Screws
Screws
"L" Bolt
" LeftGrille Open
\\
PowerCordLocation
18
Anti-Tip Bracket Installation
36" All-Refrigerotor ond All-Freezer Units
Level unit All models have 4-point leveling. The front is
supported bu leveling legs;the rear is supported
by adjustable wheels. Both are accessible from
the front of the unit.
To level the back of the unit, turn the 7/16"
hex nut located above the front wheels. Turn
clockwise to raise or counterclockwise to lower
the unit.
For front leveling, use a 1-1/4" open-end
wrench.
Adjust height of unit to match installation
cutout opening 83-1/2 to 84-1/2". The unit
should be level and plumb with cabinetry.
-4,CAUTION:
The rear leveling wheels ond front leveling legs
ore limited to a maximum height adjustment of
1". Ifthe installation requires more than 84-1/2"
height, the installer should elevate the unit on
o sheet of plywood or runners. Cabinetry trim
could also be added across the top of the
opening to shorten the opening. If you attempt
to raise the unit more than 1", gou will damage
the front leveling legs and the rear leveling
wheels.
- PRUDENCE
Les roues de nivellement orri@reet les pattes
de nivellement avant permettent un r@glage
maximal de 25 mm (1 po).SiI'ouverture pour
I'appareil m@nagero une hauteur sup@rieure
2,15 m (84-1/2 po),I'installateur dolt @lever
I'appareil m@nagersur une feuille de contre-
plaqu@ou des glissi@res.IIest @golement possible
d'ojouter des baguettes de finition des placards
sur le haut de I'ouverture afin de la r@duire.
Lever I'appareil m@nagerde plus de 25 mm (1 po)
endommage les pattes de nivellement avant
et les roues de nivellement orri@re.
19
Anti-Tip Bracket Installation
36" All-Refrigerator and All-Freezer Units
Secure unit
to wall
The "L"rods can be found in the upper left
and right corners of the unit in the access
compartment. Lookthrough the access
compartment to make sure the rods line
up with the anti-tip bracket.
There are 2 washers and a hair pin cotter per
rod. Remove the washers and hair pin cotter
from the end of the rod.
Rotate and move the "L"rod into the slot
in the anti-tip bracket tab. Once it isin
the slot, rotate the "L" rod so the hook portion
is pointing down. The holes at the front end
of the rod should be in a vertical position.
Do this to both sides.
Pull out on the end of the rod to make sure
it issecure in the bracket.
Locate the hole on the rod that is closest
to the unit. A hair pin cotter will be put through
this hole to secure the rod. If this hole appears
to be too far awag for a snug fit against
the unit, add the washers one at a time until
the pin will fit tightlg into the hole.
Align the straight section of the pin with
the hole from the underside of the rod. Push
the pin up until it snaps into position. Pliers
mag be used. NOTE:The hair pin cotter must be
vertical when this step is completed to ensure
the "L" rod is engaged in the bracket.
Check the rod for tightness bg pulling forward.
If the rod moves, remove the hair pin cotter
and place another washer on the rod.
Reinsert the pin.
Bend the left grille back into place (freezer onlg)
and replace the screws.
Replace the flat grille panel bg sliding
it under the flange at the top of the access
compartment and pushing the grille back
into place. Replace screws.
"L" RodPointingDown
Engagedin Bracket
"L" Rod
JJ
0
Wall Bracket
\
"L" Rod
i Washer
Hair PinCotter
isVertical
2
f
20
  • Page 1 1
  • Page 2 2
  • Page 3 3
  • Page 4 4
  • Page 5 5
  • Page 6 6
  • Page 7 7
  • Page 8 8
  • Page 9 9
  • Page 10 10
  • Page 11 11
  • Page 12 12
  • Page 13 13
  • Page 14 14
  • Page 15 15
  • Page 16 16
  • Page 17 17
  • Page 18 18
  • Page 19 19
  • Page 20 20
  • Page 21 21
  • Page 22 22
  • Page 23 23
  • Page 24 24
  • Page 25 25
  • Page 26 26
  • Page 27 27
  • Page 28 28

GE Monogram ZIFP360NXARH Manuel utilisateur

Catégorie
Frigos
Taper
Manuel utilisateur

dans d''autres langues