Dash Mini Toaster Oven Le manuel du propriétaire
- Catégorie
- Petits appareils de cuisine
- Taper
- Le manuel du propriétaire

DMTO100
Cute & Compact | 550 Watts
mini
Toaster Oven

2 ∙ page title table of contents ∙ 3
Important Safeguards .................................................................... 4-9
Parts & Features ......................................................................... 10-11
Using Your Mini Toaster Oven ................................................. 12-13
Toasting Chart ........................................................................... 14-15
Cleaning & Maintenance ......................................................... 16-17
Recipes ....................................................................................... 18-27
Notes.......................................................................................... 28-29
Customer Support .......................................................................... 30
Warranty ........................................................................................... 31
mini TOASTER OVEN
We believe that taking small steps every day to live a healthier life
can have a big impact and that the best path to wellness is to eat
whole, natural foods. At Dash, we make products that make it easier
for you to prepare and eat real food at home, so that you can feel
your best. In the store, in your kitchen, and online we gives you the
tools and the support to make delicious healthy meals.
That’s what living unprocessed is all about!
Dash

important safeguards ∙ 5 4 ∙ important safeguards
• Read all instructions.
• Remove all bags and packaging from
appliance before use.
• Make sure the appliance is cleaned
thoroughly before using.
• Never leave appliance unattended
when in use.
• Do not use appliance for other than
intended use.
• For household use only. Do not use
outdoors.
• Close supervision is necessary when
any appliance is used by or near
children.
• A re may occur if the toaster-oven
is covered or touching ammable
material, including curtains, draperies,
walls, and the like, when in operation.
Do not store any item on top of the
appliance when in operation.
• Do not touch hot surfaces. Use handles
or knobs.
• Allow appliance to cool completely
prior to assembly, disassembly or
cleaning.
• Oversized foods or metal utensils must
not be inserted in a toaster as they may
create a re or risk of electric shock.
• Do not store any materials, other than
the manufacturer’s recommended
accessories in this toaster when not in
use.
• Extreme caution should be used
when using containers constructed of
materials other than metal or glass.
• Extreme caution must be used when
moving an appliance containing hot oil
or other hot liquids.
• Do not place any of the following
materials in the toaster: paper,
cardboard, plastic or similar materials.
• Do not cover any part of the toaster
with metal foil. This will cause
overheating of the toaster.
• Use extreme caution when removing
tray or disposing of hot grease.
• Do not clean with metal scouring pads.
Pieces can break off the pad and touch
electrical parts creating a risk of electric
shock.
• During rst use, it is common to see a
small amount of smoke, or experience a
slight odor. This is normal.
• Do not open the door of the Mini Toaster
Oven during use. This will cause the heat
to escape and affect the cooking process.
• Do not spray water on the door of the
Mini Toaster Oven while the appliance is
in use.
• This appliance does NOT include a
convection function, and therefore is
not appropriate for baking poultry or
meat. Use this appliance for warming
ingredients within the designated
15 minutes time frame.
• Use oven mitts when removing
ingredients from the Toaster.
• When cleaning, be careful of the fragile
quartz tube. A broken quartz tube may
result in electric shock or other injury.
• Do not operate this appliance with a
damaged cord, damaged plug, after
the appliance malfunctions, is dropped,
or damaged in any manner. Return
appliance to the nearest authorized
service facility for examination, repair, or
adjustment.
• For maintenance other than cleaning,
please contact StoreBound directly at
1-800-898-6970 from 7AM-7PM PT
Monday-Friday or by email at support@
storebound.com.
• Do not place appliance on or near a hot
gas burner, hot electric burner, or in a
heated oven.
• Refrain from using attachments that are
not recommended by the appliance
manufacturer, as this may result in re,
electric shock, or personal injury.
• Do not let the cord touch hot surfaces,
or hang over the edges of tables or
counters.
• This appliance is not intended for use
by persons (including children) with
reduced physical, sensory, or mental
capabilities, or lack of experience and
knowledge unless they are provided with
supervision and instruction concerning
use of the appliance by a person
responsible for their safety.
• Always be sure to unplug the appliance
from the outlet prior to moving, cleaning,
storage, and when not in use.
• To disconnect, turn the timer knob to
”OFF”, then remove plug from wall outlet.
• There is no On/Off button on the Mini
Toaster Oven. To turn the Mini Toaster
on, simply plug in the Mini Toaster Oven
and set the appropriate time. To turn off,
simply unplug the Mini Toaster Oven.
• StoreBound shall not accept liability for
damages caused by improper use of the
appliance.
• Improper use of the appliance can result
in property damage or even in personal
injury.
IMPORTANT SAFEGUARDS IMPORTANT SAFEGUARDS
IMPORTANT SAFEGUARDS: PLEASE
READ AND SAVE THIS INSTRUCTION
AND CARE MANUAL.
When using electrical appliances, basic safety precautions should be followed, including:

mesures de sécurité importantes ∙ 7 6 ∙ important safeguards
IMPORTANT SAFEGUARDS
IMPORTANT SAFEGUARDS: PLEASE
READ AND SAVE THIS INSTRUCTION
AND CARE MANUAL.
• To protect against electrical shock,
do not immerse cord, plugs or the
appliance in water or other liquid.
• Make sure that the voltage indicated on
the appliance matches the local mains
voltage.
• This appliance has a polarized plug
(one blade is wider than the other).
To reduce the risk of electric shock,
this plug will t in a polarized outlet
only one way. If the plug does not
completely t in the outlet, reverse
the plug. If it still does not t, contact a
qualied electrician. Do not attempt to
modify the plug in any way.
• The power supply cord is short to
reduce risk from becoming entangled
in or tripping over a longer cord.
An extension cord may be used if care
is exercised in its use. If an extension
cord is used, the marked electrical
rating of the extension cord should be
at least as high as the electrical rating
of the appliance. The extension cord
should be arranged so that it will not
drape over the countertop or tabletop
where it can be pulled on by children or
tripped over unintentionally.
MESURES DE SÉCURITÉ IMPORTANTES
MESURES DE SÉCURITÉ IMPORTANTES:
VEUILLEZ LIRE ET CONSERVER CE
MANUEL D’UTILISATION
Lors de l’utilisation d’appareils électriques, des précautions élémentaires de
sécurité doivent être respectées, notamment:
• Lisez toutes les instructions.
• Retirez tous les sachets et emballages
de l’appareil avant l’utilisation.
• Ne laissez jamais l’appareil sans
surveillance pendant l’utilisation.
• Assurez-vous que l’appareil est bien
nettoyé avant l’utilisation.
• Ne pas utiliser l’appareil pour d’autres
utilisations que celle prévue. Usage
domestique seulement.
• Une surveillance étroite est nécessaire
lorsque l’appareil est utilisé par ou près
des enfants.
• Un incendie peut se produire si le four
grille-pain est couvert ou touche des
matériaux inammables, y compris des
rideaux, des rideaux, des murs, etc., en
cours de fonctionnement. Ne rangez
aucun objet sur l’appareil lorsqu’il est en
marche.
• Ne pas utiliser l’appareil pour d’autres
utilisations que celle prévue.
• Ne touchez pas les surfaces chaudes.
Utilisez des gants ou des maniques.
• Laisser refroidir avant de monter ou
démonter.
• Des aliments trop gros ou des
ustensiles en métal ne doivent pas
être insérés dans un four toaster, car ils
peuvent provoquer un incendie ou un
risque de choc électrique.
• Soyez extrêmement prudent lorsque
vous déplacez un appareil contenant
de l’huile chaude ou d’autres liquides
chauds.
• Ne pas utiliser à l’extérieur.
• Ne stockez aucun matériel, autre que
les accessoires recommandés par le
fabricant, lorsque ce four n’est pas
utilisé.
• Soyez extrêmement prudent lorsque
vous utilisez des contenants autres
qu’en métal ou en verre.
• Ne pas utiliser cet appareil si le
cordon est endommagé, si la
prise est endommagée, après un
dysfonctionnement de l’appareil, sa
chute, ou si l’appareil est endommagé
de quelque manière que ce soit.
Retournez cet appareil auprès du
centre de service agréé le plus proche
pour un examen, une réparation, ou un
ajustement.
• Ne placez aucun des matériaux suivants
dans le four: papier, carton, plastique
ou semblables.
The Mini Toaster Oven is hot while in use. For safe handling
use oven mitts or wait until the oven has cooled completely.

IMPORTANT SAFEGUARDSMESURES DE SÉCURITÉ IMPORTANTES MESURES DE SÉCURITÉ IMPORTANTES
mesures de sécurité importantes ∙ 9 8 ∙ mesures de sécurité importantes
• Ne pas couvrir le plateau ramasse-
miettes ou aucune partie du four avec
du papier aluminium. Cela cause la
surchauffe du four.
• Pour tout entretien autre que le
nettoyage, contactez directement
StoreBound au +1-800-898-6970 de
7h à 19h (HNP) du lundi au vendredi ou
par email [email protected].
• Ne placez pas l’appareil sur ou près
d’une source de chaleur telle que:
brûleur au gaz ou électrique chaud, ou
dans un four chauffé.
• Soyez extrêmement prudent lorsque
vous retirez le plateau ou que vous
vous débarrassez de la graisse chaude.
• Il faut faire preuve d’une extrême
prudence lors du déplacement d’un
appareil contenant de l’huile chaude
ou d’autres liquides chauds.
• Évitez d’utiliser des accessoires
qui ne sont pas recommandés par
le fabricant de l’appareil, car cela
pourrait provoquer un incendie, une
électrocution ou des blessures.
• Un incendie peut se produire si le four
est recouvert ou s’il est en contact avec
un matériau inammable, y compris
des rideaux, des tentures, des murs,
et autres, lorsqu’il est en marche. Ne
rangez aucun objet sur l’appareil en
cours de fonctionnement.
• Ne pas laisser le cordon d’alimentation
toucher à des surfaces chaudes, ou
pendre d’un comptoir ou d’une table.
• An de prévenir tout choc électrique,
n’immergez pas le cordon, la prise ou
l’appareil dans de l’eau ou d’autres
liquides.
• Cet appareil n’est pas destiné à être
utilisé par des personnes (y compris les
enfants) avec des capacités physiques,
sensorielles ou mentales réduites, ou
sans expérience et connaissances à
moins qu’une personne responsable
de leur sécurité supervise l’utilisation.
• Assurez-vous de débrancher l’appareil
de la prise de courant avant de
le déplacer, le nettoyer, et ranger
l’appareil, et lorsqu’il n’est pas utilisé.
• Pour déconnecter, réglez le bouton de
la minuterie sur” OFF ”, puis retirez la
che de la prise murale.
• Il n’ya pas de bouton Allumé / Eteint
sur le mini-four grille-pain. Pour allumer
le mini-grille-pain, il suft de brancher
le mini-grille-pain et de régler l’heure
appropriée. Pour l’éteindre, débranchez
simplement le mini-grille-pain.
• Ne pas nettoyer avec un tampon à
récurer métallique. Des parties peuvent
se détacher du tampon et toucher
les parties électriques, ce qui peut
entraîner un risque de choc électrique.
• Au cours de la première utilisation, il est
courant de voir une petite quantité de
fumée, ou de sentir une légère odeur.
Ceci est normal.
• N’ouvrez pas la porte du Four Toaster
Mini pendant l’utilisation. Cela va laisser
la chaleur s’échapper et affecter le
processus de cuisson.
• Ne vaporisez pas d’eau sur la porte
du Four Toaster Compact pendant
l’utilisation de l’appareil.
• Cet appareil n’inclut PAS de fonction de
convection, et n’est donc pas approprié
pour la cuisson de la volaille ou des
MESURES DE SÉCURITÉ IMPORTANTES:
VEUILLEZ LIRE ET CONSERVER CE
MANUEL D’UTILISATION
viandes. Utilisez cet appareil pour
réchauffer les ingrédients dans le délai
indiqué de 15 minutes.
• Assurez vous de porter des gants
protecteurs lorsque vous retirez des
ingrédients du four.
• Pour le déconnecter, tournez la
minuterie sur “OFF”, puis débranchez
la prise.
• Toujours débrancher et laisser refroidir
le four avant de le nettoyer.
• StoreBound n’accepte aucune
responsabilité pour des dommages
causés par une utilisation impropre de
l’appareil.
• Une utilisation impropre de l’appareil
peut entraîner des dommages
matériels ou même des blessures
corporelles.
• Pour vous protéger contre les chocs
électriques, n’immergez pas le cordon,
les ches et l’appareil dans l’eau ou tout
autre liquide.
• L’usage d’accessoires non-
recommandés par le fabricant de
l’appareil peut causer des blessures.
• Cet appareil est muni d’une che
polarisée (une lame est plus large que
l’autre). An de réduire le risque de
choc électrique, cette che ne peut
être insérée dans une prise polarisée
que d’une seule façon. Si la che ne
rentre pas complètement dans la prise,
retournez-la. Si elle ne rentre toujours
pas, contactez un électricien qualié.
N’essayez pas de modier la che de
quelque façon que ce soit.
• Le cordon d’alimentation est court an
de réduire les risques de blessures ou
de dommages pouvant être causés
par le fait de trébucher ou d’emmêler
dans le cordon. Une rallonge peut être
utilisée si des précautions sont prises
lors de son utilisation. Si une rallonge
est utilisée, sa capacité électrique doit
être équivalente ou supérieure à la
puissance de l’appareil. La rallonge doit
être arrangée de façon à ne pas pendre
d’un comptoir ou d’une table, ou de
toute autre surface où des enfants
pourraient s’y suspendre ou trébucher
involontairement.
Le Four Toaster Mini est chaud pendant l’utilisation.
Pour une manipulation en toute sécurité, utilisez
des gants isolants ou attendez que le four soit
complètement refroidi.

10 ∙ parts & features
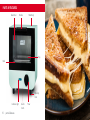
parts & Features
Non-slip
Feet
Rack
Tray
Handle
Crumb
Catch
Indicator Light Timer
Glass Door Main Body

12 ∙ using your mini toaster oven using your mini toaster oven ∙ 13
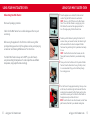
using your mini Toaster Oven using your mini Toaster Oven
1
2
3
Place the appliance on a stable, flat, heat-resistant
surface. Plug the Mini Toaster into a wall socket.
NOTE: There is no On/Off button on the Mini Toaster
Oven. To turn the Mini Toaster on, simply plug in the
Mini Toaster Oven and set the appropriate time. To
turn off, simply unplug the Mini Toaster Oven.
Preheat your Mini Toaster by setting the Timer for 3-5
minutes. Once you have set the time, the Indicator Light
will illuminate. When the time has elapsed the Mini
Toaster will ring indicating that it is preheated and ready
for use.
NOTE: To set the Timer for less than 5 minutes, turn the
Timer past 5 minutes, then back to your desired cooking
time.
Place your food on the Rack and/or Tray inside the Mini
Toaster. Close the Glass Door. If using the Tray to toast,
it is recommended to flip your food halfway through
the cooking process.
Before Using Your Mini Toaster:
Remove all packaging materials.
Check that the Mini Toaster has no visible damage and that no parts
are missing.
Before using the appliance for the first time or before using it after
prolonged storage, wash and dry the appliance and any accompanying
accessories. See “Cleaning & Maintenance” for instructions.
Your Dash Mini Toaster is always set to 400℉, so you don’t have to
worry about setting the temperature. To cook recipes that use a different
temperature, simply adjust the time accordingly.
4
Turn the Timer to the appropriate setting. Once you have
set the time, the Indicator Light will illuminate. When the
cooking time has elapsed, the Mini Toaster will ring. Use
oven mitts to remove your food from the Mini Toaster as
the appliance and your food will be hot.
NOTE: To set the Timer for less than 5 minutes, turn the Timer
past 5 minutes, then back to your desired cooking time.

toasting chart ∙ 15 14 ∙ using your mini toaster oven
toasting chart
TOASTING LEVEL TIME
Light 2–3 minutes
Medium 3–4 minutes
Medium-Dark 3–5 minutes
Dark 4–6 minutes
Please Note:
This Toasting Chart is a guideline. Actual cooking times may vary
depending on your food. Your Dash Mini Toaster is always set to 400℉,
so you don’t have to worry about setting the temperature. To cook recipes
that use a different temperature, simply adjust the time accordingly.
The and symbols around the Timer indicate light and dark
toast and the symbol represents the estimated time for dark toast.
These symbols are only guidelines and your actual cooking time may
vary depending on your ingredients.
toasting settings. The
symbol represents the estimated time for light

cleaning & maintenance ∙ 17
CLeaning & maintenance
Before Cleaning Your Mini Toaster Oven:
Ensure that you have unplugged the appliance before cleaning.
Allow the oven to cool completely before cleaning.
Thoroughly clean the Mini Toaster after each use.
When Cleaning Your Mini Toaster Oven:
Use a damp cloth to wipe down the exterior of the appliance.
Dry with a soft cloth.
Do not use abrasive cleaning agents to clean the appliance.
Use warm water to clean the Rack, Tray, and Crumb Catch. Wipe down
with a dry, clean cloth.
Open the Crumb Catch by pulling toward the front of the Mini Toaster
until the latch has been released. Be sure to do this over a trash can as
crumbs may fall out. The Crumb Catch will open but it will not remove
entirely.
Using a damp, soapy cloth, wipe down the interior of the Mini Toaster.
Thoroughly rinse the cloth and wipe again. Do not leave residual water in
the oven. WARNING: Be careful not to touch or damage the quartz heating
element while cleaning.
Always dry the Mini Toaster thoroughly.
It is highly recommended that you clean and dry the Rack and Tray by
hand, after each use.

1918
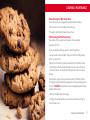
RECIPE
ideas
mini Toaster Oven
Check out these recipes for yummy inspiration
and a variety of delicious ideas for your Dash
Mini Toaster Oven!

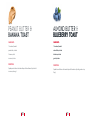
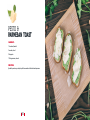
1 slice bread, toasted
peanut butter, to taste
½ banana, sliced
cinnamon, to taste
INGREDIENTS:
Peanut butter &
Banana TOAST
DIRECTIONS:
Spread peanut butter on the toast and top with sliced banana. Sprinkle with
cinnamon, and enjoy!
20 21
1 slice bread, toasted
almond butter, to taste
blueberries, to taste
granola, to taste
INGREDIENTS:
Almond Butter
Blueberry Toast
DIRECTIONS:
Spread almond butter on the toast and top with blueberries. Sprinkle granola on top.
Enjoy!
1 slice bread, toasted
almond butter, to taste
blueberries, to taste
granola, to taste
INGREDIENTS:
Almond Butter &
Blueberry Toast

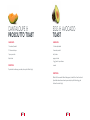
1 slice bread, toasted
2-3 slices cantaloupe
1 piece prosciutto
feta, to taste
INGREDIENTS:
cantaloupe &
prosciutto toast
DIRECTIONS:
Top toast with cantaloupe, prosciutto, and a sprinkle of feta. Enjoy!
22
1 slice bread, toasted
½ avocado, mashed
salt, to taste
pepper, to taste
1 egg, fried or to preference
sriracha
INGREDIENTS:
Egg & Avocado
toast
DIRECTIONS:
Mash half of an avocado. Add salt and pepper, to taste. Mix until well combined.
Spread the mashed avocado evenly across toast, top with the fried egg, and
drizzle with sriracha. Enjoy!
23

24 24
1 slice bread, toasted
½ avocado, sliced
2 tbsp pesto
1-2 tbsp parmesan, shaved
INGREDIENTS:
pesto &
parmesan Toast
DIRECTIONS:
Spread the pesto on your toast, top with the avocado and then the shaved parmesan.
1 slice bread, toasted
½ avocado, sliced
2 tbsp pesto
1-2 tbsp parmesan, shaved
INGREDIENTS:
pesto &
parmesan Toast
DIRECTIONS:
Spread the pesto on your toast, top with the avocado and then the shaved parmesan.

26 27 26
¼ cup olive oil
2 tbsp honey
1 tsp curry powder
½ tsp dried parsley
1 package (8-10 oz) whole wheat pita bread
INGREDIENTS:
curried herb
pita chips
DIRECTIONS:
In a small cup, stir together olive oil, honey, curry powder, and parsley. Split
each pita crosswise into 2 rounds; brush each round with the oil mixture. Cut
each round into quarters and then cut each quarter in half. Line the Tray with
parchment paper. Place pita pieces on the Tray. The chips can be baked in
batches. Slide the Tray into the Mini Toaster Oven. Toast for 4 minutes. Store in
plastic zip-loc bag.
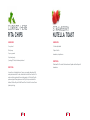
1 slice bread, toasted
1 tbsp of nutella
strawberries, to preference
INGREDIENTS:
strawberry
nutella toast
DIRECTIONS:
Toast bread for 2-4 minutes. Slice strawberries. Spread nutella and top with
strawberries.

NOTES Notes
notes ∙ 29 28 ∙ notes

30 ∙ customer support warranty ∙ 31
We welcome and value all concerns and questions from our customers. Please do not hesitate
to contact us for product support, warranty, and maintenance related questions directly at:
1(800)-898-6970 from 7AM - 7PM PST, Monday - Friday, or by email at suppor[email protected].
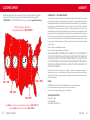
Feel free to give us a call any time
during the hours below: 1 (800) 898-6970
7AM to 7PM
8AM to 8PM
9AM to 9PM
10AM to 10PM
Hey Hawaii! You can reach our customer service team from 5AM to 5PM HAST.
And also, Alaska, feel free to reach out from 6AM - 6PM UTC.
customer support
STOREBOUND, LLC – 1 YEAR LIMITED WARRANTY
Your StoreBound product is warranted to be free from defects in material and workmanship for a period of
one (1) year from the date of the original purchase when utilized for normal and intended household use.
Should any defect covered by the terms of the limited warranty be discovered within one (1) year, StoreBound,
LLC will repair or replace the defective part. To process a warranty claim, contact Customer Support at
1-800-898-6970 for further assistance and instruction. A Customer Support agent will assist you by
troubleshooting minor problems. If troubleshooting fails to x the problem, a return authorization will be
issued. Proof of purchase indicating the date and place of purchase is required and should accompany the
return. You must also include your full name, shipping address, and telephone number. We are unable to
ship returns to a PO box. StoreBound will not be responsible for delays or unprocessed claims resulting
from a purchaser’s failure to provide any or all of the necessary information. Freight costs must be prepaid
by the purchaser.
Send all inquiries to [email protected].
There are no express warranties except as listed above.
REPAIR OR REPLACEMENT AS PROVIDED UNDER THIS WARRANTY IS THE EXCLUSIVE REMEDY OF
THE CUSTOMER. STOREBOUND SHALL NOT BE LIABLE FOR ANY INCIDENTAL OR CONSEQUENTIAL
DAMAGES OR FOR BREACH OF ANY EXPRESS OR IMPLIED WARRANTY ON THIS PRODUCT EXCEPT
TO THE EXTENT REQUIRED BY APPLICABLE LAW. ANY IMPLIED WARRANTY OF MERCHANTABILITY
OR FITNESS FOR A PARTICULAR PURPOSE ON THIS PRODUCT IS LIMITED IN DURATION TO THE
DURATION OF THIS WARRANTY.
Some states do not allow the exclusion or limitation of incidental or consequential damages, or
limitations on how long an implied warranty lasts. Therefore, the above exclusions or limitations may
not apply to you. This warranty gives you specic legal rights and you may also have other rights, which
vary from state to state.
REPAIRS
DANGER! Risk of electric shock! The Dash Mini Toaster Oven is an electrical appliance.
Do not attempt to repair the appliance yourself under any circumstances.
Contact Customer Support regarding repairs to the appliance.
TECHNICAL SPECIFICATIONS
Voltage 120V ~ 60Hz
Power Rating 550W
Stock#: DMTO100_20180918_v4
warranty

1-800-898-6970 | @unprocessyourfood | bydash.com
-
 1
1
-
 2
2
-
 3
3
-
 4
4
-
 5
5
-
 6
6
-
 7
7
-
 8
8
-
 9
9
-
 10
10
-
 11
11
-
 12
12
-
 13
13
-
 14
14
-
 15
15
-
 16
16
-
 17
17


Dash Mini Toaster Oven Le manuel du propriétaire
- Catégorie
- Petits appareils de cuisine
- Taper
- Le manuel du propriétaire
dans d''autres langues
Documents connexes
-
Dash Easy Toaster Le manuel du propriétaire
-
-
Dash DEZT001 Manuel utilisateur
-
Dash Express Toaster Oven Le manuel du propriétaire
-
Dash DVTS501AQ Manuel utilisateur
-
Dash DVTS501 CLEAR VIEW TOASTER Manuel utilisateur
-
-
-
Dash Mini Maker Grill Le manuel du propriétaire
-