1
INSTRUKCJA OBSŁUGI
WĘDZARNIA DOMOWA W GARNKU, 35 L,
NA KUCHENKĘ GAZOWĄ
USER MANUAL
HOME SMOKER IN A POT, 35 L,
FOR GAS COOKTOP
BEDIENUNGSANLEITUNG
RÄUCHEROFEN IM TOPF, 35 L,
FÜR GASHERD
NOTICE D’UTILISATION
FUMOIR DOMESTIQUE EN MARMITE, 35L,
POUR CUISINIÈRE À GAZ
NAUDOJIMO INSTRUKCIJA
35 L BUITINĖ RŪKYKLA PUODE
DUJINEI VIRYKLEI
LIETOOŠANAS INSTRUKCIJA
MĀJAS KŪPINĀTAVA KATLĀ 35 LITRI,
GĀZES PLĪTIJ
KASUTUSJUHEND
KODUSEKS KASUTAMISEKS MÕELDUD GAASIPLIIDIL
TÖÖTAV SUITSUAHI 35 LIITRISES POTIS
NÁVOD K POUŽITÍ
DOMÁCÍ UDÍRNA V HRNCI, 35 L,
NA PLYNOVÝ SPORÁK
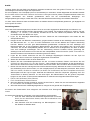
*zdjęcie poglądowe | sample photo for illustrative purposes only | Abbildung kann vom Produkt abweichen
No 330150

2
INSTRUKCJA OBSŁUGI
WĘDZARNIA DOMOWA W GARNKU, 35 L, NA KUCHENKĘ GAZOWĄ
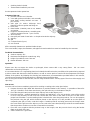
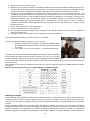
Wędzarnia domowa w garnku, pierwsze tak innowacyjne urządzenie tego typu w Polsce-– teraz w większej i
nowej konstrukcyjnie wersji na 35 L, dającej możliwość uwędzenia do 8 kg wsadu (w tym m.in. długich
kiełbas), z wykorzystaniem wysokiego (50 cm) garnka.
UWAGA: Urządzenie umożliwia wędzenie na zewnątrz i w kuchni TYLKO NA KUCHENCE GAZOWEJ.
Przed użyciem należy dokładnie zapoznać się z niniejszą instrukcją i stosować się do podanych zaleceń.
Instrukcję należy zachować – zawarte w niej wskazówki będą pomocne w czasie eksploatacji urządzenia.
Zalety wędzarni:
Możliwość wygodnego wędzenia i podpiekania mięs, ryb oraz serów – bez wychodzenia z domu.
Możliwość użycia wędzarni w kuchni lub w innym pomieszczeniu, a także na zewnątrz.
System odprowadzania dymu na zewnątrz pomieszczenia za pomocą wężyka (np. za okno).
Duża pojemność wędzarni (35 L), pozwalająca uwędzić jednorazowo nawet do 8 kg wsadu.
Wysoki garnek (50 cm) umożliwiający wędzenie ryb, kiełbas oraz innych dłuższych wyrobów – szynek czy
polędwiczek.
Szczelne zamknięcie.
Prosta, kompaktowa, funkcjonalna konstrukcja z nierdzewnej stali.
Zamontowany do pokrywy profilowany wieszak ze stalowego drutu, w kształcie trójkąta, umożliwiający
wygodne zawieszanie wędzonek i zapobiegający ich przemieszczaniu się.
Możliwość wykorzystania rusztu ustawionego na tacce okapnikowej lub podwieszonego na hakach.
Łatwy montaż i demontaż części wędzarni.
Łatwa obsługa urządzenia.
Poręczne uchwyty zamontowane na bokach
garnku i w pokrywie.
Dwie oddzielne tacki – jedna na zrębki, druga na
tłuszcz wytapiany w procesie wędzenia
(okapnikowa), rozdzielone podkładką ze
stalowego drutu.
Haki wędzarnicze w zestawie.
Termometr montowany w pokrywie.
Produkt chroniony prawem patentowym.
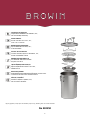
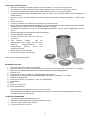
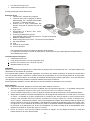
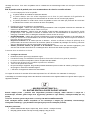
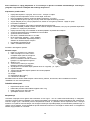
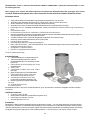
Elementy zestawu:
1) garnek z 4 zatrzaskami i 2 uchwytami
2) pokrywa z uszczelką i uchwytem oraz części
montażowe (śruby, podkładki uszczelniające i
nakrętki – po 2 szt.)
3) króciec na wężyk odprowadzający dym, z uszczelką silikonową i nakrętką mocującą
4) wężyk (3 m)
5) termometr (0-250⁰C) z nakrętką, podkładką i uszczelką
6) wieszak na wędzonki, części montażowe (uszczelki silikonowe i nakrętki – po 3 szt.)
7) tacka na zrębki
8) trójkątna podkładka ze stalowego drutu – pod tackę okapnikową
9) tacka okapnikowa
10) ruszt
11) haki w kształcie S (3 szt.)
12) instrukcja użytkowania
Elementy montażowe znajdują się wewnątrz garnka.
Montażu uchwytu pokrywy, wieszaka, termometru, króćca i wężyka odprowadzającego dym należy dokonać we
własnym zakresie.

3
Charakterystyka techniczna
Pojemność wędzarni: 35 L
Maksymalna sumaryczna waga zawieszanego wsadu: 8 kg
Wysokość garnka bez pokrywy: 500 mm
Dolna średnica: 292 mm
Eksploatacja
Uwaga! Nie narażaj urządzenia na długotrwały, bezpośredni kontakt z bardzo dużym ogniem – może on spowodować
odkształcenie oraz przepalenie garnka.
Zaleca się używanie płytki separującej (nie jest elementem zestawu), która zmniejszy możliwość narażenia produktu
na bezpośredni kontakt z intensywnym ogniem z palnika, zapewni precyzyjną kontrolę temperatury oraz dłuższą
żywotność produktu. Stosując się do zaleceń dotyczących czyszczenia i konserwacji, podanych w dalszej części
instrukcji, zapewnisz urządzeniu odpowiednio długie i efektywne działanie.
Przed pierwszym użyciem wędzarnię należy przemyć gorącą wodą ze środkiem myjącym, dobrze spłukać i wytrzeć
do sucha.
Sposób użycia:
Po zmontowani urządzenia przygotuj je do wędzenia zgodnie z podaną poniżej kolejnością:
1. Wybierz zrębki (tabela ze wskazówkami w dalszej części instrukcji) – w ilości ok. 50-100 g (1-2 garście) wsyp
je na tackę, a następnie umieść tackę na spodzie garnka.
2. Na tacce ze zrębkami połóż trójkątną stalową podkładkę i ustaw na niej tackę okapnikową.
3. Odpowiednio przygotowane do wędzenia, dobrze osuszone produkty powieś na wieszaku pod pokrywą
wędzarni – w taki sposób, aby nie stykały się ani z sobą, ani ze ściankami garnka. Zapewni to prawidłową
cyrkulację ciepła. Do zawieszenia produktów wykorzystaj haki wędzarnicze znajdujące się w zestawie.
Produkty możesz również przygotować z wykorzystaniem rusztu, który należy ustawić na tacce okapnikowej.
Możliwe jest także wykorzystanie opcji podwieszenia rusztu na hakach, pod wieszakiem. Jeśli obróbce
poddawane są produkty o mniejszych gabarytach, można jednocześnie wykorzystać wieszak pod pokrywką i
ruszt ustawiony na tacce okapnikowej (uwzględniając zalecenie, że wyroby nie powinny się zez sobą stykać).
4. Pokrywę wraz z powieszonymi na wieszaku produktami nałóż na garnek i zamknij ją za pomocą zatrzasków
zamontowanych na korpusie garnka.
5. Ustaw wędzarnię na palniku gazowym.
6. Nałóż wężyk do odprowadzania dymu na króciec zamontowany w porywie garnka i wyprowadź wężyk na
zewnątrz pomieszczenia (np. za okno) – lub podłącz wężyk do okapu. Wystawiając wężyk za okno zadbaj o to,
by dym nie przeszkadzał sąsiadom.
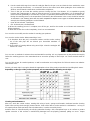
7. Włącz gaz i rozpocznij proces wędzenia. W ciągu pierwszych 5-10 minut dopuszczalne jest delikatne
zwiększenie mocy grzania w celu rozpoczęcia procesu wyżarzania się zrębków. Po tym czasie zaleca się
zmniejszenie grzania (najlepiej do minimum) lub podłożenie między źródło ciepła a garnek płytki separacyjnej.
Podczas procesu wędzenia temperatura (wskazywana przez termometr umieszczony w pokrywie) powinna
wynosić od 70 do 80⁰C. Czas wędzenia oraz dokładna temperatura zależą od rodzaju wędzonych
przysmaków. Przykładowo można przyjąć następujące wskazówki:
mięso: 60-120 minut, mały ogień;
ryby: 30-60 minut, najmniejszy ogień.
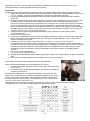
8. Po zakończonym procesie wędzenia wyłącz gaz, zaczekaj, aż wędzarnia
przestygnie i wyjmij gotowe produkty.
9. Kiedy wędzarnia całkowicie wystygnie, wyczyść ją zgodnie z zaleceniami.
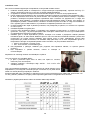
Wędzarnię możesz z powodzeniem wykorzystać także do podpiekania wyrobów.
Urządzenie możesz również użyć bez zakładania wężyka:
1) kiedy kuchenka jest podłączona na zewnątrz budynku i dym
wydobywający się z króćca nie będzie przeszkadzał domownikom czy
sąsiadom;
2) w opcji podpiekania bez użycia zrębków – kiedy króciec będzie pełnił
funkcją odpowietrznika.

4
Mięso przeznaczone do wędzenia możesz wcześniej zapeklować lub zamarynować. Bardzo ważne jest dokładne
wysuszenie porcji przed procesem wędzenia. Pamiętaj też, że zbyt duża ilość zrębków może spowodować
zakwaszenie wędzonek.
Przepisy na wędzonki, marynaty oraz pekle do ryb i mięs znajdziesz na nasze stronie: www.browin.pl/przepisnik
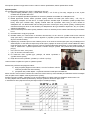
Ilość 50-100 g zrębków wystarczy, aby uzyskać odpowiednią barwę wędzonek i wzbogacić ich aromat.
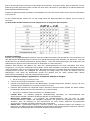
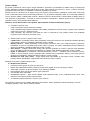
W zależności od rodzaju przygotowanej potrawy, polecamy następujące zrębki:
Czyszczenie i konserwacja
Po użytkowaniu wystudzoną wędzarnię umyj najpierw przy użyciu szczotki, gąbki i dedykowanego płynu do
czyszczenia wędzarni marki Browin. Dokładnie oczyszczone urządzenie spłucz i osusz. Części urządzenia można
myć w zmywarce – o ile pozwala na to jej pojemność (sam garnek, ze względu na jego wymiary, najprościej jest myć
ręcznie).
Stal nierdzewna charakteryzuje się tym, że pierwiastki stopowe tworzą na jej powierzchni cienką, przezroczystą
warstwę chroniącą przed korozją. Jeżeli powierzchnia ta zostanie uszkodzona w sposób mechaniczny i odpowiednio
jej nie zabezpieczysz, mogą pojawić się na niej wżery. Odpowiednie czyszczenie i konserwacja pozwolą na długo
zachować produkt w doskonałym stanie. Częstotliwość czyszczenia i konserwacji uzależniona jest od stopnia
eksploatacji i warunków, w jakich wędzarnia jest używana i przechowywana. Każda stal nierdzewna, której powłoka
zostanie uszkodzona, bez właściwego zabezpieczenia będzie rdzewieć.
Aby dobrze dbać o produkt, zalecamy stosowanie się do następujących wskazówek:
1) Podczas czyszczenia stali nierdzewnej:
o nigdy nie stosować materiałów silnie ściernych;
o nigdy nie czyścić kwasami nieorganicznymi lub wybielaczami zawierającymi podchloryn sodu, gdyż mogą
spowodować przebarwienia powierzchni i korozję wżerową;
o nigdy nie dopuszczać do kontaktu stali nierdzewnej ze stalą niestopową (cząstki tych stali ulegną
przyspieszonej korozji na powierzchni stali nierdzewnej).
2) Konserwacja stali nierdzewnej w momencie pojawienia się zmian:
o Lekka rdza – stosować domowe środki czyszczące dedykowane dla stali nierdzewnej zawierającej węglan
wapnia lub kwas cytrynowy. Dokładnie spłukać wodą i wytrzeć do sucha.
o Średnie przebarwienia – czyścić środkami na bazie kwasu fosforowego lub 10% roztworem kwasu
fosforowego (spryskać powierzchnię i odczekać zgodnie z zaleceniem producenta). Po czyszczeniu wykonać
neutralizację łagodnym detergentem alkalicznym. Dokładnie spłukać wodą i wytrzeć do sucha.
o Silna rdza – skorzystać z profesjonalnych usług lub dedykowanych produktów do wytrawiania i pasywacji
stali (stosując się do zaleceń w instrukcji obsługi detergentu). Po obróbce powierzchnię zawsze dokładnie
spłukać wodą i wytrzeć do sucha.

5
o Rysy i zarysowania na powierzchni szlifowanej lub szczotkowanej – usuwać używając tarczy polerskiej i
polerując w kierunku struktury powierzchni (należy używać materiału polerskiego nie zawierającego żelaza),
następnie umyć łagodnym detergentem szorującym. Spłukać czystą zimną wodą i wytrzeć do sucha.
o Zabrudzenia z oleju, tłuszczu, smarów – zmywać rozpuszczalnikami organicznymi, a następnie ciepłą
wodą z mydłem lub łagodnym detergentem. Spłukać czystą zimną wodą i wytrzeć do sucha.
Przechowywać w suchym i najlepiej ciepłym miejscu.
1. Zasady bezpieczeństwa
Wędzarnię używać tylko na kuchenkach gazowych.
W czasie wędzenia NIEDOPUSZCZALNE jest przenoszenie wędzarni i dotykanie jej bez rękawiczek
ochronnych.
Źródło ciepła, na którym ustawiono wędzarnię, musi zapewniać jej stabilność.
Nie pozostawiać wędzarni bez nadzoru w czasie jej użytkowania.
Chronić przed dziećmi.
Nie przeciążać urządzenia - zbyt duża ilość porcji do wędzenia może zatrzymywać ciepło, wydłużając czas
wędzenia lub powodując nierównomierne efekty tego procesu.
Używanie urządzenia niezgodnie z jego przeznaczeniem jest zabronione.
Przy zastosowaniu metod czyszczenia należy przestrzegać zasad BHP.
Opakowanie i zużyty sprzęt należy usunąć zgodnie z przepisami obowiązującymi na terenie państwa, w którym
urządzenie to jest użytkowane.
─ USER MANUAL ─
HOME SMOKER IN A POT, 35 L, FOR GAS COOKTOP
Home smoker in a pot, the first such innovative device of this kind in Poland - now in a larger and structurally
new 35 L version, providing the ability to smoke up to 8 kg of content (including long sausages), using a tall
(50 cm) pot.
PLEASE NOTE: The unit allows smoking outdoors and in the kitchen ONLY ON A GAS COOKTOP.
Before using the device, read this manual carefully and follow the instructions provided. Keep this manual –
the instructions it contains will be helpful when operating the device.
Advantages of the smoker:
Enables convenient smoking and browning of meats, fish and cheeses - without leaving your home.
Can be used in a kitchen or in another room, as well as outdoors.
A system for removing smoke to the outside of the room using a hose (e.g., through a window).
The large capacity of the smoker(35 L) allows up to 8 kg of content to be smoked at one time.
The high pot (50 cm) enables smoking fish, sausages and other longer products – hams or sirloins.
Tight closure.
Simple, compact, functional design in stainless steel.
Attached to the cover is a profiled steel wire hanger, in the shape of a triangle, which allows the smoked
meats to be hung conveniently and prevents them from moving.
Possibility of using a grill set on a drip tray or suspended from hooks.
Easy assembly and disassembly of smoker parts.
Easy operation of the device.
Useful handles installed on the sides of the pot and in the cover.
Two separate trays – one for woodchips, the other for fat rendered during the smoking process (drip tray),
separated by a pad made of steel wire.

6
Smoking hooks included.
Thermometer installed in pot cover.
Product protected under patent law.
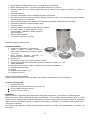
Contents of the set:
1) pot with 4 latches and 2 handles
2) cover with gasket and holder, and assembly
parts (bolts, sealing washers and nuts - 2
pcs of each).
3) stub pipe for smoke discharge hose,
featuring a silicone gasket and fixing nut
4) hose (3 m)
5) thermometer (0-250°C) with a nut, washer
and gasket
6) hanger for smoked products, assembly parts
(silicone gaskets and nuts - 3 pcs of each)
7) wood chip tray
8) triangular pad made of steel wire – to be placed under the drip tray
9) drip tray
10) grill
11) S-shaped hooks (3 pcs)
12) user manual
All the assembly elements are provided inside the pot.
The cover handle, hanger, thermometer, stub pipe and smoke outlet hose must be installed by the customer.
Technical characteristics
Smoker capacity: 35 L
Maximum total weight of content hung: 8 kg
Height of pot without cover: 500 mm
Bottom diameter: 292 mm
Operation
Please note! Do not expose the device to prolonged, direct contact with a very strong flame - this can cause
deformation and burning of the pot.
It is recommended to use a separating plate (not included) that will reduce the possibility of the product being exposed
to direct contact with intense fire from the burner, as well as ensure precise control over the temperature and longer
lifetime of the product. By following the cleaning and maintenance recommendations provided further in this manual,
you will ensure that the unit will operate for a sufficiently long and efficient time.
Prior to using the smoker for the first time, wash it using hot water with a cleaning agent. Then rinse it thoroughly and
wipe it dry.
How to use:
Once the unit has been assembled, prepare it for smoking according to the order given below:
1. Prepare the wood chips (table with instructions is provided further in this manual) - in quantities of about 50-
100 g (1-2 handfuls). Pour them onto the tray, then place the tray on the bottom of the pot.
2. Place the triangular steel pad on the wood chip tray and set the drip tray on it.
3. Hang the products – properly prepared for smoking and well-dried – on a rack under the cover of the smoker
in such a way that they do not come into contact with each other or the walls of the pot. This will ensure
proper heat circulation. Use the smoking hooks included in the set to hang the products. You can also prepare
the products using the grill, which should be placed on the drip tray. It is also possible to use the option of
suspending the grill on hooks, under the hanger. If smaller products are being processed, the hanger under
the cover and the grill set on the drip tray can be used at the same time (bearing in mind the recommendation
that the products should not come into contact with one another).
4. Place the cover, together with the products hung on the hanger, over the pot and close it using the latches
fitted on the body of the pot.
5. Set the smoker on a gas burner.

7
6. Put the smoke discharge hose onto the stub pipe fitted in the pot cover and lead the hose outside the room
(e.g. out through the window) - or connect the hose to the cooker hood. When putting the hose outside the
window, ensure that the smoke does not disturb the neighbours.
7. Turn on the gas and start the smoking process. During the first 5-10 minutes, it is acceptable to gently
increase the heating power in order to start the process of chip burning. Afterwards, it is recommended to
reduce the heat (preferably to a minimum) or to place a separation plate between the heat source and the pot.
During the smoking process, the temperature (indicated by the thermometer in the cover) should be between
70 and 80⁰C. The smoking time and the exact temperature depend on the type of smoked delicacies. For
example, the following guidelines can be followed:
meat: 60-120 minutes, small flame;
fish: 30-60 minutes, smallest flame.
8. When the smoking process is complete, turn off the gas, wait for the smoker to cool down and remove the
finished products.
9. When the smoker has cooled completely, clean it as recommended.
You can also successfully use the smoker for roasting your products.
You can also use the device without attaching a hose:
1) in situations when the pot is connected outdoors and the smoke coming
out of the stub pipe will not disturb your household members or
neighbours;
2) in the option of roasting without using wood chips when the stub pipe will
function as a vent.
You can cure or marinade in advance the meat intended for smoking. It is very important to dry the portions thoroughly
before the smoking process. Also remember that an excessive quantity of wood chips can cause smoked meats to
sour.
You can find recipes for smoked products, as well as marinades and curing brines for fish and meat at our website:
www.browin.com
50-100 g of wood chips is enough to obtain the appropriate colour of the products smoked and enriching their aroma.
Depending on the type of the product prepared, we recommended the following wood chips:
Cleaning and maintenance
After use, wash the cooled smoker, starting with using a brush, sponge and Browin's dedicated smoker cleaning
liquid. Rinse and dry the thoroughly cleaned device. Parts of the device can be washed in a dishwasher - as long as
its capacity allows it (the pot itself, due to its dimensions, is easier to wash by hand).
Stainless steel is characterised by the alloying elements forming a thin, transparent layer on its surface to protect
against corrosion. If this surface is mechanically damaged and not properly protected, pitting can occur. Proper

8
cleaning and maintenance will keep the product in excellent condition for a long time. The frequency of cleaning and
maintenance depends on the intensity of use and the conditions in which the smoker is used and stored. Any stainless
steel whose coating is damaged will rust without proper protection.
In order to take good care of the product, we recommend following the following tips:
1) When cleaning stainless steel:
never use strongly abrasive materials;
never use inorganic acids or bleaches containing sodium hypochlorite for cleaning, as they may cause
surface discolorations and pitting corrosion.
never let stainless steel come in contact with non-alloy steel (the particles of such steel types will undergo
accelerated corrosion on the stainless-steel surface).
2) Maintenance of stainless steel in the event of appearance of changes:
Light rust - apply home cleaning agents dedicated to stainless steel, containing calcium carbonate or citric
acid. Rinse thoroughly with water and wipe dry.
Moderate discolourations - clean with agents based on phosphoric acid or 10% solution of phosphoric acid
(spray the surface and wait according to the producer’s recommendations). After cleaning, perform
neutralisation with mild alkaline detergent. Rinse thoroughly with water and wipe dry.
Severe rust - employ professional service providers or use dedicated products for steel etching and
passivation (following the recommendations in the detergent user manual). Always rinse the surface with
water after processing and wipe it dry.
Nicks and scratches on polished or brushed surface - remove using a polishing wheel by polishing in the
direction of the surface structure (use a non-iron polishing material), then wash with a mild scouring detergent.
Rinse with clean cold water and then wipe clean.
Stains from oil, fat, and grease – remove with organic solvents and then with warm water with soap or mild
detergent. Rinse with clean cold water and then wipe clean.
Store in a dry and preferably warm place.
1. Safety principles
Use the smoker only on gas cooktops.
It is UNACCEPTABLE to move the smoker and touch it without protective gloves while smoking.
The source of heat on which the smoker is standing has to ensure its stability.
Do not leave the smoker unattended while it is used.
Keep away from children.
Do not overload the device – excessive number of portions to be smoked may block the heat, extending the
smoking time or resulting in uneven effects of this process.
It is forbidden to use the product in a manner inconsistent with its intended use.
When using the cleaning methods, always adhere to OHS principles.
The packaging and worn equipment should be disposed of in line with provisions of the law binding on the territory of
the country where the device is used.
─ BEDIENUNGSANLEITUNG ─
RÄUCHEROFEN IM TOPF, 35 L, FÜR GASHERD
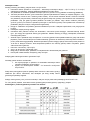
Ein Räucherofen im Topf, das erste innovative Gerät dieser Art in Polen - jetzt in einer größeren und neu
gestalteten Version für 35 L, die die Möglichkeit bietet, bis zu 8 kg Einlage (darunter u.a. lange Würste) in
einem hohen (50 cm) Topf zu räuchern.
HINWEIS: Das Gerät ermöglicht das Räuchern in Außenbereichen und in der Küche NUR AUF EINEM
GASHERD.
Lesen Sie diese Anleitung vor dem Gebrauch sorgfältig durch und befolgen Sie die darin enthaltenen
Anweisungen. Bewahren Sie diese Anleitung auf - die darin enthaltenen Hinweise werden Ihnen bei der
Bedienung des Geräts hilfreich sein.

9
Vorteile dieses Räucherofens:
Räuchern und braten Sie bequem Fleisch, Fisch und Käse an - ohne das Haus zu verlassen.
Der Räucherofen kann in der Küche oder in einem anderen Raum sowie im Freien genutzt werden.
Ein System zur Ableitung von Rauch nach außen mittels Schlauch (z. B. aus dem Fenster).
Großes Fassungsvermögen des Räucherofens (35 l), in dem bis zu 8 kg Lebensmittel auf einmal geräuchert
werden können.
Ein hoher Topf (50 cm) zum Räuchern von Fisch, Würsten und anderen längeren Produkten - Schinken oder
Filets.
Dichter Verschluss.
Einfache, kompakte und funktionelle Konstruktion aus rostfreiem Stahl.
Ein am Deckel montierter profilierter Aufhänger in Form eines Dreiecks, an dem die Räucherprodukte bequem
aufgehängt werden können und der verhindert, dass sie verrutschen.
Es besteht die Möglichkeit, einen auf ein Abtropftablett gestellten oder an Haken aufgehängten Rost zu
nutzen.
Einfache Montage und Demontage der Räucherofenteile.
Einfache Bedienung des Geräts.
Handliche Griffe an den Seiten des Topfs und
am Deckel.
Zwei separate Tabletts - eins für
Räucherspäne, das andere für das beim
Räuchern ausgeschmolzene Fett
(Abtropftablett), getrennt durch eine
Stahldrahtunterlage.
Räucherhaken im Set enthalten.
Am Deckel montiertes Thermometer.
Patentrechtlich geschütztes Produkt.
Bestandteile des Sets:
1. Topf mit 4 Deckelverschlüssen und 2 Griffen
2. Deckel mit Dichtung und Griff sowie Montageteilen (Schrauben, Dichtungsscheiben und Muttern – je 2 Stück)
3. Stutzen für den Rauchableitungsschlauch, mit Silikondichtung und Befestigungsmutter
4. Schlauch (3 m)
5. Thermometer (0-250°C) mit Mutter, Unterlegscheibe und Dichtung
6. Aufhänger für Räucherprodukte, Montageteile (Silikondichtungen und Muttern – je 3 Stück)
7. Tablett für Räucherspäne
8. dreieckige Unterlage aus Stahldraht – unter das Abtropftablett
9. Abtropftablett
10. Rost
11. Haken in S-Form (3 St.)
12. Bedienungsanleitung
Die Montageelemente befinden sich im Inneren des Topfes.
Der Deckelgriff, der Aufhänger, das Thermometer, der Stutzen und der Rauchableitungsschlauch müssen
vom Nutzer selbst montiert werden.
Technische Charakteristik
Fassungsvermögen des Räucherofens: 35 L
Maximales Gesamtgewicht der aufgehängten Einlage: 8 kg
Höhe des Topfes ohne Deckel: 500 mm
Unterer Durchmesser: 292 mm

10
Betrieb
Achtung! Setzen Sie das Gerät nicht längerem, direktem Kontakt mit einer sehr großen Flamme aus - dies kann zu
Verformungen und Verbrennungen des Topfs führen.
Es wird empfohlen, eine Trennplatte (nicht im Set enthalten) zu verwenden, die die Möglichkeit des direkten Kontakts
des Produkts mit den intensiven Flammen des Brenners verringert und eine präzise Temperaturkontrolle sowie eine
längere Lebensdauer des Produkts gewährleistet. Wenn Sie die untenstehenden Reinigungs- und
Pflegeempfehlungen befolgen, stellen Sie sicher, dass das Gerät ausreichend lange und effizient funktioniert.
Vor dem ersten Gebrauch sollte der Räucherofen mit heißem Wasser und Spülmittel gewaschen, gut abgespült und
trockengewischt werden.
Anwendungsweise:
Wenn das Gerät zusammengebaut ist, bereiten Sie es in der unten angegebenen Reihenfolge zum Räuchern vor:
1. Wählen Sie die entsprechenden Räucherspäne (eine Tabelle mit Hinweisen befindet im weiteren Teil der
Anleitung) - ca. 50-100 g (1-2 Handvoll), schütten Sie sie auf das Tablett und platzieren Sie das Tablett
anschließend auf dem Boden des Topfs.
2. Legen Sie die dreieckige Stahlunterlage auf das Tablett mit den Räucherspänen und stellen Sie das
Abtropftablett darauf.
3. Hängen Sie die zum Räuchern vorbereiteten, gut getrockneten Produkte an den Aufhänger unter dem Deckel
des Räucherofens auf - so, dass sie weder miteinander noch mit den Wänden des Topfes in Berührung
kommen. Dadurch wird eine gute Wärmezirkulation gewährleistet. Verwenden Sie zum Aufhängen der
Räucherprodukte die im Set enthaltenen Räucherhaken. Sie können die Produkte auch auf einem Rost
zubereiten, der auf dem Abtropftablett platziert wird. Es besteht auch die Möglichkeit, den Rost an Haken
unter dem Aufhänger aufzuhängen. Bei der Verarbeitung kleinerer Produkte können gleichzeitig der
Aufhänger unter dem Deckel und ein Rost auf dem Abtropftablett verwendet werden (wobei zu beachten ist,
dass die Produkte nicht miteinander in Berührung kommen sollten).
4. Legen Sie den Deckel zusammen mit den am Aufhänger aufgehängten Produkten auf den Topf und
verschließen Sie ihn mit den am Topfkörper angebrachten Verschlüssen.
5. Stellen Sie den Räucherofen auf einen Gasbrenner.
6. Stecken Sie den Rauchableitungsschlauch auf den im Deckel montierten Stutzen und führen Sie den
Schlauch aus dem Raum (z. B. aus dem Fenster) - oder schließen Sie den Schlauch an die Dunsthaube an.
Wenn Sie den Schlauch aus dem Fenster lassen, achten Sie darauf, dass der Rauch die Nachbarn nicht stört.
7. Drehen Sie das Gas auf und beginnen Sie mit dem Räuchervorgang. Während der ersten 5-10 Minuten kann
die Heizleistung leicht erhöht werden, um den Ausglühprozess der Räucherspäne einzuleiten. Nach dieser
Zeit ist es ratsam, die Hitze zu reduzieren (am besten auf ein Minimum) oder eine Trennplatte zwischen die
Wärmequelle und den Topf zu legen. Während des Räucherns sollte die Temperatur (angezeigt durch das
Thermometer im Deckel) zwischen 70 und 80⁰C liegen. Die Räucherdauer und die genaue Temperatur
hängen von der Art der zu räuchernden Delikatessen ab. Man kann den folgenden Richtwerten folgen:
Fleisch: 60-120 Minuten, kleine Flamme;
Fisch: 30-60 Minuten, kleinste Flamme.
8. Wenn der Räuchervorgang beendet ist, drehen Sie das Gas zu, warten Sie, bis der Räucherofen abgekühlt
ist, und nehmen Sie die fertigen Produkte heraus.
9. Wenn der Räucherofen vollständig abgekühlt ist, reinigen Sie ihn gemäß den Empfehlungen.
Sie können den Räucherofen auch erfolgreich zum Anbraten Ihrer Erzeugnisse
nutzen.
Sie können das Gerät auch verwenden, ohne einen Schlauch anzuschließen:
1. wenn der Herd außerhalb des Gebäudes angeschlossen ist und der
Rauch, der aus dem Stutzen kommt, weder die Hausbewohner noch
die Nachbarn stört;
2. beim Anbraten ohne die Verwendung von Räucherspänen – wenn
der Stutzten als Entlüfter dient.

11
Das zu räuchernde Fleisch können Sie vorher pökeln oder marinieren. Es ist sehr wichtig, dass die Portionen vor dem
Räuchern gründlich getrocknet werden. Denken Sie auch daran, dass eine zu große Menge von Räucherspänen die
Räucherprodukte übersäuern kann.
Rezepte für Räucherprodukte, Marinaden und Pökellaken für Fisch und Fleisch finden Sie auf unserer Internetseite:
www.browin.de
50-100 g Räucherspäne reichen aus, um die richtige Farbe der Räucherprodukte zu erhalten und ihr Aroma zu
bereichern.
Je nach Art des zuzubereitenden Gerichts empfehlen wir die folgenden Räucherspäne:
Reinigung und Pflege
Waschen Sie die abgekühlte Räucherkammer nach dem Gebrauch zunächst mit einer Bürste, einem Schwamm und
dem Räucherofen-Reinigungsmittel von Browin. Das gründlich gereinigte Gerät abspülen und abtrocknen. Teile des
Geräts können in der Geschirrspülmaschine gereinigt werden - sofern das Fassungsvermögen dies zulässt (der Topf
selbst lässt sich aufgrund seiner Abmessungen am einfachsten von Hand waschen).
Rostfreier Stahl zeichnet sich dadurch aus, dass die Legierungselemente auf seiner Oberfläche eine dünne,
transparente, vor Korrosion schützende Schicht bilden. Wenn diese Oberfläche mechanisch beschädigt und nicht
richtig geschützt ist, kann es zu Lochfraß kommen. Bei richtiger Reinigung und Pflege bleibt das Produkt lange Zeit in
ausgezeichnetem Zustand. Die Häufigkeit der Reinigung und Pflege hängt vom Grad der Nutzung und den
Bedingungen, unter denen der Räucherofen genutzt und gelagert wird, ab. Jeder rostfreier Stahl, dessen
Beschichtung beschädigt ist, rostet ohne entsprechenden Schutz.
Um das Produkt gut zu pflegen, empfehlen wir, die folgenden Hinweise zu befolgen:
1. Bei der Reinigung von rostfreiem Stahl:
o niemals stark schleifende Materialien verwenden;
o niemals mit anorganischen Säuren oder Bleichmitteln, die Natriumhypochlorit enthalten, reinigen, da diese
Verfärbungen der Oberfläche und Lochfraß verursachen können;
o rostfreien Stahl niemals mit unlegiertem Stahl in Berührung kommen lassen (Partikel aus diesen Stählen
beschleunigen die Korrosion auf der Oberfläche von rostfreiem Stahl).
2. Wartung von rostfreiem Stahl bei Auftreten von Veränderungen:
o Leichter Rost - für Edelstahl geeignete Haushaltsreiniger verwenden, die Calciumcarbonat oder
Zitronensäure enthalten. Gründlich mit Wasser abspülen und trockenreiben.
o Mittlerstarke Verfärbungen - mit Produkten auf Phosphorsäurebasis oder mit einer 10 %igen
Phosphorsäurelösung reinigen (die Oberfläche besprühen und gemäß der Empfehlung des Herstellers
abwarten). Nach der Reinigung ist eine Neutralisation mit einem milden alkalischen Reinigungsmittel
durchzuführen. Gründlich mit Wasser abspülen und trockenreiben.
o Starker Rost - professionelle Dienste in Anspruch nehmen oder spezielle Produkte zum Einätzen und
Passivieren von Stahl gemäß den Empfehlungen des Herstellers des Reinigungsmittels verwenden. Nach der
Reinigung die Oberfläche gründlich mit Wasser abspülen und trockenreiben.

12
o Risse und Kratzer auf geschliffener oder gebürsteter Oberfläche mit einer Polierscheibe entfernen und in
Richtung der Oberflächenstruktur polieren (Poliermaterial, das kein Eisen enthält, verwenden), dann mit
einem milden Scheuermittel waschen. Mit kaltem, sauberem Wasser abspülen und trockenreiben.
o Verschmutzungen durch Öl, Fett, Schmiermittel mit organischen Lösungsmitteln und anschließend mit
warmem Seifenwasser oder einem milden Reinigungsmittel abwaschen. Mit kaltem, sauberem Wasser
abspülen und trockenreiben.
An einem trockenen und am besten warmen Ort aufbewahren.
1. Sicherheitsgrundsätze
Den Räucherofen nur auf Gasherden verwenden.
Während des Räucherns ist es UNZULÄSSIG, den Räucherofen an einen anderen Ort zu tragen oder ihn
ohne Schutzhandschuhe zu berühren.
Die Wärmequelle, auf der der Räucherofen aufgestellt wird, muss dessen Stabilität gewährleisten.
Die Räucherkammer während des Betriebs nicht unbeaufsichtigt lassen.
Sicher vor Kindern aufbewahren.
Das Gerät nicht überladen - zu viele Portionen von Räucherprodukten können Hitze speichern und die
Räucherdauer verlängern oder zu ungleichmäßigen Räucherergebnissen führen.
Eine unsachgemäße Verwendung des Geräts ist verboten.
Bei der Anwendung von Reinigungsmethoden sind die Gesundheits- und Sicherheitsvorschriften zu beachten.
Verpackungen und verbrauchte Geräte müssen gemäß den Vorschriften des Landes, in dem das Gerät verwendet
wird, entsorgt werden.
─ NOTICE D’UTILISATION ─
FUMOIR DOMESTIQUE EN MARMITE, 35L, POUR CUISINIÈRE À GAZ
Le fumoir domestique en marmite, le premier appareil innovant de ce type, maintenant dans une version plus
grande avec une nouvelle conception de 35 L, donnant la possibilité de fumer jusqu'à 8 kg de charge
(y compris des saucisses longues), en utilisant une haute marmite (50 cm).
NOTE: L'appareil permet de fumer à l'extérieur et dans la cuisine UNIQUEMENT sur UNE CUISINIÈRE À GAZ.
Avant l’utilisation, il faut lire cette notice et de suivre les recommandations. Conservez la notice: les
instructions qu'elle contient vous seront utiles lors de l'utilisation de l'appareil.
Avantages du fumoir:
Fumez et faites dorer vos viandes, poissons et fromages sans sortir de chez vous.
Possibilité d'utiliser le fumoir dans la cuisine ou dans une autre pièce, ainsi qu'à l'extérieur.
Système d'évacuation des fumées vers l'extérieur de la pièce à l'aide d'un tuyau (par exemple par la fenêtre).
Grande capacité du fumoir (35 L), permettant de fumer jusqu'à 8 kg d'aliments en même temps.
Une marmite haute (50 cm) pour fumer le poisson, les saucisses et d'autres produits plus longs - jambons ou
filets.
Fermeture étanche.
Conception simple, compacte et fonctionnelle en acier inoxydable.
Un support en fil d'acier profilé, en forme de triangle, fixé au couvercle. Il permet de suspendre les viandes
fumées de manière pratique et d'éviter qu'elles ne se déplacent.
Possibilité d'utiliser la grille posée sur un bac de récupération ou suspendue à des crochets.
Montage et démontage faciles des pièces du fumoir.
Utilisation facile.
Poignées pratiques fixées sur les côtés de la marmite et dans le couvercle.
Deux bacs distincts - l'un pour les copeaux de bois, l'autre pour la graisse fondue pendant le processus de
fumage (bac d'égouttage), séparés par une rondelle en fil d'acier.

13
Crochets de fumage inclus.
Thermomètre monté sur le couvercle.
Produit protégé par le droit des brevets.
Éléments du kit:
1. marmite avec 4 loquets et 2 poignées
2. couvercle avec joint et poignée et pièces
d'assemblage (vis, rondelles d'étanchéité
et écrous– 2 unités de chacune)
3. embout pour le tuyau d'évacuation des
fumées, avec joint en silicone et écrou de
fixation
4. tuyau (3 m)
5. thermomètre (5 0-250°C) avec écrou,
rondelle et joint
6. crochet à produits fumés, pièces
d'assemblage (joints en silicone et écrous– 3 unités de chacune)
7. plateau à copeaux de bois
8. plateau triangulaire en fil d'acier - sous le bac de récupération
9. bac d'égouttement
10. grille
11. crochets en S (3 unités)
12. notice d'utilisation
Les éléments de montage sont situés à l'intérieur de la marmite.
Le support de couvercle, le crochet, le thermomètre, l'embout et le tuyau d'évacuation des fumées doivent
être installés par le client.
Caractéristiques techniques
Capacité du fumoir: 35 L
Poids total maximal de la charge suspendue: 8 kg
Hauteur de la marmite sans couvercle: 500 mm
Diamètre inférieur: 292 mm
Utilisation
Attention! N'exposez pas l'appareil à un contact direct et prolongé avec une flamme très vive - cela peut entraîner une
déformation et une brûlure de la marmite.
Il est recommandé d'utiliser une plaque séparatrice (non fournie) qui réduira l'exposition du produit au contact direct
avec une chaleur intense, assurera un contrôle précis de la température et une plus longue durée de vie du produit.
En suivant les recommandations de nettoyage et d'entretien données plus loin dans cette notice, vous vous assurerez
que l'appareil fonctionnera pendant une période suffisamment longue et efficace.
Avant la première utilisation, le fumoir doit être lavé à l'eau chaude et au détergent, rincé et essuyé.
Mode d’emploi:
Une fois l'appareil assemblé, préparez-le à fumer dans l'ordre indiqué ci-dessous:
1. Sélectionnez les copeaux de bois (voir le tableau avec les instructions plus loin) - en quantités d'environ 50-
100 g (1-2 poignées), versez-les dans le bac, puis placez le bac sur le fond de la marmite.
2. Placez le plateau triangulaire en acier sur le bac à copeaux de bois et posez le bac de récupération dessus.
3. Suspendez les produits correctement préparés pour le fumage et bien séchés sur le crochet sous le couvercle
du fumoir - de manière à ce qu'ils n'entrent pas en contact les uns avec les autres ou avec les parois de la
marmite. Cela permettra d'assurer une bonne circulation de la chaleur. Utilisez les crochets de fumage inclus
dans le kit pour suspendre les produits. Vous pouvez également préparer les produits à l'aide de la grille, qui
doit être placée sur le bac de récupération. Il est également possible de suspendre la grille aux crochets, sous
le support. En cas de traitement de produits plus petits, il est possible d'utiliser simultanément le support sous
le couvercle et la grille posée sur le bac de récupération (en tenant compte de la recommandation selon
laquelle les produits ne doivent pas entrer en contact).
4. Placez le couvercle, ainsi que les produits accrochés au support, sur la marmite et fermez-la à l'aide des
loquets situés sur le corps de la marmite.

14
5. Placez le fumoir sur un brûleur à gaz.
6. Enfilez le tuyau de sortie de fumée sur l'embout fixé dans le couvercle de la marmite et faites sortir le tuyau à
l'extérieur de la pièce (par la fenêtre, par exemple) - ou raccordez le tuyau à la hotte de la cuisinière. Lorsque
vous placez le tuyau à l'extérieur de la fenêtre, veillez à ce que la fumée ne dérange pas vos voisins.
7. Allumez le gaz et commencez le processus de fumage. Pendant les 5 à 10 premières minutes, il est
acceptable d'augmenter légèrement la puissance de chauffage afin d'amorcer le processus de recuit des
copeaux. Après ce temps, il est conseillé de réduire la chaleur (de préférence au minimum) ou de placer une
plaque de séparation entre la source de chaleur et la marmite. Pendant le processus de fumage, la
température (indiquée par un thermomètre dans le couvercle) doit se situer entre 70 et 80⁰C. La durée du
fumage et la température exacte dépendent du type de produits à fumer. Par exemple, les conseils suivants
peuvent être suivis:
viande: 60 à 120 minutes, le feu le plus faible ;
poisson: 30 à 60 minutes, le feu le plus fort.
8. Une fois le processus de fumage terminé, éteignez le gaz, attendez jusqu’à ce que le fumoir refroidisse et
retirez les produits finis.
9. Lorsque le fumoir a complètement refroidi, nettoyez-le comme recommandé.
Vous pouvez également utiliser le fumoir pour cuire vos produits.
Vous pouvez également utiliser l'appareil sans fixer le tuyau:
1. lorsque la cuisinière est raccordée à l'extérieur du bâtiment et que
la fumée qui s'échappe de l’embout ne dérange pas le ménage ou
les voisins;
2. pour l'option de cuisson sans copeaux - où l'embout sert d'évent.
La viande à fumer peut être préalablement salée ou marinée. Il est très important
de bien sécher la portion avant de la fumer. N'oubliez pas non plus qu'une trop
grande quantité de copeaux de bois peut provoquer l'aigrissement des viandes fumées.
Vous trouverez des recettes de viandes fumées, de marinades pour les poissons et les viandes sur notre site Internet:
www.browin.com
Une quantité de 50 à 100 g de copeaux de bois suffit pour donner la bonne couleur aux viandes fumées et enrichir
leur arôme.
Selon le type de plat préparé, nous recommandons les copeaux suivants:
Nettoyage et entretien
Après utilisation, lavez d'abord le fumoir refroidi à l'aide d'une brosse, d'une éponge et du liquide de nettoyage pour
fumoir de Browin. Rincez et séchez l'appareil nettoyé. Les pièces de l'appareil peuvent être lavées dans le lave-
vaisselle, pour autant que sa capacité le permette (en raison de ses dimensions, il est plus facile de laver la marmite à
la main).
L'acier inoxydable résiste à la corrosion grâce aux éléments d'alliage qui forment une fine couche protectrice
transparente à sa surface. Si elle est endommagée mécaniquement et n'est pas correctement entretenue, des piqûres
peuvent se produire. Un nettoyage et un entretien adéquats permettront de conserver le produit en excellent état
pendant longtemps. La fréquence du nettoyage et de l'entretien dépend du degré d'utilisation et des conditions de

15
stockage du fumoir. Tout acier inoxydable dont le revêtement est endommagé rouille s'il n'est pas correctement
protégé.
Afin de prendre soin du produit, nous vous recommandons de suivre les conseils suivants:
1. Lors du nettoyage de l'acier inoxydable:
ne jamais utiliser de matériaux hautement abrasifs,
ne jamais nettoyer avec des acides inorganiques ou de l'eau de Javel contenant de l'hypochlorite de
sodium, qui peuvent provoquer une décoloration de la surface et une corrosion par piqûres,
ne jamais permettre le contact entre l'acier inoxydable et l'acier non allié (les particules de ces aciers
accéléreront la corrosion sur la surface de l'acier inoxydable).
2. Entretien de l'acier inoxydable en cas d’altération:
o Corrosion légère - utiliser des nettoyants ménagers dédiés à l'acier inoxydable contenant du carbonate de
calcium ou de l'acide citrique. Rincer à l'eau et essuyer.
o Décoloration moyenne - nettoyer avec des produits à base d'acide phosphorique ou une solution d'acide
phosphorique à 10% (vaporiser la surface et attendre selon les recommandations du fabricant). Après le
nettoyage, neutralisez avec un détergent alcalin doux. Rincer à l'eau et essuyer.
o Rouille importante - utiliser des services professionnels ou des produits de décapage et de passivation de
l'acier (en suivant les recommandations de la notice d’utilisation du détergent). Rincez toujours la surface à
fond avec de l'eau et essuyez.
o Rayures et éraflures sur la surface poncée ou brossée - enlevez en utilisant un disque de polissage et en
polissant dans le sens de la structure de la surface (utiliser un matériau de polissage non ferreux), puis lavez
avec un détergent doux. Rincez à l'eau froide et propre et essuyez.
o Saletés provenant d'huiles, de graisses et de lubrifiants - éliminer avec des solvants organiques, puis
avec de l'eau chaude savonneuse ou un détergent doux. Rincez à l'eau froide et propre et essuyez.
Conserver dans un endroit sec et chaud.
1. Consignes de sécurité
N'utilisez le fumoir que sur les cuisinières à gaz.
Pendant le fumage, il est INTERDIT de manipuler et de toucher le fumoir sans gants de protection.
La source de chaleur sur laquelle le fumoir est placé doit être stable.
Ne laissez pas le fumoir sans surveillance pendant son utilisation.
Tenir hors de portée des enfants.
Ne pas surcharger l’appareil. De grandes quantités d'aliments peuvent retenir la chaleur, prolonger le temps
de fumage ou causer des résultats inégaux.
L'utilisation de l'appareil à d'autres fins est interdite.
Les règles de santé et de sécurité doivent être respectées lors de l'utilisation des méthodes de nettoyage.
L'emballage et le matériel usagé doivent être éliminés conformément aux réglementations en vigueur dans le pays où
l'appareil est utilisé.
– NAUDOJIMO INSTRUKCIJA –
35 L BUITINĖ RŪKYKLA PUODE DUJINEI VIRYKLEI
Buitinė rūkykla puode – pirmasis toks naujoviškas prietaisas Lenkijoje, dabar didesnis ir naujos 35 l
konstrukcijos, kuriame galima rūkyti iki 8 kg gaminių (įskaitant ir ilgas dešras), naudojant aukštą (50 cm)
puodą.
DĖMESIO: Prietaise galima rūkyti lauke ir virtuvėje TIK ANT DUJINĖS VIRYKLĖS.
Prieš naudojant būtina atidžiai susipažinti su šia instrukcija ir laikytis joje pateikiamų rekomendacijų.
Išsaugokite instrukciją – joje pateikiami nurodymai gali praversti naudojant prietaisą.
Rūkyklos privalumai:
Idealus būdas karštai rūkyti ir kepti mėsą, žuvis ir sūrius – neišėjus iš namų.
Rūkyklą galima naudoti virtuvėje ar kitoje patalpoje, taip pat lauke.

16
Dūmų šalinimo iš patalpos laukan (pvz., pro langą) sistema per žarnelę.
Didelė rūkyklos talpa (35 l) – per vieną kartą galima išrūkyti iki 8 kg gaminių.
Aukštas puodas (50 cm), kuriame galima rūkyti žuvis, dešras ir kitus ilgesnius gaminius – kumpius ar
nugarines.
Sandariai uždaroma.
Paprasta, kompaktiška, funkcinė nerūdijančiojo plieno konstrukcija.
Prie dangčio pritvirtinta profiliuota trikampė pakaba iš plieninės vielos, ant kurios galima patogiai sukabinti
rūkomus gaminius, kad neslankiotų.
Galima naudoti groteles, kurios dedamos ant surenkamojo padėkliuko arba kabinamos ant kablių.
Paprastai surenkamos ir ardomos rūkyklos dalys.
Paprasta naudoti.
Patogios rankenos, pritvirtintos puodo šonuose ir dangtyje.
Du atskiri drožlių ir rūkant lašančių riebalų
(surenkamasis) padėkliukai, atskirti plieninės
vielos grotelėmis.
Rūkymo kabliai pridedami.
Termometras tvirtinamas dangtyje.
Produktas saugomas patentų teisės
Komplekto elementai:
1. puodas su 4 spūsčiukais ir 2 rankenomis
2. dangtis su tarpine ir rankena bei tvirtinimo
dalys (varžtai, sandarinimo poveržlės ir veržlės
– po 2 vnt.)
3. dūmų šalinimo žarnelės atvamzdis su
silikonine tarpine ir tvirtinimo veržle
4. žarnelė (3 m)
5. termometras (0–250 °C) su veržle, poveržle ir tarpine
6. rūkomų gaminių pakaba, tvirtinimo dalys (silikoninės tarpinės ir veržlės – po 3 vnt.)
7. drožlių padėkliukas
8. trikampės plieninės vielos grotelės – dedamos po surenkamuoju padėkliuku
9. surenkamasis padėkliukas
10. grotelės
11. S raidės formos kabliai (3 vnt.)
12. naudojimo instrukcija
Tvirtinimo elementai sudėti puode.
Dangčio rankeną, kablį, termometrą, atvamzdį ir dūmų šalinimo žarnelę būtina sumontuoti patiems.
Techninė charakteristika
Rūkyklos talpa: 35 l
Didžiausias suminis kabinamos mėsos svoris: 8 kg
Puodo aukštis be dangčio: 500 cm
Apatinis skersmuo: 292 cm
Naudojimas
Dėmesio! Neleisti, kad prietaisą ilgą laiką tiesiogiai veiktų labai stipri liepsna – gali deformuoti ir sudeginti puodą.
Rekomenduojama naudoti skiriamąją plokštelę (nepridedama), kuri sumažina gaminio tiesioginį sąlytį su stipria
degiklio liepsna, leidžia tiksliai kontroliuoti temperatūrą ir užtikrina ilgesnę gaminio naudojimo trukmę. Laikydamiesi
toliau instrukcijoje pateikiamų valymo ir priežiūros rekomendacijų, užtikrinsite, kad prietaisas būtų tinkamai ilgai ir
veiksmingai naudojamas.
Prieš pirmą kartą naudodami, rūkyklą nuplaukite karštu vandeniu su plovikliu, gerai praskalaukite ir nuvalykite, kad
būtų sausa.

17
Naudojimo būdas:
Surinkę prietaisą, paruoškite jį rūkymui toliau nurodyta tvarka:
1. Pasirinkite drožles (lentelė su nurodymais – tolimesnėje instrukcijos dalyje) – apie 50–100 g (1–2 saujos)
suberkite ant padėkliuko, paskiau padėkliuką padėkite ant puodo dugno.
2. Ant padėkliuko su drožlėmis padėkite trikampes plienines groteles ir ant jų padėkite surenkamąjį padėkliuką.
3. Tinkamai paruoštus rūkomus, geria nusausintus gaminius pakabinkite ant kablio po rūkyklos dangčius – taip,
kad nesiliestų vienas su kitu ir neliestų puodo sienelių. Tai leis laisvai cirkuliuoti šilumai. Gaminius kabinkite
ant pridedamų rūkymo kablių. Gaminius taip pat galima rūkyti ant grotelių, kurios dedamos ant surenkamojo
padėkliuko. Taip pat galima groteles pakabinti ant kablių po pakaba. Jeigu rūkomi mažesnių matmenų
gaminiai, galima juos kabinti ant pakabos po dangčiu ir sukrauti ant grotelių, kurios padėtos ant surenkamojo
padėkliuko (laikytis nurodymo, kad gaminiai negali liestis).
4. Dangtį su sukabintais ant pakabos gaminiais uždėkite ant puodo ir uždarykite spūsčiukais, kurie įrengti puodo
korpuse.
5. Pastatykite rūkyklą ant dujų degiklio.
6. Užmaukite dūmų šalinimo žarnelę ant atvamzdžio, sumontuoto puodo dangtyje, nutieskite žarnelę laukan
(pvz., pro langą) arba prijunkite žarnelę prie gartraukio. Kišdami žarnelę pro langą, pasirūpinkite, kad dūmai
netrukdytų kaimynams.
7. Atsukite dujas ir pradėkite rūkyti. Pirmąsias 5–10 minučių galima švelniai padidinti kaitinimo galią, kad drožlės
įsipliekstų. Vėliau rekomenduojama sumažinti kaitinimą (geriausia iki žemiausio) arba tarp šilumos šaltinio ir
puodo padėti skiriamąją plokštelę. Rūkant temperatūra (rodoma dangtyje įtaisyto termometro) turėtų siekti nuo
70 iki 80 ⁰C. Rūkymo trukmė ir tiksli temperatūra priklauso nuo rūkomų gaminių rūšies. Pavyzdžiui, galima
vadovautis šiomis gairėmis:
mėsa: 60–120 minučių, silpna ugnis;
žuvys: 30–60 minučių, silpniausia ugnis.
8. Baigę rūkyti, užsukite dujas, palaukite, kol rūkykla atauš ir išimkite išrūkytus gaminius.
9. Kai rūkykla visiškai ataušta, išvalykite ją, kaip nurodyta.
Rūkyklą galite sėkmingai naudoti ir gaminiams kepti.
Prietaisą galima naudoti ir be žarnelės:
1. kai viryklė prijungta ne pastate ir iš atvamzdžio sklindantys dūmai
netrukdo namiškiams ar kaimynams;
2. kepant, kai nenaudojamos drožlės – kai atvamzdis naudojamas
kaip alsuoklis.
Rūkyti skirtą mėsą galima prieš tai pasūdyti arba marinuoti. Labai svarbu gerai ją
išdžiovinti prie rūkant. Atsiminkite, kad naudojant per daug drožlių rūkomi
gaminiai gali pasidaryti rūgštūs.
Rūkytų mėsos gaminių, žuvų ir mėsos marinatų ir sūdymo receptų rasite mūsų tinklalapyje www.browin.com
50–100 g drožlių užtenka, kad rūkomi mėsos gaminiai įgautų tinkamą spalvą ir pagerėtų jų kvapas.
Atsižvelgiant į ruošiamą patiekalą, siūlome šias drožles:

18
Valymas ir priežiūra
Baigus rūkyti ataušintą rūkyklą pirmiausia nuvalykite šepetėliu, kempine ir „Browin“ prekės ženklo rūkykloms skirtu
valikliu. Gerai nuvalytą prietaisą praskalaukite ir išdžiovinkite. Prietaiso dalis galima plauti indaplovėje, jeigu dalys joje
telpa (puodą dėl jo matmenų geriausia plauti rankomis).
Nerūdijančiajam plienui būdinga tai, kad lydinio elementai jo paviršiuje sudaro ploną skaidrų sluoksnį, kuris saugo nuo
korozijos. Jeigu šis sluoksnis pažeidžiamas mechaniškai ir nėra tinkamai prižiūrimas, jo paviršiuje gali atsirasti
korozijos židinių. Tinkamas valymas ir priežiūra suteikia galimybę ilgai išsaugoti gaminį puikios būklės. Valymo ir
priežiūros dažnumas priklauso nuo naudojimo dažnumo ir sąlygų, kuriomis prietaisas naudojamas laikomas.
Nerūdijantysis plienas, kurio danga pažeidžiama, pradeda rūdyti, jeigu tinkamai neapsaugoma.
Norint gerai rūpintis gaminiu, rekomenduojame laikytis šių nurodymų:
1. Valydami nerūdijantįjį plieną:
nenaudokite stipriai švitrinių medžiagų;
nevalykite neorganinėmis rūgštimis arba balikliais, kurių sudėtyje yra natrio hipochlorito, nes gali pakeisti
paviršiaus spalvą ir sukelti korozijos židinius;
neleiskite, kad nerūdijantysis plienas liestųsi su nelegiruotuoju plienu (šio plieno dalelės ima sparčiau
rūdyti nerūdijančiojo plieno paviršiuje).
2. Nerūdijančiojo plieno priežiūra, kai atsiranda:
o Nedaug rūdžių – naudokite buitinius valiklius, skirtus nerūdijančiajam plienui, kurių sudėtyje yra kalcio
karbonato arba citrinos rūgšties. Gerai praskalaukite vandeniu ir nusausinkite.
o Vidutinių spalvinių dėmių – valykite valikliais su fosforo rūgštimi arba 10 proc. fosforo rūgšties tirpalu
(apipurkškite paviršių ir palaukite, kiek rekomenduoja gamintojas). Baigę valyti, rūgštį neutralizuokite švelniu
šarminiu plovikliu. Gerai praskalaukite vandeniu ir nusausinkite.
o Daug rūdžių – kreipkitės dėl profesionalių paslaugų arba naudokite tam skirtus plieno ėsdinimo ir pasyvinimo
preparatus (laikykitės ploviklio naudojimo instrukcijos nurodymų). Apdorotą paviršių gerai praskalaukite
vandeniu ir nusausinkite.
o Įtrūkimus ir įbrėžimus šlifuotame arba šepečiu šveičiamame paviršiuje – šalinkite poliravimo disku
poliruodami paviršiaus struktūros link (naudokite poliravimo medžiagą, kurios sudėtyje nėra geležies), paskiau
nuplaukite švelniu šveičiamuoju plovikliu. Nuplaukite švariu šaltu vandeniu ir nusausinkite.
o Aliejaus, riebalų, tepalų nešvarumus – valykite organiniais tirpikliais, paskiau šiltu vandeniu su muilu arba
švelniu plovikliu. Nuplaukite švariu šaltu vandeniu ir nusausinkite.
Laikykite sausoje ir geriausia šiltoje vietoje.
1. Saugos taisyklės
Rūkyklą naudokite tik ant dujinių viryklių.
Rūkant DRAUDŽIAMA perkelti rūkyklą ir liesti ją be apsauginių pirštinių.
Šilumos šaltinis, ant kurio stovi rūkykla, turi užtikrinti konstrukcijos stabilumą.
Nepalikite naudojamos rūkyklos be priežiūros.
Saugokite nuo vaikų.
Pernelyg neapkraukite prietaiso – per daug rūkomų gabalų gali sulaikyti šilumą ir pailginti rūkymo trukmę arba
dėl to gaminiai gali būti netolygiai išrūkomi.
Draudžiama prietaisą naudoti ne pagal paskirtį.
Valydami laikykitės DSS taisyklių.
Pakuotę ir panaudotą prietaisą šalinkite, laikydamiesi šalies, kurioje prietaisas naudotas, teisės aktų reikalavimų.
– LIETOŠANAS PAMĀCĪBA –
MĀJAS KŪPINĀTAVA KATLĀ 35 LITRI, GĀZES PLĪTIJ
Mājas kūpinātava katlā, pirmā šāda novatoriska ierīce Polijā - tagad lielākā un jaunā 35 litru konstrukcijas
versijā, kas ļauj kūpināt līdz 8 kg produktu (ieskaitot garas desas), izmantojot augstu (50 cm) katlu.
Uzmanību: ierīce ir paredzēta kūpināšanai TIKAI UZ GĀZES PLĪTS gan ārpus telpām, gan virtuvē.

19
Pirms lietošanas ir rūpīgi jāiepazīstas ar šo instrukciju un jāievēro norādītās rekomendācijas. Instrukcija ir
jāsaglabā - tajā ietvertie norādījumi būs noderīgi lietojot ierīci.
Kūpinātavas priekšrocības:
Iespēja ērti kūpināt un cept gaļu, zivis un sieru - neizejot no mājas.
Iespēja izmantot kūpinātavu virtuvē vai citā telpā, kā arī ārā.
Dūmu izvadīšanas sistēma, izmantojot šļūteni (piemēram, caur logu).
Liels kūpinātavas tilpums (35 litri), kas ļauj vienā reizē kūpināt līdz 8 kg produktu.
Augsta ietilpība (50 cm), kas ļauj kūpināt zivis, desas un citus garus produktus - šķiņķi vai speķi.
Hermētiski noslēdzama.
Vienkārša, kompakta, funkcionāla nerūsējošā tērauda konstrukcija.
Uz vāka uzstādīta profilēta trīsstūra formas tērauda stieples balstiekārta, kas ļauj ērti pakarināt kūpināmos
produktus un neļauj tiem pārvietoties.
Iespēja izmantot režģi, kas uzstādīts uz atbalsta paplātes vai pakarināts uz āķiem.
Vienkārša kūpinātavas daļu uzstādīšana un demontāža.
Vienkārša ierīces lietošana.
Ērti rokturi, uzstādīti katla sānu un uz vāka.
Divas atsevišķas paplātes - viena skaidām,
otra - tauku savākšanai kūpināšanas laikā, ir
atdalītas ar tērauda stieples starpliku.
Komplektā ir kūpināšanas āķi.
Vākā ir uzstādīts termometrs.
Produkts ir aizsargāts ar patentu.
Sastāvā ietilpst:
1. Katls ar 4 sprūdiem un 2 rokturiem.
2. Vāks ar blīvējumu un rokturi, kā arī
montāžas daļas (skrūves, blīvējuma
starplikas un uzgriežņi - 2 gab.).
3. Dūmu novadīšanas caurule ar silikona
blīvējumu un stiprinājuma uzgriezni.
4. Šļūtene (3 m).
5. Termometrs (0-250⁰C) ar uzgriezni,
blīvējuma starpliku un blīvējumu.
6. Āķi šķiņķiem un montāžas daļas (silikona blīves un uzgriežņi - pa 3 gab.).
7. Paplāte skaidām.
8. Trīsstūrveida tērauda stieples paliktnis zem tauku paplātes.
9. Paplāte taukiem.
10. Režģis.
11. Kūpināšanas āķi (3 gab.).
12. Lietošanas instrukcija.
Montāžas elementi atrodas katla iekšpusē. Vāka roktura, pakares, termometra, dūmu izvadīšanas caurules
uzstādīšana un tiek veikta patstāvīgi.
Tehniskie raksturojumi:
Kūpinātavas tilpums: 35 litri
Pakarināto produktu maksimālais kopējais svars: 8 kg
Katla augstums bez vāka: 500 mm
Apakšējais diametrs: 292 mm
Ekspluatācija
Uzmanību! Neļaujiet ierīcei ilgstoši tieši saskarties ar lielu uguni - tas var izraisīt katla deformāciju un izdegšanu.
Ieteicams izmantot liesmas sadalītāju (nav iekļauts komplektā), kas samazinās iespēju kūpinātavai tieši saskarties ar
intensīvu degļa uguni, nodrošinās precīzu temperatūras kontroli un palielinās ierīces kalpošanas laiku. Ievērojot
tīrīšanas un kopšanas rekomendācijas, kas sniegtas instrukcijas turpmākajā daļā, jūs nodrošināsiet pietiekami ilgu un
efektīvu ierīces darbību. Pirms kūpinātavas pirmās lietošanas ieteicams to nomazgāt ar karstu ūdeni un mazgāšanas
līdzekli, rūpīgi izskalot un nosusināt.

20
Lietošanas veids:
Pēc ierīces montāžas sagatavojiet to kūpināšanai, ievērojot tālāk norādīto secību:
1. Izvēlieties skaidas (tabula ar norādījumiem ir sniegta instrukcijas turpmākajā daļā) - apmēram 50-100 g (1-2
saujas), izberiet tās uz pannas un pēc tam novietojiet paplāti katla dibenā.
2. Uz paplātes ar skaidām novietojiet trīsstūrveida tērauda starpliku un uzlieciet uz tās paplāti taukiem.
3. Pareizi sagatavotus kūpināšanai, labi nosusinātus produktus nostipriniet uz pakares zem kūpinātavas vāka -
tā, lai tie nepieskartos viens otram vai pannas sienām. Tas nodrošinās pareizu siltuma cirkulāciju. Lai pakārtu
produktus, izmantojiet komplektā iekļautos kūpināšanas āķus. Produktus var pagatavot arī uz režģa, kas
jāuzstāda uz tauku paplātes. Ir iespējams izmantot režģa pakarināšanas iespēju uz āķiem, zem pakares. Ja
apstrādājamie produkti ir mazāka izmēra, vienlaikus var izmantot pakari zem vāka un režģi, kas uzstādīts uz
tauku paplātes (ņemot vērā ieteikumu, ka produktiem nevajadzētu pieskarties viens otram).
4. Uz katla uzstādiet vāku kopā ar pārtikas produktiem, kas piestiprināti pie pakares, un aizveriet to ar sprūdiem
uz katla korpusa.
5. Uzstādiet kūpinātavu uz gāzes plīts.
6. Uzvelciet dūmu atvadīšanas šļūteni uz veidgabala, kas uzstādīts uz katla sienas, un izvelciet to no telpas
(piemēram, caur logu) - vai pievienojiet šļūteni tvaika nosūcējam. Pārliecinieties ka caur logu izvadītā šļūtene
un izplūstošie dūmi kaimiņiem neradīs neērtības.
7. Ieslēdziet gāzi un sāciet kūpināšanas procesu. Pirmajās 5-10 minūtēs ir pieļaujams nedaudz palielināt
karsēšanas jaudu, lai sāktu skaidu sildīšanas procesu. Pēc tam ieteicams samazināt karsēšanu (vēlams līdz
minimumam) vai ievietot liesmas sadalītāju starp siltuma avotu un katlu. Kūpināšanas procesa laikā
temperatūrai (ko parāda termometrs, kas uzstādīts vākā) jābūt starp 70 un 80⁰C. Kūpināšanas ilgums un
temperatūra ir atkarīga no kūpināmās pārtikas veida. Piemēram, var pieņemt šādus ieteikumus:
gaļa: 60-120 minūtes, uz mazas uguns;
zivis: 30-60 minūtes, uz minimālas uguns.
8. Kad kūpināšana ir pabeigta, izslēdziet gāzi, pagaidiet, līdz kūpinātava atdziest, un izņemiet gatavos
produktus.
9. Kad kūpinātava ir pilnībā atdzisusi, notīriet to saskaņā ar
rekomendācijām.
Kūpinātavu var veiksmīgi izmantot arī izstrādājumu cepšanai.
Ierīci var izmantot arī neuzstādot šļūteni:
1. ja plīts ir pievienota ārpus ēkas un dūmi, kas izplūst no caurules,
netraucēs jums vai kaimiņiem;
2. cepšanas gadījumā, neizmantojot zāģu skaidas - kad caurule veiks
ventilācijas funkciju.
Gaļu, kas paredzēta kūpināšanai, var iepriekš marinēt vai mērcēt sālījumā. Pirms
kūpināšanas ir ļoti svarīgi labi nosusināt porcijas. Atcerieties arī, ka pārāk daudz
skaidu var izraisīt pārmērīgu kūpinājumu skābumu.
Receptes kūpinātai gaļai, marinādēm un sālījumiem zivīm un gaļai ir atrodamas mūsu mājas lapā: www.browin.com
50-100 g skaidu ir pietiekami, lai iegūtu pareizu kūpinātas gaļas krāsu un bagātinātu tās ar aromātu.
Atkarībā no pagatavojamā ēdiena veida mēs iesakām šādas zāģu skaidas:
La page est en cours de chargement...
La page est en cours de chargement...
La page est en cours de chargement...
La page est en cours de chargement...
La page est en cours de chargement...
La page est en cours de chargement...
La page est en cours de chargement...
La page est en cours de chargement...
-
 1
1
-
 2
2
-
 3
3
-
 4
4
-
 5
5
-
 6
6
-
 7
7
-
 8
8
-
 9
9
-
 10
10
-
 11
11
-
 12
12
-
 13
13
-
 14
14
-
 15
15
-
 16
16
-
 17
17
-
 18
18
-
 19
19
-
 20
20
-
 21
21
-
 22
22
-
 23
23
-
 24
24
-
 25
25
-
 26
26
-
 27
27
-
 28
28


dans d''autres langues
- English: BROWIN 330150 Owner's manual
- Deutsch: BROWIN 330150 Bedienungsanleitung
- polski: BROWIN 330150 Instrukcja obsługi
- eesti: BROWIN 330150 Omaniku manuaal