
GEAppliances.com
0
Safety Instructions .............. 2-3
Operating Instructions
Compacting ............................ 6
Features ................................ 4
Loading ................................ S
Removing a FullTrashBag ............. 6
Trash Bag Installation ..................5
Using the Trash Compactor ......... 5-6
Careand Cleaning
Cleaning the Unit ....................... 7
Troubleshooting Tips ............. 8
ConsumerSupport
Consumer Support ................... 12
Product Registration
for Customers in Canada .......... 9, 10
Warrantg ............................. 11
GCG1500
GCG1580
GCG1700
L_
Write the model and serial
numbers here:
Model #
Serial #
You can find them on the label
on the front of the frame.
165D4700P385 49-55061-i 09-09JR

IMPORTANT SAFETY INFORMATION.
READ ALL INSTRUCTIONS BEFORE USING.
WARNING!
Foryour safety,theinformation in this manualmust befollowed to minimize theriskof fireor
explosion,electricshock,or to preventpropert_ldamage, personalinjur_l,ordeath.
SAFETYPRECAUTIONSWhen using electrical appliances, basic safety precautions should be followed, including the following:
• This compactor is for household use only. Use PRECAUTIONS AGAINST UNREASONABLE USE
this appliance only for its intended purpose as
described in this Owner's Manual.
Close supervision is necessary when any
appliance is operated near children. Do not
allow the compactor to be used as a toy, or to
run unattended at any time.
• CHILD LOCK-OUT INSTRUCTIONS"Turn
the knob to OFF and remove it when not
compacting trash. This will help prevent
anyone from tampering with the compactor
or children from operating it.
• Do not push trash into the drawer with hands
or feet. Trash might contain broken glass,
sharp pieces of metal, or other sharp objects
that might cause injury.
• When removing or carrying the trash bag,
keep the bag away from your body. Sharp
objects may have pierced it.
Be careful when cleaning the inside of the
cabinet or trash drawer. Glass fragments may
be stuck to the ram, imbedded in the drawer
surface or lying in the bottom of the cabinet.
Do not install or store compactor where it will
be exposed to outside conditions.
Make sure the compactor is properly installed
and leveled on a floor that can support its
weight.
Do not touch moving parts.
Do not compact food waste such as raw meat
and fish, rinds, personal hygiene items and
disposable diapers. These items create very
strong odors and should not go into the
compactor.
Do not use as a freestanding unit. Use only as
a built-in unit.
OF YOURCOMPACTOR:
Never compact shotgun shells, cartridges for
firearms, fireworks, etc., which are highly
explosive.
Never compact flammable materials such as
paint, oil- or gasoline-saturated rags, engine
starting fluid cans, paint thinner cans, etc.-
spontaneous combustion or explosive vapor
concentrations could occur.
Never compact containers of toxic chemicals
such as strong insecticides or other poisonous
materials-compaction could release
hazardous fumes.
Never compact aerosol cans containing
explosive or highly toxic chemicals. (If
you are sure the aerosol cans contain
non-hazardous materials such as shaving
cream, cheese spread and whipped cream,
they may be compacted.)
Do not compact lit cigarettes, cigars, or other
hot or burning items.
Do not store or use gasoline or other
flammable vapors and liquids in the vicinity of
this or any other appliance.
Do not overload your appliance.
Handle a loaded trash bag with care. Sharp
objects can pierce the bag and cause injury.
Do not overload trash bag with heavy
material such as glass.
2

GEAppliances.com
ELECTRICALSAFETY
When using electrical appliances, basic safety precautions should be followed, including the following:
• To prevent hazard of electrical shock,
this compactor must be properly installed and
grounded in accordance with the Installation
Instructions before it is used.
Do not operate with a damaged cord set,
plug, motor,or after damage in any manner.
Havethe appliance examined,repaired,or
adjusted by an authorized servicetechnician.
Do not take apart this appliance. Incorrect
reassembly can cause electric shock when
subsequently used.
Unplug the compactor before making any
repairs. NOTE: We strongly recommend that
any servicing be performed by a qualified
person.
Do not use an adapter plug or an extension
cord with this appliance.
Follow National Electric Codes or prevailing
local codes and ordinances. This appliance
must be supplied with 120V, 60Hz and
connected to an individual, properly grounded
branch circuit protected by a 15 or 20 amp
circuit breaker or time delay fuse.
If the electric supply provided does not meet
the above requirements, call a licensed
electrician.
serving only this appliance be provided.
Do not, under any circumstances, cut or
remove the third grounding prong from the
power cord.
This appliance must be grounded. In the event
of a malfunction or breakdown, grounding will
reduce the risk of electric shock by providing
a path of least resistance for electric current.
This appliance is equipped with a cord having
an equipment grounding conductor and a
grounding plug. The plug must be plugged
into an appropriate outlet that is properly
installed and grounded in accordance with
local codes and ordinances.
A WARNING:Improperconnection of
the equipment grounding conductor can result
in a riskof electric shock. Checkwith a qualified
electricianif you are indoubt as to whether the
appliance isproperly grounded.
• Do not modify the plug with this appliance. If
it will not fit the outlet installed, have a proper
outlet installed by a qualified electrician.
• We recommend that a separate circuit
%
PROPER INSTALLATION AND MAINTENANCE
This compactor must be properly installed and located in accordance with the Installation Instructions
before it is used. If blou did not receive an Installation Instruction Manual, you can receive one by visiting
GEAppliances.com, or by calling 800.GE.CARES(800.432.2737) in the United States. In Canada, visit
www.GEAppllances.ca or call 1.800.561.3344.
READAND FOLLOWTHISSAFETYINFORMATIONCAREFULLY
SAVE THESEINSTRUCTIONS

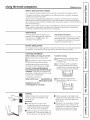
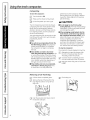
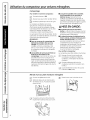
About the trash compactor.
@
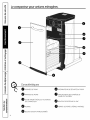
Features
0
0
@
DRAWERHANDLE
DOOR PANEL
FOOTPEDALDRAWEROPENERAND
COMPACTORACTIVATION
O TOEKICK
O ON/OFF KNOB
0
e
O
DRAWERSAFETYSWITCH
MODELAND SERIALNUMBER LABEL
BAG RETAINERBUTTONS
O MOVEABLESIDEDOOR LATCH
4

Usingthe trash compactor. GEAppliances.com
What It Does and How It Works
Yourcompoctor reduceshousehold trosh to os little os one-fourth of its originol volume.
Itcompocts most refuse,including poper,cons, bottles,jors, plostic contoiners, wroppings,
sweepings ond some food wostes.
Droptrosh into the disposoble bog (designedfor compoctor use)thot linesthe compoctor
trash drawer and close the drawer. When you start the compactor, an electricallg-operated
ram moves down intothe drawer,compacts trash, moves back up again-and the compactor
shuts off automaticallg.
NOTE:Thetrash drawer must be at least 1/2 full before gou will notice compaction because
the ram does not travelall the wag down into the drawer. Bgadding trash, compaction is
transferred to the items below untilall trash iscompacted.
ON/OFF Knob
The removoble knob isprovidedfor gour
protection oso sofetg meosure.When the
knob switch isin the OFFposition,the
compoctor will not operote.
Child Lockout Instructions:
Lockthe compoctor when it isnot in use,bg
removing the knob. Thiswill keepchildren
from operoting the compoctor ond prevent
ongone from tompering with it.
Drawer Safety Switch
Thecompactor hastwo safetg switchesto ensurethot the drawer isin itsfullg closed position
for operation.Thecompactor will not cgcle without the drawer beingfullg closed.
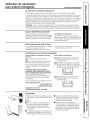
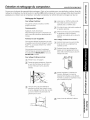
Trash Bag Installation
Beforeinstalling a new bag, be sure that:
r_ The drower side issecurelg locked.
I--51The contoiner isclean ond free of shorp
debristhot moy puncture the bog.
Reinforcedplostic bogscome with gour
compoctor ond ore reodg to beinstolled.
You must usethe specially designed
heavy-duty trash bags included with your
compactor. Thesebogs ore ovoiloble from
gour deoler or FoctorgServiceCenter.Ask for
cotolog numberWC6OXIO005.
Toorder bogs,coiltoll-free:
National Parts Center 800.626.2002(U.S.)
800.661.1616(Canada)
GEAppfiances.com(U.S.)
www.GEAppfiances.ca(Canada)
Toinstall a new bag:
r_ Plocethe bog into the drower. Open
the bog ond pull the top edgesover
the drower top.
[] Lockthe bag in plocebg pullingthe
four prepunched holesoverthe bag
retoiner buttons.Holeswill expondover
the buttons without harming the bog.
r3-] Pressinsideof baq against the
drawer bottom, sidlesand corners
for a smooth fit.
Loading
Slightlglift and pull the compactor door
handle or pressthe foot pedal and pull
the drawer out.
Remember:
• Tohelp keepthe ram cleanwhen
compacting messgfood waste, placea
coupleof folded sheetsof newspaper
on top ofthe load to be compacted.
• Items too bulkg to go into the drawer can
be folded to fit. If itcannot be folded to fit
into the drawer, do not attempt to force it.
• Foldednewspaper isolso helpfulwhen
compacting a large glass bottle, or several
bottles orjars, or ang other itemsthat
might shatter.
• Although it isnot necessargto compact
until the drawer isfull or nearlg full,we
suggestthat, for maximum compaction,
you stort the compoctor eoch time o
significant amount of trash is added.

Usingthe trash compactor.
Compacting
Tostart the compactor:
El] Turnthe knobto ON.
[_ Makesure the drawer isfullg closed.
r3] Lift the foot pedal up to start cycle.
The ram travels downward into the drawer,
compacting the trash.At the bottom of the
stroke,the ram automatically reverses
direction,retracts out ofthe drawer,returns
to itsstarting position,and the compactor
shutsoff automatically.
Thecycle takes lessthan 30 seconds.Asthe
trash drawer fills with trash, cycle time gets
progressively shorter.
NOTES:
• You will not see compacting oftrash the
first few times you load.Thecompactor
drawer should be about 1/2 full before
the compactor can beginto compress
the load.
• Glassbottles can make a loud noise
when they break during compaction. This
isnormal. Also,bottles in the trash drawer
will not alwags breakduring the first cgcle.
Breakingglass and associated noisemag
occur several cycles later,depending on
the tgpe and volume of the trash.
• When bottles and cans are compacted,
smalltears in the bag may occur. This
isnormal and in no wag affects the
performance of the compactor. Keep
the bag awag from gour bodg to prevent
injurg from sharp objectsthat mag have
piercedthe bag.
CAUTION:
Do not apply too much force when
turning the knob. The knobshould alwags
rotate easilg. Forcingmag breakthe knob
and damage the switch.
When emptying waste baskets into the
trash drawer, some items may spill into
the compactor behind the drawer. Items
behind the drawer could preventit from
closing completelg and prevent the
compactor from operating. To remove
such itemsfrom behind the drawer, open
the drawer and remove it to cleanthem
out. Seethe Coreand Cleaningsection.
Tostop the compactor:
Thecompactor may be stopped at ang time.
r-fJ Attempting to openthe drawer while
the ram ismoving will stop the ram.
The safetg switch will activate.
[] Closethe drawer completelg and the
ram will travel back to the UPposition.
r3] open the drawer fullg and turn the knob
to OFF.
6
Removing a Full Trash Bag
[_] Pullthe drawer completelg open.
Removethe top of the bag from the
bag retainer buttons. Pullup all four
bag cuffs.
r_ Pushthe side-locklatch down and tilt
the drawer sideopen.
r_ Liftthe bag out.

Careand cleaning of the compactor. 6EAppliances.com
As is true of most appliances, proper care is needed to give you continued satisfaction. Before cleaning the compactor,
turn the knob to the OFF position and remove it. If you will be away for more than a couple of dabls, remove the
compactor bag. Lock the compactor by removing the knob and store it in a safe place.
Cleaning the Unit
Toclean the outside:
Wipewith a cleandamp cloth.
Painted panels:
Apply a coat of kitchen/appliance wax when
the compactor isnew,and then several times
a year.
Stainless steelpanels:
Stainlesssteel panelscan be cleanedwith
Cerama Bryte®or a similar product using a
clean, soft cloth.
Cerama Bryte isavailable from GEPartsby
calling 800.626.2002(U.S.)or 800.661.1616
(Canada).
Tocleanthe drawer interior:
_7_ Removethe bag.Seepage 6.
[_ Wear protective gloves.Theremay be
bits of glass in the drawer. Pressthe
sidedoor latch down.
r4] Wash with a damp cloth using warm,
soapy water. Rinseand then dry with
a soft cloth.
[_ Ifthe drawer sidewas removed,slide it
back into the tilted position.
j_ Pressthe sidedoor latch down while
pressing the sideto the upright position.
Lockthe sidedoor latch.
Toclean the cabinetinterior:
[_ Pullthe drawer out until it stops.
Notethe tracks inwhich the drawer
rollers move.
j_] Liftthe front to clear the drawer stops.
Grab the drawer on both sides.Pullit out
the restof the way and set it aside.
%
Vacuum insideof the cabinet. Liquid
spillsor wet trash should be cleaned up
by hand,or usea vacuum designedto
pick up liquid.
%
Holdthe sidedoor latch and tilt
the sideof the drawer untilthe latch
clears the drawer front. Thedrawer side
can be removed by tilting and slidingit
out.
J
[] Wash,rinseand dry the inside.

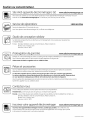
Before you call for service...
_ Troubleshooting Tips
Problem Possible Causes What To Do
Compactor won't Compactor is unplugged • Make sure the cord is plugged securelg into a
operate working outlet.
Circuit breaker/fuse is • Checkhouse circuit breakers/fuses. Replace
tripped/blown fusesor reset breaker.
Knob switchmag not be • Makesure the switch isin the ONposition.
in the ONposition
Footpedal mag not belifted • Liftfoot pedal up momentarilg untilcompaction cgcle
up long enough to start cgcle starts.
Drawer mag not beclosed • Checkto make surethe drawer isfirmlg closed.
Compactor has an automatic • If gou have just compacted repeatedlg, this protector
thermal motor reset mag have opened the motor circuit. Wait a few
minutes and the motor reset will reclose
automaticallg.
Drawer is hard Trash meg have fallen • Remove ang trash.
to close behind the drawer
Drawer will not The ram is not all the • Liftup on the foot pedal and release to allow ram to
open wag up complete a cgcle.
Little or no apparent Drawer is not full • The drawer must be at least 1/2 fullof trash before
compaction enough gou willsee ang amount of compacting. The ram does
not travel all the wag to the bottom. Trash inthe bottom
of the drawer willbe crushed during later cgcles.
Trash is stuck between mm • Remove ang trash.
and basket
8

Please place in envelope and mail to:
Veuillez mettre dans une enveloppe et envoyez _:
OWNERSHIPREGJSTRATJOH
P.O. BOX1780
MISSJSSAUGA,OHTARJO
L4Y4G1
(FORCAHADJAHCOHSUMERSOHLY)

For Canadian
Customers
Pour les
Consommateurs
Canadiens
z
Z
rr"
rr"
C3
Z
klJ
Z
..-1
_9
Z
I
I
I
I
I
I
I
Pleaseregisteryour product to enableusto contactyou
in the remoteeventasafetynolJceisissuedforthis product
andtoallow for efficientcommunicaOonunderthe terms
ofvour warranty,shouNthe need arise.
REGISTERON-LINE: wwvv,geappJiances,ca MAILTO:
ENREGISTREMENTSURINTERNE]_,: _.electtemenagersge.ea POSTER_,:
[][]MISS/MLLE.MR'/M[][]Ms.MRS'/MME'FIRSTNAME/PRENOM LASTNAME/NOM
STREETNO/ N°RUE STREETNAME/RUE
crfY/VILLE
Veuillezenregi_erv_e produitafindenouspermetb'ede
communiqueravecvoussijamaisunavisdes6curit_concemant
ceproduit6tait_misetdecommuniquerfacilementavecvousen
ver_devo_egararrde,silebesoins'enfairsen_r.
RO,BOX1780,MISSISSAUGA
ONTARIO,L4Y461
A_. NO/APP./RR#
PROVINCE POSTALCODE/POSTAL
AREACODE/ IND.RE_G.[TELEPHONE JE-MAIL
DIDYOUPURCHASEASERVICECONTRACTFORTHISAPPLIANCE? YES/OUI FI IFYES/ SlOUI:EXPIRATION
Y/A M D/J
AVEZ-VOUSACHETI_UN CONTRATDESERVICEPOURCETAPPAREIL? NO/NON []
NAME OFSELLINGDEALER/ NOMDU MARCHAND MODEL / MODt _LE
SERIAL/St_RIE
INSTALLA]IONDATE/DATED'INSTALLA]ION
Y/A M D/J CORRESPONDENCE [] ENGLISH
CORRESPONDANCE [] FRAN(_AIS
[] Ido notwishtoreceiveanypromotionaloffersrecjardingthisproduct.
[] Jened6sirepasrecevoird'offrespromotionnellesconcernantceproduit.
I ............................................................................................................................................................................................................................................................................................................................................................................................................................................................................................................................................................................................................................................................................................................................................................................................................................................................
L
10

Trash Compactor Warranty.
All warranty service provided by our Factory Service Centers,
or an authorized Customer Care®technician. Toschedule
service on-line, visit us at GEAppliances.com, or call 800.GE.CARES
(800.432.2737) in the United States. In Canada, call
1.800.561.3344. Please have serial number and model
number available when calling for service.
Staple Four receipt here.
Proof of the original purchase
date is needed to obtain service
under the warrant F.
For The Period Of: GE Will Replace:
One Vear
From the dateof the
original purchase
Any part ofthe compactor which foils due to o defect in materials or workmanship.
During this limited one-year warranty, GEwill also provide,free of charge, all labor
and in-home serviceto replace the defective part.
What GE Will Not Cover:
• Service trips to gour home to teach gou how to use
the product.
• Improper installation, deliverg or maintenance.
• Failure of the product if it is abused, misused, or used for
other than the intended purpose or used commerciallg.
• Replacement of house fuses or resetting of circuit
breakers.
• Damage to the product caused bg accident, fire, floods
or acts of God.
• Incidental or consequential damage caused bg possible
defects with thisappliance.
• Damage caused after deliverg.
• Product not accessible to provide required service.
EXCLUSION OF IMPLIED WARRANTIES--Vour sole and exclusive remedy is product repair as provided in
this Limited Warranty. Any implied warranties, including the implied warranties of merchantability or
fitness for a particular purpose, are limited to one year or the shortest period allowed by law.
This warranty is extended to the original purchaser and any succeeding owner for products purchased for
home use within the USA or Canada. If the product is located in an area where service by a GE Authorized
Servicer is not available, you may be responsible for a trip charge or you may be required to bring the product
to an Authorized GE Service location for service. In Alaska, the warranty excludes the cost of shipping or
service calls to your home.
Some states do not allow the exclusion or limitation of incidental or consequential damages. This warranty
gives you specific legal rights, and you may also have other rights which vary from state to state. To know
what your legal rights ore, consult your local or state consumer affairs office or your state's Attorney General.
Warrantor (USAI: General Electric Company. Louisville, KV 40225
Warrantor (Canadal: Mabe Canada Inc., Suite 310, 1 Factory Lane, Moncton, N.B. E1C 9M3
11

Consumer Support.
GEAppliances Website In the U.S.A.GEAppliances.com
Have a question or need assistancewith your appliance?Try the GEAppliances Website 24 hours a day,
any day of the year! Forgreater convenience and faster service,you can now download Owner's Manuals,
order parts or even schedule serviceon-line.In Canada:www.GEAppliances.ca
Schedule Service In the U.S.A.GEAppliances.com
Expert GErepair service isonly one step away from your door.Geton-line and schedule your serviceat your
convenience any day of the year! Or call 800.GE.CARES(800.432.2737)during normal businesshours.
In Canada, call 1.800.561.3344
Real LifeDesign Studio In the U.S.A. aEApplionces.com
GEsupports the UniversalDesignconcept-products, services and environments that can be usedby peopleof all
ages,sizesand capabilities. We recognizethe needto designfor awide range of physical and mental abilitiesand
impairments. Fordetails of GE'sUniversalDesignapplications, including kitchen design ideasfor people with disabilities,
check out our Websitetoday. Forthe hearing impaired, please call800.TDD.GEAC(800.855.4522).
In Canada, contact: Manager,Consumer Relations,Mabe Canada Inc.
Suite310,1 Factory Lane
Moncton, N.B.EIC 9M5
Extended Warranties
In the U.S.A.GEApplionces.com
Purchasea GEextended warranty and learn about special discounts that are available while your warranty isstill
in effect. You can purchase iton-line anytime, or call800.626.2224during normal businesshours.GEConsumer Home
Serviceswill still be there after your warranty expires.In Cenede,cull1.888.261.2133
Ports and Accessories
In the U.S.A.GEApplionces.com
Individualsqualified to servicetheir own appliances can haveparts or accessoriessent directly to their homes
(VISA,MasterCardand Discovercards are accepted).Orderon-line today, 24 hours every day or by phone at
800.626.2002during normal businesshours.
Instructions contained in this menuel cover procedures to be performed by eny user.Other servicing generally
should bereferred to qualified service personnel Caution must be exercised,since improper servicing meg cause
unsafe operation.
Customers in Cenede should consultthe yellow pages for the nearest Mabeservice center,or call 1.800.661.1616.
Contact Us
In the U.S.A.GEApplionces.com
If you are not satisfiedwith the serviceyou receivefrom GE,contact uson our Websitewith all the details including
your phone number,or write to: General Manager,Customer Relations
GEAppliances,Appliance Park
Louisville,KY40225
In Cenede: www.GEAppliences.ce, or write to: Director,Consumer Relations,Mabe Canada Inc.
Suite310,1 Factory Lane
Moncton, N.B.EIC 9M3
Register YourAppliance /n the U.S.A.GEApplionces.com
Register your new epplience on-line--et your convenience! Timely product registration will allow for enhanced
communication and prompt serviceunder the terms of your warranty, should the need arise.You may also mail
in the pre-printed registration card included inthe packing material. InCenede: www,GEAppliences,ce
12
Printed in China

www.electromenagersge.ca
Mesures de s_curit_ ............. 2-3
Foncionnement
Compactage ........................... 6
Caract@istiques ........................ 4
Chargement ............................ 5
Retrait d'un sac
plein d'ordures m_nag@es ............. 6
Installation du sac
d'ordures m_nag@es .................. 5
Utilisation du compacteur
pour ordures m_nag@es ............ 5-6
¢13 Entretien et nettoyage
Nettoyage de I'appareil ................ 7
Conseils de d_pannage .......... 8
Soutien au consommateur
Soutien au consommateur ........... 12
Inscription du propri@aire ......... 9, 10
Garantie .............................. 11
GCG1500
GCG1580
GCG1700
0
Inscrivez ici les num_ros
de module et de s_rie :
ModUle N°
S_rie N°
Vous lestrouverez sur I'_tiquette
appos_e sur la partie avant du
cadre de I'appareil.
165D4700P385 49-55061-1 09-093R

MESURESDES 'CURIT "IMPORTANTE&
LISEZD'ABORDTOUTESLESDIRECTIVES.
AVERTISSEMENT !
Pour votre s4curit4, vous devez suivre I'information contenue dons ce manuel pour r@duireles risques
d'incendie, d'explosion, de choc @lectriqueou pour @vitertout dommoge mot4riel, des blessures ou
Io mort.
PRdLCAUTIONS DE SdLCURITdLEn utilisant des opporeils @lectriques,il lout toujours suivre les pr@cautions de bose, blcompris ce
qui suit
Cecompacteur est r_serv_ (_I'utilisation
r_sidentielle. Utilisez cet appareil seulement
pour I'usage auquel il est destin_ selon ce
manuel du propri@aire.
IIfaut une supervision @troiteIorsque I'appareil
est utilis@par ou pr@sd'enfants. Ne laissez
jamais le compacteur @re utilis@comme jouet
ou fonctionner sans supervision.
• VERROUILLAGEDESCOMMANDES: Mettez
le bouton 5 la position OFF (errS.t!et retirez-le
Iorsque vous ne faites pas de compactage
d'ordures m_nag@es. Cela emp_chera toute
mauvaise utilisation du compacteur et
emp_chera les enfants de I'utiliser.
• Ne poussez pas les d_chets dans le tiroir avec
les mains ou les pieds. Lesd_chets pourraient
contenir du verre cass_, des pi_ces de m@al
tranchantes ou d'autres objets coupants qui
pourraient provoquer des blessures.
• Enretirant ou transportant le sac d'ordures
m_nag@es, gardez le sac loin de votre corps.
Les objets coupants peuvent I'avoir perc&
• Attention en nettogant I'int@ieur de
I'armoire ou letiroir _ ordures m_nag@es.
Les fragments de verre pourraient @re coll_s
au coulisseau, incrust_s dans la surface du
tiroir ou au bas de I'armoire.
• N'installez pas et ne rangez pas le compacteur
(_un endroit oQ il sera expos@aux conditions
ext@ieures.
PR_'CAUTIONSCONTRE L'UTILISATION
D_-RAISONNABLEDU COMPACTEUR:
Ne compactezjamais de cartouches (_plomb,
de cartouches d'armes (_feu, de pi_ces de feu
d'artifice, etc. qui sont tr_s explosifs.
Ne compactezjamais de mat@iaux
inflammables comme peinture, chiffons
satur@sd'huile ou d'essence, contenants de
liquides de d@marrage (_moteur, contenants
de diluant de peinture, etc. IIpourrait g
avoir une combustion spontan@e ou des
concentrations de vapeurs explosives.
Ne compactezjamais les contenants de
produits chimiques toxiques comme des
insecticides forts ou autres mat@riaux
toxiques; le compactage pourrait degager
des vapeurs dangereuses.
Ne compactezjamais d'a@osols contenant
des produits chimiques explosifs ou tr@s
toxiques. (Sivous @tescertains que les
a@osols contiennent des mat@iaux non
dongereux comme Io cr@mede rosoge,
le fromage (_tartiner et la cr@mefouett@e,
ils peuvent @trecompoct@s.)
Ne compactez pas les cigarettes, les cigares
allum_s ou autres articles chauds ou en feu.
Ne rangez et n'utilisez pas d'essence ou
autres vapeurs et liquides inflammables pros
de cet appareil ou de tout autre appareil
_lectrom_nager.
• Assurez-vous que le compacteur est bien
install_ et (_niveau sur un sol qui peut
supporter son poids.
• Ne touchez pas aux pi_ces mobiles.
Ne compactez pas de d@chetsalimentaires
comme de la viande crue et du poisson, des
couennes, des articles d'hggi@ne personnelle
et des couches jetables. Ces articles
produisent de tr@sfortes odeurs et ne vont
pas dans le compacteur.
Ne surchargez pas votre appareil
@lectrom@nager.
Planipulez un sac _ poubelle plein avec soin.
Lesobjets pointus peuvent percer le sac et
vous blesser. Ne surchargez pas le sac
poubelle de mati@resIourdes comme du verre.
2
• Ne I'utilisez pas comme appareil amovible.
Utilisez seulement comme appareil encastr&

www.electromenagersge.ca
SECURITEELECTRIQUE
En utilisont des opporeils @lectriques,il lout toujours suivre les pr@coutions de bose,bl compris ce
qui suit:
Pour _viter tout danger de choc _lectrique, •
ce compacteur doit _tre bien install_ et mis
la term conform_ment aux instructions
d'installation avant de I'utiliser.
Ne foites pos fonctionner ovec un cordon, une
fiche ou un moteur endommog_s ou opr_s
tout outre dommoge. Foites examiner, r_porer
ou ojuster I'opporeil par un technicien de
service outoris&
Ne d_montez pos cet opporeil. Un opporeil
mol remont_ pourroit provoquer un choc
_lectrique Iors de son utilisotion subs_quente.
D_branchez lecompacteur avant
toutes r_parations. RENARQUE: Nous
recommondons fortement que route
r_paration soit ex_cut_e par une personne
qualifi_e.
N'utilisez pas une fiche d'adaptation ou
une rallonge _lectrique avec cet appareil.
Suivez les codes notionoux de I'_lectricit_
ou les codes et ordonnonces en vigueur
Iocalement. Cet appareil doit _tre aliment_
d'un courant de 120 V,60 Hz et branch_
un circuit exclusif mis (_la term correctement
et prot_g_ par un disjoncteur de 15 ou
20 amperes ou un fusible temporis&
Si I'olimentotion _lectrique fournie ne r_pond
pas aux exigences pr_c_dentes, appelez
un _lectricien ogre&
Nous recommandons de pr@voirun circuit
distinct pour cet appamil.
Ne coupez et ne retirez dons oucun cos
Io troisi@me broche de mise _ Ioterre du
cordon.
Cet appamil doit @tremis _ la term. Dans le
cas de mauvais fonctionnement ou de panne,
la mise @la term r@duirale risque de choc
@lectrique en fournissant une voie de moindre
r@sistance pour le courant @lectrique.
Cet apporeil est dote d'un cordon et d'une
fiche ovec mise 0 Io term. Lo fiche doit #tre
branchee dons une prise appropriee
correctement installee et mise 0 la term
conformement oux codes et reglements
Iocoux.
AVERTISSEMENT :Toute
mauvaise connexion du conducteur de mise
la terre de I'_quipement pourrait mener
un risque de choc _lectrique. Consultez un
_lectricien qualifi_ si vous n'_tes pas certain
que I'appareil soit bien mis _ la terre.
• Ne modifiez pas la fiche de cet appamil.
Si elle n'entre pas completement dans
la prise, faites installer une prise appropri@e
par un @lectricien qualifi&
INSTALLATION ET ENTRETIEN APPROPRIES
Avant d'utiliser ce compacteur, il lout s'assumr qu'il a @t4correctement install@,en conformit4 avec
les directives d'installation foumies. Si vous n'avez pas requ de directives d'installation, vous pouvez
les obtenir en visitant notre site Web d I'adresse GEAppliances.com ou en composant le 1.800.z_32.2737
(1.800.GE.CARES)aux Etats-Unis. Au Canada, visitez notre site Web www.electromenagersGE.ca ou
composez le 1.800.561.33z_z_.
\lll
• VEUILLEZLIRE ETSUIVREATTENTIVEMENTCESMESURES
DE CURIT L.
CONSERVEZ CES DIRECTIVES

0
ua
m
,tl_O
0
0
Lecompacteur pour ordures m_naggres.
@
0
0
0
Caractdristiques
POIGNE-EDETIROIR
0
0
@
PANNEAUDE PORTE
OUVRETIROIR/_PE-DALEETACTIVATION
0
0
DU COMPACTEUR
PLINTHE
BOUTONON/OFF (MARCHE/ARRE-T)
0
0
INTERRUPTEURDESE-CURITE-DU TIROIR
EMPLACEMENTDESNUME-ROSDE
MODE-LEETDESE-RIE
BOUTONSDERETENUEDU SAC
VERROUDEPORTELATE-RALEAMOVIBLE
4

Utilisation du compacteur
pour orduresm nag res.
_.electromenagersge.ca
Ce qu'il fait et comment il fonctionne
Votrecompacteur r_duitlesorduresm_nag_resjusqu'aun quart de leurvolumeoriginal.
IIcompacte la plupartdesd_chets,g comprisle papier,lescannettes,lesbouteilles,lesbocaux,les
contenantsde plastique,lesenveloppes,lesrestesde balagageet certainsd_chetsalimentaires.
D_posezlesd_chetsdanslesacjetable (conCupour lescompacteurs)a I'int@ieurdutiroir d'ordures
menag_resdu compacteuret fermezletiroir.Lorsquevousallumezlecompacteur,un coulisseau
_lectriquesed@laceversle basdansletiroir,compactelesorduresm_nag_res,remonte a
nouveauet lecompacteur s'_teintautomatiquement.
REMARQUE:Letiroir(_orduresm_nag_resdoit_treau mainsrempli(_moiti_avant de noterle
compactage carlecoulisseaunesed@lacepasjusqu'aufond dutiroir.Enajoutant desordures,
la forcede compressionesttransf@@auxarticlesen dessousjusqu'(_cequa tout soit compact&
Bouton ON/OFF (marche/arr_t)
Leboutonamovibleestfourni pourvotre
protectioncomma mesurede s_curit&Lorsque
I'interrupteurdubouton est(_la positionOFF
(arr_t),lecompacteurne peutpasfonctionneE
Verrouillagedescommandes:
Verrouillezlecompacteur Iorsqu'iln'estpas
utilis_enretirant lebouton.Celaemp_cherales
enfantsd'utiliserlecompacteurainsiquetoute
autreutilisationabusive.
Interrupteur de s_curit#, du tiroir
Lecompacteura deuxinterrupteursde s_curit_
pourfaireen sorteque letiroirsoit
compl_tementferm_ Iorsqu'ilest en marche.
Lecompacteur nefonctionnerapassiletiroir
n'estpascompl_tementferm&
Installation du sac d'ordures m#nag#res
Avant d'installer unnouveausac,assurez-
vous qua :
rTiLe c6t_du tiroirest bienverrouill&
I-_--ILecontenantestpropreet libraded_bris
tranchants qui pourraientpercerlesac.
Dessacsde plastiquerenforc_ssont fournis
avecvotrecompacteur etsont pr_ts(__tre
install_s.
Vousdevezutiliser lessacs d'ordures
m_nag_resrobustes sp_ciolement conqus
pour cat usageet inclus ovec lecompacteur.
Cessacssontdisponibleschezvotre
concessionnaireouau centrede servicede
I'usine.Demandezle num_rodecatalogue
WC60X:10005.
Pourcommanderdessacs,appelezsansfraisau:
Centrenational depi_ces
1.800.526.2002(E.-U.)
1.800.661.1616 (Canada)
GEAppliances.com(E.-U.)
www.electromenagersge.ca(Canada)
Pourinstaller un nouveausac:
p1 Placezlesac dansletiroir.Ouvrezlesac
ettirezlesbardssup_rieurspar dessus
ledessusdu tiroir.
[] Verrouillezlesacen placeenaccrochant
lesquatretrous pr@erc@ssur lesboutons
de retenuedusac.Lestrous s'@largirontsur
lesboutonssansprobl@mepour lesac.
r_] PressezI'int_rieurdu saccontre lebas
dutiroir,lesc6t_setles coins pourun
ajustementfacile.
Chargement
Soulevezunpeu ettirezla poign@de la porte
du compacteurou enfoncezla p_daleet sortez
letiroir.
Rappel:
• Pouraider (_garder lecoulisseaupropre
en compactantdesorduresm_nag_res
salissantes,placezquelquesfeuillesde
journaux pli@ssurle dessusde lacharge
compacter.
• Lesarticlestrap grospour entrerdansletiroir
sereplientpour s'ajusterdansletiroiESice
n'estpaspossible,n'essagezpasde lesforcer.
• Lesjournauxrep%ssont aussiutilespour
compacter unegrossebouteillede verreou
plusieursbouteillesou bocauxou autres
articlesqui pourraient_clater.
• Bienqu'ilnesoit pasn_cessairede
compacterjusqu'a cequa letiroirsoit plain
ou presqueplain,noussugg_rons,pour un
compactage maximum,d'utiliserI'appareil
chaquefoisquavous ajoutezunequantit_
importante ded_chets.

"i"__.
%.
0
I=
ILl
m
I=
A
I=
0
0
Utilisationdu compacteur pour orduresm@naggres.
Compactage
Pour me_re en marche le compacteur :
Eli Tournezle bouton 6 ON.
[] Assurez-vousque le tiroir est bien ferm&
[_ Soulevezla p@dalepour lancer lecgcle.
Lecoulisseause d@placevers le bas
dans letiroir, compactant lesd@chets.
A lafin de la course, lecoulisseauchange
automatiquement de direction,sort du tiroir,
revient 6 sa position de d@partet le
compacteur s'@teintautomatiquement.
Cecgcle prend moins de 30 secondes.Tandis
que le tiroir se remplit de d@chets,ladur_e du
cgcle diminue progressivement.
REMARQUES:
• Vous ne verrez pas le compactage des
d_chets lespremieres fois que vous
chargez, lespremieres fois que vous
chargez.Letiroir du compacteur doit
_treau moins rempli 5 moiti_ avant que
lecompacteur commence 5 compacter
la charge.
• Lesbouteilles de verre peuvent faire un
bruit fort en sebrisant Iors du
compactage. C'estnormal. Dem_me, les
bouteillesdans le tiroir _ ordures ne se
briseront pas toujours durant le premier
cgcle.Leverrequi sebriseet le bruit qui g
est associ@peuvent se produire plusieurs
cgclesplustard selonle tgpe et levolume
desd@chets.
• Lorsque les bouteilles et lescannettes
sont compact_es, le sacpourrait se
d_chirerun peu. Celaest normal et
n'affecte aucunement le rendement de
I'appareil.Gardezle sac loin de votre corps
pour @vitertoute blessured'objets coupants
qui pourraient avoirtransperc@le sac.
A MISE EN GARDE:
• Ne pressezpas trop en tournant le
bouton. Lebouton devrait toujours tourner
facilement. Forcerpourrait briser le bouton
et endommager I'interrupteur.
• Envidant les paniers de d_chets dans le
tiroir 6 ordures, certains articles peuvent
tomber derriere le tiroir. Cesarticles
pourraient emp@cherletiroir de sefermer
compl@tementetainsi emp@cherle
compacteur de fonctionner. Pour lesretirer
de I'arri@redu tiroir,ouvrez le tiroir et
retirez-le pour lesenlever.Consultez
la section Entretienet nettogoge.
Pour arr@terle compacteur :
Lecompacteur peut _tre arr_t_en tout temps.
[_ Essagerd'ouvrir le tiroir tandis que
le coulisseaused_place arr_tera le
coulisseau.L'interrupteur de s_curit_
s'activera.
I-_ Fermezenti_rement letiroir et le
_he_J
coulisseaureviendra _ la position vers
le HAUT.
I_] Ouvrezenti_rement letiroir et tournez
le bouton 6 OFF(arr_t).
6
Retrait d'un sac plein d'ordures m@nag@res
[_ Ouvrezcompl_tement le tiroir, r4]
[_ Retirezledessusdu sac desboutons
de retenue du sac. Poussezlesquatre
reversdu sac.
Sortez le sacavecle chariot du sac.
r3] Poussezle verrou de c6t_ vers le bas
et penchez le c6t_ du tiroir pour ouvrir.

Entretienet nettoyage du compacteur, www.electromenogersge.co
Comme pour la plupart des appareils dectrom4nagers, il lout un ban entretien pour une satisfaction continue. Avant de
nettoyer le compacteur, toumez le bouton _ la position OFF (arr@t)et enlevez-le. Si vous pr@voyezd'etre absent pendant
quelques jours, retirez le sac du compacteur. Verrouillez le compacteur en retirant le bouton et rangez-le en lieu sot.
Nettoyage de I'appareil
Pour nettoyer I'ext_rieur:
Essugezlessurfaces @I'aided'un chiffon
propre et humide.
Panneau×peints :
Appliquezun peu de poli pour
@lectrom@nagersIorsque le compacteur est
neuf, et ensuite _ plusieursreprises pendant
I'ann@e.
Panneaux en acier ino×ydable :
Vouspouvez nettoger lespanneaux enacier
inoxgdable avec leproduit nettogant Cerama
BrgteMDou un produit similaire et un chiffon
doux et propre.
Vouspouvezvous procurer le nettogant
Cerama Brgteau servicedes pi@cesdeGE
en composant le _0.626.2002 (E.-U.)ou au
800.661.1616(Canada).
Pour nettoyer I'int_rieur du tiroir :
%
[]
Retirezle sac.Voir page 6.
Portezdes gants protecteurs. IIpourrait
y avoirdes morceaux de verre duns
le tiroir.Enfoncezleverrou de porte
lat_rale.
Lavezavec un chiffon humide et de
_LLJ
I'eautilde savonneuse. Rincezet
ass_chezavec un chiffon doux.
%
%
Sile c6t_ du tiroir a _t_retire,remettez-le
en position pench_e.
Enfoncezle verrou de la porte lat_rale
en pressantle c6t_ _ la position
verticale. Verrouillezle verrou de porte
lat_rale.
Pournettoyer I'int_rieur de I'armoire :
[] Sortez letiroirjusqu'_ ce qu'il s'arr_te.
NotezlesrailsoOsed_placent les
roulettes du tiroir.
r2]
SoulevezI'avantpour d_gager les
buttes du tiroir.Agrippezle tiroir des
deux c6t_s. Sortez-lejusqu'au bout et
mettez-le de c6t_.
%
Tenezle verrou de porte lat_rale et
penchez le c6t_ du tiroirjusqu'6 ce que
leverrou d@gageI'avantdu tiroir. Lec6t_
du tiroir se retireen le penchant et le
glissantpour le sortir.
%
r@]
PassezI'aspirateur@I'int@rieurde
I'armoire.Nettogez @la main les
d@versementsliquidesou lesd@chets
humides ou passezun aspirateur conqu
pour ramasser le liquide.
/
Lavez,rincez et ass@chezI'int@rieur.

Avant d'appeler un r parateur...
_ Conseils de d@ponnoge
Probl_me Cause Possible Quoi faire
Le compacteur ne Le compacteur est bloqu_ • Assurez-vous que le cordon est bien branch_ dons
fonctionne pas une prise sous tension.
Le fusible est grill_ ou • V_rifiezlesfusiblesou lesdisjoncteurs. Remplucezlefusible
le disjoncteur est d_clench_ ou r_enclenchezle disjoncteur.
Le bouton de I'interrupteur • Assurez-vousque I'interrupteur est 6 Ioposition ON
pourrait ne pus _tre 6 la (marche).
position ON(marche)
La p_dale n'a peut-6tre pas • Soulevezla p_dale momentan_mentjusqu'6 ce que
_t_ soulev_e pendant assez lecycle decompactage d_bute.
Iongtemps pour amorcer le cycle
Letiroir n'est peut-6tre pasferm_ • Assurez-vousque le tiroir est bien ferm&
Le moteur du compacteur
comporte un m_canisme
de protection thermique
qui se remet en marche
automatiquement
• Si vous uvez compuct_ plusieurs fois en peu temps,
cette protection pourruit uvoir ferm_ le moteur.
Attendez quelques minutes et le moteur se remettru
en murche uutomatiquement.
Le tiroir est difficile Des ordures pourraient _tre • Retireztoutes les ordures.
6 fermer tomb_es derri6re le tiroir
Le tiroir ne s'ouvre pos Le coulisseau n'est pas 6 • Soulevez la p_dale et rel6chez-la pour permettre au
la fin de sa course coulisseau de terminer son cgcle.
Peuou oucun
compoctoge apparent
Le tiroir n'est pas
assezrempli
• Letiroir doit _tre au moins 6 moiti@plein de d@chetsavant
que vous puissiezconstater un compactage des d@chets.
Lecoulisseaune se d@placepasjusqu'au bas. Lesordures
au bas du tiroir seront @crashesdurant lescgcles
subs_quents.
Des ordures sont coinc_es
entre le coulisseau et le panier
Retireztoutes lesordures.
8
La page charge ...
La page charge ...
La page charge ...
La page charge ...
-
 1
1
-
 2
2
-
 3
3
-
 4
4
-
 5
5
-
 6
6
-
 7
7
-
 8
8
-
 9
9
-
 10
10
-
 11
11
-
 12
12
-
 13
13
-
 14
14
-
 15
15
-
 16
16
-
 17
17
-
 18
18
-
 19
19
-
 20
20
-
 21
21
-
 22
22
-
 23
23
-
 24
24


GE GCG1580R0SS Le manuel du propriétaire
- Taper
- Le manuel du propriétaire
- Ce manuel convient également à
dans d''autres langues
- English: GE GCG1580R0SS Owner's manual
Documents connexes
-
GE ZCGP150RII-00 Le manuel du propriétaire
-
GE Profile UCG1680LSS Mode d'emploi
-
-
GE Profile Series ZCGS150LSS-00 Le manuel du propriétaire
-
GE ZCGS150 SS Manuel utilisateur
-
-
GE Profile Series GCG1500R0BB Manuel utilisateur
-
-
-
