Philips Blender HR1840 Manuel utilisateur
- Catégorie
- Fabricants de jus
- Taper
- Manuel utilisateur

HR1843, 1842, 1841, 1840

2
English Page 4
• Keep pages 3 and 46 open when reading these
operating instructions.
Français Page 10
• Pour le mode d'emploi: dépliez les pages 3 et
446.
Deutsch Seite 16
• Schlagen Sie beim Lesen der
Gebrauchsanweisung Seiten 3 und 46 auf.
Nederlands Pagina 22
• Sla bij het lezen van de gebruiksaanwijzing de
pagina's 3 en 46 op.
Italiano Pagina 28
• Prima di usare l'apparecchio, aprite le pagine 3
e 46 e leggete attentamente le istruzioni per
l'uso.
Español Página 34
• Desplegar las páginas 3 y 46 al leer las
instrucciones de manejo.
Português Página 40
• Durante a leitura do modo de emprêgo,
desdobre e verifique as pág. 3 e 46.

3
M
N
I
G
H
F
J
K
L
T
O
Q
S
B
A
R
E
C
D
P
1

4
Juice Extractor and Blender Combination: a unique combination of a blender and a juice extractor, which
offers the possibilities of both in one appliance. With the blender you can prepare delicious, healthy
cocktails, soups and sauces. With the juice extractor you can make fruit and vegetable juices according to
your own taste, that are 100% pure.
Juice Extractor and Blender Combination is very easy to use and easy to clean, especially if you follow
the instructions in this booklet.
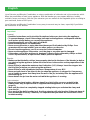
Important
General
• Read the instructions and look at the illustrations before you start using the appliance.
• To prevent damage, check if the voltage indicated on the appliance corresponds with the
local mains voltage before you connect the appliance.
• Keep the appliance out of the reach of children.
• Never let the appliance run unattended.
• Never use accessories or parts other than those specifically advised by Philips. Your
guarantee will become invalid if you use other parts or accessories.
• Do not clean the appliance, nor its accessories in the dishwasher.
• Never use the appliance if the mains cord, the plug or any other part is damaged.
• If the mains cord of this appliance is damaged, it must only be replaced by Philips or their
service representative, as special tools and/or parts are required.
Blender
• Make sure that the knife unit has been properly attached to the base of the blender jar before
you start using the appliance (follow the instructions in the section on the preparation of the
blender).
• Never fill the jar above the maximum level indication (1.5 l). Always insert the stopper into
the lid of the jar before you start using the appliance.
• Never fill the jar with ingredients that have a temperature of over 80°C.
• Never put your hand or an object in the jar when the appliance is plugged in. If necessary,
use a spatula to spoon food away form the wall of the jar, but always turn the appliance off
before doing so!
• Never detach the jar from the motor unit while the appliance is running.
Juice extractor
• Never put your hand and/or a kitchen utensil (e.g. fork, knife, spoon or spatula) in the
feeding tube. Only the pusher that is supplied with the appliance is to be used for this
purpose.
• Wait until the sieve has completely stopped rotating before you unfasten the clamp and
open the lid.
• As a result of the built-in safety lock, the juice extractor will only function if the parts have all
been assembled correctly. Therefore, it is important that you follow the instructions in this
booklet carefully.
English

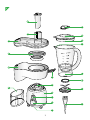
General description (see fig. 1)
A Driving shaft
B Motor unit
C Speed selector
with two speeds and pulse setting (M)
D Cord storage
E Quick Clean button
Blender
F Stopper
G Lid
H Opening for adding ingredients
I Spout
J Blender jar
K Rubber sealing ring
L Knife unit
Juice extractor
M Pusher
N Feeding tube
O Lid
P Sieve
Q Pulp container
R Clamp for (un)fastening the lid
S Juice cup
T Cleaning brush
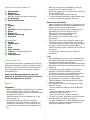
Built-in safety lock
The appliance has been equipped with a built-in
safety lock that prevents it from functioning if the
blender jar, the juice extractor or their lids have
been assembled incorrectly or have not been
assembled at all.
Please note that the blender jar, the juice
extractor or their lids should never be used to
switch the appliance on and off!
Blender
Preparation
- Wash all detachable parts before you use them
for the first time (see section on cleaning).
- Put the rubber sealing ring (K) around the edge
of the knife unit (fig. 2).
- Attach the knife unit to the blender jar (J) by
turning it (fig. 3).
- Mount the blender jar with the knife unit
attached to it onto the motor unit and fix it by
turning it to the left (fig. 4). Be careful not to
exert too much pressure on the handle of the
jar.
- After you have put the ingredients in the jar,
press the lid (G) into place (fig. 5).
- Place the stopper (F) in the lid and turn it until it
is firmly fixed (fig. 6).
- Put the mains plug in the wall socket.
• To disassemble the blender, follow these steps
in reverse order and opposite direction.
How to use the blender
- Make sure that the appliance is plugged in and
that the blender jar has been properly attached
before you switch the appliance on.
- Select the speed that is most suitable for the
ingredients you want to process (fig. 7):
1 for light processing of mainly liquid
ingredients, e.g. chocolate milk.
2 for heavy processing of mainly solid
ingredients
• If you are not sure which speed to select, you
can always use the highest speed (speed 2).
- To let the appliance run for only a few moments
at a time, set the switch to position M and
release it straight away. Repeat this as often as
necessary.
- To switch the motor off, set the switch to
position O.
Tips
• Liquid ingredients (e.g. oil) can be poured into
the blender jar while the appliance is running
through the opening in the stopper.
• Ingredients can be added into the blender while
the motor is running through the opening in the
lid (fig. 8).
• The longer you let the appliance run (max. 3
minutes), the finer the blending result will
usually be. However, dry ingredients must not
be processed for more than one minute.
• Cut meat and other solid ingredients into small
pieces before you put them in the blender.
• Solid ingredients must be processed in small
amounts at a time.
• If the appliance isn’t processing fast enough,
switch it off and
- set the appliance briefly to position M a few
times or
- switch the appliance off and stir the
ingredients with a spatula or
- pour out part of the contents of the jar.
• To grind ice cubes, drop them onto the rotating
knives through the opening in the lid.
• To make tomato juice, cut the tomatoes in four
and drop the pieces onto the rotating knives
through the opening in the lid.
5

Juice extractor
Preparation
- Wash all detachable parts before you use them
for the first time (see section on cleaning).
- Put the pulp container (Q) on the motor unit and
turn it to the left until it is firmly fixed (fig. 9).
- Insert the sieve (P) (fig. 10).
- Put the lid (O) in place and finally fasten the
clamp (R) by pushing it down (fig 11 a,b,c,d).
Make sure that the clamp is on the right side of
the motor unit. Check if the lid is properly
assembled and fastened.
- Put the juice cup (S) in place (fig. 12).
- Put the plug in the socket.
• To disassemble the juice extractor, follow
these steps in reverse order and opposite
direction. So first unfasten the clamp, then
remove the lid and the sieve and finally the
white pulp container.
How to use the juice extractor
- Wash the fruits and/or vegetables and cut them
into pieces that fit into the feeding tube.
- Switch the appliance on. We advise you to
select speed 1 for most types of fruit. However,
select speed 2 for beetroots and coconut flesh
(very hard).
- Put the pieces in the feeding tube and push
them down gently with the pusher (fig. 13 a,b).
Don’t exert too much pressure on the pusher,
since this would affect the quality of the end
result and it could even cause the sieve to come
to a halt.
If no more juice comes out of the appliance:
- Switch the appliance off (position O) and wait
until the sieve has completely stopped rotating.
- Remove the juice cup (fig.15).
- Drink the juice right after you have extracted it.
If it is exposed to air for some time, the juice will
lose its nutritional value and its taste. If you
want to preserve the juice, put it in a well-sealed
jug or jar and put it in the refrigerator. The juice
will then keep for max. 24 hours.
- To obtain even the last drops of juice, put the
juice cup back in the juice extractor and switch it
on again.
If the pulp container is full:
- Switch the appliance off (position O) and wait
until the sieve has completely stopped rotating.
- Unfasten the clamp and remove the lid (fig. 14).
- Remove the sieve (fig. 16).
- Detach the pulp container from the motor unit
by turning it to the right and remove it (fig. 17).
- Empty the pulp container (fig. 18).
- Clean the sieve.
- Reassemble the juice extractor and switch it on
again.
If the juice cup is full:
- Switch the appliance off (position O) and wait
until the sieve has completely stopped rotating.
- Remove the juice cup (fig. 15 ) and empty it.
• The maximum content of the juice cup is 700
ml.
Tips
• Always use fresh fruits and vegetables; they
contain more juice.
• Very suitable for juice extraction are pineapples,
beetroots, apples, cucumbers, carrots, spinach,
melons, tomatoes, oranges and grapes.
• Firm fruits that contain a lot of starch, such as
bananas, papayas, avocados, figs and
mangoes are not suitable for processing in the
juice extractor. Use the blender to process
these fruits.
• It is unnecessary to remove thin peels and
skins. Only thick peels (e.g. those of oranges,
pineapples or uncooked beetroots) need to be
removed.
• Leafs and leaf stalks of for instance lettuce can
also be processed in the juice extractor.
• If you want to extract the juice of oranges,
lemons, tangerines or grapefruits, peel the fruits
first and remove the white skin underneath
before you start processing, as this skin has a
bitter taste.
• Apple juice turns brown very quickly. You can
slow down this process by adding a few drops
of lemon juice.
• The pulp of carrots, beetroots, cabbage or
spinach can be used as the basis for soups,
sauces, jam, desserts, ice cream etc. Boil the
pulp and add some herbs. Puree the pulp in the
blender. You can use tomato pulp to make
tomato paste.
• Just try the following combinations of juices:
apple/carrot, orange/grape,
pineapple/grapefruit, carrot/beetroot,
carrot/melon and apple/orange.
Cleaning
General
• Do not clean the appliance or its parts in the
dishwasher.
• The motor unit can be cleaned with a soft, moist
cloth. Never immerse the motor unit in water!
Do not use abrasives, scourers, alcohol etc.
• Clean the parts that have come into contact with
food immediately after use.
6

7
Cleaning the blender
- Assemble the blender jar properly (see section
on preparation of the blender). Pour lukewarm
water and some washing-up liquid into the
blender jar. Assemble the lid and the stopper.
- Press the Quick Clean button a number of times
to clean the jar quickly.
- Unplug the appliance.
- Remove the lid, the stopper, the blender jar and
the knife unit and rinse them with clean, hot
water.
- If you want to clean the blender more
thoroughly, remove the knife unit and clean all
parts separately. Be careful with the sharp
edges of the knife unit!
Cleaning the juice extractor
- Switch off and remove the mains plug from the
wall socket before cleaning.
- Remove the lid, the pulp container and the
sieve. Rinse them immediately after use.
- You can use the brush to clean the sieve.

Using vegetable/fruit pulp from the juice
extractor:
M Savoury cakes
Ingredients:
250 gr vegetable pulp (particularly suitable are
cabbage, celery or celeriac, tomatoes, carrots,
onions, peppers, leeks, spinach and fennel)
100 gr breadcrumbs
2 eggs
2 tbsp tomato ketchup
1 tbsp chopped green herbs (e.g.
parsley/chives)
2 tsp sambal
50 gr grated mature cheese
salt
pepper
50 gr butter
Preparation:
Stir the tomato ketchup, chopped herbs, sambal
and cheese through the pulp. Put the pulp in a
bowl and mix with the breadcrumbs, the eggs and
some salt and pepper. Make 4 -5 flat cakes of the
mixture.
Heat the butter in a frying pan and fry the cakes
over moderate heat for approx. 5 minutes on each
side until they are brown and cooked.
Serve hot.
8
M Apple pancakes
Ingredients:
150 gr apple pulp
150 gr self-raising flour
2 eggs
approx. 100 ml milk
50 gr r aisins
50 gr dried apricots, cut into pieces
butter
sugar and cinnamon according to
taste
Preparation:
Stir the self-raising flour and the eggs through the
apple pulp. Add enough milk to make a fairly firm
mixture. Spoon the raisins and apricots through
the mixture.
Heat some butter in a frying pan. Put scoops of
the mixture into the frying pan at a small distance
from each other. Flatten the mixture into pancakes
and fry them over a moderate heat on both sides
until they are golden and cooked. Serve the
pancakes hot or cold and sprinkle them with sugar
and cinnamon according to taste.
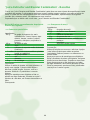
Recipes Juice Extractor and Blender Combination
This Juice Extractor and Blender Combination is a product with which you can experiment endlessly and
try out all kinds of recipes. You can make delicious juices, shakes, soups and sauces in no time at all. To
give you an idea of the possibilities, we have included a number of recipes which will certainly prove a
success. We wish you lots of fun experimenting with your new Juice Extractor and Blender Combination!

Fresh juices
M Vitamin drink
Ingredients for three glasses:
1 mango
1 banana
juice of 1 apple (washed), 1 kiwi fruit
and 1 orange
2 tsp honey (or more, according to taste)
300 ml buttermilk
Preparation:
Peel the kiwi fruit and the orange. Process them in
the juice extractor together with the apple. Peel
the mango and the banana and mix them in the
blender together with the fruit juice, the honey and
the buttermilk to create a delicious shake!
Tip: replace the buttermilk with quark or yoghurt to
create a tasty and healthy dessert.
M Ice-cold shake for a tropical day
Ingredients for two glasses:
1
⁄2 pineapple
2 apples
1 pink grapefruit
ice cubes (approx. 2 full glasses)
Preparation:
Skin the pineapple and peel the grapefruit, rinse
the apples and cut everything into pieces. Process
them in the juice extractor and collect the juice.
Assemble the blender and put the ice cubes in the
blender jar. Crunch the ice at the highest setting
and add the fruit juice. You will have a delicious,
ice-cold fresh fruit shake that will quench your
thirst!
M Vegetable shake
Ingredients for one large serving:
200 ml carrot juice
1
⁄2 stalk of celery, cut into pieces
1 medium-sized tomato, peeled and cut
into pieces
1
⁄2 small green or red pepper, cut into
pieces
small handful of fresh spinach or
several sprigs of parsley
2 or 3 ice cubes
1 long, thin stalk of celery for
garnishing
Preparation:
Process 6 to 8 carrots in the juice extractor.
Assemble the blender accessory. Put the carrot
juice, the vegetables and the spinach or the
parsley in the blender and mix for 15-30 seconds
at maximum speed. Add the ice cubes and blend
for a few more seconds. Pour the shake into a tall
glass and garnish with a long, thin stick of celery.
M Gazpacho blanco
Ingredients for 4 servings:
500 gr seedless white grapes
2 cucumbers (approx. 750 gr)
1 shallot, cut into pieces
1 clove garlic, chopped
1
⁄4
tsp salt
1
⁄4
tsp white pepper
500 ml low-fat yoghurt
6-8 drops of Tabasco
Preparation:
Wash the grapes and remove their stalks. Process
them in the juice extractor and collect the juice.
Assemble the blender accessory. Put the grape
juice in the blender. Peel the cucumber, halve it
lengthwise and remove the seeds. Cut the
cucumber into thick slices and add these slices to
the grape juice in the blender. Add the shallot, the
garlic, the salt and the pepper and run the
machine briefly. Pour the mixture into a bowl and
stir the yoghurt and Tabasco through it.
Chill the soup by putting it in a covered bowl in the
refrigerator for 30 minutes. Serve in large soup
bowls and garnish with cucumber slices and
halved grapes.
9

10
Juice Extractor and Blender Combination associe idéalement un bol mélangeur et une centrifugeuse pour
vous faire bénéficier des avantages de deux appareils en un seul produit. Grâce au bol mélangeur fruits
et légumes, vous pourrez préparer des cocktails, des soupes et des sauces à la fois succulents et
diététiques. Grâce à la centrifugeuse, vous pourrez réaliser des jus de fruits et de légumes 100 %
naturels.
Juice Extractor and Blender Combination est très facile à utiliser et à nettoyer, notamment si vous suivez
les instructions du mode d’emploi.
Important
Généralités
• Lisez soigneusement les instructions en vous aidant des illustrations avant la première mise
en service de l’appareil.
• Pour éviter tout incident, avant de brancher l’appareil vérifiez que la tension indiquée sur
l’appareil correspond bien à celle de votre secteur.
• Tenez l’appareil hors de portée des enfants.
• Ne laissez jamais l’appareil sous tension sans surveillance.
• N’utilisez jamais d’accessoires ou d’éléments autres que ceux indiqués par Philips. Si vous
utilisez d’autres accessoires ou éléments, la garantie risque de ne plus être assurée.
• Ne lavez pas l’appareil ni ses accessoires dans le lave-vaisselle.
• N’utilisez jamais l’appareil si le cordon d’alimentation, la prise ou toute autre partie est
endommagé.
• Si le cordon secteur de votre appareil est endommagé, il doit impérativement être remplacé
par un réparateur indépendant agréé Philips car des équipements et des composants
spécifiques sont exigés.
Bol mélangeur fruits et légumes
• Assurez-vous que l’ensemble couteau est correctement fixé sur la base du bol mélangeur
avant d’utiliser l’appareil (suivez les instructions de la partie intitulée préparation du bol
mélangeur fruits et légumes).
• Ne remplissez jamais le bol au-dessus du niveau maximal indiqué (1,5l). Fixez toujours le
bouchon sur le couvercle du bol avant chaque utilisation.
• Ne remplissez jamais le bol avec des ingrédients ayant une température supérieure à 80°C.
• N’introduisez jamais votre main ou un objet dans le bol lorsque l’appareil est branché. Le cas
échéant, utilisez une spatule pour détacher les aliments des parois du bol mais pour ce faire,
mettez toujours l’appareil hors tension.
• Ne détachez jamais le bol du bloc moteur lorsque l’appareil fonctionne.
Centrifugeuse
• N’introduisez jamais votre main et/ou un ustensile de cuisine (par exemple : une fourchette,
un couteau, une cuillère, une spatule) dans la cheminée. Utilisez uniquement le poussoir
fourni à cet effet.
• Attendez l’arrêt complet du tamis avant de déverrouiller et d’ouvrir le couvercle.
• Grâce au système de verrouillage de sécurité intégré, la centrifugeuse fonctionne seulement
si toutes les parties sont correctement assemblées.
• Dans tous les cas suivez impérativement les instructions citées dans ce mode d’emploi.
Français

Description générale (fig. 1)
A Arbre moteur
B Bloc moteur
C Sélecteur de vitesse
deux vitesses possibles et marche
intermittente (M)
D Enrouleur de cordon
E Bouton de nettoyage rapide
Bol mélangeur fruits et légumes
F Bouchon
G Couvercle
H Ouverture pour ajouter des ingrédients
I Bec verseur
J Bol mélangeur
K Joint d’étanchéité
L Ensemble couteau
Centrifugeuse
M Poussoir
N Cheminée
O Couvercle
P Collerette (2)
Q Cuve
R Fixation pour (dé)verrouiller le couvercle
S Récipient
T Brosse de nettoyage
Verrouillage de sécurité intégré
Cet appareil est équipé d’un système de
verrouillage de sécurité qui l’empêche de
fonctionner si le bol mélangeur, la centrifugeuse
ou leurs couvercles respectifs ne sont pas
assemblés correctement.
Veuillez noter que le bol mélangeur, la
centrifugeuse ou leurs couvercles respectifs
ne doivent jamais être utilisés pour mettre
l’appareil sous tension ou hors tension.
Bol mélangeur fruits et légumes
Préparation
- Lavez tous les éléments détachables avant la
première utilisation (reportez-vous à la partie
intitulée nettoyage).
- Placez le joint d’étanchéité (K) autour de
l’ensemble couteau (fig.2).
- Fixez l’ensemble couteau en la tournant (fig.3)
sur le bol mélangeur (J).
- Installez le bol mélangeur équipé de l’ensemble
couteau sur le bloc moteur et fixez-le en tournant
dans le sens inverse des aiguilles d’une montre
(fig.4). Veillez à ne pas exercer une pression
trop forte sur la poignée du bol.
- Après avoir mis les ingrédients dans le bol,
appuyez sur le couvercle (G) pour le mettre en
place (fig.5).
- Fixez le bouchon (F) sur le couvercle puis
tournez-le jusqu’au verrouillage complet (fig.6).
- Branchez la fiche dans la prise murale.
• Pour démonter le bol mélangeur fruits et
légumes, suivez les instructions ci-dessus en
sens inverse.
Utilisation du bol mélangeur fruits et légumes
- Branchez l’appareil et vérifiez que le bol
mélangeur est correctement assemblé avant de
mettre l’appareil sous tension.
- Sélectionnez la vitesse appropriée aux
ingrédients que vous voulez utiliser (fig.7).
Réglez sur :
1 pour mélanger des ingrédients liquides,
tels que du lait chocolaté.
2 pour mixer des ingrédients solides.
• Si vous ne savez pas quelle vitesse utiliser, vous
pouvez toujours sélectionner la vitesse la plus
élevée (vitesse 2).
- Si vous désirez faire fonctionner l’appareil par
intermittence, placez le sélectionneur de vitesse
sur M et relâchez-le immédiatement.
Recommencez cette étape aussi souvent qu’il le
faut.
- Pour mettre l’appareil hors tension, placez
l’interrupteur sur O.
Conseils d’utilisation
• Les ingrédients liquides (l’huile, par exemple)
peuvent être versés dans le bol mélangeur
lorsque l’appareil fonctionne par l’ouverture du
bouchon.
• Des ingrédients peuvent être ajoutés dans le bol
mélangeur fruits et légumes lorsque le moteur
fonctionne par l’ouverture du couvercle (fig. 8).
• Plus vous laissez fonctionner l’appareil
(maximum 3 minutes), plus les ingrédients sont
mixés finement. Cependant, les ingrédients secs
ne doivent pas être mixés plus d’une minute.
• Coupez la viande et les autres ingrédients
solides en petits morceaux avant de les
introduire dans le bol mélangeur fruits et
légumes.
• Les ingrédients solides doivent être mixés par
petites quantités.
• Si l’appareil ne fonctionne pas assez vite, vous
pouvez soit :
- régler l’appareil sur M pendant quelques
instants ou
- mettre l’appareil hors tension et mélanger les
ingrédients à l’aide d’une spatule ou
- mettre l’appareil hors tension et retirer une
partie du contenu du bol.
11

• Pour piler de la glace, versez les cubes de glace
à travers l’ouverture du couvercle sur la lame en
rotation.
• Pour faire du jus de tomate, coupez les tomates
en quatre et introduisez-les dans le bol à travers
l’ouverture du couvercle.
Centrifugeuse
Préparation
- Lavez tous les éléments détachables avant la
première utilisation (reportez-vous à la partie
intitulée nettoyage).
- Fixez la cuve (Q) sur le bloc moteur en la
tournant dans le sens contraire des aiguilles
d’une montre jusqu’au verrouillage complet
(fig.9).
- Placez le tamis (P) (fig.10).
- Posez le couvercle (O) et enfin verrouillez la
fixation (R) en la rabattant vers le bas (fig.11
a, b, c, d). Veillez à placer la fixation du côté
droit du bloc moteur. Vérifiez que le couvercle
est correctement placé et verrouillé.
- Placez le récipient (S) (fig.12).
- Branchez la fiche dans la prise murale.
• Pour démonter le bol mélangeur fruits et
légumes, suivez les instructions ci-dessus en
sens inverse. Par conséquent, déverrouillez
d’abord la fixation, puis retirez le couvercle, le
tamis et finalement la cuve de couleur blanche.
Utilisation de la centrifugeuse
- Lavez les fruits et/ou les légumes et coupez-les
en morceaux de telle sorte qu’ils puissent entrer
par la cheminée.
- Mettez l’appareil sous tension. Nous vous
conseillons de choisir la vitesse 1 pour la plupart
des fruits. Cependant, sélectionnez la vitesse 2
pour les betteraves et les noix de coco,
ingrédients particulièrement durs.
- Introduisez les morceaux dans la cheminée et
appuyez légèrement à l’aide du poussoir (fig.13
a,b). N’appuyez pas trop fort sur le poussoir car
cela pourrait affecter la qualité de la préparation
et le résultat final, et pourrait même entraîner
l’arrêt du tamis.
Lorsque l’appareil n’extrait plus de jus :
- Mettez l’appareil hors tension (position O) et
attendez l’arrêt complet du tamis.
- Retirez le récipient (fig.15).
- Buvez le jus aussitôt pour qu’il ne perde rien de
son goût ni de ses qualités nutritives en restant
exposé à l’air trop longtemps. Si vous désirez
conserver le jus, versez-le dans une bouteille ou
un pot hermétique que vous rangerez dans le
réfrigérateur. Le jus peut se conserver ainsi
pendant 24 heures au maximum.
- Pour extraire les dernières gouttes de jus, placez
à nouveau le récipient sur la centrifugeuse et
mettez l’appareil sous tension.
Lorsque la cuve est pleine :
- Mettez l’appareil hors tension (position O) et
attendez l’arrêt complet du tamis.
- Déverrouillez la fixation et retirez le couvercle
(fig.14).
- Retirez le tamis (fig.16).
- Détachez la cuve du bloc moteur en la tournant
dans le sens des aiguilles d’une montre et
retirez-la (fig.17).
- Videz la cuve (fig.18).
- Nettoyez le tamis.
- Assemblez à nouveau les éléments de la
centrifugeuse et mettez l’appareil sous tension.
Lorsque le récipient est plein :
- Mettez l’appareil hors tension (position O) et
attendez l’arrêt complet du tamis.
- Retirez le récipient (fig.15) et videz-le.
• Le récipient a une contenance maximale de 700
ml.
Conseils d’utilisation
• Utilisez toujours des fruits et des légumes frais
car ils contiennent davantage de jus.
• Les fruits et légumes suivants donnent plus
particulièrement de jus : les ananas, les
betteraves, les pommes, les concombres, les
carottes, les épinards, les melons, les tomates,
les oranges et le raisin.
• Les fruits fermes qui contiennent beaucoup
d’amidon, tels que les bananes, les papayes, les
avocats, les figues et les mangues ne peuvent
pas être centrifugés avec succès. Il convient
donc d’utiliser le bol mélangeur fruits et légumes.
• Il n’est pas nécessaire de retirer les peaux fines.
Il faut peler uniquement les peaux épaisses (par
exemple celle des oranges, des ananas ou des
betteraves crues).
• Les queues des fruits et les feuilles de salade
par exemple peuvent être centrifugées.
• Si vous désirez extraire le jus d’oranges, de
citrons de mandarines ou de pamplemousses,
pelez tout d’abord les fruits et retirez la peau
blanche qui les recouvre avant de les centrifuger
car elle a un goût amer.
• Le jus de pommes s’oxyde très rapidement.
Vous pouvez ralentir cette oxydation en ajoutant
quelques gouttes de citron.
• La pulpe des carottes, des betteraves, du chou
ou des épinards peut servir de base à de
nombreuses soupes, sauces, confitures,
desserts, crèmes glacées, etc. Faites bouillir la
12

13
pulpe et ajoutez-y quelques fines herbes.
Transformez la pulpe en purée dans le bol
mélangeur fruits et légumes. Vous pouvez
utiliser de la pulpe de tomates pour obtenir du
concentré de tomates.
• Essayez les mélanges de fruits suivants :
pomme/carotte, orange/raisin,
ananas/pamplemousse, carotte/betterave,
carotte/melon et pomme/orange.
Nettoyage
Généralités
• Ne lavez pas l’appareil ni ses accessoires dans
le lave-vaisselle.
• Le bloc moteur peut se nettoyer avec un chiffon
doux et humide. Ne plongez jamais le bloc
moteur dans l’eau. N’utilisez pas d’abrasif, de
produit à récurer, d’alcool, etc.
• Nettoyez les éléments de l’appareil qui ont été
en contact avec les aliments immédiatement
après usage.
Nettoyage du bol mélangeur fruits et légumes
- Assemblez le bol mélangeur correctement (voir
la partie relative à la préparation du bol
mélangeur fruits et légumes). Versez de l’eau
tiède additionnée d’un peu de liquide vaisselle
dans le bol mélangeur. Placez le couvercle et le
bouchon.
- Appuyez sur le bouton de nettoyage rapide
plusieurs fois pour nettoyer le bol mélangeur
rapidement.
- Retirez la fiche de la prise murale.
- Retirez le couvercle, le bouchon, le bol
mélangeur et l’ensemble couteau, puis rincez-les
avec de l’eau chaude et propre.
- Si vous désirez nettoyer davantage le bol mélan-
geur fruits et légumes, retirez l’ensemble cou-
teau et nettoyez tous les éléments séparément.
Manipulez la lame aiguisée avec précaution.
Nettoyage de la centrifugeuse
- Avant de nettoyer l'appareil arrêtez-le et
débranchez la fiche de la prise de courant
- Retirez le couvercle, le bol et le tamis. Rinsez-
les immédiatement après usase .
- Vous pouvez utiliser la brosse pour nettoyer le
tamis.

Utilisez la chair de légumes et la pulpe de
fruits centrifugés.
M Petits gâteaux de légumes
Ingrédients :
250 g de chair de légumes (les légumes
suivants sont particulièrement
recommandés : le chou, le céleri ou
céleri-rave, les tomates, les carottes,
les oignons, les poivrons, les
poireaux, les épinards et le fenouil).
100 g de chapelure
2 œufs
2 cuillères à soupe de ketchup
1 cuillère à soupe de fines herbes
(persil/ciboulette haché, par exemple)
50 g de fromage râpé
sel
poivre
50 g de beurre
Préparation :
Ajoutez le ketchup, les fines herbes hachées et le
fromage à la chair de légumes tout en remuant.
Versez le mélange dans un bol et mixez en
ajoutant la chapelure, les œufs, un peu de sel et
de poivre. Fabriquez 4 ou 5 galettes avec le
mélange obtenu.
Faites fondre le beurre dans une poêle et faites
frire les galettes à feu moyen, en comptant
environ 5 minutes par face, jusqu’à ce qu’elles
soient dorées et cuites.
Servez chaud.
M Galettes de pommes
Ingrédients :
150 g de pulpe de pomme
150 g de farine pour gâteaux
2 œufs
environ 100 ml de lait
50 g de raisins secs
50 g d’abricots séchés et coupés en
morceaux
beurre
sucre et cannelle, selon votre goût
Préparation :
Mélangez la farine et les œufs avec la pulpe de
pommes tout en remuant. Ajoutez une quantité
suffisante de lait pour réaliser un mélange
relativement ferme. Ajoutez les raisins secs et les
morceaux d’abricot à l’aide d’une cuillère.
Faites fondre un peu de beurre dans une poêle.
Mettez des cuillerées du mélange dans la poêle à
une courte distance les unes des autres.
Fabriquez des galettes en tassant le mélange et
faites frire les deux faces à feu moyen jusqu’à ce
qu’elles soient dorées et cuites.
Servez les galettes chaudes ou froides et
saupoudrez-les avec du sucre et de la cannelle
selon votre goût.
14
Livre de recettes Juice Extractor and Blender Combination
Avec Juice Extractor and Blender Combination, vous allez pouvoir essayer toutes sortes de recettes.
Vous pourrez réaliser rapidement des cocktails, des milk-shakes, des soupes et des sauces succulentes.
Pour vous donner une idée des multiples possibilités de Juice Extractor and Blender Combination, nous
vous proposons un certain nombre de recettes faciles à réaliser.

Cocktails
M Boissons vitaminées
Ingrédients pour trois verres :
1 mangue
1 banane
jus d’1 pomme (lavée), 1 kiwi et 1
orange
2 cuillères à café de miel (ou plus selon
votre goût)
300 ml de babeurre
Préparation :
Epluchez le kiwi et l’orange. Passez-les dans la
centrifugeuse avec la pomme. Epluchez la
mangue et la banane et mixez-les avec le jus de
fruits, le miel et le babeurre pour réaliser un
délicieux milk-shake !
Conseil : pour obtenir un dessert à la fois
savoureux et nutritif, remplacez le babeurre par du
yaourt ou du quark.
M Milk-shake tropical
Ingrédients pour deux verres :
1
⁄2
ananas
2 pommes
1 pamplemousse rose
cubes de glace (l’équivalent de 2
verres pleins)
Préparation :
Epluchez l’ananas et le pamplemousse, rincez les
pommes et coupez tous les ingrédients en
morceaux. Passez-les dans la centrifugeuse et
récupérez le jus.
Montez le mixeur et mettez les cubes de glace
dans le bol mixeur. Mixez les cubes de glace à la
vitesse la plus élevée et ajoutez le jus de fruit.
Vous obtenez un délicieux milk-shake de fruits
glacé qui désaltère.
M Milk-shake aux légumes
Ingrédients pour un grand verre
200 ml de jus de carotte
1
⁄2 branche de céleri, coupée en
morceaux
1 tomate de taille moyenne, pelée et
coupée en morceaux
1
⁄2 poivron rouge ou vert, coupé en
morceaux
une petite poignée d’épinards frais ou
plusieurs brins de persil
2 ou 3 cubes de glace
1 longue branche fine de céleri pour la
garniture
Préparation :
Passez 6 à 8 carottes dans la centrifugeuse.
Montez le mixeur. Mettez le jus de carotte, les
légumes et les épinards ou le persil dans le bol
mixeur et mixez pendant 15-30 secondes à la
vitesse maximale. Ajoutez les cubes de glace et
mélangez pendant quelques secondes encore.
Versez le mélange obtenu dans un grand verre et
décorez avec une longue branche fine de céleri.
M Gaspacho blanco
Ingrédients pour 4 personnes :
500 g de raisons blancs sans pépins
2 concombres (750 g environ)
1 échalote coupée en morceaux
1 gousse d’ail haché
1
⁄4
de cuillère à café de sel
1
⁄
4 de cuillère à café de poivre blanc
500 ml de yaourt maigre
6-8 gouttes de Tabasco
Préparation
Lavez les raisins et enlevez leur queue. Passez-
les dans la centrifugeuse et récupérez le jus.
Montez le mixeur. Versez le jus de raisin dans le
bol mixeur. Epluchez le concombre, coupez-le en
deux dans le sens de la longueur et enlevez les
pépins. Coupez le concombre en morceaux épais
et ajoutez ces derniers au jus de raisin dans le
mixeur. Ajoutez l’échalote, l’ail, le sel, le poivre, et
faites tourner la machine pendant un court instant.
Versez le mélange dans un bol et ajoutez le
yaourt et le Tabasco tout en remuant. Mettez la
soupe au frais pendant 30 minutes dans un
récipient recouvert. Servez dans de grands bols et
garnissez avec des morceaux de concombre et
des raisins coupés en deux.
15

16
Juice Extractor and Blender Combination ist eine einzigartige Kombination von Mixer und Entsafter in
einem einzigen Gerät. Mit dem Mixer-Aufsatz bereiten Sie köstliche und gesunde Cocktails, Suppen und
Soßen. Mit dem Entsafter-Aufsatz machen Sie 100%ig reine Frucht- und Obstsäfte nach eigenem
Geschmack.
Juice Extractor and Blender Combination ist leicht zu verwenden und zu reinigen. Befolgen Sie nur die
vorliegenden Anweisungen.
Wichtig
Allgemeines
• Lesen Sie die Gebrauchsanweisung sorgfältig durch und sehen Sie sich dabei die
Abbildungen an, bevor Sie das Gerät zum ersten Mal verwenden.
• Prüfen Sie vor Gebrauch, ob die Spannungsangabe auf dem Typenschild mit der örtlichen
Netzspannung übereinstimmt.
• Achten Sie darauf, daß Kinder nicht mit dem Gerät hantieren.
• Lassen Sie das Gerät während des Betriebs nicht unbeaufsichtigt.
• Versuchen Sie niemals, Geräteteile anderer Hersteller zu verwenden, die nicht ausdrücklich
von Philips empfohlen werden. Die Garantie wird dadurch hinfällig.
• Das Gerät, seine Teile und das Zubehör sind nicht für den Geschirrspüler geeignet.
• Verwenden Sie das Gerät nicht, wenn das Netzkabel, der Stecker oder andere Teile
beschädigt sind.
• Wenn das Netzkabel defekt oder beschädigt ist, muß es von einer durch Philips autorisierten
Werkstatt ersetzt werden, da für die Reparatur Spezial-Werkzeug und/oder spezielle Teile
benötigt werden.
Mixer-Aufsatz
• Achten Sie darauf, daß die Messereinheit ordnungsgemäß mit dem Mixbecher verbunden ist,
bevor Sie das Gerät verwenden. Vgl. den Abschnitt “Der Mixer-Aufsatz, Vorbereitung zum
Gebrauch”.
• Füllen Sie den Mixbecher niemals höher als bis zur Markierung 1,5 l. Setzen Sie stets den
Sicherheitsverschluß in den Deckel, bevor Sie das Gerät einschalten.
• Füllen Sie keine Zutaten in den Mixbecher, die heißer sind als 80° C.
• Stecken Sie niemals Ihre Finger oder irgendwelche Gegenstände, in den Mixbecher. Haben
sich Zutaten an den Wänden des Mixbechers angesammelt, so schalten Sie das Gerät aus
und schieben erst dann den Inhalt mit dem Spatel zur Mitte hin.
• Lassen Sie das Gerät stets zum Stillstand kommen, bevor Sie den Mixbecher abnehmen.
Entsafter-Aufsatz
• Stecken Sie niemals Ihre Finger oder irgendwelche Küchengeräte wie Messer, Gabel, Löffel
oder Spatel in den Einfüllstutzen. Benutzen Sie hierzu nur den mitgelieferten Stopfer.
• Lassen Sie das Raspelsieb stets zum völligen Stillstand kommen, bevor Sie die Verriegelung
und den Deckel öffnen.
• Zu Ihrer Sicherheit läßt sich das Gerät nur einschalten, wenn alle Teile ordnungsgemäß
zusammengesetzt sind. Darum ist es wichtig, daß Sie die Hinweise in dieser
Gebrauchsanweisung genau befolgen.
Deutsch

Allgemeine Beschreibung (Abb. 1)
A Antriebsachse
B Motorgehäuse
C Geräteschalter
Stufen 1 und 2, M = Momentschalter, 0 = Aus
D Kabelaufwicklung
E Schnellreinigungsschalter
Mixer-Aufsatz
F Sicherheitsverschluß
G Deckel
H Einfüllöffnung
I Ausguß
J Mixbecher
K Dichtungsring aus Gummi
L Messereinheit
Entsafter
M Stopfer
N Einfüllstutzen
O Deckel
P Raspelsieb
Q Tresterbehälter
R Verriegelung des Deckels
S Saftbehälter
T Reinigungsbürste
Die integrierte Sicherheitsverriegelung
Das Gerät ist mit einer Sicherheitsverriegelung
versehen und läßt sich nur dann einschalten,
wenn der Mixbecher oder der Entsafter mit dem
jeweiligen Deckel aufgesetzt sind.
Hinweis: Der Mixbecher und der Entsafter,
bzw. ihre Deckel, dürfen nicht verwendet
werden, um das Gerät ein- oder
auszuschalten!
Der Mixer-Aufsatz
Vorbereitung zum Gebrauch
- Reinigen Sie vor dem ersten Gebrauch alle
abnehmbaren Teile. Vgl. den Abschnitt
“Reinigen”.
- Setzen Sie den Dichtungsring (K) auf den Rand
der Messereinheit (Abb. 2).
- Schrauben Sie die Messereinheit mit einer
Drehung im Uhrzeigersinn auf das untere Ende
des Mixbechers (J) (Abb. 3).
- Setzen Sie den Mixbecher mit der
Messereinheit unter Drehen gegen den
Uhrzeigersinn auf das Motorgehäuse (Abb. 4).
Drehen Sie nicht zu stark am Griff des
Mixbechers.
- Füllen Sie die Zutaten ein, und setzen Sie den
Deckel (G) auf den Mixbecher (Abb. 5).
- Setzen Sie den Sicherheitsverschluß (F) in den
Deckel, und drehen Sie ihn fest (Abb. 6).
- Stecken Sie den Stecker in die Steckdose.
• Zum Auseinandernehmen verfahren Sie in
umgekehrter Reihenfolge und Richtung.
Der Gebrauch des Mixer-Aufsatzes
- Prüfen Sie, bevor Sie das Gerät einschalten, ob
der Stecker in der Steckdose ist und ob der
Mixer-Aufsatz korrekt aufgesetzt ist.
- Stellen Sie den Geräteschalter auf die
erforderliche Position (Abb. 7):
1 für schonende Verarbeitung, vor allem von
Flüssigkeiten,
2 für die Verarbeitung fester Zutaten.
• Verwenden Sie im Zweifelsfall die höhere
Geschwindigkeit (2).
- Schalten Sie kurz auf M, wenn Sie das Gerät
nur für einen Augenblick betreiben wollen. Sie
können diese Position bei Bedarf mehrmals
nacheinander verwenden.
- Schalten Sie den Motor aus, indem Sie den
Geräteschalter auf Position 0 stellen.
Hinweise
• Flüssige Zutaten, z.B. Öl zur Mayonnaise,
können Sie durch das Loch im
Sicherheitsverschluß des Deckels zufügen.
• Durch die Öffnung im Deckel lassen sich
Zutaten einfüllen, während sich die
Messereinheit dreht (Abb. 8).
• Im allgemeinen erhalten Sie ein feineres
Ergebnis, je länger Sie den Motor laufen lassen
(max. 3 Minuten).
• Schneiden Sie trockene und feste Zutaten in
kleine Stücke vor, und bearbeiten Sie sie in
kleinen Portionen jeweils nicht länger als 1
Minute.
• Wenn das Gerät nicht schnell genug arbeitet,
so ...
- schalten Sie einige Male kurz auf Position M
oder
- schalten Sie das Gerät aus, und rühren Sie die
Zutaten mit einem Spatel durch, oder
- gießen Sie einen Teil des Inhalts ab.
• Wollen Sie Eiswürfel zerkleinern, so lassen Sie
sie bei eingeschaltetem Gerät auf die rotierende
Messereinheit fallen.
• Zur Zubereitung von Tomatensaft schneiden
Sie die Tomaten in vier Teile und lassen diese
Stücke durch die Einfüllöffnung auf die
rotierenden Messer fallen.
17

Der Entsafter-Aufsatz
Vorbereitung zum Gebrauch
- Reinigen Sie vor dem ersten Gebrauch alle
abnehmbaren Teile. Vgl. den Abschnitt
“Reinigen”.
- Setzen Sie den Tresterbehälter (Q) mit einer
Drehung gegen den Uhrzeigersinn fest auf das
Motorgehäuse (Abb. 9).
- Setzen Sie das Raspelsieb (P) ein (Abb. 10).
- Setzen Sie den Deckel (O) auf und verriegeln
Sie ihn mit der Verriegelung (R), indem Sie
sie einhaken und hinunterdrücken (Abb. 11
a, b, c und d). Achten Sie darauf, daß die
Verriegelung sich auf der rechten Seite des
Motorgehäuses befindet. Prüfen Sie den
richtigen Sitz des Deckels.
- Setzen Sie den Saftbehälter (S) an seinen Platz
(Abb. 12).
- Stecken Sie den Stecker in die Steckdose.
• Um den Entsafter-Aufsatz
auseinanderzunehmen, verfahren Sie wie
oben beschrieben, nur in umgekehrter
Reihenfolge und Richtung. Lösen Sie zuerst
die Verriegelung, nehmen Sie dann den
Deckel ab, danach das Raspelsieb und
schließlich den weißen Tresterbehälter.
Der Gebrauch des Entsafters
- Waschen Sie das Obst und/oder das Gemüse,
und schneiden Sie es in Stücke, die durch die
Einfüllöffnung passen.
- Schalten Sie das Gerät ein. Für das meiste
Obst/Gemüse empfiehlt es sich, die Position 1
zu wählen; für härtere Zutaten, z.B. Rote Bete
und das Fleisch der Kokosnuß, wählen Sie
Position 2.
- Geben Sie die Stücke in den Einfüllstutzen und
drücken Sie sie mit dem Stopfer leicht an
(Abb. 13a und b). Drücken Sie sie nicht zu stark
an, sonst leidet die Qualität des Saftes. Es
könnte auch das Gerät zum Stillstand kommen.
Es kommt kein Saft mehr aus dem Gerät
- Schalten Sie das Gerät aus (Position O), und
warten Sie, bis das Raspelsieb zum Stillstand
gekommen ist.
- Nehmen Sie den Saftbehälter ab (Abb. 15).
- Trinken Sie den Saft möglichst sofort. Hat er
eine Weile an der Luft gestanden, verliert er an
Nährwert und an Geschmack. Wollen Sie den
Saft aufbewahren, so füllen Sie ihn in ein gut
verschlossenes Gefäß, und stellen Sie es in
den Kühlschrank. Dort bleibt der Saft ca. 24
Stunden gut genießbar.
- Stellen Sie den Saftbehälter zurück in das
Gerät, und schalten Sie es nochmals ein. So
kommen noch die letzten Tropfen heraus.
Der Tresterbehälter ist voll
- Schalten Sie das Gerät aus (Position O), und
warten Sie, bis das Raspelsieb zum Stillstand
gekommen ist.
- Lösen Sie die Verriegelung (Abb. 14), und
nehmen Sie den Deckel ab.
- Nehmen Sie das Raspelsieb ab (Abb. 16).
- Nehmen Sie den Tresterbehälter mit einer
Drehung im Uhrzeigersinn ab (Abb. 17)
- Leeren Sie den Tresterbehälter (Abb. 18).
- Reinigen Sie das Raspelsieb.
- Setzen Sie den Entsafter-Aufsatz wieder
zusammen, und schalten Sie das Gerät, falls
gewünscht, wieder ein.
Der Saftbehälter ist voll
- Schalten Sie das Gerät aus (Position O), und
warten Sie, bis das Raspelsieb zum Stillstand
gekommen ist.
- Nehmen Sie den Saftbehälter ab (Abb. 15), und
leeren Sie ihn.
• Der Saftbehälter faßt maximal 700 ml.
Hinweise
• Verwenden Sie nur frisches Obst bzw. Gemüse.
Sie erhalten dann mehr Saft.
• Besonders zu empfehlen sind Ananas, Äpfel,
Melonen, Orangen und Trauben bzw. Möhren,
Rote Bete, Tomaten, Gurken und Spinat.
• Stärkehaltige Früchte, z.B. Bananen, Papaya,
Avocado, Mango und Feigen, sollten mit diesem
Gerät nicht entsaftet werden. Verwenden Sie für
diese Früchte den Mixer-Aufsatz.
• Blätter und Strünke (z.B. von Kopfsalat) können
in diesem Gerät mitverarbeitet werden. Sie
brauchen nur Früchte mit dicken und harten
Schalen zu schälen, z.B. Orangen, Ananas und
rohe rote Bete.
• Wenn Sie Saft aus Zitrusfrüchten herstellen
wollen, so entfernen Sie zuerst den weißen
Anteil der Schalen, weil er sonst einen bitteren
Beigeschmack verursacht.
• Apfelsaft wird schnell braun. Geben Sie gleich
ein paar Tropfen Zitronensaft hinzu, um diesen
Vorgang zu verzögern.
• Der Trester von Möhren, roter Bete, Kohl und
Spinat läßt sich als Basis für Suppen, Saucen,
Desserts usw. verwenden. Kochen Sie den
Trester auf, und würzen Sie ihn. Aus
Tomatentrester können Sie Tomatenmark
herstellen.
• Versuchen Sie die folgenden Kombinationen
von Säften: Äpfel und Möhren, Orangen und
Trauben, Ananas und Grapefruit, Möhren und
Rote Bete, Möhren und Melone, Apfel und
Orange.
18

19
Reinigen
Allgemeines
• Ziehen Sie vor jeder Reinigung den Stecker aus
der Steckdose.
• Das Gerät und seine einzelnen Teile sind für
den Geschirrspüler nicht geeignet.
• Das Motorgehäuse kann mit einem feuchten
Tuch abgewischt werden. Verwenden Sie keine
Scheuermittel oder Lösungsmittel wie Alkohol
und Azeton. Tauchen Sie das Motorgehäuse
niemals in Wasser!
• Reinigen Sie alle Teile, die mit Lebensmitteln in
Berührung gekommen sind, sofort nach
Gebrauch.
Reinigen des Mixer-Aufsatzes
- Setzen Sie das Gerät so zusammen, wie im
Abschnitt “Vor dem Gebrauch” beschrieben.
Geben Sie lauwarmes Wasser, dem Sie ein
wenig Spülmittel zugefügt haben, in den
Mixbecher. Setzen Sie den Deckel mit dem
Sicherheitsverschluß auf.
- Drücken Sie einige Male den
Schnellreinigungsschalter (E), um den
Mixbecher schnell zu säubern.
- Ziehen Sie den Stecker aus der Steckdose.
- Nehmen Sie den Deckel mit dem
Sicherheitsverschluß, den Mixbecher und die
Messereinheit zum Reinigen ab. Spülen Sie mit
klarem, heißem Wasser nach.
- Wenn Sie den Mixer-Aufsatz gründlicher
reinigen wollen, so nehmen Sie den Aufsatz
auseinander, und reinigen Sie jedes einzelne
Teil für sich. Seien Sie vorsichtig im Umgang
mit den Schneiden der Messereinheit!
Reinigen des Entsafter-Aufsatzes
- Schalten Sie das Gerät vor jeder Reinigung
aus, und ziehen Sie den Stecker aus der
Steckdose.
- Nehmen Sie den Deckel, den Tresterbehälter
und das Raspelsieb ab, und reinigen Sie alles
unmittelbar nach dem Gebrauch.
- Zum Reinigen des Raspelsiebs können Sie die
mitgelieferte Reinigungsbürste verwenden.

Mit dem Mark von Gemüse/Obst aus dem
Entsafter hergestellt:
M Gemüsepuffer
Zutaten:
250 g Gemüsemark, besonders geeignet
sind: Kohl, (Knollen-) Sellerie,
Tomaten, Möhren, Zwiebel, Paprika,
Lauch, Spinat und Fenchel
100 g Semmelbrösel/Paniermehl
2 Eier
2 El Tomatenketchup
1 El gehackte frische Kräuter (Petersilie,
Schnittlauch)
2 Tl Sambal
50 g geriebener Käse
Salz
Pfeffer
50 g Butter
Zubereitung:
Rühren Sie den Tomatenketchup, die gehackten
Kräuter, den Sambal und den Käse unter das
Mark. Mischen Sie diese Masse in einer Schüssel
mit dem Semmelbröseln und den Eiern. Geben
Sie Pfeffer und Salz hinzu. Formen Sie aus dieser
Masse 4 bis 5 flache Puffer.
Zerlassen Sie die Butter in einer Pfanne, und
backen Sie die Puffer bei mäßiger Hitze von jeder
Seite ca. 5 Minuten braun.
Servieren Sie die Puffer heiß.
M Apfelpfannkuchen
Zutaten:
150 g Apfelmark
150 g backfertiges Mehl
2 Eier
ca. 100 ml Milch
50 g Rosinen
50 g getrocknete Aprikosen,
feingeschnitten
Butter zum Braten
Zucker und Zimt nach Belieben
Zubereitung:
Rühren Sie das Mehl und die Eier in das
Apfelmark. Geben Sie soviel Milch hinzu, daß eine
geschmeidige, halbfeste Masse entsteht. Rühren
Sie dann die Rosinen und die gehackten
Aprikosen darunter.
Zerlassen Sie die Butter in einer Pfanne. Geben
Sie von dem Teig, jeweils einen Löffel voll, nicht
zu dicht nebeneinander in die Pfanne. Streichen
Sie den Teig glatt, und backen Sie die
Pfannkuchen von beiden Seiten, bis sie goldgelb
geworden sind.
Die Pfannkuchen können heiß oder kalt serviert
werden. Streuen Sie nach Belieben Zucker und
Zimt darüber.
20
Rezepte zu Juice Extractor and Blender Combination.
Mit Juice Extractor and Blender Combination. können Sie endlos experimentieren und alle möglichen
Rezepte ausprobieren. Im Nu haben Sie köstliche Säfte und Shakes oder Suppen und Soßen zubereitet.
Nehmen Sie die folgenden Rezepte als Anregung; sie werden Ihnen bestimmt gelingen. Wir wünschen
Ihnen viel Freude beim Experimentieren mit Ihrem neuen Juice Extractor and Blender Combination.
La page est en cours de chargement...
La page est en cours de chargement...
La page est en cours de chargement...
La page est en cours de chargement...
La page est en cours de chargement...
La page est en cours de chargement...
La page est en cours de chargement...
La page est en cours de chargement...
La page est en cours de chargement...
La page est en cours de chargement...
La page est en cours de chargement...
La page est en cours de chargement...
La page est en cours de chargement...
La page est en cours de chargement...
La page est en cours de chargement...
La page est en cours de chargement...
La page est en cours de chargement...
La page est en cours de chargement...
La page est en cours de chargement...
La page est en cours de chargement...
La page est en cours de chargement...
La page est en cours de chargement...
La page est en cours de chargement...
La page est en cours de chargement...
La page est en cours de chargement...
La page est en cours de chargement...
La page est en cours de chargement...
La page est en cours de chargement...
-
 1
1
-
 2
2
-
 3
3
-
 4
4
-
 5
5
-
 6
6
-
 7
7
-
 8
8
-
 9
9
-
 10
10
-
 11
11
-
 12
12
-
 13
13
-
 14
14
-
 15
15
-
 16
16
-
 17
17
-
 18
18
-
 19
19
-
 20
20
-
 21
21
-
 22
22
-
 23
23
-
 24
24
-
 25
25
-
 26
26
-
 27
27
-
 28
28
-
 29
29
-
 30
30
-
 31
31
-
 32
32
-
 33
33
-
 34
34
-
 35
35
-
 36
36
-
 37
37
-
 38
38
-
 39
39
-
 40
40
-
 41
41
-
 42
42
-
 43
43
-
 44
44
-
 45
45
-
 46
46
-
 47
47
-
 48
48


Philips Blender HR1840 Manuel utilisateur
- Catégorie
- Fabricants de jus
- Taper
- Manuel utilisateur
dans d''autres langues
- italiano: Philips Blender HR1840 Manuale utente
- English: Philips Blender HR1840 User manual
- español: Philips Blender HR1840 Manual de usuario
- Deutsch: Philips Blender HR1840 Benutzerhandbuch
- Nederlands: Philips Blender HR1840 Handleiding
- português: Philips Blender HR1840 Manual do usuário
Documents connexes
-
Philips HR2875/00 Manuel utilisateur
-
Philips HR 2821 Operating Instructions Manual
-
Philips hr 2825 Manuel utilisateur
-
Philips HR1847/05 Manuel utilisateur
-
-
Philips HR7776/90 Manuel utilisateur
-
-
-
-
Philips HR2092/75 Manuel utilisateur
Autres documents
-
Nesco JB-50 Manuel utilisateur
-
Moulinex JU 4001 Le manuel du propriétaire
-
West Bend L5760 Manuel utilisateur
-
-
Solac BV5712 Fiche technique
-
Fagor LC-300 Le manuel du propriétaire
-
T-Fal Vitacompact Le manuel du propriétaire
-
Fagor LC-320 Le manuel du propriétaire
-
Palson MULTIFRUIT COMPACT Operating Instructions Manual
-