Volvo S90 Manuel utilisateur

Catégorie
Logiciel de navigation
Taper
Manuel utilisateur
SENSUS NAVIGATION
SENSUS NAVIGATION
Sensus Navigation is a satellite-based traffic information and navigation
system.
Volvo works continuously to improve our product. Modifications can
mean that information, descriptions and illustrations in this supplement
differ from the equipment in your vehicle. We reserve the right to make
changes without prior notice.
2
NAVIGATION
Activating and deactivating the navi-
gation system*
4
Navigation system* symbols and buttons
5
Information cards in the navigation
system*
6
Navigation system* in center display
6
Navigation system* in the instrument
panel
8
Activating and deactivating the navi-
gation system* in the instrument panel
8
Navigation system* in head-up display*
9
Voice control for navigation system*
9
Entering a destination directly on the
map
10
Entering a destination using an address
10
Entering a destination with a free
text search
11
Entering a POI as a destination
12
Entering a destination using Recent/
Favorites/Library
13
Entering a destination with Send to Car
14
Itinerary
15
Viewing an itinerary
16
Editing or clearing an itinerary
16
Viewing alternative routes
17
Viewing points of interest along the route
17
Show guidance in the itinerary
18
Traffic disruptions on map
18
Show traffic disruptions along the route
19
Selecting a detour in the navigation
system*
19
Real Time Traffic Information (RTTI)
20
Activating and deactivating
enhanced traffic information
21
Navigation system* settings
21
Map settings
21
Route settings and guidance
22
Traffic information settings
23
Map updating
24
Updating maps with a computer and
USB flash drive
25
Updating maps from a vehicle with
Internet connection
27
Frequently Asked Questions regar-
ding the navigation system*
28
Navigation license agreements*
29
Navigation system* copyright
35
INDEX
Index 37
TABLE OF CONTENTS
NAVIGATION
NAVIGATION
* Option/accessory.
4
Activating and deactivating the
navigation system*
The navigation system is automatically activated
when the driver's door is opened and is deacti-
vated when the driver locks and arms the vehi-
cle.
Activating navigation
Navigation system tile
Home button
View the map on the center display by tapping
the top tile (1) in Home view.
If the center display does not show the navigation
system tile, press the Home button (2) twice
quickly and then tap the navigation system tile
(1).
A map will appear of the surrounding area and
the vehicle's current location (blue triangle).
Tap this symbol to display the
map across the entire center
display.
WARNING
Observe the following:
Direct all your attention to the road and
make sure that your concentration is
focused on driving.
Follow applicable traffic laws and use
good judgment while driving.
Road conditions can be affected by
weather or season, which may make cer-
tain recommendations less reliable.
Deactivating navigation
While the ignition is switched on, the navigation
system is always active in the background. It
switches off automatically when the ignition is
switched off and the vehicle is locked.
NOTE
The navigation system is available even when
the engine is turned off. If the battery charge
level becomes too low, the system will switch
off.
Related information
Navigation system* in center display (p. 6)
Navigation system* in the instrument panel
(p. 8)
Navigation system* in head-up display*
(p. 9)
Voice control for navigation system* (p. 9)
Navigation system* symbols and buttons
(p. 5)
NAVIGATION
* Option/accessory.
5
Navigation system* symbols and
buttons
The map in the center display displays symbols
and colors that inform the driver of different
roads and the area around the vehicle and along
the route. A tool bar with different buttons for dif-
ferent settings is shown on the left.
Symbols and buttons on the map
Estimated time of arrival/remaining time to
arrival
Distance to destination
Compass/switches between north and vehi-
cle's direction of travel up
Start
Destination
Switch map view from 2D to 3D
Reset map to follow the vehicle
Point of Interest (POI
1
)
Traffic information
Minimize (expanded view) or maximize the
map (full screen)
The vehicle on the planned route
Minimize toolbar
Repeat most recent voice guidance
Minimize toolbar
Calculate a new route
Voice guidance temporarily On/Off
Display list of guidance points in the itinerary
Set a final destination/waypoint
Cancel guidance
Shows list of the itinerary's points of interest
(POI
1
) and traffic information
Next maneuver
Itinerary and alternative route
Destination
Related information
Information cards in the navigation system*
(p. 6)
Traffic disruptions on map (p. 18)
Real Time Traffic Information (RTTI) (p. 20)
Show traffic disruptions along the route
(p. 19)
1
Point of Interest
NAVIGATION
* Option/accessory.
6
Information cards in the navigation
system*
All icons on the map, such as destinations, way-
points and favorites, have an information card
that can be opened by tapping the icon.
Press the information card once to display a
small card, and press twice to display a larger
card with more information. The information and
possible options vary depending on the type of
icon.
For example, when a POI(
2
) is highlighted, the
driver can select e.g.:
Start navigation - save the location as a
destination
Add as waypoint - the position is saved as
an intermediate destination (only displayed at
the specified destination)
Save - the position is saved in the library
Remove from itinerary - the position is
removed if it is included in the itinerary
Nearby POI - points of interest close to the
car's position are shown
Related information
Itinerary (p. 15)
Entering a POI as a destination (p. 12)
Viewing points of interest along the route
(p. 17)
Navigation system* in center display
The navigation system can be presented and
controlled in several different ways, e.g. via the
center display.
All settings for the navigation system can be
changed in the center display. The driver can
select how the map should be displayed or enter
a destination here.
If the map image is not shown in the center dis-
play, tap the top tile (for the navigation system).
Where am I?
What is the vehicle's current geographic loca-
tion?
Tap the vehicle symbol (blue triangle) on the
map to display information directly on the
map.
Find the vehicle symbol on the map
After zooming out/in or moving the
map, it may be difficult to find the vehi-
cle's location on the map again. Tap
the crosshairs to reset the map to fol-
low the vehicle symbol.
North or direction of travel facing up on
the map
There are two ways to show the vehi-
cle's movement in relation to the map.
Tap the symbols to toggle between the
vehicle's direction of travel or north
shown facing up on the map.
When the map is shown with north fac-
ing up, the vehicle symbol moves in the
actual compass direction on the map. If the vehi-
cle is moving west, it will be shown moving left on
the map (east is right, south is down, etc.).
2
Point of Interest
NAVIGATION
* Option/accessory.
7
When the vehicle symbol is pointing up, the map
rotates under the vehicle symbol following the
turns made by the vehicle. The compass symbol
indicates which direction is north (N) on the map
and the direction in which the front of the vehicle
is pointing is shown in the center of the compass:
Compass symbols Compass direction
N North
NE Northeast
E East
SE Southeast
S South
SW Southwest
W West
NW Northwest
2D or 3D view
Tap the symbols to toggle between 2D
and 3D display.
With 3D display, the vehicle's direction of travel is
always up. The map rotates under the vehicle
symbols following the turns made by the vehicle.
The compass indicates which direction is north
(N) on the map and the direction in which the
front of the vehicle is pointing is shown in the
center of the compass: The map scale is not
shown in 3D mode.
With 2D display, the map is shown with north fac-
ing up, and the vehicle symbols moves in the
actual compass direction on the map.
Zoom in
To make the map larger, tap the center display
twice in quick succession with one finger or place
two fingers on the center display and move them
apart ("stretch").
Zoom out
To make the map smaller, tap the center display
once with two fingers or place two fingers on the
center display and move them together ("pinch").
Scroll
Place one finger on the map, swipe in the desired
direction and release. The scroll function is only
possible with the map in maximized view, not
minimized.
Change the headers displayed
Maximize the map and tap the map heading at
the top of the center display. The following head-
ers can be displayed on the map:
1.
Destination Destination, arrival time (
ETA) or
remaining travel time (RTA) and distance to
destination (Distance). For more information
on selecting ETA or RTA, see "Route set-
tings and guidance".
2. Current position as address (Address) or as
coordinates (Coordinates). When coordinates
are shown, altitude is also shown (Altitude).
To choose between address and coordinates,
see section "Map settings".
Related information
Navigation system* settings (p. 21)
Navigation system* in the instrument panel
(p. 8)
Navigation system* in head-up display*
(p. 9)
Route settings and guidance (p. 22)
Map settings (p. 21)
NAVIGATION
* Option/accessory.
8
Navigation system* in the
instrument panel
The navigation system can be presented and
controlled in several different ways, e.g. via the
instrument panel.
The map is only shown on the 12" instrument panel.
While driving, the driver receives voice guidance
and instructions on the instrument panel. Map
guidance in the instrument panel can also be
activated without entering a destination.
The right-side steering wheel keypad
and instrument panel
Some of the navigation system's functions, such
as
Take me home and Cancel guidance, can
be controlled using the right-side steering wheel
keypad. If a message is displayed in the instru-
ment panel, it must be accepted or dismissed
before the menu can be displayed.
Open/close the menu. The menu will close
automatically after a period of inactivity or
after certain selections.
Scroll among the menus.
Scroll among selections in a menu.
Confirm or mark a selection.
Related information
Activating and deactivating the navigation
system* in the instrument panel (p. 8)
Navigation system* in center display (p. 6)
Navigation system* in head-up display*
(p. 9)
Activating and deactivating the
navigation system* in the
instrument panel
The navigation system will be automatically dis-
played in the instrument panel when a destina-
tion is set. The navigation system can also be
displayed without entering a destination.
1. Pull down the center display's Top view.
2.
Tap
Settings.
3. Tap My Car Displays Driver Display
Information
.
4.
Tap the
Show Map radio button to display
the navigation system in the instrument
panel without entering a destination.
Related information
Navigation system* in the instrument panel
(p. 8)
NAVIGATION
* Option/accessory.
9
Navigation system* in head-up
display*
The navigation system can be presented and
controlled in several different ways, e.g. via the
head-up display.
Navigation system in windshield.
The driver can also get guidance and information
from the navigation system in the head-up dis-
play on the lower section of the windshield.
You can make settings to specify if the naviga-
tion system should be shown in the head-up dis-
play, as well as the position of the information
field.
Related information
Navigation system* in center display (p. 6)
Navigation system* in the instrument panel
(p. 8)
Voice control
3
for navigation
system*
Several of the navigation system's functions can
be activated with voice commands.
Tap on the right-side steering wheel keypad
and say one of the following commands:
"
Navigation" - Starts a navigation dialog
and displays examples of commands.
"
Take me home" - Guidance is provided to
the location set as
Home.
"
Go to [city]" - Inputs a city as a destination,
e.g. "Go to San Francisco".
"
Go to [address]" - Inputs an address as a
destination. An address must contain city and
street. e.g. "Go to Filbert Street 5, San Fran-
cisco".
"
Add intersection" - Starts a dialog to input
two streets. The destination will then be the
intersection of these two streets.
"
Go to [zip code]" - Input a zip code as the
destination. e.g. "Go to 1 2 3 4 5".
"
Go to [contact]" - Input an address from
the phone book as the destination. Example
"Go to Robyn Smith".
"
Search [POI category]" - Search Points
of Interest (POI) in a certain category (e.g.
restaurants)
4
. To sort the list along the route,
say "
Along the route" when the list of
results is displayed.
"
Search [POI category] i [city]" -
Searches for POIs in a certain category and
city. The list of results is sorted based on the
center point of the city. Example "Look for
restaurant in San Francisco".
"
Search [POI name]". For example,
"Search Golden Gate Bridge".
"
Change country/Change state
5,6
" -
Changes the search area for navigation.
"
Show favorites" - Displays locations
marked as favorites in the instrument panel.
"
Clear itinerary" - Deletes all stored way-
points and destinations in an itinerary.
"
Repeat voice guidance" - Repeats the
most recent guidance instruction.
"
Turn off voice guidance" - Guidance off.
"
Turn on voice guidance" - Guidance on.
NAVIGATION
* Option/accessory.
10
Entering a destination directly on
the map
A destination can be specified in different ways
in the navigation system* – tapping a point on
the map with your finger is one of them.
It is often easiest to scroll to the desired position
on the map and tap it.
1. Make sure the map is in full-screen mode.
2. Scroll to the desired location on the map.
3. Press and hold the location. An icon will be
created and a menu will appear.
4.
Select
Go here to start guidance.
Deleting the icon
To delete the location's icon:
Select
Delete
Changing the icon's location
To change the location of the icon:
Press and hold the icon, drag it to the
desired location and then release it.
Related information
Itinerary (p. 15)
Entering a destination using an address
(p. 10)
Entering a destination with a free text search
(p. 11)
Entering a POI as a destination (p. 12)
Entering a destination using Recent/Favor-
ites/Library (p. 13)
Entering a destination with Send to Car
(p. 14)
Route settings and guidance (p. 22)
Entering a destination using an
address
There are several ways to set a destination in the
navigation system*. Entering an address is one
of them.
1. When the map appears, expand the toolbar
using the down arrow on the left-hand side
and tap
Set dest.
> The map will switch to free text search.
2.
Tap
Address.
3. It is not necessary to fill in all of the fields.
For guidance to a city, for example, you only
need to fill in the city and country. You will
then be guided to the center of the city.
4. Select any available field and use the center
display's keyboard to type:
Country/State/Province
City/Territory/Zip code
Address
Number
Junction
3
Certain markets only.
4
The user can choose to call the POI or enter it as a destination.
5
For European countries, "country" is used instead of "state".
6
For Brazil and India, search area is changed in the center display.
NAVIGATION
}}
* Option/accessory.
11
For vehicles with Volvo On Call*, it is also possi-
ble to send addresses and destinations to the
vehicle's navigation system via the Volvo On Call
app.
Related information
Itinerary (p. 15)
Entering a destination directly on the map
(p. 10)
Entering a destination with a free text search
(p. 11)
Entering a POI as a destination (p. 12)
Entering a destination using Recent/Favor-
ites/Library (p. 13)
Entering a destination with Send to Car
(p. 14)
Route settings and guidance (p. 22)
Information cards in the navigation system*
(p. 6)
Entering a destination with a free
text search
A destination can be set in different ways in the
navigation system* - with free text searching, for
example, a search can be made using phone
numbers, postal codes, streets, cities, coordi-
nates and points of interest (POI
7
).
The on-screen keyboard can be used to type
most characters and to search for destinations.
1. When the map appears, expand the toolbar
using the down arrow on the left-hand side
and tap
Set dest.
> The map will switch to free text search.
2. Enter a search word in the search box or limit
the search results by choosing a filter.
> The search results will be listed as you
type.
3.
If the search provided the desired result -
tap a search result to display its information
card and select to continue using the search
result.
If the search provided too many results -
tap
Advanced filter to select a position to
search around and then select a search
result to continue using it.
Around vehicle
Around destination – only displayed if a
destination has been set.
Along route – only displayed if a destina-
tion has been set.
Around point on map
7
Point of Interest
||
NAVIGATION
* Option/accessory.
12
Coordinates
A destination can also be entered using map
coordinates.
Enter coordinates, e.g. "N 58.1234 E
12.5678" and tap
Search.
Compass directions N, E, S and W can be
entered in different ways, e.g.:
N 58,1234 E 12,5678 (with space)
N58,1234 E12,5678 (without space)
58,1234N 12,5678E (with compass direc-
tions after the coordinates)
58,1234-12,5678 (with hyphen without com-
pass direction)
Either a dot [.] or a comma [,] can be used.
Related information
Itinerary (p. 15)
Entering a destination directly on the map
(p. 10)
Entering a destination using an address
(p. 10)
Entering a POI as a destination (p. 12)
Entering a destination using Recent/Favor-
ites/Library (p. 13)
Entering a destination with Send to Car
(p. 14)
Route settings and guidance (p. 22)
Entering a POI as a destination
A destination can be specified in different ways
in the navigation system* - selecting a point of
interest (POI
8
) is one of them.
1. When the map appears, expand the toolbar
using the down arrow on the left-hand side
and tap
Set dest.
> The map will switch to free text search.
2.
Tap
POI.
3. Tap the desired filter (some alternatives are
only shown when a destination or waypoint is
specified):
Near the vehicle
Near the destination
Near waypoint
Along route
Around point on map
4. Scroll to the desired POI and select it.
5.
Select
Start navigation or Add as
waypoint.
Many POI (e.g. restaurants) have sub-categories
(e.g. fast food).
Which POI are shown on the map can be
changed via the map settings. This setting does
not affect searches for POI to be used as desti-
nations (even POI that have not been selected
for display can be shown here as alternate desti-
nations).
Certain POI will only appear on the map if the
scale is greater than 1 km (1 mile).
NOTE
The symbols, number and variants of
POIs vary between different markets.
In connection with map data updating,
some symbols may be added and others
disappear – all symbols for the map sys-
tem in question can be found through the
menu system.
Related information
Itinerary (p. 15)
Entering a destination directly on the map
(p. 10)
Entering a destination using an address
(p. 10)
Entering a destination with a free text search
(p. 11)
Entering a destination using Recent/Favor-
ites/Library (p. 13)
NAVIGATION
}}
* Option/accessory.
13
Entering a destination with Send to Car
(p. 14)
Map settings (p. 21)
Entering a destination using
Recent/Favorites/Library
A destination can be specified in different ways
in the navigation system* - selecting from a list is
one of them.
1. When the map appears, expand the toolbar
using the down arrow on the left-hand side
and tap
Set dest.
> The map will switch to free text search.
2. Select one of these lists at the top of the
screen:
Recent
Favorites
Library
After an option in a list has been marked, it can
be added as a destination by tapping either the
Start navigation or Add as waypoint button.
Recent
This is a list of previous searches. Scroll through
the list and select.
This is also available as a menu option in the
instrument panel and can be displayed using the
right-side steering wheel keypad.
To edit the list, tap Edit.
Favorites
This is a list of locations that have been set as
favorites from the
Library. Scroll through the list
and select.
A position that has been deleted in
Favorites will
remain in Library, but with a grayed-out star. To
return a position to Favorites, go to Library and
mark the position's star again.
Use
Set Home address to program a fre-
quently used destination. An entered Home des-
tination is also available as a menu option in the
instrument panel and can be displayed using the
right-side steering wheel keypad.
To edit the list, tap
Edit.
8
Point of Interest
||
NAVIGATION
* Option/accessory.
14
Library
This is a list of saved locations and itineraries.
The most recently saved will be shown at the top
of the list.
Tap the location's star to select/deselect it as a
favorite. A location with a selected (filled in) star
will also be displayed under the
Favorites head-
ing.
If a location is deleted in
Library, it will also be
deleted in Favorites.
The Library can be sorted in various ways:
Added - sort in chronological order.
Name - sort in alphabetical order.
Distance - sort according to distance from
the vehicle's current location.
Received - locations sent to the vehicle
using the Send to Car function will be filtered
out. New unread locations have a BLUE
marker that is grayed out once the positions
have been read.
Use
Edit to delete one or more items in the list.
Related information
Itinerary (p. 15)
Entering a destination directly on the map
(p. 10)
Entering a destination using an address
(p. 10)
Entering a destination with a free text search
(p. 11)
Entering a POI as a destination (p. 12)
Entering a destination with Send to Car
(p. 14)
Route settings and guidance (p. 22)
Entering a destination with Send to
Car
A destination can be specified in different ways
in the navigation system* – using the Send to
Car function is one of them.
Sending a location to the vehicle
Send to Car is a function that makes it possible
to add a destination/location to the vehicle's nav-
igation system from a computer.
Send to Car can also be performed using the
Volvo On Call app. Volvo On Call can also be
used to send a destination/location to the vehicle
from a Volvo On Call customer service center.
Please note that the procedure shown here is
only one example from one of several map serv-
ice providers.
1. Go to wego.here.com on the computer.
> A map service will open.
2. Search for the desired location.
3. Right-click the location and then click the
address.
> A side menu/information card will open.
4.
Click Share in the side menu.
5.
Click Send to car in the side menu.
6. Select the vehicle and enter the vehicle's VIN
number or the email address registered to
your Volvo ID. Then click Send.
NAVIGATION
* Option/accessory.
15
7.
Click Finish.
> The location will be sent to the vehicle.
For more information about other service provid-
ers and the Send to Car function, please visit the
Volvo Cars support site (support.volvocars.com).
Receiving and using a location in the
vehicle
In order for the vehicle to receive data, it must be
connected to the Internet. If the location was sent
to the vehicle using Volvo On Call, the vehicle's
integrated modem will be used to receive the
data, i.e. no other Internet connection is required.
1. When the vehicle has received a location, a
notification will appear in the center display.
Tap the notification/symbol.
> An information card will open.
2. Select how you would like to use the loca-
tion.
Using a stored location
Received locations are saved in the navigation
system's library for later use.
Related information
Itinerary (p. 15)
Entering a destination directly on the map
(p. 10)
Entering a destination using an address
(p. 10)
Entering a destination with a free text search
(p. 11)
Entering a POI as a destination (p. 12)
Entering a destination using Recent/Favor-
ites/Library (p. 13)
Route settings and guidance (p. 22)
Itinerary
The itinerary is the route that the navigation sys-
tem* suggests when the user enters a destina-
tion.
The first location set will be the itinerary's desti-
nation (final destination).
The next locations set will be the itinerary's way-
points (intermediate stops along the route).
An itinerary and its destination and waypoints can
be easily edited at any time.
Related information
Viewing an itinerary (p. 16)
Editing or clearing an itinerary (p. 16)
Viewing alternative routes (p. 17)
Show guidance in the itinerary (p. 18)
NAVIGATION
* Option/accessory.
16
Viewing an itinerary
It is possible to show the itinerary in the naviga-
tion system* during road navigation.
1. During guidance, expand the toolbar using
the down arrow and then the three dots.
2.
Tap the Itinerary symbol to open the itiner-
ary.
Related information
Editing or clearing an itinerary (p. 16)
Viewing alternative routes (p. 17)
Show guidance in the itinerary (p. 18)
Editing or clearing an itinerary
It is possible to remove waypoints or the entire
itinerary in the navigation system* while guidance
is being provided.
1. Expand the toolbar using the down arrow
first and then the three dots.
2.
Tap the Itinerary symbol to open the itiner-
ary.
3. Tap the recycling bin to delete a waypoint
from the itinerary or tap
Clear itinerary to
delete the entire itinerary.
Related information
Viewing alternative routes (p. 17)
Viewing points of interest along the route
(p. 17)
Show guidance in the itinerary (p. 18)
NAVIGATION
* Option/accessory.
17
Viewing alternative routes
It is possible to search for alternate routes in the
navigation system* while guidance is being pro-
vided.
1. Expand the toolbar using the down arrow
first and then the three dots.
2.
Tap the Itinerary symbol to open the itiner-
ary.
3.
Tap
Alternative routes.
4. Select an alternative route:
Eco
Fast
Scenic
5. Tap the map.
> The updated route will be displayed on
the map and guidance will resume.
Related information
Editing or clearing an itinerary (p. 16)
Show traffic disruptions along the route
(p. 19)
Selecting a detour in the navigation system*
(p. 19)
Route settings and guidance (p. 22)
Viewing points of interest along the
route
A list of points of interest (POI
9
) along your
route can be displayed in the navigation system*.
1.
Tap
Ahead.
2.
Tap
POI.
> POIs along the route are displayed
according to their distance from the vehi-
cle.
3. If there are multiple POIs in the same loca-
tion, they will be displayed as a group. Tap
the group for a list of the POIs.
4. Select a POI.
5. Select one of the information card's options
and follow the instructions.
Related information
Information cards in the navigation system*
(p. 6)
Map settings (p. 21)
NAVIGATION
* Option/accessory.
18
Show guidance in the itinerary
A list of coming guidance points helps the driver
prepare in advance for upcoming maneuvers,
e.g. moving into the correct lane before making a
turn.
To display a list of upcoming turns in the itinerary
in the navigation system*:
1. Expand the toolbar using the down arrow on
the left-hand side.
2. Expand the toolbar further using the three
dots.
3.
Tap the
Turn-by-Turn symbol (see image).
A list of guidance points on the itinerary will be
displayed instead of the toolbar (you can scroll
through the list). Tap the arrow pointing to the
left to minimize the list.
The next guidance point is always shown at the
top of the list.
Tap one of the guidance points in the
list to show the location on the map.
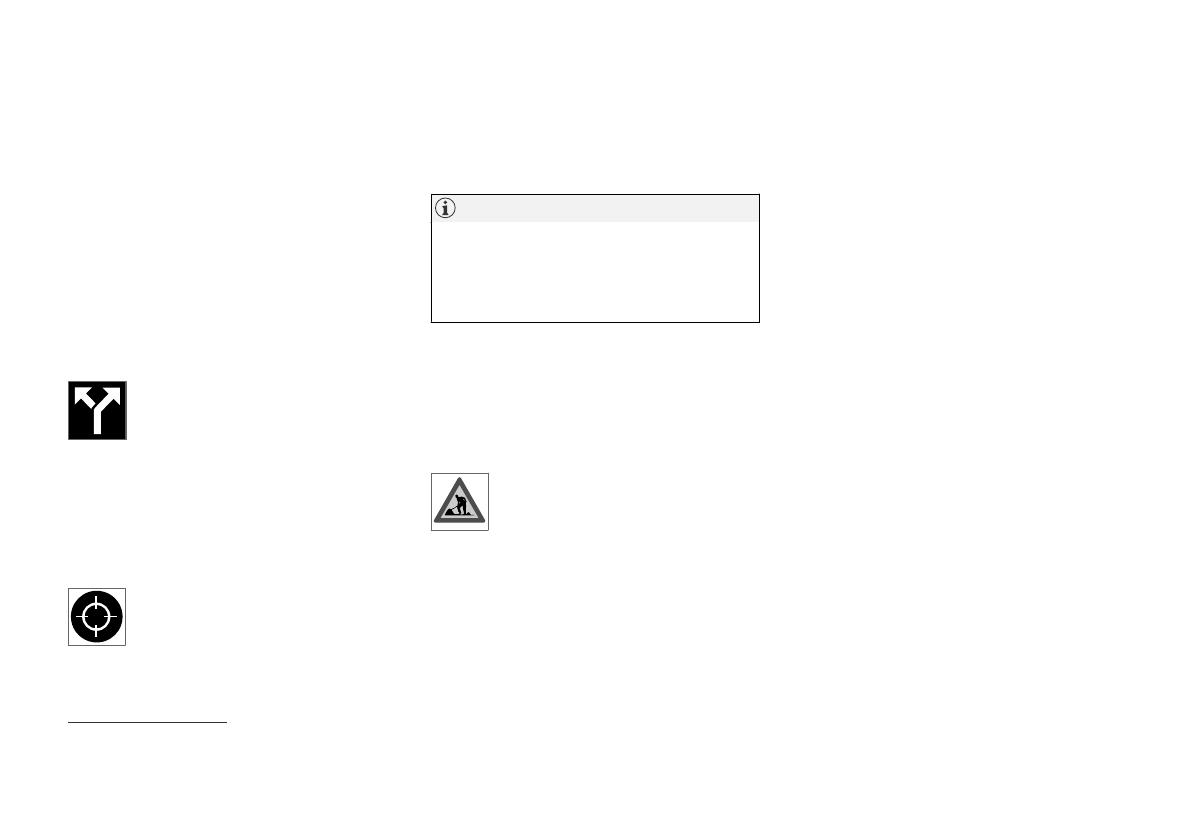
Tap the map's crosshairs (see image)
to return to the map guidance view,
where the map shows the vehicle's current loca-
tion.
Traffic disruptions on map
10
The navigation system* receives information on
traffic events and traffic disruptions and displays
these on the map.
NOTE
Traffic information is not available in all
areas/countries.
Coverage areas for traffic information is con-
tinuously extended.
It is possible to make settings to determine which
traffic-related information is shown on the map.
Traffic disruptions, such as congested and slow-
moving traffic, road work and accidents, are
shown with different symbols when the map is
zoomed in.
Road construction, for example, is indi-
cated by this symbol. Sections of road
with major traffic disruptions are also
shown with a red line on the side of the
road affected. The line also indicates which direc-
tion of traffic is affected. If the disruption affects
both directions of traffic, the section of road is
marked with red lines on both sides of the road.
Information on traffic disruptions
Tap the traffic disruption symbol.
> An information card will be displayed.
Information may include e.g. the location
of the traffic disruption with the street
name/road number and its type/extent/
duration.
Avoiding traffic disruptions
If there are traffic disruptions along the route, the
Avoid option can be selected. The system will
then calculate an alternate route.
Real Time Traffic Information (RTTI)
11
If the vehicle is connected to the Internet,
enhanced traffic information can be retrieved
using RTTI
12
.
Related information
Traffic information settings (p. 23)
Map settings (p. 21)
Show traffic disruptions along the route
(p. 19)
Real Time Traffic Information (RTTI) (p. 20)
Information cards in the navigation system*
(p. 6)
9
Point of Interest
  • Page 1 1
  • Page 2 2
  • Page 3 3
  • Page 4 4
  • Page 5 5
  • Page 6 6
  • Page 7 7
  • Page 8 8
  • Page 9 9
  • Page 10 10
  • Page 11 11
  • Page 12 12
  • Page 13 13
  • Page 14 14
  • Page 15 15
  • Page 16 16
  • Page 17 17
  • Page 18 18
  • Page 19 19
  • Page 20 20
  • Page 21 21
  • Page 22 22
  • Page 23 23
  • Page 24 24
  • Page 25 25
  • Page 26 26
  • Page 27 27
  • Page 28 28
  • Page 29 29
  • Page 30 30
  • Page 31 31
  • Page 32 32
  • Page 33 33
  • Page 34 34
  • Page 35 35
  • Page 36 36
  • Page 37 37
  • Page 38 38
  • Page 39 39
  • Page 40 40
  • Page 41 41
  • Page 42 42
  • Page 43 43

Volvo S90 Manuel utilisateur

Catégorie
Logiciel de navigation
Taper
Manuel utilisateur

dans d''autres langues