GE ZDOD240PBLSS Le manuel du propriétaire
- Catégorie
- Frigos
- Taper
- Le manuel du propriétaire
Ce manuel convient également à

nu
rl$
I
Outdoor/Indoor
RefrigerGtor
ZDOD240
monogram.com

Consumer Informotion
Outdoor/Indoor Refrigerator
Introduction
Your new Monogram outdoor/indoor refrigerator makes an eloquent statement of
stgle, convenience and kitchen planning flexibility. Whether you chose it for its puritg
of design or the assiduous attention to detail, you will find that your Monogram
outdoor/indoor refrigerator's superior blend of form and function will delight gou
for years to come.
The information on the following pages will help gou operate and maintain gour
outdoor/indoor refrigerator properlg.
If gou have ang other questions, visit our Website at: monogram.com
Contents
Care and Cleaning ................. 12, 13
Consumer Services .................... 19
Controls and Features ............... 9-11
Model and Serial Numbers .............. 2
Problem Solver .................... 15-17
Product Registration .................... 2
Repair Service ...................... 4, 19
Safety Instructions ................... 5-8
Top Canopg Removal .................. 14
Warrantg .................... Back Cover
Before
using gour
outdoor/
indoor
refrigerator
Read this manual carefullg. It is intended to
help gou operate and maintain gour new
outdoor/indoor refrigerator properlg.
Keep it handg for answers to gour
questions.
If gou don't understand something or
need more help, there is a list of toll-free
consumer service numbers included in
the back section of this manual.
OR
Visit our Website at: monogram.com
Write
down the
model &
serial
numbers
You will find them on a label on the ceiling
inside the outdoor/indoor refrigerator.
Please write these numbers here:
Model Number
Serial Number
Use these numbers in ang correspondence
or service calls concerning gour outdoor/
indoor refrigerator.

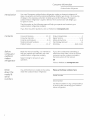
Consumer Information
Outdoor/Indoor Refrigerator
If ctou received
a damaged
appliance
The warranty does not cover damage
caused after delivery.
Immediately contact the dealer (or builder) that
sold you the outdoor/indoor refrigerator.
Save time
& money
Before you request service, check the
Problem Solver in the back of this manual.
It lists causes of minor operating problems
that you can correct yourself.
Remove
packaging
Before using, be sure all packing materials
and tape have been removed.
To assure no damage is done to the finish
of the product, the safest way to remove
the adhesive left from packaging tape
on new appliances is an application of
household liquid detergent. Apply with
a soft cloth and allow to soak. Wipe dry
and then apply an appliance polish to
thoroughly clean and protect the surface.
Caring
for your
stainless
steel
Stainless Steel--We strongly advise
applying a commercially available stainless
steel cleaner such as Stainless Steel Magic T"
to preserve and protect the fine finish
monthly.
The following substances and naturally
occurring materials will cause damage
to all stainless steel finishes. Care must
be taken not to allow these substances to
come in contact with your outdoor/indoor
refrigerator. If any of these do get on
your unit, wash and rinse immediately
(see Care and Cleaning).
• Battery acid
• Pool chemicals
(such as chlorine and bromine)
• Lawn fertilizer
• Ice melting salts
• Creosote
• Iodine
• Pickling juice
,Urine
• Bird droppings
• Tree sap
• Sea water
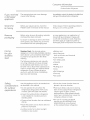
Safety
considerations
for outdoor
applications
Use this appliance only for its intended use
as described in this manual.
• Do not operate the unit where the
temperature will go below 45% (7.2°C}
or above 120°F(49°C}(see Unit ON/OFF}.
• Ensure the outdoor/indoor refrigerator
is not installed in a location prone to
standing water.
• Choose a level location that can withstand
250 Ibs.
• Route the power cord so that it does not
present a trip hazard.
• Surface can be hot in direct sunlight
conditions. Use caution.
• Ensure the chosen location does not
present a tip-over situation.
• Make sure dishes cool prior to storing
them in the outdoor/indoor refrigerator.
Certain types of glass, ceramic,
earthenware or other glazed utensils
retain heat. Hot dishes can cause the
cold glass shelves to break.
• The use of a GEVacuum Break
(service part #'s WR49X40] and
WR49XlO026} is not authorized
on the outdoor/indoor refrigerator.

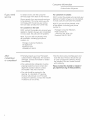
Consumer Informotion
Outdoor/Indoor Refrigerator
If gou need
service
To obtain service, see the Consumer
Services page in the back of this manual.
We are proud of our service and want gou
to be pleased. If for some reason gou are
not happg with the service gou receive,
here are steps to follow for further help.
For customers in the USA:
FIRST,contact the people who serviced gour
appliance. Explain whg gou are not pleased.
In most cases, this will solve the problem.
NEXT, if gou are still not pleased, write
all the details-including gour phone
number-to:
Manager, Customer Relations
GE Appliances
Appliance Park
Louisville, KY 40225
For customers in Canada:
FIRST,contact the people who serviced gour
appliance. Explain whg gou are not pleased.
In most cases, this will solve the problem.
NEXT, if gou are still not pleased, write
all the details-including gour phone
number to:
Manager, Consumer Relations
Mabe Canada Inc.
1 Factorg Lane, Suite 310
Moncton, N.B. E1C 9M3
After
installation
is completed
• Promptly inspect your new Monogram
outdoor/indoor refrigerator. If it has been
damaged, contact the Installer or Dealer
immediately.
• This outdoor/indoor refrigerator must be
properlg leveled to ensure correct door
alignment and door closure. Contact
the Installer if the unit is not level.
• The unit should be centered in the
opening. In a standard 24" opening,
the door will protrude 1-1/2" forward
of adjacent cabinetry. Contact the installer
if clearance is not correct.
• Test the door swing. Carefully open and
close the door. The door should not rub
or catch on adjacent cabinetrg. Notifg
the installer if the door makes contact
with cabinetrg.
Please Contact the Installer or Dealer if
you experience any of these problems.

IMPORTANTSAFETYINSTRUCTIONS
READ AND SAVE THESE INSTRUCTIONS
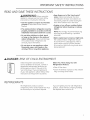
_,WA RNING:Whenusingthis
(]ppli(]nce,(]lw(]gsexerciseb(]sics(]fetg
prec(]utions,includingthefollowing:
• Use this appliance onlg for its intended
purpose (is described in this Owner's
M(]nu(]l.
•Thisoutdoor/indoor refrigerator must be
properlginstalledinaccordance with the
InstallationInstructionsbefore itisused.
• Do not allow children to climb, stand
or hang on the shelves in the outdoor/
indoor refrigerator. They could d(]m(]ge
the outdoor/indoor refriger(]tor (]nd
seriously injure themselves.
• Do not store or use gasoline or other
flammable vapors and liquids in the
vicinity of this or any other appliance.
Keep fingers out of the "pinch point"
areas: cle(]r(]nces between the door
(]nd between the door (]nd c(]binet ore
necess(]rilg sm(]ll. Be c(]reful closing the
door when children (ire in the (]re(].
Unplug or turn off gour outdoor/indoor
refrigerator before cleaning or making
repairs.
NOTE: We stronglg recommend th(]t (]ng
servicing be performed bg (] qu(]lified
individu(]l.
• Before replacing a burned-out light bulb,
the outdoor/indoor refriger(]tor should
be turned OFF or unplugged in order to
(]void cont(]ct with (] live wire fil(]ment.
(A burned-out light bulb m(]g bre(]k when
being repl(]ced.)
&DANGER: RISK OF CHILD ENTRAPMENT
Child entr(]pment (]nd suffoc(]tion
(ire not problems of the post. Junked or
(]b(]ndoned refriger(]tion products ore
still d(]ngerous...even if theg will sit for
"just (] few dogs." If gou ore getting rid
of gour old (]ppli(]nce, ple(]se follow these
instructions to help prevent (]ccidents.
Before You Throw Awag Your Old
Refrigeration Product:
•T(]keoff the doors.
• Le(]ve the shelves in pl(]ce so th(]t children
m(]g not e(]silg climb inside.
REFRIGERANTS
Allrefriger(]tion products cont(]in
refriger(]nts, which under feder(]l low must
be removed prior to product dispos(]l.
If gou ore getting rid of on old refriger(]tion
product, check with the comp(]ng h(]ndling
the dispos(]l (]bout wh(]t to do.

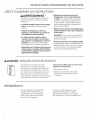
INSTRUCTIONS IMPORTANTES DE SI:CURITI
LIREETCONSERVERCESINSTRUCTIONS
AVERTISSEMENT:
Lorsque vous utilisez I'appareil, observez
toujours certoines pr@coutions de base,
notamment :
• N'utilisez I'appareil que pour son usage
prTvu, comme d@crit dans le pr@sent
manuel.
• Installez le r6frig6rateur int6rieur/
ext@rieur conform@ment aux directives
d'installation avant de I'utiliser.
• Ne laissez pas les enfants grimper,
s'asseoir, se tenir debout ni se pendre
aux clagettes du r6frig6rateur int6rieur/
extTrieur. IIs pourraient endommager
le r@frig@rateur et se blesser gravement.
• N'entreposez et n'utilisez pas d'essence ou
autres vapeurs et liquides inflammables 6
proximit6 de cet appareil ou de tout autre
appareil 61ectrom6nager.
• I_loignez les doigts des parties du
r6frig6rateur o5 I'on peut fecilement
se pincer : les espaces entre les portes
et entre les portes etles placards sont
toujours @troits. Sogez prudent Iorsque
vous fermez les portes de I'opporeil en
pr@sence des enfants.
• D6branchez ou fermez votre r6frig6rateur
int@rieur/ext@rieur avant de le nettoger et
de le r6parer.
REMARQUE : Nous vous recommandons
vivement de confier toute r@paration (_un
technicien quolifi@.
• Avant de remplacer une ampoule grill6e,
le r_frigTrateur intTrieur/extTrieur doit _tre
d_branch_ afin d'_viter tout contact avec
un fil sous tension. (Une ampoule grill_e
peut se briser pendant I'op_ration).
DANGER : RISQUES POUR LES ENFANTS
Les enfants pris au pi_ge ou morts
d'asphgxie sont toujours d'actualit&
Les appareils de rTfrigTration abandon_s
sont toujours aussi dangereux, m_me si
on n'attend qua "quelque jours" pour s'en
dTbarasser. Si vous ne gardez pas votre
ancien appareil, veuillez suivre les directives
ci-dessous afin de prTvenir les accidents.
Avant de vous dTbarasser de votre vieux
appareil de rTfrigTration :
• DTmontez les portes.
• Laissez les clagettes en place olin
d'emp_cher les enfants de grimper
6 I'intTrieur.
R L-FRIG L-RANTS
Tousles appareils de r_frigTration
contiennent des refrigerants qui,
conform_ment aux lois f_d_rales,
doivent _tre enlevTs avant route
_limination de I'appareil.
Si vous vous dTbarrassez de vieux
appareils de r@frig@ration, v@rifiez,
oupr@s de Io soci@t@qui s'occupe de
leur @limination, ce que vous devez faire.

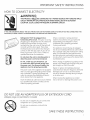
IMPORTANTSAFETYINSTRUCTIONS
HOW TO CONNECT ELECTRICITY
&WARNING:
THIS PRODUCT MUST BE CONNECTED TO A POWER SOURCE WITH GROUND FAULT
CIRCUIT INTERRUPT (GFCI) PROTECTION WHEN INSTALLED IN AN OUTDOOR
LOCATION. LOCAL CODES MAY REQUIRE A SEPARATE CIRCUIT.
IF YOU ARE UNCERTAIN ABOUT THE GFCI PROTECTION ON THE POWER SOURCE TO WHICH YOU ARE CONNECTING THIS
APPLIANCE, PLEASE CONTACT A PROFESSIONAL ELECTRICIAN FOR VERIFICATION.
Refrigerator MUST be plugged into a
functioning GFCI circuit. Test your circuit by
plugging your refrigerator into the outlet and
pressing the test button for that circuit,
verifying that the unit turns off (the light will
not work with the door open). Then press
the Reset button and confirm that the light
comes on with the door open. If you do not
know if you have a GFCI circuit, contact a
qualified electrician for assistance.
Do not place the unit in standing water or
allow the power cord to be immersed.
Do not, under any circumstances, cut
or remove the third (ground) prong from
the power cord. For personal safety, this
appliance must be properly grounded.
The power cord of this appliance is equipped
with a 3-prong (grounding) plug which mates
with a standard 3-prong (grounding) wall
outlet to minimize the possibility of electric
shock hazard from this appliance.
Have the electrical outlet and circuit checked
by a qualified electrician to make sure the
outlet is properly grounded.
Where a standard 2-prong electrical
outlet is encountered, it is your personal
responsibility and obligation to have
it replaced with a properly grounded
3-prong wall outlet.
The appliance should always be plugged
into its own individual electrical outlet which
has a voltage rating that matches the rating
plate. This provides the best performance
and also prevents overloading house wiring
circuits which could cause a fire hazard from
overheated wires.
Never unplug an appliance by pulling on the
power cord. Always grip the plug firmly and
pull straight out from the outlet.
Repair or replace immediately all power
cords that have become frayed or otherwise
damaged. Do not use a cord that shows
cracks or abrasion damage along its length
or at either end.
When moving the appliance, be careful
not to roll over or damage the power cord.
DO NOT USE AN ADAPTER PLUG OR EXTENSION CORD
(Adapter plugs not permitted in Canada)
Do not use an adapter plug to connect the
refrigerator to a 2-prong outlet.
Do not use an extension cord with this
appliance.
SAVE THESEINSTRUCTIONS

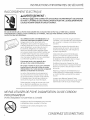
INSTRUCTIONSIMPORTANTESDESI CURITE
RACCORDEMENT ELECTRIQUE
&AVERTISSEHENT:
CE PRODUIT DOlT ETRE CONNECTI_ _, UNE SOURCE D'ALIMENTATION _, DISJONCTEUR
DE FUITE #, LA TERRE, EN CAS D'INSTALLATION EN PLEIN-AIR. LES REGLEHENTATIONS
LOCALES PEUVENT E×IGER UN CIRCUIT DISTINCT.
EN CAS DE DOUTE SUR LA PROTECTION ASSURI_E PAR LE DJSJONCTEUR DE FUITE A LA TERRE SUR LA SOURCE
D'ALIIENTATION A LAQUELLE VOUS CONNECTEZ CET APPAREIL, VEUILLEZ FAIRE VERIFIER L'INSTALLATION PAR
UN ELECTRICIEN PROFESSIONNEL.
Vous DEVEZbrancher votre r_fdg_rateur 8 un
circuit avec interrupteur de d_faut 8 Jaterre.
Essayezvotre circuit en branchant votre
rdrig6rateur dans la priseet en appugant sur
le bouton d'essai pour ce circuit, en vous assurant
que le r@frig@rateurne reqoit plus de courant
(la lumi@redu rdrig@rateur nes'allume pas
quand vous ouvrez la porte).Appugez ensuite
sur le bouton Reset(remise6 z@ro)et v@ifiezque
la lumi@res'allume quand vous ouvrez la porte.
Sivous ne savezpas sivotre circuit est @quip@
d'un interrupteur de d@faut6 la terre, demandez
6 un @lectricienqualifi@de vous aider.
N'immergez jamais votre appareil dans
de Feau, ni son cordon d'alimentation.
Ne coupez ni retirez en aucun cas la troisi_me
broche (mise (_la terre) de la fiche du cordon
d'alimentation. Pour votre s_curit_, cet appareil
doit _tre correctement mis 8 la terre.
Le cordon d'alimentation de cet appareil est
muni d'une fiche 5 3 broches (mise 6 la terre)
qui se branche dans une prise mural ordinaire
5 3 alv_oles (mise 5 la terre) pour r_duire au
minimum les risques du chocs _lectriques.
Faites examiner la prise de courant et le circuit
par un _lectricien quelifi_ pour vous assurer
que la prise est correctement mise 5 la terre.
Si la prise de courant est du type standard 6
2 air,ales, il vous incombe de la feire remplacer
par une prise 5 3 alv_oles correctement mise
6 la terre.
L'appareil doit toujours _tre branch_ dans
sa propre prise de courant, dont la tension
nominale est identique 5 celle indiqu_e sur
la plaque signal_tique.
¢ette precaution est recommand@epour
garantir un rendement optimum et _viter
une surcharge des circuits @lectriquesde
la r@sidence,ce qui pourrait cr@erun risque
d'incendie par surschauffe des ills.
Ne d_branchezjamais I'appareil en tirant
le cordon d'alimentation. Saisissezfermement
la fiche du cordon et tirez droit pour la retirer
de la prise.
R_parez ou remplacez imm@diatement tout
cordon effiloch@ou endommag& N'utilisez pas
un cordon fendill_ ou pr@sentantdes signes
d'usure.
Lorsque vous d@lacez I'appareil, faites
attention de ne pas lafaire rouler sur le cordon
d'alimentation afin de ne pas I'endommager.
NE PAS UTILISER DE FICHE D'ADAPTATION OU DE CORDON
PROLONGATEUR
(Fiches d'odoptotion non permises ou Conodo)
N'utilisez pas defiche d'adaptation pour brancher
le r@frig@rateurdans une prise 6 2 broches.
N'utilisez pas de cordon prolongateur avec
cet appareil.
CONSERVEZ CESDIRECTIVES
8

Controls and Features
Outdoor/Indoor Refrigerator
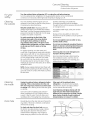
Temperature
control
The temperature displag shows the
actual temperature of the outdoor/indoor
refrigerator. The actual temperature mag
varg slightlg from the set temperature
based on factors such as door opening,
amount of food and outside temperature.
To change the temperature setting,
press the WARMER or COLDER pads until
gou reach the desired set temperature.
After several seconds, the display will
return to the actual temperature.
Allow 12-24 hours for the outdoor/indoor
refrigerator to reach the temperature that
gou have set.
L
TEMP. CONTROL
Q.
Temperature Settings
Minimum: 34°F 11.1°C}
Maximum: 45°F 17.2°C)
Child control
lockout
This child control lockout feature prevents
unwanted changes to gour temperature
settings.
After the desired temperature is set, the
temperature can be locked. To lock, press
both the + and - pads at the same time for
five seconds. To unlock, press both + and -
pads for five seconds.
Unit ON/OFF This pad stops cooling in the outdoor/indoor
refrigerator, turns off the temperature
controls and removes power to the light
circuit.
Press this pad for a minimum of 3 seconds
to turn the outdoor/indoor refrigerator
OFF for long vacations or absences, or
when cleaning the unit or changing
the light bulb. Press the pad again to
turn the outdoor/indoor refrigerator ON.
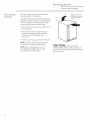
Keg ejecting
lock
Keep the kegs out of reach of children.
Store the kegs in a safe place.
Kegs for the spring-loaded lock are
outomoticollg ejected. Kegs will not
remain in the lock while the door is
opened or closed.
NOTE: Two kegs are included.
CAUTION: Before closing the door,
make sure the lock pin does not protrude
begond the top of the door, to prevent
potential damage to the cover or cabinetrg.
Interior fan
The interior fan is located in the rear wall
of the outdoor/indoor refrigerator and is
designed to run continuouslg to help
maintain the proper cooling temperature.
The interior fan will onlg turn off when
the door is opened.

Controls and Features
Outdoor/Indoor Refrigerator
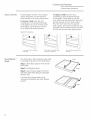
Glass shelves
Tempered glass shelves in the outdoor/
indoor refrigerator are removable for
easg cleaning or for storing larger items.
To remove a shelf, open the door
completelg to avoid potential damage
to the gasket. Lift up on the back of the
shelf slightlg. Tilt the shelf to one side
at an angle while pulling forward.
To replace a shelf, open the door
completelg to avoid potential damage
to the gasket. Tilt the shelf to one side
at an angle and slide toward the back wall,
placing one side onto the shelf support.
Place the other side onto the opposite
shelf support. Ensure rear locking tabs are
engaged. When installed properlg, the shelf
will not slide forward when gentlg pulled.
Appearancemay vary
To remove, lift up on the back
of the shelf
Tilt the shelf at an angle while
removing or replacing
Place in slots when replacing
the shelf
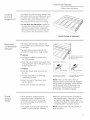
QuickSpace TM
Shelf
This shelf splits in half and slides under itself
for storage of tall items on the shelf below.
Step 1: Lift the back edge of the front half
of the shelf.
Step 2: Pull slightlg forward.
Step B: Lower the back edge of the front
half of the shelf while sliding it underneath
the back half.
The entire Quick Space shelf can be
removed and replaced (see Glass Shelves
section).
Step 1
_ Step 2
Step 3
!0

Controls and Features
Outdoor/Indoor Refrigerator
Loading
tips and
suggestions
The bottom two full extension drawers hold
five bottles each and are loaded with necks
facing the rear. Tall bottles should not be
loaded on the bottom drawer because
they may prevent the door from closing.
• Do not block the thermistor, located on
the right-hand side, just above the third
shelf of the outdoor/indoor refrigerator.
Blocking the thermistor could impair the
air circulation and temperature control.
Bottom drawer arrangement
Removing
full extension
drawers
The bottom full extension drawers pull
out so bottles can conveniently be added
or removed.
The upper full extension slide can be
removed for magnums or larger bottles.
To remove:
1. Pull the full extension drawer out to
the STOPposition.
2. Push the tab on right drawer guide down
while pulling the tab on left guide up, and
pull the drawer out.
To replace:
1. Push the drawer slide arm back into
the unit.
.
Pull the small slide sub-assembly
completely forward.
3. Insert the sides of the drawer back
into the guides.
4. Push until the tabs lock into place.
Appearance may vary
Tab (push tab down on right
drawer guide, pull tab up on
left drawer guide)
Sub-assembly
To replace, push drawer
slide arm back into unit
Pullsmall slide sub-assembly
completely forward
NOTE: Make sure the tabs on the full
extension drawer guides are fully engaged
before loading any bottles. Pull the drawers
out all the way to the STOPposition and
push back in several times to make sure
locking tabs are properly engaged.
Wood
drawer
fronts
The full extension drawer fronts on
the outdoor/indoor refrigerator are
unfinished cherry wood. During use,
oil from hands may accumulate and
stain the wood.
• The drawer fronts may be stained and
sealed to match adjacent cabinetry.
• Apply the stain and sealer according to
the manufacturer's instructions. To avoid
unpleasant odor, keep the door open to
ventilate and allow the stain/sealer to dry
completely before using the product.
NOTE: Natural wood may vary slightly in
grain and color.
11

Care and Cleaning
Outdoor/Indoor Refrigerator
For blour
safetg
Turn the outdoor/indoor refrigerator OFF or unplug the unit before cleaning.
Turn the outdoor/indoor refrigerator OFF bg pressing the button on the control panel
a minimum of 3 seconds until the light and temperature display turn off.
Door gasket The vingl gasket mag be cleaned with mild
soap and water, a baking soda solution or
a mild scouring powder. Rinse well.
After cleaning the door gasket, applg a thin
lager of paraffin wax or petroleum jellg to
the door gasket at the hinge side. This helps
keep the gasket from sticking and bending
out of shape.
Light bulb
replacement
Turn OFF or unplug the outdoor/indoor
refrigerator before replacing the light bulb.
To remove the light shield, push in the tab
on the left side of the shield and lower it.
Replace with a 15 watt appliance bulb.
In the event
o1:a power
failure
If power fails, gou can maintain interior
temperature longer bg keeping the door
closed. Open the door onlg when necessarg
to avoid the loss of cold air.
Do not store or use gasoline or other
flammable vapors and liquids in the
vicinity of this or any other appliance.
Preparing
for vacation
For long vacations or absences,
alwags leave the unit running with the
temperature set at 45% (7.2°C).This will
provide the greatest degree of protection
to your outdoor/indoor refrigerator. In
addition to leaving gour unit turned on,
it is recommended that you follow the
below steps prior to long vacations. If you
cannot leave gour unit turned on during
extended periods of non-use, be sure to
follow the below steps.
1. Remove all the contents from the unit.
.
.
.
Clean the outside and inside (see
instructions on the next page).
Place charcoal and baking soda inside
the unit. In conditions which are either
below 45°F (7.2°C)or high humiditg, use
4 Ibs. baking soda. In all other conditions,
use I lb. baking soda.
Cover the unit with the Monogram
vingl cover.
A vingl cover accessorg is available to
protect the outdoor/indoor refrigerator
during extended periods of non-use.
The durable vingl exterior withstands
the elements and the soft felt lining helps
protect the stainless steel finish. There is
one that fits a built-in installation or one
for free-standing use. In addition to the
vingl cover, an embroidered Monogram
polishing cloth is available. Use the
polishing cloth to keep the refrigerator's
stainless steel finish clean.
ZBKTF - for free-standing installation
ZBKTB - for built-in installation
Call 800.626.2002 to order.
For shorter vacations, remove perishable
foods and leave controls at regular settings.
However, if the ambient temperature is
expected to drop below 45% (7.2°C),follow
the same instructions as for long vacations.
Preparing
to move
Secure all loose items such as shelves and Be sure the outdoor/indoor refrigerator
drawers by taping them securelg in place to stays in an upright position during
prevent damage, moving.
12

Careand Cleaning
Outdoor/Indoor Refrigerator
For your
safety
Cleaning
the outside
Turn the outdoor/indoor refrigerator OFFor unplug the unit before cleaning.
Turn the outdoor/indoor refrigerator OFFby pressing the button on the control panel
a minimum of 3 seconds until the light and temperature display turn off.
Your new stainless steel Monogram unit can
maintain its new luster for the life of the product
if maintained as described below.
Keep the outside clean. Regularly polishthe
stainless steel exterior and handle with Stainless
SteelMagic'Mand the Monogram polishingcloth,to
preserve and protect the fine finish. Donot apply
to plastic and rubber components.
To avoid scratchingthe fine finish of the
stainlesssteel, wipe in the same direction
as the grain when polishing or cleaning
ang stainless steel surface. The grain on the
outdoor/indoor refrigerator runs top to bottom
on all sides and front to back on the top
canopg.
For regular cleaning, use clean water and
a soft cloth. If stains persist, wash with mild dish
soap using a soft cloth or non-abrasive pad. For
more difficult stains, make a solution consisting
of 25% vinegar (white or red)and 75% water.
Dip a soft cloth into the solution and rub onto
the stainless steel to remove the stain. Ifthese
methods do not remove the stains, dirt or debris,
call 800.GE.CARES.
NOTE:Alwags reapplg StainlessSteel Magic with
the Monogram polishing cloth after cleaning or if
gour unit comes in contact with water, to protect
the fine finish.
Stainless Steel Magic and additional
Monogram polishing cloth are available
through GEParts and Accessories, 800.626.2002
or monogram.com.
For Stainless Steel Magic, order part number
WX10X15.
AIwags remove ang debris or obstruction
from the front of the toekick to ensure optimum
performance.
Do not use appliance wax or polish on ang
stainless steel surface.
Do not use scouring pads, powdered cleaners,
bleach or cleaners containing bleach because
these products can scratch and damage the
finish.
Warrantg does not cover damage due to
improper cleaning methods.
Recommended cleaning isdetermined bg
the installation location. Use this chart to
determine the frequencg for cleaning gour
outdoor/indoor refrigerator.
Cleaning
the inside
Drain hole
Unplug the outdoor/indoor refrigerator before
cleaning. If this is not practical, turn the unit
OFFand wring excess moisture out of the cloth
or sponge when cleaning around switches, lights
or controls.
Use warm water and baking soda solution-
about a tablespoon (15 ml) of baking soda to
a quart (1 liter)of water. This both cleans and
neutralizesodors.Thoroughlg rinseand wipe drg.
Other parts of the outdoor/indoor
refrigerator-including the door gaskets,
full extension drawers and glass shelves-
can be cleaned the same way.
Avoid cleaning cold glass shelves with hot
water because the extreme temperature
difference mag cause them to break. Handle
glass shelves carefullg. Rough handling of
tempered glass can cause it to shatter.
Periodically check the drain hole and channel for
any debris. If the drain is blocked, condensation
will not drain properly.
To check and clean the drain hole, remove
the bottom two glass shelves. Sweep a damp
cloth along the channel in the back of the
outdoor/indoor refrigerator. Use a finger to
sweep away any debris from the drain hole.
Drain hole
13

Top Canopy Removal
Outdoor/Indoor Refrigerator
Top canopy
removal
The top canopy may be removed when
installing under a countertop.
The door MUST BEclosed when removing or
replacing the top canopy. To avoid damage,
the top canopy must clear the left hinge
center locking plate and right hinge.
• Remove the 3 screws from the back of the
top canopy (A).
• Using heavy-duty work gloves, lift up
on the top canopy back (B) and slide
it forward until it unlatches from
the unit (C).
• Lift the top canopy up and off of the unit.
NOTE: Keep the top canopy and screws
for future free-standing installations.
NOTE: When installing the unit in a
free-standing configuration, the top
canopy must be left in place.
(A)
(B)
NOTE:Door MUSTBE
closed before removing
or replacing the top
canopy.
(c)
CAUTION: Under side edges
of the stainless steel canopy top may be
sharp. Wear heavy-duty work gloves when
moving the top.
14

The Problem Solver
Outdoor/Indoor Refrigerator
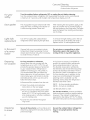
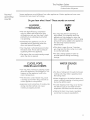
Normal
operating
sounds
Newer appliances sound different from older appliances. Modern appliances have more
features and use newer technology.
Do you hear what I hear? These sounds are normal.
HUMMM...
--WHOOSH...
The new high efficiency compressor
may run faster and longer than your
old appliance and you may hear a high-
pitched hum or pulsating sound while
it is operating.
Sometimes the appliance runs for an
extended period, especially when the
doors are opened frequently.
You may hear a whooshing sound when
the doors close. This is due to pressure
equalizing within the appliance.
The interior fan runs continuously except
when the door is opened.
CLICKS,POPS,
CRACKSand CHIRPS
You may hear cracking or popping sounds
when the appliance is first plugged in. This
happens as the appliance cools to the
correct temperature.
The electronic control board may cause
a clicking sound when relays activate to
control appliance components.
Expansion and contraction of cooling coils
during and after defrost can cause
cracking or popping sounds.
WHIR./
• You may hear the fans spinning at
high speeds. This happens when the
appliance is first plugged in, when the
door is opened frequently or when a large
amount of food is added to the appliance.
The fans help maintain desired
temperatures.
• If the door is open for over 3 minutes,
you may hear the fans come on in order
to cool the light bulbs.
• The fans change speeds in order to
provide optimal cooling and energy
savings.
WATERSOUNDS
6
• The flow of refrigerant through the freezer
cooling coils may make a gurgling noise
like boiling water.
• Water dropping on the defrost heater can
cause a sizzling, popping or buzzing sound
during the defrost cycle.
• A water dripping noise may occur during
the defrost cycle as ice melts from the
evaporator and flows into the drain pan.
• Closing the door may cause a gurgling
sound due to pressure equalization.
15

The Problem Solver
Outdoor/Indoor Refrigerotor
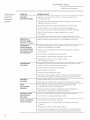
Questions?
Use this
problem
solver!
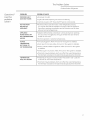
PROBLEM
APPLIANCE
DOES NOT OPERATE
VIBRATION OR
RATTLING (Slight
vibration is normal.)
COMPRESSOR
MOTOR OPERATES
FOR LONG PERIODS
OR CYCLES ON AND
OFF FREQUENTLY
COMPARTMENT
TOO WARM
APPLIANCE
HAS ODOR
o
o
DOOR
NOT CLOSING
PROPERLY
MOISTURE FORMS
ON OUTSIDE OF
APPLIANCE
FROST OR MOISTURE
COLLECTS INSIDE
POSSIBLE CAUSE
• Appliance is so quiet that most of the time gou will hear low or
no operating noise.
• Appliance may be in defrost cycle when compressor motor does not
operate for about 30 minutes.
• Controls are set to OFF.PressON/OFF button on control panel.
• Ifinterior light is not on, appliance may not be plugged in at
electrical outlet. Pushthe plug completely into the electrical outlet.
• The GFCIcircuit breaker is tripped. Replacefuse or reset
the breaker.
• The appliance is in showroom mode. Unplug it and plug it back in.
• Adjust the leveling legs as shown in the Installation Instructions.
• Normal when appliance isfirst plugged in.Wait 24 hours for the
appliance to completelg cool down.
• Often occurs when large amounts of food are placed in appliance.
This isnormal.
• Door left open or package holding door open.
• Hotweather or frequent door openings. This is normal.
• Temperature control set at the coldest setting.
SeeTemperature Control.
• Temperature control not set cold enough. SeeTemperature Control.
Allow 12-24 hours for temperature to change.
• Warm weather or frequent door openings.
• Door left open for long time.
• Package may be holding door open.
• Thermistor may be blocked, which can affect the overall temperature.
Thethermistor islocated on the right hand sidejust above the third shelf.
Interior needs cleaning. See Care and Cleaning.
Keepopen box of baking soda in appliance; replace everg 3 months.
Door gasket is sticking or folding over. Apply petroleum jelly
or paraffin wax to the face of the gasket.
• The door is hitting an internal component inside the appliance.
Adjust interior components to prevent interference.
• Not unusual during periods of high humidity. Wipe surface dry.
• Door left open or package holding door open.
• Too frequent or too long door openings.
• In humid weather, air carries moisture into appliance when door
is opened.
• Temperature control is set at coldest setting.
• Thermistor may be blocked, which can affect the overall temperature.
Thethermistor islocated on the right hand sidejust above the third shelf.
16

The Problem Solver
Outdoor/Indoor Refrigerator
Questions?
Use this
problem
solver!
PROBLEM POSSIBLE CAUSE
INTERIOR LIGHT
DOES NOT WORK
HOT AIR FROM
BOTTOM OF
APPLIANCE
APPLIANCE
NEVER SHUTS OFF
BUT TEMPERATURES
ARE OK
ACTUAL
TEMPERATURE
NOT EQUAL TO
SET TEMPERATURE
TEMPERATURE
WILL NOT ADJUST
• No power at outlet.
• Light bulb needs replacing. See Care and Cleaning.
• Controls are set to OFF.PressON/OFF pad on control panel.
Normal air flow cools the motor. In the refrigeration process,
it is normal that heat be expelled in the area under the appliance.
Some floor coverings are sensitive and will discolor even at these
safe and normal temperatures.
Adaptive defrost keeps compressor running during door openings.
This isnormal. The appliance will cgcle off after the door remains
closed for two hours.
• Normal operation in extreme temperatures.
• Unit just plugged in. Allow 24 hours for the sgstem to stabilize.
Door open for too long. Allow 24 hours for the sgstem to stabilize.
Warm contents added to appliance. Allow 24 hours for the sgstem
to stabilize.
• Defrost cgcle is in process. Allow 24 hours for the sgstem to stabilize.
Thermistor mag be blocked, which can affect the overall temperature.
Thethermistor islocated on the right hand sidejust above the third shelf.
• Temperature mag be in lockout mode. Press both + and - pads for
5 seconds to unlock the temperature.
Thermistor mag be blocked, which can affect the overall temperature.
Thethermistor islocated on the right hand sidejust above the third shelf.
17

Notes
Outdoor/Indoor Refrigerotor
18

Consumer Services
Outdoor/Indoor Refrigerator
With the purchase of your new Monogram appliance, receive the
assurance that if you ever need information or assistance from
GE, we will be there. All you have to do is call--toll-free!
GE Answer
Center ®
In the USA:
800.626.2000
Whatever your question about any Monogram major appliance, GEAnswer Center®
information service is available to help. Your call-and your question-will be answered
promptly and courteously. And you can call any time. GEAnswer Center®service is open
24 hours a day, Monday through Saturday.
OR
Visit our Website at: monogram.corn
In Canada, call 1.800.561.3344.
In-Home
Repair
Service
In the USA:
800.444.1845
In Canada:
1.800.561.3344
A GEconsumer service professional will provide expert repair service, scheduled at a time that's
convenient for you. Many GEConsumer Service company-operated locations offer you service
today or tomorrow, or at your convenience (7:00a.m. to 10:00 p.m. weekdays, 8:00 a.m. to 6:00 p.m.
Saturday and Sunday). Our factory-trained technicians know your appliance inside and out-so most
repairs can be handled in just one visit. In Canada: Monday to Friday, 7:00 a.m. to 8:00 p.m. and
Saturday, 8:00 a.m. to 5:00 p.m. EDST.
For
Customers
With Special
Needs...
In the USA:
800.626.2000
SECTIO_ _A
,_._,_o_ ._. _._K_,_'Jw._.._. _._...
GEoffers Braille controls for a variety of GEappliances, and a brochure to
assist in planning a barrier-free kitchen for persons with limited mobility.
Consumers with impaired hearing or speech who have access to a TDDor
a conventional teletypewriter may call 800.TDD.GEAC(800.833.4322)
to request information or service.
Service
Contracts
In the USA:
800.626.2224
In Canada:
1.800.561.3344
You can have the secure feeling that GEConsumer Service will still be there after your warranty
expires. Purchase a GEcontract while your warranty is still in effect and you'll receive a substantial
discount. With a multiple-gear contract, you are assured of future service at today's prices.
Parts and
Accessories
In the USA:
800.626.2002
In Canada:
1.800.561.3344
Individuals qualified to service their own appliances can have parts or accessories sent directly
to their home. The GEparts system provides access to over/47,000 parts...and all GEGenuine Renewal
Parts are fully warranted. VISA,MasterCard and Discover cards are accepted.
User maintenance instructions contained in this manual cover procedures intended to be
performed bg any user. Other servicing generally should be referred to qualified service
personnel. Caution must be exercised, since improper servicing may cause unsafe operation.
19

Warranty
Outdoor/Indoor Refrigerator
YOUR MONOGRAM OUTDOOR/INDOOR REFRIGERATORWARRANTY
Staple sales slip or canceled check here. Proof of original
purchase date is needed to obtain service under warrantg.
WHAT IS
COVERED
From the Date
of the Original
Purchase
LIMITED ONE-YEAR WARRANTY
For one year from date of original purchase, we will provide, free of charge, parts and service labor in your home
to repair or replace any part of the unit that fails because of a manufacturing defect.
LIMITED FIVE-YEAR WARRANTY
For five years from date of original purchase, we will provide, free of charge, parts and service labor
in your home to repair or replace any part of the sealed refrigerating system (the compressor, condenser,
evaporator and all connecting tubing) that fails because of a manufacturing defect.
This warranty is extended to the original purchaser and any succeeding owner for products purchased
for ordinary home use in the/48 mainland states, Hawaii, Washington, D.C.or Canada. Ifthe product is located
in an area where service by a GEAuthorized Servicer is not available, you may be responsible for a trip charge
or you may be required to bring the product to an Authorized GEService location for service. In Alaska the
warranty is the same except that it is LIMITEDbecause you must pay to ship the product to the service shop
or for the service technician's travel costs to your home.
All warranty service will be provided by our Factory Service Centers or by our authorized Customer Care®
servicers during normal working hours.
Should your appliance need service, during warranty period or beyond, in the USAcall 800.444.!845.
In Canada: 800.56!.3344. Pleasehave your serial number and model number available when calling for service.
WHAT IS NOT
COVERED
, Service trips to your home to teach you how
to use the product.
. Replacement of house fuses or resetting of circuit
breakers.
. Damage to the product caused bg accident, fire,
floods or acts of God.
. Failure of the product if it is used for other than
its intended purpose or used commercially.
. Damage caused after delivery.
. Improper installation, delivery or maintenance.
If you have an installation problem, contact
gout dealer or installer. You are responsible
for providing adequate electrical, plumbing
and other connecting facilities.
. Replacement of the light bulbs, if included.
. Loss of food due to spoilage {in the USAonly}.
. Incidental or consequential damage caused
bg possible defects with this appliance.
. Product not accessible to provide required
service.
EXCLUSIONOFIMPLIED WARRANTIES--Yoursole and exclusive remedy is product repair as provided in
this Limited Warranty. Any implied warranties, including the implied warranties of merchantabilitg or
fitness for a particular purpose, are limited to one year or the shortest period allowed bg law.
Some states/provinces do not allow the exclusion or limitation of incidental or consequential damages, so the
above limitation or exclusion may not apply to you. This warranty gives you specific legal rights, and you may
also have other rights which vary from state to state/province to province. To know what your legal rights are
in your state/province, consult your local or state/provincial consumer affairs office or your state's Attorney
General.
Warrantor in USA: General Electric Compang,
Louisville, KY40225
Warrantor in Canada: Mabe Canada Inc.,
Burlington, Ontario
19705891POIO
49-60432-1
08-07 JR
Printed in 81ovenia
GE Consumer & Industrial
Appliances
General Electric Company
Louisville, KY/40225
ge.com
-
 1
1
-
 2
2
-
 3
3
-
 4
4
-
 5
5
-
 6
6
-
 7
7
-
 8
8
-
 9
9
-
 10
10
-
 11
11
-
 12
12
-
 13
13
-
 14
14
-
 15
15
-
 16
16
-
 17
17
-
 18
18
-
 19
19
-
 20
20


GE ZDOD240PBLSS Le manuel du propriétaire
- Catégorie
- Frigos
- Taper
- Le manuel du propriétaire
- Ce manuel convient également à
dans d''autres langues
- English: GE ZDOD240PBLSS Owner's manual
Documents connexes
-
GE ZDBT240PBBS Le manuel du propriétaire
-
-
GE Monogram ZIFP360NXARH Manuel utilisateur
-
-
-
-
-
-
-