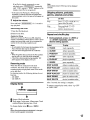
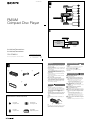
Sony CDX-GT650UI - Fm/am Compact Disc Player Operating Instructions Manual
- Catégorie
- Récepteurs multimédia de voiture
- Taper
- Operating Instructions Manual

SON~
4-193-831-12(1 )
FM/AM
Compact
Disc
Player
Operating Instructions
_____
Mode d'emploi --Ju.
Owner's
Record
The model and serial numbers are located
on
the bottom of the unit.
Record the serial number
in
the space provided below.
Refer to these numbers whenever you call upon your Sony dealer regarding this product.
Model No. CDX-GT650UI Serial No. _
To
cancel the demonstration (DEMO) display, see page
6.
Pour annuler I'affichage de demonstration (DEMO), reportez-vous a
la
page
6.
CDX-GT650UI
~
~
~
SensMe'·
f gracenote.
[Q]D~@
DIGITAL
AUDIO
I TEXT I
Made for
~
iPod
CJ
iPhone
©2010 Sony Corporation

ZAPPIN and Quick-BrowZer are trademarks
of
Sony Corporation.
HD Radio
H
,1
is a proprietary trademark
of
iBiquity Digital Corp.
Microsoft, Windows, Windows Vista and
Windows Media and logos are trademarks
or
registered trademarks
of
Microsoft Corporation
in the United States and/or other countries.
f
gracenote
.
12
TONE ANALYSIS and
its
logo are trademarks ofSony
Corporation.
SensMe and the SensMe logo are
trademarks or registered
trademarks
of
Sony Ericsson
Mobile Communications
AB.
•
SensMe'M
[SIIII
',.'.
II!II
lliIO
" •
-.:;. .
Music recognition technology and related data are
provided by Gracenote®. Gracenote
is
the industry
standard
in
music recognition technology and
related content delivery. For more information,
please visit www.gracenote.com.
CD and music-related data from Gracenote, Inc.,
copyright
© 2000-2010 Gracenote. Gracenote
Software, copyright
© 2000-2010 Gracenote. This
product and service may practice one or more
of
the following U.S. Patents: #5,987,525;
#6,061,680; #6,154,773, #6,161,132, #6,230,192,
#6,230,207, #6,240,459, #6,330,593, and other
patents issued or pending. Some services supplied
under license from Open Globe, Inc. for U.S.
Patent: #6,304,523.
Gracenote and CDDB are registered trademarks
of
Gracenote. The Gracenote logo and logotype, and
the "Powered by Gracenote" logo are trademarks
of
Gracenote.
~
The
"SAT
Radio Ready"
'~A~l.-'
logo indicates that this
RADIO
product will control a satellite
REA
D Y radio tuner module (sold
separately). Please see your nearest authorized
Sony dealer for details on the satellite radio
tuner module.
"SAT
Radio,"
"SAT
Radio Ready," the
SAT
Radio and
SAT
Radio Ready logos and all
related marks are trademarks
of
Sirius
XM
Radio Inc. and
XM
Satellite Radio Inc.
Warning
Be
sure to install this unit in the dashboard
of
the car for safety. For installation and
connections, see the supplied installation/
connections manual.
FOR UNITED STATES CUSTOMERS. NOT
APPLICABLE
IN
CANADA, INCLUDING
IN
THE PROVINCE OF QUEBEC.
POUR
lES
CONSOMMATEURS AUX
ETATS-UNIS. NON APPLICABLE
AU
CANADA,Y COMPRIS
lA
PROVINCE DE
QUEBEC.
You
are cautioned that any changes or
modifications not expressly approved in this
manual could void your authority to operate this
equipment.
This equipment has been tested and found to
comply with the limits for a Class B digital
device, pursuant to Part
15
of
the FCC Rules.
These limits are designed to provide reasonable
protection against harmful interference in a
residential installation. This equipment
generates, uses, and can radiate radio frequency
energy and,
if
not installed and used in
accordance with the instructions, may cause
harmful interference to radio communications.
However, there is no guarantee that interference
will not occur in a particular installation.
If
this
equipment does cause harmful interference to
radio
or
television reception, which can be
determined by turning the equipment
off
and on,
the user
is
encouraged to try to correct the
interference by one
or
more
of
the following
measures:
- Reorient or relocate the receiving antenna.
- Increase the separation between the equipment
and receiver.
- Connect the equipment into an outlet on a
circuit different from that to which the receiver
is connected.
- Consult the dealer
or
an experienced radiolTV
technician for help.
CAUTION
The
use
of
optical instruments with this product
will increase eye hazard.
For the State of California, USA only
Perchlorate
Material-
special handling may apply,
See www.dtsc.ca.govlhazardouswaste/perchlorate
Perchlorate Material: Lithium battery contains
perchlorate
2
..

This product
is
protected
by
certain intellectual
property rights
of
Microsoft Corporation. Use or
distribution of such technology outside
of
this
product
is
prohibited without a license from
Microsoft or
an
authorized Microsoft subsidiary.
iPhone, iPod, iPod classic, iPod nano, and iPod
touch are trademarks
of
Apple Inc., registered
in the U.S. and other countries.
Apple, Macintosh and iTunes are trademarks
of
Apple Inc., registered in the U.S. and other
countries.
MPEG Layer-3 audio coding technology and
patents licensed from Fraunhofer lIS and Thomson.
Warning if your car's ignition has no
ACC position
Be sure to set the Auto
Off
function (page 24).
The unit will shut offcompletely and
automatically in the set time after the unit is
turned off, which prevents battery drain.
If
you do not set the Auto Off function, press
and hold
(SOURCE/OFF)
until the display
disappears each time you
tum
the ignition off.
•
3

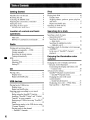
Table
of
Contents
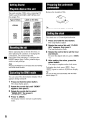
Getting Started
Playable discs on this unit 6
Resetting the unit 6
Canceling the
DEMO
mode 6
Preparing the card remote commander 6
Setting the clock 6
Detaching the front panel 7
Attaching the front panel 7
Location of controls and basic
operations
Main unit. 8
RM-XI51 Card Remote Commander
10
Radio
Storing and receiving stations
11
Storing automatically -
BTM
11
Storing manually
II
Receiving the stored stations
11
Tuning automatically
11
• RDS
11
Overview
11
Selecting
PTY
12
Setting
CT
. . . . . . . . . . . . . . . . . . . . . . . . . .
12
CD
Playing a disc
12
Display items
12
Repeat and shuffle play
12
USB devices
Playing back a USB device
13
Display items
13
Repeat and shuffle play ]4
Enjoying music according to your mood
-
SensMe™
14
Before using the SensMe™ function
14
Installing "SensMe™ Setup" and "Content
Transfer" in your computer.
14
Registering a USB device using ''SensMe™
Setup"
]5
Transferring tracks to the USB device using
"Content Transfer"
15
Playing tracks in the channel
- SensMe™ channels . . . . . . . . . . . . . . . . ]5
4
iPod
Playing back iPod 16
Display
items.
. . . . . . . . . . . . . . . . . . . .
..
17
Skipping albums, podcasts, genres, playlists
and artists. . . . . . . . . . . . . . . . . . . . . . . .
..
17
Repeat and shuffle play . . . . . . . . . . . . .
..
17
Operating an iPod directly
- Passenger control. . . . . . . . . . . . . . . . . .
..
18
Searching for a track
Searching a track by name
- Quick-BrowZer™
18
Searching by skip items
- Jump mode
18
Searching by alphabetical order
- Alphabet search. . . . . . . . . . . . . . . . .
..
19
Searching a track by listening to track passages
-
ZAPPINTM
. . . . . . . . . . . . . . . . . . . . . . .
..
]9
In
the case
of
''SensMe™ channels"
playback. . . . . . . . . . . . . . . . . . . . . . . . .
..
19
Enjoying the illumination color
variation
Changing the color
of
display and buttons
-Dynamic
Color Illuminator. . . . . . . . . . . . . 20
Customizing the display and button color
- Custom Color 20
Advanced color setting. . . . . . . . . . . . . . . . . .
21
SensMe™
Channels synchronization
-
SensMe™
Channels Color 2]
Changing the color with sound
synchronization
- Sound Synchronization 2]
Displaying clear color - White Menu
21
Start up effect - Start White
21

Sound Settings and Setup Menu
Changing the sound settings 22
Adjusting the sound characteristics 22
Enjoying sophisticated sound functions
- Advanced Sound Engine 22
Selecting the sound quality
- EQ7 Preset 22
Customizing the equalizer curve
- EQ7 Setting
23
Optimizing sound by Time Alignment
- Listening Position
23
Adjusting the listening position 24
D~+Advanced
24
Using rear speakers as subwoofer
- Rear Bass Enhancer 24
Adjusting setup items - SET 24
Other functions
Using optional equipment 25
Auxiliary audio equipment 25
Additional Information
Precautions . . . . . . . . . . . . . . . . . . . . . . . . . . . 26
Notes on discs 26
Playback order
of
~P31W~NAAC
files 26
About iPod . . . . . . . . . . . . . . . . . . . . . . . . . 26
~aintenance
. . . . . . . . . . . . . . . . . . . . . . . . . . 27
Removing the unit. 28
Specifications 28
Troubleshooting . . . . . . . . . . . . . . . . . . . . . . . 29
Error displayslMessages. . . . . . . . . . . . . . .
31
-
http://esupport.sony.com
http://www.sony.com/mobileAV
Provides information on:
• Models and manufacturers of compatible digital audio players
• Supported MP3IWMAJAAC files
• System requirements for the software in the supplied CD-ROM
5

•
6
Getting
Started
Playable
discs
on
this
unit
This unit can play CD-DA (also containing CD
TEXT) and CD-RlCD-RW (MP3/WMA/AAC
files (page
26».
Type of discs
Label
on
the disc
CD-DA
illJo~@
ffiJo~@
DIGITAL
AUDIO
DIGITAL
AUDIO
GtH·ftID
IReWritablel
illJo~@
ffiJo§@
MP3
DIGITAL
AUDIO
DIGITAL
AUDIO
,
••
1
••
IReWritablel
WMA
AAC
illJo~@
[Q]O~~
lijQ
••
Il.thM'
IReWritablel
Resetting
the
unit
Before operating the unit for the first time, or
after replacing the
car
battery
or
changing the
connections, you must reset the unit.
Detach the front panel (page 7) and press the
RESET button (page 8) with a pointed object,
such as a ball-point pen.
Note
Pressing the
RESET
button will erase the clock setting
and
some stored contents.
Canceling
the
DEMO
mode
You
can cancel the demonstration display which
appears during turning off.
1 Press and hold the select button.
The setup display appears.
2 Rotate the control dial until "DEMO"
appears, then press it.
3 Rotate the control dial to select
"DEMO-OFF," then press it.
The setting is complete.
4 Press ~ (BACK).
The display returns to normal reception/play
mode.
Preparing
the
card
remote
commander
Remove the insulation film.
Tip
For
how
to
replace the battery. see page 27.
Setting
the
clock
The clock uses a 12-hour digital indication.
1 Press and hold the select button.
The setup display appears.
2 Rotate the control dial until "CLOCK
ADJ" appears, then press it.
The hour indication flashes.
3 Rotate the control dial to set the hour
and minute.
To
move the digital indication, press
(SEEK)
-/+.
4 After setting the minute, press the
select button.
The setup is complete and the clock starts.
To
display the clock, press
(DSPL).
Press
(
DSPL)
again to return to the previous display.
Tip
You
can set the clock automatically with the RDS
feature (page
12).

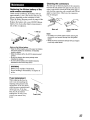
Detaching
the
front
panel
You can detach the front panel
of
this unit to
prevent theft.
Caution alarm
If
you tum the ignition switch to the OFF
position without detaching the front panel, the
caution alarm will sound for a few seconds.
The
alarm will only sound
if
the built-in
amplifier is used.
1 Press and hold
(SOURCE/OFF).
The unit is turned off.
2 Press
(OPEN
).
The front panel is flipped down.
3 Slide the iront panei to the right, then
gently
pUll
out the left end of the front
panel.
Notes
• Do not drop
or
put
excessive pressure on the front
panel
and
display window.
• Do not subject the front panelto heat/high
temperature
or
moisture. Avoidleaving it
in
a parked
car
or
on a dashboardlrear
tray.
• Do notdetach the front panel during playback
of
the
USB device, otherwise USB data may be damaged.
Attaching the front panel
Place the hole ®
of
the front panel onto the
spindle
® on the unit, then lightly push the left
side in.
Press
(--=S=-=Oc=7
U
-=-=R=-=C=-=E=-:/O=FF=-)
on the unit (or insert a
disc) to operate the unit.
Note
Do not
put
anything on the innersurface
of
the front
panel.
•
7

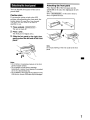
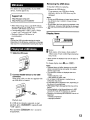
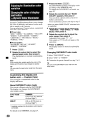
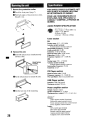
Location
of
controls
and
basic
operations
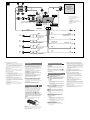
Main unit
Front panel removed
16
This section contains instructions on the location
of
controls and basic operations.
For details, see the respective pages.
[II
SEEK
+/-
buttons
Radio:
To
tune in stations automatically (press); find
a station manually (press and hold).
CDIUSB:
To
skip tracks (press); skip tracks
continuously (press, then press again within
about 1 second and hold); reverse/fast-
forward a track (press and hold).
SensMe™:
To
skip tracks (press); reverse/fast-forward a
track (press and hold).
[2J
SOURCE/OFF button*1
Press
to
tum on the power/change the source
(Radio/CDIUSB/SensMe
TM*2/
AUX).
Press for 1 second to tum off the power.
Press for more than 2 seconds
to
tum off the
power and the display disappears.
~
a.
(BROWSE) button page 18
To
enter the Quick-BrowZer™ mode.
@]
Control dial/select button page 22, 24
To
adjust volume (rotate); select setup items
(press and rotate).

[§]
Receptor for the card remote
commander
lID
Display window
[1]
OPEN
button page
7,
12
rnJ
USB connector page 13, 15, 16
To connect to the USB device.
lID
~ (BACK)/MODE button*1 page 11,
18
Press to return to the previous display/select
the radio band (FM/AM).
Press and hold to enter/cancel the passenger
controL
nm
ZAP button
page
19
To
enter
ZAPPINTM
mode.
[1]
COLOR button page
20
To select the preset colors (press); register
custom color settings (press and hold).
[1g]
PTV
/CAT*3
button page 12
To select PTY in RDS.
~
Number buttons
Radio:
To receive stored stations (press); store
stations (press and hold).
CDIUSBISensMe™:
(D/CD:
ALBUM
-/+
(during
MP3IWMN
AAC playback)
To
skip albums/change
SensMe™
channels (press); skip albums
continuously (press and hold).
®:
REP*4
page
12, 14, 17
CD:
SHUF
page
12, 14, 17
@:PAUSE
To pause playback. To cancel, press
again.
IHl
DSPL (display)/SCRL (scroll) button
page
11, 12, 13, 17, 18
To change display items (press); scroll the
display item (press and hold).
~
AUX
input
jack page 25
To
connect a portable audio device.
[1§]
RESET button page 6
[11]
~
(eject) button
To
eject the disc.
MJ
Disc
slot
Insert the disc (label side up), playback
starts.
*I If an HO Radio tuner
or
SAT tuner is connected:
when
(SOURCE/OFF)
is pressed, the connected
device
tHO,"
"XM"
or
"SR") will appear
in
the
display. Furthermore,
if
(
MODE)
is pressed, you
can switch the HO Radio tuner band
or
SAT tuner
band.
*2 When
a USB device set
up
for the SensMe™
function is connected.
*3 When the SAT tuner is connected.
*4 This button has
a tactile dot.
Notes
• When ejecting/inserting a disc, keep any USB
devices disconnected
to
avoid damage to the disc.
• Ifthe unit is turned
off
and
the display disappears,
it
cannot be operated with the cardremote
commander unless
(SOURCE/OFF)
on the unitis
pressed,
or
a disc is inserted to activate the unit first.

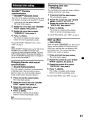
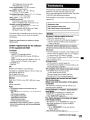
RM-X151 Card Remote
Commander
Remove the insulation film before use (page 6).
[fJ
OFF button
To
turn off the power; stop the source.
[?J
SOURCE button*1
To
turn on the power; change the source
(Radio/CD/USB/SensMe
TM*2/
AUX).
~
"(~V"(~)buttons
To
control Radio/CDIUSB/SensMe™, the
same as
(SEEK)
-/+
on the unit.
Setup, sound setting, etc., can be operated by
.....
@]
DSPL (display) button
To
change display items.
lID
VOL (volume) +*3/_ button
To adjust volume.
[§]
ATT (attenuate) button
To
attenuate the sound.
To
cancel, press
again.
[l]
SEL (select) button
The same as the select button on the unit.
lID
MODE button*1
Press to select the radio band (FM/AM).
Press and hold to enter/cancel the passenger
control.
~
t(+V.(-)buttons
To control CDIUSB/SensMe™, the same as
(D/®
(ALBUM
-/+)
on the unit.
Setup, sound setting, etc., can be operated by
t •.
IIQ]
SCRL (scroll) button
To
scroll the display item.
[1]
Number buttons
To
receive stored stations (press); store
stations (press and hold).
*1 Ifan HO Radio tuner
or
SAT tuner is connected:
when
(SOURCE)
is pressed, the connected device
("HO,"
''XM'' or "SR") will appear
in
the display
Furthermore,
if
(
MODE)
is pressed, you
can
switch
the HO Radio tuner band
or
SAT tuner band.
*2 When a USB device set up for the SensMe™
function is connected.
*3 This button has
a tactile dot.

Radio
Storing
and
receiving
stations
Caution
When tuning in stations while driving, use Best
Tuning Memory (BTM) to prevent an accident.
Overview
FM stations with Radio Data System (RDS)
service send inaudible digital information along
with the regular radio program signal.
Display items
oRadio band, Function
oProgram service name, Clock, Frequency*,
Preset number
* While receiving the RDS station,
"*"
is displayed on
the left
of
the frequency indication.
To change display items
0,
press
(DSPL).
Storing automatically - BTM
1 Press
(SOURCE/OFF)
repeatedly until
"TUNER" appears.
To
change the band, press
(MODE)
repeatedly.
You
can select from
FMI,
FM2,
FM3,
AMI
or AM2.
2 Press and
hold
the select button.
The setup display appears.
3 Rotate the control dial until
"BTM"
appears, then press it.
The unit stores stations in order
of
frequency
on the number buttons.
A beep sounds when the setting is stored.
II
Storing manually
1 While receiving the station
that
you
want
to
store, press and
hold
a
number button
(ill
to
®)
until
"MEMO" appears.
Note
Ifyou try
to
store anotherstation on the same number
button, the previously stored station will be replaced.
Receiving the stored stations
1 Select the band, then press a number
button
(ill
to
®).
Tuning automatically
1 Select the band, then press
(SEEK)
+/-
to
search
for
the station.
Scanning stops when the unit receives a
station. Repeat this procedure until the
desired station is received.
Tip
Ifyou know the frequency
of
the station you want to
listen
to,
press
and
hold (
SEEK)
+/-
to locate the
approximate frequency, then press
(SEEK)
+/-
repeatedly to fine adjust to the desired frequency
(manual tuning).
RDS
services
This unit automatically provides RDS services as
follows:
PTY
(Program Types)
Displays the currently received program type.
Also searches your selected program type.
CT
(Clock Time)
The
CT
data from the RDS transmission sets
the clock.
Notes
• Depending on the country/region, not
all
RDS
functions may be available.
• RDS will not work
if
the signalstrength is too weak,
or
if
the station you are tuned to
is
not transmitting
RDSdata.
•
11

•
Selecting PTY
1 Press
(PTY)
during
FM
reception.
''''E'
'..1'
,
1#
~I#
The current program type name appears
if
the
station
is
transmitting PTY data.
2 Rotate the control dial until the
desired program type appears, then
press it.
The unit starts to search for a station
broadcasting the selected program type.
Type of programs
NEWS (News), INFORM (Information),
SPORTS (Sports), TALK (Talk), ROCK
(Rock), CLS ROCK (Classic Rock), ADLT
HIT
(Adult Hits), SOFT RCK (Soft Rock),
TOP 40 (Top 40), COUNTRY (Country),
OLDIES (Oldies), SOFT (Soft), NOSTALGA
(Nostalgia), JAZZ (Jazz), CLASSICL
(Classical),
RAND
B (Rhythm and Blues),
SOFT R B (Soft Rhythm and Blues),
LANGUAGE (Foreign Language), REL
MUSC
(Religious Music), REL TALK
(Religious Talk), PERSNLTY (Personality),
PUBLIC (Public), COLLEGE (College),
WEATHER (Weather)
Notes
•
You
cannot use this function
in
countrieslregions
where no PTY data is available.
•
You
mayreceive a different radio program from the
one you select.
Setting
CT
1 Set "CT-ON" in setup (page 24).
Notes
• The
CT
function may
not
work even though an RDS
station is being received.
• There might be a difference between the time set by
the
CT
function
and
the actual time.
CD
Playing
a
disc
1 Press
(OPEN).
2 Insert the disc (label side up).
3 Close the front panel.
Playback starts automatically.
Ejecting the disc
1 Press
(OPEN).
2
Press~.
The disc is ejected.
3 Close the front panel.
Display items
oSource
eTrack name*1, Disc/artist name*1, Artist
name*1, Album number*2, Album name*1,
Track numberlElapsed playing time, Clock
*I
The
information
of
a CD
TEXT,
MP3IWMAlAAC is
displayed.
*2 Album numberis displayed only when the album is
changed.
To change display items
e,
press
(DSPL).
Tip
Displayeditems maydifferdepending on the disc type.
recording format
and
settings.
Repeat and shuffle play
1 During playback, press ® (REP) or
ill
(SHUF) repeatedly until the
desired setting appears.
Select
e:
TRACK
e:
ALBUM*
SHUF ALBUM*
SHUF DISC
To
play
track repeatedly.
album repeatedly.
album in random order.
disc in random order.
12
* When an MP3IWMAlAAC
is
played.
After 3 seconds, the setting is complete.
To return to normal play mode, select
"e: OFF"
or
"SHUF OFF."

USB
devices
For
details on the compatibility
of
your
USB
device, visit the support site.
Support site
http://esupport.sony.com
http://www.sony.com/mobileAV
•
MSC
(Mass Storage Class)
and
MTP
(Media
Transfer Protocol) type
USB
devices
compliant
with the
USB
standard
can
be
used.
• Corresponding
co
dec
is
MP3
(.mp3),
WMA
(.wma),
AAC
(.m4a)
and
AAC
(.mp4).
•
Backup
of
data in a USB
device
is
recommended.
Note
Connect the USB device afterstarting the engine.
Depending on the USB device, malfunction
or
damage
may occur
if
it is connectedbefore starting the engine.
Playing
back
a
USB
device
1 Slide the USB cover.
2 Connect the USB device to the USB
connector.
When
using a cable, use
the
one supplied with
the USB device to connect.
Playback
starts.
If
a USB device is already connected, to start
playback, press
(SOURCE/OFF)
repeatedly until
"USB"
appears.
Press
and
hold
(SOURCE/OFF)
for I second to
stop playback.
Removing the USB device
1
Stop
the USB device playback.
2
Remove
the USB device.
If you remove
your
USB device during
playback, data in
the
USB
device
may
be
damaged.
Notes
• Do notuse USB devices
so large
or
heavy that they
may fall down due to vibration,
or
cause a loose
connection.
•
Do
notdetach the front panel duringplayback
of
the
USB device, otherwise USB data
may
be damaged.
• This unit cannot recognize USB devices
via
a USB
hub.
Display items
..,...,
.............
=======
EU·'=======
o
Source
oTrack name, Artist name,
Album
number*,
Album
name,
Track
number/Elapsed playing
time,
Clock
* Album numberis displayed only when the album is
changed.
To change display items
0,
press
(DSPL).
Notes
• Displayeditems will differ, depending on the USB
device, recorded format
and
settings. For details,
visit the supportsite.
• The maximum number
of
displayable data is as
follows.
- folders (albums): 128
- files (tracks)
per
folder: 500
• Do notleave
a USB device
in
a
parked
car,
as
malfunction
may
result.
• Itmay take time for playback to begin, depending on
the amount
of
recorded data.
• DRM (Digital Rights Management) files may notbe
played.
• During playback
or
fast-forwardIreverse
of
a VBR
(Variable Bit Rate) MP3IWMAlAAC file, elapsed
playing time
may
not display accurately.
• Playback
of
the following MP3IWMAlAAC files is not
supported.
-Iossless
compression
- copyright-protected
-
13

Enjoying
music
according
to
your
mood
-
SensMe™
After 3 seconds, the setting is complete.
To
return to normal play mode, select "e:;
OFF"
or
"SHUF
OFF. "
Repeat and shuffle play
1 During playback, press
G)
(REP) or
m(SHUF) repeatedly until the
desired setting appears.
Tip
Registration can be performedeitheralong with the
installation procedure
or
afterinstallation.
eTransferring
tracks to the USB device
using "Content Transfer"
In
order to group tracks by channel, track
sound patterns need to be analyzed by
12
TONE
ANALYSISTM, which is loaded
in
"Content
Transfer."
With the USB device connected to your
computer, drag and drop tracks from Windows
Explorer
or
iTunes, etc., to "Content
Transfer."
Both analysis and transfer
of
tracks will be
performed by "Content Transfer."
track repeatedly.
album repeatedly.
To
play
album in random order.
device in random order.
e:; TRACK
e:; ALBUM
Select
SHUF DEVICE
SHUF ALBUM
Sony's
unique ''SensMe™ channels" features
automatically group tracks by channel, and allow
you to enjoy music intuitively.
• Before using the
SensMe™
function
The
following is the basic procedure required to
enjoy the
SensMe™
function
on
the unit.
oInstalling
''SensMe™
Setup" and
"Content Transfer"
in
your computer
First install ''SensMe™ Setup" and "Content
Transfer" from the supplied CD-ROM.
f)
Registering a USB device using
''SensMe™
Setup"
Connect
a
USB
device to your computer, and
perform registration using "SensMe™ Setup"
to enable the
SensMe™
function on this unit.
oConnecting the USB device and
enjoying the
SensMe™
function on the
unit
Connect the set up USB device.
You
can then
enjoy ''SensMe™ channels" on this unit.
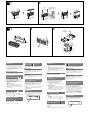
Installing
''SensMe™
Setup" and
"Content Transfer"
in
your
computer
Use
of
the supplied software (''SensMe™
Setup"
and "Content Transfer")
is
required to enable the
SensMe™ function on this unit.
Install the software in your computer from the
supplied CD-ROM.
1 Insert the supplied CD-ROM into your
computer.
The Installation Wizard runs automatically.
2 Follow the on-screen instructions to
complete the installation.
14

rnM
L..
Uf
,
Registering a USB device using
''SensMe™
Setup"
USB device registration is required to enable the
SensMe™ function on the unit.
If
registration is not perfonned along with the
installation procedure, follow the steps below.
1 Start
''SensMe™
Setup" on your
computer.
2 Connect a USB device to your
computer.
3 Complete registration following the
on-screen instructions.
Tip
111/1"'\1
'",.,",.,,...,...1
....
"","";rof",,,.,..rI ,
ICD
...I",,,;,..,..,
....
,..
....
f
....
i
.....
;
....
,...
"Jvu
....
VIII'W-vl
a
'C;~'~lv'CU
uvu
uc;;v,
....
c:;
vV,"alll"'~
analyzed tracks, the USB device can
be
unregistered
again.
Transferring tracks to the USB
device using "Content Transfer"
To
enable the
SensMe™
function on this unit,
tracks need to
be
analyzed and transferred to the
registered USB device, using "Content Transfer."
1 Connect the registered USB device to
your computer.
For USB devices, connect with the MSC
mode.
"Content Transfer" starts automatically.
If
a message appears, follow the on-screen
instructions
to
proceed.
2 Drag and drop tracks from Windows
Explorer or iTunes, etc., to "Content
Transfer."
The analysis and transfer
of
tracks start.
For details on operations, see the Help
of
"Content Transfer."
Note
The
track analysis
by
12 TONE ANALYSISTM maytake
time, depending on the computer environment.
Playing tracks in the channel
- SensMe™ channels
''SensMe™
channels" automatically group tracks
into channels by their tunes.
You
can select and
playa
channel that fits your mood, activity, etc.
1 Connect a USB device set up for the
SensMe™ function.
2 Press
(SOURCE/OFF)
repeatedly until
"SENSME CH" appears.
The channel list appears, and the most
melodic or rhythmical sections*
of
tracks are
shuffle played.
* May
not
be
detected correctly.
1"4
S=r[f1
MnRtol I
tolLJ~
IIU
\/111111
3 Selecting a track from the channel list
using the control dial.
• Change the channel
Push
(DIm
(ALBUM -1+) to select the
desired channel.
• Change the track
Push
(SEEK)
+1-
until the desired track _
appears, then press the control dial.
Playback starts from the beginning
of
the
current track.
If
you do not operate anything for
10
seconds,
the display returns to normal play mode.
Notes
• Depending on the track, it may
not
be detected
correctly
or
may
be
groupedin a channel
not
suited
to
the track's mood.
• Ifthe connectedUSB device contains manytracks, it
may
take time for "SensMe™ channels" to start, due
to
data reading.
Tip
Tracks are played in random order. The order will vary
at
each channelselection.
continue to next page
-.
15

•
16
Channel list
• Recommended, Shuffle All
"MORNING" (5:00 AM - 9:59 AM)
"DAYTIME" (10:00 AM - 3:59 PM)
"EVENING" (4:00 PM - 6:59 PM)
"NIGHT" (7:00 PM -
11
:59 PM)
"MIDNIGHT" (12:00 AM - 4:59 AM)
Tracks recommended for each time
of
day.
Set the clock (page 6) for the channel to be
displayed accurately.
"SHUFFLE ALL": Plays all analyzed tracks in
random order.
• Basic channels
Plays tracks according to the music type.
"ENERGETIC": High-spirit tracks.
"RELAX": Calm tracks.
"MELLOW": Mellow, melancholy tracks.
"UPBEAT": Happy tracks to improve your
mood.
"EMOTIONAL": Ballad tracks.
"LOUNGE": Lounge music.
"DANCE": Rhythm and rap, rhythm and blues
tracks.
"EXTREME": Intense rock tracks.
•
In-car
channels
Plays tracks that are suitable while driving.
"FREEWAY": Speedy, high-spirit tracks.
"CHILLOUT DRIVE": Intoned, healing ballad
tracks.
"WEEKEND TRIP": Delightful, bright and
happy tracks.
"MIDNIGHT CRUISE": Jazz or piano-featured
tracks with mature mood.
"PARTY RIDE": Up-tempo and alive tracks.
"MORNING COMMUTE": Bright and breezy
tracks.
"GOIN' HOME": Warm and relaxing tracks.
iPod
For details on the compatibility
of
your iPod, see
"About iPod" (page 26) or visit the support site.
In these Operating Instructions, "iPod" is used as
a general reference for the iPod functions
on
the
iPod and iPhone, unless otherwise specified
by
the text or illustrations.
Support
site
http://esupport.sony.com
http://www.sony.com/mobileAV
Playing
back
iPod
Before connecting the iPod, tum down the
volume
of
the unit.
1 Slide the USB cover.
2 Connect
the
iPod
to
the
USB
connector
via
the
dock
connector
to
USB cable.
The iPod will turn on automatically, and the
display will appear on the iPod screen as
below.
*
Tip
We
recommend the RC-1001P USB cable (not
supplied)
to
connect the dock connector.
The tracks on the iPod start playing
automatically from the point last played.

Skipping albums, podcasts,
genres, playlists and artists
Note
Some letters storedin iPod
may
not
be
displayed
correctly.
Repeat and shuffle play
1 During playback, press ® (REP) or
m(SHUF) repeatedly until the
desired setting appears.
SHUF PLAYLIST
•
To
play
track repeatedly.
album repeatedly.
podcast repeatedly.
artist repeatedly.
playlist repeatedly.
genre repeatedly.
album in random order.
podcast in random order.
playlist in random order.
artist in random order.
genre in random order.
device in random order.
Press
CD/CD
(ALBUM
-/+)
[press once for each]
Do
this
Press and hold
CD/CD
(ALBUM
-/+)
[hold to desired point]
To
Skip
e::
TRACK
Skip
continuously
e::
ALBUM
e::
ARTIST
e::
PLAYLIST
e::
GENRE
e::
PODCAST
Select
SHUF ALBUM
SHUF PODCAST
SHUF ARTIST
SHUF DEVICE
SHUF GENRE
Removing the
iPod
1 Stop the iPod playback.
2 Remove the iPod.
Caution for iPhone
When you connect an iPhone via USB, telephone
volume is controlled
by
iPhone itself. In order to avoid
sudden loud soundafter
a call, do
not
increase the
volume on the unit during
a telephone call.
Notes
• Do
not
detach the front panelduring playback
of
the
iPod, otherwise data maybe damaged.
• This unit cannot recognize iPod via
a USB hub.
Tips
• When the ignition key is turned to the
ACC
position,
and
the unit is on, the iPod will be recharged.
• Ifthe iPod is disconnectedduring playback, "NO
DEV"appears in the display
of
the unit.
If
an iPod
is
already connected, to start
playback press
(SOURCE/OFF)
repeatedly
until "USB" appears. ("IPOD" appears in the
display when iPod is recognized.)
*
In
the case
of
an iPod touch
or
iPhone being
connected,
or
that the iPod was lastplayed back
using passengercontrol, the logo will
not
appear
on
the screen.
3 Adjust the volume.
Press and hold
(SOURCE/OFF)
for 1 second to
stop playback.
Resuming mode
When the iPod is connected to the dock
connector, the mode
of
this unit changes to
resuming mode and playback starts in the mode
set by the iPod.
In
resuming mode, the following buttons do not
function.
- ® (REP)
-m(SHUF)
Display items
After 3 seconds, the setting is complete.
To
return to normal play mode, select
"e::
OFF"
or "SHUF OFF."
oSource (iPod) indication
eTrack name, Artist name, Album name, Track
numberlElapsed playing time, Clock
To
change display items
e,
press
(DSPL).
Tip
When album/podcastlgenre/artistlplaylist is changed,
its item numberappears momentarily.
17

•
Operating
an
iPod
directl,y
-
Passenger
control
You
can operate an iPod connected
to
the dock
connector directly.
1 During playback, press and hold
(MODE).
"MODE
IPOD"
appears and you will be able
to operate the iPod directly.
To
change the display item
Press
(DSPL).
The display items change as follows:
Track name
--+
Artist name
--+
Album name
--+
MODE
IPOD
--+
Clock
To
exit the passenger control
Press and hold
(MODE).
Then
"MODE
AUDIO" will appear and the play
mode will change to resuming mode.
Notes
• The volume can be adjusted only by the unit.
•
If
this mode is canceled, the repeat setting will be
turned
off.
Searching
for
a
track
Searching
a
track
by
name
-
Quick-BrowZer™
You can search for a track in a
CD
or
USB
device
easily by category.
1 Press Q. (BROWSE).
The unit enters the Quick-BrowZer mode,
and the list
of
search categories appears.
2 Rotate the control dial to select the
desired search category, then press it
to confirm.
3 Repeat step 2 until the desired track
is
selected.
Playback starts.
To
return to the previous display
Press
~
(BACK).
To
exit the Quick-BrowZer mode
Press Q. (BROWSE).
Note
When entering the Quick-BrowZermode, the repeat!
shuffle setting is canceled.
Searching by skip items
-Jump
mode
When many items are in a category, you
can
search the desired item quickly.
1 Press
(SEEK)
+
in
Quick-BrowZer
mode.
The following display appears.
II
IMp
UUII
Ern
Q
18
oCurrent item number
eTotal item number in the current layer
Then the item name will appear.
2 Rotate the control dial to select the
desired item or one near the desired
item.
It
skips in steps
of
10%
of
the total item
number.
3 Press the select button.
The display returns to the Quick-BrowZer
mode and the selected item appears.
4 Rotate the control dial to select
the
desired item and press it.
Playback starts
if
the selected item is a track.

To
cancel Jump mode
Press
~
(BACK) or
(SEEK)
-.
Note
Ifno operation is performed for 7 seconds, the Jump
mode is canceled.
Searching by alphabetical order
- Alphabet search
When an iPod is connected to the unit, you can
search for a desired item alphabetically.
1 Press
(SEEK)
+
in
Quick-BrowZer
mode.
An alphabetical list appears.
2 Rotate the control dial to select the
first letter of the desired item, then
press
it.
A list
of
items beginning with the selected
letter appears in alphabetical order.
If
there is no song beginning with the selected
letter, "NOT FOUND" appears.
3 Rotate the control dial to select the
desired item, then press
it.
Playback starts
if
the selected item is a track.
L-----t------'
The part of each track to
playback in ZAPPIN mode.
Searching
a
track
by
listening
to
track
passages
-
ZAPPINTM
While playing back short track passages in a CD
or
USB device in sequence, you can search for a
track you want to listen to.
ZAPPIN mode is suitable for searching for a
track in shuffle
or
shuffle repeat mode.
1 Press
(ZAP)
during playback.
After "ZAPPIN" appears
in
the display,
playback starts from a passage
of
the next
track.
The passage is played for the set time, then a
click sounds and the next passage starts.
Track
2 Press the select button or
(ZAP)
when
a track you want to listen
is
played
back.
The track that you select returns to normal
play mode from the beginning. •
To
search a track by ZAPPIN mode again,
repeat steps 1 and
2.
In
the case of
''SensMe™
channels" playback
If
the track being searched is transfered by
"Content Transfer," the most melodic or
rhythmical sections*
of
tracks are played. For
details on the
SensMe™
function, see page
14.
*
May
not
be
detected correctly.
Tips
•
You
can select the playback time from about 6
seconds/15 seconds/3D seconds (page
25).
You
cannot select the passage
of
the track
to
playback.
• Press
(SEEK)
+/-
in ZAPPIN mode to skip a track.
• Press
(D/m
(ALBUM
-/+)
in ZAPPIN mode to skip
album.
• Pressing
~
(BACK) also confirms a track
to
playback.
\
I
IQ
RLPfi
I:ti
To
cancel Alphabet search
Press
~
(BACK)
or
(SEEK)
-.
A list
of
the search categories appears.
Notes
•
In
Alphabetsearch, a symbol
or
article (alan/the)
before the selected letter
of
the item is excluded.
• Depending on the search item you select, onlyJump
mode maybe available.
• Ifno operation is performed for 5 seconds, Alphabet
search is canceled.
• Alphabetsearch maytake some time, depending on
the amount
of
tracks.
19

•
Enjoying
the
illumination
color
variation
Changing
the
color
of
display
and
buttons
-Dynamic
Color
Illuminator
Dynamic Color Illuminator allows you to change
the color
of
the display and buttons on the main
unit to match the car's interior.
You
can select from
12
preset colors, customized
color and 5 preset patterns.
• Preset colors
"RED," "AMBER," "M_AMBER," "YELLOW,"
"WHITE," "LIGHT GREEN," "GREEN,"
"LIGHT BLUE," "SKY BLUE," "BLUE,"
"PURPLE," "PINK."
• Preset patterns
"RAINBOW," "OCEAN," "SUNSET,"
"FOREST," "RANDOM."
1 Press
(COLOR).
2 Rotate the control dial to select the
desired preset
COIOF, then press it.
The display returns to normal reception/play
mode.
Note
If
the control dial is rotated rapidly, the color
of
the
display
and
the buttons may change too quickly
Tip
You
can enter the preset color mode from the setup
menu.
Customizing the display and
button color - Custom Color
You
can register a customized color for the
display and buttons.
About DAY/NIGHT color mode
You
can set a different color for DAYINIGHT.
The display color changes for DAYINIGHT
color mode
as
below.
1 Press and hold
(COLOR).
The DAY/NIGHT custom color display varies
according
to
the DIMMER setting.
To
change the DAYINIGHT color mode, see
page 20.
2 Rotate the control dial until "BASE
COLOR" appears, then press it.
*
You
can select a preset color
as
a basis for
further customizing.
To
not customize a preset color, skip to step
5.
* When you select "BASE COLOR," customized color
is overwritten.
3 Rotate the control dial to select from
"RGB RED," "RGB GREEN," or "RGB
BLUE," then press
it.
4 Rotate the control dial to adjust the
color range, then press it.
Adjustable color range: "0" - "32."
You
cannot set "0" for all color ranges at the
same time.
S Press
~
(BACK).
The display returns to normal reception/play
mode.
Changing DAY/NIGHT color mode
1 Select "DAY/NIGHT" in step
2.
2 Select "DAY" or "NIGHT."
3 Customize the preset channel from step 2 to
5.
Tip
You
can set the DAYINlGHTcolormode from the
setup menu.
Color mode
DAY
NIGHT
DIMMER
OFF or AUTO (tum off
the head light*)
ON or AUTO (tum on
the head light*)
20
* Available only when the illumination control leadis
connected.
For details on the DIMMER, see page 24.
La page est en cours de chargement...
La page est en cours de chargement...
La page est en cours de chargement...
La page est en cours de chargement...
La page est en cours de chargement...
La page est en cours de chargement...
La page est en cours de chargement...
La page est en cours de chargement...
La page est en cours de chargement...
La page est en cours de chargement...
La page est en cours de chargement...
La page est en cours de chargement...
La page est en cours de chargement...
La page est en cours de chargement...
La page est en cours de chargement...
La page est en cours de chargement...
La page est en cours de chargement...
La page est en cours de chargement...
La page est en cours de chargement...
La page est en cours de chargement...
La page est en cours de chargement...
-
 1
1
-
 2
2
-
 3
3
-
 4
4
-
 5
5
-
 6
6
-
 7
7
-
 8
8
-
 9
9
-
 10
10
-
 11
11
-
 12
12
-
 13
13
-
 14
14
-
 15
15
-
 16
16
-
 17
17
-
 18
18
-
 19
19
-
 20
20
-
 21
21
-
 22
22
-
 23
23
-
 24
24
-
 25
25
-
 26
26
-
 27
27
-
 28
28
-
 29
29
-
 30
30
-
 31
31
-
 32
32
-
 33
33
-
 34
34
-
 35
35
-
 36
36
-
 37
37
-
 38
38
-
 39
39
-
 40
40
-
 41
41


Sony CDX-GT650UI - Fm/am Compact Disc Player Operating Instructions Manual
- Catégorie
- Récepteurs multimédia de voiture
- Taper
- Operating Instructions Manual
dans d''autres langues
Documents connexes
-
Sony CDX-GT575UI Le manuel du propriétaire
-
Sony CDX-GT650UI Le manuel du propriétaire
-
-
Sony CDX-GS500R Le manuel du propriétaire
-
Sony CDX-GT660UP Manuel utilisateur
-
Sony CDX-DAB700U Le manuel du propriétaire
-
Sony DSX-S300BTX Manuel utilisateur
-
Sony DSX-S200X Le manuel du propriétaire
-
-
Sony DSX-MS60 Mode d'emploi