La page est en cours de chargement...

©Copyright LOTRONIC 2017 SPOTY60LED Page 1
6
6
0
0
W
W
L
L
E
E
D
D
M
M
O
O
V
V
I
I
N
N
G
G
H
H
E
E
A
A
D
D
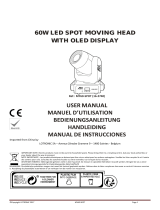
Ref.: SPOTY60LED (16-2760)
USER
MANUAL
MANUEL D’UTILISATION
BEDIENUNGSANLEITUNG
HANDLEIDING
MANUAL DE INSTRUCCIONES

©Copyright LOTRONIC 2017 SPOTY60LED Page 2
60W WHITE LED MOVING HEAD
BEFORE YOU BEGIN
Contents of the carton:
• 1 x LED light effect
• 1x omega clamp
• 1x Signal cable
• 1x Mains lead
• 1x User Manual
Unpacking Instructions
Immediately upon receiving a fixture, carefully unpack the carton, check the contents to ensure that all parts are
present and have been received in good condition. Notify the freight company immediately and retain packing
material for inspection if any parts appear to be damaged from shipping or the carton itself shows signs of
mishandling. Keep the carton and all packing materials. In the event that a fixture must be returned to the factory, it
is important that the fixture be returned in the original factory box and packing.
Safety Instructions
Please read these instructions carefully, they include important information about the installation, usage and
maintenance of this product.
• Please keep this User Guide for future reference. If you sell the unit to another user, be sure that he also receives
this instruction booklet.
• Always make sure that you are connecting to the proper voltage, and that the line voltage you are connecting to is
not higher than that stated on the decal or rear panel of the fixture.
• This product is intended for indoor use only!
• It is essential that the device is earthed. A qualified person must carry out the electric connection.
• To prevent risk of fire or shock, do not expose fixture to rain or moisture. Make sure there are no flammable
materials close to the unit while operating.
• The unit must be installed in a location with adequate ventilation, at least 1m from adjacent surfaces. Be sure that
no ventilation slots are blocked.
• Always disconnect from power source before servicing or replacing fuse and be sure to replace with same fuse size
and type.
• Secure fixture to fastening device using a safety chain. Never carry the fixture solely by its head. Use its carrying
handles.
• Maximum ambient temperature (Ta) is 104° F (40°C). Do not operate the fixture at temperatures higher than this.
• In the event of a serious operating problem, stop using the unit immediately. Never try to repair the unit by
yourself. Repairs carried out by unskilled people can lead to damage or malfunction. Please contact the nearest
authorized technical assistance center. Always use the same type of spare parts.
• Don’t connect the device to a dimmer pack.
• Make sure the power cord is never crimped or damaged.
• Never disconnect the power cord by pulling or tugging on the cord.
• Avoid direct eye exposure to the light source while it is on.
DISCONNECT DEVICE: Where the MAINS plug or an appliance coupler is used as the disconnect device, the
disconnect device shall remain readily operable.
GB

©Copyright LOTRONIC 2017 SPOTY60LED Page 3
Features
• 7/10/12 DMX channels
• Sound active, DMX, auto, master-slave mode
• Color wheel: 8 colors + white, spilt colors, rainbow effect
• Gobo wheel: 9 static gobos + white, rainbow effect, gobo shake
• Manual focus
• Variable electronic dimmer (0-100%)
• Shutter: 0-20Hz
• Strobe
Specifications
Power supply ..................................................................................... 100-240Vac 50/60Hz
Consumption ............................................................................................................. 100W
Fuse ................................................................................................... 5 x20mm T3A / 250V
Light source ............................................................................ White ultra bright 60W LED
Pan .......................................................... 540°/360°/180°, 8/16 bit movement resolution
Tilt ............................................................. 230°/180°/90°, 8/16 bit movement resolution
Beam angle .................................................................................................................... 15°
Dimensions .......................................................................................... 370 x 250 x 220mm
Weight ........................................................................................................................ 3.8kg
Installation
The unit should be mounted via its screw holes on the bracket. Always ensure that the unit is firmly fixed to avoid
vibration and slipping while operating. Always ensure that the structure to which you are attaching the unit is secure
and able to support a weight of 10 times of the unit’s weight. Also always use a safety cable that can hold 12 times
the weight of the unit when installing the fixture.
The equipment must be fixed by professionals at a place where is out of the reach of people and where nobody can
pass by or under it.
Fuse Replacement
Disconnect the power cord before replacing a fuse and always replace with the same type fuse.
With a screwdriver wedge the fuse holder out of its housing.
Remove the damaged fuse from its holder and replace with exactly the same type of fuse.
Insert the fuse holder back in its place and reconnect power.
Warning: If after replacing the fuse you continue to blow fuses, STOP using the unit. Contact customer support for
further instructions. Continuing to use the unit may cause serious damage.
CONTROL PANEL
To access the main menu press the MENU button. Press the UP or DOWN buttons
until you reach function you wish to change. When you reach the function you
wish to change, press the ENTER button. When a function is selected, use the UP
or DOWN buttons to change the function settings. Once your changes are made,
press the ENTER button.

©Copyright LOTRONIC 2017 SPOTY60LED Page 4
FUNCTION MENU
D512
A001 - A512, DMX Address setting
AUTO
AUTO1
AUTO2
AUTO3
SOUND
S001-S099
HAND
7CH
10CH
12CH
INV
PAN
TILT
DMX CHANNELS
7 DMX CHANNELS
CH value
Function
1
000-255
X rotation 0°-540°
2
000-255
Y rotation 0°-230°
3
000-255
60W LED dimmer from dark to bright
4CH: Strobe
0-5
6-249
250-255
ON
Strobe from slow to fast
ON
5CH 9 Colors + White
0-19
20-39
40-59
60-79
80-99
100-119
120-139
140-159
160-179
180-216
217-255
white
dark blue
orange
plum purple
light blue
red
green
pink
yellow
color rotating CW from slow to fast
color rotating CCW from slow to fast
6CH 9 Gobos + Open
0-9
10-19
20-39
40-59
60-79
80-99
100-119
120-139
140-159
160-179
180-217
218-255
Open
Gobo 1
Gobo 2
Gobo 3
Gobo 4
Gobo 5
Gobo 6
Gobo7
Gobo8
Gobo9
Gobo rotating CW from slow to fast
Gobo rotating CCW from slow to fast
7CH Reset
1-199
200-239
240-255
No function
Reset after 3 second
No function
10 DMX CHANNELS
CH value
Function
1
000-255
X rotation 0°-540°
2
000-255
X fine adjustment

©Copyright LOTRONIC 2017 SPOTY60LED Page 5
3
000-255
Y rotation 0°-230°
4
000-255
Y fine adjustment
5
000-255
XY speed from fast to slow
6
000-255
60W LED dimmer from dark to bright
7CH: Strobe
0-5
6-249
250-255
ON
Strobe from slow to fast
ON
8CH 9 Colors + White
0-19
20-39
40-59
60-79
80-99
100-119
120-139
140-159
160-179
180-216
217-255
white
dark blue
orange
plum purple
light blue
red
green
pink
yellow
color rotating CW from slow to fast
color rotating CCW from slow to fast
9CH 9 Gobos + Open
0-9
10-19
20-39
40-59
60-79
80-99
100-119
120-139
140-159
160-179
180-217
218-255
Open
Gobo 1
Gobo 2
Gobo 3
Gobo 4
Gobo 5
Gobo 6
Gobo7
Gobo8
Gobo9
Gobo rotating CW from slow to fast
Gobo rotating CCW from slow to fast
10CH Reset
1-199
200-239
240-255
No function
Reset after 3 second
No function
12 DMX CHANNELS
CH value
Function
1
000-255
X rotation 0°-540°
2
000-255
X fine adjustment
3
000-255
Y rotation 0°-230°
4
000-255
Y fine adjustment
5
000-255
XY speed from fast to slow
6
000-255
60W LED dimmer from dark to bright
7CH: Strobe
0-5
6-249
250-255
ON
Strobe from slow to fast
ON
8CH 9 Colors + White
0-19
20-39
40-59
60-79
80-99
100-119
120-139
140-159
160-179
180-216
217-255
white
dark blue
orange
plum purple
light blue
red
green
pink
yellow
color rotating CW from slow to fast
color rotating CCW from slow to fast

©Copyright LOTRONIC 2017 SPOTY60LED Page 6
Cleaning
Due to fog residue, smoke, and dust cleaning the internal and external lenses should be carried out periodically to
optimize light output.
1. Use normal glass cleaner and a soft cloth to wipe down the out-side casing.
2. Clean the external optics with glass cleaner and a soft cloth every 20 days.
3. Always be sure to dry all parts completely before plugging the unit back in.
Trouble Shooting
IMPORTANT NOTE: Electric products must not be put into household waste. Please bring them to a recycling centre. Ask
your local authorities or your dealer about the way to proceed.
9CH Color scroll
000-255
0-100% in steps of 1/2 5 6
10CH 9 Gobos + Open
0-9
10-19
20-39
40-59
60-79
80-99
100-119
120-139
140-159
160-179
180-217
218-255
Open
Gobo 1
Gobo 2
Gobo 3
Gobo 4
Gobo 5
Gobo 6
Gobo7
Gobo8
Gobo9
Gobo rotating CW from slow to fast
Gobo rotating CCW from slow to fast
11CH Gobo shake
0-255
Gobo shake from slow to fast
12CH Reset
1-199
200-239
240-255
No function
Reset after 3 second
No function
Problem
Solution
Fixture can not start to work
1. Check if the power fuse burnout
Fixture light normally, but no responding to
the DMX controller
1. Check if the DMX start address is correct 2. Check if the XLR signal
cable was damaged
Fixture work intermittently
Check if the fan works well, whether dust blocks the fan and fan nets
Dark light, brightness decreases obviously
1. Check whether the internal and external optical system clean
Beam is not pure (have a halo
)
Clean the dust and oil of bulb, lens and other parts
The beam is distorted
1. Check whether the lens is broken
2. Clean the dust or oil of lens

©Copyright LOTRONIC 2017 SPOTY60LED Page 7
PREPARATIFS
Contenu de l’emballage:
• 1 effet de lumière à LED
• 1x attache oméga
• 1x cable signal
• 1 cordon secteur
• 1 Mode d’emploi
Déballage
Dès réception de l’appareil, ouvrez le carton et vérifiez que le contenu est complet et en bon état. Sinon, prévenez
immédiatement le transporteur et conservez l’emballage s’il montre des signes de mauvais traitements. Conservez le
carton et tous les matériaux d’emballage afin de pouvoir transporter l’appareil en toute sécurité.
Consignes de sécurité
Lisez attentivement ce manuel qui contient des informations importantes sur l’installation, l’utilisation et l’entretien
de cet appareil.
• Conservez le manuel pour référence ultérieure. Si l’appareil change un jour de propriétaire, assurez-vous que le
nouvel utilisateur est en possession du manuel.
• Assurez-vous que la tension secteur convient à cet appareil et qu’elle ne dépasse pas la tension d’alimentation
indiqué sur la plaque signalétique de l’appareil.
• Uniquement pour utilisation à l’intérieur!
• L’appareil doit être impérativement relié à la terre.
• Afin d’éviter tout risque d’incendie ou de choc électrique, ne pas exposer cet appareil à la pluie ou à l’humidité.
Assurez-vous qu’aucun objet inflammable ne se trouve à proximité de l’appareil pendant son fonctionnement.
• Installez l’appareil à un endroit bien ventilé à une distance minimum de 1m de toute surface. Assurez-vous que les
fentes de ventilation ne sont pas bloquées.
• Débranchez l’appareil du secteur avant toute manipulation ou entretien. Lorsque vous remplacez le fusible, utilisez
uniquement un fusible qui présente exactement les mêmes caractéristiques que l’ancien.
• Sécurisez l’appareil sur le dispositif de fixation au moyen d’une chaîne. Ne portez jamais l’appareil en le tenant par
le boîtier. Tenez-le par l’étrier.
• La température ambiante ne doit pas dépasser 40°C. Ne pas faire fonctionner l’appareil à des températures
supérieures.
• En cas de dysfonctionnement, arrêtez immédiatement l’appareil. N’essayez jamais de réparer l’appareil par vous-
même. Une réparation mal faite peut entraîner des dommages et des dysfonctionnements. Contactez un service
technique agréé. Utilisez uniquement des pièces détachées identiques aux pièces d’origine.
• Ne pas brancher l’appareil sur un variateur.
• Assurez-vous que le cordon d’alimentation n’est jamais écrasé ni endommagé.
• Ne jamais débrancher l’appareil en tirant sur le cordon.
• Ne pas exposer vos yeux à la source lumineuse.
• Lorsque le cordon d'alimentation ou un coupleur d'appareil est utilisé comme dispositif de déconnexion, ce
dispositif doit rester facilement accessible;
Si un interrupteur omnipolaire est utilisé comme dispositif de déconnexion, l'emplacement sur l'appareil et la
fonction de l'interrupteur doit être décrite, et le commutateur doit rester facilement accessible
F

©Copyright LOTRONIC 2017 SPOTY60LED Page 8
Description
• 7/10/12 canaux DMX
• Modes de fonctionnement: DMX, activé par le son, maître-esclave et automatique
• Roue de couleur : 8 couleurs + blanc, couleurs splittées, effet arc-en-ciel
• 9 gobos statiques + ouvert, effets gobo scroll & gobo shake
• Mise au point manuelle
• Dimmer électronique variable (0-100%)
• Obturateur: 0-20Hz
• Effet stroboscope
Caractéristiques techniques
Alimentation ..................................................................................... 100-240Vac 50/60Hz
Consommation .......................................................................................................... 100W
Fusible .............................................................................................. T3A / 250V 5 x 20mm
Source lumineuse ......................................................... LED 60W blanche ultra lumineuse
Pan ..................................................... 540°/360°/180°, résolution du movement 8/16 bit
Tilt ........................................................ 230°/180°/90°, résolution du movement 8/16 bit
Angle des rayons ........................................................................................................... 15°
Dimensions .......................................................................................... 370 x 250 x 220mm
Poids ........................................................................................................................... 3,8kg
Remplacement du fusible
Sortez le porte-fusible de son logement à l’aide d’un tournevis cruciforme.
Sortez le fusible grillé et remplacez-le par un autre en tous points identiques.
Remettez le porte-fusible dans son logement et rebranchez l’appareil sur le secteur.
Attention : Si le fusible continue à sauter après avoir été remplacé, ARRETEZ l’appareil. Contactez votre revendeur.
Vous risquez d’endommager l’appareil si vous continuez à l’utiliser.
Montage
Fixez l’appareil sur l’étrier au moyen des trous de vis. Assurez-vous que l’appareil est solidement fixé afin d’éviter des
vibrations et des mouvements pendant le fonctionnement. Vérifiez que le support sur lequel vous allez installer
l’appareil est solide et capable de supporter au moins 10 fois le poids de l’appareil. Lors de l’installation utilisez
toujours un câble de sécurité supplémentaire qui peut porter 12 fois le poids le d’appareil. Cet appareil doit être
installé par des professionnels. Il doit être installé à un endroit où il est hors de portée des personnes et où personne
ne peut passer en-dessous.
TABLEAU DE COMMANDE
Pour accéder au menu principal, appuyez sur la touche MENU. Appuyez sur les touches
UP/DOWN jusqu’à ce que vous atteigniez la fonction souhaitée. Lorsque vous l’avez
atteinte, appuyez sur ENTER. Lorsqu’une fonction a été sélectionnée, changez les
réglages au moyen des touches UP et DOWN. Lorsque vous avez fini les réglages,
appuyez sur ENTER.

©Copyright LOTRONIC 2017 SPOTY60LED Page 9
FONCTIONS
D512
A001 - A512, réglage de l’adresse DMX
AUTO
AUTO1
AUTO2
AUTO3
SOUND
S001-S099
HAND
7CH
10CH
12CH
INV
PAN
TILT
7 CANAUX DMX
Valeur
Fonction
1
000-255
Rotation axe X 0°-540°
2
000-255
Rotation axe Y 0°-230°
3
000-255
Dimmer de la led 60W sombre -> lumineux
4
0-5
6-249
250-255
Allumé
Stroboscope lent rapide
Allumé
Canal 5 : 9 couleurs + Blanc
0-19
20-39
40-59
60-79
80-99
100-119
120-139
140-159
160-179
180-216
217-255
blanc
Bleu foncé
orange
pourpre
Bleu clair
rouge
vert
rose
jaune
Rotation des couleurs vers la droite lent rapide
Rotation des couleurs vers la gauche lent rapide
Canal 6: 9 gobos + ouvert
0-9
10-19
20-39
40-59
60-79
80-99
100-119
120-139
140-159
160-179
180-217
218-255
Ouvert
Gobo 1
Gobo 2
Gobo 3
Gobo 4
Gobo 5
Gobo 6
Gobo 7
Gobo 8
Gobo 9
Rotation des gobos vers la droite lent rapide
Rotation des gobos vers la gauche lent rapide
Canal 7: Reset
1-199
200-239
240-255
Aucune fonction
Reset après 3 secondes
Aucune fonction

©Copyright LOTRONIC 2017 SPOTY60LED Page 10
10 CANAUX DMX
Valeur
Fonction
1
000-255
Rotation axe X 0°-540°
2
000-255
Réglage fin axe X
3
000-255
Rotation axe Y 0°-230°
4
000-255
Réglage fin axe Y
5
000-255
Vitesse axes X/Y rapide -> lent
6
000-255
Dimmer de la led 60W sombre -> lumineux
7
0-5
6-249
250-255
Allumé
Stroboscope lent rapide
Allumé
Canal 8 : 9 couleurs + Blanc
0-19
20-39
40-59
60-79
80-99
100-119
120-139
140-159
160-179
180-216
217-255
blanc
Bleu foncé
orange
pourpre
Bleu clair
rouge
vert
rose
jaune
Rotation des couleurs vers la droite lent rapide
Rotation des couleurs vers la gauche lent rapide
Canal 9: 9 gobos + ouvert
0-9
10-19
20-39
40-59
60-79
80-99
100-119
120-139
140-159
160-179
180-217
218-255
Ouvert
Gobo 1
Gobo 2
Gobo 3
Gobo 4
Gobo 5
Gobo 6
Gobo 7
Gobo 8
Gobo 9
Rotation des gobos vers la droite lent rapide
Rotation des gobos vers la gauche lent rapide
Canal 10: Reset
1-199
200-239
240-255
Aucune fonction
Reset après 3 secondes
Aucune fonction
12 CANAL DMX
Valeur
Fonction
1
000-255
Rotation axe X 0°-540°
2
000-255
Réglage fin axe X
3
000-255
Rotation axe Y 0°-230°
4
000-255
Réglage fin axe Y
5
000-255
Vitesse axes X/Y rapide -> lent
6
000-255
Dimmer de la led 60W sombre -> lumineux

©Copyright LOTRONIC 2017 SPOTY60LED Page 11
Entretien
En raison des résidus de fumée et de poussière, il convient de nettoyer régulièrement les lentilles internes et
externes pour optimizer la puissance lumineuse.
1. Essuyez le boîtier extérieur avec un nettoyant de vitre classique et un chiffon doux.
2. Nettoyez les optiques externs avec du nettoyant à vitres et un chiffon doux toutes les 3 semaines.
3. Séchez soigneusement toutes les pieces avant de rebrancher l’appareil.
Diagnostic de Défaillance
7
0-5
6-249
250-255
Allumé
Stroboscope lent rapide
Allumé
Canal 8 : 9 couleurs + Blanc
0-19
20-39
40-59
60-79
80-99
100-119
120-139
140-159
160-179
180-216
217-255
blanc
Bleu foncé
orange
pourpre
Bleu clair
rouge
vert
rose
jaune
Rotation des couleurs vers la droite lent rapide
Rotation des couleurs vers la gauche lent rapide
Canal 9 : Défilement Couleurs
000-255
0-100% par étapes de 1/256
Canal 10: 9 gobos + ouvert
0-9
10-19
20-39
40-59
60-79
80-99
100-119
120-139
140-159
160-179
180-217
218-255
Ouvert
Gobo 1
Gobo 2
Gobo 3
Gobo 4
Gobo 5
Gobo 6
Gobo 7
Gobo 8
Gobo 9
Rotation des gobos vers la droite lent rapide
Rotation des gobos vers la gauche lent rapide
Canal 11: Gobo shake
0-255
Gobo shake lent rapide
Canal 12: Reset
1-199
200-239
240-255
Aucune fonction
Reset après 3 secondes
Aucune fonction
Problème
Solution
L'appareil ne fonctionne pas
1. Vérifiez le fusible
L'appareil s'allume normalement mais ne
réagit pas à la commande DMX
1. Vérifiez l'adresse DMX 2. Vérifiez si le câble signal est endommagé
L'appareil fonctionne pas intermittences
Vérifiez si le ventilateur fonctionne bien, ou si la poussière bloque le
ventilateur et la grille

©Copyright LOTRONIC 2017 SPOTY60LED Page 12
NOTE IMPORTANTE : Les produits électriques ne doivent pas être mis au rebut avec les ordures ménagères. Veuillez les faire recycler là où il existe des
centres pour cela. Consultez les autorités locales ou votre revendeur sur la façon de les recycler.
1. VORBEREITUNGEN
Verpackungsinhalt:
• 1 x LED Lichteffektgerät
• 1x Omega Halter
• 1x Signalkabel
• 1 Netzkabel
• Bedienungsanleitung
Auspacken
Sofort nach Empfang vorsichtig den Karton auspacken und den Inhalt überprüfen. Alle Teile müssen vollzählig und in
einwandfreiem Zustand sein. Sofort die Transportfirma benachrichtigen und das Verpackungsmaterial aufbewahren,
wenn Teile Transportschäden aufweisen. Verpackungsmaterial auch für späteren Transport des Geräts aufbewahren.
Sicherheitshinweise
Diese Anleitung sorgfältig vor der ersten Inbetriebnahme lesen. Sie enthält wichtige Informationen über Installation,
Gebrauch und Instandhaltung des Geräts.
• Die Anleitung für spätere Bezugnahme aufbewahren und an den nächsten Bediener weitergeben.
• Stets die Netzspannung vor Anschluss des Geräts überprüfen Sie muss mit der auf der Rückseite des Geräts
angegebenen Spannung übereinstimmen und darf auf keinen Fall höher sein.
• Dieses Gerät ist nur für Innengebrauch!
• Das Gerät gehört zur Schutzklasse I. Daher muss es unbedingt an eine geerdete Steckdose angeschlossen werden.
• Um Brand und Stromschlag zu vermeiden, das Gerät vor Regen und Feuchtigkeit schützen. Keine brennbaren
Materialien während des Betriebs in der Nähe des Geräts lassen.
• Das Gerät muss an einem gut belüfteten Ort und in mindestens 1m Entfernung zur nächsten Fläche angebracht
werden. Darauf achten, dass die Belüftungsschlitze nicht blockiert oder verstopft sind.
• Immer erst das Gerät vom Netz trennen, bevor es gewartet oder die Sicherung ersetzt wird. Die Sicherung nur
durch eine identische ersetzen.
• Das Gerät mit einer Sicherheitskette befestigen. Das Gerät niemals nur am Kopf tragen, sondern auch am Sockel.
• Die Raumtemperatur darf 40°C nicht überschreiten. Das Gerät niemals bei höheren Temperaturen betreiben.
• Bei Betriebsstörungen das Gerät sofort ausschalten. Das Gerät niemals selbst reparieren. Reparaturen dürfen nur
von einem Fachmann vorgenommen werden. Alle verwendeten Ersatzteile müssen mit den Originalteilen identisch
sein.
• Das Gerät nicht an ein Dimmerpack anschließen.
• Das Netzkabel niemals quetschen oder beschädigen.
• Beim Abziehen des Netzsteckers nur am Stecker ziehen, niemals am Kabel.
Faible Luminosité
1. Vérifiez si les optiques internes et externes sont propres
Le rayon n'est pas propre (il a un halo)
Nettoyez les optiques, lentilles et autres pièces
Le rayon est déformé
1. Vérifiez si la lentille est cassée
2. Nettoyez la poussière et la graisse sur la lentille
D

©Copyright LOTRONIC 2017 SPOTY60LED Page 13
• Niemals direkt in die Lichtquelle blicken.
• Netztrennungsvorrichtungen
a) Wenn das Gerät über den Netzstecker ausgeschaltet wird, muss die Steckdose jederzeit leicht zugänglich
bleiben
b) Wenn das Gerät über einen Schalter ausgeschaltet wird, muss dieser klar gekennzeichnet und leicht zugänglich
sein.
Features
• 7/10/12 DMX Kanäle
• Betriebsarten : DMX, klangaktiviert, Master-Slave oder automatisch
• Farbrad mit 8 Farben + weiss, geteilte Farben, Rainbow Effekt
• Goboscheibe mit 9 festen Gobomustern + Gobo Shake
• Manuelle Scharfeinstellung
• Elektronischer Dimmer (0-100%)
• Shutter: 0-20Hz
• Stroboskop
Technische Daten
Versorgung ........................................................................................ 100-240Vac 50/60Hz
Verbrauch .................................................................................................................. 100W
Sicherung.......................................................................................... T3A / 250V 5 x 20mm
Leuchtmittel ..............................................................................................weisse 60W LED
Pan ............................................................................. 540°/360°/180°, 8/16 bit Auflösung
Tilt ................................................................................ 230°/180°/90°, 8/16 bit Auflösung
Strahlenwinkel .............................................................................................................. 15°
Abmessungen ...................................................................................... 370 x 250 x 220mm
Gewicht ...................................................................................................................... 3,8kg
Auswechseln der Sicherung
Vor Auswechseln der Sicherung Gerät vom Netz trennen. Nur eine identische Sicherung benutzen.
Mit einem Kreuzschraubendreher den Sicherungshalter aus seinem Gehäuse entfernen.
Die durchgebrannte Sicherung aus dem Halter nehmen und durch eine identische Sicherung
ersetzen.
Den Sicherungshalter zurück ins Gehäuse setzen und Netz wieder anschließen.
Warnung: Wenn die neue Sicherhung ebenfalls durchbrennt, benutzen Sie das Gerät nicht mehr, da es sonst
schweren Schaden nehmen kann. Nehmen Sie Verbindung mit Ihrem Fachhändler auf.
Montage
Das Gerät kann in jeder beliebigen Stellung montiert werden, solange für ausreichende Belüftung gesorgt ist.
Der Ventilator und die Belüftungsschlitze dürfen auf keinen Fall verstopft werden. Bei der Wahl des
Anbringungsortes darauf achten, dass das Gerät leicht zugänglich für Wartungs- und Reinigungsarbeiten bleibt.
Benutzen Sie immer Sicherheitskabel.
Das Gerät vor Regen, Feuchtigkeit, extremen Temperaturschwankungen schützen. Die Montagestelle muss gut
belüftet sein.
Den Haltebügel am Gerät befestigen. Das Gerät muss fest und sicher installiert werden, um Erschütterungen und
Spielraum während der Bewegungen zu vermeiden. Die Montagefläche muss stabil sein und mindestens 10-mal das
Gewicht des Geräts tragen können. Bei der Montage das Gerät immer zusätzlich durch ein Sicherheitskabel
absichern, dass mindestens 12-mal das Gewicht des Geräts tragen kann. Das Gerät darf nur von einem Fachmann

©Copyright LOTRONIC 2017 SPOTY60LED Page 14
installiert werden. Es muss an einer Stelle installiert werden, wo es für Menschen unzugänglich ist und niemand
unter dem Montagebereich stehen oder gehen kann.
BEDIENFELD
Auf MENU drücken, um ins Hauptmenü zu gehen. Mit den UP / DOWN
Tasten zur gewünschten Funktion gehen und auf ENTER drücken. Wenn
eine Funktion gewählt ist, mit den UP / DOWN Tasten die Einstellung
ändern und auf ENTER drücken.
MENÜ
D512
A001 - A512, DMX Address setting
AUTO
AUTO1
AUTO2
AUTO3
SOUND
S001-S099
HAND
7CH
10CH
12CH
INV
PAN
TILT
7 DMX KANÄLE
Wert
Funktion
1
000-255
Drehung um die X-Achse 0°-540°
2
000-255
Drehung um die Y-Achse 0°-230°
3
000-255
60W LED Dimmer von dunkel auf hell
4
0-5
6-249
250-255
AN
Stroboskop von langsam auf schnell
AN
Kanal 5: 9 Farben + Weiß
0-19
20-39
40-59
60-79
80-99
100-119
120-139
140-159
160-179
180-216
217-255
weiß
dunkelblau
orange
purpur
hellblau
rot
grün
rosa
gelb
Farbdrehung rechts von langsam auf schnell
Farbdrehung links von langsam auf schnell
Kanal 6: 9 Gobos + Offen
0-9
10-19
20-39
40-59
60-79
80-99
100-119
120-139
Offen
Gobo 1
Gobo 2
Gobo 3
Gobo 4
Gobo 5
Gobo 6
Gobo 7

©Copyright LOTRONIC 2017 SPOTY60LED Page 15
140-159
160-179
180-217
218-255
Gobo 8
Gobo 9
Gobodrehung rechts von langsam auf schnell
Gobodrehung links von langsam auf schnell
Kanal 7: Reset
1-199
200-239
240-255
Unbelegt
Reset nach 3 Sekunden
Unbelegt
10 DMX KANÄLE
Wert
Funktion
1
000-255
Drehung um die X-Achse 0°-540°
2
000-255
Feineinstellung X-Achse
3
000-255
Drehung um die Y-Achse 0°-230°
4
000-255
Feineinstellung Y-Achse
5
000-255
XY-Achse Drehgeschwindigkeit von schnell auf langsam
6
000-255
60W LED Dimmer von dunkel auf hell
7
0-5
6-249
250-255
AN
Stroboskop von langsam auf schnell
AN
Kanal 8: 9 Farben + Weiß
0-19
20-39
40-59
60-79
80-99
100-119
120-139
140-159
160-179
180-216
217-255
weiß
dunkelblau
orange
purpur
hellblau
rot
grün
rosa
gelb
Farbdrehung rechts von langsam auf schnell
Farbdrehung links von langsam auf schnell
Kanal 9: 9 Gobos + Offen
0-9
10-19
20-39
40-59
60-79
80-99
100-119
120-139
140-159
160-179
180-217
218-255
Offen
Gobo 1
Gobo 2
Gobo 3
Gobo 4
Gobo 5
Gobo 6
Gobo 7
Gobo 8
Gobo 9
Gobodrehung rechts von langsam auf schnell
Gobodrehung links von langsam auf schnell
Kanal 10: Reset
1-199
200-239
240-255
Unbelegt
Reset nach 3 Sekunden
Unbelegt

©Copyright LOTRONIC 2017 SPOTY60LED Page 16
Pflege
Aufgrund von Staub- und Schmutzablagerungen müssen die inneren und äusseren Linsen regelmässig gereinigt
werden, um die Lichtausbeute zu optimieren.
1. Mit normalem Glasreiniger und einem weichen Tuch das Gehäuse abwischen.
2. Die externe Optik mit Glasreiniger und einem weichen Tuch alle 3 Wochen reinigen.
3. Alle Teile komplett reinigen, bevor Sie das Gerät wieder ans Netz anschliessen.
12 DMX KANÄLE
Wert
Funktion
1
000-255
Drehung um die X-Achse 0°-540°
2
000-255
Feineinstellung X-Achse
3
000-255
Drehung um die Y-Achse 0°-230°
4
000-255
Feineinstellung Y-Achse
5
000-255
XY-Achse Drehgeschwindigkeit von schnell auf langsam
6
000-255
60W LED Dimmer von dunkel auf hell
7
0-5
6-249
250-255
AN
Stroboskop von langsam auf schnell
AN
Kanal 8: 9 Farben + Weiß
0-19
20-39
40-59
60-79
80-99
100-119
120-139
140-159
160-179
180-216
217-255
weiß
dunkelblau
orange
purpur
hellblau
rot
grün
rosa
gelb
Farbdrehung rechts von langsam auf schnell
Farbdrehung links von langsam auf schnell
Kanal 9: Farbenübergang
000-255
0-100% in 1/256 Schritten
Kanal 10 9 Gobos + Offen
0-9
10-19
20-39
40-59
60-79
80-99
100-119
120-139
140-159
160-179
180-217
218-255
Offen
Gobo 1
Gobo 2
Gobo 3
Gobo 4
Gobo 5
Gobo 6
Gobo 7
Gobo 8
Gobo 9
Gobodrehung rechts von langsam auf schnell
Gobodrehung links von langsam auf schnell
Kanal 11: Gobo Shake
0-255
Gobo Shake von langsam auf schnell
Kanal 12: Reset
1-199
200-239
240-255
Unbelegt
Reset nach 3 Sekunden
Unbelegt

©Copyright LOTRONIC 2017 SPOTY60LED Page 17
Fehlerdiagnose
WICHTIGER HINWEIS: Elektrogeräte gehören nicht in den Hausmüll. Sie müssen in speziellen Betrieben recycelt werden.
Bringen Sie sie zu einer speziellen Entsorgungsstelle für Elektrokleingeräte (Wertstoffhof)!
ALVORENS U BEGINT
Verpakkingsinhoud:
• 1 x LED licht effect
• 1x omega houder
• 1x signaal kabel
• 1x Netsnoer
• 1x Handleiding
Uitpakken
Onmiddellijk naar de aankoop van het toestel, verwijder voorzichtig de verpakking en wees zeker dat het toestel in
geode toestand is. Breng direct uw dealer op de hoogte en bewaar het verpakkingsmateriaal indien onderdelen of
het karton door het transport beschadigd zijn. Bewaar het karton en alle verpakkingsmaterialen. Indien het toestel
moet gerepareerd worden is het belangrijk het toestel in zijn originele verpakking te versturen.
Veiligheidsinstructies
Lees de handleiding aandachtig door. Ze bevat belangrijke informaties voor de installatie, gebruik en onderhoud van
dit toestel.
• Bewaar deze handleiding.
• Wees zeker dat u het toestel op de juiste spanning aansluit en dat de lichtnetspanning niet hoger dan de op de
zijde van het toestel aangegeven spanning is.
• Alleen voor gebruik binnenshuis!
• Dit apparaat behoort tot beschermingsklasse I. Het moet dus verplicht worden geaard. Een bevoegde persoon
moet de elektrische aansluiting uitvoeren.
• Om vuur en elektrische schokken te verhinderen bescherm het toestel tegen regen en vochtigheid. Wees zeker dat
geen ontvlambare materialen in de buurt van het toestel zijn tijdens de werking.
• Plaats het toestel in een ruimte met voldoende ventilatie en in tenminste 1m afstand van oppervlakken. Wees
zeker dat de ventilatie openingen niet geblokkeerd zijn.
• Verwijder het stopcontact alvorens u het toestel onderhoud of de zekering vervangt. Gebruik alleen een zekering
met dezelfde specificaties.
• Gebruik het toestel niet in ruimtes met een temperatuur van meer dan 40°C.
Problem
Lösung
Gerät funktioniert nicht
1. Prüfen, ob die Sicherung durchgebrannt ist.
Lampe leuchtet, reagiert aber nicht auf
den DMX Controller
1. Prüfen, ob die DMX Adresse richtig ist
2. Prüfen, ob das XLR Kabel beschädigt ist
Gerät arbeitet mit Unterbrechungen
Prüfen, ob der Ventilator funktioniert, oder ob Staub und Schmutz
die Belüftungsschlitze verstopfen.
Wenig Leuchtkraft
1. Prüfen, ob die interne und externe Optik sauber ist
Der Strahl ist nicht sauber (hat einen Hof)
Optik reinigen
Der Strahl ist verzerrt
1. Prüfen, ob die Linse gebrochen ist.
2. Linse reinigen
NL

©Copyright LOTRONIC 2017 SPOTY60LED Page 18
• In geval van een ernstig probleem stopt het toestel direct. Verzoek nooit het toestel zelfs te repareren. Alle
reparaties moeten van een ervarene technicus doorgevoerd worden. Gebruik alleen onderdelen met dezelfde
specificaties.
• Sluit het toestel niet op een dimmer pack aan.
• Nooit het netsnoer beschadigen of platdrukken.
• Nooit aan de kabel trekken.
• Nooit in de lichtbron kijken.
• Ontkoppeling van het net
Indien het toestel via een schakelaar wordt uitgeschakeld, moet deze duidelijk gemarkeerd en gemakkelijk
bereikbaar zijn.
Features
• 7/10/12 DMX kanalen
• Geluid geactiveerd, DMX, auto, master-slave en show mode
• Kleurenwiel met 8 kleuren + wit, gedeelte kleuren, rainbow effect
• Gobowiel met 9 vaste gobo’s + wit, gobo shake
• Handmatige focus
• Elektronische dimmer (0-100%)
• Shutter: 0-20Hz
• Strobe effect
Specificaties
Voeding ............................................................................................. 100-240Vac 50/60Hz
Opgenomen vermogen ............................................................................................. 100W
Zekering ............................................................................................ T3A / 250V 5 x 20mm
Lichtbron ........................................................................................ Heldere witte 60W led
Pan .......................................................... 540°/360°/180°, 8/16 bit movement resolution
Tilt ............................................................. 230°/180°/90°, 8/16 bit movement resolution
Straalhoek ..................................................................................................................... 15°
Afmetingen ......................................................................................... 370 x 250 x 220mm
Gewicht ...................................................................................................................... 3,8kg
Vervanging van de zekering
Trek de voedingskabel uit het stopcontact alvorens U de zekering vervangt. Gebruik alleen een zekering met
dezelfde specificaties
Verwijder de zekeringshouder d.m.v. een kruis schroevendraaier uit de behuizing.
Verwijder de oude zekering en zet een nieuwe zekering met dezelfde specificaties in.
Plaats de zekeringshouder terug in zijn behuizing en sluit de voedingskabel op een stopcontact aan.
Installatie
De unit kan in iedere positie geïnstalleert worden mits voor voldoende koeling gezorgt is.
Het is belangrijjk nooit de ventilator of de koelingsopeningen te verstoppen. Bij de keuze van d’installatie plaats denk
eraan dat de plaats gemakkelijk bereikbaar is voor onderhouds en reinigingsdoeleinden.
Gebruik altijd veiligheidskabels.
Bescherm het toestel tegen regern, vochtigheid en extreme temperatuurveranderingen. Kies een plaats met
voldoende ventilatie.
Bevestig het toestel via de schroef gaten op de houder. Wees zeker dat het toestel vast geïnstalleerd is om trillingen
en afglijden tijdens de werking te vermijden. Wees zeker dat de truss waaraan u het toestel bevestigd, stabiel is en
10 keer het gewicht van het toestel kan dragen. Tijdens de montage, gebruik altijd een veiligheidskabel dat 12 keer

©Copyright LOTRONIC 2017 SPOTY60LED Page 19
het gewicht kan dragen.
Het toestel moet van een vakman op een plaats monteert worden waar het buiten het bereik van mensen is en
niemand onder kan staan.
CONTROLE PANEEL
Druk de MENU toets om in het hoofdmenu te gaan. Druk de UP/DOWN toetsen totdat u
de gewenste functie bereikt. Druk ENTER. Wijzig de waarde d.m.v. de UP/DOWN toetsen
en druk ENTER. Houd nu de MENU toets ingedrukt tijdens tenminste 3 seconden om de
instelling te bevestigen en in het geheugen op te slaan. Indien de MENU toets niet
gedurende 8 seconden wordt ingedrukt zal het toestel de instelling automatisch opslaan. Druk MENU om het menu
zonder wijzingen te verlaten.
FUNCTIETABEL
D512
A001 - A512, DMX Adres instelling
AUTO
AUTO1
AUTO2
AUTO3
SOUND
S001-S099
HAND
7CH
10CH
12CH
INV
PAN
TILT
DMX KANALEN
7 DMX KANALEN
Kanaal waarde
Functie
1
000-255
Draaiing om de X as 0°-540°
2
000-255
Draaiing om de Y as 0°-230°
3
000-255
60W led dimmer van donker naar helder
Kanaal 4: Stroboscoop
0-5
6-249
250-255
AAN
Stroboscoop van traag naar snel
AAN
Kanaal 5: 9 kleuren + Wit
0-19
20-39
40-59
60-79
80-99
100-119
120-139
140-159
160-179
180-216
217-255
wit
donkerblauw
oranje
paars
lichtblauw
rood
groen
pink
geel
Kleur rotatie rechts van traag naar snel
Kleur rotatie links van traag naar snel

©Copyright LOTRONIC 2017 SPOTY60LED Page 20
Kanaal 6: 9 gobo's + Open
0-9
10-19
20-39
40-59
60-79
80-99
100-119
120-139
140-159
160-179
180-217
218-255
Open
Gobo 1
Gobo 2
Gobo 3
Gobo 4
Gobo 5
Gobo 6
Gobo 7
Gobo 8
Gobo 9
Gobo draaiing rechts van traag naar snel
Gobo draaiing links van traag naar snel
Kanaal 7: Reset
1-199
200-239
240-255
Geen functie
Reset naar 3 seconden
Geen functie
10 DMX KANALEN
Kanaal waarde
Functie
1
000-255
Draaiing om de X as 0°-540°
2
000-255
Fijninstelling van de X-as
3
000-255
Draaiing om de Y as 0°-230°
4
000-255
Fijninstelling Y as
5
000-255
Draaisnelheid om de XY as van traag naar snel
6
000-255
60W led dimmer van donker naar helder
7
0-5
6-249
250-255
AAN
Stroboscoop van traag naar snel
AAN
Kanaal 8: 9 kleuren + Wit
0-19
20-39
40-59
60-79
80-99
100-119
120-139
140-159
160-179
180-216
217-255
wit
donkerblauw
oranje
paars
lichtblauw
rood
groen
pink
geel
Kleur rotatie rechts van traag naar snel
Kleur rotatie links van traag naar snel
Kanaal 9: 9 gobo's + Open
0-9
10-19
20-39
40-59
60-79
80-99
100-119
120-139
140-159
Open
Gobo 1
Gobo 2
Gobo 3
Gobo 4
Gobo 5
Gobo 6
Gobo 7
Gobo 8
1/34