Sharp CS-2640 Le manuel du propriétaire
- Catégorie
- Calculatrices
- Taper
- Le manuel du propriétaire

CS-2640
ELECTRONIC PRINTING CALCULATOR
DRUCKENDER TISCHRECHNER
CALCULATRICE IMPRIMANTE ÉLECTRONIQUE
CALCULADORA IMPRESORA ELECTRÓNICA
CALCOLATRICE ELETTRONICA STAMPANTE
ELEKTRONISK SKRIVANDE OCH VISANDE RÄKNARE
ELEKTRONISCHE REKENMACHINE MET AFDRUK
CALCULADORA ELETRÔNICA COM IMPRESSORA
ELEKTRONISESTI TULOSTAVA LASKIN
OPERATION MANUAL
BEDIENUNGSANLEITUNG
MODE D’EMPLOI
MANUAL DE MANEJO
MANUALE DI ISTRUZIONI
BRUKSANVISNING
GEBRUIKSAANWIJZING
MANUAL DE INSTRUÇÕES
KÄYTTÖOHJE
ENGLISH ............................................................... Page 2
CALCULATION EXAMPLES ................................. Page 121
DEUTSCH .............................................................. Seite 15
RECHNUNGSBEISPIELE ..................................... Seite 121
FRANÇAIS ............................................................. Page 29
EXEMPLES DE CALCULS .................................... Page 122
ESPAÑOL .............................................................. Página 42
EJEMPLOS DE CÁLCULOS ................................. Página 122
ITALIANO .............................................................. Pagina 55
ESEMPI DI CALCOLO ........................................... Pagina 123
SVENSKA .............................................................. Sida 68
RÄKNEEXEMPEL .................................................. Sida 123
NEDERLANDS ...................................................... Pagina 81
REKENVOORBEELDEN ....................................... Pagina 124
PORTUGUÊS ........................................................ Página 95
EXEMPLOS DE CÁLCULO ................................... Página 124
SUOMI ................................................................... Sivu 108
LASKENTAESIMERKKEJÄ ................................... Sivu 125

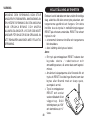
Notes for handling Lithium batteries:
CAUTION
Danger of explosion if battery is incorrectly replaced.
Replace only with the same or equivalent type recommended
by the manufacturer.
Dispose of used batteries according to the manufacturer’s
instructions.
Hinweise zur Handhabung von Lithium-Batterien:
VORSICHT
Bei Verwendung einer uneeigneten Ersatzbatterie besteht
Explosionsgefahr.
Nur durch den gleichen oder einen vom Hersteller
empfohlenen gleichwertigen Typ ersetzen.
Verbrauchte Batterien gemäß Herstelleranleitung entsorgen.
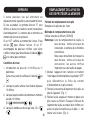
Remarques sur la manipulation des piles au lithium:
ATTENTION
Danger d’explosion de la pile si elle n’est pas remplacée
correctement.
Remplacez-la uniquement par le même type de pile ou un type
équivalent recommandé par le fabricant.
Débarrassez-vous des piles usagers en respectant les
instructions du fabricant.
Notas para el manejo de las baterías de litio:
PRECAUCIÓN
Peligro de explosión si reemplaza incorrectamente la batería.
Reemplácela por otra igual o de tipo equivalente
recomendada por el fabricante.
Deshágase de las baterías de acuerdo con las instrucciones
del fabricante.
Note concernenti le batterie al litio:
AVVERTENZA
Se la batteria non viene sostituita in modo corretto c’è pericolo
di esplosioni.
Sostituire la batteria con una dello stesso tipo o con una
equivalente raccomandata dalla fabbrica.
Smaltire le batterie usate seguendo le istruzioni della fabbrica.
Observera om hantering av litiumbatterier:
OBSERVERA!
Felaktigt batteribyte medför risk för explosion.
Byt endast ut batteriet mot ett batteri av samma eller
motsvarande typ rekommenderat av tillverkaren.
Kassera ett förbrukat batteri enligt tillverkarens anvisningar.
Opmerkingen betreffende de behandeling van lithiumbatterijen:
LET OP
Ontploffingsgevaar indien de batterij verkeerd wordt aangebracht.
Vervang uitsluitend door een batterij van hetzelfde of een
gelijkwaardig type, aanbevolen door de fabrikant.
Gooi gebruikte batterijen weg overeenkomstig de instructies van
de fabrikant.
Notas para o manuseio de pilhas de lítio:
PRECAUÇÃO
Existe o perigo de explosão se a pilha for trocada incorretamente.
Troque apenas com o mesmo tipo ou equivalente recomendado
pelo fabricante.
Descarte-se das pilhas usadas de acordo com as instruções do
fabricante.
Huomautuksia litiumparistojen käsittelystä:
HUOMAUTUS
Räjähdysvaara, jos paristo vaihdetaan väärin.
Paristo tulee vaihtaa vain samaniaiseen tai valmistajan
suosittelemaan vastaavaan tyyppiin.
Hävitä käytetyt paristot valmistajan antamien ohjeiden mukaisesti.

1
Caution!
The socket outlet shall be installed near the equipment and shall be easily accessible.
Vorsicht!
Die Netzsteckdose muß in der Nähe des Gerätes angebracht und leicht zugänglich sein.
Observera!
Anslut till ett vägguttag som återfinns nära enheten och är lätt åtkomligt.
Let op!
Het stopcontact moet in de buurt van het apparaat zijn en ook gemakkelijk toegankelijk
zijn.
Atenção!
A tomada elétrica deve estar perto do equipamento e ser de fácil acesso.
Attention!
La prise de courant murale doit être installée à proximité de l’appareil et doit être
facilement accessible.
Aviso!
El tomacorriente debe estar instalado cerca del equipo y debe quedar bien accesible.
Attenzione!
La presa della corrente deve essere installata in prossimità dell’apparecchio ed essere
facilmente accessibile.
Huomautus!
Pistorasia tulee asentaa laitteen lähelle paikkaan, jossa sen käyttöä on helppoa.

2
CONTENTS
OPERATIONAL NOTES
ENGLISH
Page
• INSTALLING OF BATTERY FOR MEMORY
PROTECTION ................................................... 3
• OPERATING CONTROLS ................................ 4
• INK RIBBON REPLACEMENT ......................... 8
• PAPER ROLL REPLACEMENT ........................ 9
• ERRORS ......................................................... 10
• REPLACEMENT OF BATTERY FOR
MEMORY PROTECTION ................................ 11
• SPECIFICATIONS ........................................... 12
• RESETTING THE UNIT .................................. 14
• CALCULATION EXAMPLES ......................... 121
• CONVERSION CALCULATION
EXAMPLES ................................................... 144
• TAX RATE CALCULATIONS ......................... 146
• DISCOUNT RATE CALCULATION ............... 149
To insure trouble-free operation of your SHARP
calculator, we recommend the following:
1. The calculator should be kept in areas free from
extreme temperature changes, moisture, and
dust.
2. A soft, dry cloth should be used to clean the
calculator. Do not use solvents or a wet cloth.
3. Since this product is not waterproof, do not use
it or store it where fluids, for example water, can
splash onto it. Raindrops, water spray, juice,
coffee, steam, perspiration, etc. will also cause
malfunction.
4. While the memory protection battery is not
installed, the tax / discount rate and conversion
rate set up will be cleared upon terminating the
AC power supply.
The tax / discount rate and conversion rate set
up will also be cleared when the memory
protection battery is removed from the unit.
5. If service should be required on this equipment,
use only a SHARP servicing dealer, a SHARP
approved service facility or SHARP repair service
where available.
6. Do not wind the AC cord around the body or
otherwise forcibly bend or twist it.
SHARP will not be liable nor responsible for any
incidental or consequential economic or
property damage caused by misuse and/or
malfunctions of this product and its peripherals,
unless such liability is acknowledged by law.

3
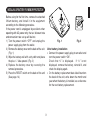
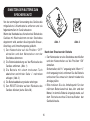
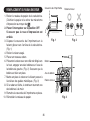
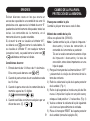
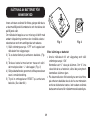
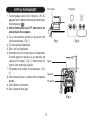
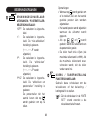
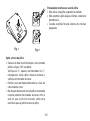
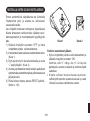
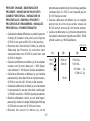
INSTALLING OF BATTERY FOR MEMORY PROTECTION
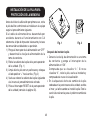
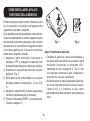
Before using for the first time, remove the attached
lithium battery, and install it in the equipment
according to the following procedure.
If the power cord is unplugged by accident when
operating with AC power only, the tax / discount rate
and conversion rate set up will be lost.
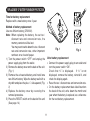
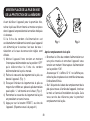
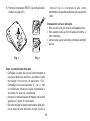
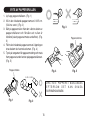
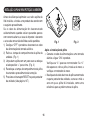
1) Turn the power switch “OFF” and unplug the
power supply plug from the outlet.
2) Remove the battery cover on the back of the unit.
(Fig. 1)
3) Wipe the battery well with a dry cloth and place
the plus “+” side upward. (Fig. 2)
4) Replace the battery cover by reversing the
removal procedure.
5) Press the RESET switch on the back of the unit
(See page 14).
After battery installation
• Connect the power supply plug to an outlet and
turn the power switch “ON”.
Check that “0.” is displayed. If “0.” is not
displayed, remove the battery, reinstall it, and
check the display again.
• On the battery replacement date label found on
the back of the unit, write down the month and
year when the battery is installed, as a reference
for the next battery replacement.
Fig. 1 Fig. 2
1
2

4
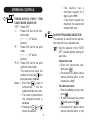
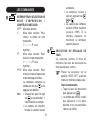
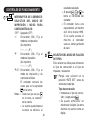
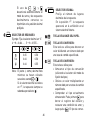
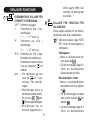
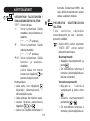
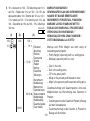
POWER SWITCH; PRINT / ITEM
COUNT MODE SELECTOR:
“OFF”: Power OFF.
“•”: Power ON. Set to the non-
print mode.
(“•
•
•
...
•
•
•
–P” will be
printed.)
“P”: Power ON. Set to the print
mode.
(“•
•
•
...
•
•
•
+P” will be
printed.)
“P•IC”: Power ON. Set to the print
and item count mode.
The counter will count the
number of times that has
been pressed in addition.
Notes: • Each time is used in
subtraction, 1 will be
subtracted from the count.
• The count is printed when
the calculated result is
obtained.
• Pressing of , or
clears the counter.
OPERATING CONTROLS
• The counter has a
maximum capacity of 3
digits (up to ±999).
If the count exceeds the
maximum, the counter will
recount from zero.
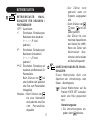
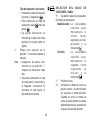
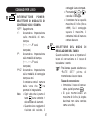
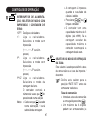
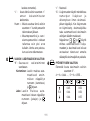
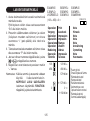
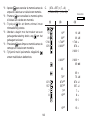
RATE SETTING MODE SELECTOR:
This selector is used to set the conver-
sion rate or the tax / discount rate.
“
”: Set this selector to the “RATE
SET” position before storing an
each rate.
Conversion rate:
• Enter the conversion rate,
then press .
• A maximum of 6 digits can be
stored (decimal point is not
counted as a digit).
Tax / discount rate:
• Enter the adding tax rate, then
press .
• To store a discount rate, press
before pressing .
• A maximum of 4 digits can be
stored (decimal point is not

5
counted as a digit).
“•” : Set this selector to the “•” posi-
tion before starting calculations.
Note: • Be sure to set this selector to
the “•” position after storing an
each rate.
• For the conversion rate and
the tax / discount rate, a single
value can be stored for each.
If you enter a new rate, the
previous rate will be cleared.
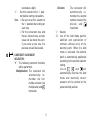
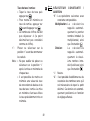
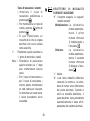
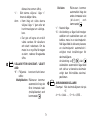
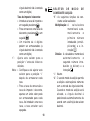
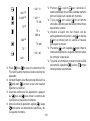
CONSTANT / ADD MODE
SELECTOR:
“K” : The following constant functions
will be performed:
Multiplication: The calculator will
automatically re-
member the first
number entered (the
multiplicand) and
instruction.
Division: The calculator will
automatically re-
member the second
number entered (the
divisor) and
instruction.
“•”: Neutral
“A”: Use of the Add mode permits
addition and subtraction of
numbers without entry of the
decimal point. When the Add
mode is activated, the decimal
point is automatically positioned
according to the decimal selector
setting.
Use of , , and will
automatically override the Add
mode and decimally correct
answers will be printed at the
preset decimal position.

6
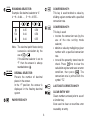
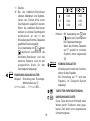
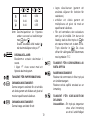
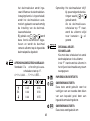
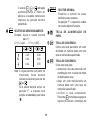
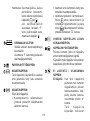
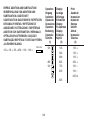
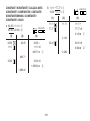
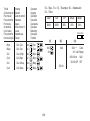
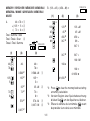
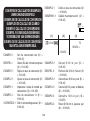
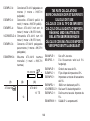
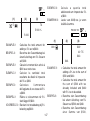
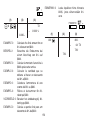
5/4
ROUNDING SELECTOR:
Example: Set decimal selector to “2”.
4
÷
9 = 0.444 ... , 5
÷
9 = 0.555 ...
Note: The decimal point floats during
successive calculation by the
use of or .
If the decimal selector is set to
“F” then the answer is always
rounded down ( ).
DECIMAL SELECTOR:
Presets the number of decimal
places in the answer.
In the “F” position, the answer is
displayed in the floating decimal
system.
PAPER FEED KEY
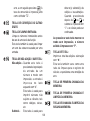
CONVERSION KEY:
This key is used to obtain a value by
dividing a given number with a specified
conversion rate.
CONVERSION KEY:
This key is used:
• to store the conversion rate (by the
use of the rate setting mode
selector).
• obtains a value by multiplying a given
number with a specified conversion
rate.
• to recall the presently stored rate for
check. Press first to clear the
calculation register and reset an error
condition, then press . The
conversion rate is printed with the
symbol “TC”.
LAST DIGIT CORRECTION KEY
CLEAR ENTRY KEY:
Clears numbers entered prior to use of
a function key.
Also used to clear an overflow error
caused by an entry.
4 9 5 9
0.45 0.56
5/4 0.44 0.56
0.44 0.55

7
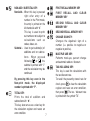
NON-ADD / SUBTOTAL KEY:
Non-Add – When this key is pressed
right after entry of a
number in the Print mode,
the entry is printed on the
left-hand side with “#”.
This key is used to print
out numbers not subject to
calculations such as
codes, dates, etc.
Subtotal – Used to get subtotal(s) of
additions and / or subtrac-
tions. When pressed
following or , the
subtotal is printed with “
◊
”
and the calculation may be
continued.
By pressing this key even in the
Non-print mode, the displayed
number is printed with “P”.
TOTAL KEY:
Prints the total of addition and
subtraction with “ ✱ ”.
This key also serves as a clear key for
the calculation register and resets an
error condition.
FIRST RECALL MEMORY KEY
FIRST RECALL AND CLEAR
MEMORY KEY
SECOND RECALL AND CLEAR
MEMORY KEY
SECOND RECALL MEMORY KEY
CHANGE SIGN KEY:
Changes the algebraic sign of a
number (i.e. positive to negative or
negative to positive).
MULTIPLE USE KEY:
Performs mark-ups, percent change
and automatic add-on / discount.
TAX-INCLUDING KEY:
This key is used for calculations with
the tax/discount rate.
To recall the presently stored rate for
check, press to clear the calculation
register and reset an error condition,
then press . The tax / discount rate
is printed with the symbol “TX”.

8
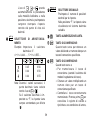
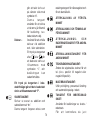
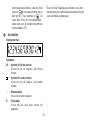
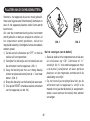
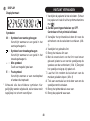
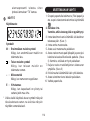
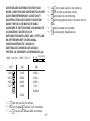
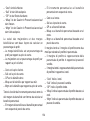
DISPLAY
Display format:
Symbols:
M : First memory symbol
Appears when a number has been
stored in First memory.
: Second memory symbol
Appears when a number has been
stored in Second memory.
– : Minus symbol
Appears when a number is a negative.
E : Error symbol
Appears when an overflow or other error
is detected.
* Although all available symbols are shown here
for instruction purposes, these symbols will not
appear on the screen simultaneously.
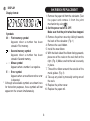
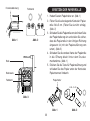
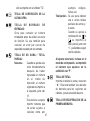
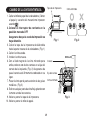
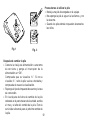
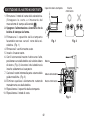
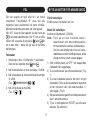
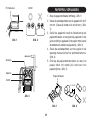
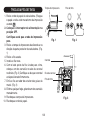
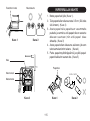
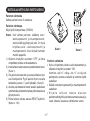
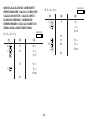
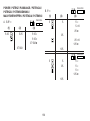
INK RIBBON REPLACEMENT
1. Remove the paper roll from the calculator. (Tear
the paper and remove it from the print
mechanism by using .)
2. Set the power switch to OFF.
Make sure that the print wheel has stopped.
3. Remove the printer cover by sliding it towards
the back of the calculator. (Fig. 1)
4. Remove the used ribbon.
5. Install the new ribbon.
6. With the black side of the ribbon facing upwards,
place one of the reels on the reel shaft on the
right. (Fig. 2) Make sure that the reel is securely
in place.
7. Thread the ribbon around the outside of the
metal guides. (Fig. 3)
8. Take up any slack by manually turning one of
the reels.
9. Replace the printer cover.
10. Replace the paper roll.

9
Fig. 1
Printer cover
Fig. 2
Ink ribbon
Fig. 3
Ink ribbon
Reel
Reel shaft
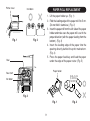
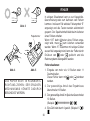
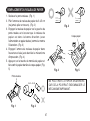
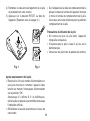
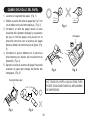
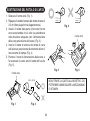
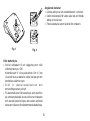
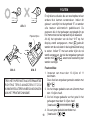
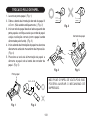
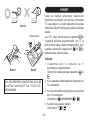
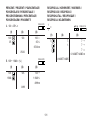
1. Lift the paper holder up. (Fig. 1)
2. Fold the leading edge of the paper roll 3 to 5 cm.
(Do not fold it slantwise.) (Fig. 2)
3. Insert the paper roll from the left side of the paper
holder and make sure the paper roll is set in the
proper direction (with the paper feeding from the
bottom). (Fig. 3)
4. Insert the leading edge of the paper into the
opening directly behind the print mechanism.
(Fig. 4)
5. Press the paper feed key and feed the paper
under the edge of the paper cutter. (Fig. 5)
PAPER ROLL REPLACEMENT
Fig. 1
Paper holder
Fig. 2
3 cm – 5 cm
(1-3/16″ to
1-31/32″)

10
DO NOT PULL PAPER BACKWARDS AS THIS
MAY CAUSE DAMAGE TO PRINTING
MECHANISM.
Fig. 3
Fig. 4
Fig. 5
Paper cutter
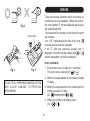
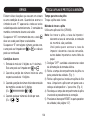
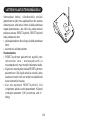
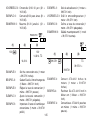
There are several situations which will cause an
overflow or an error condition. When this occurs,
the error symbol “E” will be displayed and all keys
will electronically lock.
The contents of the memory at the time of the error
are retained.
If an “0•E” is displayed at the time of the error,
must be used to clear the calculator.
If an “E” with any numerals except zero is
displayed, the error may be cleared with or
and the calculation can still be continued.
Error conditions:
1. Entry of more than 12 digits or 11 decimals.
This error can be cleared with or .
2. When the integer portion of an answer exceeds
12 digits.
3. When the integer portion of the contents of the
memory exceeds 12 digits.
(Ex. 999999999999 1 )
4. When any number is divided by zero.
(Ex. 5 0 )
ERRORS

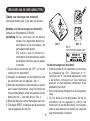
11
Time for battery replacement
Replace with a new battery once 2 year.
Method of battery replacement
Use one lithium battery (CR2032).
Note: When replacing the battery, the set tax /
discount rate and conversion rate, the
memory contents will be lost.
You may want to write down the tax / discount
rate and conversion rate, other important
numbers on a sheet of paper.
1) Turn the power switch “OFF” and unplug the
power supply plug from the outlet.
2) Remove the battery cover on the back of the unit.
(Fig. 1)
3) Remove the exhausted battery and install one
new lithium battery. Wipe the battery well with a
dry cloth and place the plus “+” side upward. (Fig.
2)
4) Replace the battery cover by reversing the
removal procedure.
5) Press the RESET switch on the back of the unit
(See page 14).
REPLACEMENT OF BATTERY FOR MEMORY PROTECTION
After battery replacement
• Connect the power supply plug to an outlet and
turn the power switch “ON”.
Check that “0.” is displayed. If “0.” is not
displayed, remove the battery, reinstall it, and
check the display again.
• Reset the tax / discount rate and conversion rate.
• On the battery replacement date label found on
the back of the unit, write down the month and
year when the battery is replaced, as a reference
for the next battery replacement.
Fig. 1
1
2
Fig. 2

12
Precautions on battery use
• Do not leave an exhausted battery in the
equipment.
• Do not expose the battery to water or flame, and
do not take it apart.
• Store batteries out of the reach of small children.
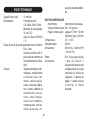
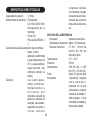
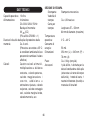
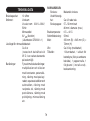
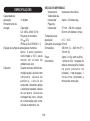
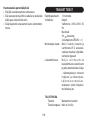
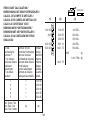
SPECIFICATIONS
Operating capacity: 12 digits
Power supply: Operating:
AC: 220V–230V, 50Hz
Memory backup:
3V (DC)
(Lithium battery CR2032 ×
1)
Memory Protection Battery lifespan:
Approx. 2 years. (tested
and confirmed at 25°C
(77°F); may change due to
usage environment)
Calculations: Four arithmetic calcula-
tions, constant multiplica-
tion and division, power
calculation, add-on / dis-
count calculation, repeat
addition and subtraction,
reciprocal calculation, item
count calculation, markup
calculation, memory cal-
culation, etc.

13
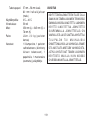
PRINTING SECTION
Printer: Mechanical printer
Printing speed: Approx. 4.3 lines/sec.
Printing paper: 57 mm (2-1/4") ~ 58 mm
(2-9/32") wide
80 mm (3-5/32") in
diameter (max.)
Operation temperature: 0°C ~ 40°C (32°F ~ 104°F)
Power consumption: 53 mA
Dimensions: 250 mm (W) × 345 mm (D)
× 78 mm (H)
9-27/32" (W) × 13-19/32"
(D) × 3-1/16" (H)
Weight: Approx. 2.0 kg (4.41 lb.)
(with battery)
Accessories: 1 lithium battery, 1 battery
replacement date label
(attached on the unit’s
back body), 1 paper roll, 1
ink ribbon (installed) and
operation manual
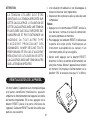
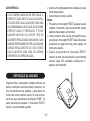
WARNING
THE VOLTAGE USED MUST BE THE SAME
AS SPECIFIED ON THIS CALCULATOR.
USING THIS CALCULATOR WITH A VOLTAGE
HIGHER THAN THAT SPECIFIED IS
DANGEROUS AND MAY RESULT IN A FIRE
OR OTHER TYPE OF ACCIDENT CAUSING
DAMAGE. SHARP WILL NOT BE HELD
RESPONSIBLE FOR ANY DAMAGE
RESULTING FROM USE OF THIS
CALCULATOR WITH OTHER THAN THE
SPECIFIED VOLTAGE.

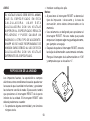
14
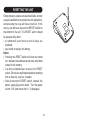
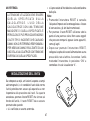
RESETTING THE UNIT
Strong impacts, exposure to electrical fields, or other
unusual conditions may render the unit inoperative,
and pressing the keys will have no effect. If this
occurs, you will have to press the RESET switch on
the bottom of the unit. The RESET switch should
be pressed only when:
• an abnormal event occurs and all keys are
disabled.
• you install or replace the battery.
Notes:
• Pressing the RESET switch will clear the stored
tax / discount rate and conversion rate, other data
stored in the memory.
• Use only a ballpoint pen to press the RESET
switch. Do not use anything breakable or anything
with a sharp tip, such as a needle.
• After pressing the RESET switch, connect the
power supply plug to an outlet. Turn the power
switch “ON” and check that “0.” is displayed.

15
Um den störungsfreien Betrieb dieses Rechners
von SHARP zu gewährleisten, empfehlen wir
folgende Massnahmen:
1. Verwenden Sie den Rechner nicht an Orten, an
denen hohe Temperaturunterschiede, hohe
Luftfeuchtigkeit oder Staub vorhanden ist.
2. Verwenden Sie ein weiches, trockenes Tuch zum
Reinigen des Rechners. Keine Lösungsmittel
oder ein feuchtes Tuch verwenden.
3. Da dieses Produkt nicht wasserdicht ist, sollten
Sie es nicht an Orten benutzen oder lagern, die
extremer Feuchtigkeit ausgesetzt sind. Schützen
Sie das Gerät vor Wasser, Regentropfen,
Sprühwasser, Saft, Kaffee, Dampf, Schweiß
usw., da der Eintritt von irgendwelchen Flüssig-
keit zu Funktionsstörungen führen kann.
4. Wenn die Speichersicherungs-Batterie nicht
eingesetzt ist, werden nach dem Abtrennen des
Gerätes von der Stromversorgung die Raten für
Steuer, Abschlag und Umrechnung gelöscht.
Die Raten für Steuer, Abschlag und Umrechnung
werden auch gelöscht, wenn die Speichersiche-
rungs-Batterie aus dem Gerät entfernt wird.
5. Wenn eine Reparatur notwendig ist, beauftragen
Sie nur einen SHARP-Händler, einen von
SHARP zugelassenen Kundendienst oder einen
SHARP-Reparaturdienst.
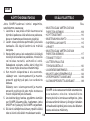
INHALT
HINWEISE ZUM BETRIEB
Seite
• EINSETZEN DER BATTERIE ZUM
SPEICHERSCHUTZ ....................................... 16
• BETRIEBSTASTEN ......................................... 17
• ERSETZEN DES FARBBANDES ................... 22
• ERSETZEN DER PAPIERROLLE................... 23
• FEHLER .......................................................... 24
• AUSWECHSELN DER BATTERIEN FÜR
DEN SPEICHERSCHUTZ ............................... 25
• TECHNISCHE DATEN ....................................26
• RÜCKSTELLUNG DES GERÄTES ................ 28
• RECHNUNGSBEISPIELE .............................121
• UMRECHNUNGSBEISPIELE .......................144
•B
ERECHNUNGEN DER STEUERRATE ........
146
•
BERECHNUNGEN DER ABSCHLAGRATE .
149
6. Wickeln Sie das Netzkabel nicht um das Gerät
oder knicken oder biegen Sie es nicht.
DEUTSCH
SHARP übernimmt keine Verantwortung oder
Haftung für irgendwelche zufälligen oder aus
der Verwendung folgenden wirtschaftlichen oder
sachlichen Schäden, die aufgrund der falschen
Verwendung bzw. durch Fehlfunktionen dieses
Gerätes und dessen Zubehör auftreten,
ausgenommen diese Haftung ist gesetzlich
festgelegt.

16
EINSETZEN DER BATTERIE ZUM
SPEICHERSCHUTZ
Vor der erstmaligen Verwendung des Gerätes die
mitgelieferte Lithiumbatterie entfernen und sie
folgendermaßen im Gerät einsetzen.
Wenn das Netzkabel aus Versehen bei Betrieb des
Gerätes mit Wechselstrom von der Steckdose
abgetrennt wird, werden die eingestellte Steuer-,
Abschlag- und Umrechnungsrate gelöscht.
1) Den Netzschalter auf die Position “OFF”
einstellen und den Netzstecker von der
Steckdose abtrennen.
2) Die Batterieabdeckung auf der Rückseite des
Gerätes entfernen. (Abb. 1)
3) Die Batterie mit einem trockenen Tuch
abwischen und mit der Seite “+” nach oben
einlegen. (Abb. 2)
4) Die Batterieabdeckung wieder anbringen.
5) Den RESET-Schalter auf der Rückseite des
Gerätes drücken (siehe Seite 28).
Nach dem Einsetzen der Batterie
• Den Netzstecker an eine Steckdose anschließen
und den Netzschalter auf die Position “ON”
einstellen.
Sicherstellen, daß “0.” angezeigt wird. Wenn “0.”
nicht angezeigt wird, entfernen Sie die Batterie
und setzen Sie erneut ein; danach wieder die
Anzeige prüfen.
• Bitte notieren Sie als Anhaltspunkt für den
nächsten Batteriewechsel das Jahr und den
Monat, in dem die Batterie eingelegt wurde, auf
dem Batteriewechsel-Datenaufkleber der
Geräterückseite.
Abb. 1
Abb. 2
1
2

17
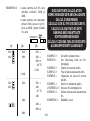
BETRIEBSTASTE; WAHL-
SCHALTER FÜR DRUCKEN /
POSTENZÄHLER:
“OFF”: Ausschalten.
“•”: Einschalten. Einstellung der
Betriebsart ohne Ausdruck.
(“•
•
•
...
•
•
•
–P” wird
gedruckt.)
“P”: Einschalten. Einstellung der
Betriebsart für Ausdruck.
(“•
•
•
...
•
•
•
+P” wird
gedruckt.)
“P•IC”: Einschalten. Einstellung auf
Ausdruck und Betriebsart für
Postenzähler.
Beim Drücken von bei
einer Addition wird jedesmal
eine Eins zum Postenzähler
hinzugefügt.
Hinweise: • Beim Drücken von
bei einer Subtraktion
wird jedesmal eine Eins
vom Postenzähler
abgezählt.
BETRIEBSTASTEN
• Der Zähler wird
gedruckt, wenn ein
Ergebnis ausgegeben
wird.
• Durch Drücken von ,
oder wird der
Zähler gelöscht.
• Der Zähler hat eine
maximale Kapazität von
drei Stellen (bis ±999).
Wenn der Zähler den
Maximalwert über-
schreitet, wird er wieder
auf Null zurückgestellt.
UMRECHNUNGSRATE-WAHL-
SCHALTER:
Dieser Wahlschalter dient zum
Speichern der Umrechnungs- oder
Steuer- / Abschlagsrate.
“
”: Diesen Wahlschalter auf die
Position “RATE SET” einstellen,
bevor eine Rate gespeichert
wird.
Umrechnungsrate:
• Die Umrechnungsrate ein-
geben, dann drücken.

18
• Es können maximal bis zu 6
Stellen gespeichert werden
(der Dezimalpunkt wird nicht
als Stelle gewertet).
Steuer- und Abschlagsraten:
• Die Rate für den Steuerauf-
schlag eingeben, dann
drücken.
• Zum Speichern einer Ab-
schlagsrate vor dem
Drücken von drücken.
• Es können maximal bis zu 4
Stellen gespeichert werden
(der Dezimalpunkt wird nicht
als Stelle gewertet).
“•” : Diesen Wahlschalter vor dem
Beginn einer Berechnung auf
die Position “•” einstellen.
Hinweis: • Stellen Sie sicher, daß
nach dem Speichern jeder
Rate dieser Wahlschalter
auf die Position “•” einge-
stellt wird.
• Für die Umrechnungsrate
un die Steuer- / Abschlags-
rate kann jeweils ein ein-
zelner Wert eingeben
werden. Wenn Sie eine
neue Rate eingeben, wird
die bisher gespeicherte
gelöscht.
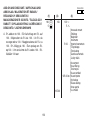
WAHLSCHALTER FÜR KONSTANTE /
ADDITION:
“K” : Die folgenden Konstanten-
Funktionen werden ausgeführt:
Multiplikation: Der Rechner
speichert die zuerst
eingegebene Zahl
(den Multiplikanden)
und die Anweisung
.
Division: Der Rechner
speichert die als
zweites eingegebene
Zahl (den Divisor)
und die Anweisung
.
La page est en cours de chargement...
La page est en cours de chargement...
La page est en cours de chargement...
La page est en cours de chargement...
La page est en cours de chargement...
La page est en cours de chargement...
La page est en cours de chargement...
La page est en cours de chargement...
La page est en cours de chargement...
La page est en cours de chargement...
La page est en cours de chargement...
La page est en cours de chargement...
La page est en cours de chargement...
La page est en cours de chargement...
La page est en cours de chargement...
La page est en cours de chargement...
La page est en cours de chargement...
La page est en cours de chargement...
La page est en cours de chargement...
La page est en cours de chargement...
La page est en cours de chargement...
La page est en cours de chargement...
La page est en cours de chargement...
La page est en cours de chargement...
La page est en cours de chargement...
La page est en cours de chargement...
La page est en cours de chargement...
La page est en cours de chargement...
La page est en cours de chargement...
La page est en cours de chargement...
La page est en cours de chargement...
La page est en cours de chargement...
La page est en cours de chargement...
La page est en cours de chargement...
La page est en cours de chargement...
La page est en cours de chargement...
La page est en cours de chargement...
La page est en cours de chargement...
La page est en cours de chargement...
La page est en cours de chargement...
La page est en cours de chargement...
La page est en cours de chargement...
La page est en cours de chargement...
La page est en cours de chargement...
La page est en cours de chargement...
La page est en cours de chargement...
La page est en cours de chargement...
La page est en cours de chargement...
La page est en cours de chargement...
La page est en cours de chargement...
La page est en cours de chargement...
La page est en cours de chargement...
La page est en cours de chargement...
La page est en cours de chargement...
La page est en cours de chargement...
La page est en cours de chargement...
La page est en cours de chargement...
La page est en cours de chargement...
La page est en cours de chargement...
La page est en cours de chargement...
La page est en cours de chargement...
La page est en cours de chargement...
La page est en cours de chargement...
La page est en cours de chargement...
La page est en cours de chargement...
La page est en cours de chargement...
La page est en cours de chargement...
La page est en cours de chargement...
La page est en cours de chargement...
La page est en cours de chargement...
La page est en cours de chargement...
La page est en cours de chargement...
La page est en cours de chargement...
La page est en cours de chargement...
La page est en cours de chargement...
La page est en cours de chargement...
La page est en cours de chargement...
La page est en cours de chargement...
La page est en cours de chargement...
La page est en cours de chargement...
La page est en cours de chargement...
La page est en cours de chargement...
La page est en cours de chargement...
La page est en cours de chargement...
La page est en cours de chargement...
La page est en cours de chargement...
La page est en cours de chargement...
La page est en cours de chargement...
La page est en cours de chargement...
La page est en cours de chargement...
La page est en cours de chargement...
La page est en cours de chargement...
La page est en cours de chargement...
La page est en cours de chargement...
La page est en cours de chargement...
La page est en cours de chargement...
La page est en cours de chargement...
La page est en cours de chargement...
La page est en cours de chargement...
La page est en cours de chargement...
La page est en cours de chargement...
La page est en cours de chargement...
La page est en cours de chargement...
La page est en cours de chargement...
La page est en cours de chargement...
La page est en cours de chargement...
La page est en cours de chargement...
La page est en cours de chargement...
La page est en cours de chargement...
La page est en cours de chargement...
La page est en cours de chargement...
La page est en cours de chargement...
La page est en cours de chargement...
La page est en cours de chargement...
La page est en cours de chargement...
La page est en cours de chargement...
La page est en cours de chargement...
La page est en cours de chargement...
La page est en cours de chargement...
La page est en cours de chargement...
La page est en cours de chargement...
La page est en cours de chargement...
La page est en cours de chargement...
La page est en cours de chargement...
La page est en cours de chargement...
La page est en cours de chargement...
La page est en cours de chargement...
La page est en cours de chargement...
La page est en cours de chargement...
La page est en cours de chargement...
La page est en cours de chargement...
La page est en cours de chargement...
La page est en cours de chargement...
La page est en cours de chargement...
La page est en cours de chargement...
La page est en cours de chargement...
-
 1
1
-
 2
2
-
 3
3
-
 4
4
-
 5
5
-
 6
6
-
 7
7
-
 8
8
-
 9
9
-
 10
10
-
 11
11
-
 12
12
-
 13
13
-
 14
14
-
 15
15
-
 16
16
-
 17
17
-
 18
18
-
 19
19
-
 20
20
-
 21
21
-
 22
22
-
 23
23
-
 24
24
-
 25
25
-
 26
26
-
 27
27
-
 28
28
-
 29
29
-
 30
30
-
 31
31
-
 32
32
-
 33
33
-
 34
34
-
 35
35
-
 36
36
-
 37
37
-
 38
38
-
 39
39
-
 40
40
-
 41
41
-
 42
42
-
 43
43
-
 44
44
-
 45
45
-
 46
46
-
 47
47
-
 48
48
-
 49
49
-
 50
50
-
 51
51
-
 52
52
-
 53
53
-
 54
54
-
 55
55
-
 56
56
-
 57
57
-
 58
58
-
 59
59
-
 60
60
-
 61
61
-
 62
62
-
 63
63
-
 64
64
-
 65
65
-
 66
66
-
 67
67
-
 68
68
-
 69
69
-
 70
70
-
 71
71
-
 72
72
-
 73
73
-
 74
74
-
 75
75
-
 76
76
-
 77
77
-
 78
78
-
 79
79
-
 80
80
-
 81
81
-
 82
82
-
 83
83
-
 84
84
-
 85
85
-
 86
86
-
 87
87
-
 88
88
-
 89
89
-
 90
90
-
 91
91
-
 92
92
-
 93
93
-
 94
94
-
 95
95
-
 96
96
-
 97
97
-
 98
98
-
 99
99
-
 100
100
-
 101
101
-
 102
102
-
 103
103
-
 104
104
-
 105
105
-
 106
106
-
 107
107
-
 108
108
-
 109
109
-
 110
110
-
 111
111
-
 112
112
-
 113
113
-
 114
114
-
 115
115
-
 116
116
-
 117
117
-
 118
118
-
 119
119
-
 120
120
-
 121
121
-
 122
122
-
 123
123
-
 124
124
-
 125
125
-
 126
126
-
 127
127
-
 128
128
-
 129
129
-
 130
130
-
 131
131
-
 132
132
-
 133
133
-
 134
134
-
 135
135
-
 136
136
-
 137
137
-
 138
138
-
 139
139
-
 140
140
-
 141
141
-
 142
142
-
 143
143
-
 144
144
-
 145
145
-
 146
146
-
 147
147
-
 148
148
-
 149
149
-
 150
150
-
 151
151
-
 152
152
-
 153
153
-
 154
154
-
 155
155
-
 156
156


Sharp CS-2640 Le manuel du propriétaire
- Catégorie
- Calculatrices
- Taper
- Le manuel du propriétaire
dans d''autres langues
- italiano: Sharp CS-2640 Manuale del proprietario
- English: Sharp CS-2640 Owner's manual
- español: Sharp CS-2640 El manual del propietario
- Deutsch: Sharp CS-2640 Bedienungsanleitung
- Nederlands: Sharp CS-2640 de handleiding
- português: Sharp CS-2640 Manual do proprietário
- svenska: Sharp CS-2640 Bruksanvisning
- suomi: Sharp CS-2640 Omistajan opas
Documents connexes
-
Sharp CS-2635RH Le manuel du propriétaire
-
Sharp EL-1607P Le manuel du propriétaire
-
-
-
-
-
-
-
-