La page est en cours de chargement...

PROGRAM PLAY BOX
RM-PP1
INSTALLATION MANUAL
1st Edition
Serial No. 10001 and Higher

RM-PP1
! WARNING
This manual is intended for qualified service personnel only.
To reduce the risk of electric shock, fire or injury, do not perform any servicing other than that
contained in the operating instructions unless you are qualified to do so. Refer all servicing to
qualified service personnel.
! WARNUNG
Die Anleitung ist nur für qualifiziertes Fachpersonal bestimmt.
Alle Wartungsarbeiten dürfen nur von qualifiziertem Fachpersonal ausgeführt werden. Um die
Gefahr eines elektrischen Schlages, Feuergefahr und Verletzungen zu vermeiden, sind bei
Wartungsarbeiten strikt die Angaben in der Anleitung zu befolgen. Andere als die angegeben
Wartungsarbeiten dürfen nur von Personen ausgeführt werden, die eine spezielle Befähigung
dazu besitzen.
! AVERTISSEMENT
Ce manual est destiné uniquement aux personnes compétentes en charge de l’entretien. Afin
de réduire les risques de décharge électrique, d’incendie ou de blessure n’effectuer que les
réparations indiquées dans le mode d’emploi à moins d’être qualifié pour en effectuer d’autres.
Pour toute réparation faire appel à une personne compétente uniquement.
Attention-when the product is installed in Rack:
1. Prevention against overloading of branch circuit
When this product is installed in a rack and is
supplied power from an outlet on the rack, please
make sure that the rack does not overload the supply
circuit.
2. Providing protective earth
When this product is installed in a rack and is
supplied power from an outlet on the rack, please
confirm that the outlet is provided with a suitable
protective earth connection.
3. Internal air ambient temperature of the rack
When this product is installed in a rack, please make
sure that the internal air ambient temperature of the
rack is within the specified limit of this product.
4. Prevention against achieving hazardous
condition due to uneven mechanical loading
When this product is installed in a rack, please make
sure that the rack does not achieve hazardous
condition due to uneven mechanical loading.
5. Install the equipment while taking the operating
temperature of the equipment into consideration
For the operating temperature of the equipment, refer
to “1-2. Operating Conditions” in this manual.
6. When performing the installation, keep the rear of
the unit 10 cm (4 inches) or more away from walls
in order to obtain proper exhaust and radiation of
heat.

1
RM-PP1
Table of Contents
Manual Structure
Purpose of this manual .............................................................................................. 2
Related manuals......................................................................................................... 2
Trademarks ................................................................................................................ 2
1. Installation
1-1. Supplied Accessories ..................................................................................1-1
1-2. Operating Conditions ..................................................................................1-1
1-3. Power Supply ..............................................................................................1-1
1-3-1. Voltage and Power Requirements ..............................................1-1
1-3-2. Recomended Power Cord...........................................................1-1
1-4. Installation Space ........................................................................................1-2
1-5. Rack Mounting............................................................................................1-3
1-6. Connections and Setup ................................................................................1-7
1-7. Matching Connectors and Cables................................................................1-8
1-8. Signal Inputs and Outputs ...........................................................................1-9

2
RM-PP1
Purpose of this manual
This manual is the installation manual of Program Play Box RM-PP1.
This manual is intended for use by trained system and service engineers, and
provides the information that is required to hardware install (environment, rack
mounting, connection information, etc.).
n
For the software installation, refer to the operation manual of this unit.
Related manuals
Besides this “installation manual”, the following manuals are available for this unit.
..
..
. Operation Manual (PDF) (Supplied with this unit)
This manual is necessary for operation of this unit.
..
..
. Operation Guide (Supplied with this unit)
This guide has described how to use the Operation Manual (PDF).
..
..
. Maintenance Manual
This manual describes the information that premises the parts level service for this
unit.
Trademarks
Trademarks and registered trademarks used in this manual are follows:
. Windows, Windows XP, and Windows NT are registered trademarks of Microsoft
Corporation.
Manual Structure

1-1
RM-PP1
Section 1
Installation
Power voltage: AC 100 to 240 V ±10%
Power frequency: 50 Hz or 60 Hz
Power consumption: 45 W (70 VA)
Rush current: Power voltage 100 V IN: 15 A
Power voltage 240 V IN: 60 A
n
AC power supply is required a capacity which is commen-
surate with rush current.
If the capacity of the AC power supply is not enough, the
breaker of AC power of a supply side may operate or this
unit may not operate normally.
1-3-2. Recomended Power Cord
This unit does not come with a power cord.
To get a power cord, please contact your local Sony Sales
Office/Service Center.
w
. Use the approved Power Cord (3-core mains lead)/
Appliance Connector/Plug with earthing-contacts that
conforms to the safety regulations of each country if
applicable.
. Use the Power Cord (3-core mains lead)/Appliance
Connector/Plug conforming to the proper ratings (Volt-
age, Ampere).
If you have questions on the use of the above Power Cord/
Appliance Connector/Plug, please contact your local Sony
Sales Office/Service Center.
w
. Never use an injured power cord.
1 Power cord 125 V 10 A (2.4 m): ! 1-557-377-11
2 Plug holder (Brown): 3-613-640-01
1-1. Supplied Accessories
CD-ROM .........................................................................1
. Program Play Box Control Software
. Operation manual (PDF)
Operation guide ...............................................................1
Installation manual .......................................................... 1
Screws for rack mounting (B4 x 8).................................10
1-2. Operating Conditions
c
Good air circulation is essential to prevent internal heat build-
up. Place the unit in location with sufficient air circulation.
Do not block the ventilation holes of the cabinet and the
front and rear panels.
Operating temperature: 5dC to 40dC
Operating humidity: 20% to 90% (non-condensing)
Storage temperature: _20dC to 60dC
Locations to avoid:
. Areas where the unit will be exposed to direct sunlight
of any other strong lights.
. Areas near heat sources.
. Dusty areas or areas subject to vibration.
. Areas with strong magnetic field.
. Areas with much electrical noise.
. Areas with much static electricity.
. Areas that is impossible to find a specified room for
installation. (Refer to “1-4. Installation Space”.)
c
Fix the unit securely to avoid slipping if the unit is not
operated at horizontal place.
1-3. Power Supply
1-3-1. Voltage and Power Requirements
This unit’s power line has a switching regulator.
c
Be sure to operate the unit within the range of following
power voltage.
AC inlet
2
1

1-2
RM-PP1
28.6 101.6
254
404.8
Unit : mm
Mass : 8 kg
438
20 555.7
520
55.1
83.7
42.7
41
581(Maximum traveling distance)
44
12.5 88
5.976.2
374
424
465
480
424 (Unit and rail-installed width)
1-4. Installation Space
1-4. Installation Space
When installing, the installation space must be secured in
consideration of the ventilation and service operation.
. Do not block ventilation slots at the right side panel and
left side panel, and vents of the fan.
. Leave a space around the unit for ventilation.
. Leave more than 20 centimeters of space in the rear of
the unit to secure the operation area.
Dimensions when Rack-Mounting
n Remove the feet when rack mounting.

1-3
RM-PP1
Front Rear
660 - 830 mm
(26 - 32
3
/
4
inches)
1-5. Rack Mounting
Explains how to mount this unit into a 19-inch standard rack.
Be sure to mount this unit into a rack accurately following
the procedure and notes mentioned below.
c
. Use the specified rack mount rail.
The use of other rail of low strength may drop the unit
and cause the risk of injury.
. To prevent toppling over the rack, fix it on the horizontal
and firm floor securely with bolts, etc.
. Mount the unit into a rack with a steady posture.
m
. When other equipment with built-in hard disk drive is
already mounted in the same rack for mounting this unit,
turn off the power of the equipment before mounting this
unit.
. Adjust the temperature inside the rack within the range
of the unit’s operating temperature.
(Refer to Section 1-2.)
. Connect long enough cables on the connector panel,
considering that the unit is pulled out from the rack.
When the unit is mounted in a rack, the maximum
traveling distance is illustrated below.
1-5. Rack Mounting
Required Parts
Use the specified parts for rack mounting.
The other supplied parts are not used.
. Rack Mount Rail RMM-30 (Option)
Slide rails with brackets ............................... 2
Screws (B5 x 8) ........................................... 8
Plate nuts ...................................................... 2 (Not used)
Screws (PWH4 x 10)................................... 2 (Not used)
n
RMM-30 can be used for a rack with a depth of 660 -
830 mm (26 - 32
3
/4 inches) for 22” rail.
. Rack Mount Bracket SXA-2U (Option)
Rack angles .................................................. 2
Screws (B4 x 10) ......................................... 4
Screws (RK5 x 20) ...................................... 4
Polyamide washers....................................... 4
Ornamental washers ..................................... 4
. Supplied with the RM-PP1
Screws (B4 x 8) ........................................... 8
n
The RM-PP1 contains ten screws, but the two screws of
them are spare.
88
44
581 (Maximum traveling distance)
Distance to the center of the side rail
Height of the unit mounted in a rack Unit : mm

1-4
RM-PP1
Front bracket
Press
Pull out
Inner rail
Intermediate rail
Stopper
B4 x 8
B4 x 8
Inner rail
Inner rail
. Attaching the inner rails
3. Pull each inner rail from the two intermediate rails.
4. Pull each inner rail out of the intermediate rails while
pressing each stopper.
5. Attach the two inner rails to the unit with the eight
screws (B4 x 8).
Tightening torque: 120 x 10
_2
N.m {12.2 kgf.cm}
B4 x 10
B4 x 10
PS3 x 14
PS3 x 14
Polyamide
washers
Polyamide
washers
Feet
Feet
Rack angle
Rack angle
Rack Mounting Procedure
. Attaching the rack angles and removing the
feet
1. Attach the two rack angles to the unit using the four
screws (B4 x 10) and polyamide washers.
Tightening torque: 120 x 10
_2
N.m {12.2 kgf.cm}
c
Pay the attension to the sharp edge of rack angle.
2. Unscrew the four screws (PS3 x 14) to remove the
feet from the bottom of the unit.
c
Keep these screws and the feet.
When operating the unit after demounting it from the rack,
be sure to reattach the feet.
Tightening torque: 80 x 10
_2
N.m {8 kgf.cm}
1-5. Rack Mounting

1-5
RM-PP1
Front bracket
Slide
Rear bracket
Intermediate rail
Screws
. Attaching the outer rails
6. Loosen each two screw fixing the rear brackets.
7. Fully slide each intermediate rail toward the rear
bracket.
8. Adjust the position of the rear brackets with the rack
depth.
9. Loosely attach the outer rails with the eight screws (B5
x 8).
1-5. Rack Mounting
Rack
Rack
Unit : mm
12.7
12.7
31.75
12.7
31.75
Rail
Adjust
Front bracket
Rear bracket
B5 x 8
B5 x 8
10. Check that the two intermediate rails attached to the
rack are parallel.
11. To fix the two outer rails to the rack, fully tighten the
eight loosely fitted screws (B5 x 8) in step 9.
12. Fully tighten the four rear bracket fixing screws which
loosed in step 6.
A'
A
Intermediate rails
Rear bracket
fixing screws
Width: A = A' = 424 mm
Front side
Rear side
B5 x 8
2 pcs
B5 x 8
2 pcs
B5 x 8
2 pcs
B5 x 8
2 pcs

1-6
RM-PP1
Intermediate rail
Slide
Front
Ball retainer
17. Slide the unit in and out from the rack about three
times and check that the slide rails move smoothly.
If they are not smoothly, demount the unit and go back
to “Attaching the outer rails” (step 6).
c
When demounting the unit, carry it by the two persons
or more.
n
This unit does not have the feet at this operating.
Put down the unit on the floor or other, being careful
not to damage the unit.
18. Secure the unit to the rack with the four screws (RK5
x 20) and four ornamental washers.
Tightening torque: 120 x 10
_2
N.m {12.2 kgf.cm}
Rack
Ornamental
washers
Ornamental
washers
RK5 x 20
RK5 x 20
1-5. Rack Mounting
. Mounting in rack
c
Be sure to carry the unit by the two persons or more.
13. Set each ball retainer to the position as shown in the
figure.
14. Pull both intermediate rails by equal length.
15. Slowly insert the inner rails into the intermediate rails.
16. Slowly push the unit into the rack while pressing each
stopper .
c
Be careful not to catch your finger or hand in rack
mount rail.
Intermediate rail
Stopper
Stopper
Inner rail

1-7
RM-PP1
1-6. Connections and Setup
For details of the matching connectors and cables, refer to Section 1-7.
For details of the input/output signals of this unit, refer to Section 1-8.
For the connections and setup, refer to “Preparations” of the operation manual.
n
Setup can be performed by Program Play Box Control Software. It carries out by Maintenance Menu of
this software. Refer to Help recorded on CD-ROM in detail.
75
ZZ
ZZ
Z Termination Switch on Rear Panel
Only when the SD reference video loop-through output is not used, set the 75 Z termination switch to
ON.
Error Message
If “Error” is shown in the LCD display window of this unit, refer to “Error Messages” of the operation
manual.
Installation of Program Play Box Control Software
When installing the Program Play Box Control Software in a computer, please carry out according to the
installer supplied with the software.
n
Be sure to install this software in a personal computer with the following requirements. When this
software is installed in a personal computer without the follwing requirements, this software may not be
performed normally.
OS: Microsoft Windows XP
Microsoft Windows NT 4.0 (with Service Pack 3 or later)
Microsoft Windows 2000
Microsoft Windows 98 Second Edition
CPU: 500 MHz or higher
Memory: Minimum 128 MB
Hard disk: Minimum 20 MB of available hard disk space
Drive: CD-ROM
Display: XGA video display, Capable of 1024 x 768 resolution
1-6. Connections and Setup

1-8
RM-PP1
1-7. Matching Connectors and Cables
When external cables are connected to the connector of this unit, the hardware listed below (or equiva-
lents) must be used.
Panel indication Matching connector (cable) Sony part No.
REF IN BNC 75Z, MALE (*1) 1-569-370-12
SDI IN, BNC 75Z, MALE (*1) 1-569-370-12
SDI OUT
TC OUT XLR 3P, FEMALE 1-508-083-00
REMOTE IN (RS-232C), D-SUB 9P, FEMALE 1-563-815-21
RS-232C
PLAYER REMOTE, 9P remote control cable (RCC-G series) _
RECORDER REMOTE or
D-SUB 9P, MALE and 1-560-651-00
JUNCTION SHEEL 9P 1-561-749-00
*1: Use the coaxial cable specified by the manual of the VTR that connects this unit.
(Refer to the installation manual or the maintenance manual of the VTR.)
1-7. Matching Connectors and Cables

1-9
RM-PP1
75 Z
RECORDER REMOTE RS-232C
OFF ON
REMOTE IN(RS-232C)
21
TC OUT
SDI OUTSDI IN REF IN
PLAYER REMOTE
AC IN
12 3 45678
1-8. Signal Inputs and Outputs
< Rear panel >
Remote connectors
4 PLAYER REMOTE D-SUB 9P connector (RS-422A interface)
Remote control of a player
5 RECORDER REMOTE D-SUB 9P connector (RS-422A interface)
Remote control of a recorder
6 REMOTE IN (RS-232C) D-SUB 9P connector (RS-232C interface)
Remote control from a computer
7 RS-232C D-SUB 9P connector (RS-232C interface)
for example to perform selfdiagnostics
Input connectors
1 SDI IN BNC x 1
Serial digital interface (270 M bps)
Complies with SMPTE 259M and ITU-R BT.656
3 REF IN BNC x 2 in loop through connection
Reference video signal (Black burst or composite sync)
0.3 V p-p, 75 Z, sync negative
Output connectors
2 SDI OUT BNC x 2
Serial digital interface (270 M bps)
Complies with SMPTE 259M and ITU-R BT.656
8 TC OUT XLR3-pin x 1
Time code
2.2 V p-p, low impedance, balanced
1-8. Signal Inputs and Outputs

1-10
RM-PP1
External view
51
69
External view
15
96
1-8. Signal Inputs and Outputs
PLAYER REMOTE: 9-pin (female)
RECORDER REMOTE: 9-pin (female)
Pin No. Signal
1 GND
2 RM TX(_)
3 RM RX(+)
4 GND
5 PRIORITY
6 GND
7 RM TX(+)
8 RM RX(_)
9 GND
REMOTE IN (RS-232C): 9-pin (male)
RS-232C: 9-pin (male)
Pin No. Signal
1 DCD ; Data Carrier Detect (Input)
2 RXD ; Received Data (Input)
3 TXD ; Transmitted Data (Output)
4 DTR ; Data Terminal Ready (Output)
5 SG ; Signal Ground
6 DSR ; Data Set Ready (Input)
7 RTS ; Request to Send (Output)
8 CTS ; Clear to Send (Input)
9NC

RM-PP1
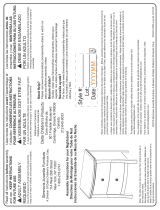
SAFETY CHECK-OUT
After correcting the original service problem,
perform the following safety checks before
releasing the set to the customer :
Check the metal trim, “metallized” knobs, screws,
and all other exposed metal parts for AC
leakage. Check leakage as described below.
LEAKAGE TEST
The AC leakage from any exposed metal part to
earth ground and from all exposed metal parts to
any exposed metal part having a return to
chassis, must not exceed 3.5 mA. Leakage
current can be measured by any one of three
methods.
1. A commercial leakage tester, such as the
Simpson 229 or RCA WT-540A. Follow the
manufacturers’ instructions to use these
instruments.
2. A battery-operated AC milliammeter. The
Data Precision 245 digital multimeter is
suitable for this job.
3. Measuring the voltage drop across a resistor
by means of a VOM or battery-operated AC
voltmeter. The “limit” indication is 5.25 V, so
analog meters must have an accurate low-
voltage scale. The Simpson 250 and Sanwa
SH-63Trd are examples of a passive VOM
that is suitable. Nearly all battery operated
digital multimeters that have a 20 V AC range
are suitable. (See Fig. A)
To Exposed Metal
Parts on Set
Fig A. Using an AC voltmeter to check AC leakage.
AC
voltmeter
(5.25V)
Earth Ground
0.15
µ
F 1.5 k
Z
The material contained in this manual consists of
information that is the property of Sony Corporation.
Sony Corporation expressly prohibits the duplication of
any portion of this manual or the use thereof for any
purpose other than the operation or maintenance of the
equipment described in this manual without the express
written permission of Sony Corporation.
Le matériel contenu dans ce manuel consiste en
informations qui sont la propriété de Sony Corporation.
Sony Corporation interdit formellement la copie de
quelque partie que ce soit de ce manuel ou son emploi
pour tout autre but que des opérations ou entretiens de
l’équipement à moins d’une permission écrite de Sony
Corporation.
Das in dieser Anleitung enthaltene Material besteht aus
Informationen, die Eigentum der Sony Corporation sind.
Die Sony Corporation untersagt ausdrücklich die
Vervielfältigung jeglicher Teile dieser Anleitung oder den
Gebrauch derselben für irgendeinen anderen Zweck als
die Bedienung oder Wartung der in dieser Anleitung
beschriebenen Ausrüstung ohne ausdrückliche
schriftliche Erlaubnis der Sony Corporation.

Printed in Japan
Sony Corporation 2003. 6 08
B&P Company ©2002
RM-PP1 (UC) E
3-775-784-01 (1)
/